Kulinary Adventures of Kath

Food Photography, Recipes & Baking
  • home
  • About
  • Work with Kath
  • Shop
  • Blog
    • The Blog
    • Recipe Archive
  • Newsletter
  • Contact
  • home
  • About
  • Work with Kath
  • Shop
    • The Blog
    • Recipe Archive
  • Newsletter
  • Contact
Raspberry Pistachio Rose Cake (23 of 25).jpg

The Blog

Recipes and Food Photography by Kath Vincent.

  • The Blog
  • Recipe Archive
  • All
  • Biscuits/Cookies
  • Breads Etc.
  • Breakfast
  • Cakes & Slices
  • Confectionary
  • Drinks
  • Events
  • Food Photography Tips
  • From The Mailing List
  • Heirloom Recipes
  • Holidays
  • Ice Cream
  • Jams Preserves & Spreads
  • Muffins
  • Off the Shelf
  • Other Desserts
  • Savoury Dishes/Meals
  • Scones
  • Tarts & Pastry
  • Travel
Passover Charoset Bliss Balls

Passover Charoset Inspired Fig Date and Pistachio Balls

Kath March 17, 2020

I find exploring other cultures through food an endlessly fascinating experience. And mostly, it can be done at home. Through cookbooks, blogs, social media and having a few ingredients at home. 

As I mentioned in a previous post, I received Leah Koenig’s book ‘The Jewish Cookbook’ for Christmas last year (the irony of that statement is still not lost on me I promise!), and it has remained one of the books I have been reading through most since then.

Towards the back of the book, in the chapter ‘Condiments, Spices & Drinks, there are quite a number of recipes for charoset. Charoset is part of the Passover seder, it’s a mixture made of fruits with much symbolic meaning for that particular religious holiday. Like many recipes within the Jewish diaspora, the ingredients change depending on what part of the world the recipe and Jewish community live or have come from. There are six different recipes for charoset in Leah’s book, and she mentions there would be many other variations. 

All of the recipes use fruit, often dried fruit with some fresh apple, some spices and some sweet red wine. Some charoset is chopped, some pureed into a smoother paste and others rolled into balls. This got me thinking - taking a bit of inspiration from each of these recipes, I could make some really nice dried fruit and nut balls. Not like those weird protein (or ‘bliss’) balls, but something really tasty made with great quality dried fruits, and spices like those used in many of these recipes. 

The Kurdish Charoset recipe was rolled into balls, many of the recipes used dates and the Yemenite Charset recipe used dried figs and a great selection of spices (including ground coriander which I never would have thought of using otherwise). I was starting to create a version of my own, taking what I liked from all of these very diverse charoset recipes. I used slivered almonds as the nut inside the balls, as we always seem to have a good supply of them, and the pistachios on the outside just look so good. I substituted vanilla extract for sweet red wine, but if you are making these for Passover, you can still use the wine instead.

Often the best recipes are heavily influenced by the work of others and the foods of other cultures (and what you have in your pantry!). So these are my Passover Charoset Inspired Fig Date and Pistachio balls, that could equally be just Fig Date and Pistachio Balls ready for a nice healthy snack. 

Fig and Date Bliss Balls

Passover Charoset Inspired Fig Date and Pistachio Balls

Ingredients: 

200g black and white dried figs

110g pitted medjool dates

50g golden sultanas

50g slivered almonds, lightly toasted

1 tsp vanilla extract

1/2 tsp ground ginger

1/2 tsp ground cinnamon

1/2 tsp ground coriander

1/2 tsp ground cardamom 

25g blanched or raw pistachios, finely chopped

Method: 

Add all the ingredients, except the pistachios, to the bowl of a food processor. Blitz until all the ingredients are combined and it clumps together. The mixture does not need to be smooth. Some of the almonds will remain in chunks. 

Roll into balls, then roll into the finely chopped pistachios to cover. Place on a tray and leave in the fridge for at least 30 minutes to firm up. The balls can then be stored in an airtight container in the fridge. 

Makes 18-20 balls. 

Passover Charoset Balls

Reference: ‘The Jewish Cookbook’ by Leah Koenig (Phaidon Press Limited, 2019), pp.406-409.

Charoset Balls for Passover
In Holidays, Other Desserts Tags Passover, Charoset, Dried Fruit, Bliss Balls, The Jewish Cookbook, Gluten Free, Dairy Free, Holiday Baking
Comment
Editing in Lightroom for Food Photography

How to Edit Food Photos in Lightroom - Editing Images Shot in Low Light

Kath March 9, 2020

The process of how I create the images I share here on my blog, in my newsletter and on social media is something I am trying to share more of. I know seeing the process can break down ideas of something being ‘too hard’ or ‘out of reach’, and having advice and tips shared by others is exactly how I learnt the basics of shooting on manual settings and editing in Lightroom.

In this post I am going to focus on how I edit my food images in Adobe Lightroom (Desktop version), specifically how I rectify images that have been shot on an overcast day and therefore have a blue/grey hue to them.

If you don’t use Lightroom, you can still apply the tips below to the image editing software or app that you use.

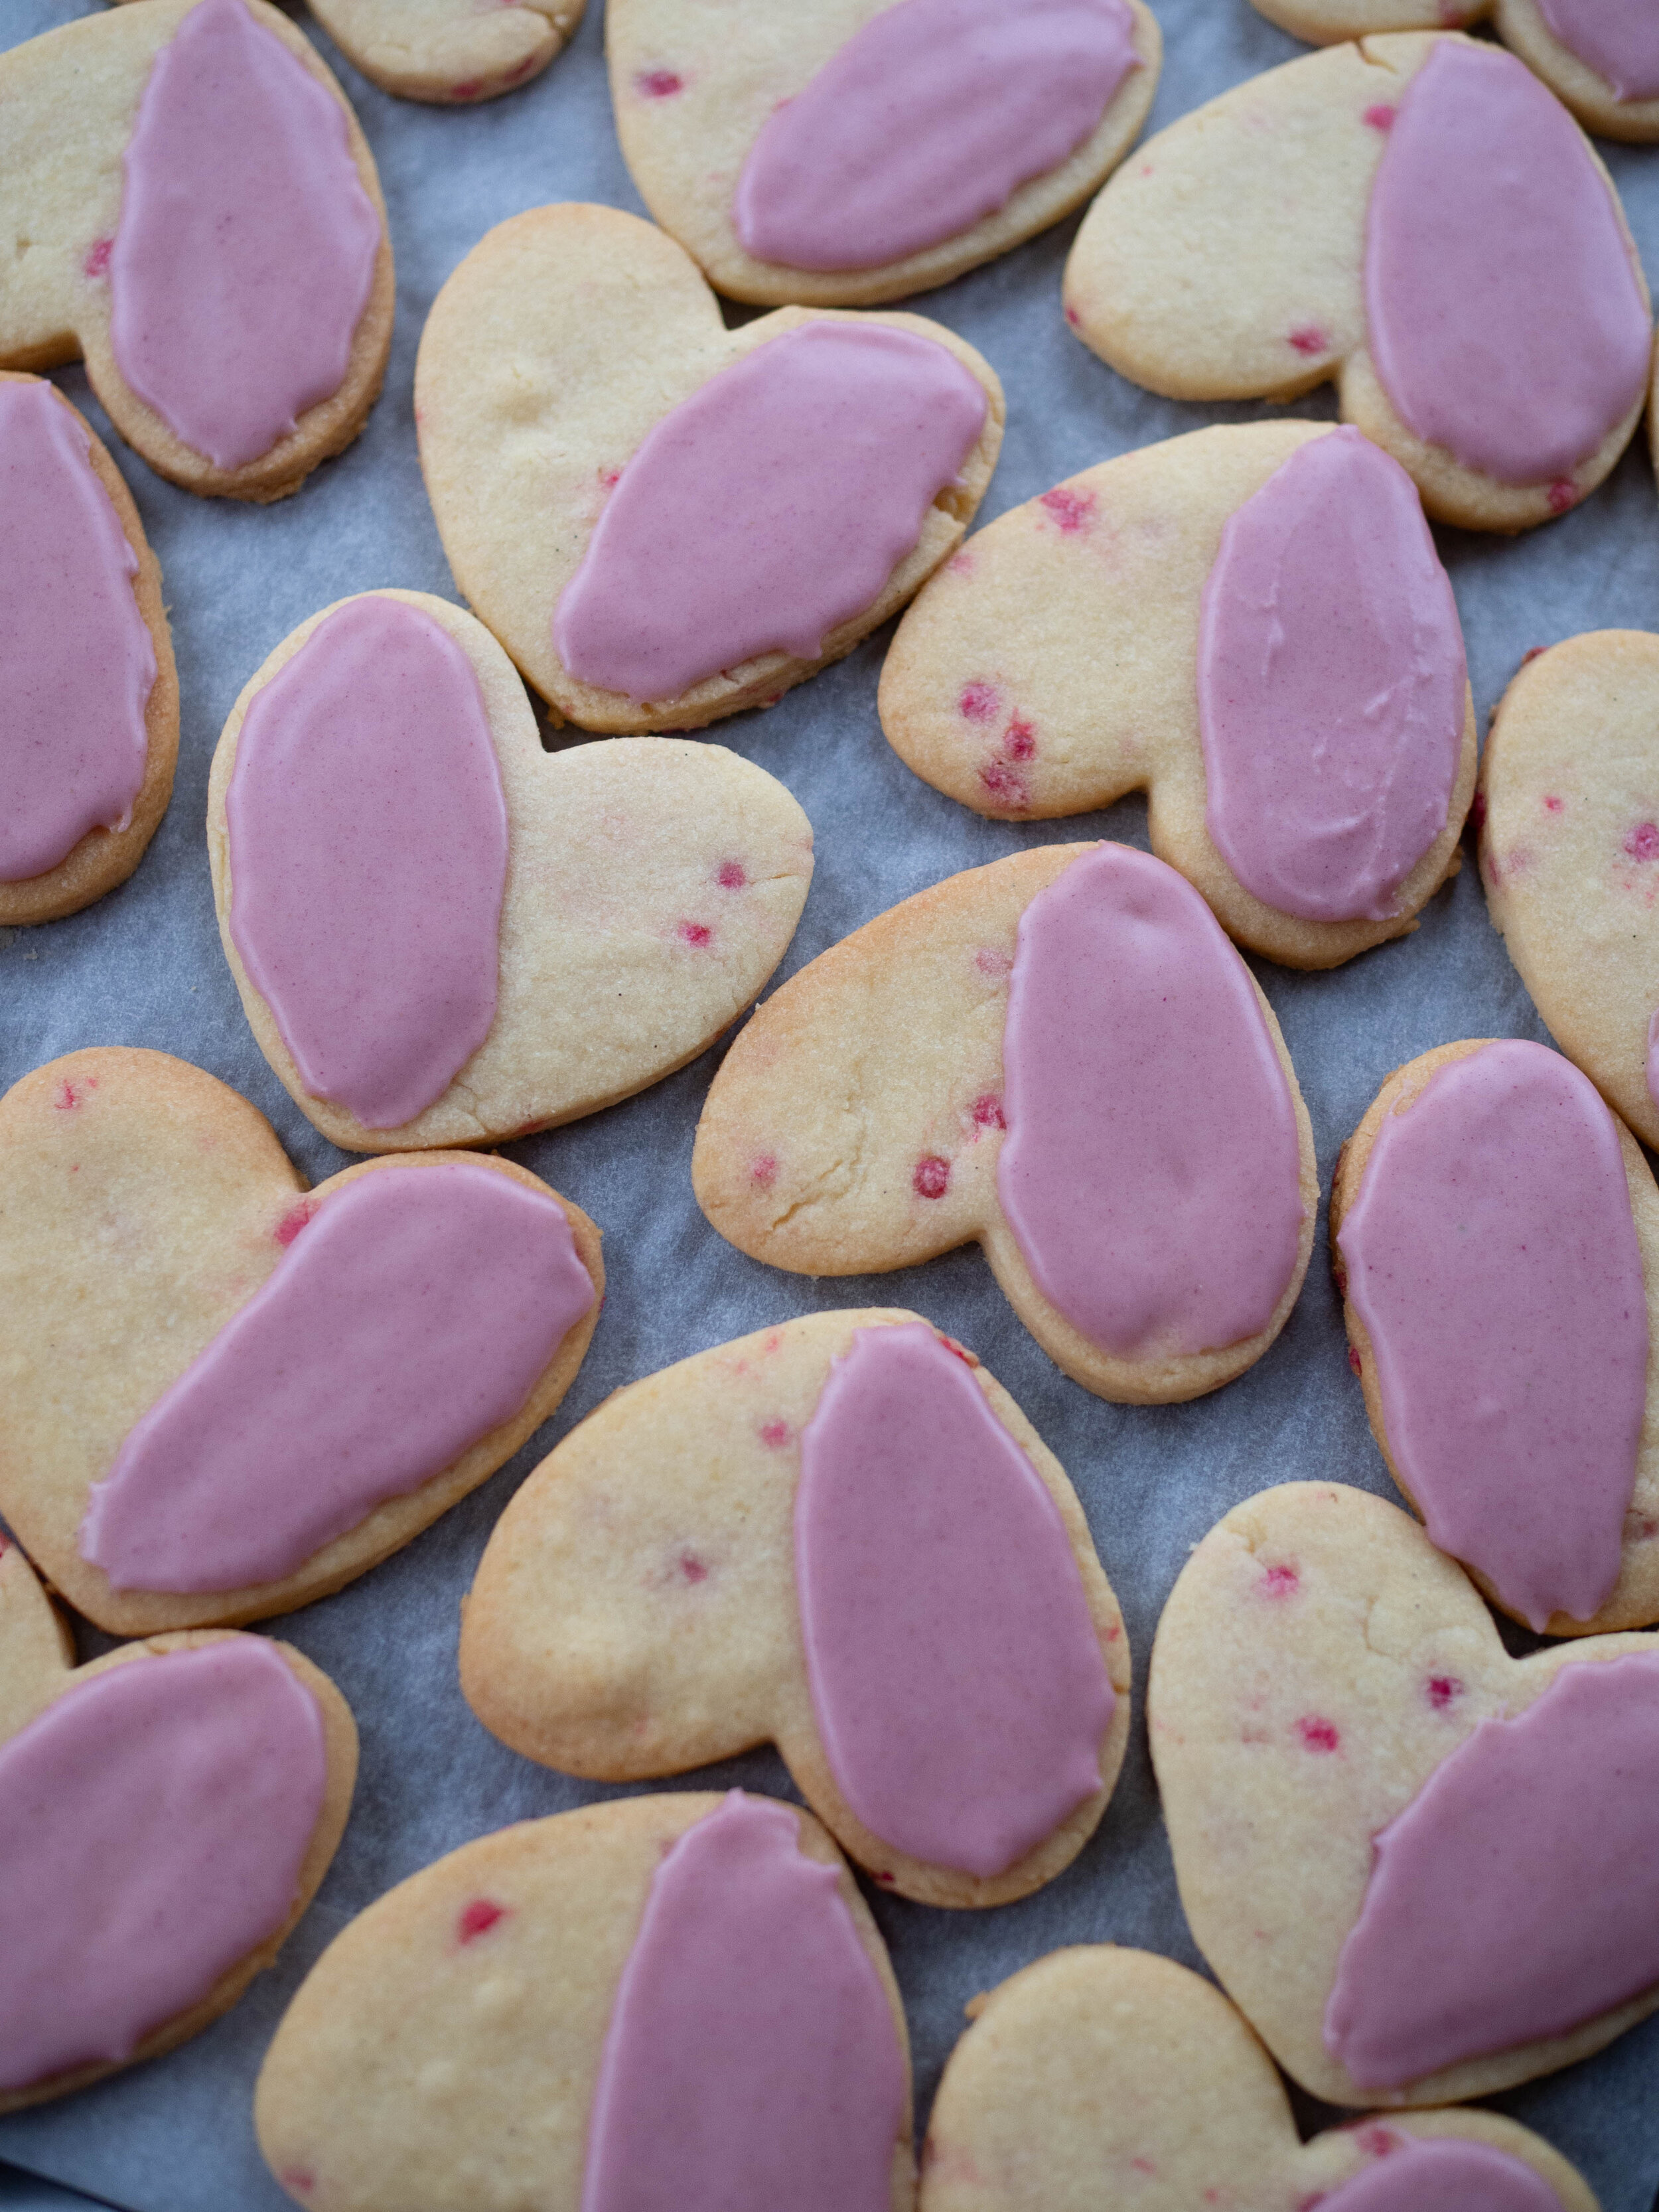
I am using an image of my Rose Sugar Cookie Hearts shot in early February, on the wettest weekend Sydney had experienced in a while!

In the tips below, I share the ways I usually edit a food image I have taken, it is not an exhaustive list and not every element will be relevant to every image. Play around with what looks best on the image you are editing, you can always undo anything you don’t like!

Click on the each Lightroom screenshot to make it bigger - I have highlighted and annotated each editing step.

For reference, the images were shot with an Olympus EM-10.

Raw Unedited Image

Raw Unedited Image

Editing Food Photos in Lightroom

Above is the image I started with. You can see how it has an overcast look to it, and needs some brightening to enhance the colour of the biscuits.

This how the ‘Develop’ section of Lightroom (Desktop) looks before you begin making any changes to the image. At the top, it will tell you what manual settings your camera was on, and why type of lens was used to shoot the selected image.

In this case I was using ISO 500, a 25mm lens, f stop 2.2 and my shutter speed was at 125. These settings are what suited my camera and my environment best at the time of the shoot, as while I was positioned right next to windows, it was later in the day and it was very overcast.

Click on Image to Enlarge

Exposure

My first point of call when editing images is adjusting the exposure if necessary. Images like this one need a bit more adjustment than others shot in better conditions. In this case I increased the exposure to +35 to brighten the image, and begin to rectify the overcast conditions the image was shot in.

Click on Image to Enlarge

Contrast

Next I check the contrast. Slightly adjusting the contrast of an image can give it more definition. Here I have increased the contrast to +12.

Click Image to Enlarge

Shadow

I always adjust the shadow in my food images. Either to decrease the shadow, as I have in this image, or to increase it in brighter images to create more depth and texture to the image. I find when an image is already on the darker side and I am looking to brighten it up, decreasing the shadows can help.

Click Image to Enlarge

Texture & Clarity

Similar to adjusting shadows, I also always slightly adjust the texture and clarity of my images. Both these editing options give more depth and definition to images, however for food images I would never take it past +10.

Click Image to Enlarge

Colour Enhancement

Since this image has the pink colour that is quite dominant, I will enhance the colour a little to make it pop. Not all images need this feature, it will just depend if there is a certain colour or element you wish to highlight. To find the Colour Panel, scroll down on the right hand side whilst in Develop mode, basic the basic section we have just been working in.

Then choose whether you wish your image to have more enhancement on the hue, saturation or luminance of a particular colour. Click the round marker on the left hand side of each colour option, then hover your curser over the part of your image you wish to adjust. This will highlight which colour over on the panel best matches to the colour in your image. This is the colour you should adjust. For this image, magenta was highlighted when I hovered over the icing on the biscuits.

Click Image to Enlarge

For this image I have focused on the hue and saturation sections in the Colour panel. I have adjusted both slightly for magenta, to enhance the colour of the icing on the biscuits but not let them look unrealistic or overdone.

Click on Image to Enlarge

Temperature

The biggest tip I can give when your shoot conditions are overcast or you have to shoot in low light and your images come out with a blue/grey hue is to alter the temperature of the image in Lightroom. I find I need to use this editing feature also when I shoot on darker backgrounds like zinc or even sometimes marble as they create can create a blue/grey tone to the image even when your shooting environment is brighter.

Simply shift the temperature gage slightly towards the yellow side, keeping an eye on the image so you can determine how far to take it. Here I’ve adjusted it from 4,550 to 5,058 and you can see the slider is still more towards the blue end than the yellow. How much you move the slider will depend on your image and what you want it to look like.

Conversely, if an image you shot is too warm looking for your style, you can use the temperature feature to cool down the tones in the image by moving the slider more towards the blue side.

Click on Image to Enlarge

Before + After Comparison

To have a look how your editing has altered the image, click on the button at the bottom of your screen to do a before and after comparison. You can also see the main changes made to the image on the Basic editing panel on the right, along with the History of changes made to the image (including when it was exported from Lightroom) on the right.

Click on Image to Enlarge

Below is the final edited image. You can see how by adjusting the exposure and temperature in particular have changed the entire image. The fact that it was shot in low light on an overcast day isn’t really noticeable now. The image now suits the fun/Summer/Valentines Day look I was going for, and highlights the lovely golden colour of the biscuits and the pink icing.

Final Edited Image

Final Edited Image

View fullsize BEFORE
BEFORE
View fullsize AFTER
AFTER
In Food Photography Tips Tags Lightroom, Food Photography Tips, Photo Editing, Editing Food Photos
Comment
Traditional Yeast Hamantaschen with Quince Lekvar

Traditional Yeast Hamantaschen with Quince Lekvar

Yeasted Hamantaschen with Quince Lekvar

Kath February 25, 2020

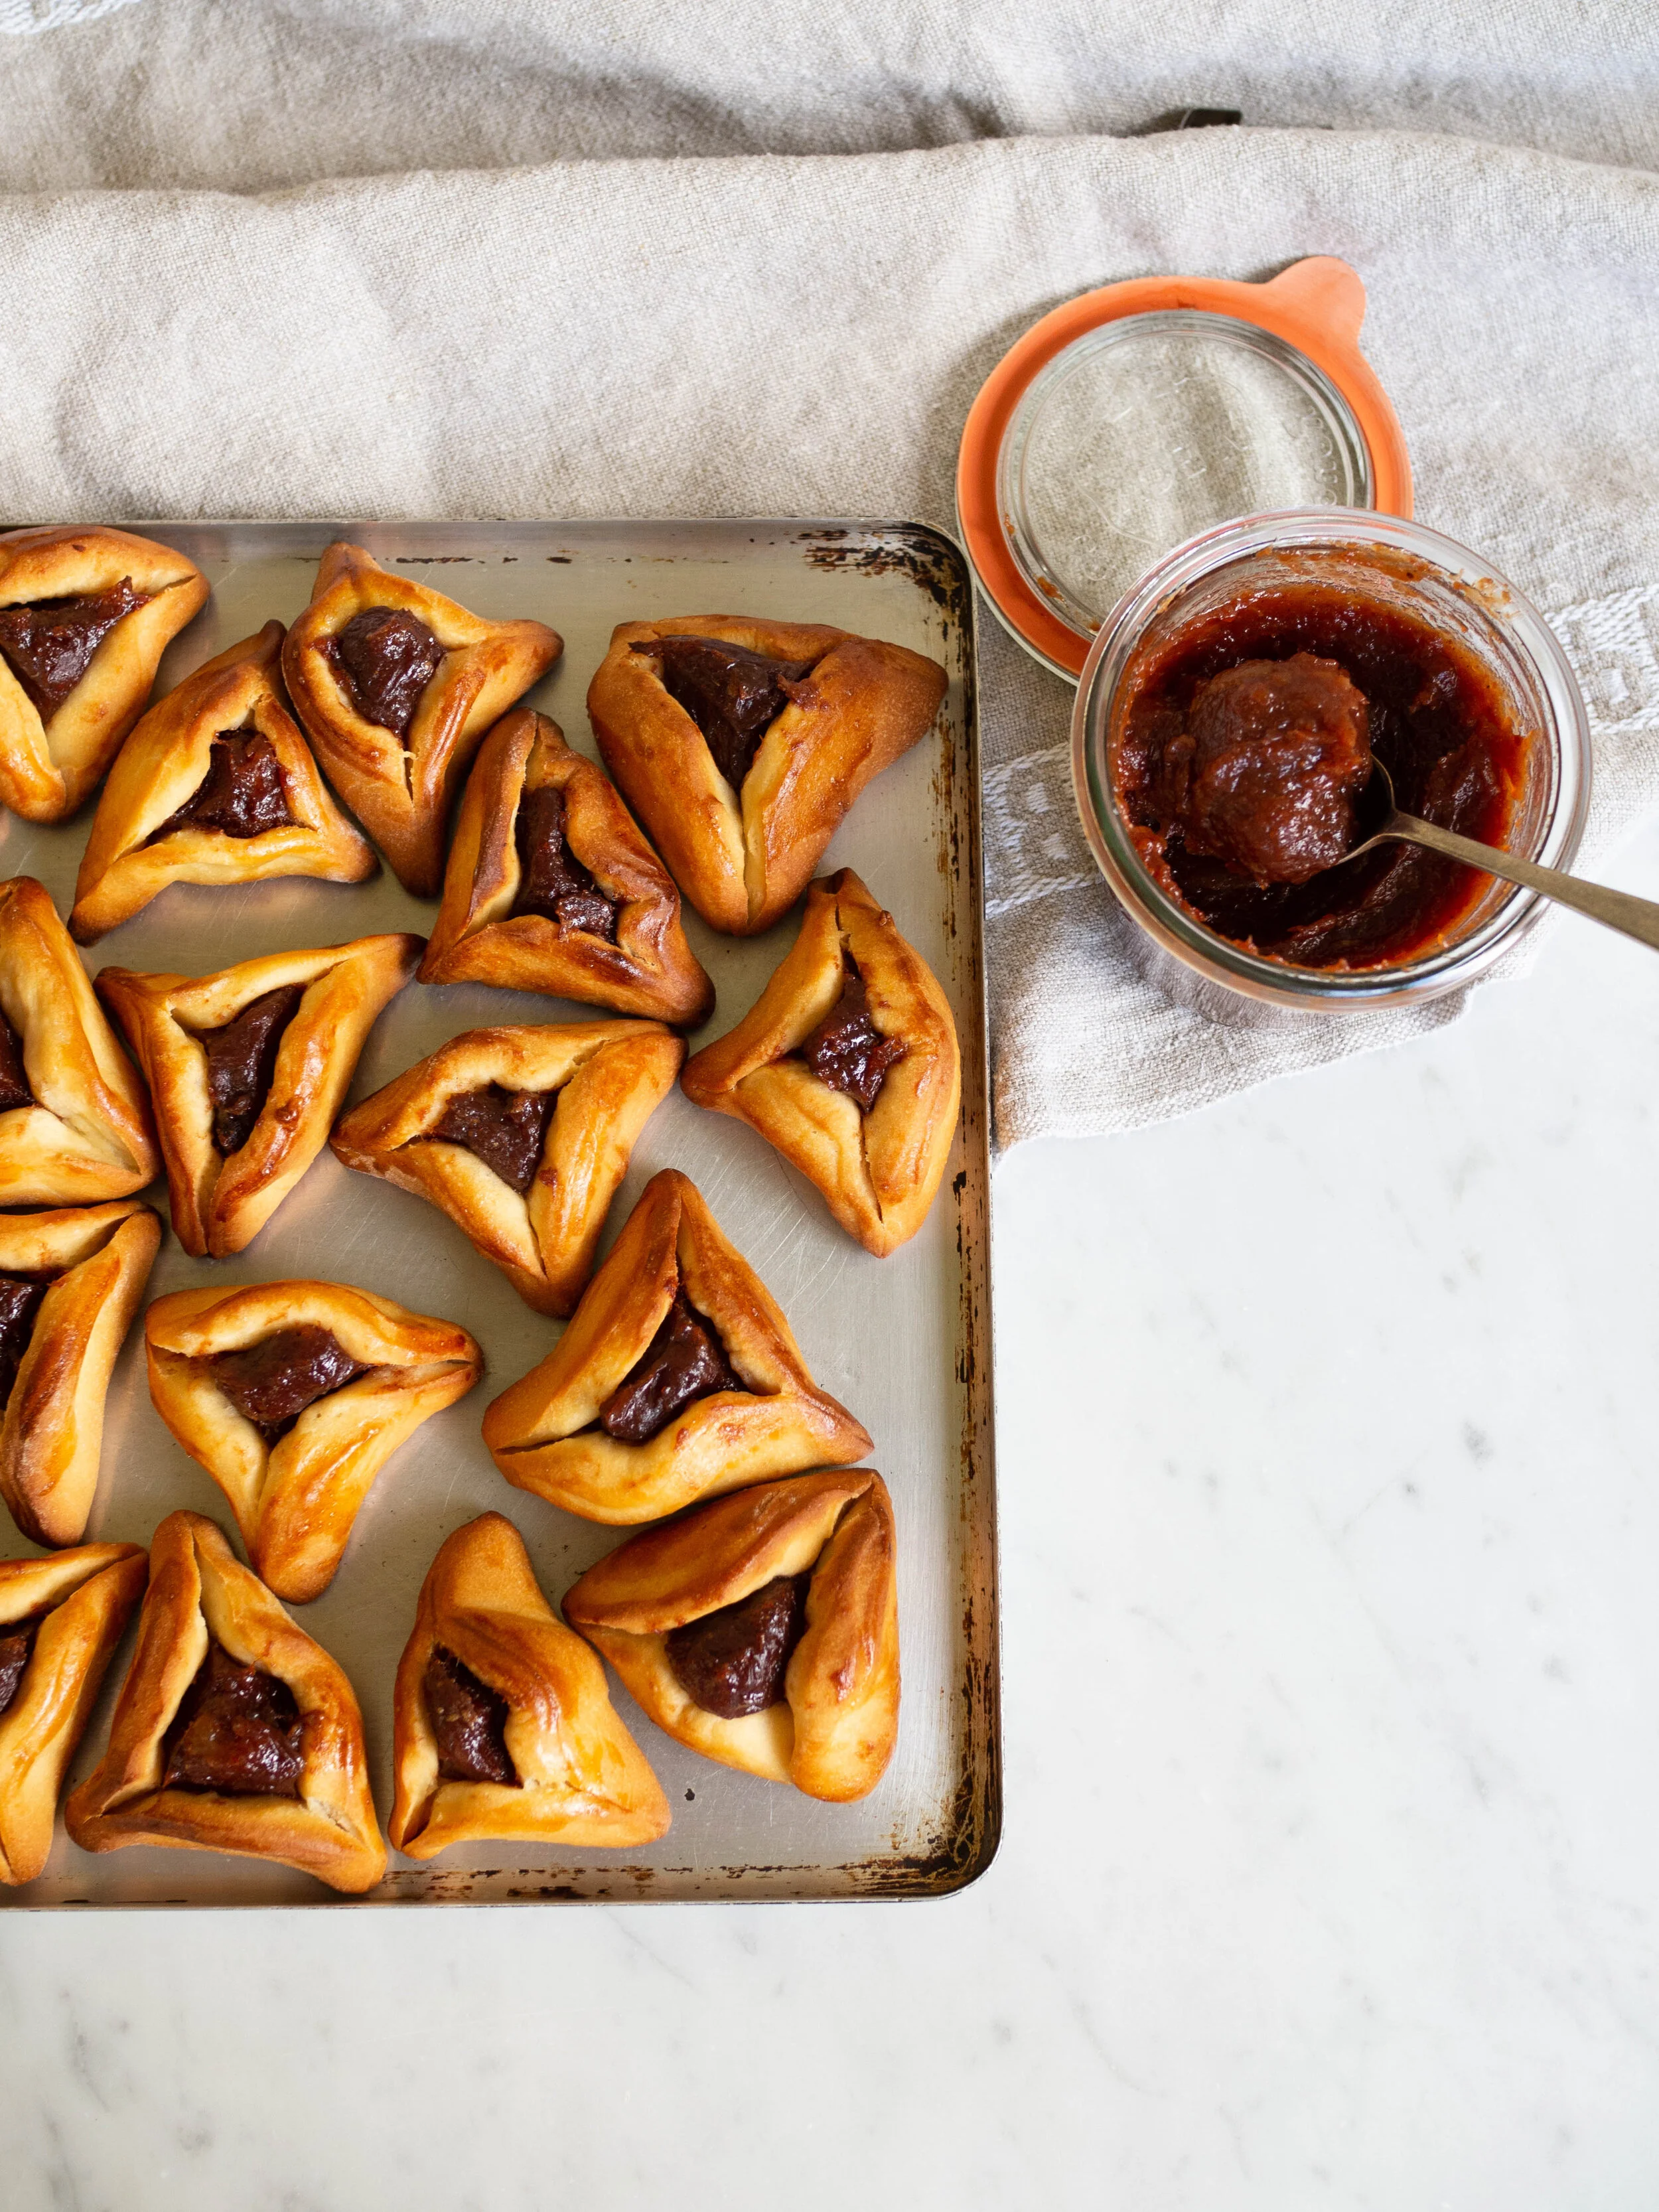
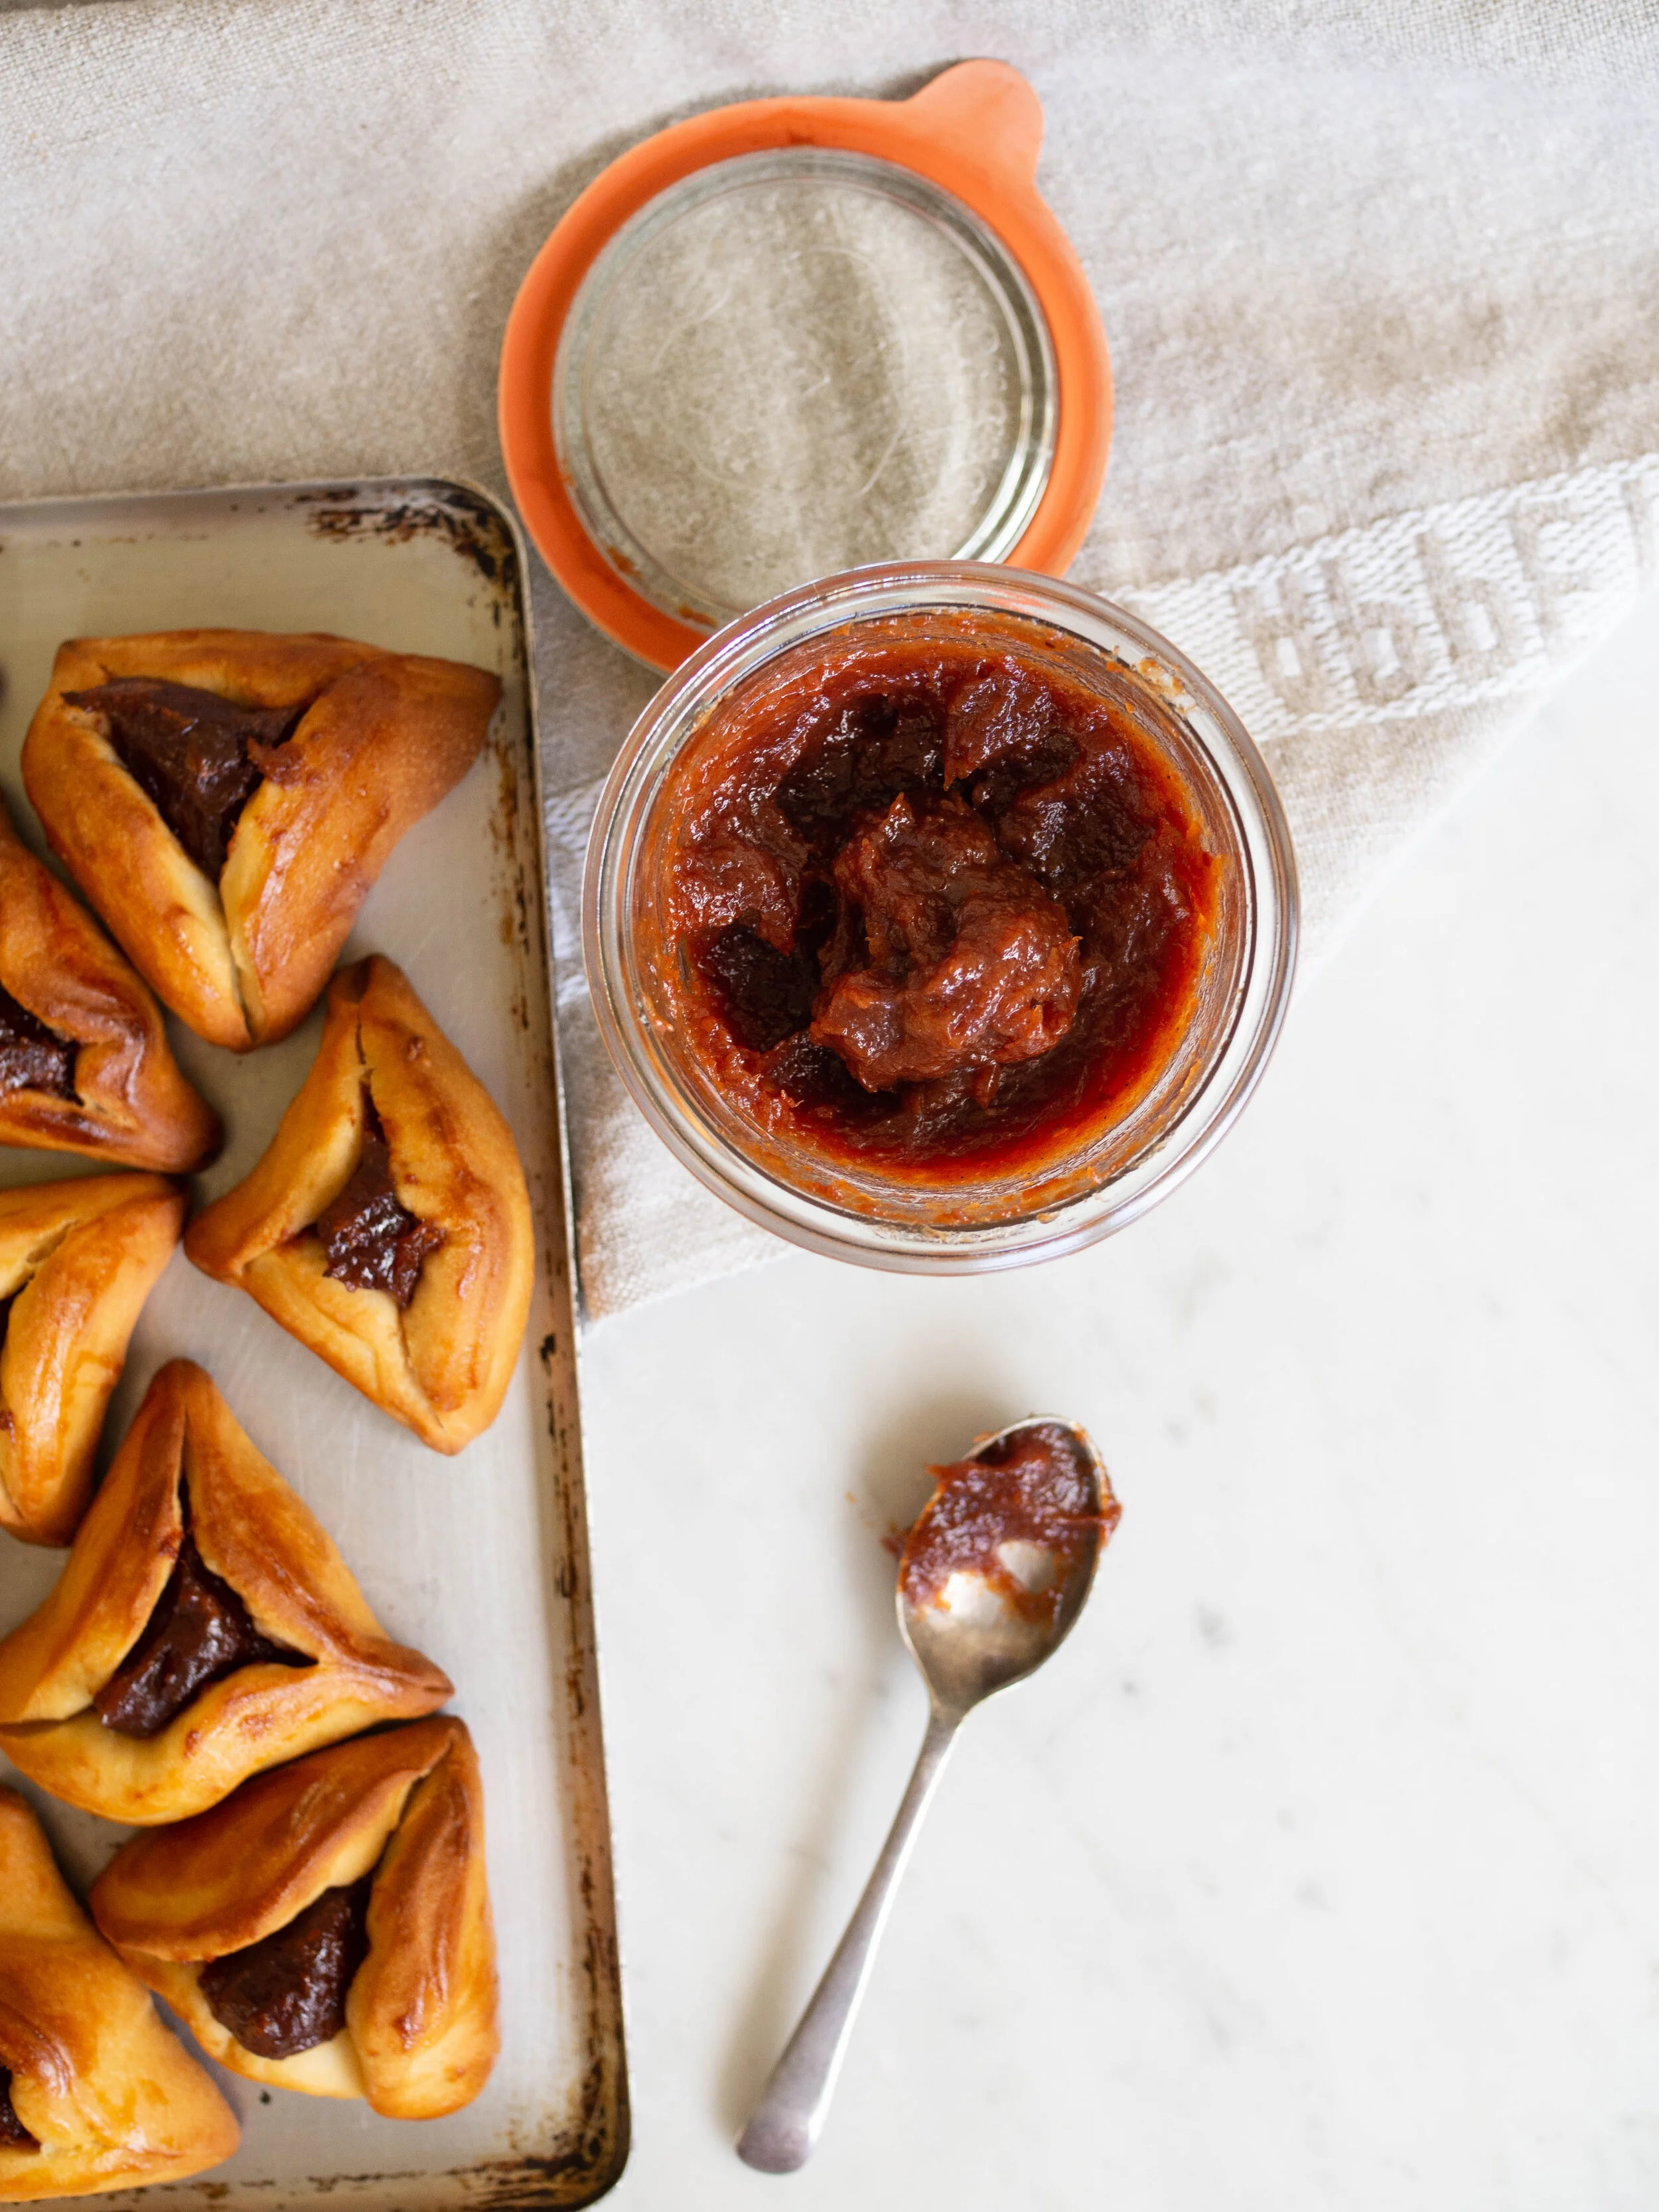
This year I was determined to make hamantaschen again, but this time with the more traditional yeasted dough. I loved my Pistachio Hamantaschen I made last year, but I really wanted to have a comparison with a more traditional hamantaschen. 

For those who have never heard of hamantaschen before, they are made to celebrate the Jewish holiday of Purim (see links at the end of this post to find out more). They are kind of like a cross between a biscuit and a pastry with a sweet tasty filling, and the triangular shape has great symbolism for the holiday. Check out my post from last year to find out a little more.

I tried to stay as traditional as I could with this, but me being me, and not being bound by any Purim traditions of my own, I altered a prune filling (or Lekvar) recipe to include dried quince and dried pears. Mostly because quince is my third favourite flavour (coming in close after rose and pistachio which alternate between spots one and two), and I have access to amazing dried quince from Singing Magpie Produce, which I knew would taste amazing cooked into a lekvar. 

I heavily leaned on Leah Koenig’s new book ‘The Jewish Cookbook’ to produce this hamantaschen recipe. Leah’s book is my new ultimate resource on Jewish cooking, spanning all diasporas and nationalities and all types of meals and holidays. If you just want one book to show you the ways of Jewish cooking and baking, this is it. I (somewhat ironically I admit) received this book as a gift for Christmas, and it has maintained its spot as my most looked at cookbook since then. 

View fullsize Folding Hamantaschen
Folding Hamantaschen
View fullsize The Jewish Cookbook by Leah Koenig
The Jewish Cookbook by Leah Koenig

I was delighted to find a yeasted hamantaschen dough in Leah’s book, as I had already decided I wanted to try this type of dough for my next hamantaschen attempt! And out of the many cookbooks I own, it is the only one to contain such a recipe. Leah also provides many hamantaschen filling options, and I was particularly intrigued by the fruit lekvar traditional to Central and Eastern Europe. Lekvar is a thick jammy paste made using dried fruits and juice. I adapted Leah’s Prune Lekvar recipe to create my Quince Lekvar, but you could stick to prunes if you can’t find any dried quince. If you can get your hands on fresh quince, a quince butter would also make a great substitute for the lekvar (see my Cosy Winter Bakes eBook for a Quince Butter recipe). 

A yeasted hamantaschen definitely takes a bit more time and effort than a more shortbread pastry hamantaschen (see my recipe last year for a good one), but it is worth the effort. I found my first dough attempt didn’t work, I think because I am baking in a more humid climate and my dough just became unbelievably sticky and wet and barely rose at all. I have slightly altered the quantities of flour in the recipe, and continue to generously add more flour as I knead the dough. This is quite an intuitive recipe (which is why I suggest kneading by hand rather than using a stand mixer), and depending on your climate, you may not need nearly as much flour as I did. For reference the original recipe says to start with 350g, and up to 70g more if needed. On my second attempt I added that total amount (420g), then I added more when I was kneading and my dough worked out much better. 

Quince Lekvar (or thick jam)

Quince Lekvar (or thick jam)

Quince Lekvar

Ingredients:

200g dried quince

100g dried pears (or dried apple)

120ml cloudy apple juice 

175ml water

4 tbsp panela sugar

1 tbsp honey

1/2 tsp ground cinnamon

1/2 tsp ground cardamom

1 tsp vanilla extract

Method: 

Place the quince, pears, apple juice, water and panela sugar in a small saucepan. Over low-medium heat bring to a gentle boil, then reduce the heat to low and cover the saucepan with its lid. Cook the fruit, stirring every now and then, for about 25-35 minutes or until the fruit has softened and most of the liquid has been absorbed. 

Take the pan off the heat, and puree the fruit with a stick blender. Stir in the honey, cinnamon, cardamon and vanilla then allow to cool completely before storing covered or in an airtight container in the fridge. 

Makes approx. 580g.

Yeasted Hamantaschen with Quince

Yeasted Hamantaschen

Ingredients: 

7g dried yeast

150g + 1 tsp caster sugar 

120ml warm water

420g plain flour, plus extra

pinch of salt

60ml canola oil, plus extra

3 eggs

1 tsp vanilla extract 

360g (approx.) Quince Lekvar

Method: 

In a large bowl stir together the yeast, warm water and the 1tsp caster sugar. Leave for 5-10 minutes until it has become frothy.

In a smaller bowl, whisk together the remaining 150g caster sugar, flour and salt.

Add two of the eggs, oil and vanilla extract to the activated yeast and whisk to combine.

Add the flour, and mix. 

Generously dust your work surface with more flour, and tip the dough out. Dust the dough with flour, and begin to knead. This dough can be quite sticky, so continue to knead and add flour until the dough becomes more manageable and elastic. Knead for about 10 minutes, the dough will still be a little sticky, but once it becomes smoother and more elastic it will be ready to prove. 

Lightly oil a large bowl with a little more of the canola oil, and place the dough in. Cover with cling film and leave in a warm spot for 1.5-2 hours or until the dough has doubled in size. This dough won’t rise as dramatically as a traditional bread dough, but if the size has at least doubled during the proofing time, then it will be ready for the next step. 

Once the dough as proofed, line two to three trays with baking paper, and preheat oven to 180 degrees/170 degrees Celsius fan. 

Lightly dust your work surface with more flour, and roll out half the dough (leave the other half covered in the bowl). Using a 7-8cm round cutter, cut out rounds of the dough and place in the prepared trays. Keep the scraps of dough and place to the side for now. Roll out the remaining dough and cut out with the cutter. Re-roll all the scraps, and cut out as before. The dough will become harder to work with now as it is becoming overworked. Discard any remaining scraps now, especially if you have cut out close to 30 rounds, and your trays are filled. 

Place a teaspoon of the quince lekvar in the centre of each round. Shape the rounds of dough into the characteristic triangle shape by pinching one side into a corner, then folding the other side up to form two more corners. Ensure the corners are well sealed and stuck together. If you need some more tips on how to fold hamantashen take a look at this graphic made by The Nosher.

Loosely place some cling over the trays and leave to rest for 30 minutes.

Crack the remaining egg into a glass and beat with a fork. Brush the tops of the hamantaschen with the egg, then place in the oven for about 18 minutes to cook. Rotate the trays in the oven about half way through to ensure the hamantaschen cook more evenly. The hamantaschen will be ready when they have puffed up a little and are golden. 

These are best eaten the day they are made, but will keep in an airtight container for a few days.

Makes about 30 hamantaschen.

Yeasted Hamantaschen

Reference: ‘The Jewish Cookbook’ by Leah Koenig (Phaidon Press Limited, 2019), pp.342 & 410. For more info on yeasted hamantaschen check out this post on the blog Poppy & Prune and this recipe on kosher.com. 

Quince Hamantaschen
In Holidays, Tarts & Pastry, Jams Preserves & Spreads Tags Purim, Hamantaschen, Yeasted Hamantaschen, Quince, Quince Lekvar, Quince Jam, Dried Quince, The Jewish Cookbook, Leah Koenig, Jewish Baking, Holiday Baking
Comment
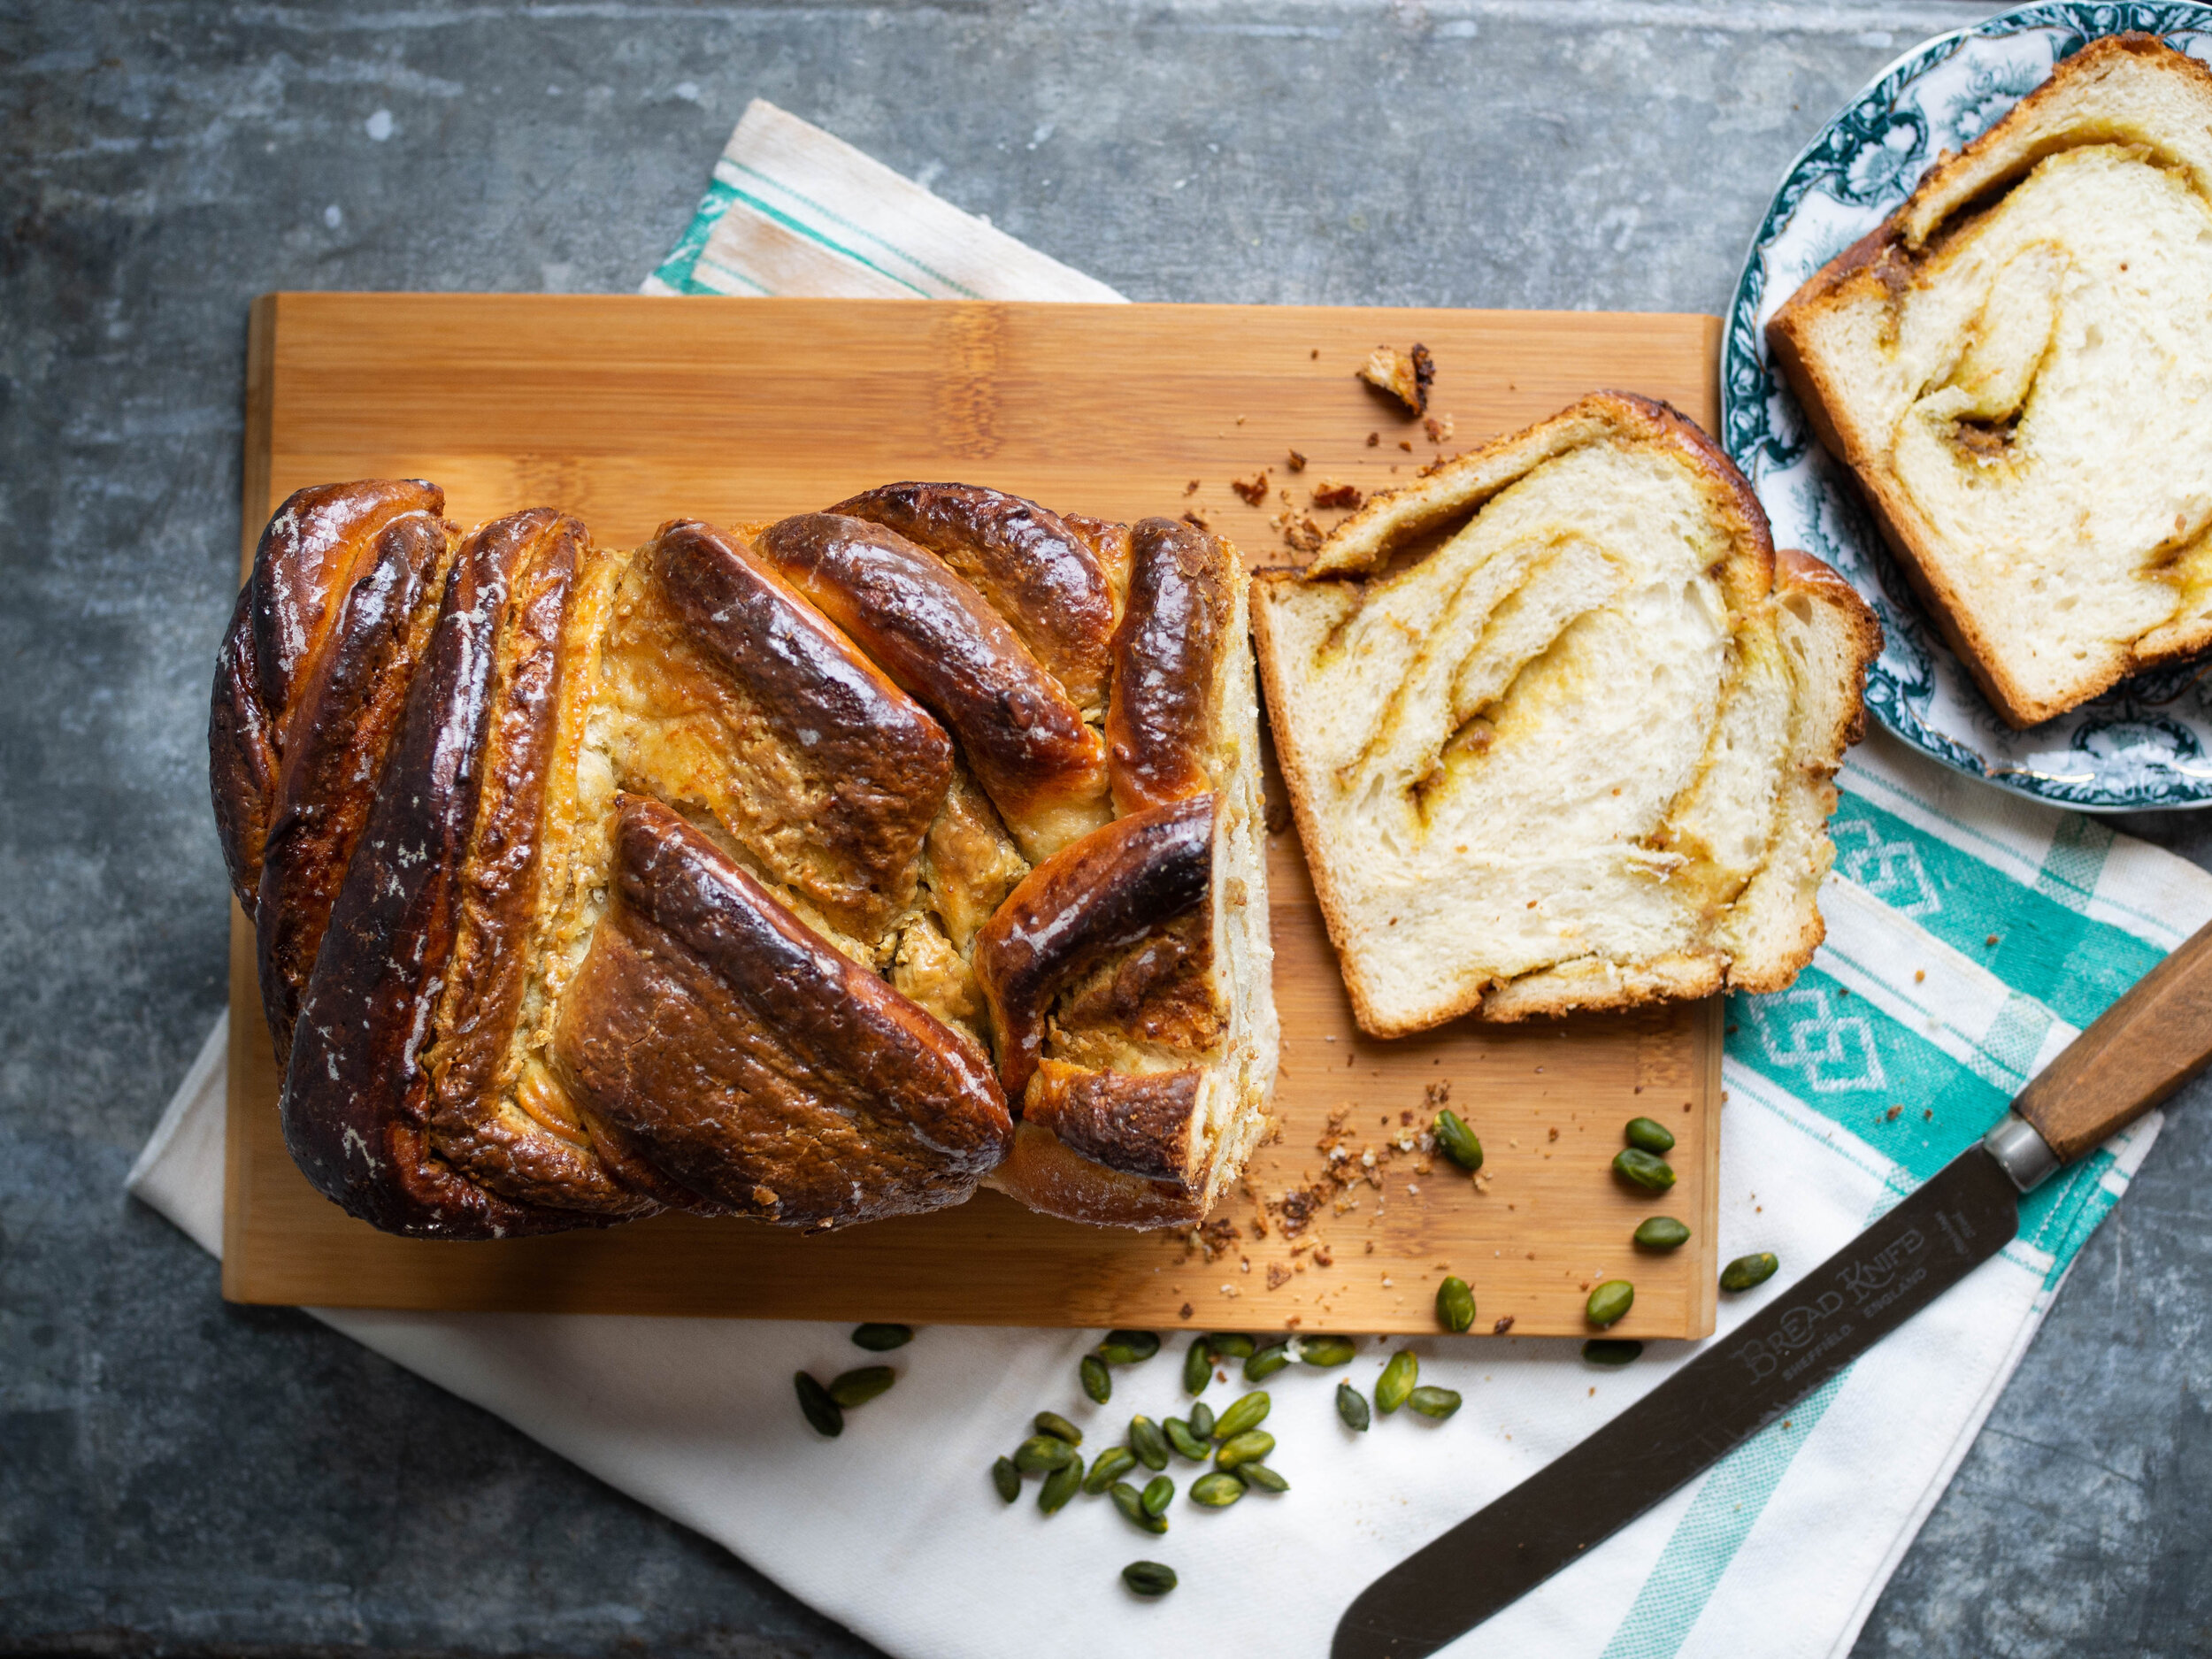
Pistachio Challah Babka

Pistachio Challah Babka

Kath February 21, 2020

If you follow along regularly with the recipes I post on this blog, you will know pistachio is one of my most favourite flavours. I seem to be endlessly drawn to it, which means it makes its way into many things I bake. 

And this babka is no exception. I have been wanting to make a babka for quite a while, and seeing as they aren’t sold widely in Sydney, making one myself was almost my only option if I wanted to eat one. 

I decided to use a challah dough to make the babka, hence this recipes name ‘challah babka’. In my mind challah is the best kind of bread, so a babka could only be improved by using it. I always use the challah recipe from the Monday Morning Cooking Club’s first book, and it works really well every time. 

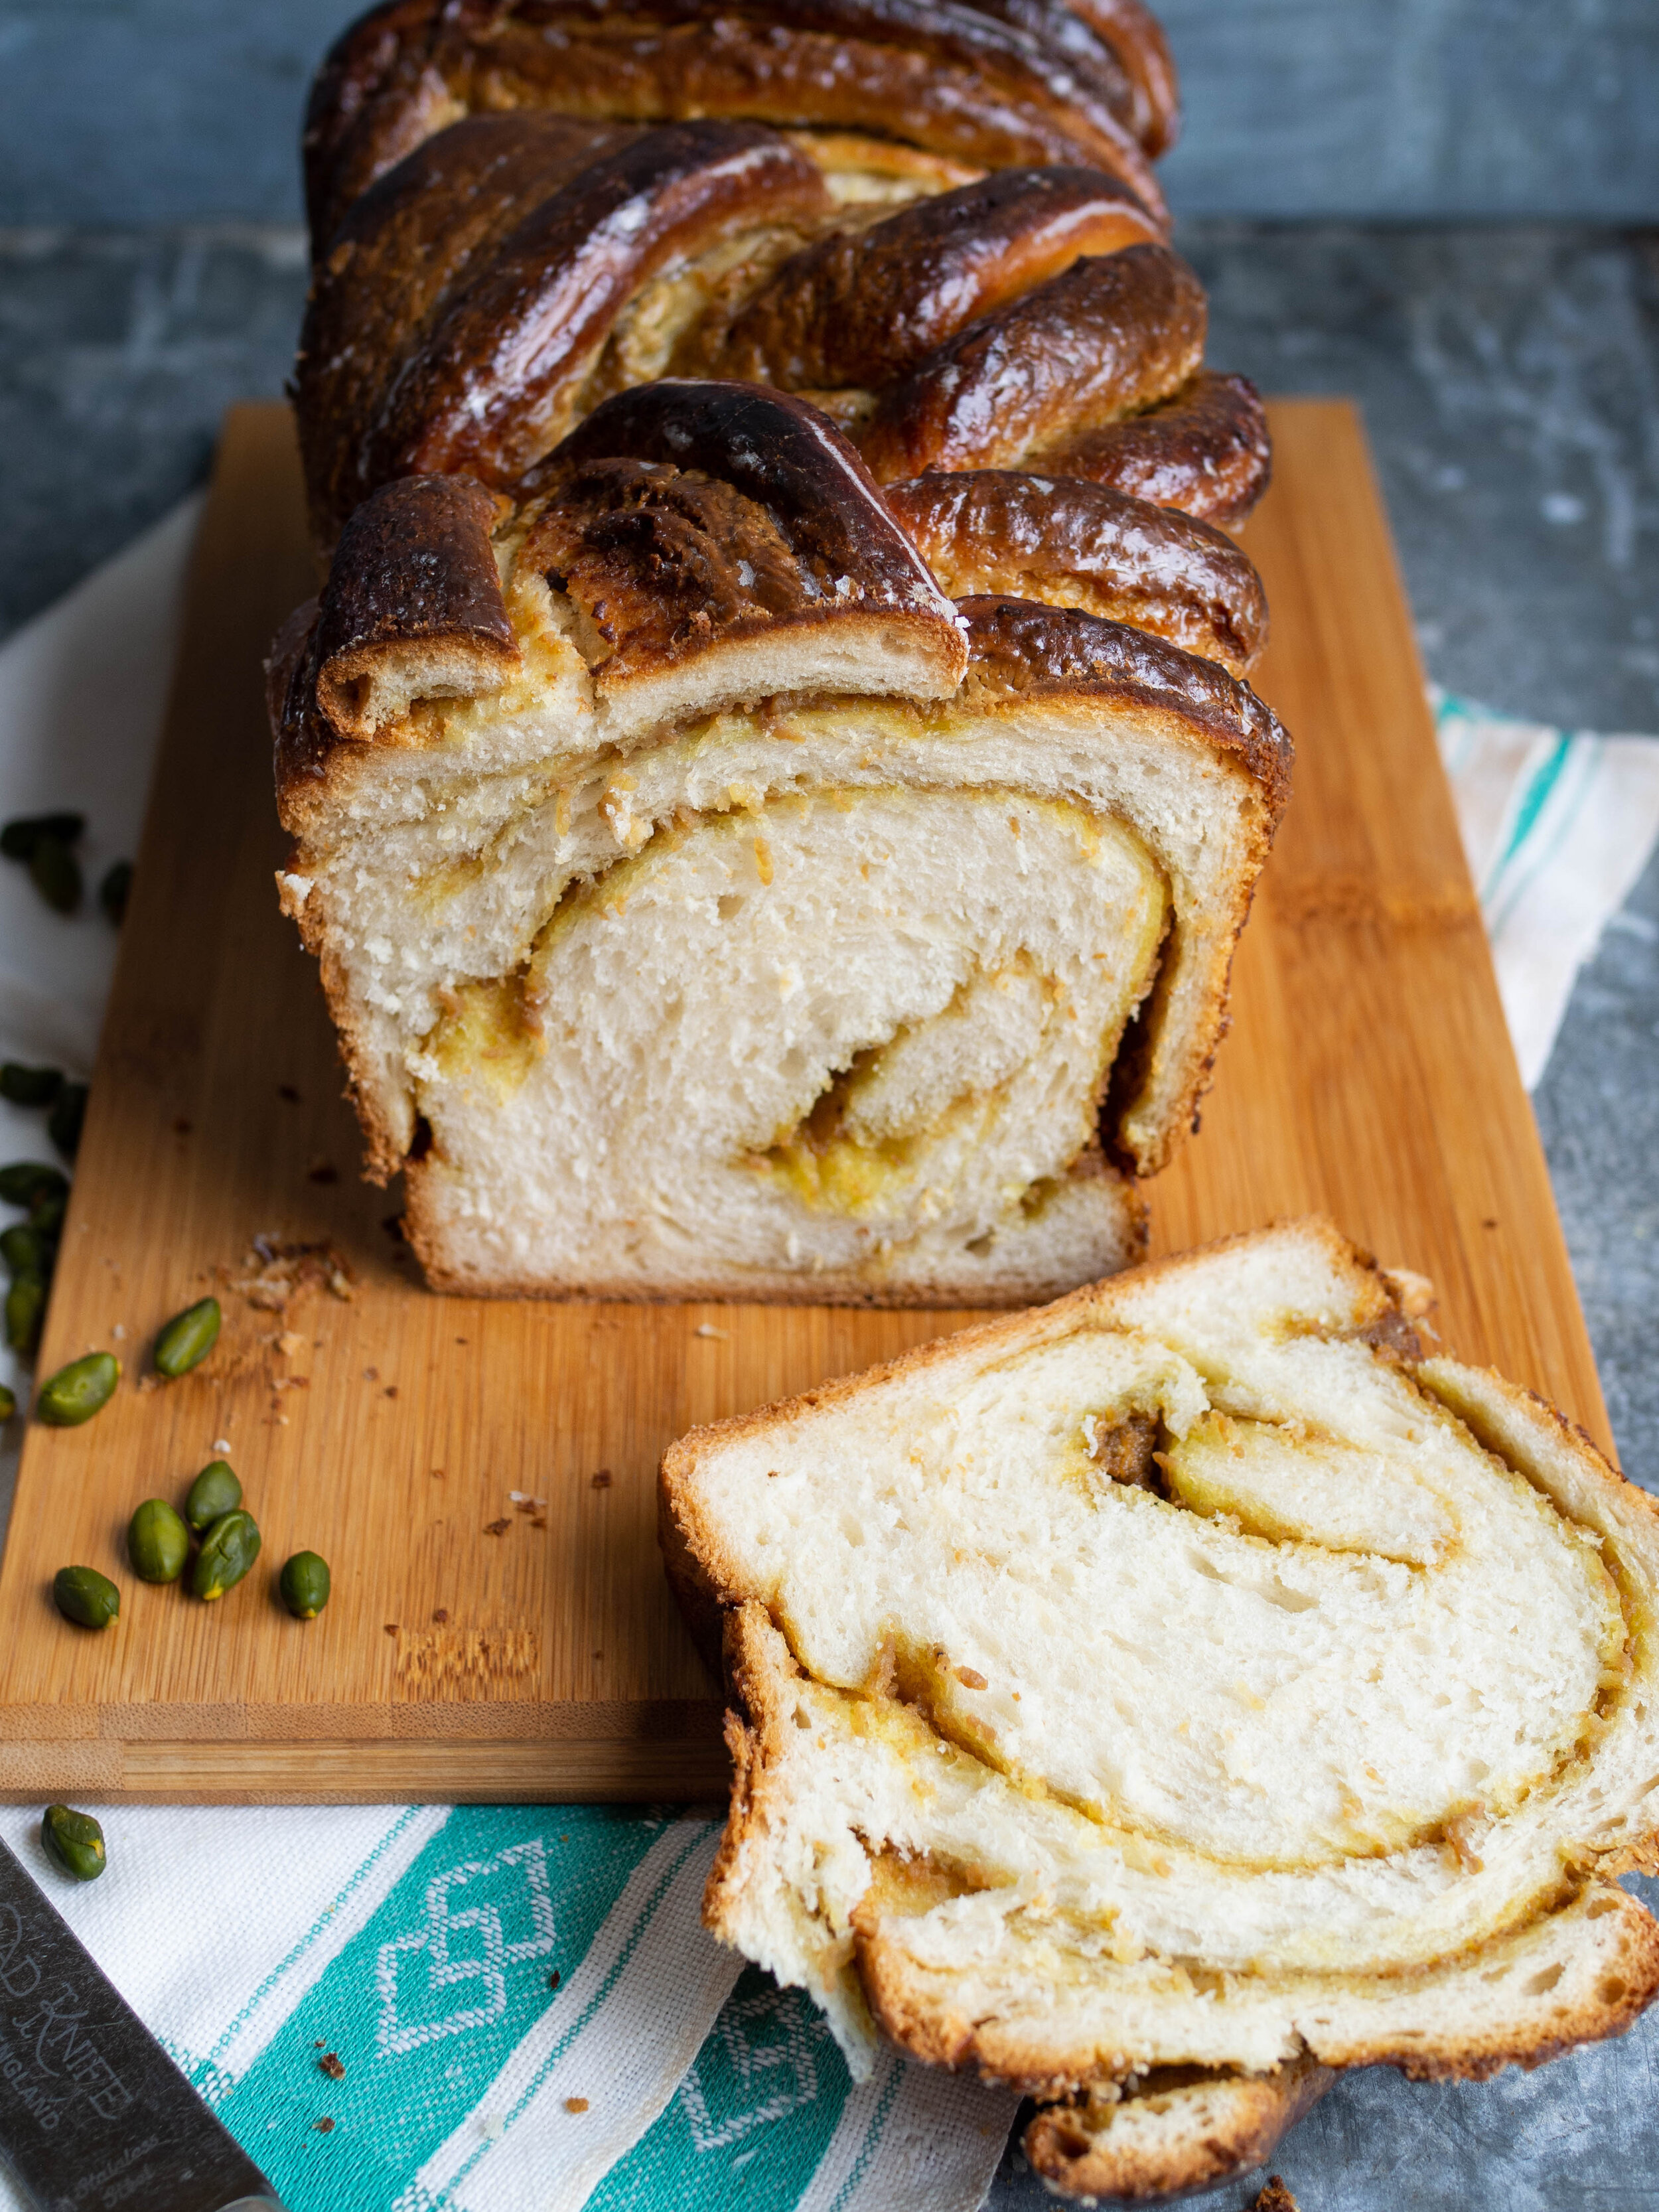
Pistachio Challah Babka

Initially, I made my own pistachio and white chocolate butter (based on the recipe in my Cosy Winter Bakes eBook) for the babka filling. The taste and colour were amazing, but being a homemade nut butter the consistency was a little thick which made the filling hard to spread over the dough. This also made the distribution of the filling quite uneven throughout the cooked babka (as you can see in the images below). 

I had made the filling this way to deliberately avoid using a jar of Italian crema di pistacchio, mostly due to the cost of it (between $14.95-$24.95 AUD/200g jar). However I also didn’t want to create a recipe that was difficult for others to replicate, and seeing as I have only recently found crema di pistacchio in a couple of stores here in Sydney, I am assuming it isn’t widely available, or available at all, in most places. And if you did find some, I would understand based on the price of it, that you might not want to use a whole jar of it in one recipe! 

View fullsize Pistachio Challah Babka with Homemade Pistachio Butter
Cream di Pistacchio I used for my babka filling

Cream di Pistacchio I used for my babka filling

Despite all that, a jar of crema di pistacchio turned out to be the perfect babka filling. Babka is often filled with Nutella, so something of that kind of consistency would be a perfect substitute. Crema di pistacchio has a wonderful creamy spreadable consistency similar to Nutella (it is essentially the pistachio version of Nutella after all), which makes it easy to spread over the dough and distributes more evenly amongst the babka as a result. 

If you can find and are happy to use crema di pistacchio for your challah babka, you will end up with a fantastic result. If you prefer to make your own pistachio butter, the taste of your challah babka will still be amazing, you just might not get the wonderful dainty swirls of filling throughout your babka. Honestly either way the taste is amazing, and well worth making babka from scratch!

Click the button below for the Pistachio & White Chocolate Butter recipe I used for my first babka attempt. The recipe makes enough for one babka filling.

Pistachio Butter Recipe
Pistachio Challah Babka made with Crema di Pistacchio

Pistachio Challah Babka made with Crema di Pistacchio

Pistachio Challah Babka

Ingredients: 

500g plain flour, plus extra

250ml warm water

9g dried yeast

85g caster sugar

3/4 tsp salt

1 egg, beaten

63ml canola or vegetable oil

200g crema di pistacchio 

cooking spray

Ingredients for the Glaze: 

50g white sugar

60ml water

Method:

Place the flour into a large bowl (one that fits your stand mixer if you have one). Make a well in the centre of the flour, then pour in the warm water. Add the yeast and 60g of the caster sugar and stir (don’t mix in the flour at this stage). Leave for 10-15 minutes, or until the yeast has become foamy. 

Then add the salt and remaining sugar, stir again (don’t mix in the flour at this stage), and wait 5-10 minutes for the yeast to become foamy again. 

Once the yeast is foamy, add the egg and the oil to the yeast mixture and combine. Then start to gradually incorporate the flour into the wet mixture. Once everything is combined, attach your bowl to your stand mixer fitted with the dough hook, and knead on a medium speed for about five minutes. The dough will be smooth and a little sticky once done. If the dough is too sticky, add a little more flour (1-2 tbsp). 

While the dough is kneading, lightly oil a large bowl. 

Once the dough is ready, place into the oiled bowl and cover. Leave in a warm spot for 1-1.5 hours, or until the dough has risen and doubled in size. 

Spray a 22 x 10 x 8.5cm (approx.) loaf tin with the cooking spray. 

Once the dough has risen, flour your work surface and tip the dough out. Lightly flour the top of the dough to prevent it sticking to your rolling pin. Using a rolling pin, roll out the dough into a rectangle (approx. 20 x 5cm). 

Dust any excess flour from the top of the dough, then spread the crema di pistacchio over the surface of the dough. 

Roll the dough tightly from one of the long edges to form a long log. Trim the ends off to neaten it up, and cut the log evenly down the middle. 

Turn the cut side of each piece of dough so it is facing up, then twist the two strands of dough together. Tuck the ends under, and gently squash the dough from either end to make it a bit more tight if it has become quite long. 

Place the dough into the prepared tin, cover and leave in a warm spot for about 30 minutes, or until the dough has risen. 

While the dough is rising, preheat oven to 180 degrees Celsius.

Once the dough has risen, place in the oven for 40 minutes. Check after 20 minutes, and loosely place some foil over the top to prevent the babka from over browning. 

While the babka is baking, make the glaze. Place the water and sugar in a small saucepan over medium heat and stir until the sugar has dissolved. Allow it to come to the boil, and then simmer for 3-5 minutes. Remove from the heat and allow to cool. 

The babka will be ready when it is golden on top, and sounds hollow when gently tapped. Remove babka from the oven, and place on a wire rack. Using a pastry brush, paint the top of the babka in about three layers of the syrup (this will help preserve the babka and stop it drying out), then leave to cool for 15-20 minutes. 

Once the babka has had a little time to cool, remove from the tin, and either cut into slices and serve immediately or allow to cool completely then slice. 

Babka like many homemade breads, is best eaten on the day it is made. If you won’t be eating all on day it is made, once the babka has cooled, cut into slices and freeze each individually. 

Pistachio Challah Babka

References: ‘Monday Morning Cooking Club - The Food, The Stories, The Sisterhood’ by Merelyn Frank Chalmers, Natanya Eskin, Lauren Fink, Lisa Goldberg, Paula Horwitz and Jacqui Israel (HarperCollins, 2013), p.263; ‘The Jewish Cookbook’ by Leah Koenig (Phaidon Press Limited, 2019), p.324; ‘Breaking Breads’ by Uri Scheft (Artisan, 2016), pp.74-79.

Pistachio Challah Babka
In Breads Etc., Jams Preserves & Spreads Tags Pistachio, Pistachio Babka, challah, Jewish Baking, Crema di Pistacchio, Pistachio Butter, Breads
Comment
5 Essentials for a Food Photoshoot

5 Essentials for a Food Photoshoot

Kath February 19, 2020

I set up photoshoots for every blog post I create (plus for paid client work as well). Below are my five essentials for a photoshoot, and also some photos of the photography set up and what the finished product ends up looking like. 

5 Essentials for a Food Photoshoot

  1. Camera - The first and most obvious thing is a camera! I use an Olympus EM-10, which is a mirrorless (or compact system) camera with a 40-150mm lens, and more recently a 25mm lens as well. I have been using my camera for a few years now, and (after much practice!) I use it on manual settings, though I am still always learning something new!

  2. Background - I have a few backgrounds to chose from. I have a couple I have bought (such as those from Capture by Lucy & FoodBackgrounds on Etsy), as well as a marble top from an old dresser that we kept after the dresser had to be thrown away. I also use our black granite kitchen bench and an old pine table (pictured in the photo above). I tend to like using the bought backgrounds most as they are portable, which means I can set up a shoot wherever the light is best at the time, or can be taken to client work too.

  3. Natural Light - This is one of the most important aspects of my blog photoshoots. All my photos are shot in natural light, and I often go to great lengths to get it! Sometimes I set up my shoot outside, but most often it will be by a window or on the floor with a door open next to it. In the photo above there was an open door to the left of the shot to bring in natural light, as well as closed windows behind.

  4. Props - I have accumulated lots of 'props' over the years! I have a few different cake stands, a stack of various plates, different mugs and cups as well as lots of old cutlery. Some things I buy specifically for photography, others are things we just have at home (my Mum has been a collector of antiques and vintage for many years) and others I have been given or inherited from my Grandma. 

  5. Food - Of course!! Without some food my blog photoshoots wouldn't be complete! I usually shoot the recipe straight after it has been cooked, and plan my day around when the recipe will be finished and when the natural light of the day will be best to shoot in. I think about how the end product will look, and what food related props might be necessary for the shoot. For example in the photo above I have a few fresh raspberries in the shot as the cake has them inside and as decoration. 

Click on the each image below for more information on the shoot set up.

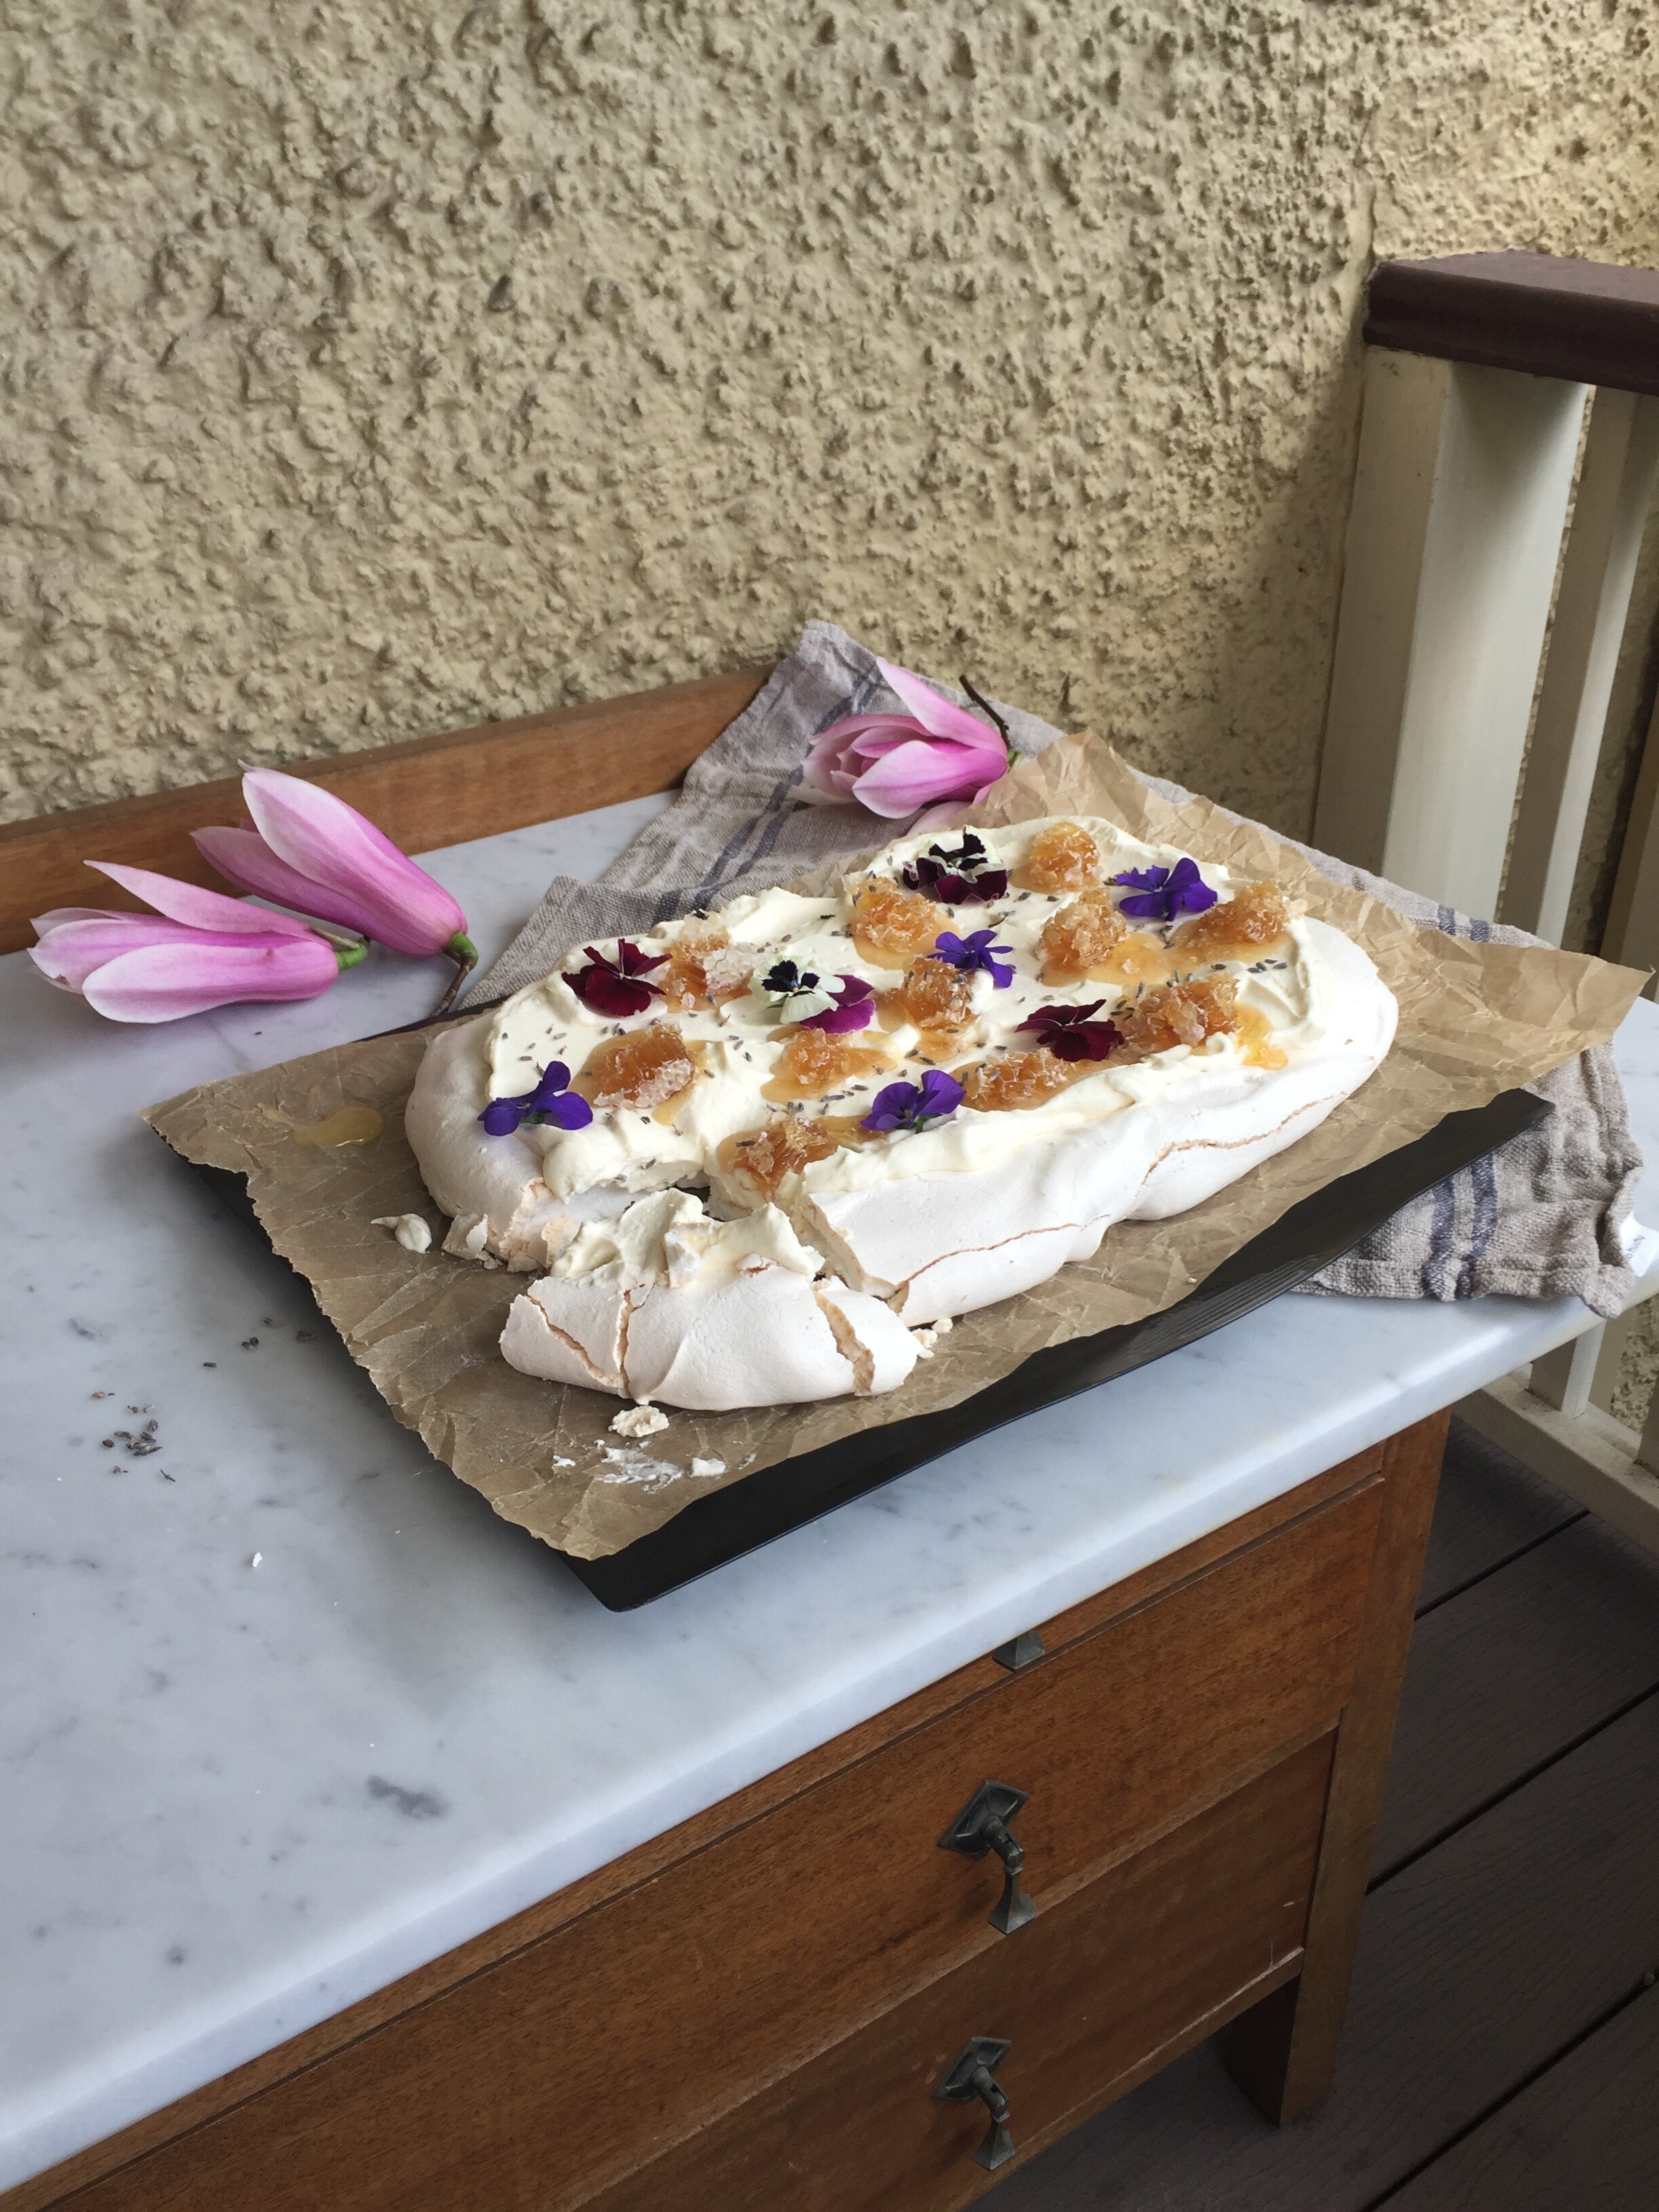
View fullsize Duck Egg Pavlova
Duck Egg Pavlova
View fullsize Duck Egg Pavlova Shoot
Duck Egg Pavlova Shoot
View fullsize Ginger Snap Iced Tea
Ginger Snap Iced Tea
View fullsize Ginger Snap Iced Tea Shoot
Ginger Snap Iced Tea Shoot
View fullsize Pistachio Raspberry & Rose Cake
Pistachio Raspberry & Rose Cake
View fullsize Pistachio Raspberry & Rose Shoot
Pistachio Raspberry & Rose Shoot
In Food Photography Tips, From The Mailing List Tags Food Photography, Food Styling, Food Photography Tips
Comment
Citrus by Catherine Phipps

Off The Shelf - 'Citrus' by Catherine Phipps

Kath February 18, 2020

Bought at: Gleebooks, Glebe (Sydney) on one of the many visits I made the to the store seeking calm and distraction while I worked nearby. 

Recipes Made: Bergamot and Lemon Roast Chicken p.103, Classic Lemon Tart p.168 and Lemon Curd p.244. 

Citrus by Catherine Phipps

I made the Bergamot and Lemon Roast Chicken when we had bergamots in season, and I think I may have roasted the chicken with half a bergamot inside the chicken too (not that the recipe says to do so), purely just to enjoy the bergamots even more. I really liked that this recipe used vermouth, which has such a wonderful fragrant smell whilst cooking, and while my gravy didn’t look much (maybe all gravy is just an ugly brown colour yet filled with flavour?), it did taste great! 

Bergamot and Lemon Roast Chicken ready for the oven

Bergamot and Lemon Roast Chicken ready for the oven

I made the Classic Lemon Tart with a mixture of homegrown bergamots, homegrown lemonades and lemons. I really liked the flavour of the tart and I liked that the pastry didn’t require using a food processor too. My filling cooked with a few bubbles on top from whisking it all up, probably because I didn’t use the right kind of cream - I used pouring rather than heavy cream , and I ended up with so much filling left over I made another only slightly smaller tart! Next time I will definitely be using heavy cream! I wrote a blog post about this recipe, and how I first heard about this book which you can find here. 

Classic Lemon Tart made with lemon, bergamot and lemonades

Classic Lemon Tart made with lemon, bergamot and lemonades

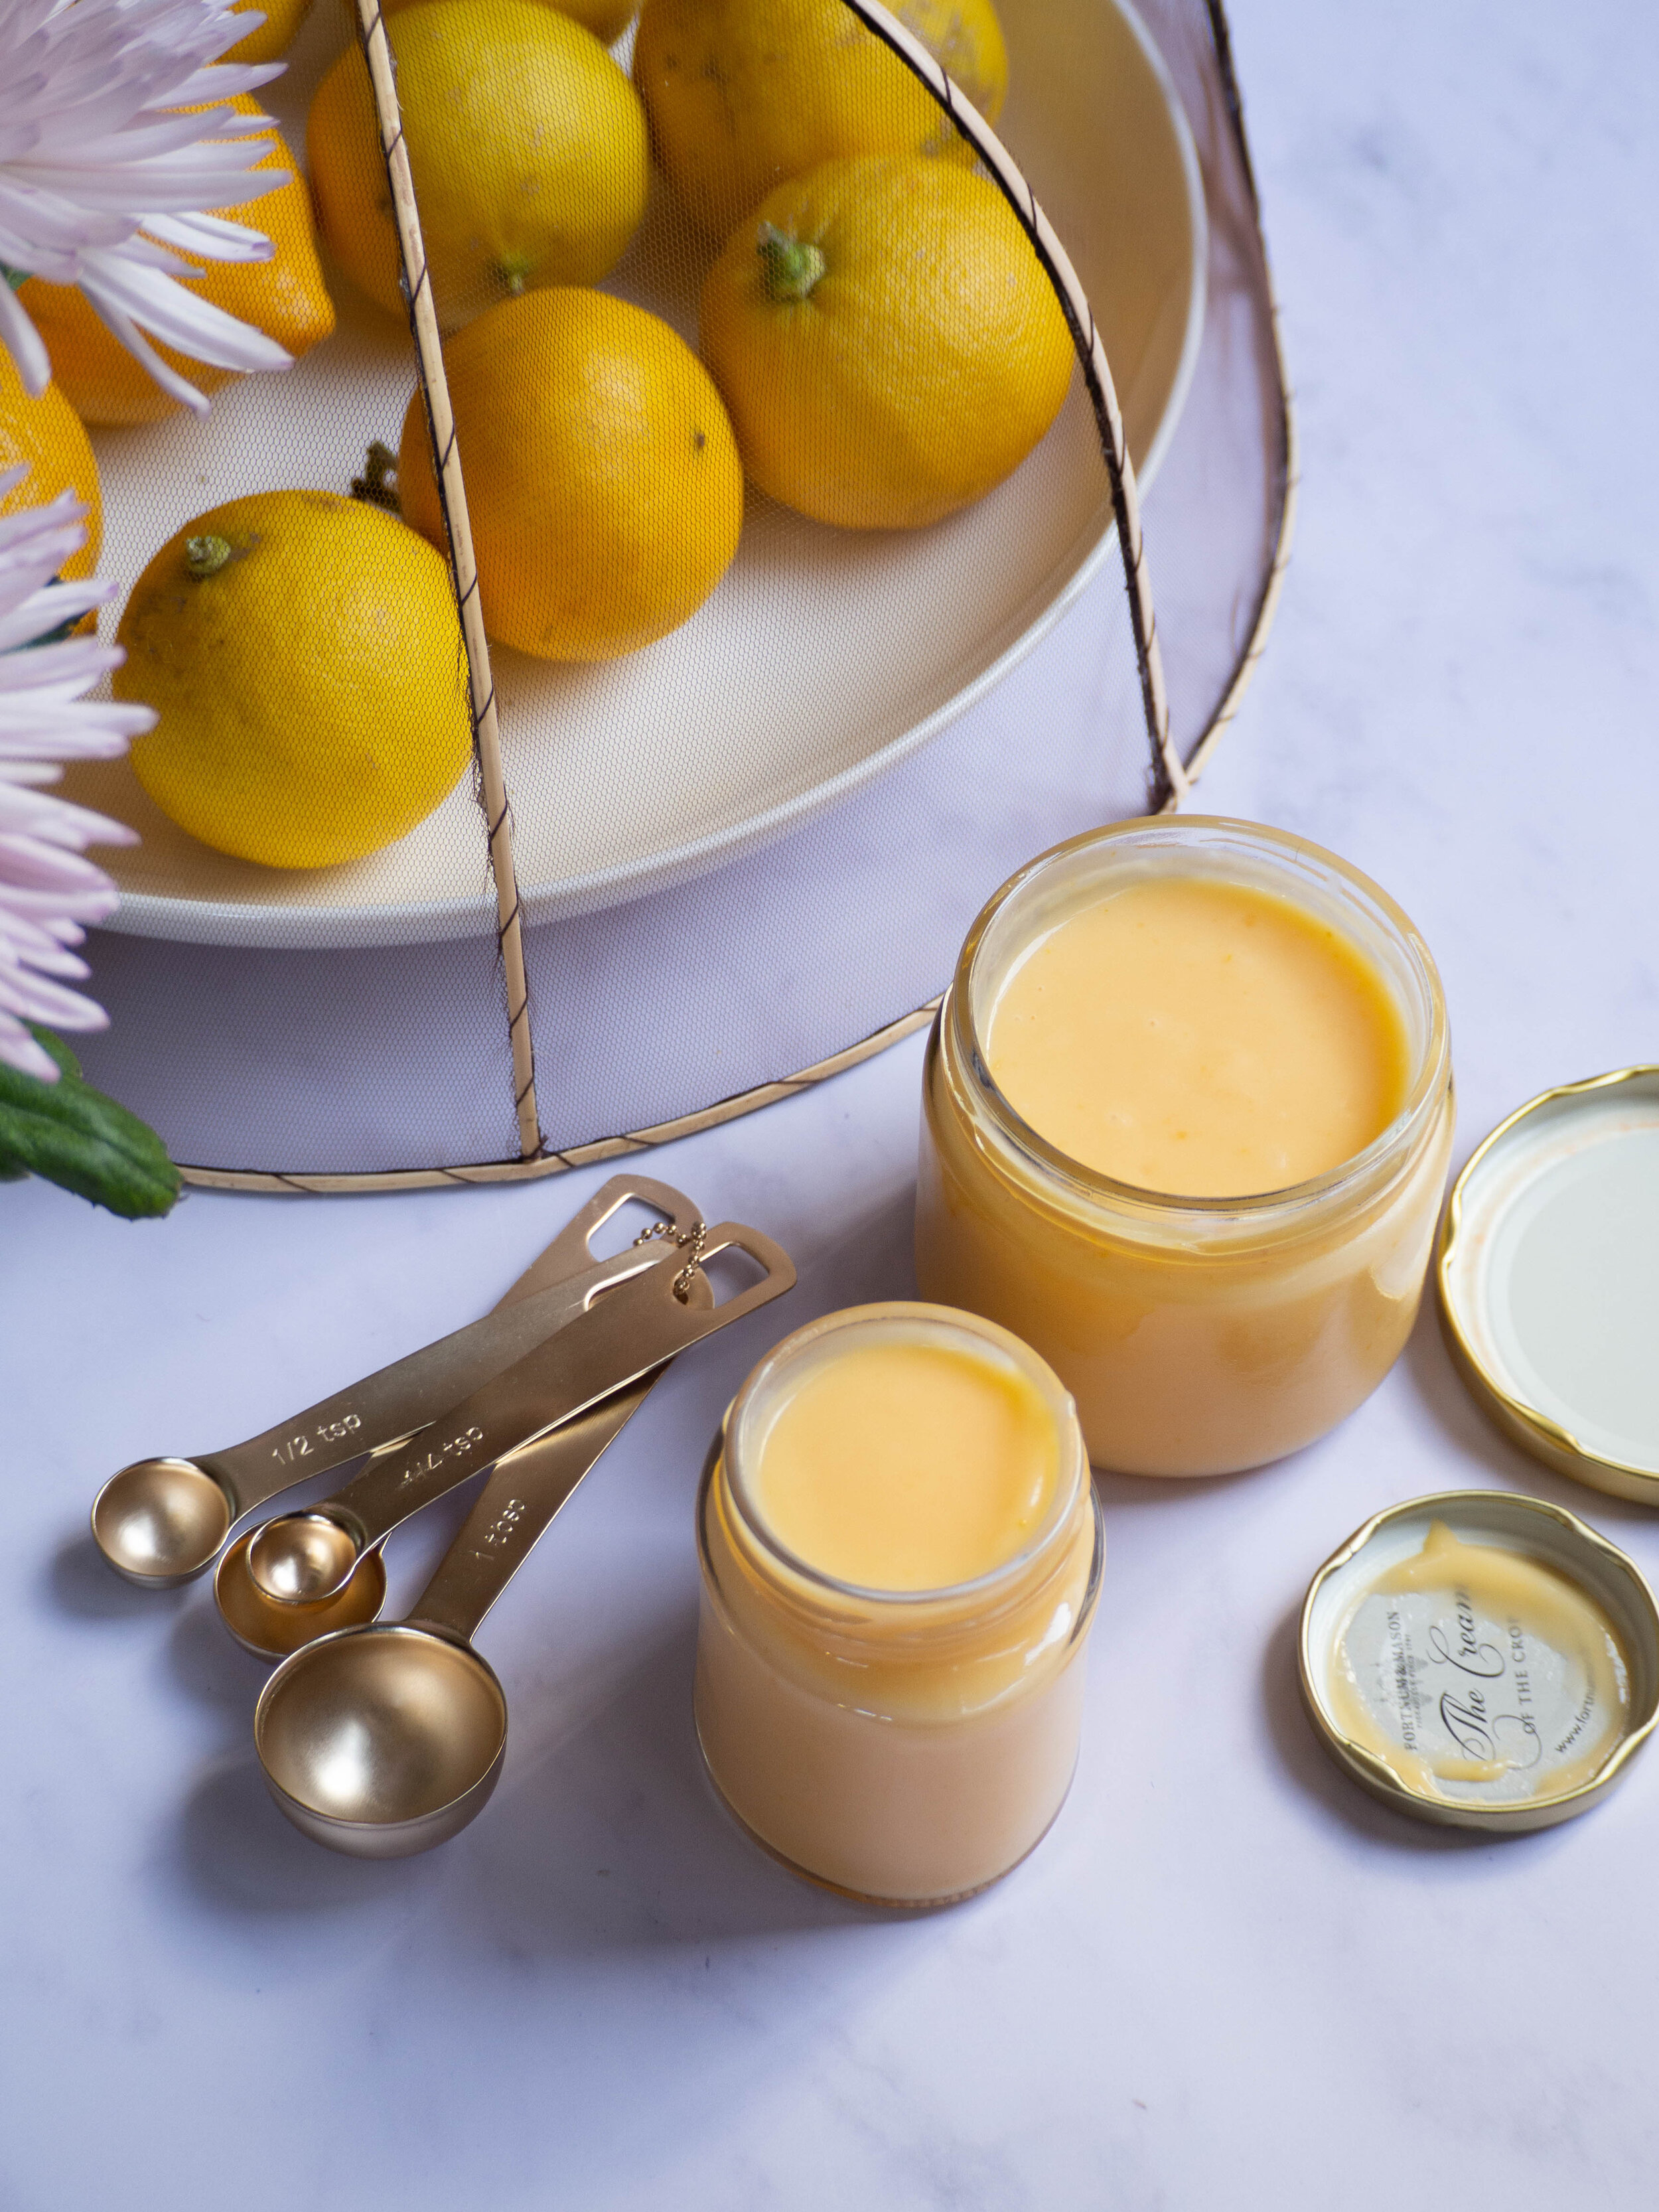
Last year I found yuzu in my local green grocer for the first time, so I bought a couple and then had to decide what to do with them. This book being my bible on what to do with citrus, I decided on making Catherine’s recipe for Lemon Curd with them, which she suggests as a good substitute for lemons in the introduction to the recipe. I really liked this curd recipe, it produced a lovely consistency of curd and it firmed up even more once it was refrigerated. I used the curd to fill mini tarts, as shown in this blog post. 

Lemon Curd made with Yuzu

Lemon Curd made with Yuzu

Favourite Things About the Book: I really love the focus on just one type of food in this book. The beginning of the book has an explanation of all types of citrus, from lemons and limes, to yuzu and finger limes. I especially love that the book contains much about bergamots, which I love and had not long started growing when I purchased the book. I refer to this book, and the introductory sections in particular, a lot when I find unusual types of citrus or want to know more about what I could use as a substitute. Catherine also details how to dry citrus, freeze, candy and much more. There is basically every recipe you will ever need for cooking or baking with citrus in here, and the cover is a lovely marbled yellow fabric that feels wonderful to the touch (even if I do stress about getting such lovely cookbook covers dirty when I am using them in the kitchen!). 

Bookmarked Recipes (to make later!): Bergamot and Rose Turkish Delight Pavlova p.166, Earl Grey and Rose Parfait p.178, Quince, Clementine and Rose Jelly p.225 and Turkish Delight p.226. 

Citrus by Catherine Phipps
In Off the Shelf Tags Citrus by Catherine Phipps, Citrus, Cookbooks, Off the Shelf, Cookbook Review
Comment
  • The Blog
  • Older
  • Newer
No results found

recipes

  • Biscuits/Cookies 40
  • Breads Etc. 9
  • Breakfast 7
  • Cakes & Slices 68
  • Confectionary 5
  • Drinks 6
  • Events 14
  • Food Photography Tips 3
  • From The Mailing List 24
  • Heirloom Recipes 12
  • Holidays 45
  • Ice Cream 9
  • Jams Preserves & Spreads 9
  • Muffins 4
  • Off the Shelf 54
  • Other Desserts 25
  • Savoury Dishes/Meals 15
  • Scones 4
  • Tarts & Pastry 9
  • Travel 13

Sign up to Friday Food Chat with Kath, a weekly newsletter for more food, baking, cookbook chat and more!

Sign Up Here!
instagram-unauth pinterest facebook url

Website Accessibility: To enable text to speech function on the blog, click the sound button to the right of each blog post.

All images & content are the property of Kathryn Vincent, unless stated otherwise. Please do not use without permission.

Kulinary Adventures of Kath

Food Photography, Recipes & Baking

instagram-unauth pinterest facebook url