Kulinary Adventures of Kath

Food Photography, Recipes & Baking
  • home
  • About
  • Work with Kath
  • Shop
  • Blog
    • The Blog
    • Recipe Archive
  • Newsletter
  • Contact
  • home
  • About
  • Work with Kath
  • Shop
    • The Blog
    • Recipe Archive
  • Newsletter
  • Contact
Raspberry Pistachio Rose Cake (23 of 25).jpg

The Blog

Recipes and Food Photography by Kath Vincent.

  • The Blog
  • Recipe Archive
  • All
  • Biscuits/Cookies
  • Breads Etc.
  • Breakfast
  • Cakes & Slices
  • Confectionary
  • Drinks
  • Events
  • Food Photography Tips
  • From The Mailing List
  • Heirloom Recipes
  • Holidays
  • Ice Cream
  • Jams Preserves & Spreads
  • Muffins
  • Off the Shelf
  • Other Desserts
  • Savoury Dishes/Meals
  • Scones
  • Tarts & Pastry
  • Travel

Oven Poached Quince

Kath May 23, 2024

Since this recipe has the quince tightly covered with foil during the cooking time in the oven, I think it’s still classified as poaching? 

Whether it’s technically poaching or baking, I find this a great way to cook these tough but delicious fruit. 

I used to spend time cutting out the cores of the raw quince to then wrap in muslin to add to the baking, but if the quince cores are in good condition I will now leave them in tact and cut them out after cooking - much easier!

Many times I have cooked quince I have found the cores are not in good condition as they contain a little mould etc. I think this occurs if a fruit fly or similar has burrowed its way into the centre of the fruit (any experts let me know in the comments if my assumption here is correct!). Look out for fruit with small holes in the flesh as these are likely to be poorer quality and may have cores that are not usable. I avoid fruit with these little holes if I can as even cutting the quince can be a lot of work, and it’s disappointing to find the core (and all the pectin it can give the poached quince) has to be completely discarded along with some if of the rest of the quince too.

In these cases I keep any useable core and place in muslin to poach with the quince, but if your quince are very good quality you should be able to leave the cores until after cooking.

View fullsize Quince! Jumbo size!
View fullsize Peeled Quince (four large quince)
View fullsize Syrup Mixture Prior to Cooking
View fullsize Poached Quince before taking cores out

Oven Poached Quince

Ingredients:

4-5 quince

300g white sugar

130ml water

juice of two lemons or two bergamots (approx. 120ml)

1 tsp vanilla bean paste or 1 vanilla bean halved length ways

8 cardamom pods

handful of fresh or dried rose petals

Method:

Preheat oven to 150 degrees Celsius.

Peel and cut the quince into quarters and place in a single layer in a large baking dish. 

In a small saucepan, combine the sugar, water, citrus juice, vanilla, cardamom and rose petals. Place over low/medium heat and stir until the sugar has dissolved.

Once the sugar has dissolved allow to simmer for a couple of minutes, then pour over the quince and cover the baking dish tightly with foil.

Place in the oven for at least 2 -3 hours, turning the quince over halfway so they colour evenly. The quince will be ready once they have softened (but remain whole) and have turned a ruby red colour. The cooking time will depend on the size of the quince. I check mine at the 1 and 2 hour marks, and then at 30 minute intervals after that if they need more than 2 hours.

Once the quince are cooked, remove from the oven and allow to cool. Discard the cardamom pods, and once the quince have cooled enough, gently cut out the cores and discard. If the colour of the quince is lighter underneath the cut part, turn them over so they are face down in the quince cooking syrup and they will colour up a bit while the quince cool further. 

Once cooled, place quince together with the syrup in an airtight container (I find glass containers work best). Keep in the fridge, they should last for a couple of months for so. You can freeze the quince as well. 

In Other Desserts Tags Quince, Poached Quinces
Comment
crumble in pink dish sitting on green tea towel

ANZAC Biscuit Inspired Fruit Crumble

Kath April 21, 2022

This recipe idea came to me not long after I woke up today, and since I actually remembered the idea after I had properly woken up and got ready for the day, I just had to make it.

This crumble is based on the Weeknight Strawberry and Apple Crumble from my cookbook, Everyday Bakes. It’s a pretty flexible recipe and makes enough to generously feed four people. 

I always like using apples as the base of my crumble, very finely sliced. You can play around with what other fruit you would like to add. I find a punnet of strawberries goes well, and this time I also added in some already cooked rhubarb I had. You could add berries, pears, stone fruit, or poached quince if you have some already. The quantities for the fruit don’t need to be exact, just make sure you don’t overfill your baking dish or you may end up with any fruit juices overflowing from the dish during baking. 

The crumble topping is inspired by ANZAC Biscuits, using oats, brown sugar, coconut and golden syrup, which I’m sure many of us are thinking about making this weekend. I hope this crumble will be a nice thing to make and enjoy this long weekend, along with a batch or two of ANZAC Biscuits.

spoonful of crumble

ANZAC Biscuit Inspired Fruit Crumble

Ingredients:

40g unsalted butter, softened

50g rolled oats (not instant oats)

50g plain flour

50g brown sugar

20g shredded coconut

1 tsp golden syrup

x2 small apples (I prefer Pink Lady apples) 

250g strawberries

Cooked rhubarb*, optional

2 tsp vanilla extract

Method:

Preheat oven to 170 degrees Celsius.

In a medium bowl, mix together the butter, oats, flour, sugar and coconut until everything is well combined. You can use your fingers to rub everything together. Once well combined, add in the golden syrup and mix with a spoon until it is fairly well incorporated. 

Finely slice the apples (no need to peel them!) and hull and quarter the strawberries. Place the fruit into a 1.25L/5 cup capacity baking dish - one that is wider and shallower instead of narrow and deep will work better for this recipe. 

If you have any cooked or stewed rhubarb you can mix some of that in now as well, just enough so your baking dish is not overly full and you still have ample room for the crumble topping without everything spilling over the sides. You could also add in any other berries (approx. 125g), one stone fruit that is finely sliced, a finely sliced pear or an additional apple if you wish. 

Toss the vanilla into the fruit and press the fruit mixture down a little so the crumble topping has a relatively even surface to sit on. Then top with the crumble topping so it evenly covers the surface.

Bake for 25 minutes, or until the topping is golden brown.

Serve warm with ice cream or cream.

If there are any leftovers, allow the crumble to cool down then cover and keep in the the fridge.

Serves four, generously.

* I used some pot roasted rhubarb I had made from Sophie Hansen and Annie Herron’s new book Around the Kitchen Table. I used the cooked cut up stalks (about 15 individual pieces of varying sizes), and allowed most of the cooking juice to drip off before adding to the crumble. 

crumble with spoon in
close up of cooked crumble mixture
In Other Desserts Tags ANZAC Biscuits, ANZAC, Crumble, Dessert, Mixer Free Recipes
Comment

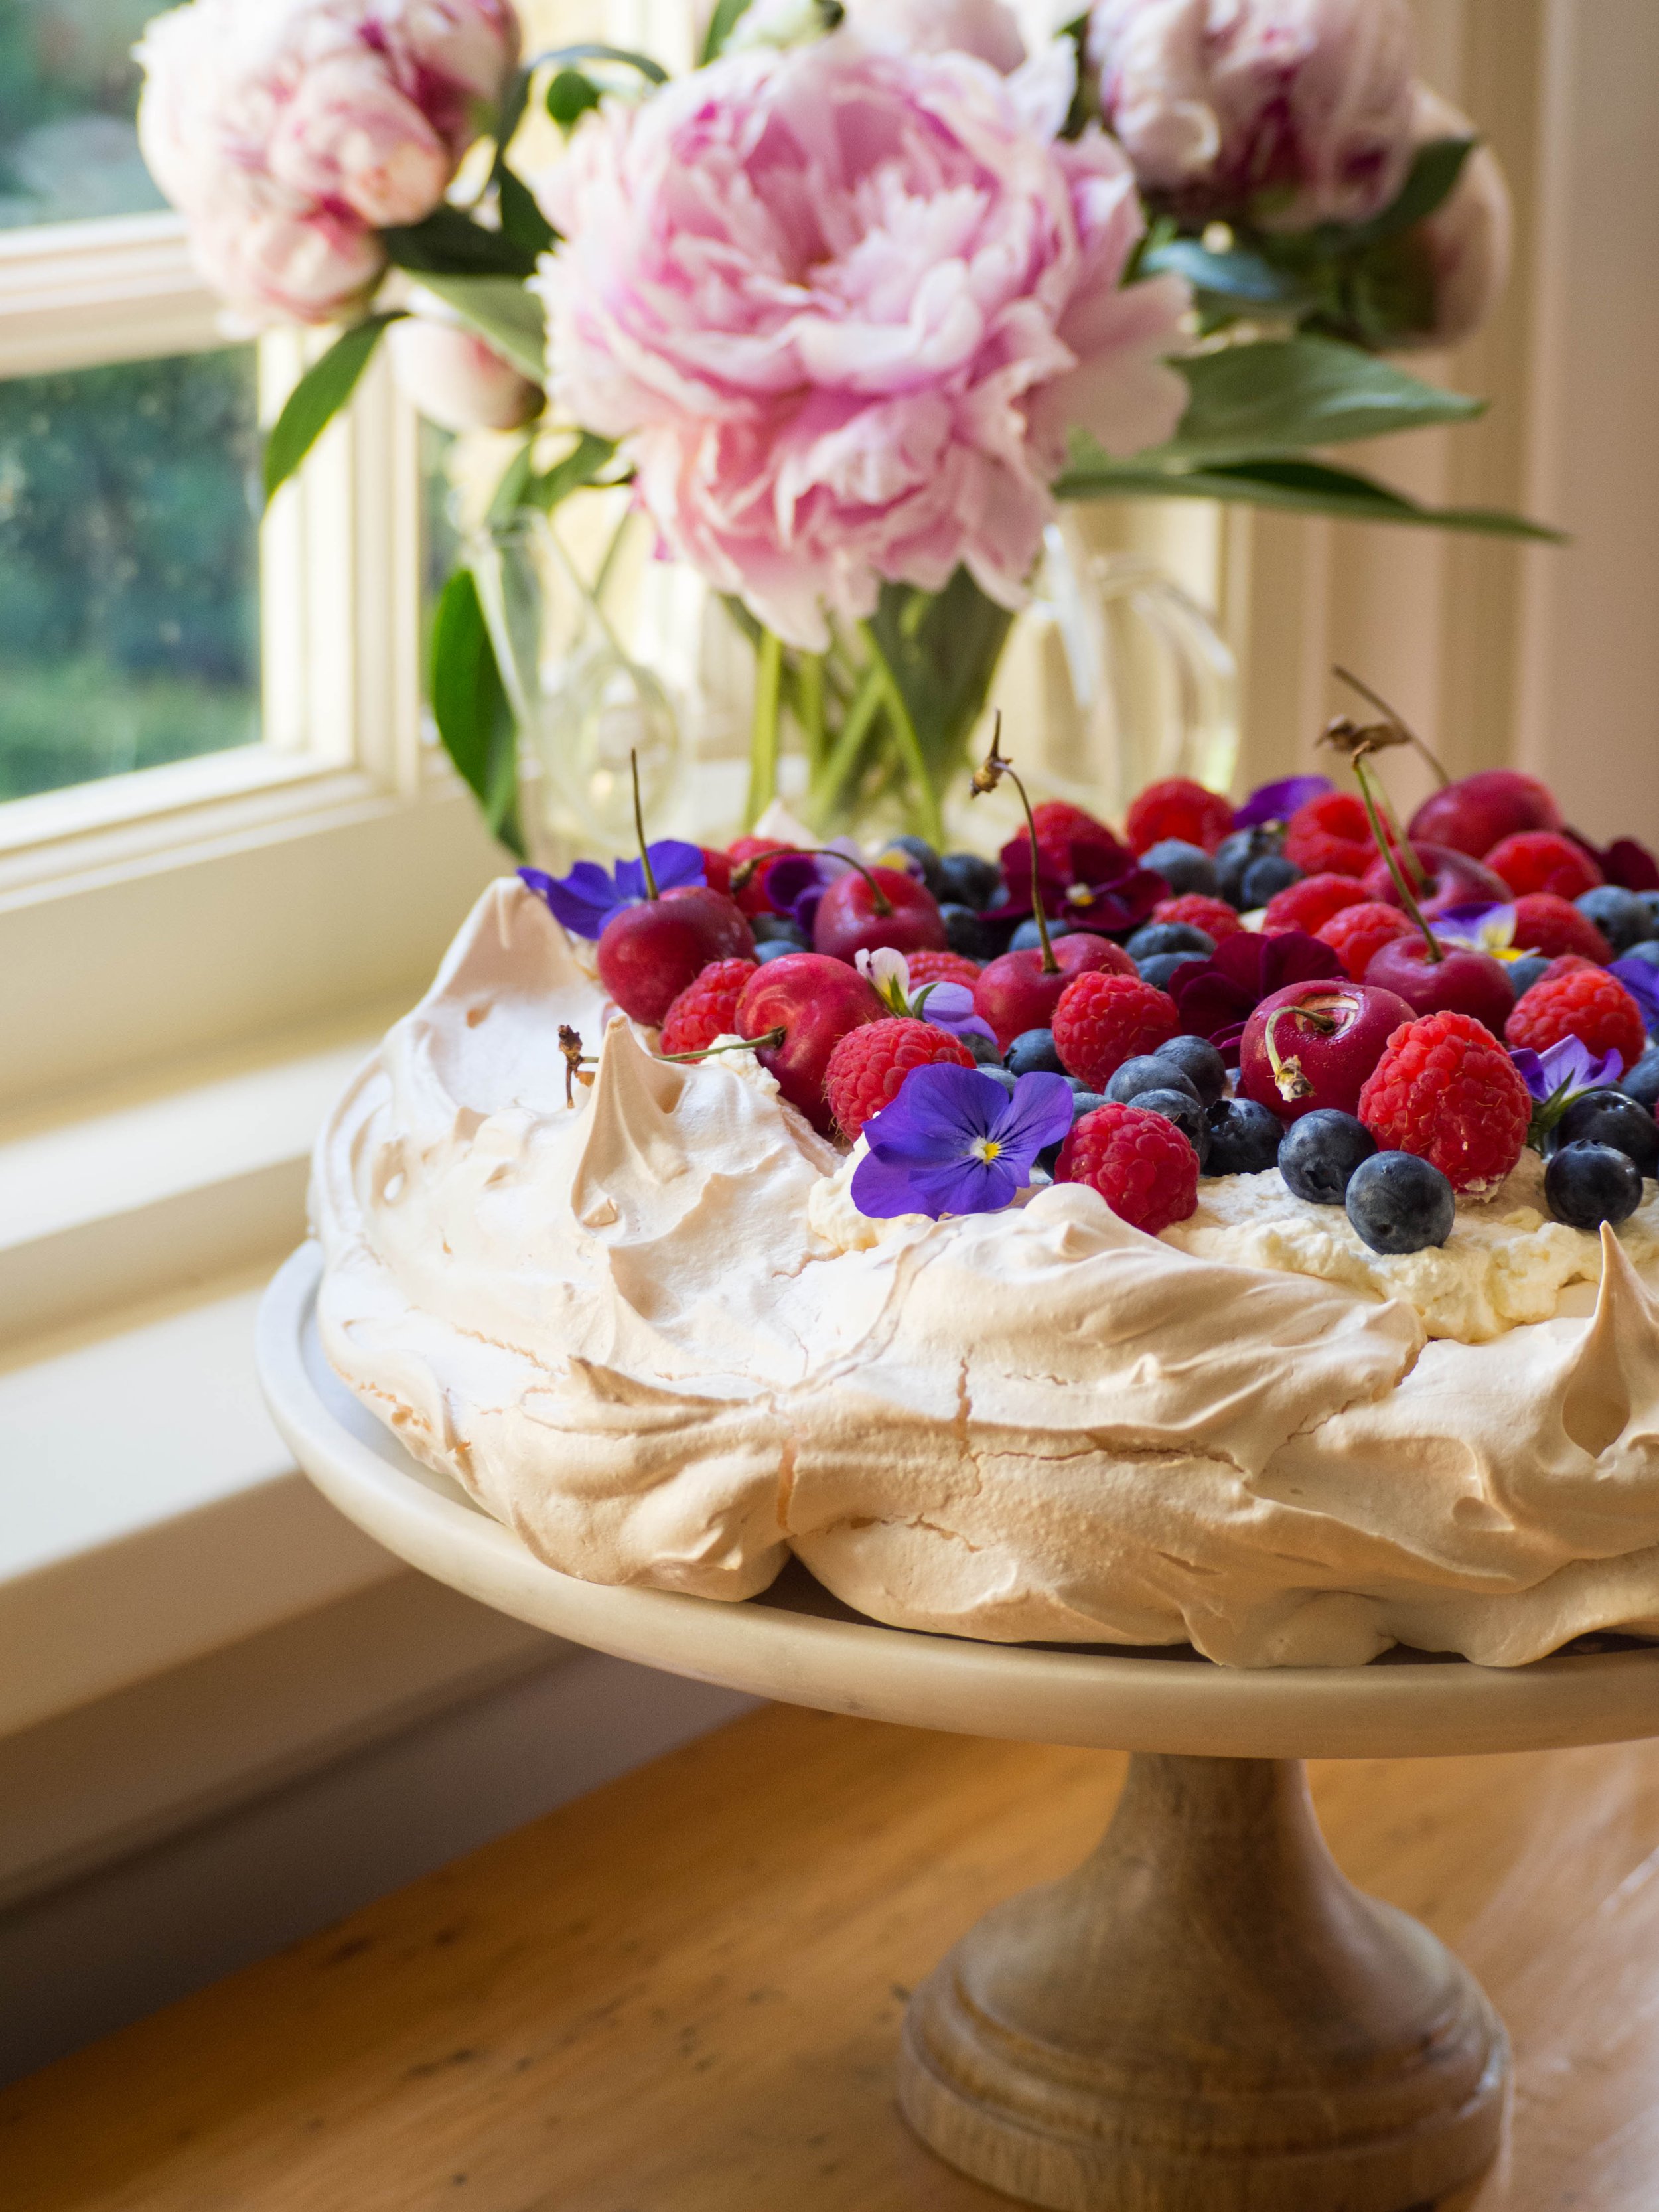
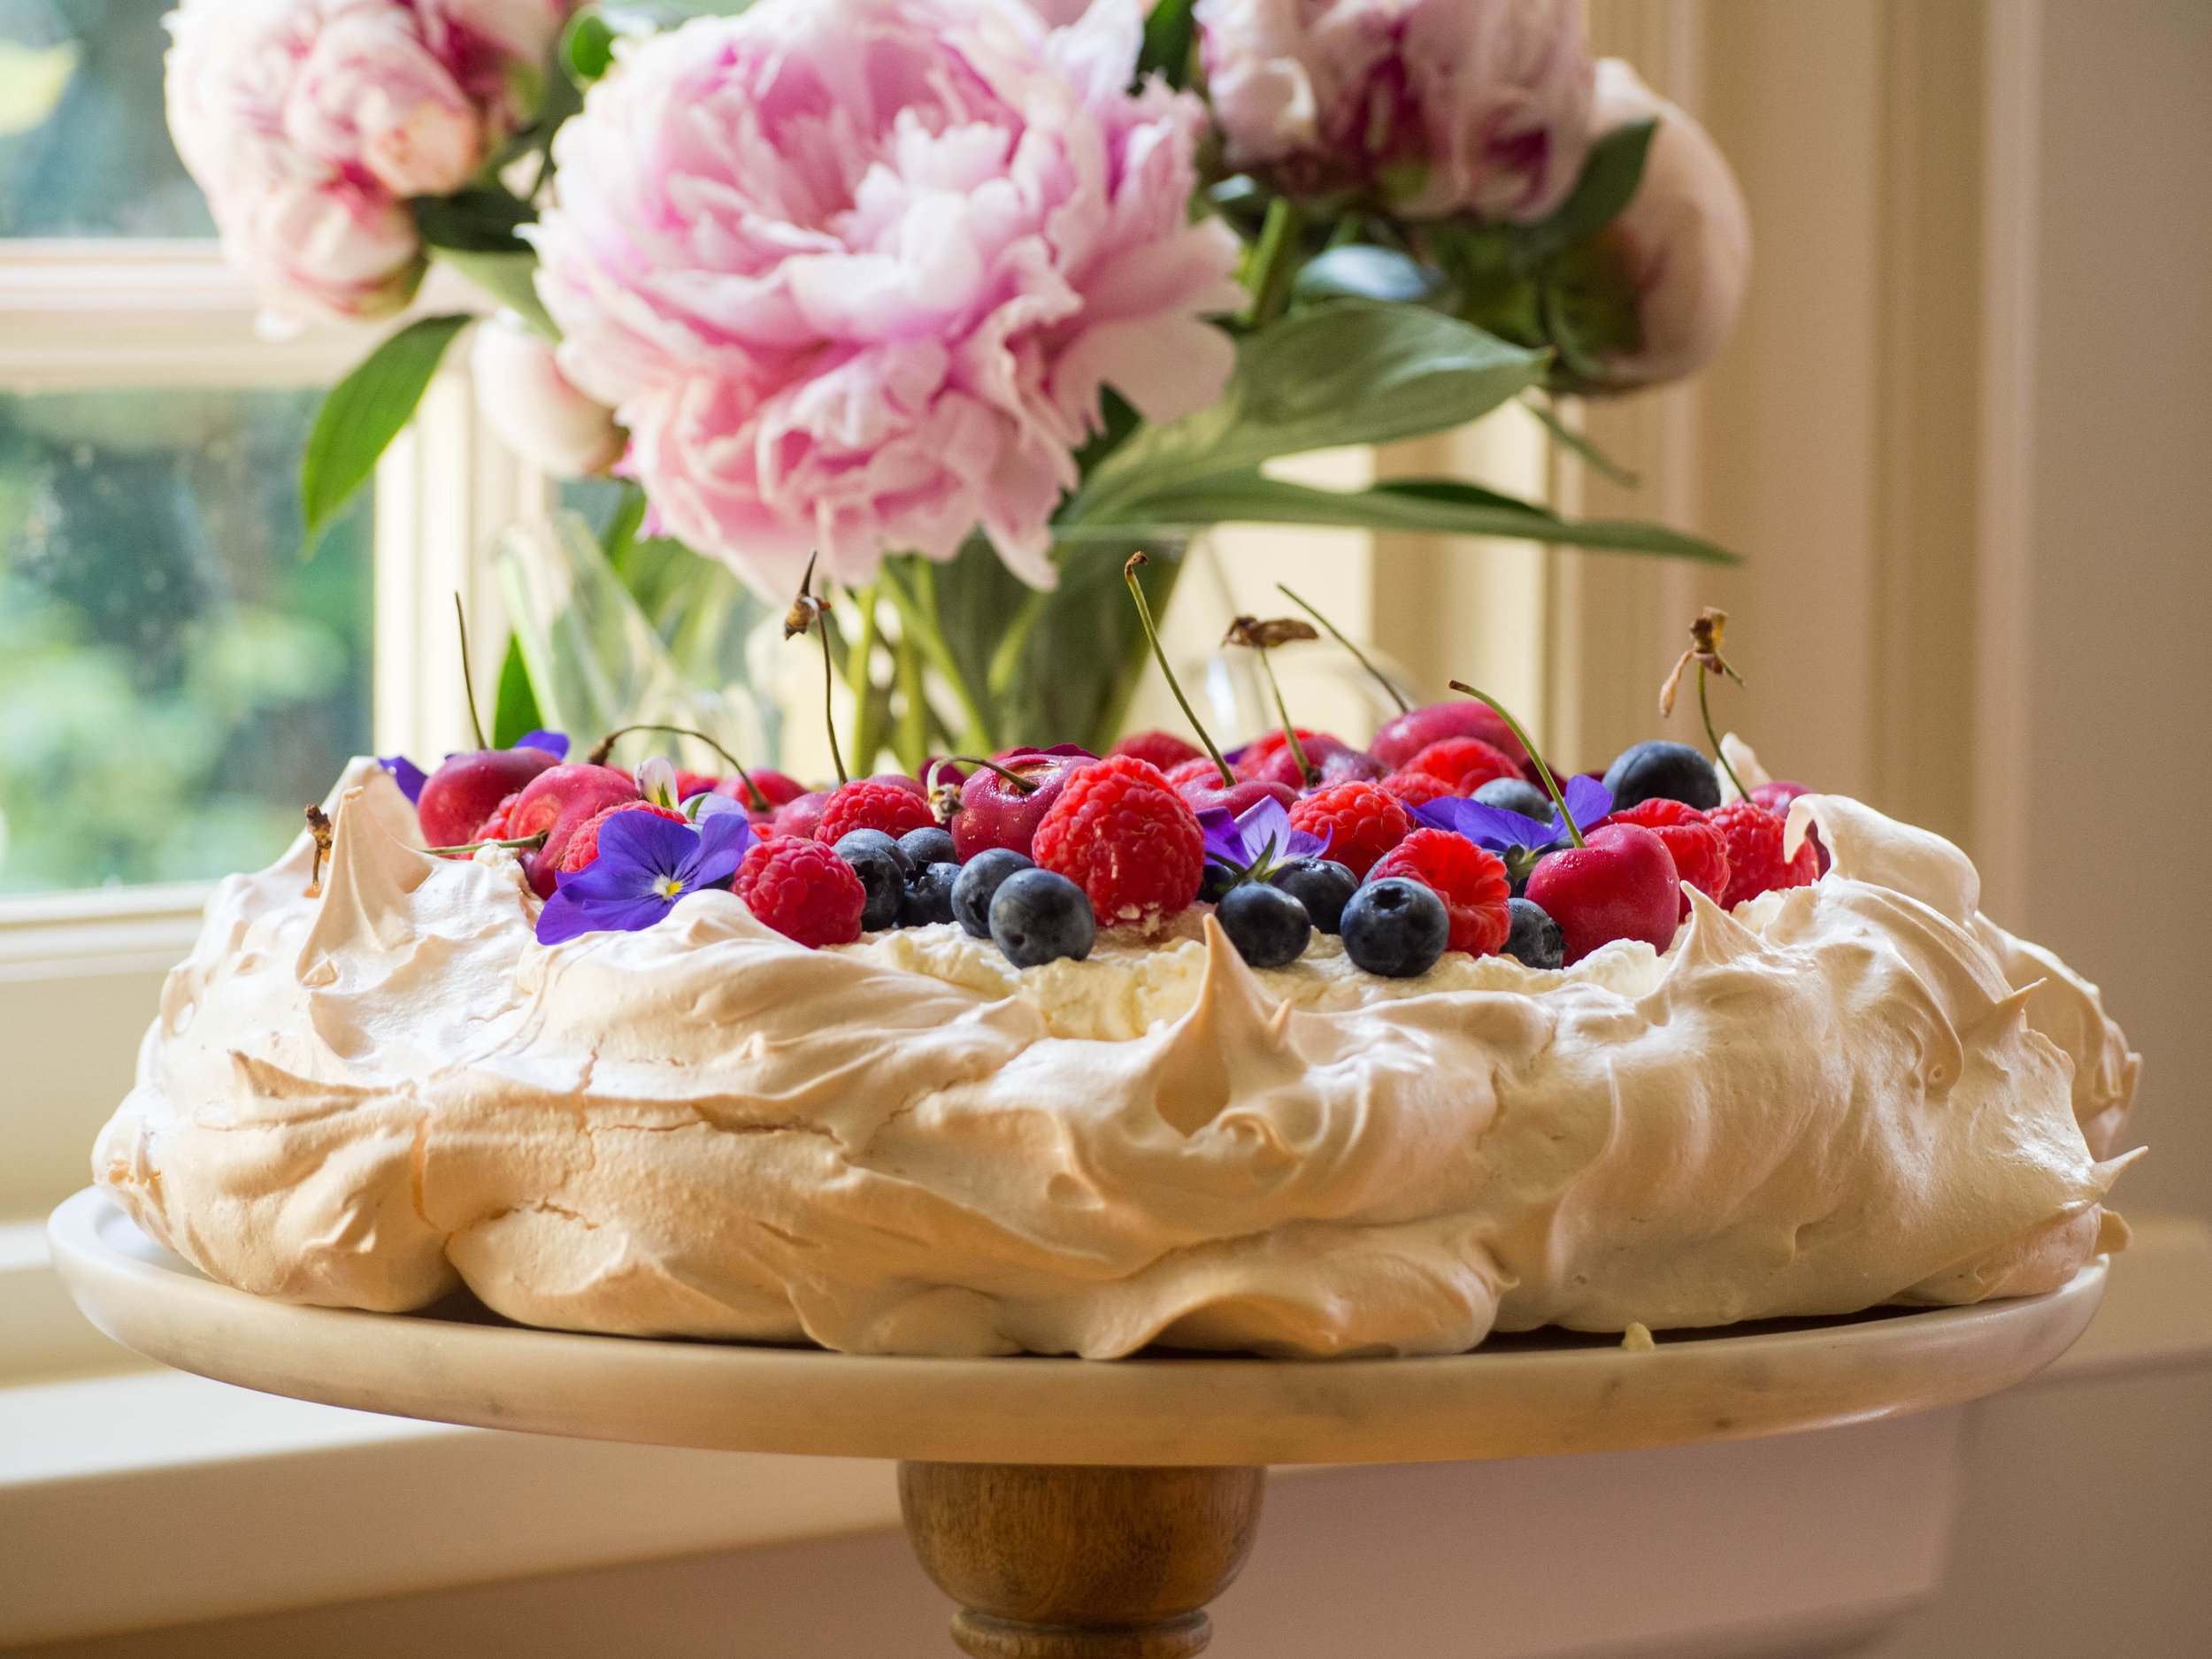
An Aussie Pav for Christmas

Kath December 20, 2021

I have posted a handful of Pavlova recipes on my blog over the years. I love a Pavlova, it was my favourite dessert that my Grandma would make and it has been quite a permanent feature in my life.

Christmas in Australia is an excellent time for a Pavlova (or ‘Pav’ as we Aussies like to shorten it to!). The pavlova itself can be made in advance, and it is a nice light dessert after a filling Christmas lunch or dinner.

This recipe for pav is the more traditional Australian take on the dessert, compared to the previous recipes I’ve shared. It is based on my Grandma’s recipe which is always the recipe I turn to when I want to make a pav. I shared her original recipe here a few years ago. That one makes a slightly smaller pav and doesn’t have any toppings as that’s how I liked to eat it as a child. Times have very clearly changed since then!

Topped with cream, berries and cherries its delicious and makes the most if the excellent in season fruit we have here at this time of year. You could also top your pav with mix other types of fruit, like mango, kiwi fruit, strawberries, stone fruit etc. It’s really up to you and what you most like to eat.

I haven’t given quantities for the fruit as you can put as little or as much as you like, just go with what looks good. I tend to put a whole punnet of blueberries and raspberries and add in a few cherries, maybe some cut up strawberries and a few edible flowers if I can get any.

If you have any leftovers you can cover the pav and store in the fridge for about 2 days.

An Aussie Pav for Christmas

Ingredients:

6 egg whites

375g caster sugar

1.5 tsp white vinegar

1.5 tsp vanilla bean paste or vanilla extract

30g cornflour

For the Topping:

300ml pouring cream

1/2 tsp vanilla bean paste

mixture of berries, such as blueberries and raspberries

handful of cherries

edible flowers, optional

Method:

Preheat oven to 200 degrees Celsius. Line a large baking tray with baking paper. Trace a circle on to the baking paper, using a plate or cake stand that is about 26-28cm in diameter (you can use whatever plate you will serve it on later).

Add the egg whites to the bowl of a stand mixer, and beat using the whisk attachment for 5-6 minutes. Gradually add the sugar during this time, a tablespoon or so at a time.

Add the vinegar and vanilla and continue to beat until the mixture is glossy and holding its peak.

Sift the cornflour over the mixture and gently fold into the meringue using a spatula until just combined.

Using your finger, place a tiny amount of the meringue mixture under two corners of the baking paper on the prepared tray. This will keep your baking paper in place whilst you shape the pavlova.

Place the meringue onto the prepared tray, keeping within the traced circle. Spread it out using a spatula, keeping the sides of the pavlova high and the middle a little lower (so it can hold the cream and fruit later!). I like to leave a little gap between my pav and the traced circle, rather than pushing the meringue right to the edges. The pav will expand a bit as it cooks, and if you’ve traced around the serving plate you will use later on, this way the pav will still fit on the plate rather than expanding past the traced circle, and therefore becoming bigger than your serving plate or cake stand!

Turn the oven down to 125 degrees Celsius and cook the pav undisturbed (don’t open the oven!), for 1.5 hours. After 1.5 hours, turn the oven off and leave the pav to cool completely in the oven (leaving it overnight to cool is best if you can).

Just before you are reading to serve your pav, whip the cream and the vanilla until the cream has thickened and forms soft peaks.

Spread the cream over centre of the pav, and decorate with the berries (or your fruit of choice), and some edible flowers if you wish.

Serves at least 10 (depends on how generous your slices are!).

Pink Peonies
In Holidays, Other Desserts, Heirloom Recipes Tags Christmas, Pavlova, Grandma, Dessert
Comment
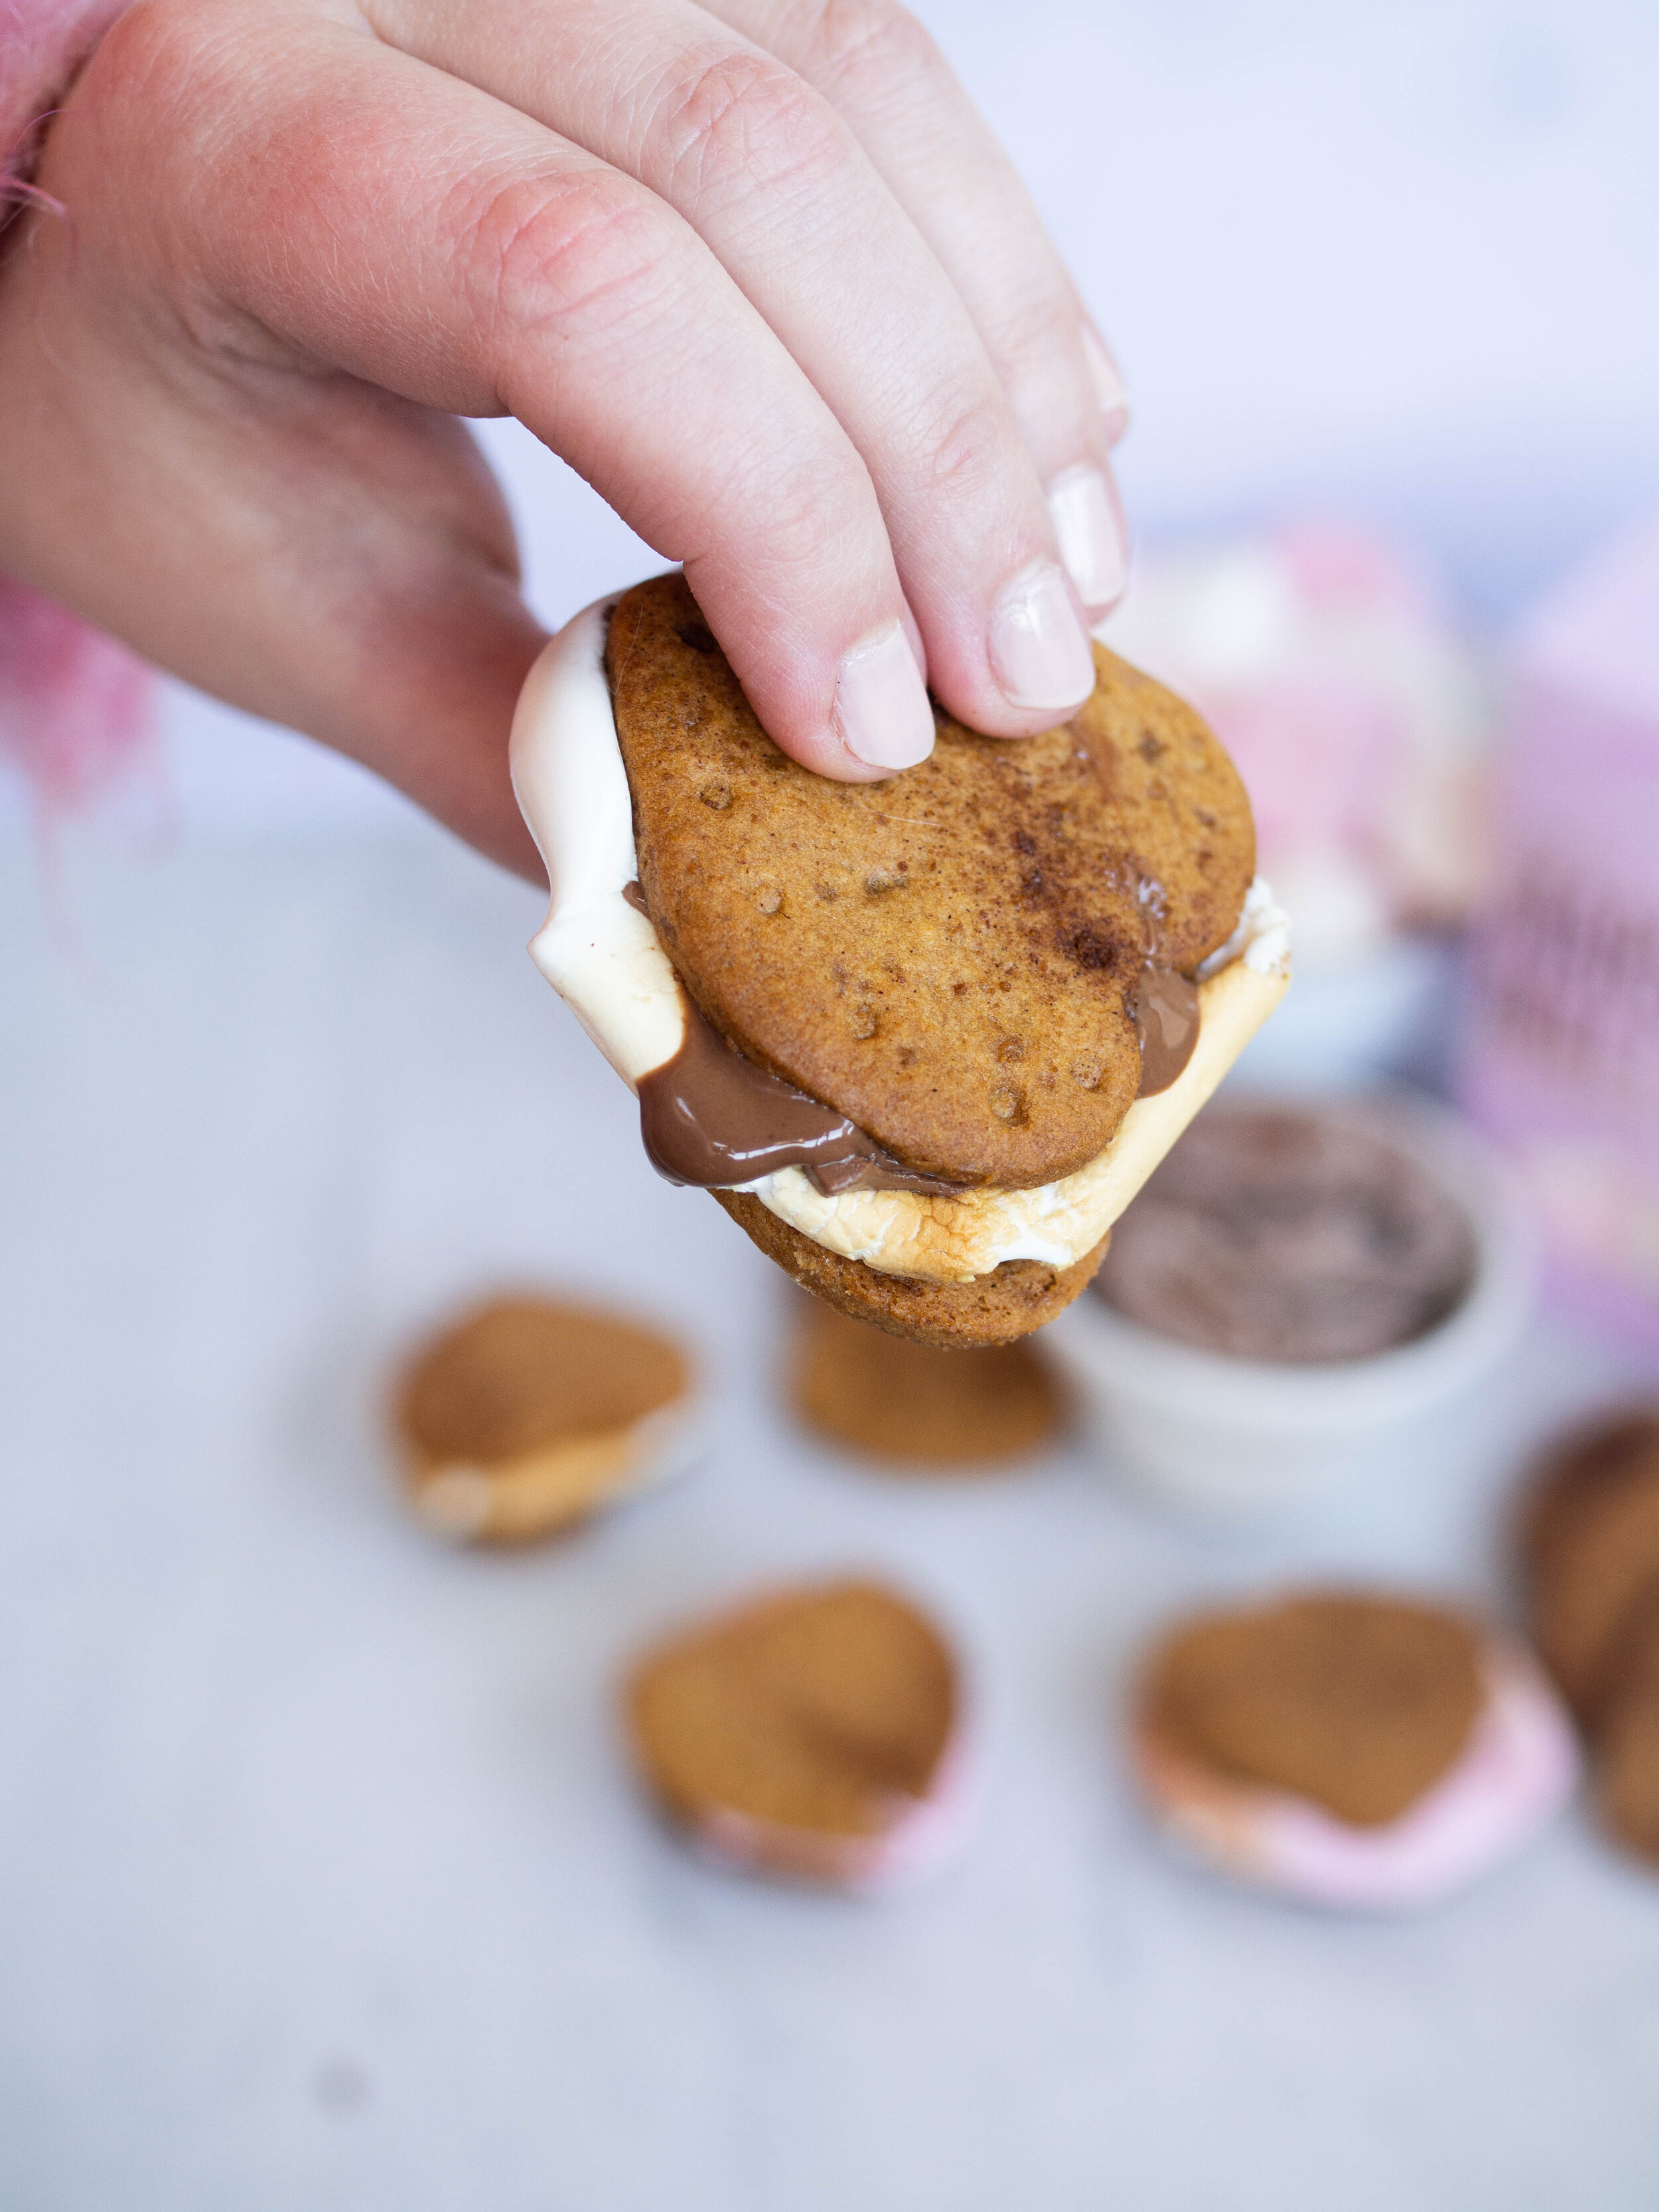
Homemade S’mores - recipe developed for Grounded Pleasures.

Homemade S’mores - recipe developed for Grounded Pleasures.

S'Mores and Other Good Things for Some Time At Home

Kath July 5, 2021

With so many of us stuck at home, or living with restrictions here in Australia at the moment, I thought a good round of up recipes was in order.

Here are a selection of recipes you could try this weekend/school holidays/lockdown/any day really, both things that will take up some time and some that will be more instantly gratifying. All will be delicious. I hope some time in the kitchen can bring you a few moments of calm or welcome distraction, and that having something home made to eat will be like a delicious comfort blanket in these uncertain times we continue to live in. 

  1. For something a little bit different, homemade S’mores with honey graham crackers are the perfect Winter/school holiday treat. This recipe was created last Winter for Grounded Pleasures, and I still have fond memories of all the recipe and taste testing. And if you like me can’t/don’t eat chocolate, I can confirm they are just as tasty and more-ish without. Good luck stopping at one! You can find the recipe on Grounded Pleasures website.

  2. Lumberjack Cake - a delicious combination of apples and dates with a crunchy maple coconut topping. If you have any poached quince left you can use them instead of apples - no need to soak in the hot water with the dates, just chop and add to the mix. 

  3. The original and the best, Caramilk Cookies. Easy. Simple. Delicious. Just make them.

  4. I can say with absolutely certainty these White Choc Blondies with Marshmallows are the best blondies I’ve ever made. You could easily adapt and add milk or dark chocolate chips in the mix too. 

  5. For a bread adventure try this Biscoff Babka (pictured below) made with soft pillowy challah dough. A lovely weekend baking project that is well worth the effort. Leftovers freeze well and it’s dairy free!

S’mores - recipe developed for Grounded Pleasures

S’mores - recipe developed for Grounded Pleasures

View fullsize Lumberjack Cake
Lumberjack Cake
View fullsize Caramilk Cookies
Caramilk Cookies
View fullsize Blondies with Marshmallows
Blondies with Marshmallows
View fullsize Biscoff Babka
Biscoff Babka

If you are after some light (mostly food related) entertainment I can highly recommend the following: 

  1. Alison Roman’s You Tube series ‘Home Movies’ - I have made quite a few of these recipes, some more than once - namely the eggplant parm, carbonara, sheet pan chicken and shallot pasta - and I love her down to earth humour and practical way of cooking. I also appreciate her unwavering love of anchovies and dill, and all things packed with flavour. 

  2. ABC Everyday Videos with Thanh Troung ‘The Fruit Nerd’ all about fruit buying and storing tips. Thanh is a wealth of knowledge in the most enthusiastic way, and has already educated us on choosing mandarins, oranges, storing our fruit (don’t keep it all in the same bowl!) and my favourite one, on what to look for when buying avocados. 

  3. Nadiya Bakes and Time to Eat on Netflix - I love watching Nadiya Hussain’s TV series. The colourful sets, beautiful kitchens, interesting recipes and clam and friendly vibe Nadiya brings is just joyful. 

  4. And finally, I’m sure most of us in Australia discovered Jimmy Rees’ ‘Meanwhile in Australia’ videos at some point in 2020, but on the off chance you haven’t and need a good laugh, please check them out. Each instalment is a parody on what’s going in in relation to COVID in Australia, with each state hilariously represented - sometimes featuring New Zealand too - all played by Jimmy. If you aren’t on social media you can find the videos on Jimmy’s YouTube channel. 

If you have anything you’d add to this list, please let me know in the comments below. And don’t forgot to tell me what you are baking at the moment too :)

S’mores - recipe developed for Grounded Pleasures.

S’mores - recipe developed for Grounded Pleasures.

In From The Mailing List, Biscuits/Cookies, Other Desserts Tags s'mores, lockdown baking
Comment
Rose Poached Peaches

Rosé Poached Peaches

Kath June 23, 2021

This recipe came about as Barossa Valley based Gomersal Wines kindly gifted me some of their products. They sent some Rosé, and since we often make poached pears in Moscato, I wondered if I could use this idea to poach another fruit in Rosé in the same manner. 

I can say with certainty that peaches (white or yellow) work very well poached in Rosé, and it is my new favourite Summer dessert.

You may be wondering why I am posting a distinctly Summer-y dessert during Winter, but I first made it during Summer with lovely in season white peaches. It was delicious, however there was no opportunity to take any photos. 

Gomersal kindly sent me another bottle so I could make it again, and I have been eagerly awaiting the out of season peaches from the USA so I could cook it again. 

Now finally the recipe is ready, and despite it being woefully out of season for those of us now in the depths of Winter I still wanted to share it.

If peaches aren’t in season where you are, instead of doing what I did and buying out of season peaches for $20/kg (!!!), you can use pears (ones that are just ripe, overripe pears won’t be too easy to peel!) instead and it will still be an equally delicious dessert. So really, this recipe will adapt to all times of year! 

Maybe I should have called the recipe Rosé Poached *Insert Your Seasonal Fruit Here*?!

Either way, it’s definitely a recipe worth giving a go. It’s certainly easy enough to make when you don’t have a lot of time, and since the peaches will last in the syrup for a few days you could definitely make this in advance. 

This recipe works best with slip stone peaches that are just ripe. Peaches that are beyond just ripe probably won’t peel or poach very neatly, and I can say from experience that cling peaches are quite difficult to eat even after poaching - unless you enjoy wrestling with a slippery peach in syrup trying to prize the flesh away from the stone!

Also, you will probably have some syrup left over after the peaches are finished. I would suggest if you want to save it, it would make a lovely addition to a Summer cocktail or drink. 

And while you can use vanilla bean paste if you don’t have any vanilla pods, if you do use a vanilla pod don’t throw it away after the peaches are done. Rinse it off and dry it, then add it to a jar of either pure vodka or rum to make your own vanilla extract. Each time you have used a vanilla pod add it to the jar, and in a few months you’ll have your own homemade vanilla extract!

Rose Poached Peaches

Rosé Poached Peaches

Ingredients: 

750ml bottle Rosé

4-6* peaches (yellow or white), just ripe or slightly under ripe slip stone if possible 

165g caster sugar 

1 vanilla pod

1 tsp vanilla extract

Ice cream to serve

Method: 

In a large saucepan, add the Rosé, sugar and vanilla extract. Slice the vanilla pod down the middle and scrape the seeds from each side and add to the pot, along with the vanilla pod pieces. 

Place over medium heat. Allow to come to a gentle boil.

Whilst the Rosé mixture is heating, carefully peel the peaches. Once the Rosé mixture has heated up and the sugar has dissolved, gently add in the peaches (a slotted spoon is good for this). 

If the peaches aren’t covered enough by the Rosé syrup, add in a little water - they don’t need to be completely submerged but you will want to move them around as they are poaching so they cook evenly. 

Lower the heat to low/medium so the Rosé syrup is simmering and leave the peaches to poach for about 20-30 minutes (the timing will depend on how ripe your peaches are and their size). Place a scrunched up piece of baking paper over the top of the peaches so ensure they don’t discolour during cooking. 

The peaches will be ready once a knife can gently pierce through the flesh and the flesh is soft but not mushy. 

Serve immediately with some of the Rosé syrup and ice cream. 

Will keep for a few days in the fridge. 

* quantity of peaches will depend on how many people you wish to serve, and how many you can fit in your saucepan.

Rose Poached Peaches

Thank you to Gomersal Wines for gifting me some of their wines so I could make this recipe.

Rose Poached Peaches (5 of 9).jpg
In Other Desserts Tags Rosé, Peaches, Gomersal Wines, Dessert
Comment
Passover Charoset Bliss Balls

Passover Charoset Inspired Fig Date and Pistachio Balls

Kath March 17, 2020

I find exploring other cultures through food an endlessly fascinating experience. And mostly, it can be done at home. Through cookbooks, blogs, social media and having a few ingredients at home. 

As I mentioned in a previous post, I received Leah Koenig’s book ‘The Jewish Cookbook’ for Christmas last year (the irony of that statement is still not lost on me I promise!), and it has remained one of the books I have been reading through most since then.

Towards the back of the book, in the chapter ‘Condiments, Spices & Drinks, there are quite a number of recipes for charoset. Charoset is part of the Passover seder, it’s a mixture made of fruits with much symbolic meaning for that particular religious holiday. Like many recipes within the Jewish diaspora, the ingredients change depending on what part of the world the recipe and Jewish community live or have come from. There are six different recipes for charoset in Leah’s book, and she mentions there would be many other variations. 

All of the recipes use fruit, often dried fruit with some fresh apple, some spices and some sweet red wine. Some charoset is chopped, some pureed into a smoother paste and others rolled into balls. This got me thinking - taking a bit of inspiration from each of these recipes, I could make some really nice dried fruit and nut balls. Not like those weird protein (or ‘bliss’) balls, but something really tasty made with great quality dried fruits, and spices like those used in many of these recipes. 

The Kurdish Charoset recipe was rolled into balls, many of the recipes used dates and the Yemenite Charset recipe used dried figs and a great selection of spices (including ground coriander which I never would have thought of using otherwise). I was starting to create a version of my own, taking what I liked from all of these very diverse charoset recipes. I used slivered almonds as the nut inside the balls, as we always seem to have a good supply of them, and the pistachios on the outside just look so good. I substituted vanilla extract for sweet red wine, but if you are making these for Passover, you can still use the wine instead.

Often the best recipes are heavily influenced by the work of others and the foods of other cultures (and what you have in your pantry!). So these are my Passover Charoset Inspired Fig Date and Pistachio balls, that could equally be just Fig Date and Pistachio Balls ready for a nice healthy snack. 

Fig and Date Bliss Balls

Passover Charoset Inspired Fig Date and Pistachio Balls

Ingredients: 

200g black and white dried figs

110g pitted medjool dates

50g golden sultanas

50g slivered almonds, lightly toasted

1 tsp vanilla extract

1/2 tsp ground ginger

1/2 tsp ground cinnamon

1/2 tsp ground coriander

1/2 tsp ground cardamom 

25g blanched or raw pistachios, finely chopped

Method: 

Add all the ingredients, except the pistachios, to the bowl of a food processor. Blitz until all the ingredients are combined and it clumps together. The mixture does not need to be smooth. Some of the almonds will remain in chunks. 

Roll into balls, then roll into the finely chopped pistachios to cover. Place on a tray and leave in the fridge for at least 30 minutes to firm up. The balls can then be stored in an airtight container in the fridge. 

Makes 18-20 balls. 

Passover Charoset Balls

Reference: ‘The Jewish Cookbook’ by Leah Koenig (Phaidon Press Limited, 2019), pp.406-409.

Charoset Balls for Passover
In Holidays, Other Desserts Tags Passover, Charoset, Dried Fruit, Bliss Balls, The Jewish Cookbook, Gluten Free, Dairy Free, Holiday Baking
Comment
  • The Blog
  • Older
  • Newer

recipes

  • Biscuits/Cookies 39
  • Breads Etc. 9
  • Breakfast 7
  • Cakes & Slices 67
  • Confectionary 5
  • Drinks 6
  • Events 14
  • Food Photography Tips 3
  • From The Mailing List 24
  • Heirloom Recipes 12
  • Holidays 44
  • Ice Cream 9
  • Jams Preserves & Spreads 9
  • Muffins 4
  • Off the Shelf 47
  • Other Desserts 25
  • Savoury Dishes/Meals 15
  • Scones 4
  • Tarts & Pastry 9
  • Travel 13

Sign up to Friday Food Chat with Kath, a weekly newsletter for more food, baking, cookbook chat and more!

Sign Up Here!
instagram-unauth pinterest facebook url

Website Accessibility: To enable text to speech function on the blog, click the sound button to the right of each blog post.

All images & content are the property of Kathryn Vincent, unless stated otherwise. Please do not use without permission.

Kulinary Adventures of Kath

Food Photography, Recipes & Baking

instagram-unauth pinterest facebook url