Kulinary Adventures of Kath

Food Photography, Recipes & Baking
  • home
  • About
  • Work with Kath
  • Shop
  • Blog
    • The Blog
    • Recipe Archive
  • Newsletter
  • Contact
  • home
  • About
  • Work with Kath
  • Shop
    • The Blog
    • Recipe Archive
  • Newsletter
  • Contact
Raspberry Pistachio Rose Cake (23 of 25).jpg

The Blog

Recipes and Food Photography by Kath Vincent.

  • The Blog
  • Recipe Archive
  • All
  • Biscuits/Cookies
  • Breads Etc.
  • Breakfast
  • Cakes & Slices
  • Confectionary
  • Drinks
  • Events
  • Food Photography Tips
  • From The Mailing List
  • Heirloom Recipes
  • Holidays
  • Ice Cream
  • Jams Preserves & Spreads
  • Muffins
  • Off the Shelf
  • Other Desserts
  • Savoury Dishes/Meals
  • Scones
  • Tarts & Pastry
  • Travel

Baked Pasta with Wood Smoked Scamorza and Eggplant

Kath November 3, 2021

Behold, a savoury recipe! 🤣

I can’t remember the last time I posted a non-sweet recipe on my blog. Despite my love for sweet treats and baked goods, I do throughly enjoy savoury flavours too. For some reason I just don’t post many of those recipes here. I think because many aren’t my own creations but cooking from one of my many cookbooks (some of these I share in my Off The Shelf series). 

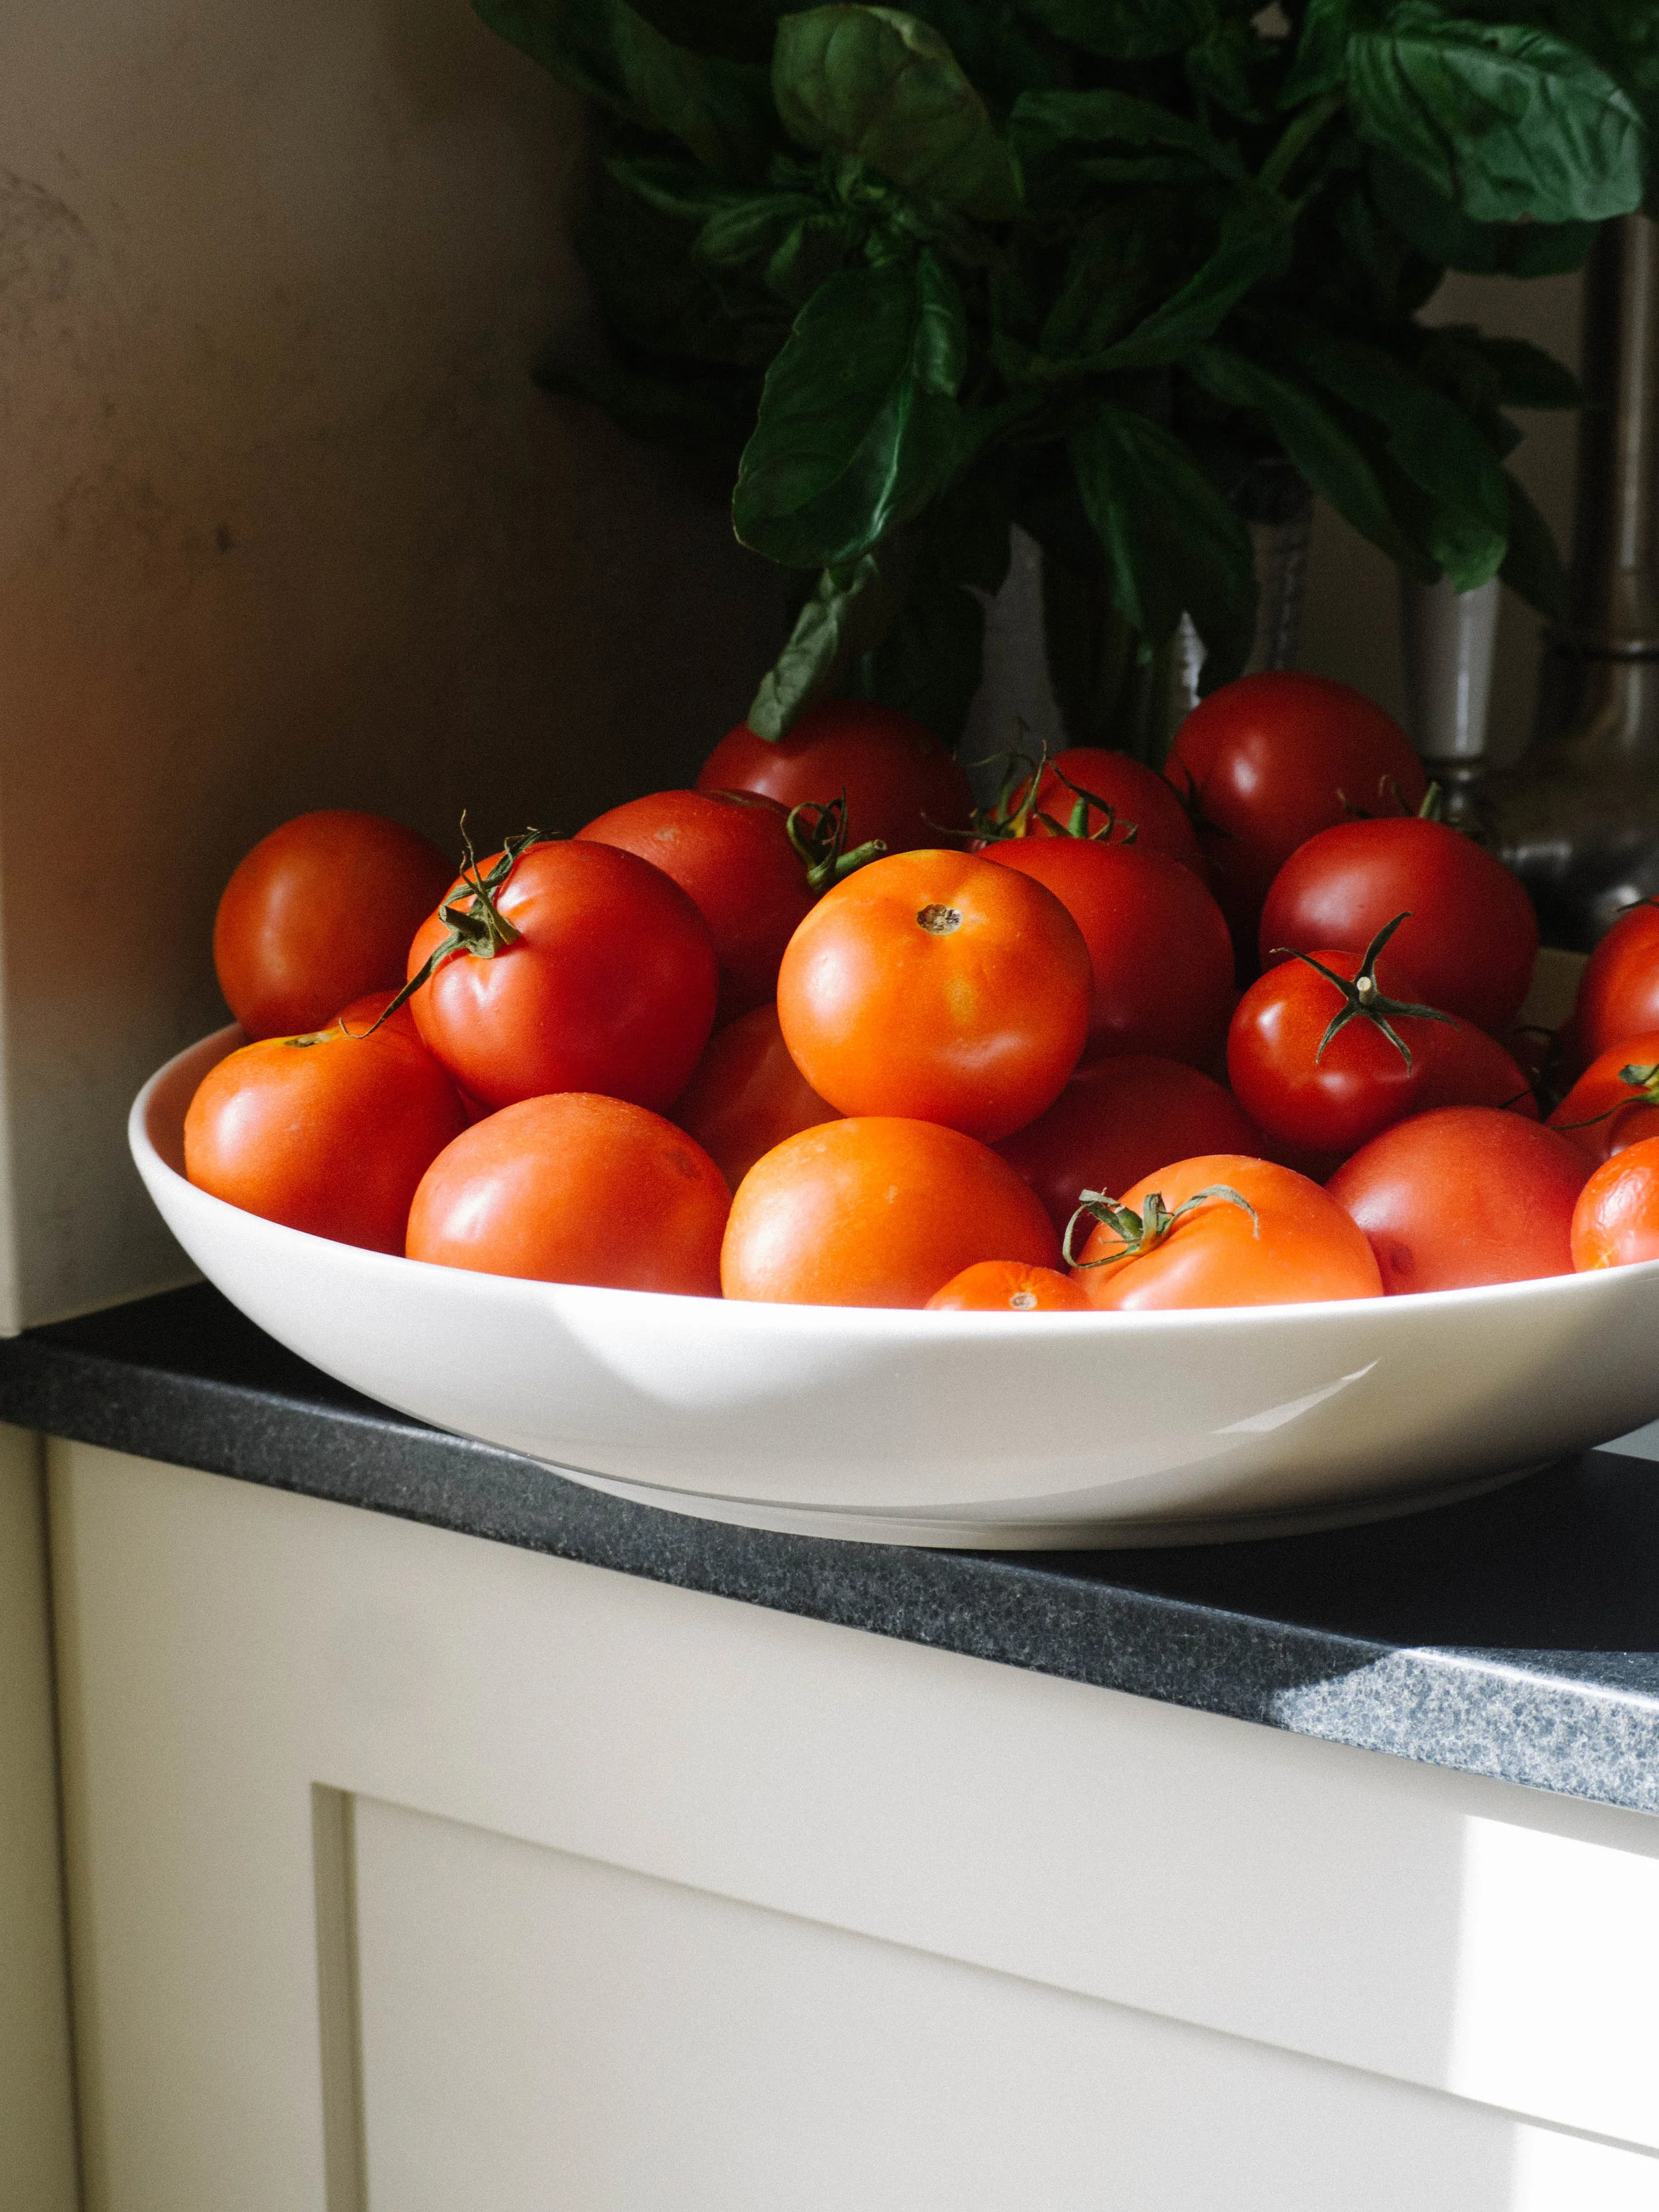
For this recipe however, I have borrowed things I have learnt from other recipes and created this baked pasta dish. The inspiration was the fact that I had both eggplant and wood smoked scamorza cheese in the fridge. And while the combination of those two things would normally have been reaching for Alison Roman’s recipe for a ‘Little Eggplant Parm’, which I do highly recommend, I felt like something a little different this time. 

Both the method of cooking eggplant and the tomato sauce for this recipe are highly influenced by Alison’s Eggplant Parm recipe. Baking eggplant is so much easier than frying and I will be forever grateful to Alison for showing me how. 

The scamorza cheese I used for this dish is wood smoked, and along with the red wine vinegar in the tomato sauce, the flavour is a real hero in the dish. I don’t think all scamorza’s are wood smoked, but if you can find one that is (or a wood smoked buffalo mozzarella) it will be well worth it. You can use more regular mozzarella cheese instead, however the flavour won’t be the same. I would add more Parmesan (or similar) to the top of the baked pasta for flavour, or even add some anchovies and/or baby capers to the tomato sauce while it is cooking - For anchovies, add your desired amount to the onions and garlic when the onion is beginning to soften, stir and allow the anchovies to melt away. For capers, add your desired amount when you add the basil to the sauce. 

Baked Pasta with Wood Smoked Scamorza and Eggplant 

Ingredients: 

2 medium eggplants

olive oil

salt 

pepper

x2 400g cans whole tomatoes such as San Marzano

1 brown onion, thinly sliced

2 garlic cloves, thinly sliced

1/2 bunch basil leaves thinly sliced 

2 tbsp tomato paste/concentrate

1 tbsp red wine vinegar

250-290g medium sized pasta such as penne, fusilli or I used casarecce (I used approx. 1/2 a 500g packet of pasta, but use a minimum of 250g)

1/2 cup grated mozzarella cheese 

140g wood smoked scamorza cheese, cut into small chunks

2 tbsp finely grated pecorino/parmesan/grana padano


Method: 

Preheat oven to 220 degrees Celsius. 

Line a large baking tray or sheet pan. 

Cut the eggplant into 1-1.5cm slices so you end up with fat round discs of eggplant. Place the eggplant discs in a single layer on your prepared tray, drizzle with some olive oil and sprinkle with some salt and pepper.

Bake for about 30-40 mins, turning the eggplant pieces over after 20 minutes to both sides cook evenly. 

The eggplant will be done when it is a deep golden brown and softened. Once cooked set aside. 

To make the tomato sauce, add about 1-2 tbsp olive oil to a large round pan (a bonus if it is oven safe too) over medium heat. 

Add the onions and cook for about five minutes, stirring now and then. Add the garlic and continue to cook with the onions until the onions have softened and are starting to turn a little golden (5-10 minutes). 

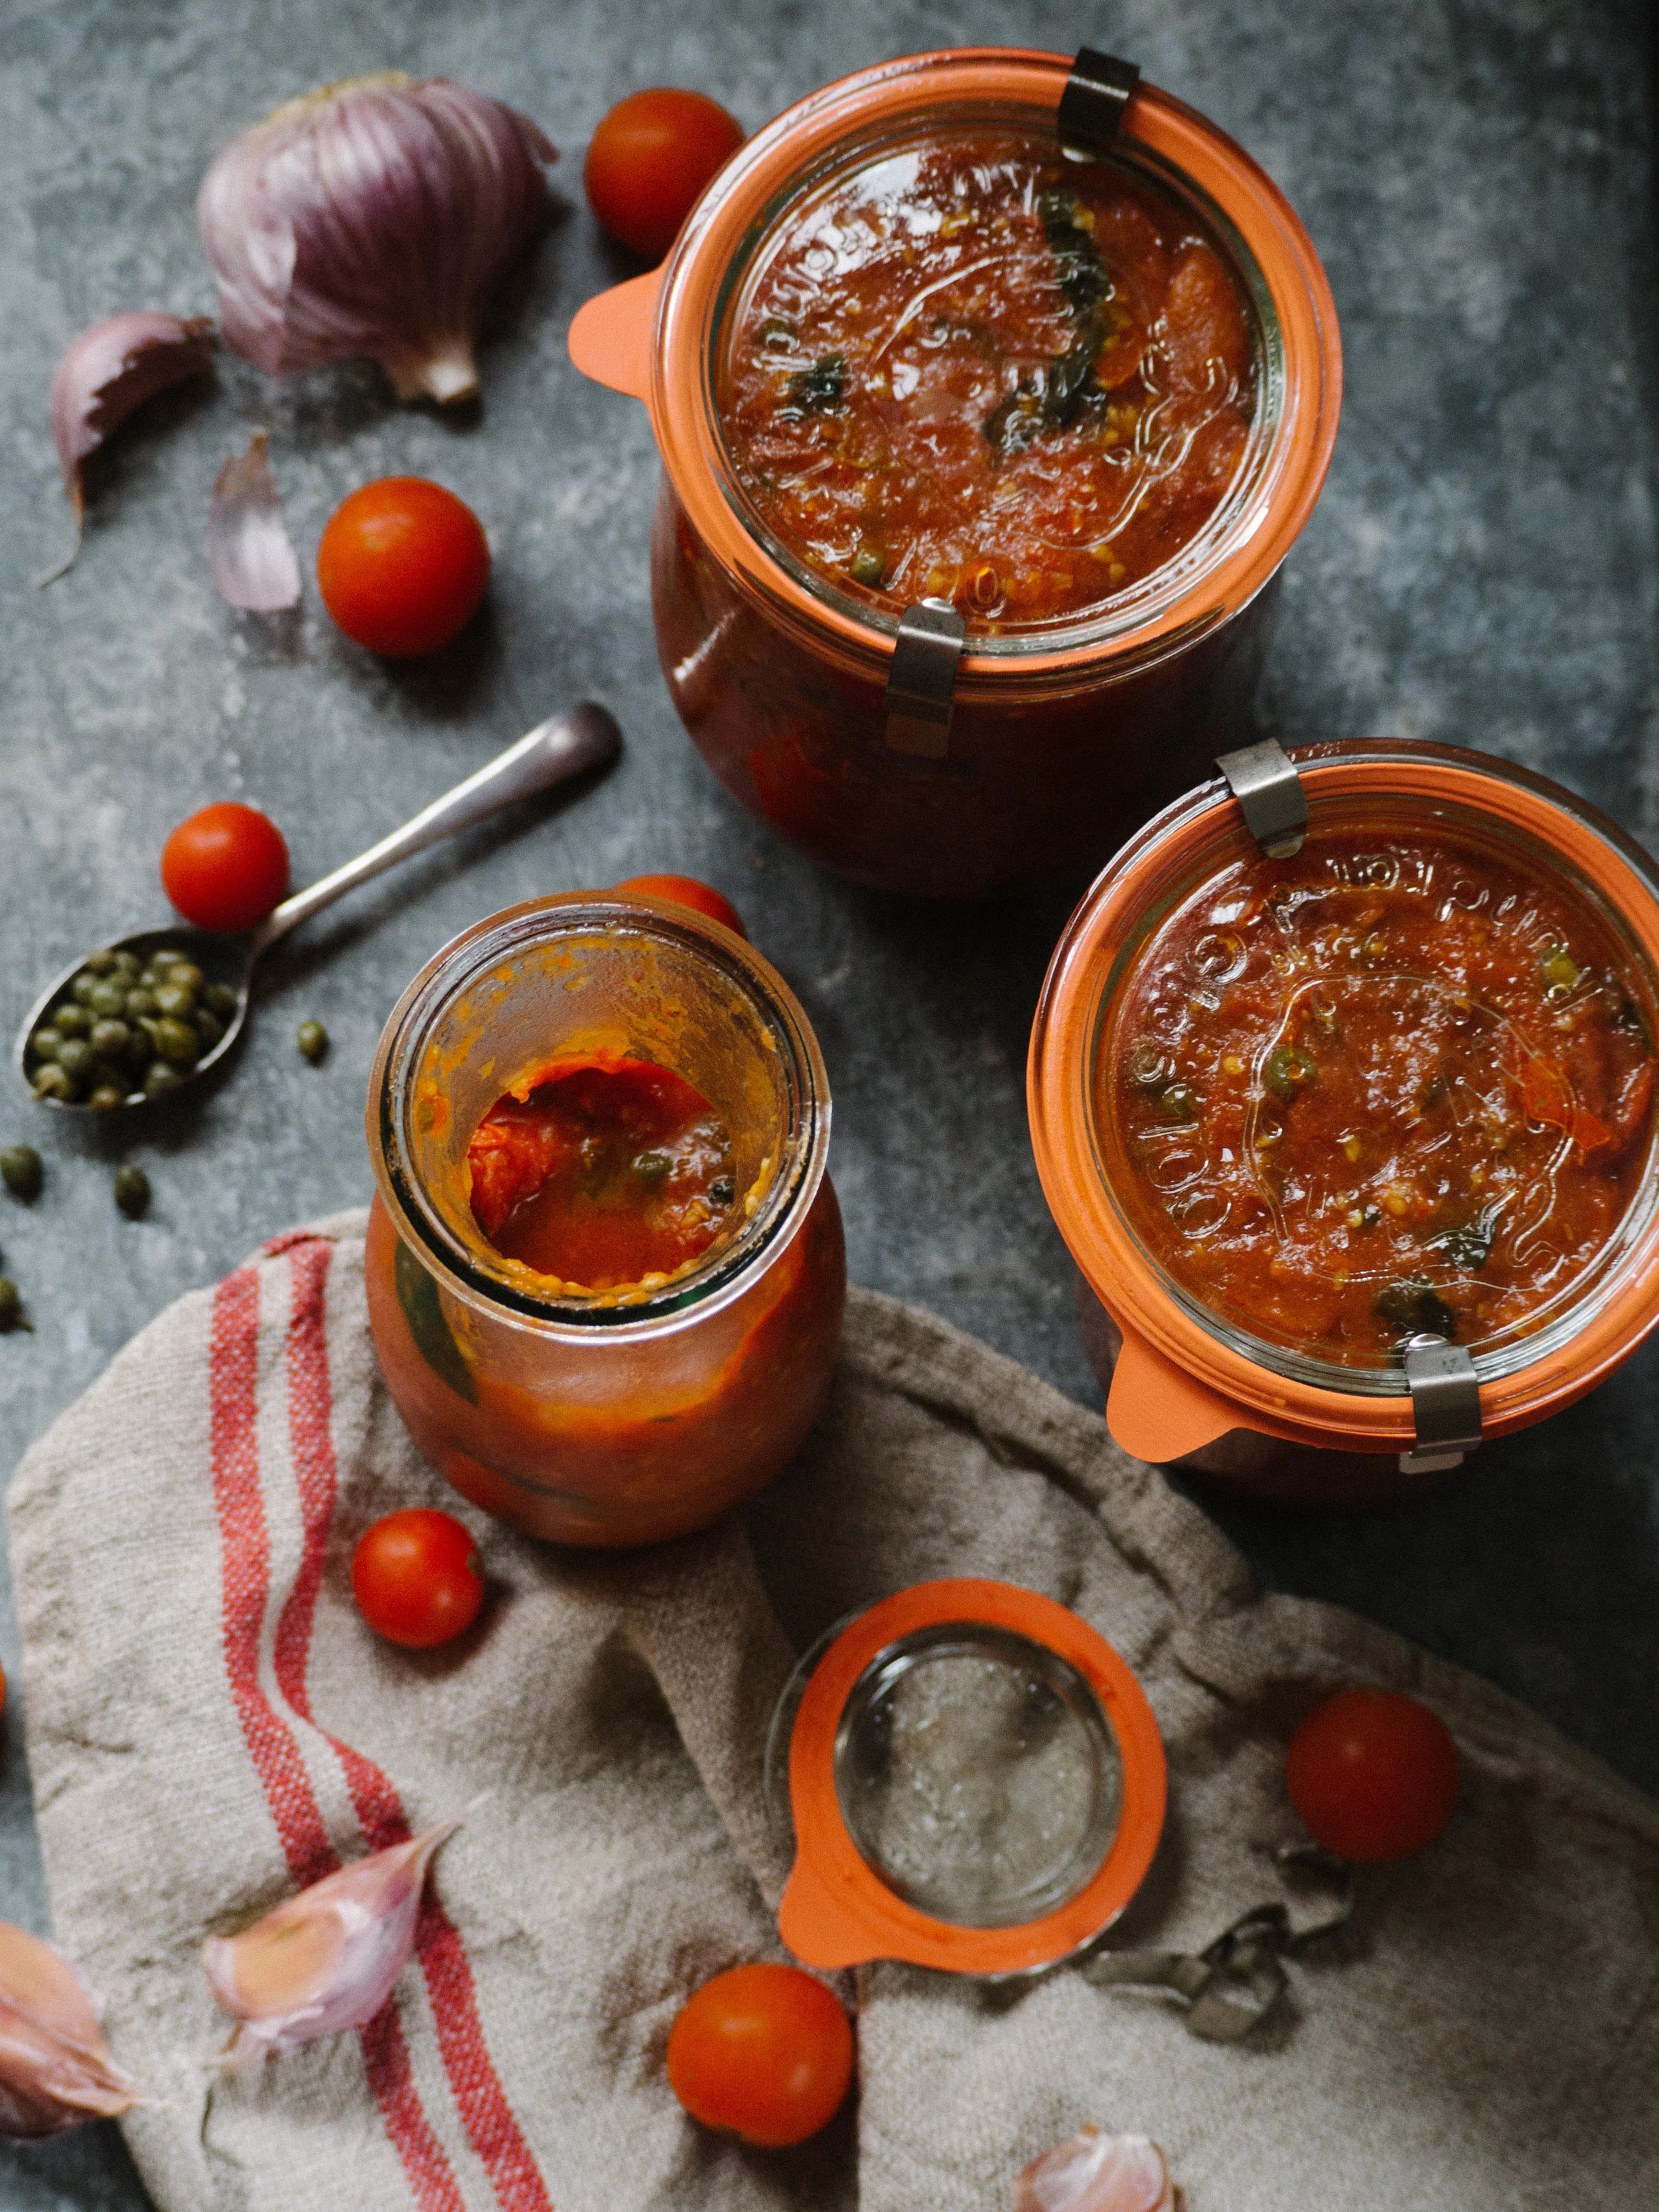
Add the two cans of tomatoes, and squish the whole tomatoes into chunks. Pour a little water (a couple of tablespoons max.) into each tomato can, and swirl around to catch any tomato left. Add this to the pan, and stir. 

Allow the tomato mixture to cook over low to medium heat until it starts to gently bubble and thicken a little. Add the tomato paste and basil and stir to combine. 

Bring a large pot of water to the boil, all the while keeping the tomato sauce gently cooking, stirring now and then. 

Reduce the oven temp to 180 degrees Celsius (or turn on and heat to 180 if you turned it off after the eggplant). 

Cook the pasta in the boiling water according to packet instructions. 

While the pasta is boiling, add the red wine vinegar to the tomato sauce and stir to combine.

Cut the eggplant up into quarters (or half for smaller pieces), and add to the sauce. 

Stir to combine and turn the heat off. 

Once the pasta is ready, drain and add to the tomato sauce and stir so the pasta is evenly coated in the sauce. 

If your pan is oven proof, you can scatter the cheeses over and place into the oven. Otherwise transfer the contents of the pan to an oven proof dish, then scatter over all the cheeses. 

Bake for about 20 minutes, or until the cheeses have melted and are golden brown. 

Serves 6.

In Savoury Dishes/Meals Tags Baked Pasta, Pasta, Eggplant, Scamorza, Alison Roman, Savoury
Comment
Six Strand Challah

Monday Morning Cooking Club @ Cornersmith + Challah with Egg and Onion

Kath June 25, 2018

Earlier this month I went to a cooking class at the Cornersmith Picklery with the Monday Morning Cooking Club (MMCC). The class was all about Jewish Comfort Food, and the day the class was held was so cold it was a perfect day to be cooking and eating warming comfort food. We all sat and watched three of the lovely MMCC ladies demonstrate each dish, then we got to sample them. 

First we ate egg & onion dip with challah, a staple at the Friday night table. I have been wanting to make challah myself for years now and just never got round to it, but with the amount of it I eat I really should have had a go! The egg dip was super simple, boiled eggs grated and mixed with onions cooked until they were soft and golden with little salt and pepper. The combination doesn’t sound much, and this is probably why I’ve never tried making it before, but it was heaven. I knew I would be making both these things, very very soon. 

View fullsize Braiding the challah using the 6 strand method
View fullsize Challah with egg and onion
View fullsize Serving the challah with egg and onion
View fullsize Matzo Ball Soup

We then had matzo ball soup, a traditional dish of Passover. I made some of my own over the Passover/Easter long weekend this year, and it was nice, but the MMCC’s one was so much better. I had used a recipe in Ottolenghi’s book Jerusalem, because it made a smaller quantity and used more herbs which I hoped would add more flavour to the soup. But I will definitely be using the MMCC’s recipe next time, as mine didn’t have nearly as much flavour as I had hoped. 

We then ate brisket with a salad. Now, I haven’t eaten red meat in at least 20 years - I have never been able to stand the taste and the texture. But I did try the brisket and I didn’t mind it. The sweetness of the honey and caramelised onions was really nice, and sliced really thinly I could imagine myself eating it on a really good reuben sandwich.  

Then came the Blintzes, a dish often served during the festival of Shavout. Consisting of individual crepes filled with a cream cheese filling and then baked with more cream, it was a decadent dessert and definitely worthy of the title comfort food. 

View fullsize Basting the Brisket
View fullsize Brisket served with salad
View fullsize Blintzes
View fullsize Blintzes served with sour cream and strawberries

As the MMCC ladies were making each dish, we heard tips and tricks they had for each recipe, sometimes learnt from the person whose recipe it had been originally or things they had worked out themselves after making it many times. The stories behind each dish were fascinating to me, as I love the history of food and the preservation of heirloom recipes. Which is of course in part why I love the MMCC so much. The stories contained in each of their books are just as interesting to me as discovering the recipes held within each book. Then the recipes themselves have opened up a whole new world of cooking and flavours for me and my family, that we now can’t live without. 

Homemade Challah
Egg & Onion

Egg & Onion

To that end, and after being inspired by this wonderful class at Cornersmith, I decided the following weekend that it was finally time to make my own challah and serve it with egg and onion. Since I was cooking only for me, I made a much smaller quantity of the egg and onion, and once the challah’s had cooled I sliced them up and placed each loaf in a zip lock bag and froze them. I found they defrosted really well, and of course toasted really well too. The egg and onion also keeps well in the fridge if stored correctly. 

Here are links for the MMCC’s Challah recipe and the egg and onion, but I have also included my paired down version of the egg and onion recipe here - something I have since gone on to make 3 times in about 2 weeks! For this recipe, the idea is to cater for one egg per person. 

Six Strand Challah

Six Strand Challah

Six Strand Challah

Six Strand Challah

Egg & Onion

Ingredients: 

x3 eggs, at room temperature

1/2 small/medium brown onion 

2 tbsp vegetable oil 

salt

ground pepper


Method: 

Peel and dice the onion, and heat the oil in a small fry pan. Add the onion and cook on a medium heat for about 10 minutes, or until the onion is nice and soft and golden in colour. 

Meanwhile, place the eggs in a medium saucepan and cover with cold tap water. Bring to the boil on a high heat, and continue to cook for a further 8 minutes once the water comes to a boil. The eggs should not be boiled for longer than 8 minutes. Once the eggs have cooked for 8 minutes transfer to a bowl of cold water. 

Once the onions have finished cooking, take them off the heat and set aside. 

When the eggs are cool enough to handle peel away the shells. Using a grater sitting in a wide but shallow bowl, grate the eggs into the bowl using the coarse side of the grater. Add the cooked onions to the eggs, allowing most of the oil to remain in the pan. Add a pinch of salt and ground pepper, and mix with a wooden spoon until combined and the salt has dissolved. 

The mixture should lightly hold together if you try to roll it into a ball with your fingers, so if it is too dry add a little more of the oil from cooking the onions. 

Serve at room temperature with slices of challah. 

If not serving immediately, cover the egg and onion with plastic wrap ensuring the wrap is touching the mixture and directly covering it, not just covering the bowl. 

Left overs can be kept covered in the same way in the fridge, and will last a few days. 

Challah with Egg and Onion

Challah with Egg and Onion

Challah with Egg and Onion

Challah with Egg and Onion

These recipes can also be found in ‘Monday Morning Cooking Club - The Food, The Stories, The Sisterhood’ by Merelyn Frank Chalmers, Natanya Eskin, Lauren Fink, Lisa Goldberg, Paula Horwitz and Jacqui Israel (HarperCollins, 2013), pp.78 & 263.

Challah with Egg and Onion

Challah with Egg and Onion

In Breads Etc., Events, Savoury Dishes/Meals Tags Monday Morning Cooking Club, Cornersmith Picklery, challah, Six Strand Challah, Egg and Onion, Jewish Comfort Food
Comment
Homemade Chunky Tomato Sauce

Homemade Chunky Tomato Sauce

Homemade Chunky Tomato Sauce + 6 Tips for Work Week Meal Prep

Kath December 1, 2017

For me, the most exciting part of work days, can be food. If I have something for lunch that I’m not looking forward to, it can make a bad day seem so much worse. I really like to be prepared and make things for work week lunches that I will enjoy eating and not make me cave and go buy something I shouldn’t. 

This chunky tomato sauce is staple for work week lunch prep for me. I have been making it consistently for the past year, and I am still not sick of it. I love tomatoes, and I have found so many uses for this sauce I never tire of it. For a work week lunch I will pair it with pasta or quinoa, add some extra basil, parmesan cheese and maybe some prosciutto and I have a meal I really look forward to eating. I can prepare a few portions of this in advance, and have it ready in the fridge to take to work in the mornings. 

I have also found this sauce is great for:

  • Pizza bases, just spread a thin layer over the base and then add any toppings you fancy
  • Adding to scrambled eggs
  • Using as a dip
  • Adding to open toasted sandwiches and bruschetta
  • As a substitute for a relish with things like frittatas
  • And of course, using it as the best homemade pasta sauce you’ve ever had is really number one on the list. 

This recipe is a quicker adaptation to this one I posted quite a while ago. I needed it to be quicker as even though I like cooking, I don’t want to spend all my time preparing for the work week. I tend to use whatever tomatoes are cheapest to buy, like the ‘imperfect picks’ or the ones that are quite ripe and ready for a quick sale. Once the sauce is cooked I store it in large glass jars in the fridge (like the ones pictured in this post). 

Homemade Chunky Tomato Sauce

Homemade Chunky Tomato Sauce

And as I have had many questions over the year about bringing food to work and how to go about it, below are some of my tips. I have also included a list of other recipes (all of which can be found in the recipe archive) I utilise most weeks to ensure I am super prepared with lots of good food to enjoy. 

Tips for Work Week Meal Prep

6 Tips for Work Week Meal Prep

1. Be Prepared

Spend some time working out what meals you want to make and what you need for each. Write a shopping list and work out which shops you need to go to. Prepare what you can in advance (i.e. things that can be frozen).

2. Utilise Your Freezer

Lots of meals either partially prepared or fully cooked can be frozen into portions and defrosted as you need them. Find some freezer safe containers and label them with the contents and date prepared. 

3. Have Some Good Storage Jars & Containers

Along with some good freezer safe containers, get some good reusable containers or large jars to store pantry staples, and other condiments and sauces you could make from scratch. Also get a couple of small/medium containers to take your lunch to work in.

4. Cook What You Like to Eat

Start with recipes and meal ideas you actually want to eat. If not buying lunch everyday is a new thing for you, don’t bother planning and prepping meals that you think you ‘should’ eat but probably won’t when it comes down to it. Prepare food that will satisfy you, and that you will maybe even look forward to eating.

5. Make It Fun

Hate food shopping? Make it more interesting by going to a market and getting some fresh produce there. This can also double as an enjoyable morning out on the weekend. You are also then buying fresh and local produce, and getting in touch with the seasonality of food and who produces it. Alternatively you could be super organised and buy your food online and save time. 

6. Always Cater For Leftovers

This is especially important on the weekends when you might have time to cook a little more. Cater for 1-2 more people than you are actually serving, especially if it’s something that will freeze or keep well and you would like to eat again. Cooked meats can be used in sandwiches and salads, and left over roast vegetables can make great additions to frittatas.

Tips for Work Week Meal Prep
Homemade Chunky Tomato Sauce

Homemade Chunky Tomato Sauce

Homemade Chunky Tomato Sauce


1.5-2kg tomatoes

4 cloves garlic, crushed

50g baby capers

45g anchovies in oil*

olive oil

1 tbsp tomato paste

1 bunch basil, leaves only, roughly chopped


Method: 

Pre-heat oven to 190 degrees Celsius. Have two deep baking dishes ready, I use two enamel ones that are approx. 28 x 20cm. 

Slice up the tomatoes into 1cm slices and divide between the two pans. If using small or cherry tomatoes, cut some in half and pierce really small ones with a knife. 

Divide the garlic and capers between the two pans. Drain the anchovies over the pans, allowing the oil to drizzle over the tomatoes. Roughly chop the anchovies and add some to each pan. Drizzle more oil over each pan, about 1/2 tbsp for each. 

Toss the contents of each pan to combine, then place in the oven. Cook for about 1 hour, checking and moving the tomatoes around in the pan every 20 minutes. Cook time for cherry tomatoes will be less, so keep an eye on them if using. 

The sauce will be ready when the tomatoes have cooked down, softened and there is some liquid from the tomatoes still in the pan. 

Remove from the oven and transfer all the tomatoes into one of the pans. Stir in the tomato paste and basil. Use immediately or allow to cool in the pans and transfer to large glass jars to store in the fridge until needed. 

Keeps in the fridge for about 10 days. 

* Yes I know, you don't like anchovies! Leave them out if you wish, however cutting them finely will help them dissolve away into the sauce and give the sauce a gentle touch of saltiness. 

Homemade Chunky Tomato Sauce

Homemade Chunky Tomato Sauce

Homemade Chunky Tomato Sauce

Homemade Chunky Tomato Sauce

In Savoury Dishes/Meals Tags Tomato Sauce, Tomato, Work Week Meal Prep, Meal Prep, Homemade
Comment
Beetroot, Goats Cheese & Thyme Frittata

Beetroot, Goats Cheese & Thyme Frittata

Beetroot, Goats Cheese & Thyme Frittata

Kath October 20, 2017

Here are some things I have been enjoying this month: 

  • Wandering around Wooloomooloo in Sydney and stopping in at Flour and Stone, and buying pretty flowers from Petal Met Sugar.
  • Sewing some vegetable seeds and planting some tomato plants - we’ll see how they go! I bought some interesting varieties of beetroot and carrot seeds from this website. 
  • I am on a quest to find the best banana bread recipe, and this one is next on my list. 
  • I received a care package as part of the My Open Kitchen E-Course (which I am really enjoying so far), and the stand out from the package has been the Rainwater Mint Tea from Scullery Made. 
  • The October issue of Jamie Magazine arrived this week, and there is a feature on making sourdough. I have attempted homemade sourdough before, so maybe this will prompt me to try again! 
  • I really enjoyed this podcast episode from Radio Cherry Bombe. 
Beautiful ranunculus from Petal Met Sugar

Beautiful ranunculus from Petal Met Sugar

View fullsize Ranunculus from Petal Met Sugar
View fullsize Jamie Magazine & Scullery Made Tea

But now to the frittata. 

Frittatas are easy to make, and you can really add anything you like to them. I really love beetroots, especially the golden or chioggia varieties. Now that I have attempted to cook chioggias myself, rather than rely on the views of others as I did in this previous post, I have found they do keep some of their colour once boiled. They aren’t quite as pretty as they are raw, but they still look pretty good (and taste really good) once cooked. 

Frittatas are a really great way to have some meals prepared for the week, and are super easy to take to work and heat up at lunch. Add a salad on the side and you’ll have a work lunch better than anything you could buy! Making the frittata in advance won’t take too much time out of your weekend or weeknight, and using leftover veggies from dinner (like sweet potato, carrot, broccoli etc), will make the whole process even quicker and make use of things that might have otherwise gone to waste. 

Beetroot, Goats Cheese & Thyme Frittata

Beetroot, Goats Cheese & Thyme Frittata

Farm fresh eggs 

Farm fresh eggs 

Beetroot, Goats Cheese & Thyme Frittata

Beetroot, Goats Cheese & Thyme Frittata

Beetroot, Goats Cheese & Thyme Frittata

Ingredients:

850g mixed golden and purple beetroot

150g sour cream (reduced fat sour cream works well)

75g cheese e.g. cheddar, parmesan etc, grated 

8 eggs 

150g goats cheese

1 small or half a large carrot, grated

1 zucchini, grated 

8 sprigs of fresh thyme 

Canola oil spray


Method:

To cook the beetroot, cut away any stems or leaves, and wash off any dirt. Place beetroot in a large pot, and cover with water. Bring to the boil and cook for 20-30 mins or until the beetroot are tender (use a fork to check). If using different varieties or colours of beetroot, have a separate smaller pots of water for each variety. 

Once cooked, drain and allow to cool a little for a few minutes. Once they are cool enough to handle, peel away the beetroot skin - the skin should gently peel away if you pull it with your fingers (wear gloves for this!). Chop the beetroots into halves or quarters depending on their size, and set aside, keeping the different colours separate if you are using different beetroot varieties.

Pre-heat oven to 180 degrees Celsius, and spray a baking dish (I use an enamel one that is approx. 28 x 20 cm) with the canola oil spray. 

In a large bowl, whisk together the sour cream, grated cheeses, eggs, carrot, zucchini and most of the thyme. Whisk until all the ingredients are well incorporated. Pour the egg mixture into your prepared baking dish, and place the cooked beetroot evenly though out the tin. Then cut up the goats cheese into chunks and do the same. 

Bake for 25-30 minutes, or until the frittata is gently browned on top and is cooked through. Serve warm sprinkled with remaining thyme, with a simple salad or as a side to a main meal.

Beetroot, Goats Cheese & Thyme Frittata

Beetroot, Goats Cheese & Thyme Frittata

Chioggia Beetroot from the market

Chioggia Beetroot from the market

Beetroot, Goats Cheese & Thyme Frittata

Beetroot, Goats Cheese & Thyme Frittata

In Savoury Dishes/Meals Tags Beetroot, Chioggia Beetroot, Frittata, Easy Weeknight Meals, Easy Work Lunches, Flour & Stone, Petal Met Sugar, My Open Kitchen, Scullery Made Tea, Jamie Magazine, Radio Cherry Bombe
Comment
Chioggia Beetroot Salad with Quick Pickled Beetroot

Chioggia Beetroot Salad with Quick Pickled Beetroot

Quick Pickled Beetroot + A Chioggia Beetroot & Goats Cheese Salad

Kath August 9, 2017

I love beetroot. It is one of the few things I have genuinely loved eating all my life. Along with ham and Vegemite, beetroot featured heavily in the meals I ate as a child and continues to do so. Mum would buy the Golden Circle tins of sliced beetroot, which are lightly pickled to preserve them. I probably thought that was the only way you could buy beetroot for a while! 

Now I buy fresh beetroot, and the more unusual the variety the better! Currently I have been buying lots of golden beetroot, but the inspiration for this salad was some utterly amazing chioggia or bulls eye beetroot I found at the Carriageworks Christmas Markets last year. The gentleman selling them said that they were the very very last of the season, and probably thought I was a little over enthusiastic about what he was selling! I knew that these beetroot existed, but I had never ever seen them anywhere and thus never had an opportunity to buy any or try them. I bought two bunches, and along with all the other things I had bought that day, carried them home with many ideas running through my mind as to what I could do with them. 

View fullsize Purchases from the Market
View fullsize Peonies from the Market

I started searching online for recipes that specifically used chioggia beetroot, and they all had a common theme - eating them raw as a decoration or in a salad. Many people said that cooking them like you would other beetroots made them lose their distinctive pink and white stripes and turned them an unappetising grey colour. At first I was a little disheartened as I had these amazing beetroots sitting in the fridge, but was still no closer to actually eating them! 

Since this was the first time I had even seen or been able to buy chioggia beetroot, I didn’t want to risk cooking them and finding it was a waste as their colour was what I wanted to retain. So, I decided to pickle them and add to a salad, as many articles and recipes had suggested online. The way I pickle my beetroot for this particular salad is super quick, and only makes what you need for the salad. I liked this method as it was easy to put together a salad for just myself and not use all my prized beetroots at once. I haven’t added any measurements to this recipe, as it is easily adaptable to serving one for lunch or many as a side to a main meal.

Chioggia Beetroot

Chioggia Beetroot

Chioggia Beetroot

Chioggia Beetroot

Quick Pickled Chioggia Beetroot

Quick Pickled Chioggia Beetroot

Quick Pickled Chioggia Beetroot

Quick Pickled Chioggia Beetroot

Chioggia Beetroot & Goats Cheese Salad

Ingredients:

chioggia beetroot, about 1/2-1 beetroot per person

white wine vinegar

baby capers in vinegar

salad leaves 

goats cheese


Method: 

Trim leaves and stems from beetroot, and wash throughly. Peel beetroot, discarding the skins and then grate. Place the grated beetroot in a bowl and add 1/2-1tsp of capers (per person), there is no need to drain the capers of the vinegar. 

Lightly cover the grated beetroot with either some of the vinegar from the capers and/or some of the white vinegar. You don’t want the beetroot to be swimming in the vinegar, just enough so all the beetroot can lightly pickle. Leave to pickle while preparing the rest of the salad.

Place salad leaves in salad bowl if serving many, or an individual plate if making for one. 

Crumble the goats cheese over the salad leaves, using as much or as little as your personal tastes dictate. 

Sprinkle the pickled beetroot and capers over the salad, using some of the pickling liquid as a light dressing if desired.

Chioggia Beetroot

Chioggia Beetroot

Chioggia Beetroot Salad with Quick Pickled Beetroot

Chioggia Beetroot Salad with Quick Pickled Beetroot

Chioggia Beetroot Salad with Quick Pickled Beetroot

Chioggia Beetroot Salad with Quick Pickled Beetroot

In Savoury Dishes/Meals Tags Chioggia Beetroot, Beetroot, Goats Cheese, Salad, Pickling
Comment
Kaffir Lime Chicken (19 of 21).jpg

How to Cook with Kaffir Limes - Kaffir Lime & Coconut Poached Chicken with Noodles

Kath June 9, 2017

There is definitely a story behind this recipe!

We have a kaffir lime tree, and have done for a few years. We use the leaves now and then in cooking, but for quite a few years I never saw limes growing on the tree. In 2015 some friends and I went to Jamie Oliver’s Food Revolution Live. Jamie demonstrated a few recipes, one of which he used the zest and juice of a kaffir lime. I was amazed. How do we have a kaffir lime tree and I’ve never seen a kaffir lime before? And more importantly, why aren’t we cooking with them?

When I got home I was telling Mum about the day and Jamie’s use of kaffir limes. She was shocked, she had thought kaffir limes weren’t edible. If that were true, I was sure that Jamie Oliver of all people would know that and not demonstrate the use of one in a live show. It transpired that Mum had been removing the flowers from the kaffir lime tree each year so if never went to fruit. But since we have now been educated on kaffir limes (thanks Jamie), we have had a complete glut of them! This year in particular, we’ve had at least 20 particularly large limes from our humble tree. 

How to cook with Kaffir Limes

While I was very excited about this, and the other citrus we have that were showing good signs of a bountiful season, I didn’t have many ideas for actually using the kaffir limes. Since we had so very many, I gave some away (along with some of the leaves). One recipient was so freaked out by them - ‘Are they meant to look like that?! They look like brains!’. I guess if you’ve never seen them before they do look pretty weird! Luckily their flavour makes up for their weird appearance.

View fullsize Kaffir Limes (1 of 3).jpg
View fullsize Kaffir Limes (2 of 3).jpg

I knew kaffir limes worked well in South East Asian cooking, but as my mind immediately goes to ideas for baking, I tried to make kaffir lime shortbread. That was a definite no go. The sweetness of the shortbread combined with the intense citrus notes of the kaffir lime conflicted with each other so much, I wasn’t sure if I was eating something sweet or savoury. 

Once it became clear that sweet was out of the question (there goes my idea of a kaffir lime pie), I steered my thoughts back to the world of savoury cooking. Having eaten a few chicken dishes (mostly Thai) that used kaffir lime leaves, I decided to combine what I liked best about them, but also use the actual kaffir limes. And this is the result. This dish will feed 4-6 people, depending on the size of chicken breasts you use (the pieces of chicken I used ended up being particularly big, so there were lots of leftovers which I have now frozen for another day!). If you can’t get any kaffir limes, use the kaffir leaves and regular limes for the juice and zest. 

How to cook with Kaffir Limes

Kaffir Lime & Coconut Poached Chicken with Noodles

Ingredients for the Poached Chicken: 

x3 chicken breasts 

x2 270ml cans of light coconut milk

juice of 1/2 kaffir lime

zest of 1/2 kaffir lime 

x6 kaffir lime leaves

1 cm slice fresh ginger 

1 stalk lemongrass, outer leaves removed and cut in half

x3 stems of coriander with roots, well washed


Ingredients for the Sauce & Rice Noodles

1 tbsp vegetable oil

x3 small gloves garlic, crushed

x1 red chilli, deseeded and finely chopped

x4 spring onions finely sliced, white part only

juice of 1/2 kaffir lime

zest of 1/2 kaffir lime

150ml chicken stock

500ml coconut poaching liquid 

1 tsp soy sauce

x1 zucchini, peeled into strips

285 g mixed beans & peas

200g packet pad thai rice noodles

x2 (or x3 small) bunches coriander, leaves & stems roughly chopped


Method: 

In a medium pot, add the chicken, coconut milk, kaffir lime zest & juice, kaffir leaves, ginger, lemongrass and coriander stems. Mix to combine then place over low heat, and loosely cover with lid. Poach the chicken for 20-30 minutes, turning over half way through. To check the chicken is cooked, cut open with a knife and check the middle of the chicken breast has cooked through. Once cooked remove from heat. 

When the chicken has cooled a little, remove from the pot and cut into chunks or slices. Reserve 500ml of the poaching liquid, then put the cut up chicken back in the pot with the remainder of the poaching liquid to keep warm. 

In a large pan on medium heat, add the vegetable oil, spring onions, garlic and chilli. Cook for a couple of minutes, stirring constantly so everything cooks evenly and doesn’t burn. Add the kaffir lime juice and zest, stock, poaching liquid, soy sauce and a couple of the kaffir lime leaves from the poaching liquid. Stir to combine, then allow to simmer for a couple of minutes. Add in most the chopped coriander and the cooked chicken. Meanwhile cook the rice noodles according to packet instructions, then add to the pan. Stir to combine, then add the zucchini, beans and peas. Mix through (using tongs is easiest), then serve with the remaining coriander. 

How to Cook with Kaffir Limes
How to cook with Kaffir Limes

References: ‘Jamie’s 30 Minute Meals’ by Jamie Oliver (Penguin Group, 2010) p.88; ‘The Heart of the Home’ by Julie Goodwin (Ebury Press, 2011) p.82; Donna Hay's Coconut Poached Chicken Salad.

How to cook with Kaffir Limes
How to Cook with Kaffir Limes
In Savoury Dishes/Meals Tags Kaffir Limes, Chicken, Dinner, Gluten Free, Dairy Free
8 Comments
  • The Blog
  • Older
  • Newer

recipes

  • Biscuits/Cookies 39
  • Breads Etc. 9
  • Breakfast 7
  • Cakes & Slices 67
  • Confectionary 5
  • Drinks 6
  • Events 14
  • Food Photography Tips 3
  • From The Mailing List 24
  • Heirloom Recipes 12
  • Holidays 44
  • Ice Cream 9
  • Jams Preserves & Spreads 9
  • Muffins 4
  • Off the Shelf 47
  • Other Desserts 25
  • Savoury Dishes/Meals 15
  • Scones 4
  • Tarts & Pastry 9
  • Travel 13

Sign up to Friday Food Chat with Kath, a weekly newsletter for more food, baking, cookbook chat and more!

Sign Up Here!
instagram-unauth pinterest facebook url

Website Accessibility: To enable text to speech function on the blog, click the sound button to the right of each blog post.

All images & content are the property of Kathryn Vincent, unless stated otherwise. Please do not use without permission.

Kulinary Adventures of Kath

Food Photography, Recipes & Baking

instagram-unauth pinterest facebook url