Kulinary Adventures of Kath

Food Photography, Recipes & Baking
  • home
  • About
  • Work with Kath
  • Shop
  • Blog
    • The Blog
    • Recipe Archive
  • Newsletter
  • Contact
  • home
  • About
  • Work with Kath
  • Shop
    • The Blog
    • Recipe Archive
  • Newsletter
  • Contact
Raspberry Pistachio Rose Cake (23 of 25).jpg

The Blog

Recipes and Food Photography by Kath Vincent.

  • The Blog
  • Recipe Archive
  • All
  • Biscuits/Cookies
  • Breads Etc.
  • Breakfast
  • Cakes & Slices
  • Confectionary
  • Drinks
  • Events
  • Food Photography Tips
  • From The Mailing List
  • Heirloom Recipes
  • Holidays
  • Ice Cream
  • Jams Preserves & Spreads
  • Muffins
  • Off the Shelf
  • Other Desserts
  • Savoury Dishes/Meals
  • Scones
  • Tarts & Pastry
  • Travel
Biscoff Hamantaschen

Biscoff Hamantaschen

Kath March 6, 2023

I had this recipe in mind to make at Purim a couple of years ago, and for some reason didn’t get around to it until this year. I originally shared this recipe (if I can really call it that, as it’s just an assembly job) over on Instagram as part of my ‘Year of Everyday Bakes’ series.

As I explained in this post, I am sharing a recipe a week that is simple, easy and could fit into your everyday life. I hope it inspires you to bake a little more without adding any stress to your day.

Hamanstachen are small triangle shaped pastries, some are more biscuit like as these are, while there are other varieties that use a yeasted dough. They are traditionally made and eaten during the Jewish holiday of Purim, and while Biscoff hamantaschen are in no way traditional, like I said they are very easy to make and require much less time than making each element from scratch.

This recipe is very low stress as I am asking you to use bought pastry, though homemade would be lovely too, and Biscoff spread. All pre-made, all easy but most importantly all tasty. You can think of these like a little free form individual tarts if you like (maybe an alternative to a jam tart or similar?), a quick and easy baking project with very tasty results

Biscoff Hamantaschen

Biscoff Hamantaschen

Ingredients:

1 sheet shortcrust pastry (approx.435g - I used Careme brand, if you use another brand who make smaller sheets of pastry you made need 2-3 sheets).

1 jar Crunchy Biscoff Spread

1 egg, beaten

Sprinkles, optional


Method:

Line three large baking trays with baking paper.

Leave the pastry on the plastic sheet it comes on, and using a 7.5-8cm round biscuit or scone cutter, cut out rounds of the pastry and place on the prepared trays. Cut out the rounds as close toegtehr as possible, so you have minimal pastry scraps left over.

Re-roll the remaining pastry - you can do this inbetween the plastic sheet the pastry came on so you don’t have to flour your bench or rolling pin - and cut out the remaining pastry.

Brush the beaten egg around the edges of each pastry round (you won’t use all of the egg). Drop teaspoonfuls of the Biscoff spread (no more than 1 tsp per pastry round, you shouldn’t need the whole jar - I used about 3/4 of one jar) into the centre of each pastry round. Then pinch the rounds into triangle shapes, esnure the corners are well sealed. You can brush with more egg if needed. See this post for more detailed instructions on how to fold the hamantaschen* - if you create a smaller hole in the centre and fold your hamantaschen up tigther than what I have done here, it will also help them not break open or spill over in the oven - you can see in the photos some of mine have spilled a little.

Place the trays of hamantaschen in the fridge for at least 30 minutes so the pastry can chill. Do not skip this step - this, along with not overfilling the hamantaschen will help ensure your hamantaschen don’t spill over and loose their shape when baking.

Preheat oven to 180 degrees Celsius.

After at least 30 minutes, remove the trays of hamantaschen from the fridge, sprinkle with sprinkles and bake for 15-20 minutes or until the pastry is golden.

Once removed from the oven you can sprinkle more sprinkles over the hamantaschen for an extra pop of colour. Allow the hamantaschen to cool on their trays.

Hamantaschen will store well in an airtight container for at least 7 days.

Makes about 24 hamantaschen - however this may vary depending on your cutter size and type of pastry used.

*for a great video demonstration of how to fold hamantaschen (plus another great recipe as well as more good hints and tips at making them) check out Lisa Goldberg’s (of the Monday Morning Cooking Club) Walking Up An Appetite YouTube Channel, as she has a great YouTube live video of making hamantaschen that shows how to fold them really well.

Biscoff Hamantaschen
In Tarts & Pastry Tags Hamantaschen, Cheats Hamantaschen, biscoff spread, Purim, Mixer Free Recipes, Holiday Baking, Easy Baking
Comment
Traditional Yeast Hamantaschen with Quince Lekvar

Traditional Yeast Hamantaschen with Quince Lekvar

Yeasted Hamantaschen with Quince Lekvar

Kath February 25, 2020

This year I was determined to make hamantaschen again, but this time with the more traditional yeasted dough. I loved my Pistachio Hamantaschen I made last year, but I really wanted to have a comparison with a more traditional hamantaschen. 

For those who have never heard of hamantaschen before, they are made to celebrate the Jewish holiday of Purim (see links at the end of this post to find out more). They are kind of like a cross between a biscuit and a pastry with a sweet tasty filling, and the triangular shape has great symbolism for the holiday. Check out my post from last year to find out a little more.

I tried to stay as traditional as I could with this, but me being me, and not being bound by any Purim traditions of my own, I altered a prune filling (or Lekvar) recipe to include dried quince and dried pears. Mostly because quince is my third favourite flavour (coming in close after rose and pistachio which alternate between spots one and two), and I have access to amazing dried quince from Singing Magpie Produce, which I knew would taste amazing cooked into a lekvar. 

I heavily leaned on Leah Koenig’s new book ‘The Jewish Cookbook’ to produce this hamantaschen recipe. Leah’s book is my new ultimate resource on Jewish cooking, spanning all diasporas and nationalities and all types of meals and holidays. If you just want one book to show you the ways of Jewish cooking and baking, this is it. I (somewhat ironically I admit) received this book as a gift for Christmas, and it has maintained its spot as my most looked at cookbook since then. 

View fullsize Folding Hamantaschen
Folding Hamantaschen
View fullsize The Jewish Cookbook by Leah Koenig
The Jewish Cookbook by Leah Koenig

I was delighted to find a yeasted hamantaschen dough in Leah’s book, as I had already decided I wanted to try this type of dough for my next hamantaschen attempt! And out of the many cookbooks I own, it is the only one to contain such a recipe. Leah also provides many hamantaschen filling options, and I was particularly intrigued by the fruit lekvar traditional to Central and Eastern Europe. Lekvar is a thick jammy paste made using dried fruits and juice. I adapted Leah’s Prune Lekvar recipe to create my Quince Lekvar, but you could stick to prunes if you can’t find any dried quince. If you can get your hands on fresh quince, a quince butter would also make a great substitute for the lekvar (see my Cosy Winter Bakes eBook for a Quince Butter recipe). 

A yeasted hamantaschen definitely takes a bit more time and effort than a more shortbread pastry hamantaschen (see my recipe last year for a good one), but it is worth the effort. I found my first dough attempt didn’t work, I think because I am baking in a more humid climate and my dough just became unbelievably sticky and wet and barely rose at all. I have slightly altered the quantities of flour in the recipe, and continue to generously add more flour as I knead the dough. This is quite an intuitive recipe (which is why I suggest kneading by hand rather than using a stand mixer), and depending on your climate, you may not need nearly as much flour as I did. For reference the original recipe says to start with 350g, and up to 70g more if needed. On my second attempt I added that total amount (420g), then I added more when I was kneading and my dough worked out much better. 

Quince Lekvar (or thick jam)

Quince Lekvar (or thick jam)

Quince Lekvar

Ingredients:

200g dried quince

100g dried pears (or dried apple)

120ml cloudy apple juice 

175ml water

4 tbsp panela sugar

1 tbsp honey

1/2 tsp ground cinnamon

1/2 tsp ground cardamom

1 tsp vanilla extract

Method: 

Place the quince, pears, apple juice, water and panela sugar in a small saucepan. Over low-medium heat bring to a gentle boil, then reduce the heat to low and cover the saucepan with its lid. Cook the fruit, stirring every now and then, for about 25-35 minutes or until the fruit has softened and most of the liquid has been absorbed. 

Take the pan off the heat, and puree the fruit with a stick blender. Stir in the honey, cinnamon, cardamon and vanilla then allow to cool completely before storing covered or in an airtight container in the fridge. 

Makes approx. 580g.

Yeasted Hamantaschen with Quince

Yeasted Hamantaschen

Ingredients: 

7g dried yeast

150g + 1 tsp caster sugar 

120ml warm water

420g plain flour, plus extra

pinch of salt

60ml canola oil, plus extra

3 eggs

1 tsp vanilla extract 

360g (approx.) Quince Lekvar

Method: 

In a large bowl stir together the yeast, warm water and the 1tsp caster sugar. Leave for 5-10 minutes until it has become frothy.

In a smaller bowl, whisk together the remaining 150g caster sugar, flour and salt.

Add two of the eggs, oil and vanilla extract to the activated yeast and whisk to combine.

Add the flour, and mix. 

Generously dust your work surface with more flour, and tip the dough out. Dust the dough with flour, and begin to knead. This dough can be quite sticky, so continue to knead and add flour until the dough becomes more manageable and elastic. Knead for about 10 minutes, the dough will still be a little sticky, but once it becomes smoother and more elastic it will be ready to prove. 

Lightly oil a large bowl with a little more of the canola oil, and place the dough in. Cover with cling film and leave in a warm spot for 1.5-2 hours or until the dough has doubled in size. This dough won’t rise as dramatically as a traditional bread dough, but if the size has at least doubled during the proofing time, then it will be ready for the next step. 

Once the dough as proofed, line two to three trays with baking paper, and preheat oven to 180 degrees/170 degrees Celsius fan. 

Lightly dust your work surface with more flour, and roll out half the dough (leave the other half covered in the bowl). Using a 7-8cm round cutter, cut out rounds of the dough and place in the prepared trays. Keep the scraps of dough and place to the side for now. Roll out the remaining dough and cut out with the cutter. Re-roll all the scraps, and cut out as before. The dough will become harder to work with now as it is becoming overworked. Discard any remaining scraps now, especially if you have cut out close to 30 rounds, and your trays are filled. 

Place a teaspoon of the quince lekvar in the centre of each round. Shape the rounds of dough into the characteristic triangle shape by pinching one side into a corner, then folding the other side up to form two more corners. Ensure the corners are well sealed and stuck together. If you need some more tips on how to fold hamantashen take a look at this graphic made by The Nosher.

Loosely place some cling over the trays and leave to rest for 30 minutes.

Crack the remaining egg into a glass and beat with a fork. Brush the tops of the hamantaschen with the egg, then place in the oven for about 18 minutes to cook. Rotate the trays in the oven about half way through to ensure the hamantaschen cook more evenly. The hamantaschen will be ready when they have puffed up a little and are golden. 

These are best eaten the day they are made, but will keep in an airtight container for a few days.

Makes about 30 hamantaschen.

Yeasted Hamantaschen

Reference: ‘The Jewish Cookbook’ by Leah Koenig (Phaidon Press Limited, 2019), pp.342 & 410. For more info on yeasted hamantaschen check out this post on the blog Poppy & Prune and this recipe on kosher.com. 

Quince Hamantaschen
In Holidays, Tarts & Pastry, Jams Preserves & Spreads Tags Purim, Hamantaschen, Yeasted Hamantaschen, Quince, Quince Lekvar, Quince Jam, Dried Quince, The Jewish Cookbook, Leah Koenig, Jewish Baking, Holiday Baking
Comment
Homemade Yuzu Curd

Homemade Yuzu Curd

Yuzu Curd

Kath August 15, 2019

This recipe came about because I found fresh yuzu in my local fruit market and I needed something to make with them! I had never seen fresh yuzu before, so I couldn’t pass up the opportunity to buy some. 

Considering I only bought two (they were quite expensive!), this curd turned out to be the perfect thing to make. I used some of it to fill some mini tarts with (using this cheats pastry recipe). I still have some curd left, and have dreams of making Flour and Stone’s Lemon Dream cake with it. We’ll see if time permits with that one. 

Bottled yuzu juice could also be used for this recipe, or another citrus entirely! 

The recipe comes from Catherine Phipps’ book Citrus, which I turn to for all my citrus questions and when I have something unusual like yuzu to use - I highly recommend it.

View fullsize Fresh Yuzu
View fullsize Juicing the Yuzu
Homemade Yuzu Curd

Yuzu Curd

Ingredients: 

200ml yuzu juice (approx. 2 large yuzu)

finely grated zest of two yuzu (if using fresh yuzu)

150g caster sugar

125g unsalted butter

2 eggs

3 egg yolks 

Method: 

Place all the ingredients into a medium saucepan and place over low heat. Stir often until the sugar has dissolved and the butter has melted. 

Continue to cook over low heat, stirring constantly for about 20-30 minutes, or until the curd has thickened (it should coat the back of your spoon). 

Remove from the heat and pour through a fine sieve into another bowl. 

Store in sterilised glass jars (about 2 medium sized jars), and leave to cool at room temperature. Once cooled, store in the fridge for 2-3 weeks. 
Makes approx. 530g.

View fullsize Yuzu Curd + Tarts

Reference: ‘Citrus - Recipes That Celebrate The Sour and The Sweet’ by Catherine Phipps (Quadrille Publishing, 2017), p.224.

Yuzu Curd
Yuzu Curd Tart with Crushed Freeze Dried Raspberry

Yuzu Curd Tart with Crushed Freeze Dried Raspberry

In Other Desserts, Jams Preserves & Spreads, Tarts & Pastry Tags Yuzu, Citrus, Citrus Curd, Mini Tarts, Citrus by Catherine Phipps
8 Comments
Pistachio Hamantaschen

Pistachio Hamantaschen

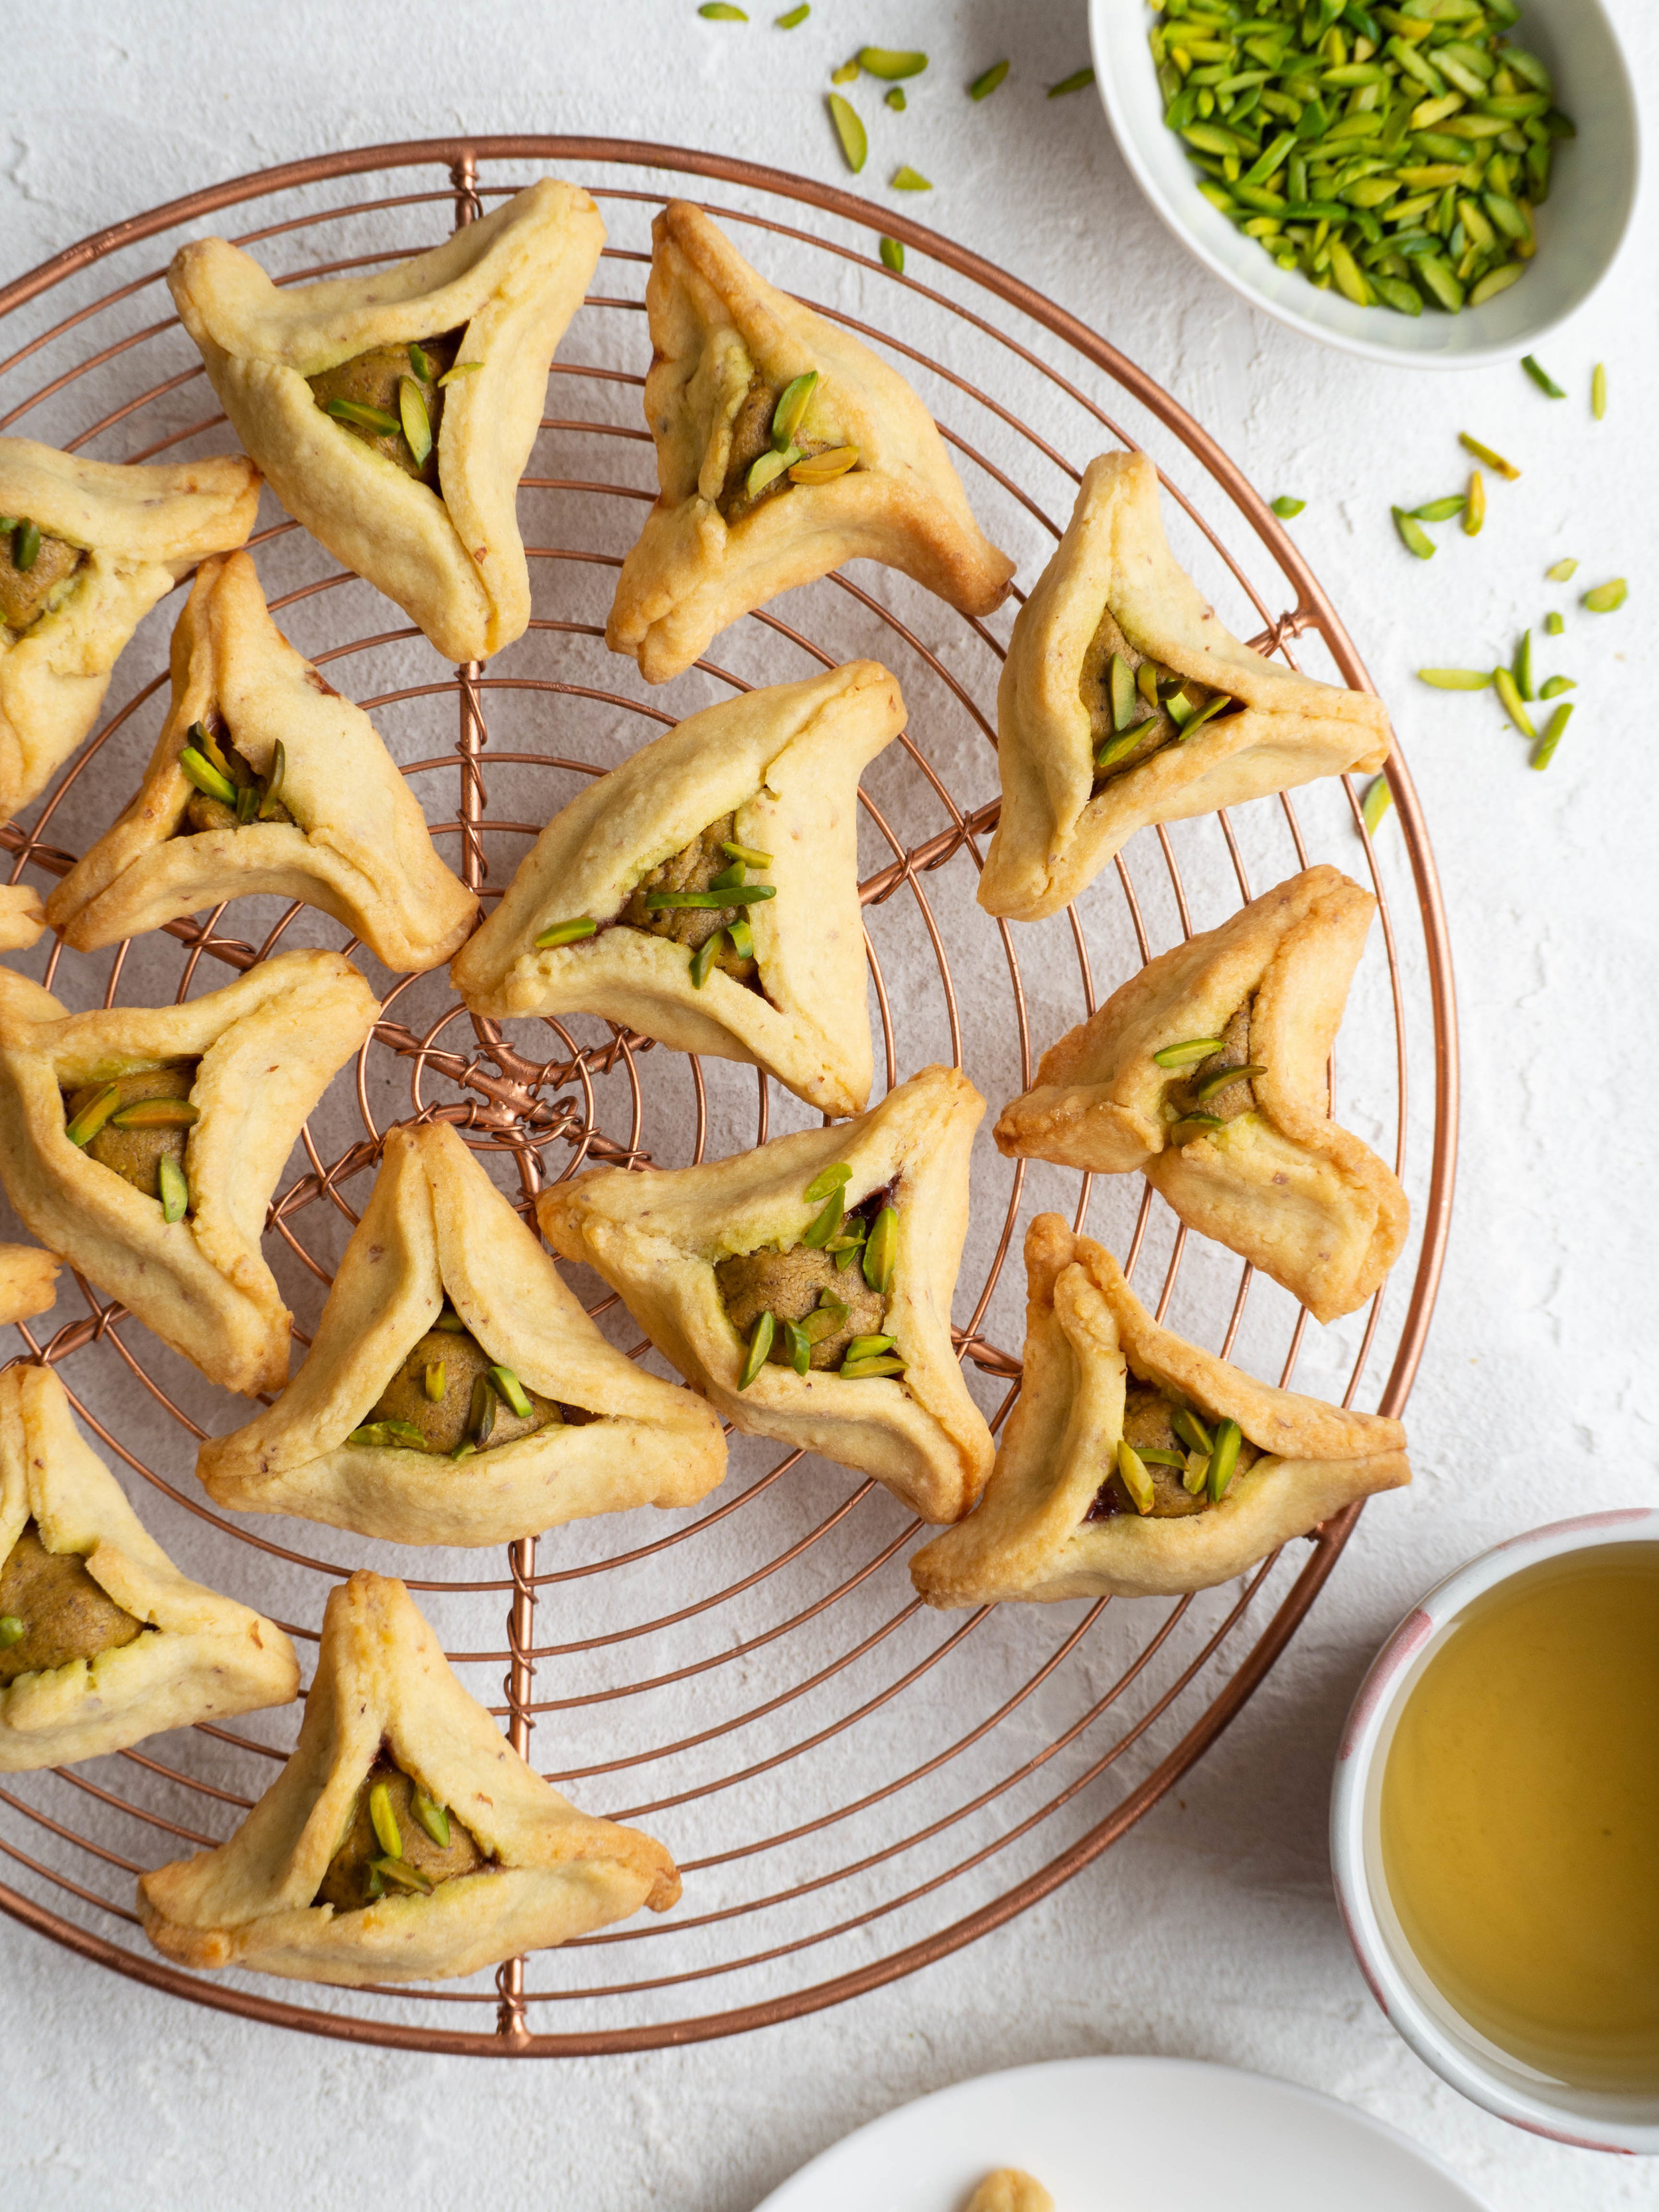
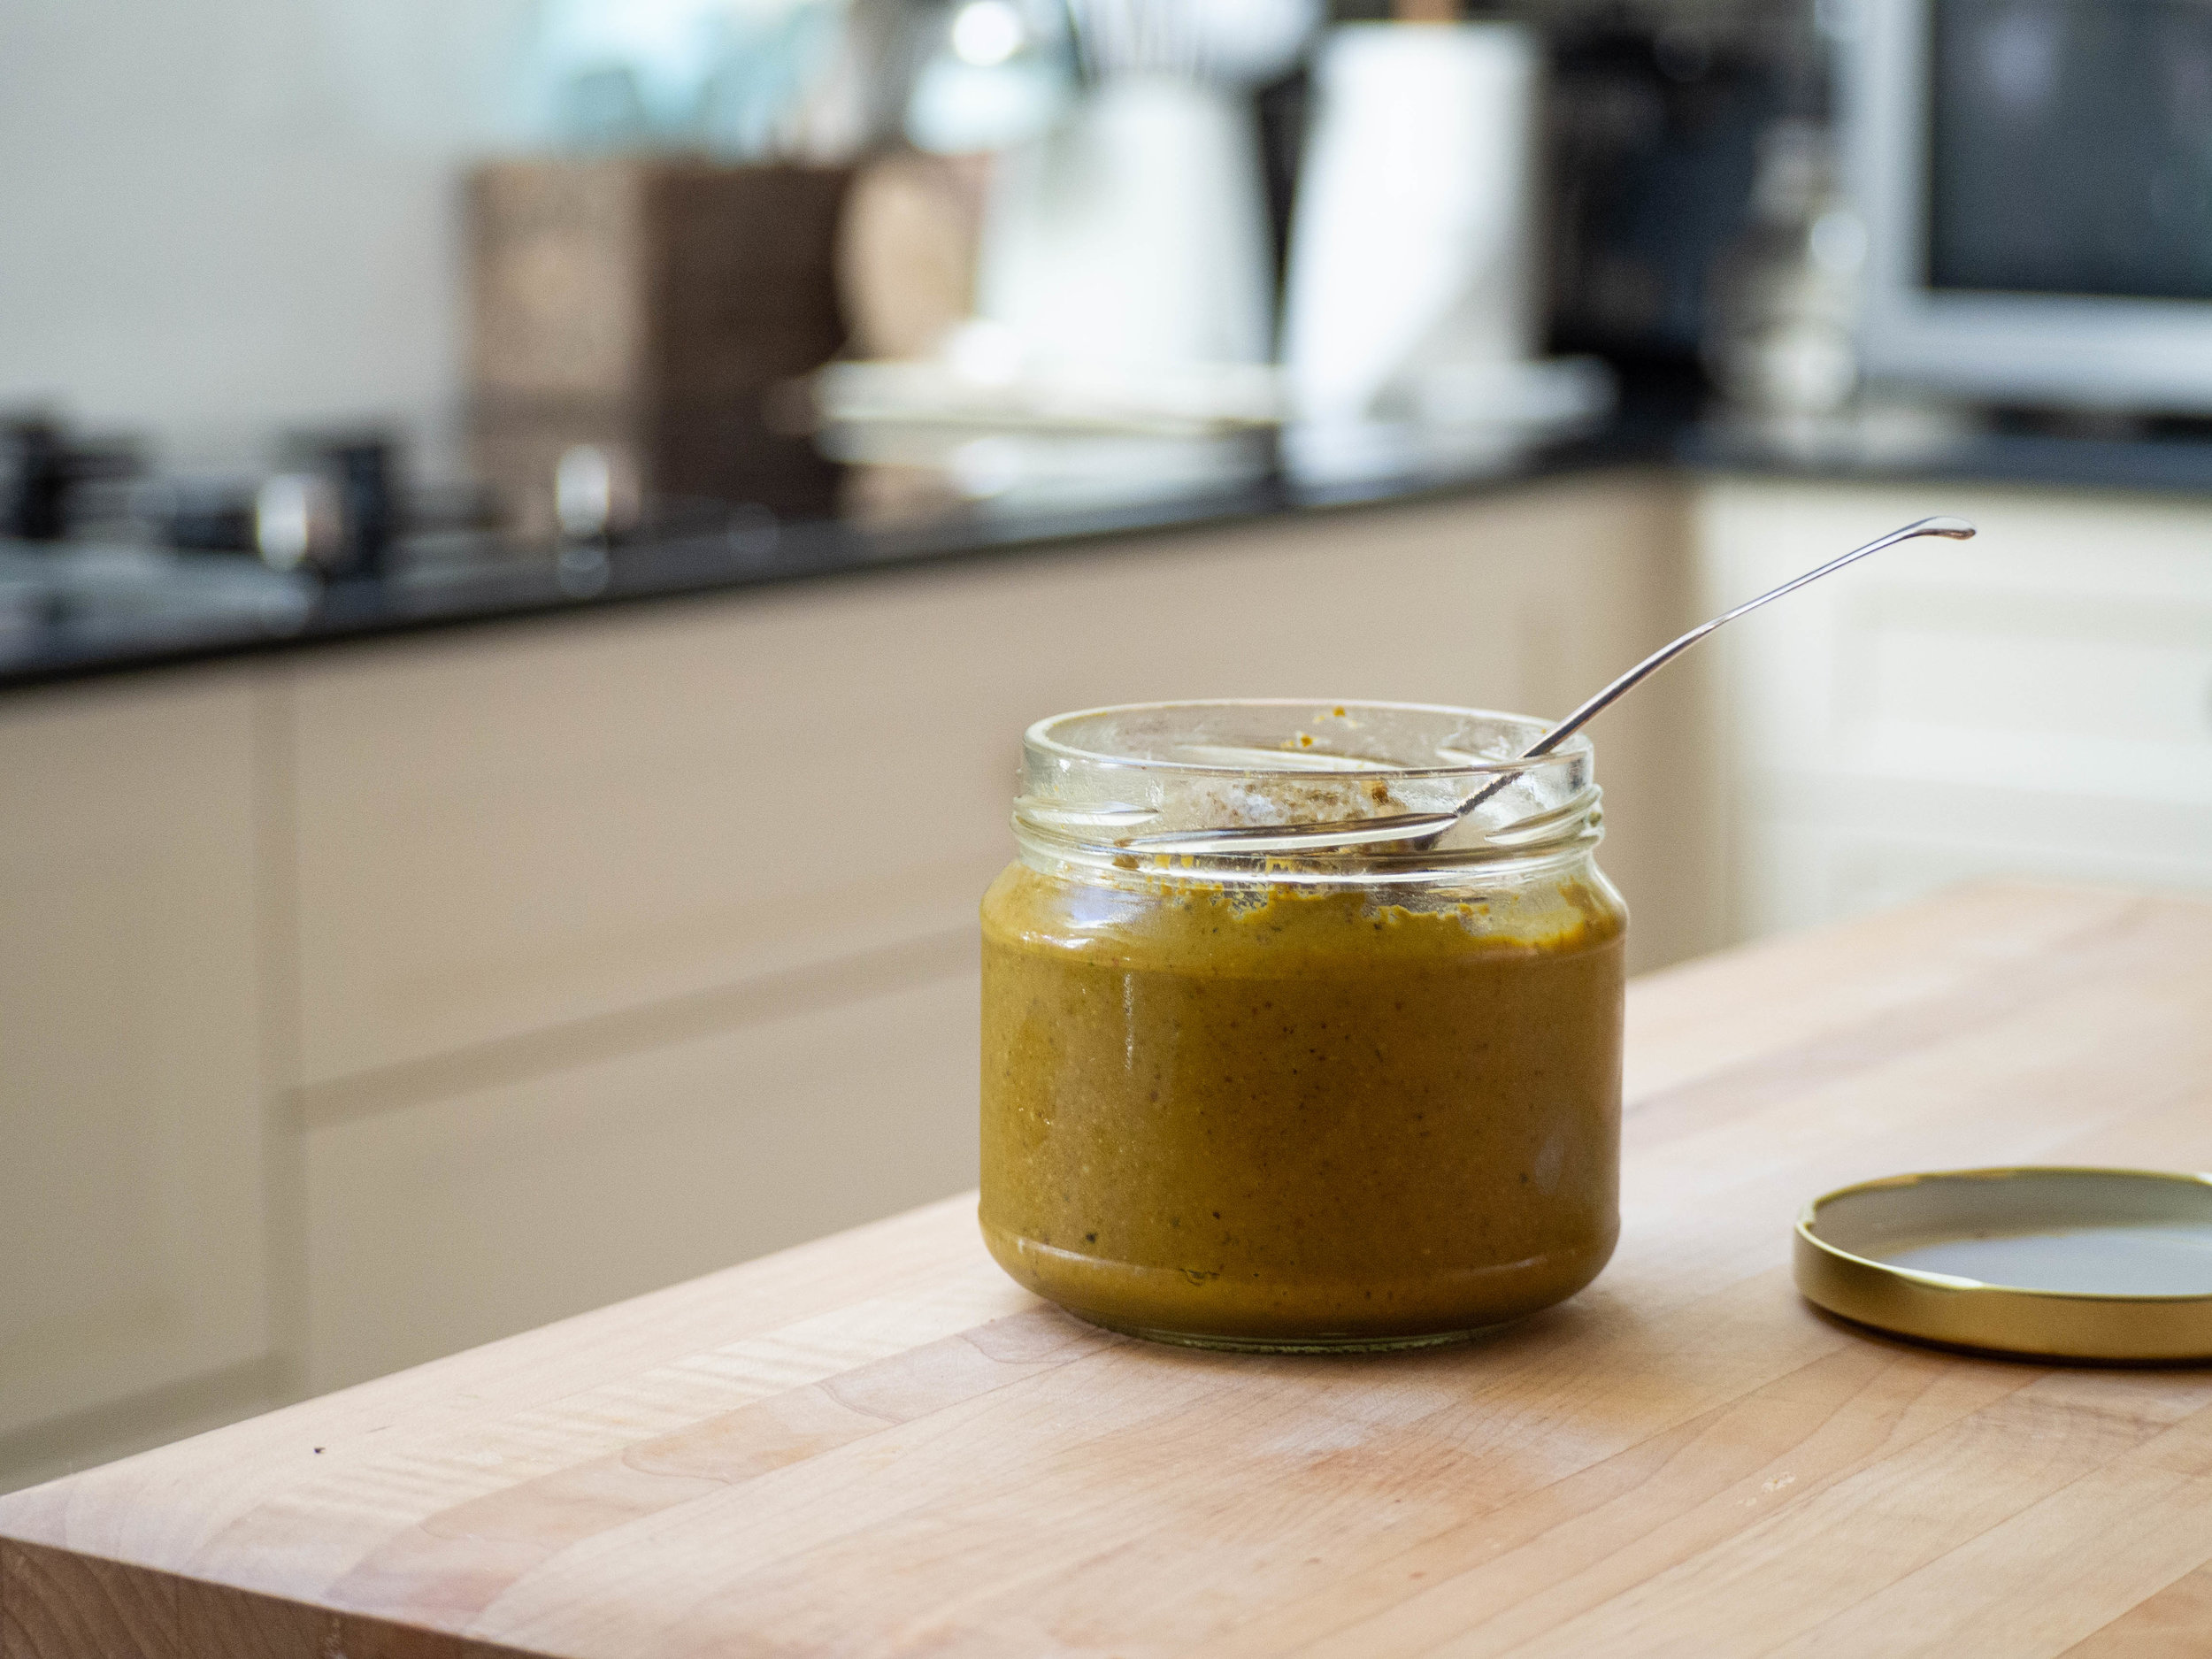
Pistachio Hamantaschen + How to Make Pistachio Paste

Kath March 17, 2019

Purists look away now, these are not traditional hamantaschen! Hamantaschen (made during the Jewish festival of Purim) are only a recent discovery for me, so I don’t have any preconceived ideas or traditions to guide me as to how they ‘should’ be. My only experience with them is seeing pictures pop up on Instagram the week or so before Purim. And many of the ones I have seen are variants on the traditional versions. The recipes from Molly Yeh’s blog ‘My Name is Yeh’ are a great example of this. Last year I made her Marzipan Sprinkle Hamantaschen and they were delightfully fun.

This year I have been baking with pistachios a lot, and trying to perfect a homemade pistachio paste (since none seems to be available to buy at any store I have so far looked at!). When I noticed Purim was fast approaching I thought a pistachio version with my newly perfected pistachio paste would be great. 

Great, if you aren’t set on a traditional hamantaschen that is! After speaking to a few people, I have since discovered that firstly, traditionally hamantaschen are filled with a poppyseed filling. Secondly, the shortbread like pastry sometimes used nowadays (like the one below), is definitely not traditional! A yeasted dough is the traditional way to make them. 

Well, that had me seriously questioning my hamantaschen idea, and for a moment considered making this version and a traditional poppyseed one with yeasted dough. After more discussion and some research online and in a few of my cookbooks, I decided to forge ahead with my super untraditional hamantaschen recipe. 

From my research on hamantaschen the shortbread like dough was a 20th century adaptation of the original, as it was easier to make and had a slightly longer shelf life. From my observations it looks like the shortbread like dough is quite common in America and in US based recipes. Which is where the below recipe originates. After some trial and error I finally settled on the dough recipe by Uri Scheft from his book ‘Breaking Breads’. Uri has bakeries in Israel and New York, and based on the types of recipes in this book, I definitely need to visit one of these bakeries one day!

So to those celebrating, Chag Purim Sameach! And for everyone else, I hope you give these a go! They are worth it just for the pistachio paste alone 😀.

If you want to know more about Purim or Hamantaschen here are a few good links! 

  • All You Need to Know About Hamantaschen 

  • The OG Hamantaschen: Yeast Dough Poppy Triangles 

  • A Purim Classic: Sugar Cookie Hamantaschen 

  • Molly Yeh’s Hamantaschen Recipes 

NB. The leftover pistachio paste can be used to flavour ice creams or gelato, cakes, icings, milkshakes etc. 

Also! The Pisacahio Paste requires blending by a fairly powerful food processor! If you don’t think yours is up to the task, or don’t feel like making it I would recommend making the marzipan from Molly’s Marzipan and Sprinkle Hamantaschen but with ground pistachios instead of almonds. 

View fullsize IMG_7339.JPG
View fullsize IMG_7378.JPG
View fullsize IMG_7368.JPG
Hamantaschen ready for the oven

Hamantaschen ready for the oven

Homemade Pistachio Paste

Homemade Pistachio Paste

How to Make Pistachio Paste

Ingredients: 

250g raw or blanched pistachios 

100g white sugar 

30ml water

60ml (4tbsp) pistachio oil 

Method: 

Pre heat oven to 160 degrees Celsius, and place the pistachios on a baking tray. Roast in the oven for 10 minutes. Once done set aside to cool a little. 

Place the sugar and water into a small/medium saucepan and heat until it reaches 120 degrees on a sugar thermometer. Whilst the sugar syrup is heating, place the roasted pistachios in the bowl of a food processor and blitz until they form a fine crumb. 

Once the sugar syrup has reached 120 degrees Celsius, gradually pour into the food processor whilst it is running. Gradually add the pistachio oil, and continue to process until a smooth paste forms. This should take between 5 and 10 minutes. Scrape down the sides of the food processor bowl at regular intervals if necessary. The finished product will be a smooth paste, similar to a nut butter. When the paste initially combines it will form a smooth ball, continue processing until a more paste like consistency is reached. 

Once a smooth paste has formed, decant into plastic containers or glass jars and store in the fridge until needed. It should last about 1 month refrigerated. If the oils in the paste separate a little during storage, mix the paste briefly before using.

Makes about 390g. 

Homemade Pistachio Paste

Homemade Pistachio Paste

Pistachio Hamantaschen

Pistachio Hamantaschen

Pistachio Hamantaschen 

Ingredients: 

230g unsalted butter (cold not room temp)

100g icing sugar (confectioners)

50g white sugar

2 eggs 

400g plain flour

50g almond meal

salt


Ingredients for the Filling: 

1/2 tbsp water

salt

60g mixed berry jam

250g pistachio paste 

slivered pistachios, to decorate

Method: 

Place the butter in between two sheets of baking paper and bash with the end of a rolling pin. This tenderises the butter without warming it up too much. 

Place the butter and both sugars in the bowl of a stand mixer and beat with the paddle attachment on a low speed until just combined. Increase the speed a little for a few moments longer to ensure everything is well mixed. 

In a glass, add one of the eggs and lightly beat. Tip half of this into another glass and add the other egg to one of the egg halves and beat until combined. Only 1.5 eggs is necessary for the dough, however keep the other half for the egg wash later. 

Add the beaten 1.5 eggs to the butter and mix on low until combined. Add the flour, almond meal and a pinch of salt then mix until almost combined. 

Tip your dough onto a work surface and bring the dough together with your hands, until everything is combined. Wrap in plastic wrap or baking paper and place in the fridge for at least 1 hour (however you can do up to this step on one day and finish off the rest the next). 

Once the dough has chilled, pre heat oven to 160 degrees Celsius and line three large baking trays with baking paper. 

Flour your work surface and roll the dough out with a rolling pin until it is about 0.5cm thick. Continue to dust with more flour if the dough is sticky. 

Cut out rounds of the dough using a 7.5-8cm (3 inch) round biscuit/cookie cutter and place on the prepared trays. Place these trays in the fridge if the dough has softened too much for a few minutes. Bring the scraps of dough together and flatten out again. If the dough is too soft re-wrap and place in the fridge for a few minutes, then continue to cut out more rounds of dough. 

Remove the trays from the fridge. Get your beaten half egg from earlier and add the water and a pinch of salt. Whisk until combined. Brush this mixture over each round of dough. 

Then spread a little of the jam in the centre of each round, then place a 1tsp sized ball of pistachio paste on top. 

Shape the rounds of dough into the characteristic triangle shape by pinching one side into a corner, then folding the other side up to form two more corners. Sprinkle the middle of each with a few slivered pistachios.

Bake for about 20-23 minutes, rotating the racks a couple of times during baking to ensure an even bake. The hamantaschen will be lightly golden when they are done. 

Cool on trays or on wire racks. 

Makes about 40. 

Pistachio Hamantaschen

References: ‘À La Mère de Famille’ by Julien Merceron (Hardie Grant Books, 2013), p.160; ‘Breaking Breads’ by Uri Scheft (Artisan, 2016), pp.258-260.

Pistachio Hamantaschen
In Tarts & Pastry, Holidays, Jams Preserves & Spreads Tags Hamantaschen, Jewish Baking, Pistachio Paste, Pistachio, Purim
2 Comments
Citrus Tart

Citrus Tart

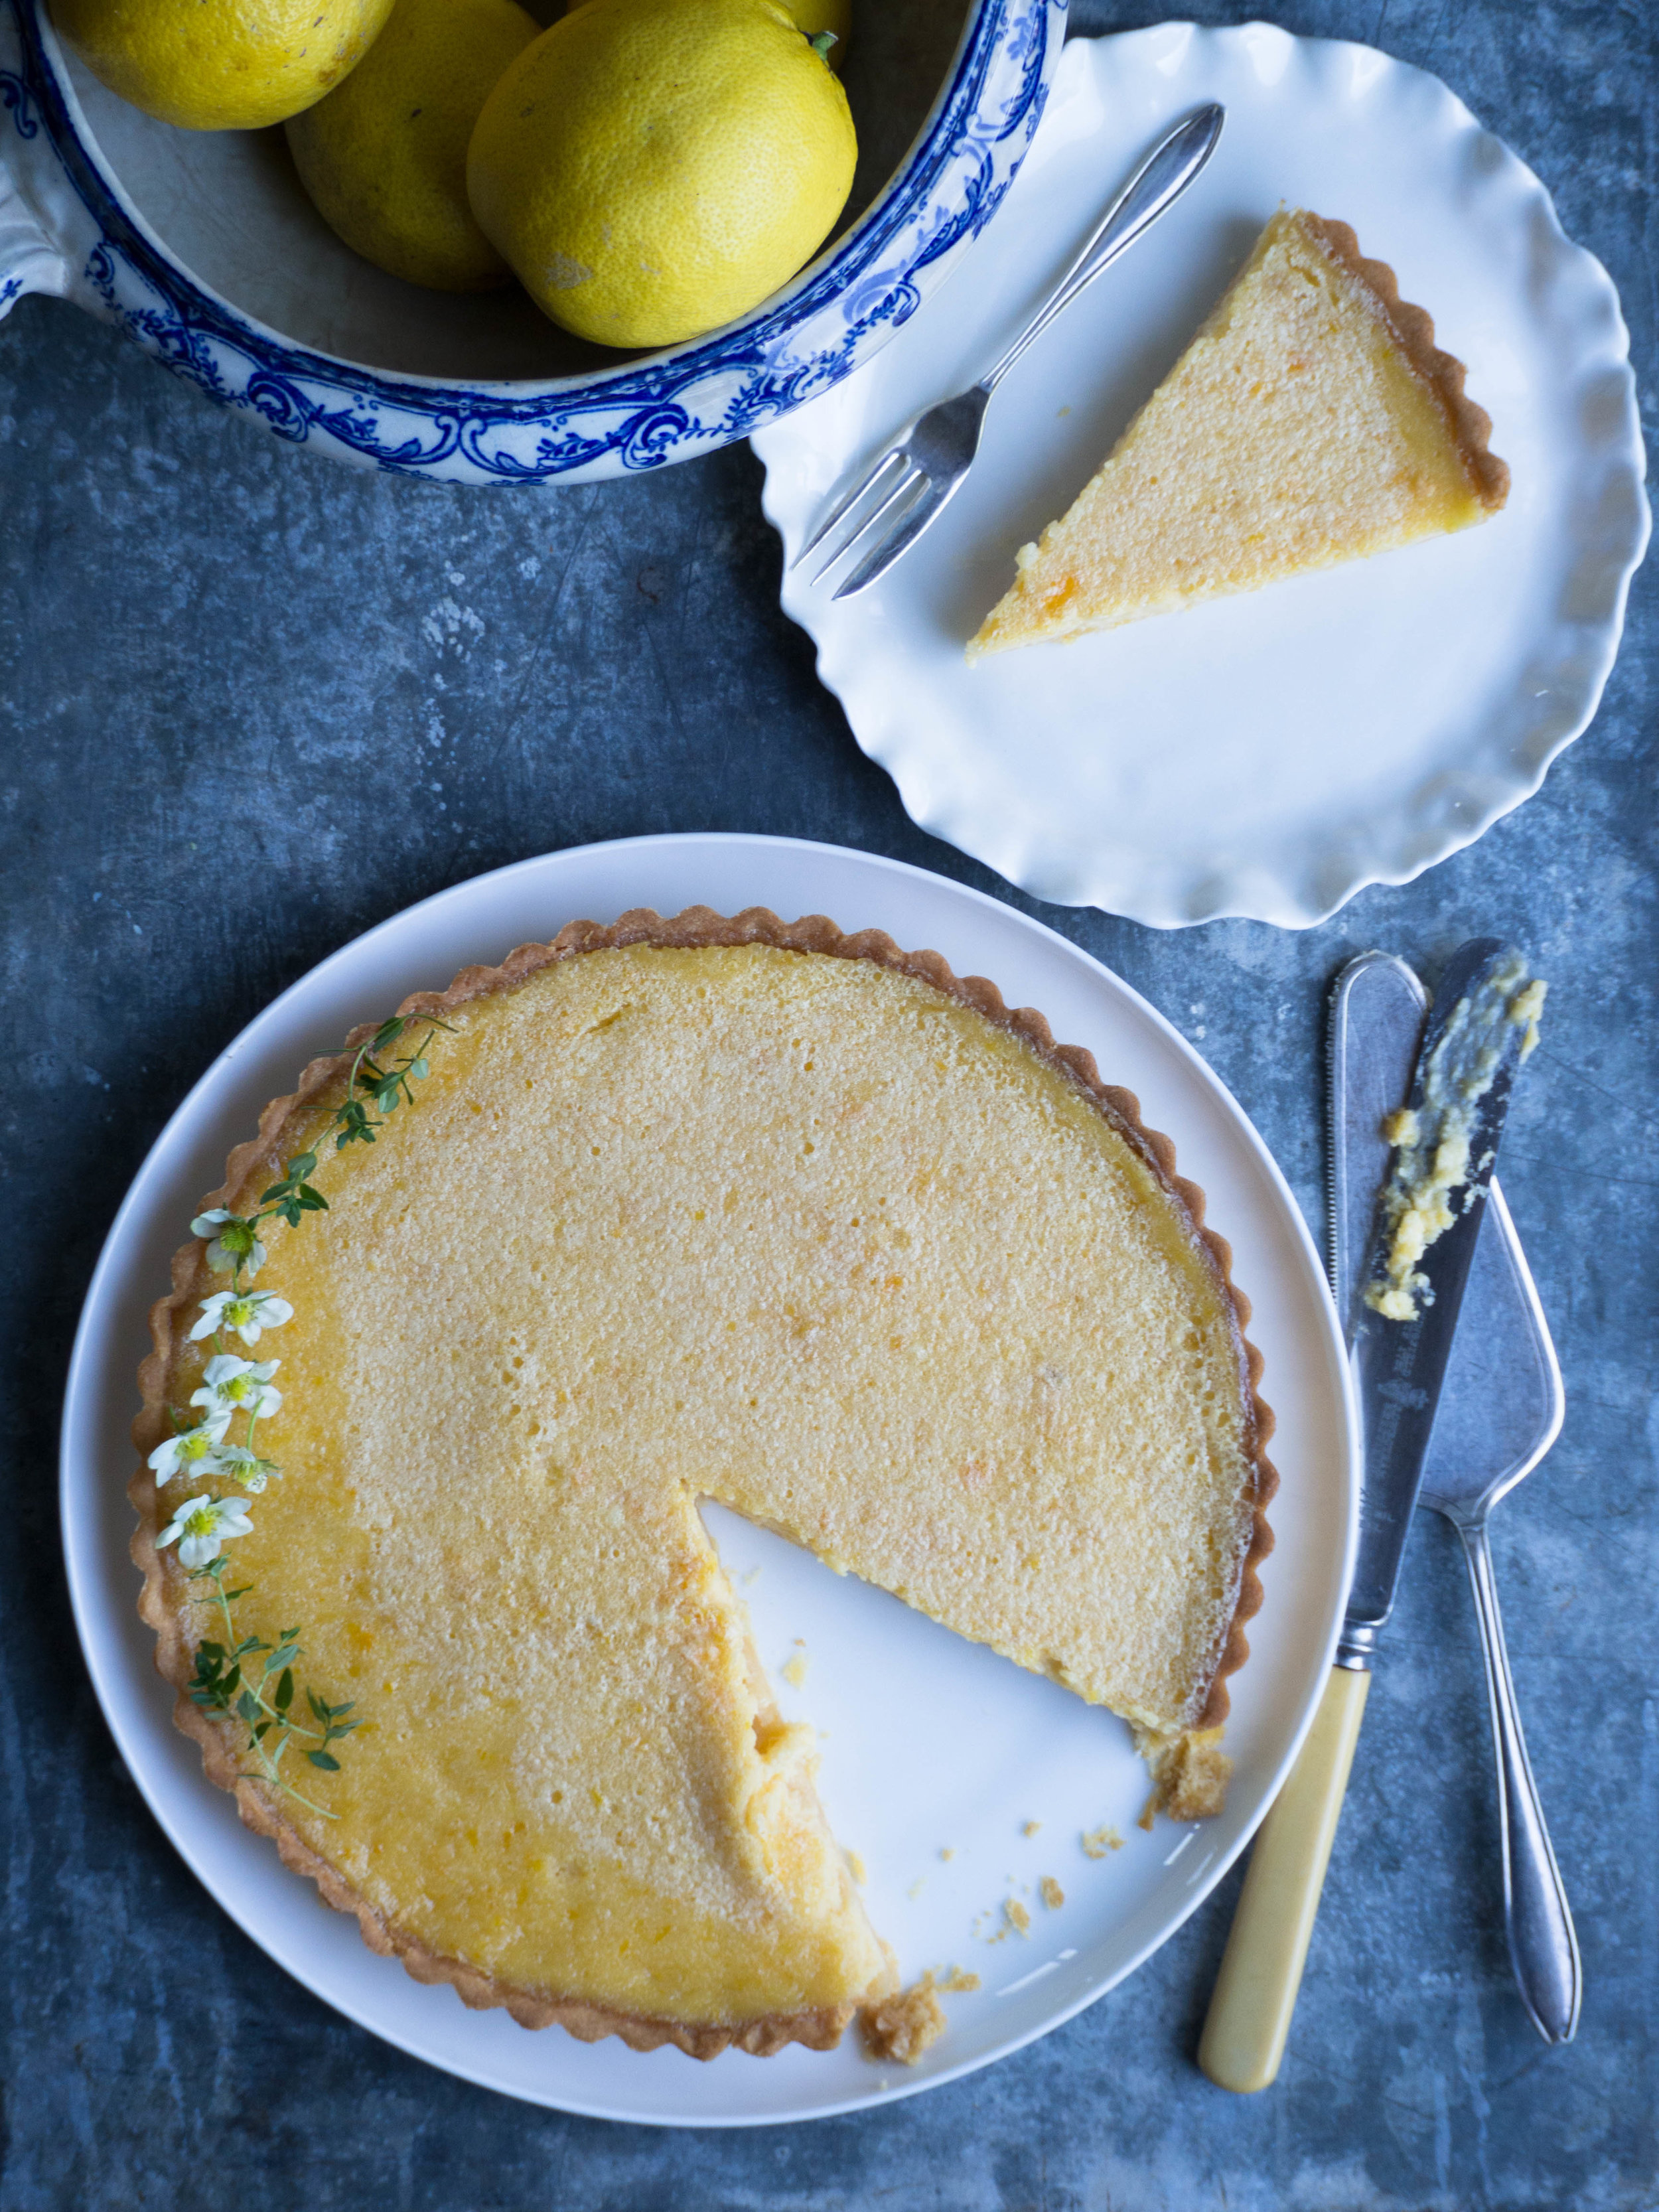
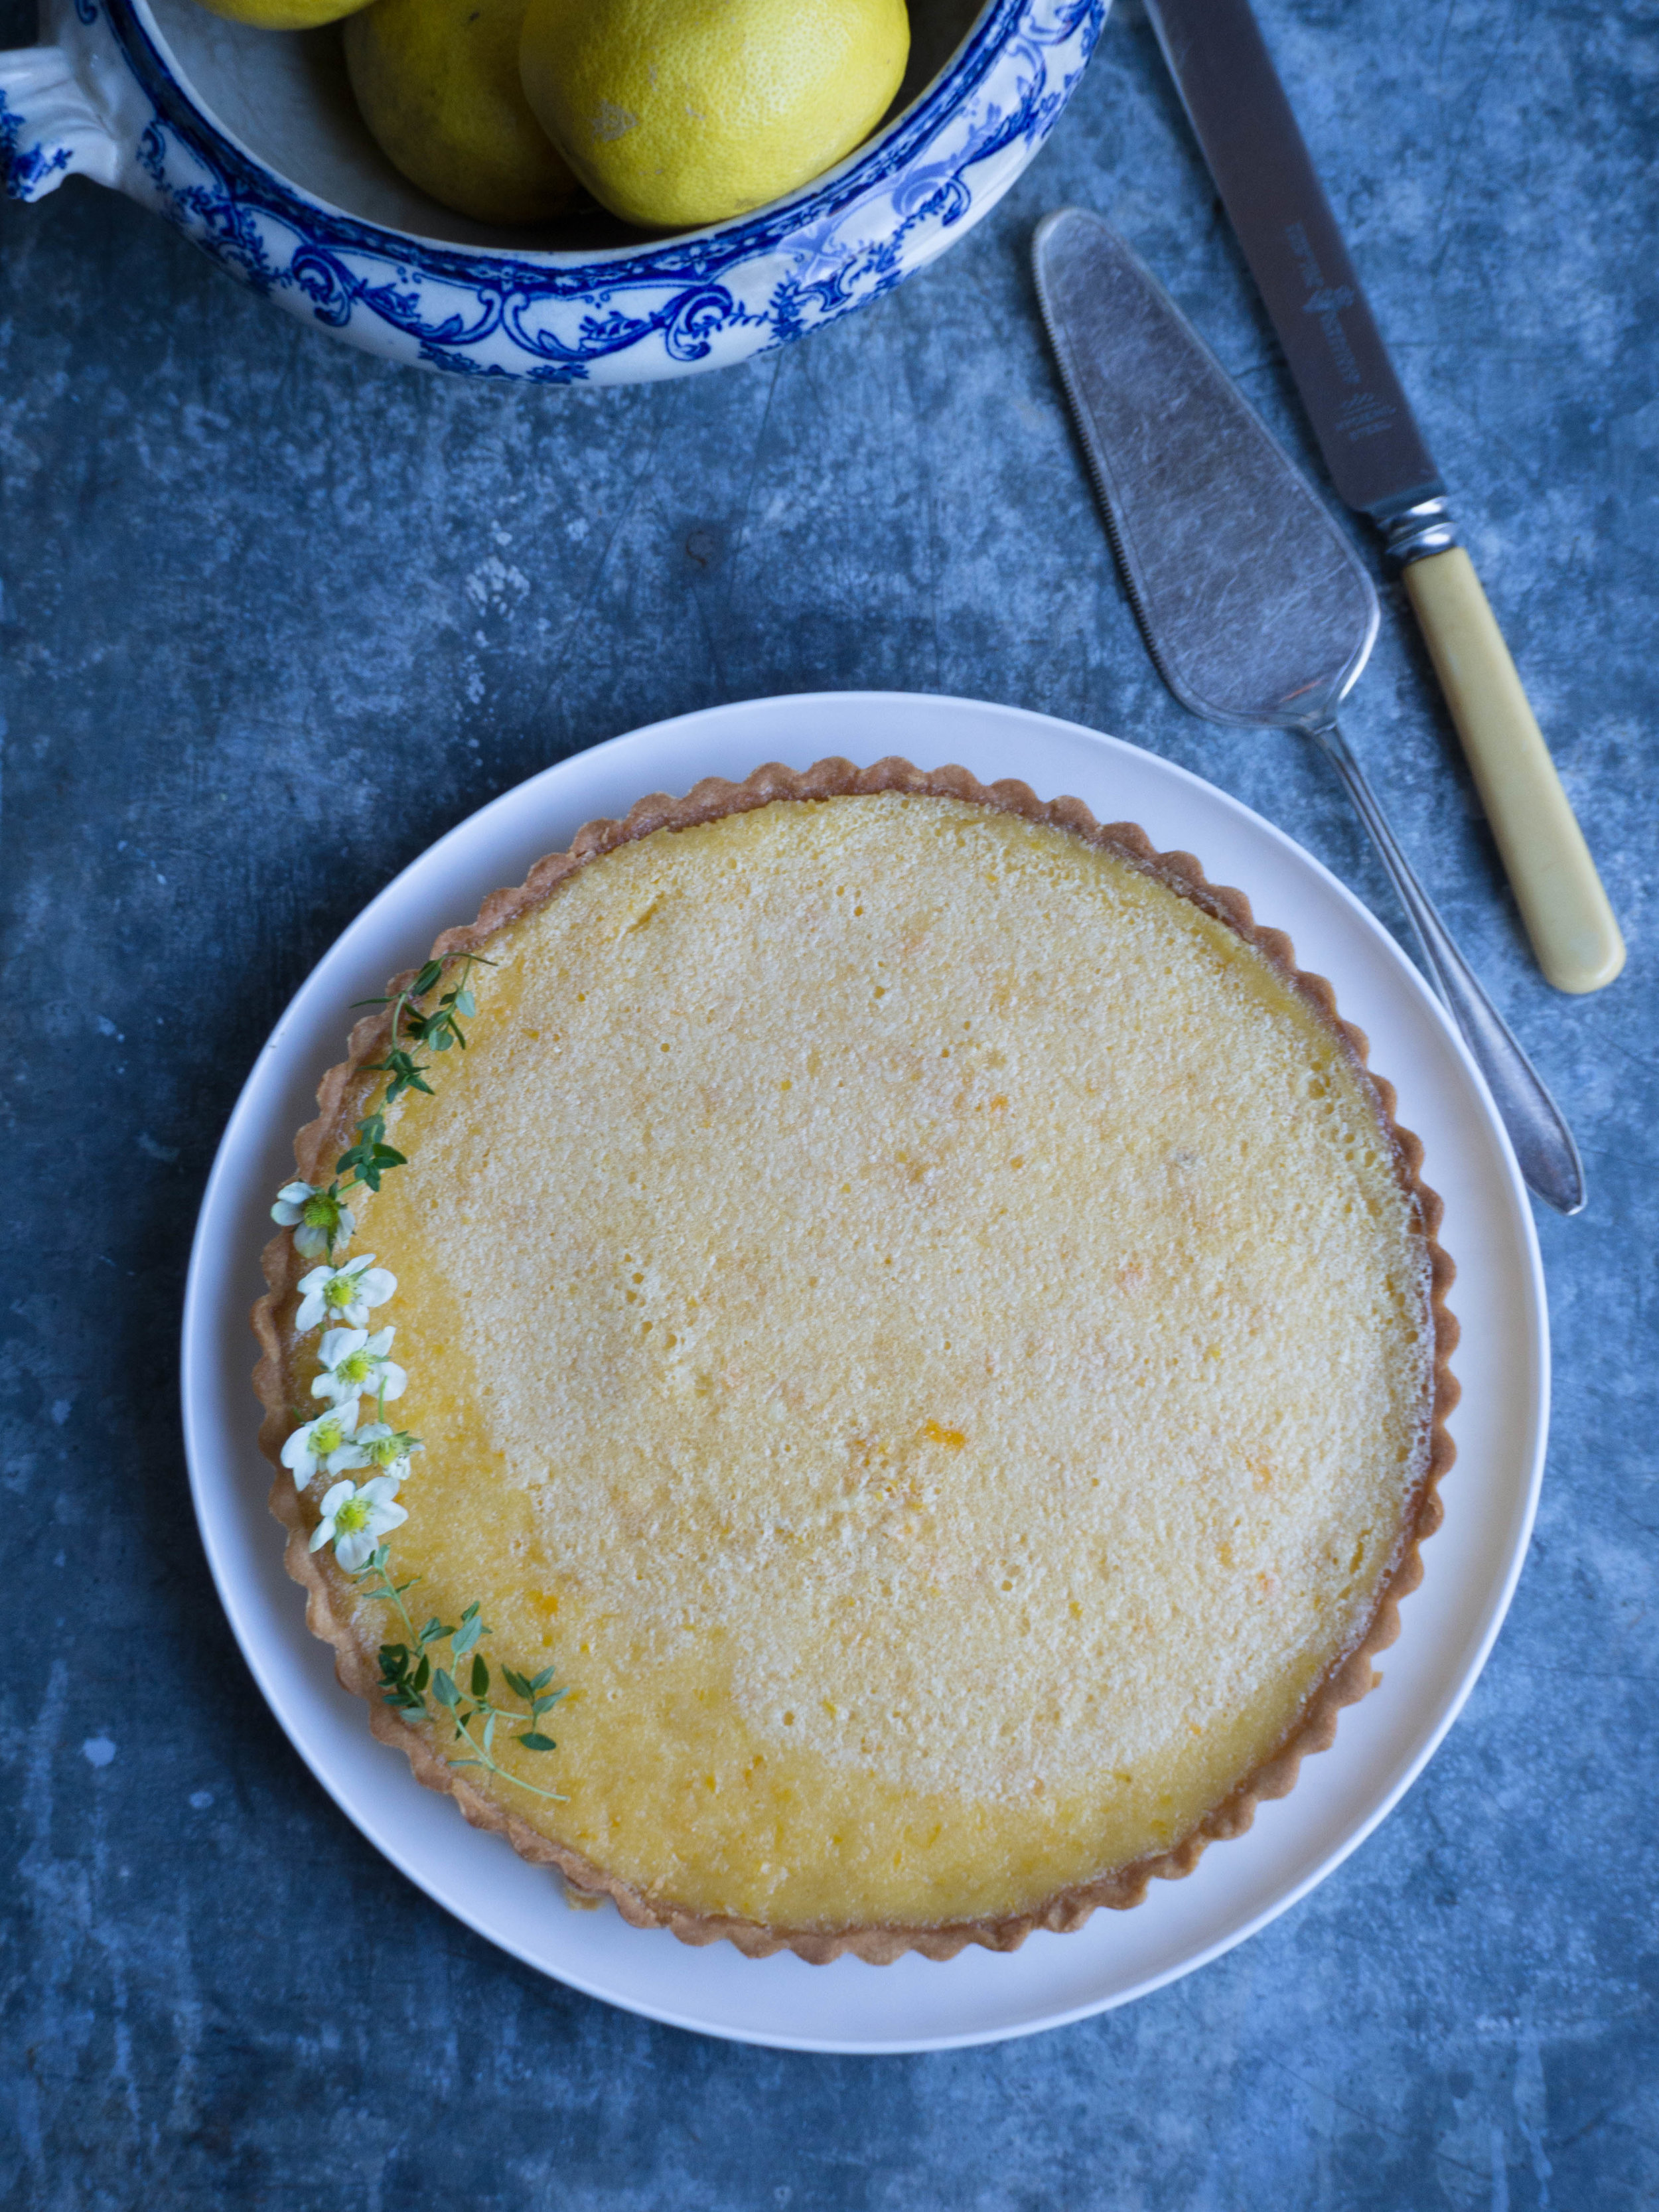
A Cirtus Tart & Surviving the 9-5

Kath August 31, 2017

I found this recipe in Catherine Phipps' book ‘Citrus’ and found the book, via the podcast ‘Stir the Pot’ by Edd Kimber. I have really taken to listening to podcasts in the past year, after my initial introduction to Cherry Bombe magazine’s ‘Radio Cherry Bombe’, my list of favourites has grown. At first these podcasts, were my way of doing something for myself on my commute to and from a job I really didn’t want to be doing anymore. My emotional health was suffering a lot because of this job, and having something that was just for me on a topic I am obsessed with made each working day a little easier. I had a little bit of a walk from the train station to my old work, and I will always remember the sense of dread I felt once I got closer to work. I would turn the corner and the knowledge that my time was up, until 5pm, would hit me. The following 7-8 hours were all about spending time in an often toxic environment, doing a job that was literally going nowhere.

The highlights of those work days mostly involved food. Apart from the podcasts, what I planned to eat at lunch, what ingredients I would buy on my lunch break or having a quiet lunch with other like minded colleagues were the moments that kept me going. I also stress purchased many a cookbook from the couple of bookstores in the area, which is where I found ‘Citrus’. I had listened to Edd Kimber’s interview with Catherine on his podcast, and had made a mental note to keep an eye out for Catherine’s book. During the interview they had discussed cooking with citrus, and to my delight, cooking with bergamots (see more on my bergamot obsession here). When I found a copy of the book, I instantly knew I had to buy it. I hadn’t been expecting to find it so easily, and being so unhappy in my job made my weakness for buying cookbooks all the more feeble. 

There are so many good recipes in ‘Citrus’, covering all types of food and occasions. This tart comes from the Desserts section, which also includes recipes for a Blood Orange and Rhubarb Meringue Pie, Bergamot and Rose Turkish Delight Pavlova (be still my heart) and a Earl Grey and Rose Parfait (was this book actually written just for me?!). I love Catherine’s flavour combinations, and the information on how to use particular and less common citrus. 

You don’t need a food processor for the pastry in this recipe, which I loved as we no longer have one (we weren’t using it so gave it away!). I used a selection of citrus for the filling, lemon, lemonades and bergamots. You could just use one type of citrus, it just depends what you feel like. However as a guide, the original recipe stipulates the zest of 2 lemons and the juice of 3 lemons for the filling - use this as a guide re the quantities of juice in particular as for example, a large orange will hold more juice than a lemon. 

Winter Citrus - Lemons, Bergamots & Lemonades

Winter Citrus - Lemons, Bergamots & Lemonades

Citrus by Catherine Phipps

Citrus by Catherine Phipps

Making the Pastry

Making the Pastry

Cooked Tart Shell & Making the Filling

Cooked Tart Shell & Making the Filling

Citrus Tart

Ingredients for the Pastry: 

200g plain flour

pinch of salt

125g unsalted butter, cold & cubed 

50g icing sugar

2 egg yolks 

Ingredients for the Filling:

6 eggs

300g caster sugar

250ml heavy cream

finely grated zest of 2 citrus (lemons, lemonades, bergamots etc) and the juice of three citrus (lemons, lemonades, bergamots, small/medium oranges etc)


Method: 

To make the pastry, put the flour and salt in a bowl, and rub in the butter until it looks like almond meal. Stir in the icing sugar, then add the egg yolks and mixing it all together with your hands. If the dough is too crumbly at this stage, add a small amount of ice cold water to help bring it together. Shape into a disc and wrap in plastic wrap, and leave to rest in the fridge for at least 30 minutes.

Once the dough has rested, preheat oven to 180 degrees Celsius and lightly flour a work surface. Roll out the pastry, dusting with extra flour if necessary. Roll it fairly thinly, however don’t go so thin that it will easily break when you are placing it into the tart tin. The pastry needs to have the circumference to line a 24cm tart tin (approx.). Gently place the pastry over the tart tin, and gently push it in to the sides of the tin, trimming the edges that hang over the sides. Keep some of the left over raw pastry for later in case you need to patch up your tart case after the blind baking process.

Put the raw pastry case in the freezer for 10 minutes, then prick the pastry all over with a fork. Crumple up a piece of baking paper, then place it over the tart and fill with pastry weights. Bake the tart for 15 minutes, then remove the pastry weights and the baking paper and bake again for about 5 minutes. At this stage you don’t want any of your tart shell to be raw. Leave the tart shell to cool while you make the filling, and turn down the oven to 150 degrees Celsius. 

To make the filling whisk the eggs and caster sugar together until they are well combined, then whisk in the cream and citrus zest and juice. To fill the pastry case, place on a lined baking sheet and pull out one of the oven racks and place it on the rack. Gently pour the filling into the case from here (best to use a jug for this), then gently push the oven rack back in and bake for 30-40 minutes until the tart filling is just set (it will still wobble slightly). Leave the tart to cool before serving, and store in the fridge if there are leftovers! 

Citrus Tart

Citrus Tart

Reference: Citrus by Catherine Phipps (Quadrille, 2017), p.168. 

Citrus Tart

Citrus Tart

If you are struggling at work…

I would highly recommend one or more of these books/podcasts. While I am no longer working in the environment I mentioned in this post, I still find these resources immensely valuable.

  1. Not Just Lucky by Jamila Rizvi

  2. The Life Changing Magic of Not Giving a F**k by Sarah Knight

  3. The Subtle Art of Not Giving a F**k by Mark Manson

  4. What Color is Your Parachute? by Richard N. Bolles

  5. Little Black Book by Otegha Uwagba

  6. Thrive by Arianna Huffington

  7. Feminist Fight Club by Jessica Bennett

  8. Pursuit with Purpose Podcast with Melyssa Griffin

  9. One Girl Band Podcast with Lola Hoad

  10. The Mindful Kind Podcast with Rachael Kable

Winter Citrus

Winter Citrus

In Tarts & Pastry, Other Desserts Tags Tart, Citrus, Stir the Pot Podcast, Catherine Phipps
Comment

How to Make Mini Fruit Mince Tarts for Christmas

Kath December 20, 2015

Merry Christmas! I hope everyone is enjoying the final lead up to the big day! 

Here is my final festive recipe - star topped mini fruit mince tarts. I first made these two years ago, and was very sceptical as to whether I would like them. I don’t usually like fruit mince pies, or anything else that has dried fruit in it to be honest. So I was extremely surprised when I liked these tarts. 

I made them so small as I think something like this needs to be small and dainty. The flavour is quite rich and I thought a little mouthful was all that was needed. You can make them bigger by using cupcake pans, or fruit mince pie pans if you have one. Use a larger cutter to cut out the pastry (about 7cm), and a larger star cutter for the tops. Making the mini version should get you about 60 tarts - which is good if you are feeding a crowd! Making them a bit larger should get you about 30 tarts. 

The pastry for this recipe has been spiked with some extra festive flavours, but it can be a little harder to work with than normal pastry. I found it to be much softer, and the day I made them was about 35 degrees Celsius, so I had to refrigerate the pastry quite often to keep it from melting! 

I hope everyone has a very happy holiday season, and a great new year! 

Mini Fruit Mince Tarts

Ingredients for the Fruit Mince: 

1 Granny Smith apple, peeled and grated

110g currants

120g sultanas

70g slivered almonds

85g mixed peel

80ml maple syrup

90g brown sugar

60g unsalted butter, chopped

80ml butterscotch liqueur/schnapps

1 egg, lightly beaten

white sugar, for sprinkling

icing sugar, for dusting

Extra butter or canola oil spray, for greasing


Ingredients for the Pastry: 

400g plain flour, plus extra for dusting

300g cold unsalted butter, chopped

90g brown sugar

1/2 tsp ground ginger

1/2 tsp ground cinnamon 

2 eggs

2 tsp vanilla extract 


Method: 

Begin by placing the apple, currants, sultanas, almonds, mixed peel, maple syrup, brown sugar, butter and butterscotch liqueur in a medium saucepan over low heat. Mix to combine and leave on a low/medium heat until all the liquid as been absorbed. Stir occasionally. 

While the fruit is cooking, prepare the pastry. In the bowl of a food processor place the flour, butter, ginger and cinnamon. Process in short bursts until the mixture looks like coarse breadcrumbs. Add the eggs and vanilla and process until the pastry forms a ball. 

Turn out on to a well floured work surface and bring the dough together. Divide the dough in half, and roll each to about 5mm thick in between sheets baking paper. Refrigerate for at least 30 minutes. 

Once the fruit has absorbed all the liquid, allow the mixture to cool completely before using. 

Pre heat the oven to 160 degrees Celsius, and prepare at least four or five 12 hole mini muffin trays by lightly spraying them with canola oil or greasing with butter.  

Using a 4.5-5cm fluted biscuit or scone cutter, cut rounds out of the halves of dough (re-roll (and chill if necessary) to use up the scraps). Tease each round out a little with your fingers, gently place into the muffin trays (they should only fill each muffin hole about halfway). Place the trays in the fridge for about 15 minutes to chill (longer if you are working in hot/humid conditions). 

Once the pastry is ready, fill each case with a teaspoon of the fruit mince. Then using a (very) small star cutter, cut stars out of the remainder of the pastry (re-roll (and chill if necessary) to use up the scraps), and gently place on top of each tart. 

Brush each tart with egg wash, and sprinkle with white sugar. Cook for 15-20 minutes, or until the tarts are lightly golden in colour. 

Once cooked, allow to cool for 5 minutes in their tins before removing the tarts to cooling racks. Sprinkle with icing sugar to serve. 

Reference: Donna Hay Magazine Issue 74 December 2013/January 2014, p.135.

In Holidays, Tarts & Pastry Tags Fruit Mince Tarts, Fruit Mince, Fruit Mince Pies, Christmas, Donna Hay
Comment
  • The Blog
  • Older
  • Newer

recipes

  • Biscuits/Cookies 39
  • Breads Etc. 9
  • Breakfast 7
  • Cakes & Slices 67
  • Confectionary 5
  • Drinks 6
  • Events 14
  • Food Photography Tips 3
  • From The Mailing List 24
  • Heirloom Recipes 12
  • Holidays 44
  • Ice Cream 9
  • Jams Preserves & Spreads 9
  • Muffins 4
  • Off the Shelf 47
  • Other Desserts 25
  • Savoury Dishes/Meals 15
  • Scones 4
  • Tarts & Pastry 9
  • Travel 13

Sign up to Friday Food Chat with Kath, a weekly newsletter for more food, baking, cookbook chat and more!

Sign Up Here!
instagram-unauth pinterest facebook url

Website Accessibility: To enable text to speech function on the blog, click the sound button to the right of each blog post.

All images & content are the property of Kathryn Vincent, unless stated otherwise. Please do not use without permission.

Kulinary Adventures of Kath

Food Photography, Recipes & Baking

instagram-unauth pinterest facebook url