Kulinary Adventures of Kath

Food Photography, Recipes & Baking
  • home
  • About
  • Work with Kath
  • Shop
  • Blog
    • The Blog
    • Recipe Archive
  • Newsletter
  • Contact
  • home
  • About
  • Work with Kath
  • Shop
    • The Blog
    • Recipe Archive
  • Newsletter
  • Contact
Raspberry Pistachio Rose Cake (23 of 25).jpg

The Blog

Recipes and Food Photography by Kath Vincent.

  • The Blog
  • Recipe Archive
  • All
  • Biscuits/Cookies
  • Breads Etc.
  • Breakfast
  • Cakes & Slices
  • Confectionary
  • Drinks
  • Events
  • Food Photography Tips
  • From The Mailing List
  • Heirloom Recipes
  • Holidays
  • Ice Cream
  • Jams Preserves & Spreads
  • Muffins
  • Off the Shelf
  • Other Desserts
  • Savoury Dishes/Meals
  • Scones
  • Tarts & Pastry
  • Travel

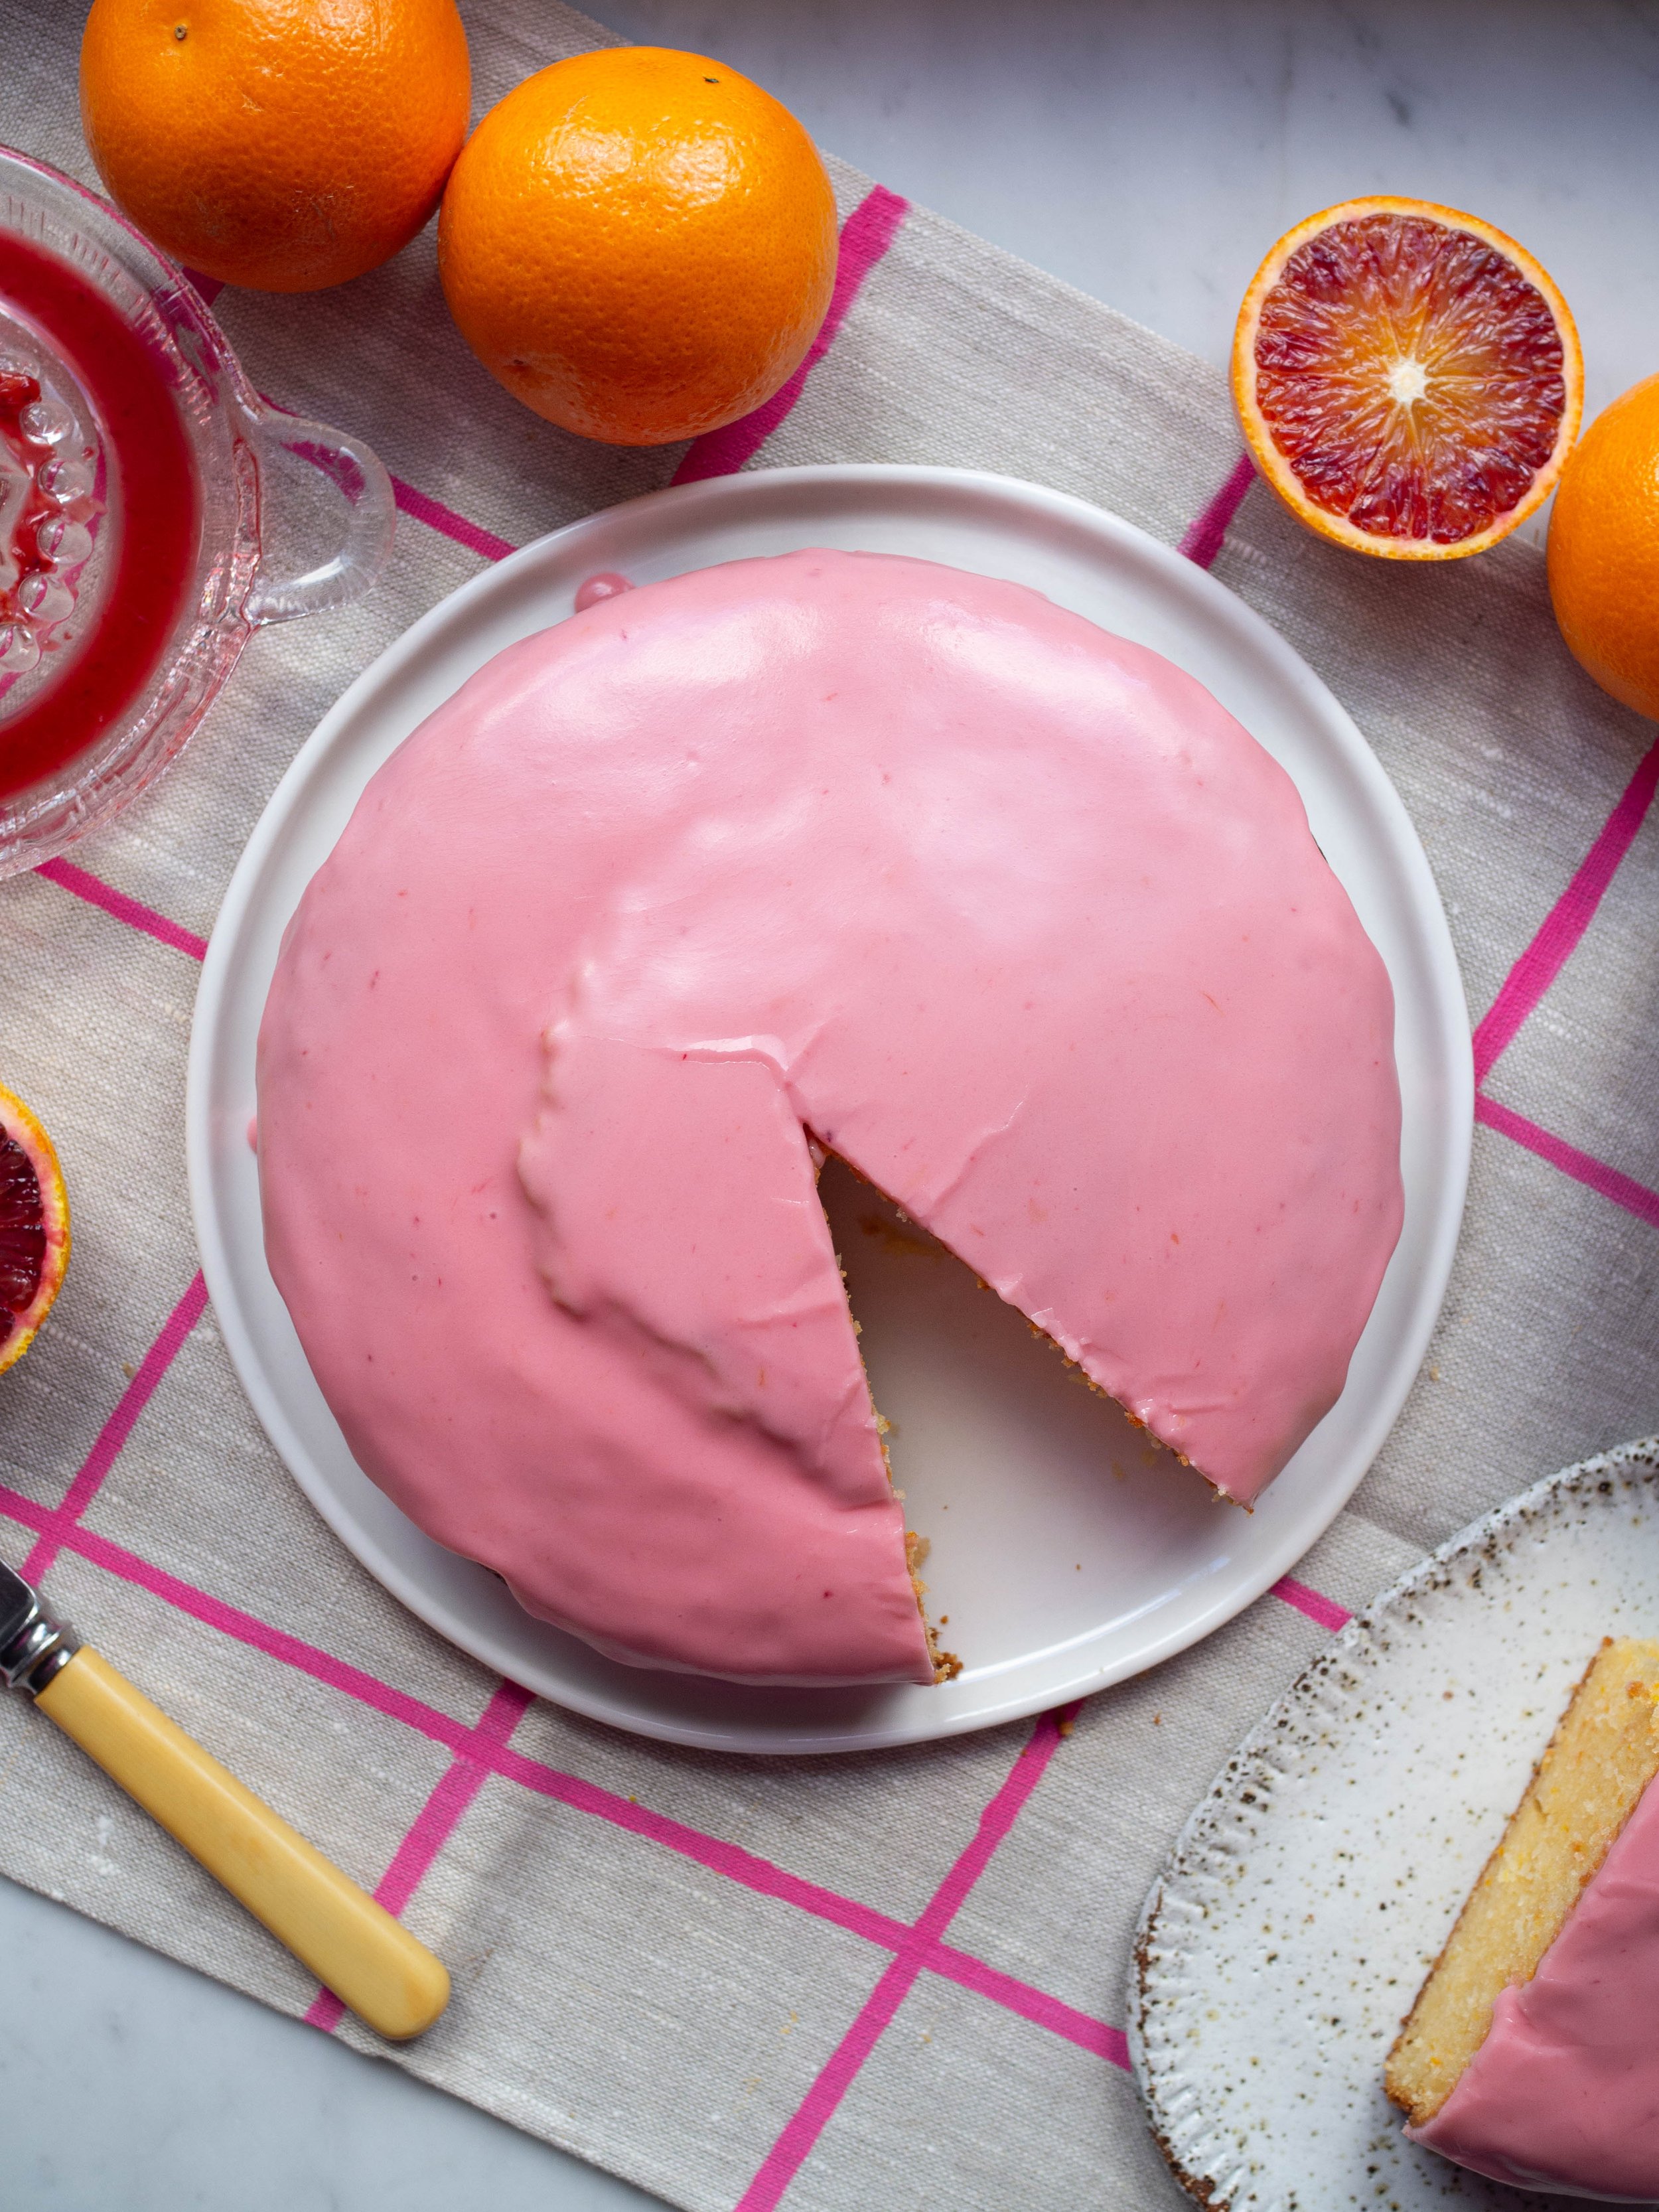
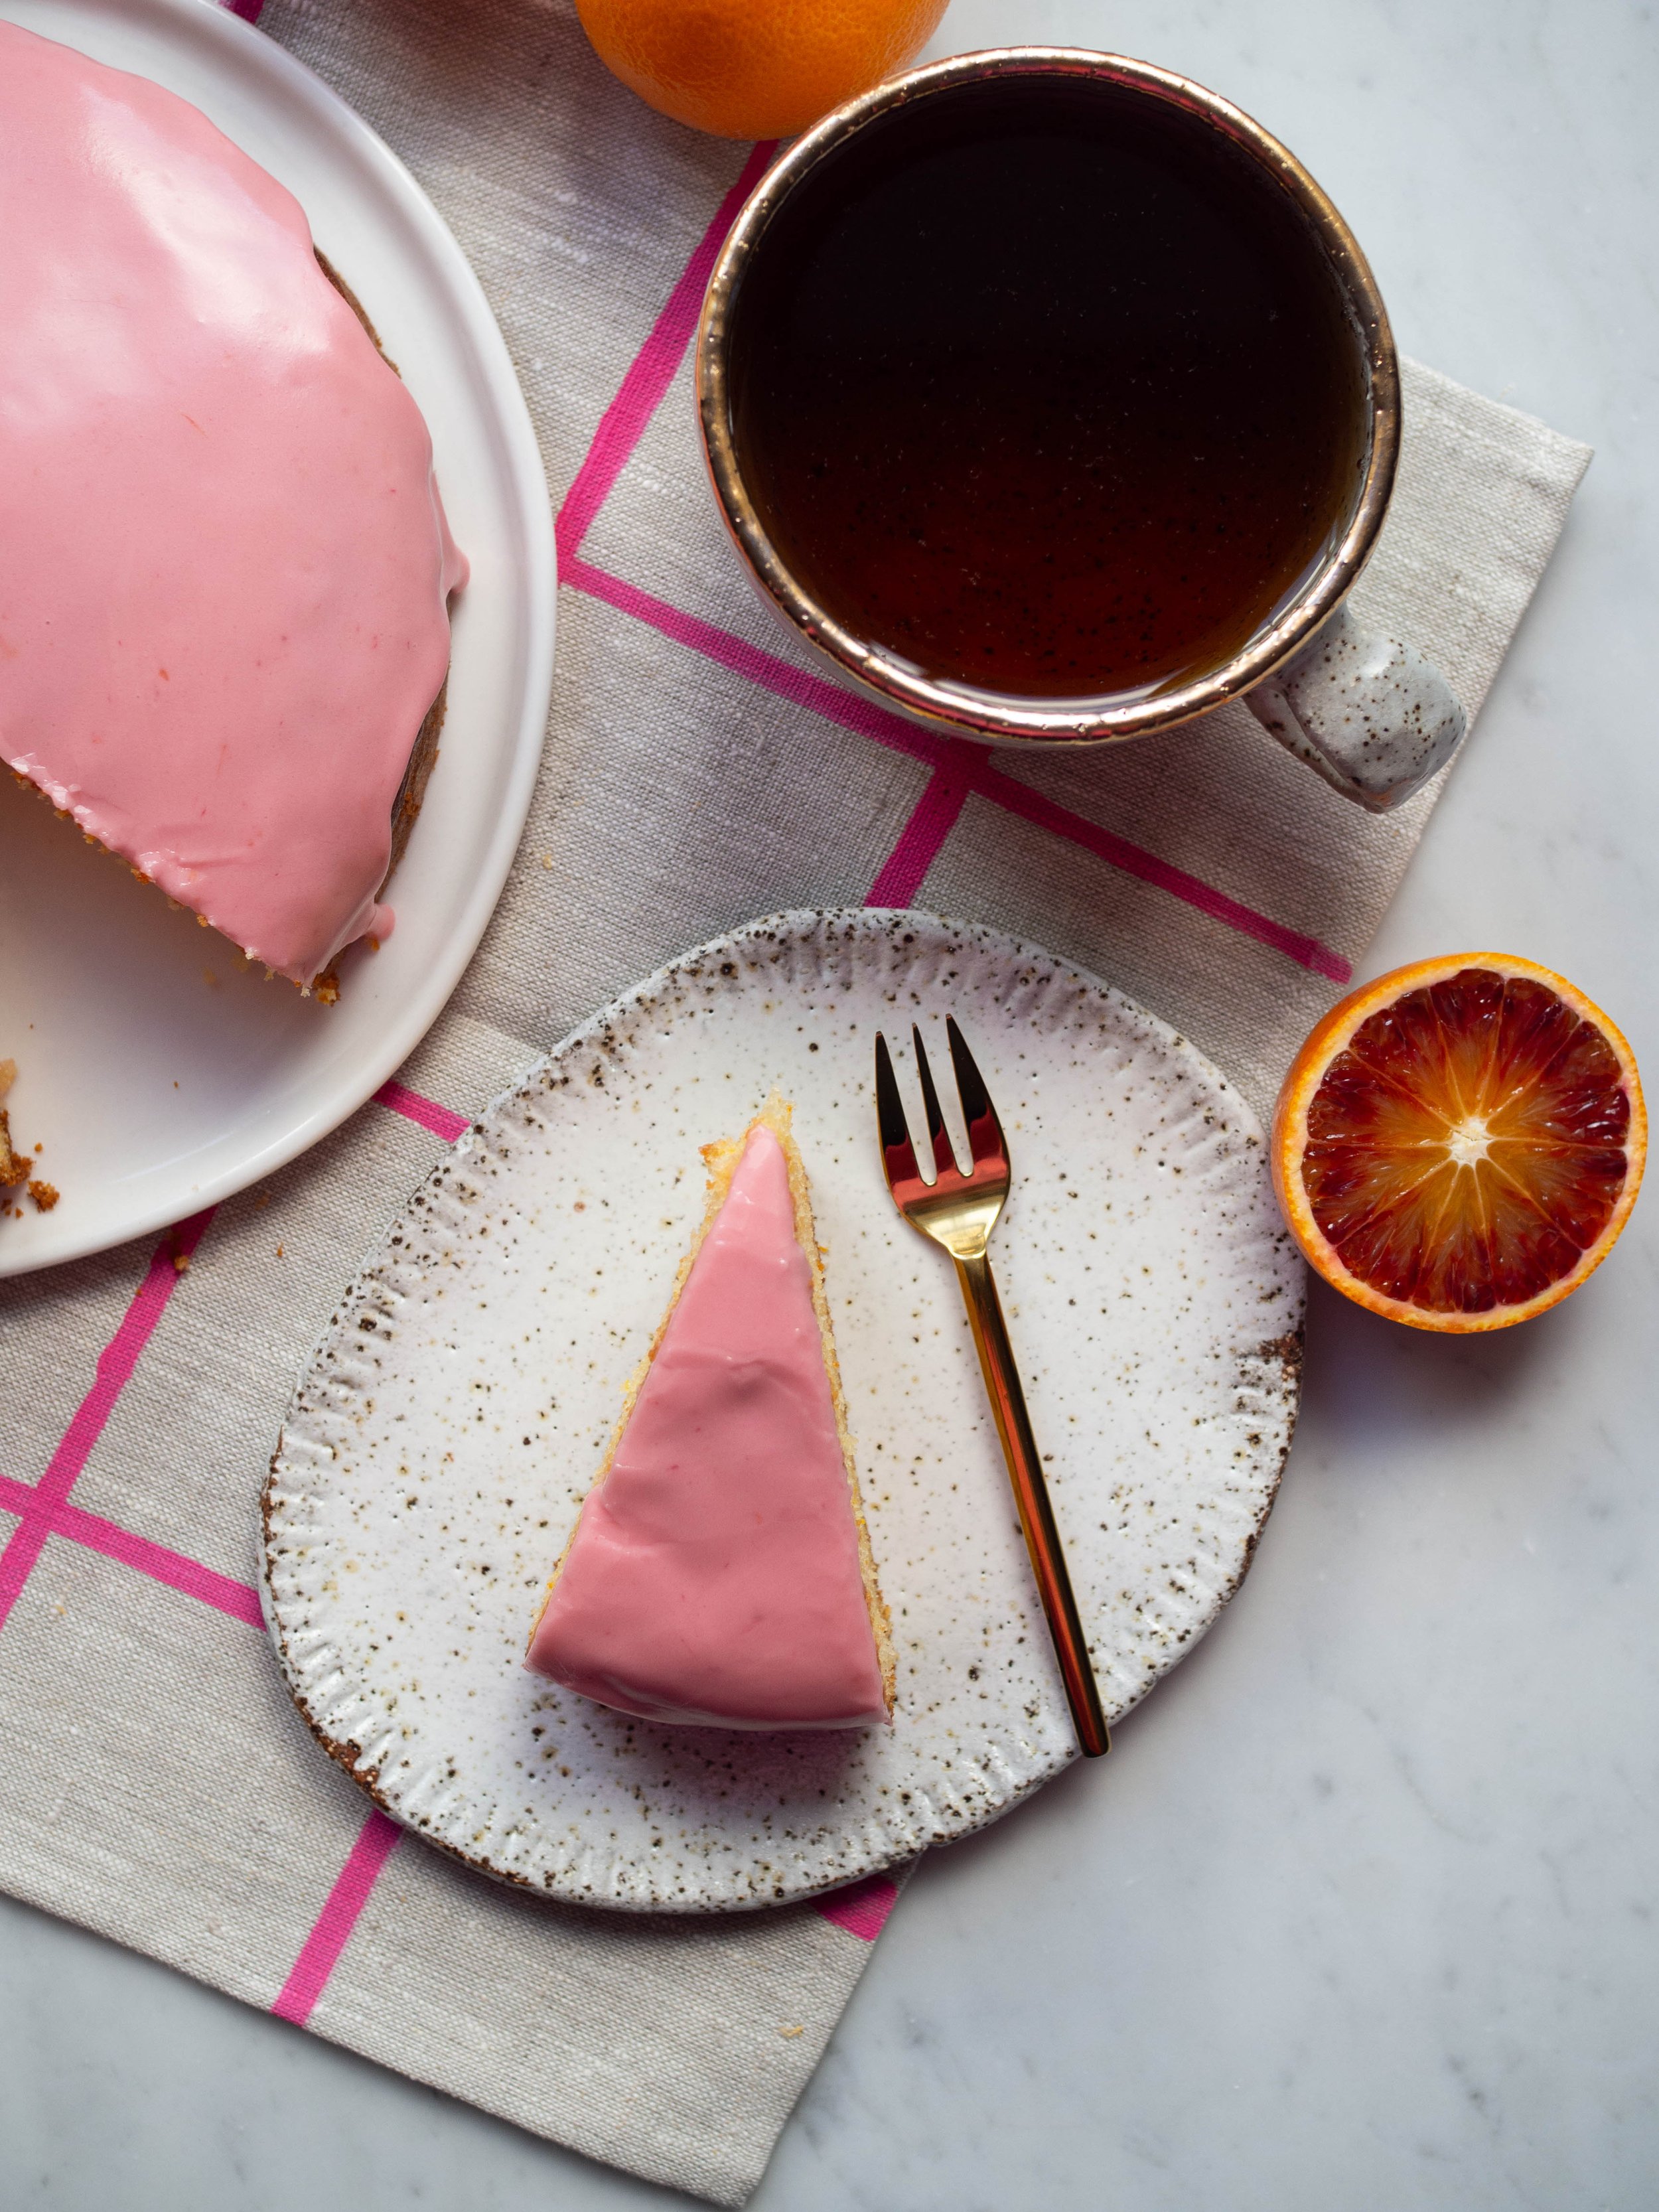
Blood Orange Yoghurt Cake

Kath September 7, 2023

I rarely make cakes that I cannot eat. Where’s the fun in baking something that I cannot enjoy? 

But sometimes ingredients need to be used up, and cakes need to be made. In this case we had blood oranges and yoghurt that needed using so this Blood Orange Yoghurt Cake was the perfect solution. 

I really like blood oranges, however they do not like me. Anything vaguely orange citrus wise triggers migraine attacks for me (as does many other things), so I have had to give them up. I still so enjoy the surprise of what the blood orange will look like inside when first cut, and the fact that the juice will make the best naturally pink icing. 

So if unlike me, you can enjoy blood oranges please make this very easy cake and enjoy it in my stead!

Blood Orange Yoghurt Cake

Ingredients: 

175g Greek Style Yoghurt

150g caster sugar

2 eggs

125ml canola/sunflower/vegetable oil

finely grated zest of one blood orange

175g self-raising flour

cooking spray

Ingredients for the Icing:

125g icing mixture*

1-2 tbsp fresh blood orange juice

Method:

Preheat oven to 160 degrees Celsius (fan), and grease and line a 20cm round springform cake tin. 

In a large bowl whisk together the yoghurt, sugar, eggs, oil and blood orange zest until combined. 

Add the self-raising flour and whisk until combined, and there are no lumps. 

Pour into the prepared cake tin, and bake for about 45 minutes. The cake will be golden in colour when its ready, and a skewer will come out clean. If the cake looks like its peaking too much (this will depend on your oven), you can turn the temperature down by 5-10 degrees Celsius. 

Allow the cake to cool in its tin for a few minutes, before removing from the in and leaving to cool completely on a wire rack.

Once the cake has cooled, make the icing by combining the icing mixture and 1 tbsp of the blood orange juice in a medium bowl. Add a little more juice, a teaspoon at a time until you have a smooth thick icing. Don’t make the icing too thin or it will run off the cake, if it looks too thin you can add more icing mixture a little at a time to rectify. 

Spread the icing over the cake, allowing it to fall over the sides a bit. 

Serves 8-10, will keep for a few days in an airtight container. 

*you can use pure icing sugar instead it will just need to be sifted first.

In Cakes & Slices Tags Blood Orange, cake, Mixer Free Recipes, Easy Baking
Comment
Baked Vanilla Doughnuts with Blood Orange Icing

Baked Vanilla Doughnuts with Blood Orange Icing

Baked Vanilla Doughnuts with Blood Orange Icing

Kath September 22, 2017

Since I really enjoy reading other people’s favourites lists, I thought I would start my own and post some here on the blog or in my newsletter now and then. I find I discover new blogs, recipes, books and podcasts through other bloggers lists, or through similar round ups on podcasts, so I hope you can find the same here! 

  • This new blog post from Beth Kirby of Local Milk - I love Beth’s honesty, and acceptance around the fluidity of her blog and it’s changing focuses over time, and her talk of slow living as “deciding what really matters to you and saying no to everything else”.

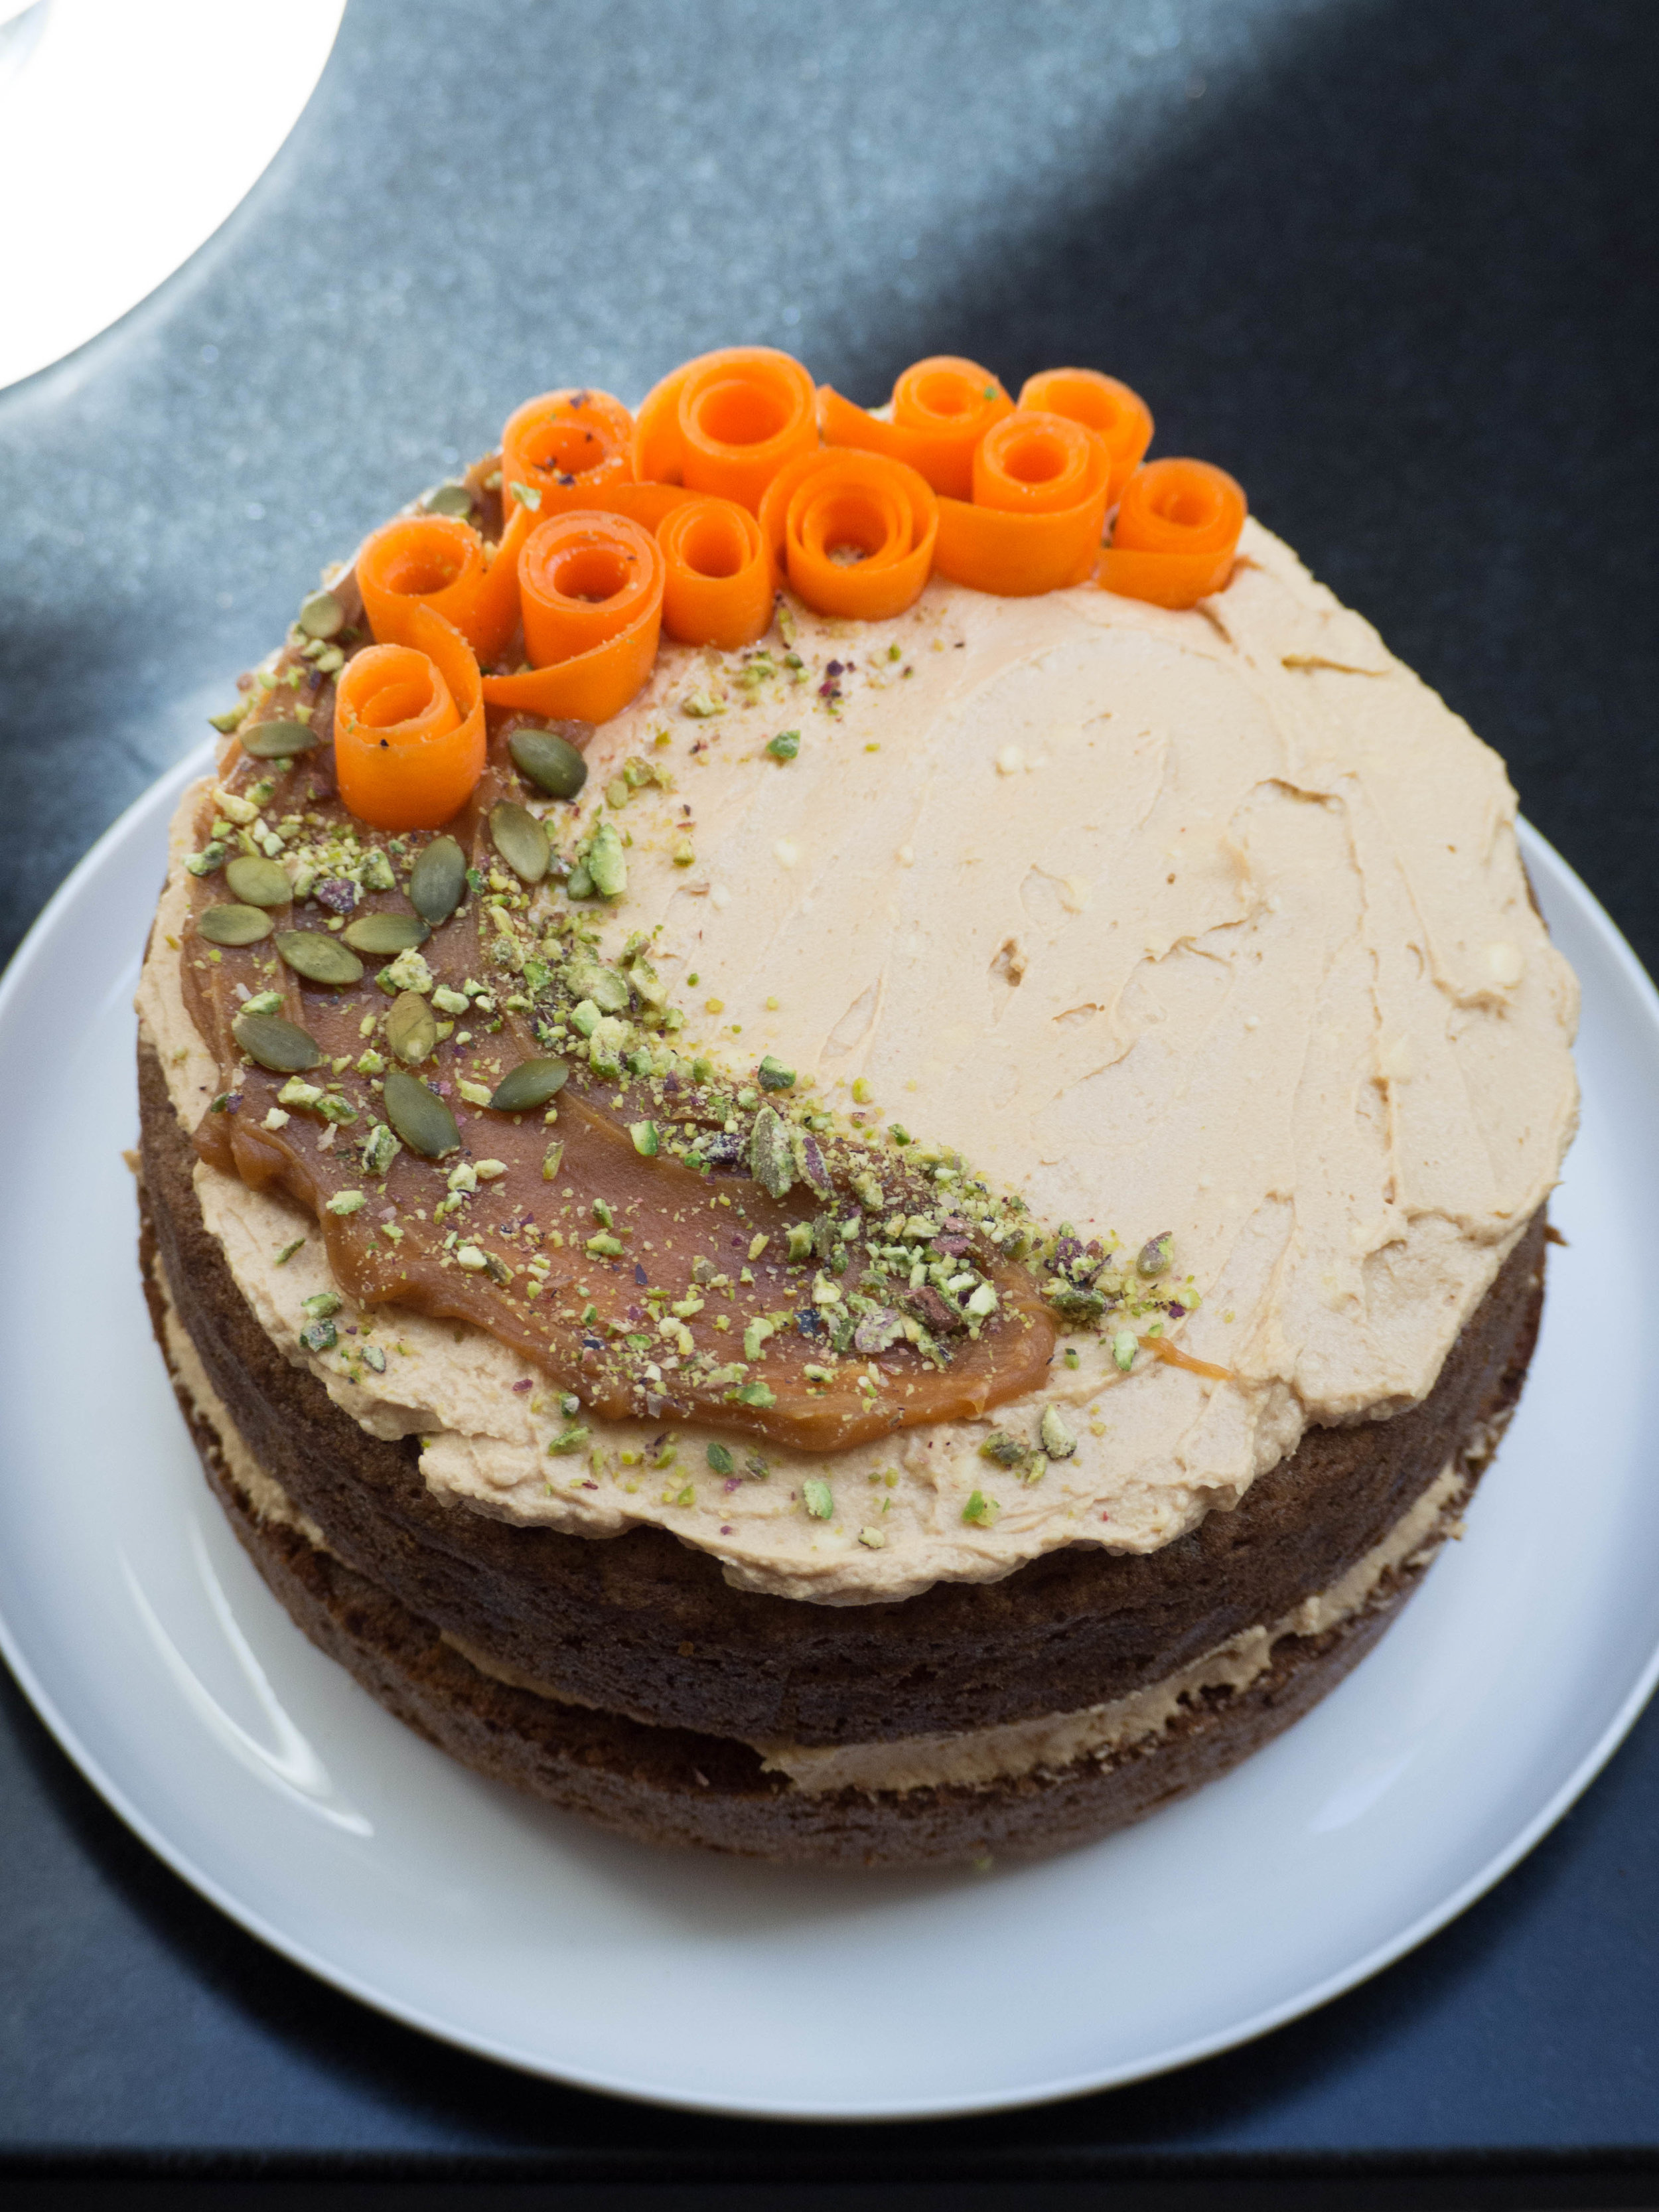
  • This Carrot Cake from My Name is Yeh - I made this (sans tahini) for my Dad’s birthday last month. It is now my favourite carrot cake, as the combination of the hawaij spices, carrot and caramel were just perfect!

  • A Bookish Baker’s blog post on why she is no longer niching her blog - In all the noise around monetising blogs, being an expert on one thing and there only being one path to follow for all this to be successful, sentiment such as that expressed in this post are so welcome and necessary.

  • Courage & Spice Podcast: The Podcast for Humans with Self-Doubt - This is a fairly new podcast from Sas Petherick, who has done extensive research on self-doubt. I am loving hearing Sas’ advice and interviews so far, they often feel like they are great personal pep talks letting me know that self doubt isn’t just something I experience, and there are things I can do to alleviate these feelings and start to boost my confidence.

  • ‘Not Just Lucky’ by Jamila Rizvi - I can’t stop recommending this book (sorry to those who have already heard my insistent arguments on why they should read it!). If you are female you will probably be able to relate to this book. Jamila focuses on women and the work environment, and I can honestly say I related to so much more than I ever thought I would. There were so many moments where I thought, ‘Oh other women feel this way too?’, ‘I’m not the only one?’, and ‘OMG it’s like Jamila knows me’. It’s good to know you aren’t alone in how you feel, particularly in the work environment, and Jamila gives some great advice on how to deal with the gender inequalities that plague our workplaces.

View fullsize Carrot Cake with Hawaij and Caramel Icing
View fullsize 'Not Just Lucky' by Jamila Rizvi

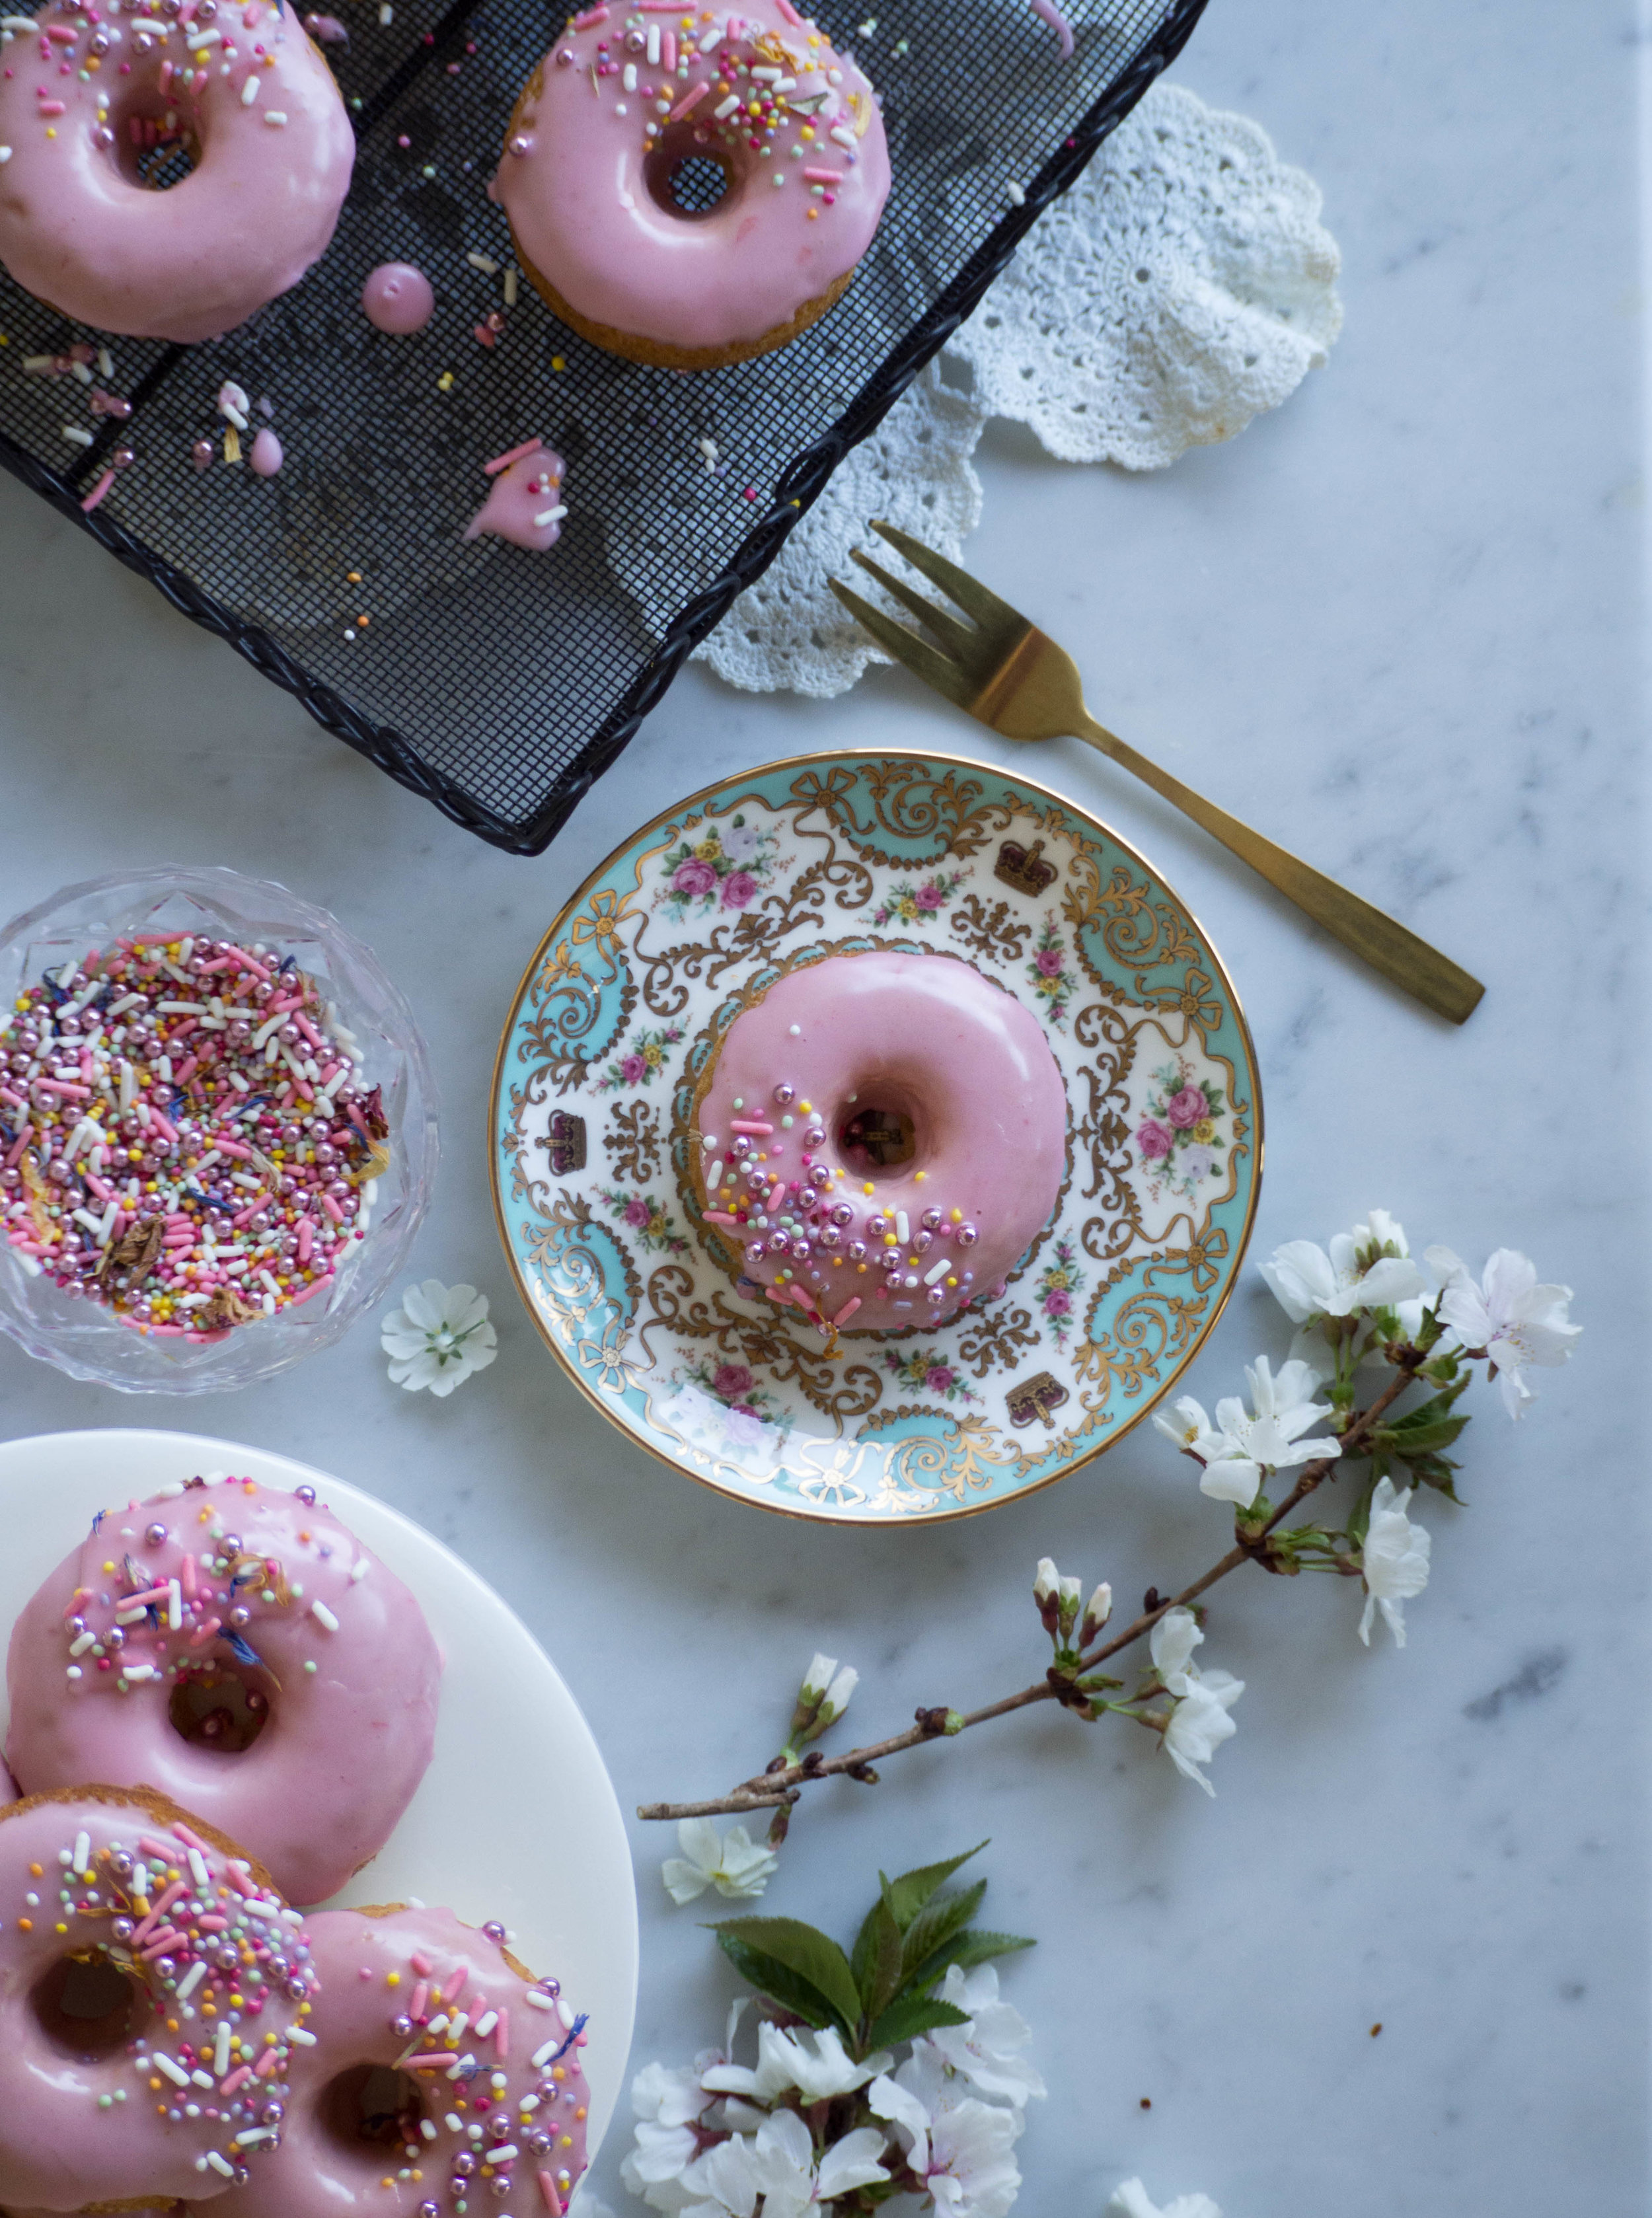
But now on to the doughnuts (or donuts? 🤔I never know which). They are extremely simple to make - they take about 10 minutes to cook, which makes them not only slightly healthier than the traditional fried doughnuts but also much quicker to make. To intensify the vanilla flavour a little, you could use some vanilla sugar instead of the white sugar. I used blood orange juice in the icing, because I love the colour, and I still have lots of blood orange juice frozen from last season!

Baked Vanilla Doughnuts

Baked Vanilla Doughnuts

Baked Vanilla Doughnuts with Blood Orange Icing

Baked Vanilla Doughnuts with Blood Orange Icing

Baked Vanilla Doughnuts with Blood Orange Icing

Baked Vanilla Doughnuts with Blood Orange Icing

Baked Vanilla Doughnuts with Blood Orange Icing

Baked Vanilla Doughnuts with Blood Orange Icing

Baked Vanilla Doughnuts with Blood Orange Icing 

Ingredients: 

135g plain flour

1 tsp baking powder

1/4 tsp bicarb soda

65g white sugar

60ml milk 

60g Greek yoghurt

1 egg

40g margarine/unsalted butter, melted

2 tsp vanilla bean paste 

canola oil spray


For the Icing: 

200-250g icing sugar 

2 tbsp blood orange juice, approx. 

selection of sprinkles, 100s & 1000s, dried edible flowers etc, to decorate 


Method: 

Preheat oven to 180 degrees Celsius, and spray a 12 hole doughnut pan with canola oil spray. 

In a medium bowl whisk together the flour, baking powder, bicarb soda and sugar. If your bicarb soda is a bit lumpy, sift to remove the lumps - there’s nothing worse than biting into a baked good to find a lump of baking soda in there! 

In a jug, whisk together the milk, yoghurt and the egg. Ensure the egg has been fully mixed into the other ingredients. Add the melted margarine and the vanilla bean paste and whisk until combined. Pour this into the flour mixture and mix until just combined - don’t over mix. Similar to muffins, these will toughen up if over mixed. 

Place a medium/large piping bag or zip-lock bag over a large glass to it is easy to fill. Spoon in the batter, then pipe into the donut pan, ensuring you only fill each about three quarters the way up - there is plenty of raising agent in the batter so they will rise and expand, and if each doughnut is overfilled the hole in the centre will disappear! 

Bake for about 10 minutes, or until the doughnuts are slightly golden and spring back to the touch. 

Allow the doughnuts to cool in the tin for a few minutes, then transfer to a cooling rack, using a small icing spatula to gently prise the out if necessary (don’t use a knife as you may scratch your tin in the process). 

Once the doughnuts have cooled, make the icing by mixing the 200g of the icing sugar and 1 tbsp of the blood orange juice together. If the icing is too runny add more icing sugar, if it is too dry add a little more blood orange juice. You don’t want to the icing to be very runny or it will all run off the donuts, and take any decoration with it! 

To ice the doughnuts, dip the top side of each (the side that was facing down in doughnut pan), into the icing and twist to ensure it is evenly coated. Remove and allow any excess icing to drip off. Leave each doughnut to sit with the icing on for a minute or two, then decorate with the sprinkles etc. 

Baked Vanilla Doughnuts with Blood Orange Icing

Baked Vanilla Doughnuts with Blood Orange Icing

Baked Vanilla Doughnuts with Blood Orange Icing

Baked Vanilla Doughnuts with Blood Orange Icing

Reference: ‘Sally’s Baking Addiction’  by Sally McKenney (Race Point Publishing, 2014), p.27. 

Baked Vanilla Doughnuts with Blood Orange Icing

Baked Vanilla Doughnuts with Blood Orange Icing

Baked Vanilla Doughnuts with Blood Orange Icing

Baked Vanilla Doughnuts with Blood Orange Icing

In Cakes & Slices Tags Blood Orange, Vanilla, vanilla sugar, doughnuts, donuts, Local Milk Blog, My Name is Yeh, Courage & Spice Podcast, A Bookish Baker, Jamila Rizvi, Favourites List, Sally's Baking Addiction
2 Comments
Blood Orange Cupcakes

Blood Orange Cupcakes

Blood Orange Cupcakes

Kath October 12, 2016

Before blood orange season is officially over, I really wanted to share this simple cupcake recipe with you. The basic recipe is my staple cupcake/cake recipe I bake over and over again, and thus adapt over and over again. 

I have had a bit of a ‘thing’ for blood oranges this season. If you follow me on Instagram, you might have noticed! And luckily, this season seems to have been particularly plentiful. To me they are much nicer than a regular orange and I always feel some level of excitement when cutting one open - how red/purple will it be?! I have bought many whilst perusing the local green grocers on my lunch break, and carried them home on the train with either grand plans to bake something that weekend or just to juice them and freeze it for something later on. 

This recipe can suit either plan, use whilst the oranges are fresh, or defrost the juice later on and make when blood oranges have long gone from the markets. If making with fresh oranges, use the zest in the cake and the juice for the icing as the below recipe suggests. If you only have the juice, use that for the icing and add the zest of a regular orange to the cake batter, or substitute for one teaspoon of vanilla extract or paste. The recipe could of course be used for a whole cake rather than cupcakes, I particularly liked making it as a simple ring cake (picture below) - just remember the cooking time will be a little longer. 

Another option - Blood Orange Ring Cake 

Another option - Blood Orange Ring Cake 

Blood Orange Cupcakes

Ingredients: 

125g canola based margarine (or other flavourless margarine)

165g golden caster sugar (or caster sugar)

finely grated zest of one small/medium blood orange

2 eggs 

250g self-raising flour

105ml milk (preferably skimmed)


Ingredients for the Icing: 

1 1/2 cups icing sugar, plus extra

juice of 1/2 - 1 blood orange 

edible flowers for decoration, optional 


Method: 

Pre-heat oven to 160 degrees Celsius, and line a 12 hole cupcake tray with cupcake cases. 

In the bowl of an electric mixer, beat the margarine, sugar and blood orange zest until light and fluffy. 

Beat in the eggs one at a time, then add half the flour and half the milk and mix. Add the remaining flour and milk and mix on medium speed until combined.

Evenly divide the mixture amongst the cupcake cases, the mixture should fill each case so they are about 3/4 full. Bake for 20-25 minutes, or until the cakes spring back when touched lightly and a skewer comes out clean. The cakes will be lightly golden when they are done. 

Remove the cupcakes from the tray and cool on a wire rack. 

Once the cupcakes have cooled completely, sift the icing sugar into a bowl. Add one tablespoon of blood orange juice, and stir. Continue to add small amounts of the juice and stir well, until the icing is a nice smooth consistency. If you find the icing becomes too runny, add little bits of sifted icing sugar until you have created the right consistency (if the icing is too runny it will just run off the cupcakes and make a mess, it needs to have a slight spreadable consistency so you end up with most of the icing on top of the cakes, rather than all down the sides).  Spread icing over each cupcake, don’t worry if it runs downs the sides a little. Top with edible flowers immediately, if using. Allow the icing to set a little before serving. 

Cakes that have been decorated with edible flowers are best eaten the day of making. If there are any leftovers store in the fridge, as the decoration will not store well at room temperature. Otherwise, storing in an airtight container at room temperature for a few days will be fine.

In Cakes & Slices Tags Blood Orange, Cupcakes, Edible Flowers
Comment
Blood Orange Chiffon Cake

Blood Orange Chiffon Cake

Blood Orange Chiffon Cake & A New Kitchen

Kath September 11, 2016

As soon as blood orange season arrived, I had recipe ideas swimming around in my head. I buy them about once a week, from the shops near where I work, only three or so at a time so they are easy to carry home after work. Then, come the weekend, I use some for baking things like this cake, then I juice the rest and freeze the it to use later on. My freezer is now quite full, along with the copious amounts of varying berries, homegrown mandarins and so much bread, the zip lock bags and small containers of blood orange juice are artfully placed in small gaps and spaces ready to be used once the weather gets warmer and ice blocks become necessary. 

The base recipe of this chiffon cake has been adapted from my favourite chiffon cake (of all time), the Custard Chiffon Cake which can be found in the Monday Morning Cooking Club’s first book. This chiffon cake was the first I ever tasted or made. Now it still remains my favourite, however adaptations such as this Blood Orange Chiffon are amazing and a great way to mix things up a bit and show off some lovely fresh produce. Not to mention I always love a cake with pink icing! Any excuse for pink icing!!

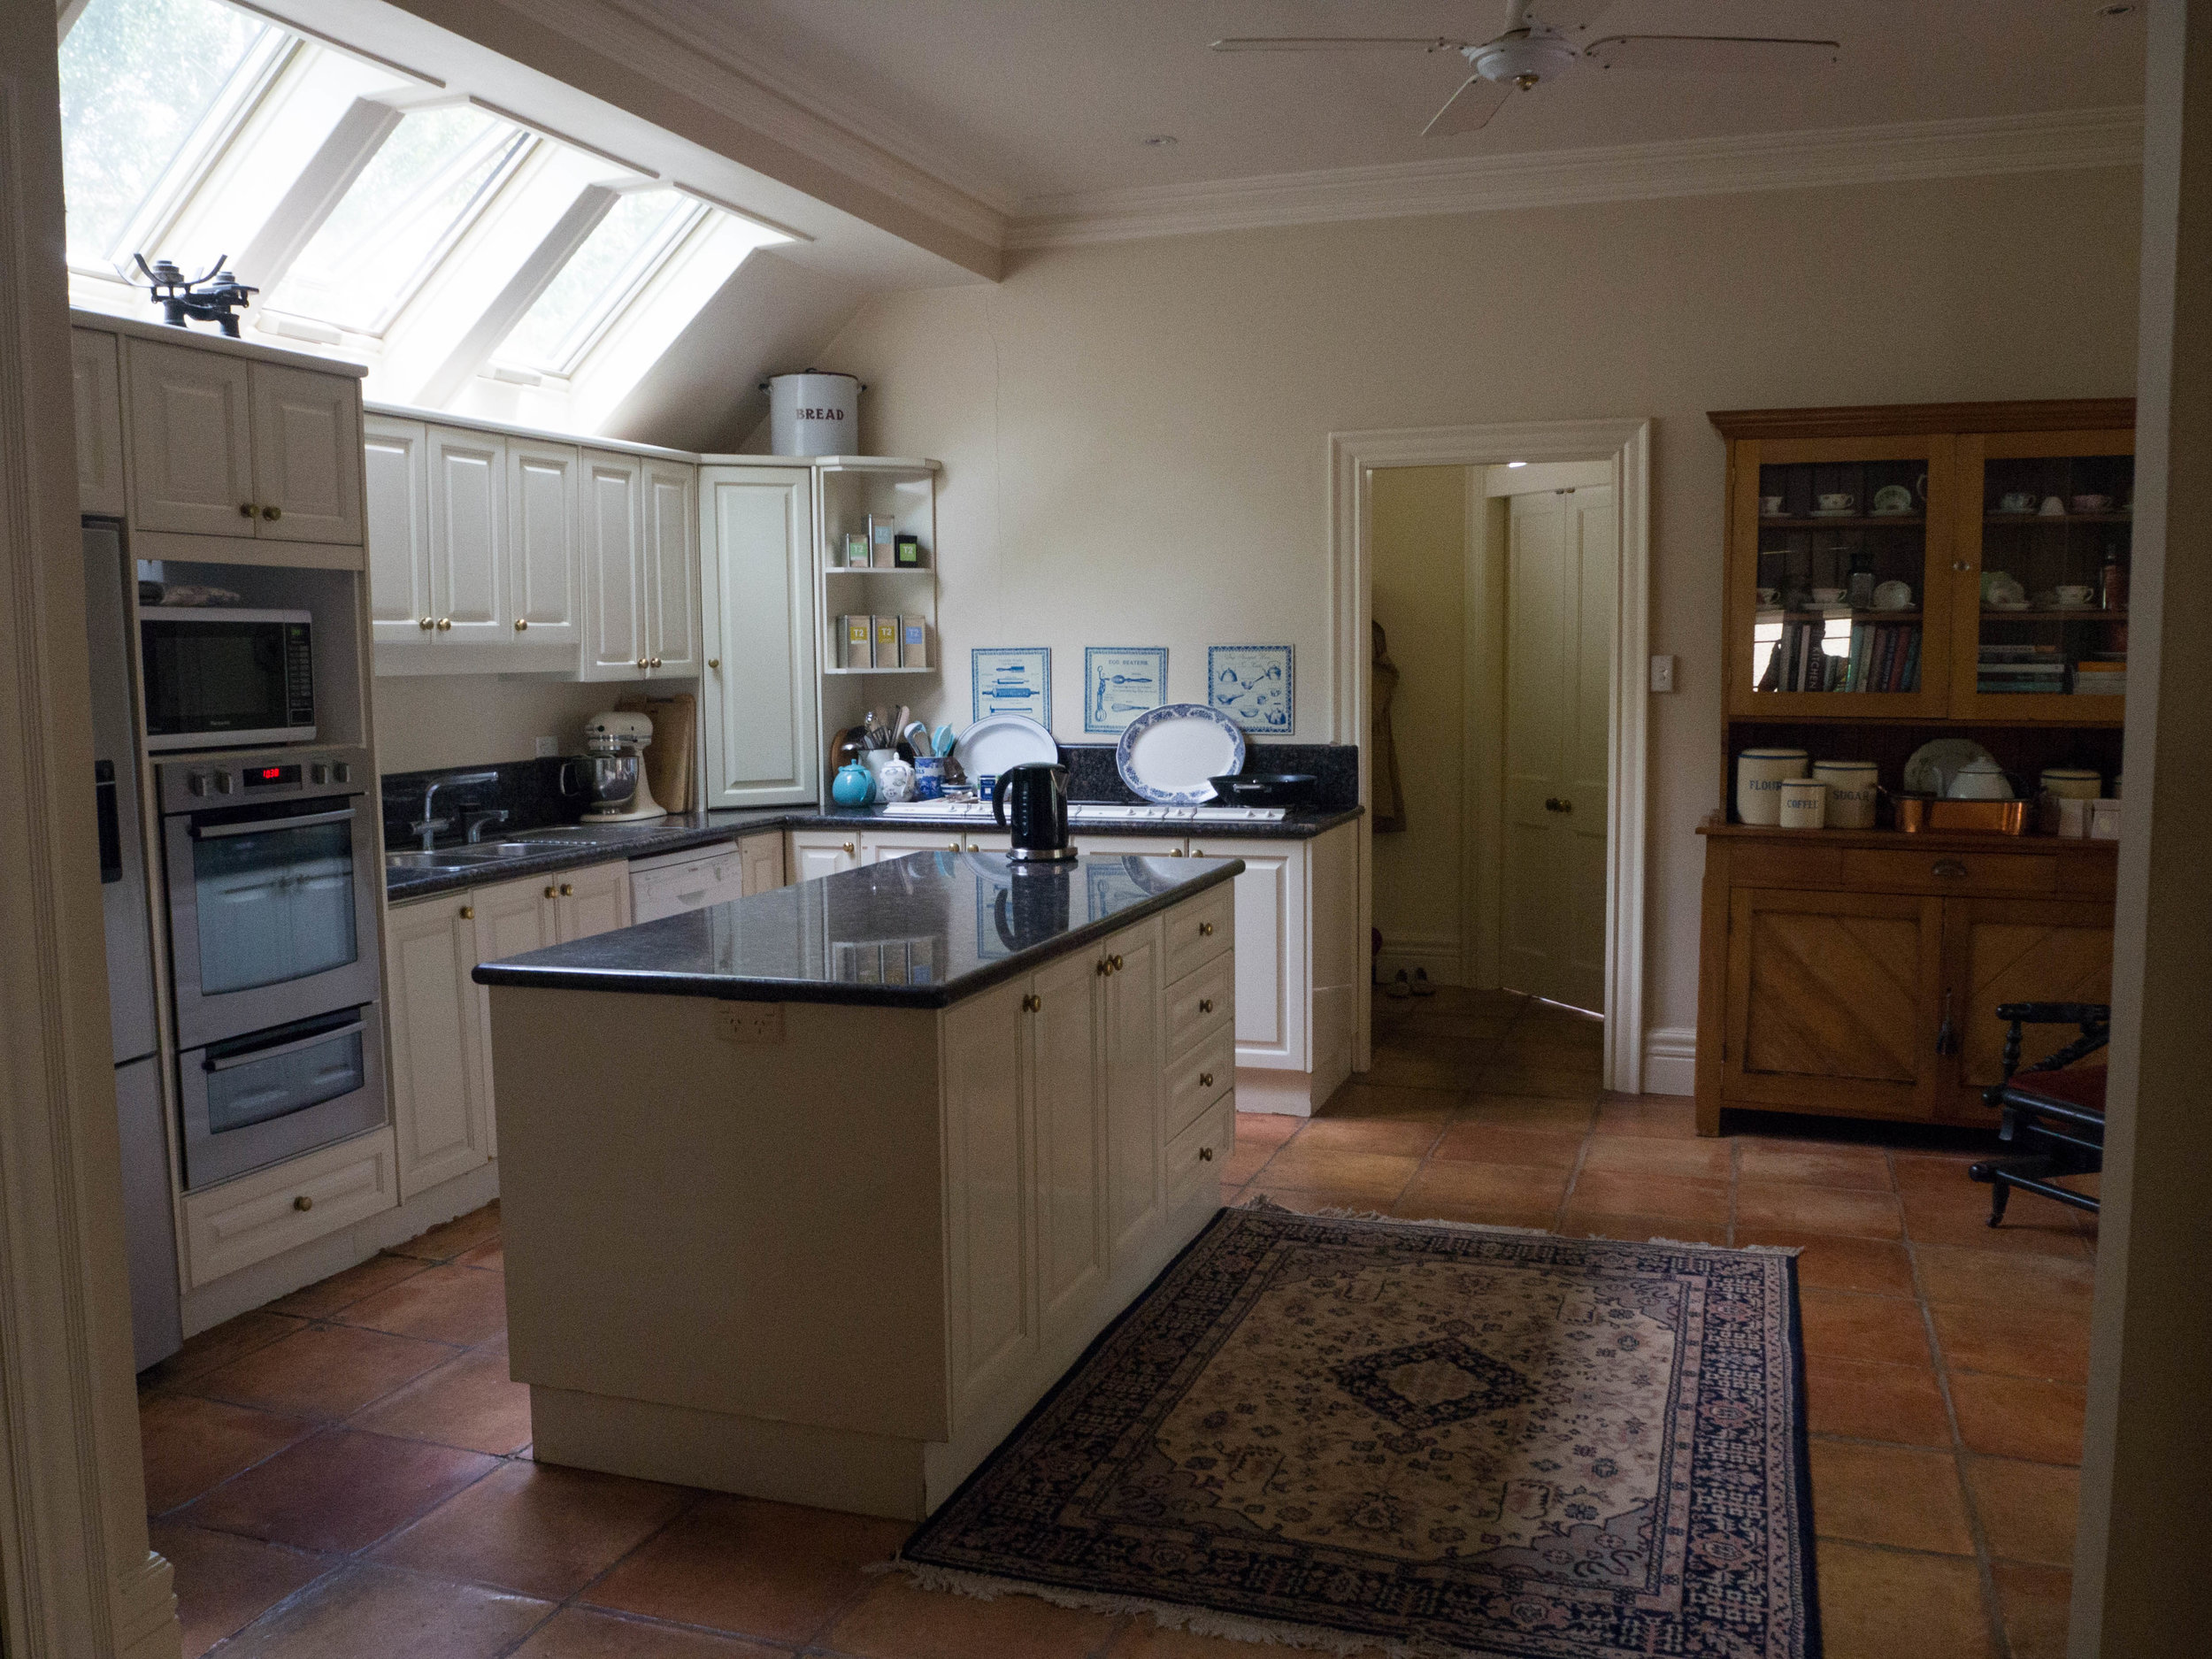
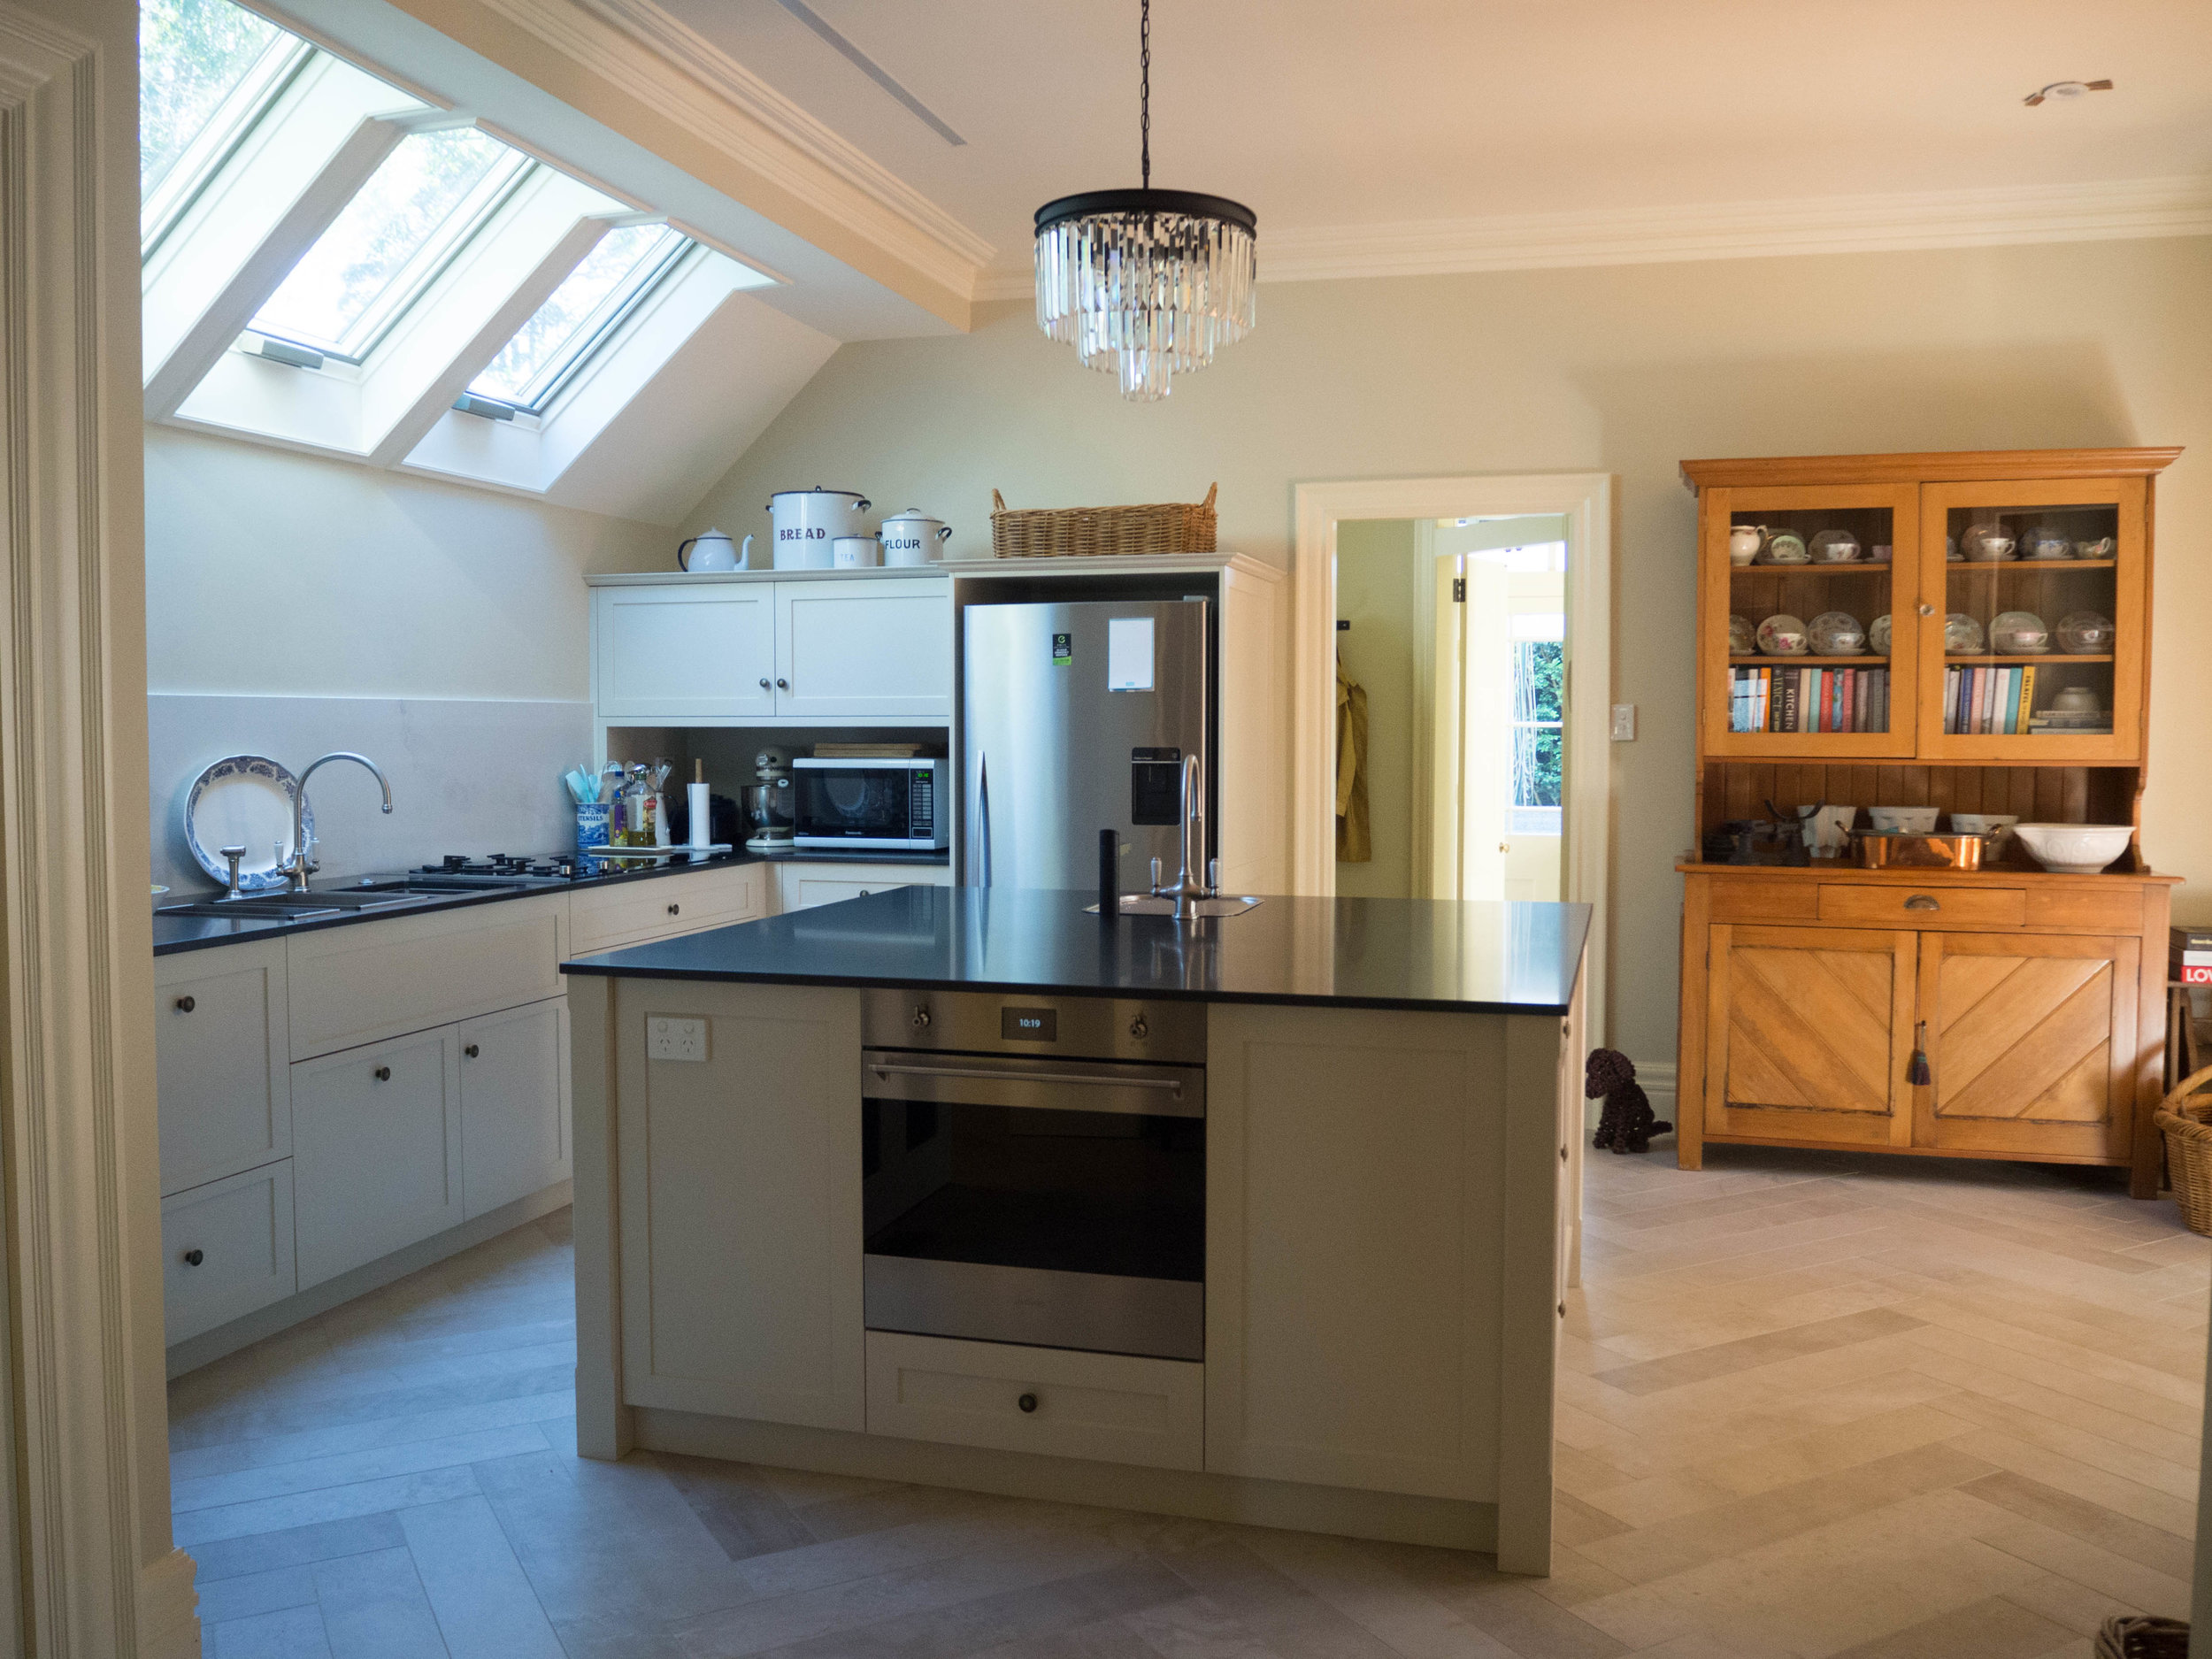
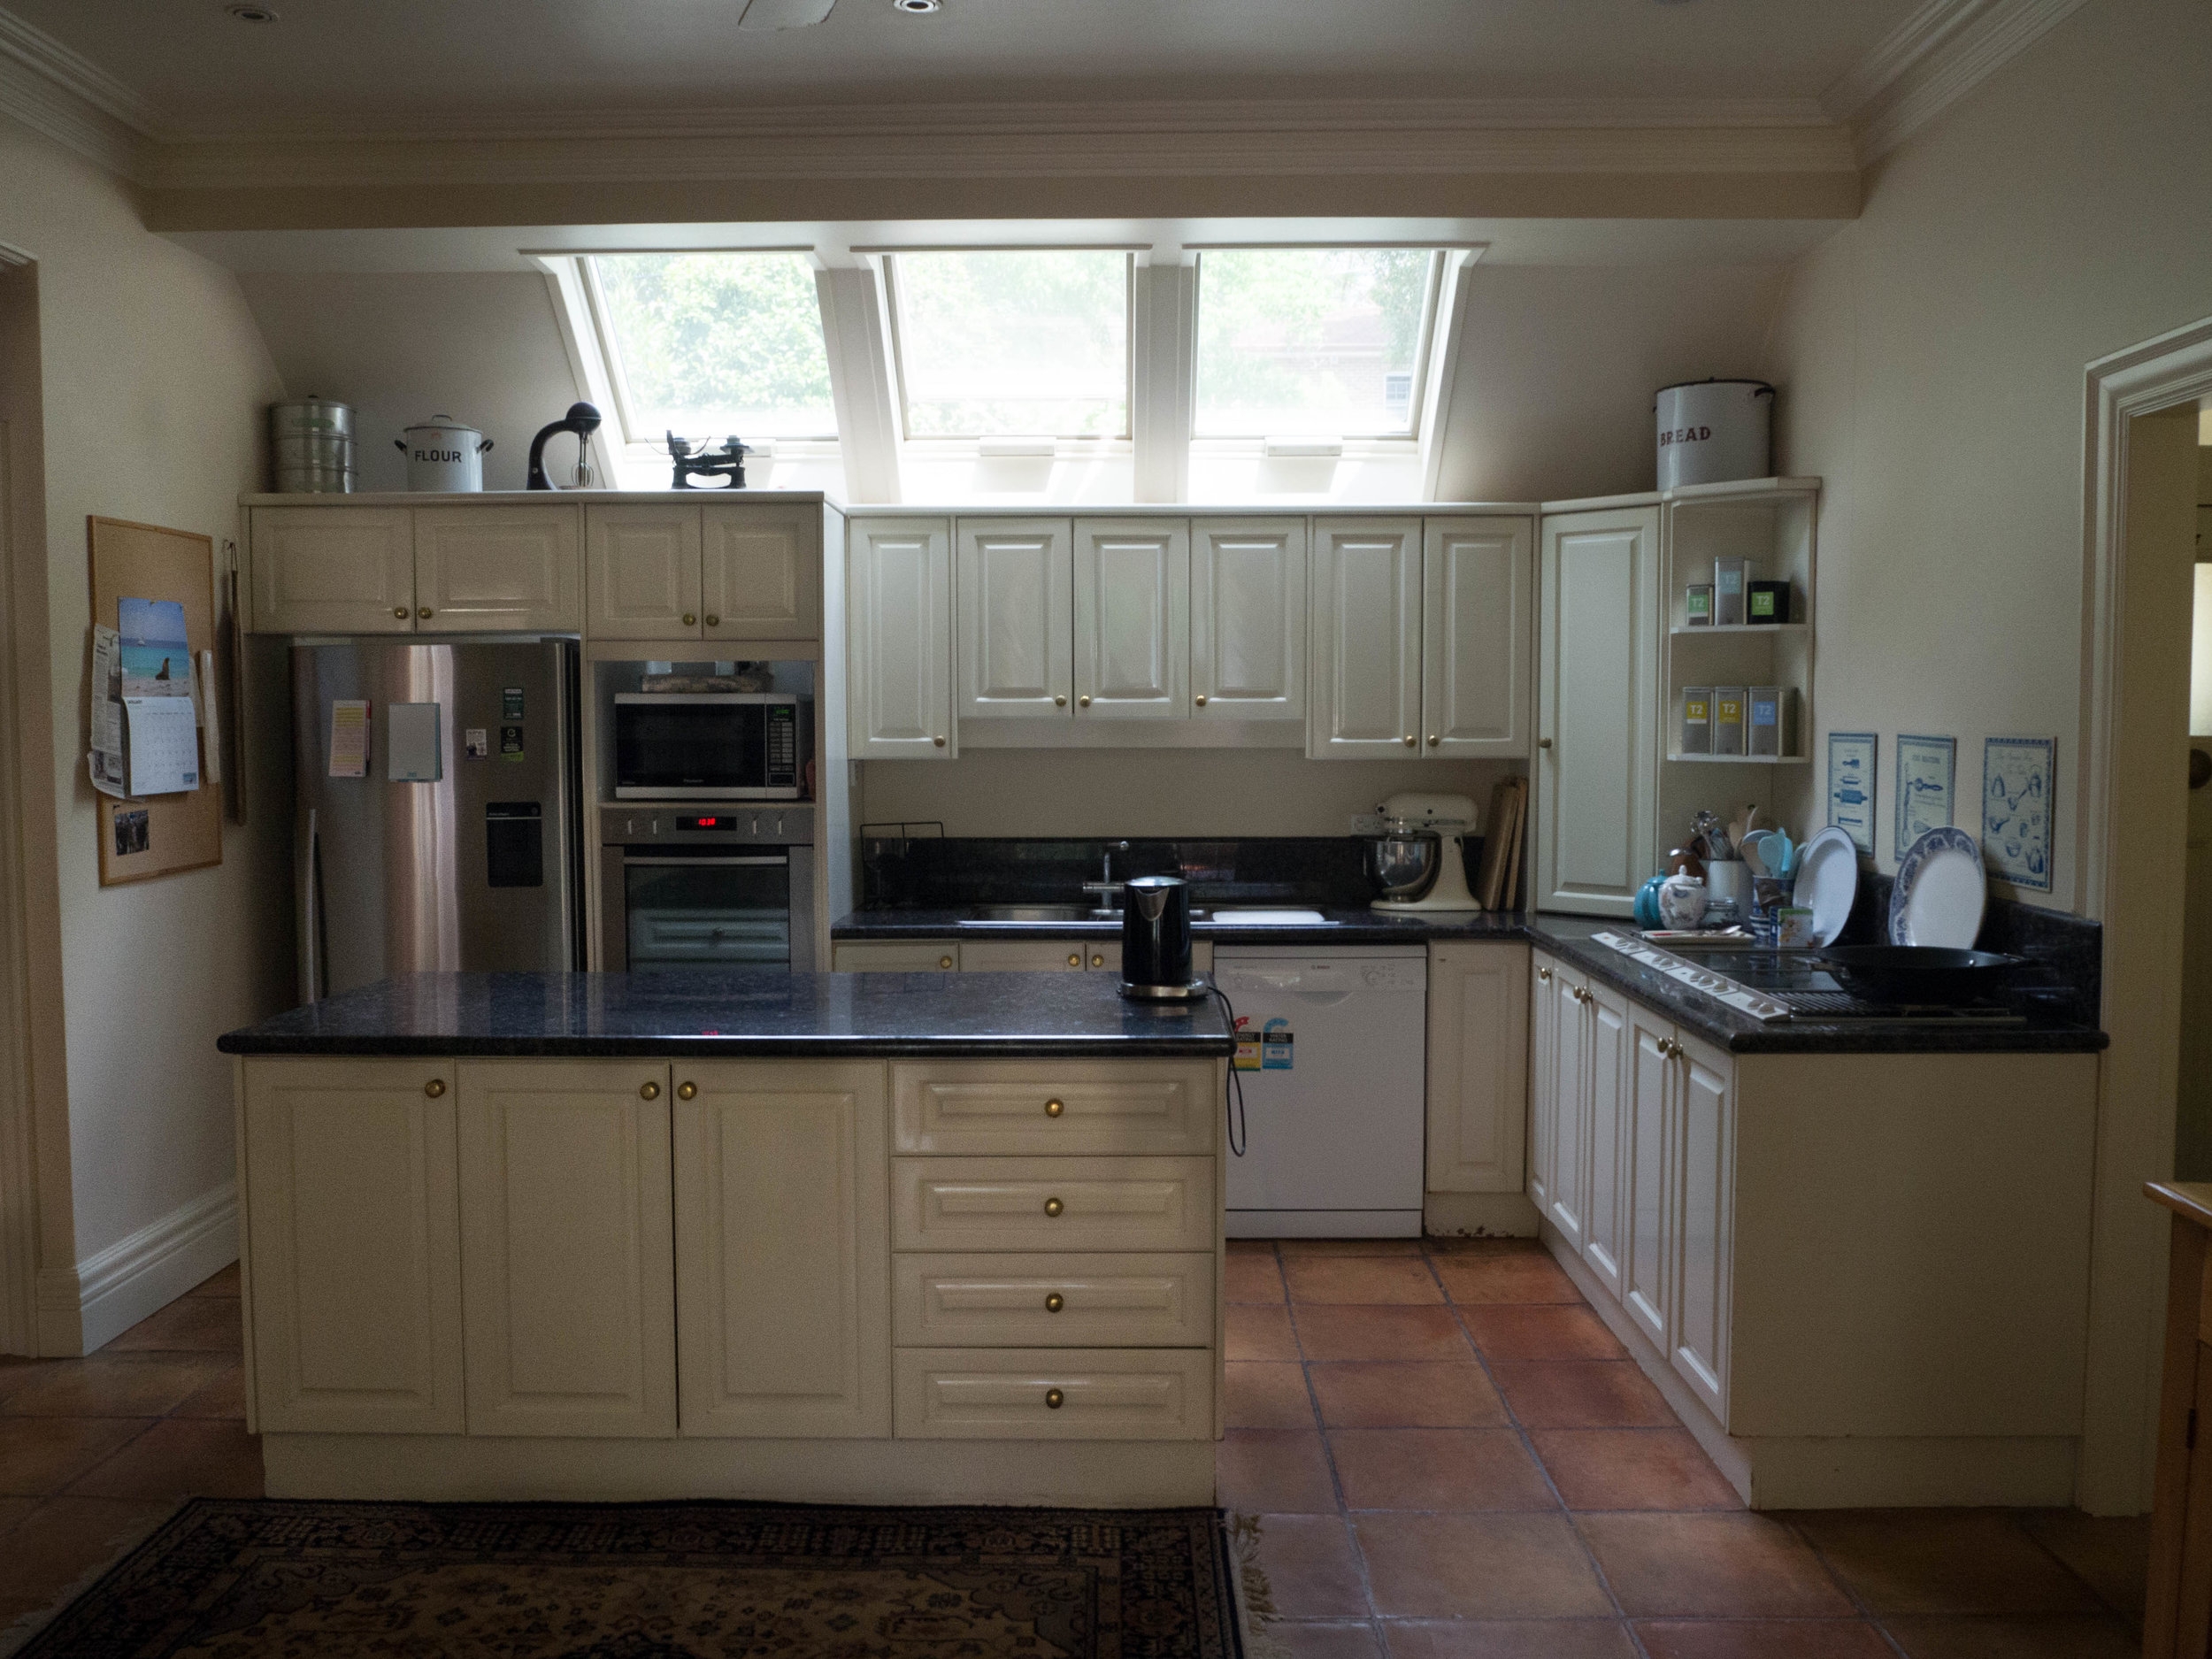
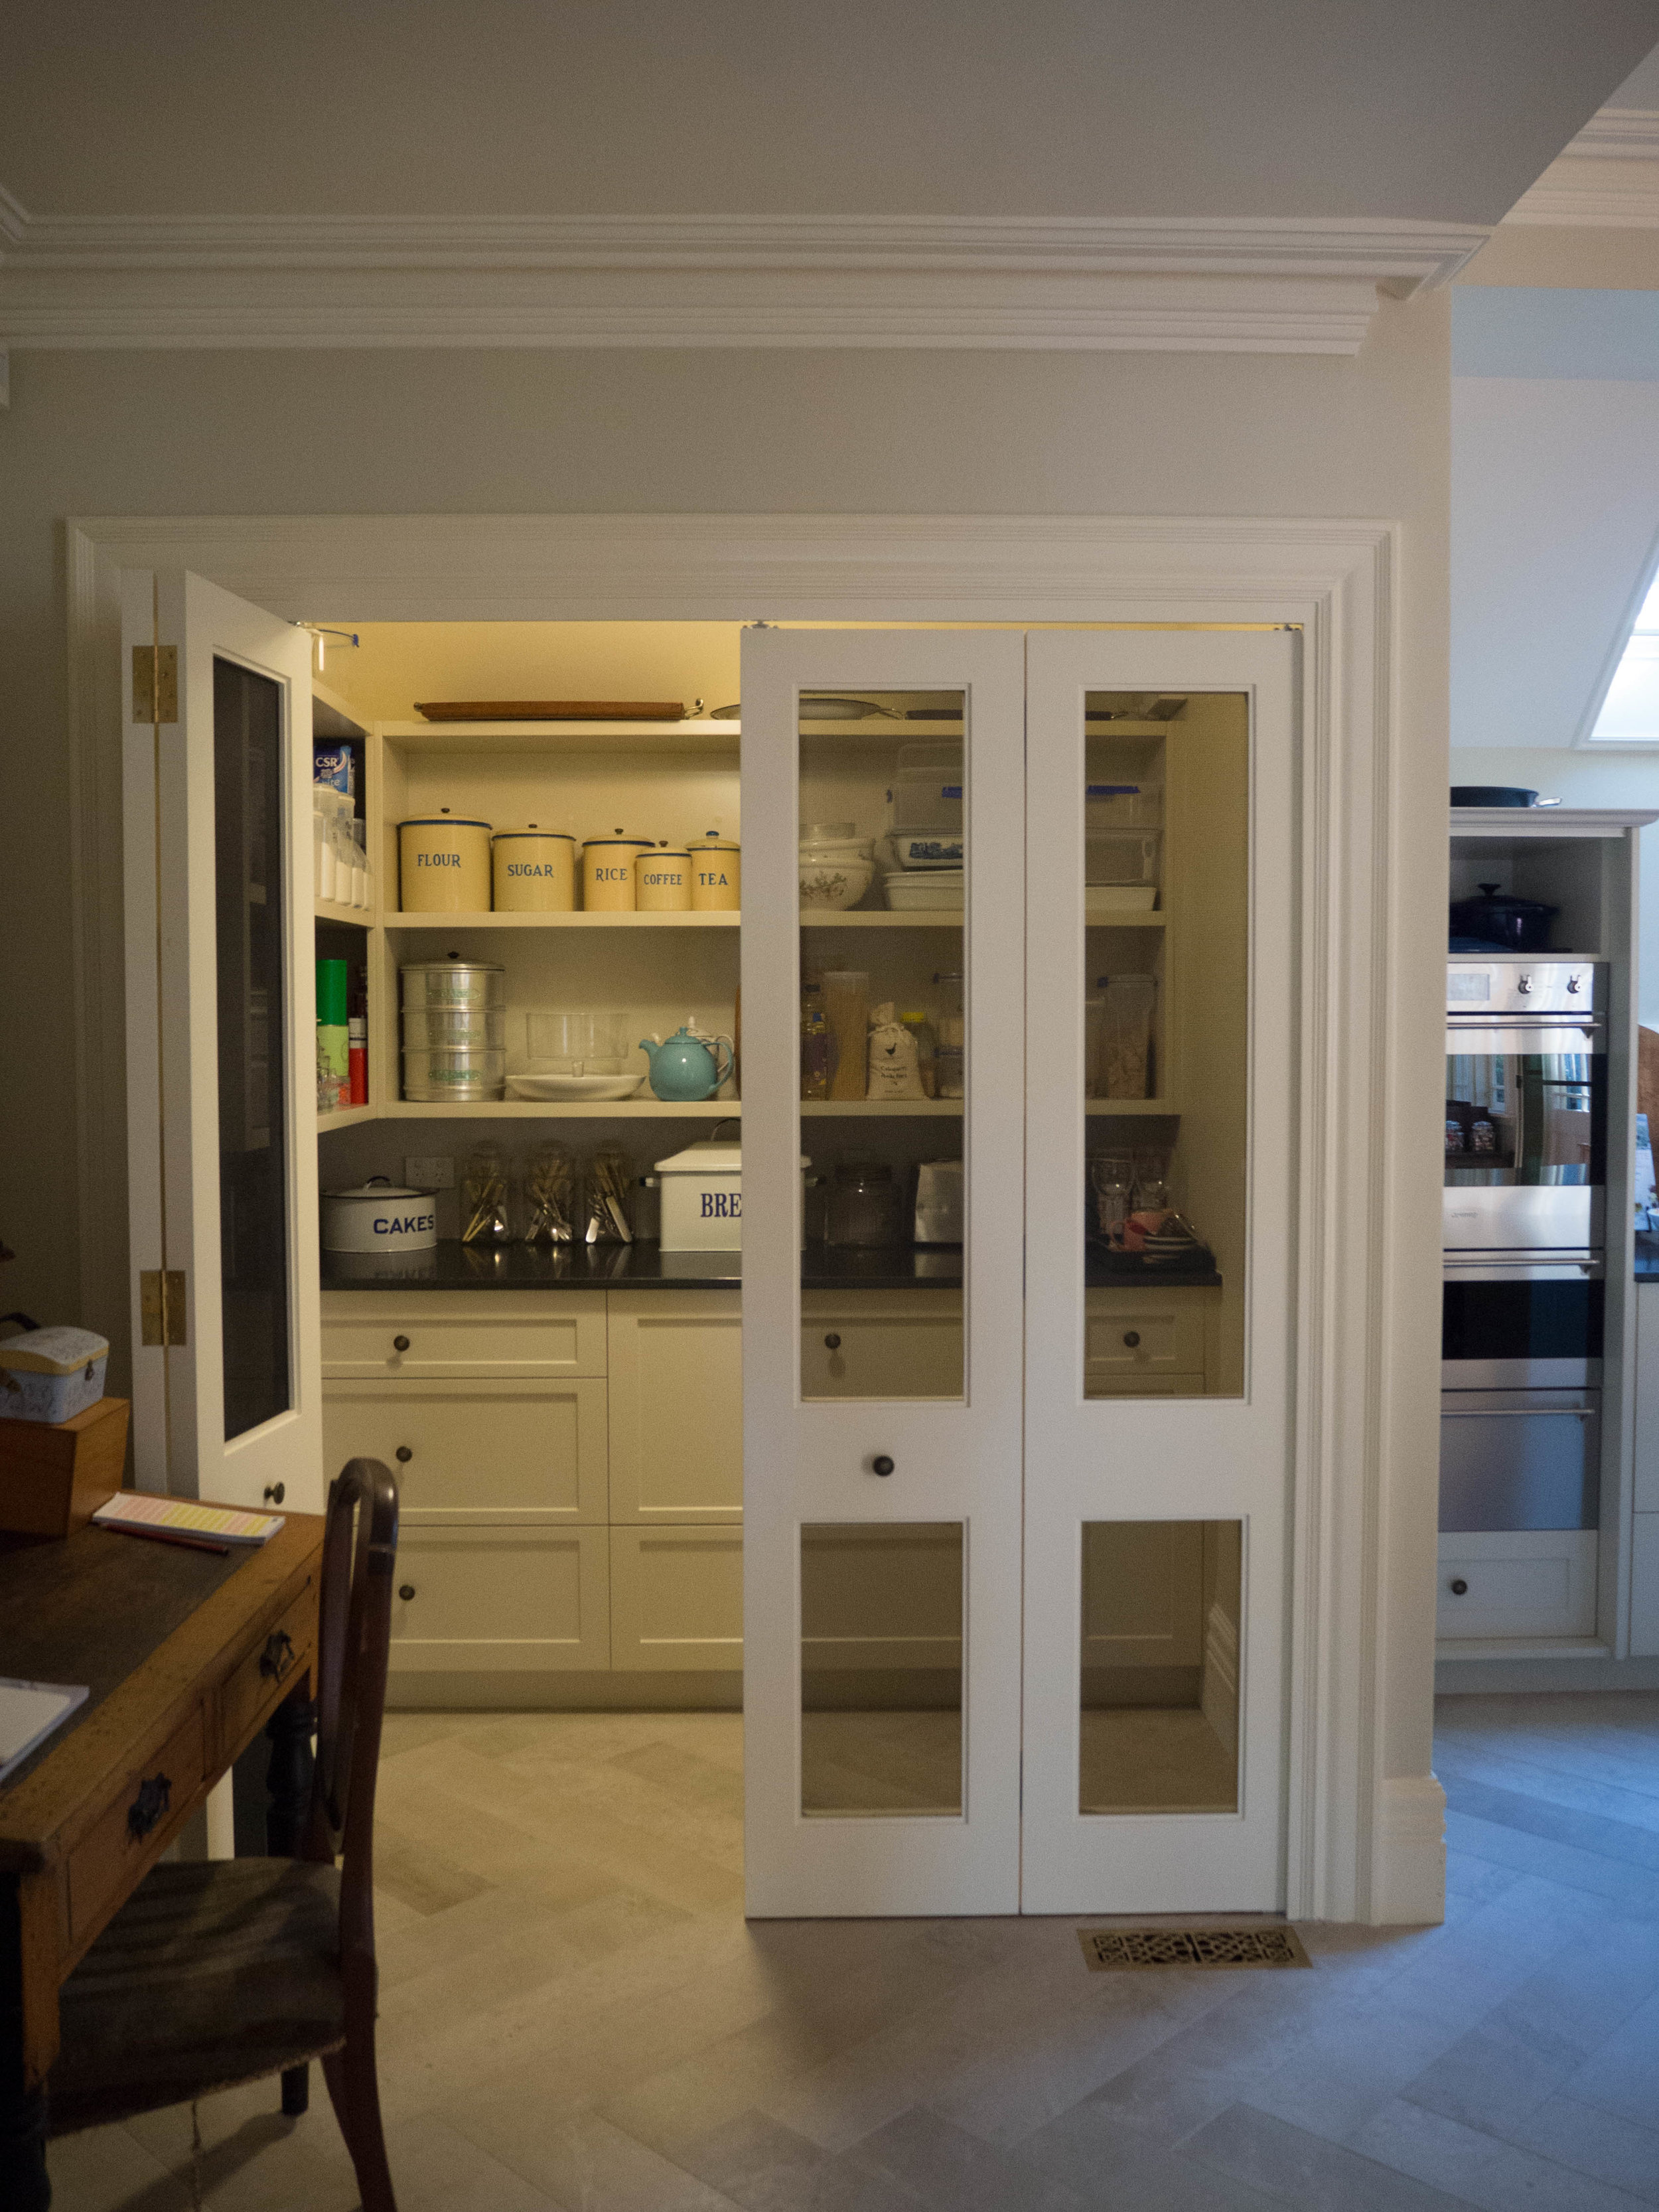
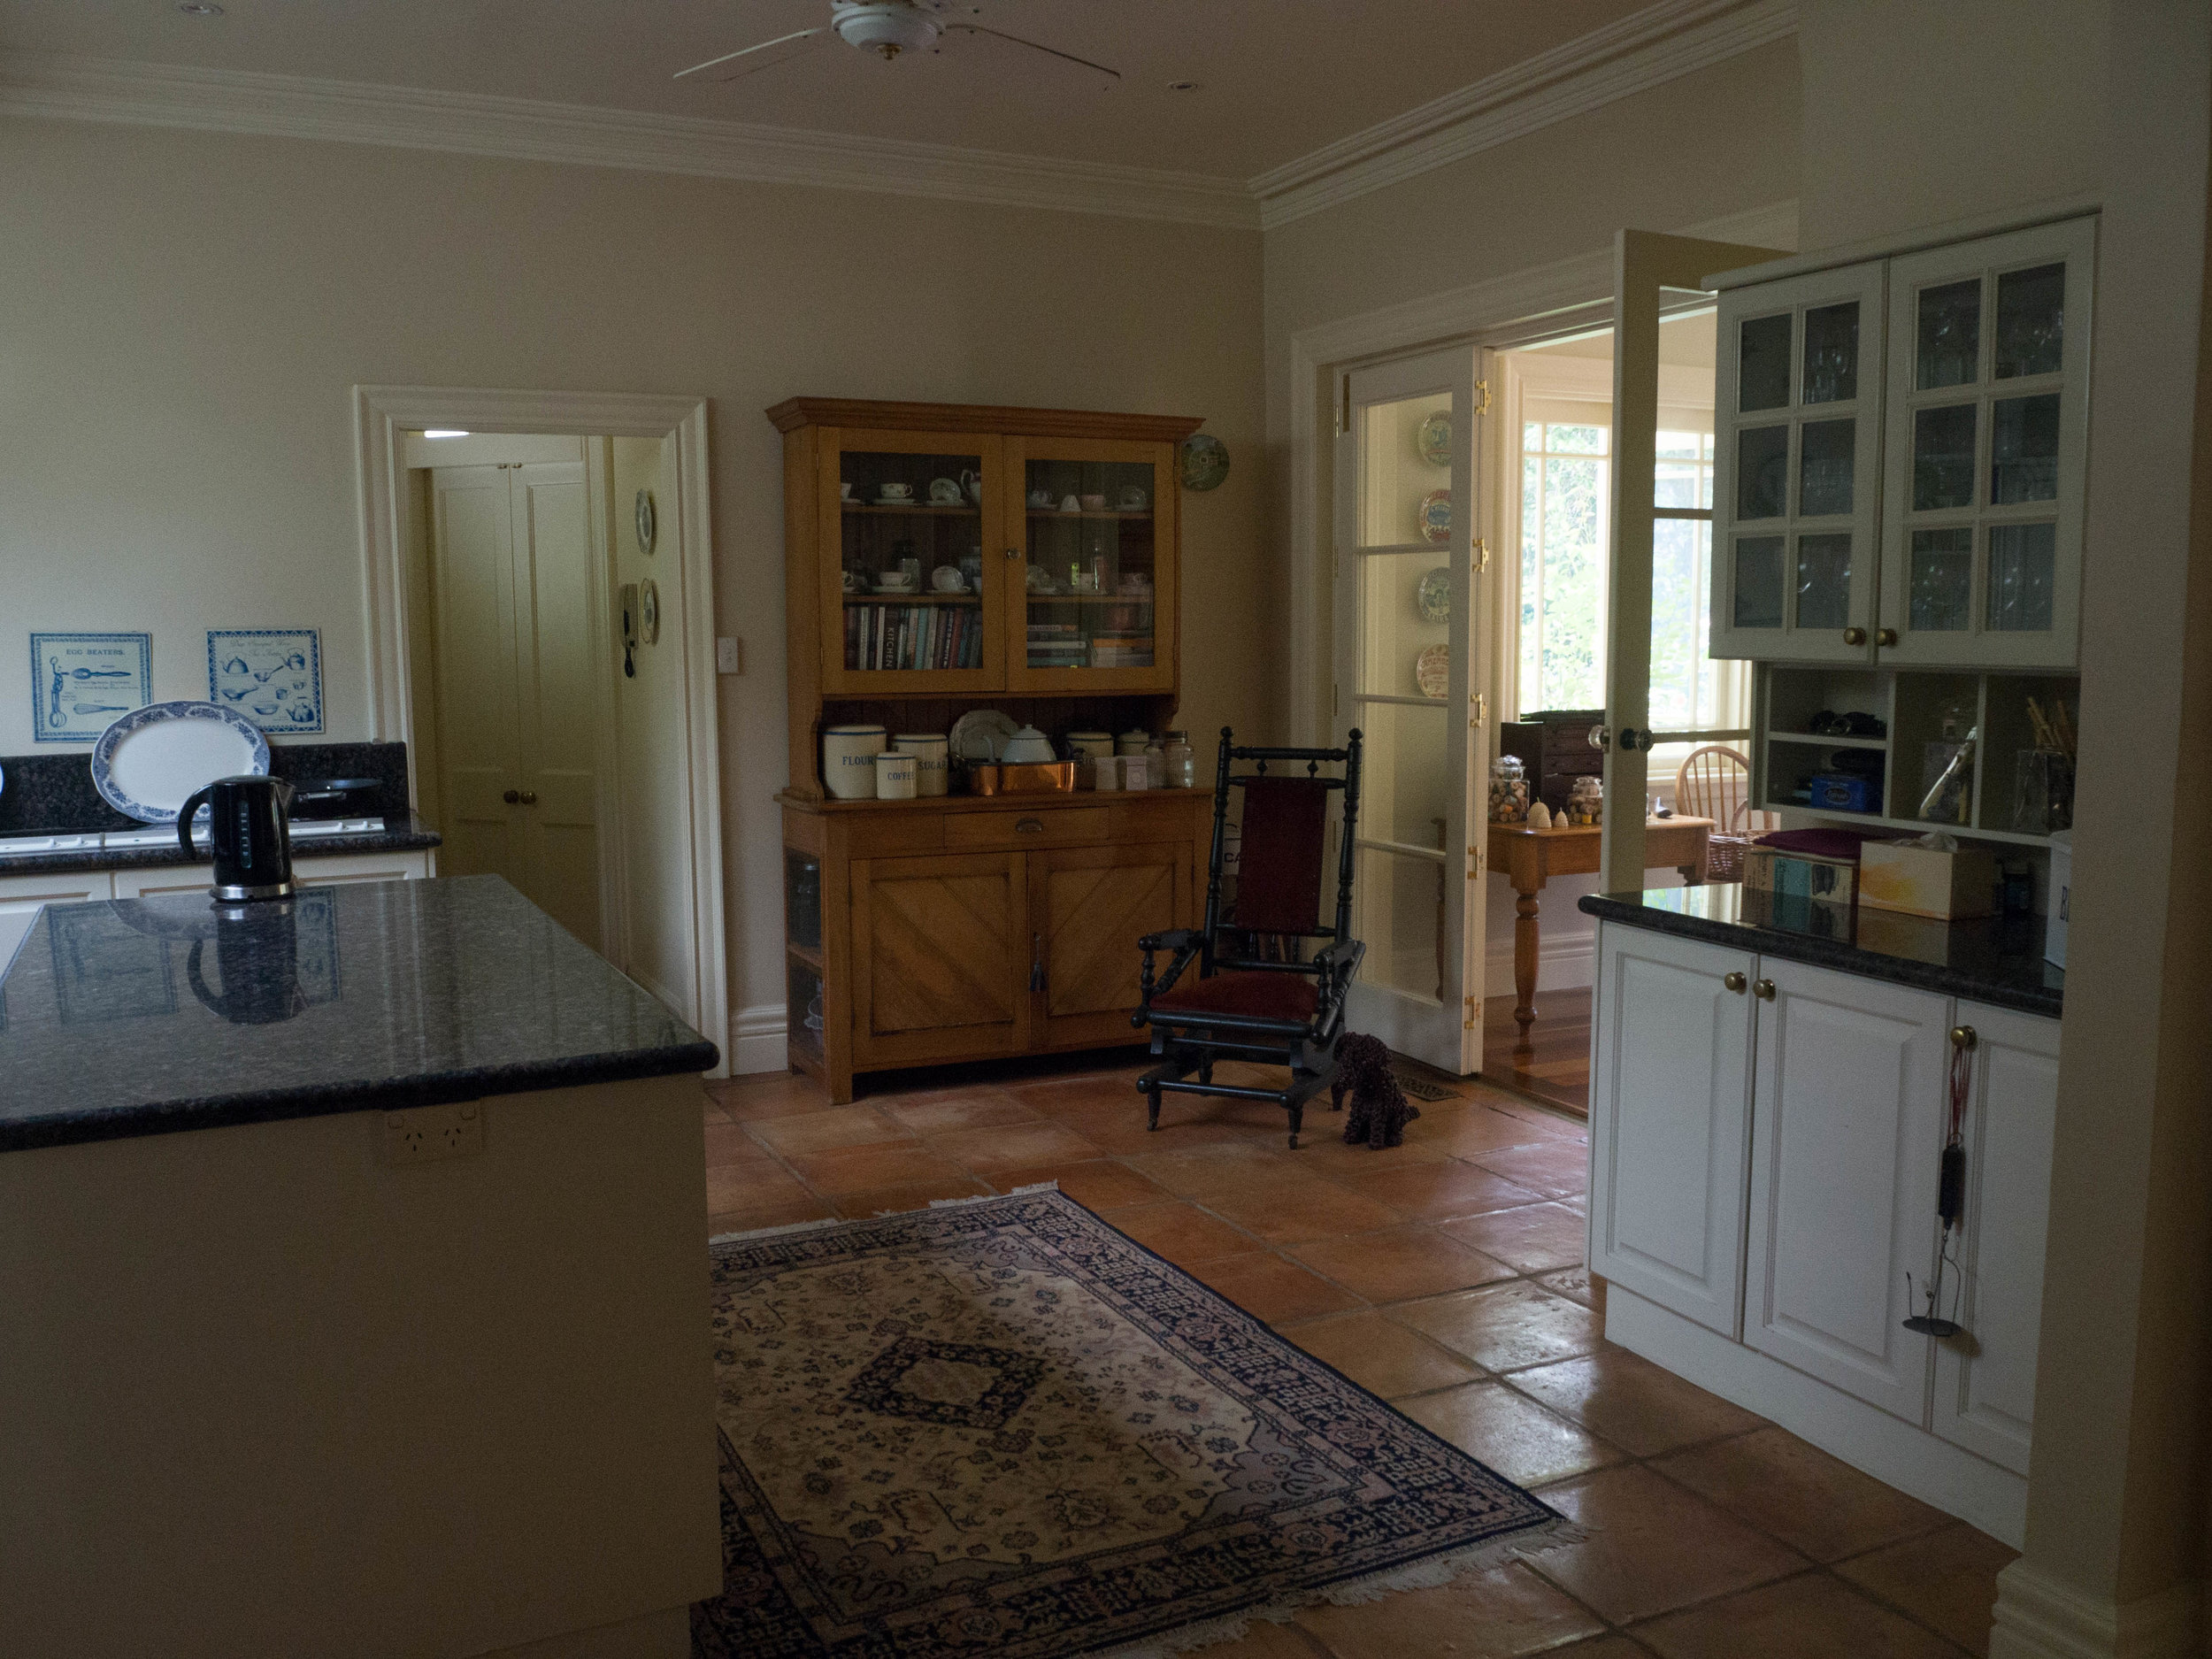
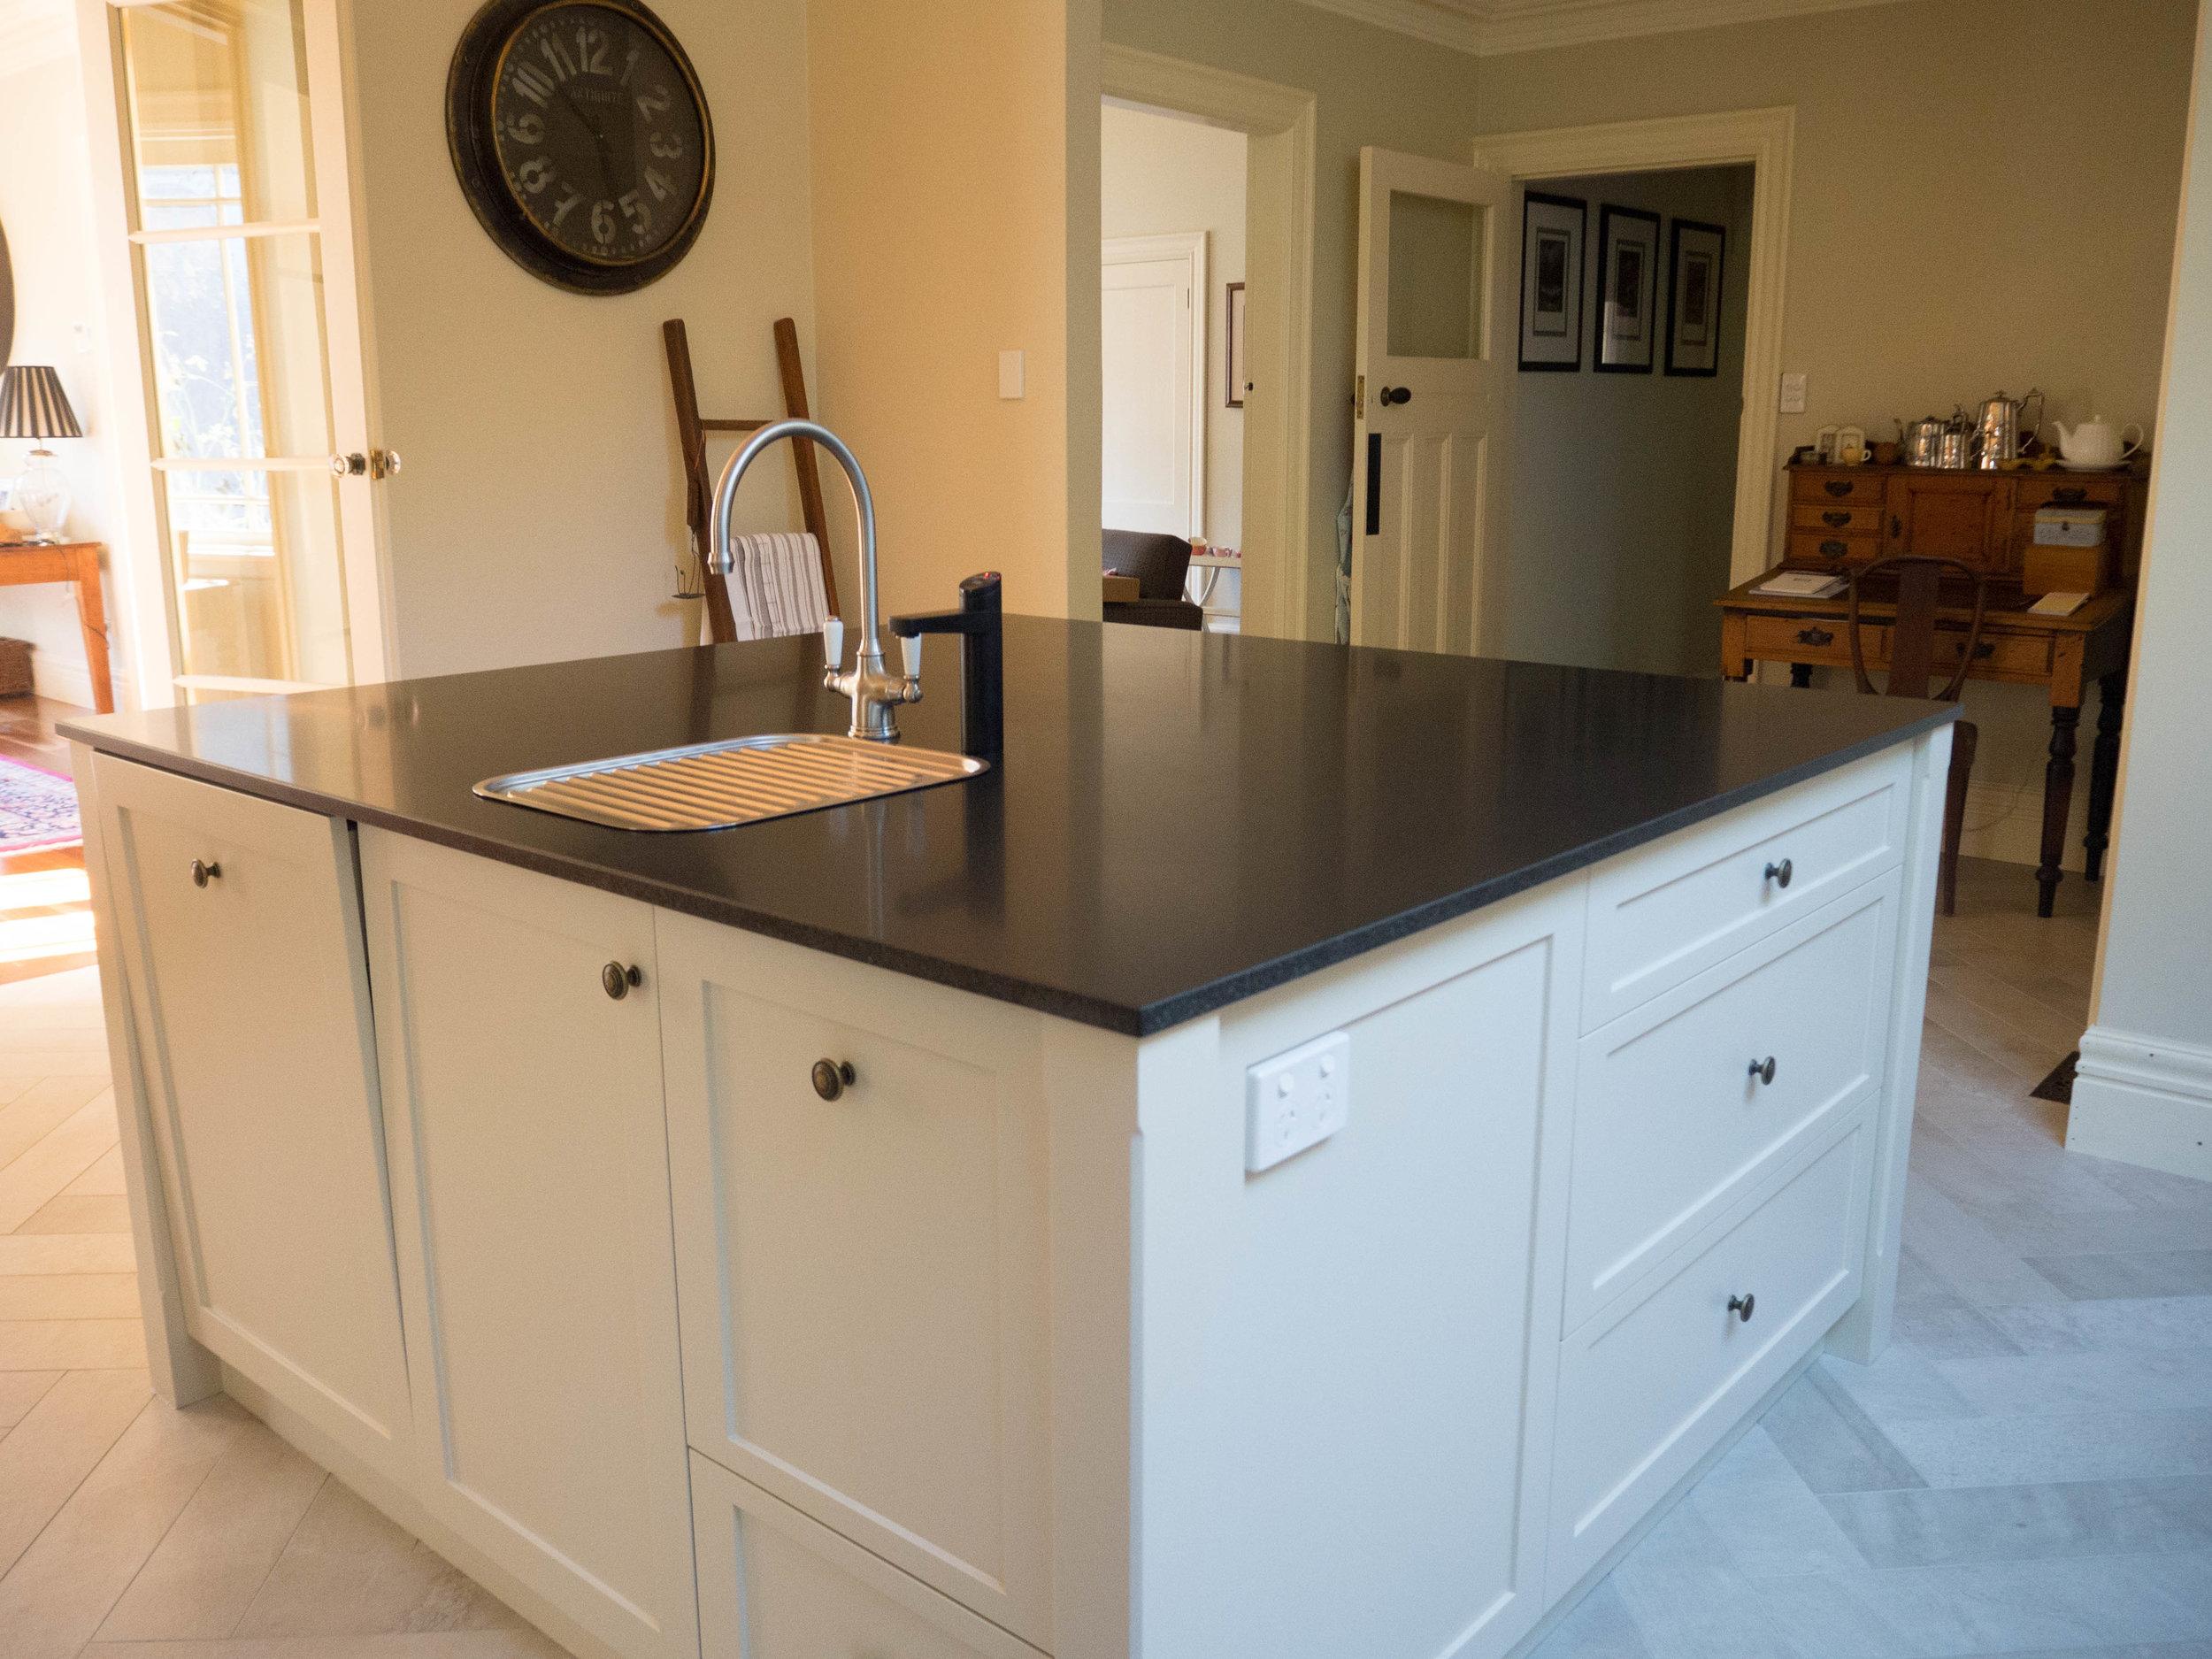
I have also added a few before and after photos of the kitchen to this post - just in case anyone was interested to see what I kept going on about for 4 months! As I mentioned in my last post, I am spending as much time as possible in the kitchen now, and am really enjoying being able to bake again. Making something like this Blood Orange Chiffon wasn’t at all possible for a while there, and I am so so happy it is all over and done with now! 

Click on the gallery below to check out the old kitchen vs the new kitchen!

Old Kitchen
Old Kitchen
New Kitchen
New Kitchen
Old Kitchen
Old Kitchen
New Kitchen
New Kitchen
Old Kitchen
Old Kitchen
New Kitchen
New Kitchen
Old Pantry/Food Storage
New Pantry
New Pantry
Old Kitchen New Kitchen Old Kitchen New Kitchen Old Kitchen New Kitchen Old Pantry/Food Storage New Pantry

Blood Orange Chiffon Cake

Ingredients: 

175 g self-raising flour

35 g plain flour

1 tsp cream of tartar

6 eggs (large), separated

345 g caster sugar

1/2 tsp vanilla extract

finely grated zest of one small/medium blood orange

170 ml blood orange juice, strained of pulp

80 ml vegetable oil 

3-4 springs of rosemary


Ingredients for Icing:

2 cups icing sugar, plus extra

juice of 1-2 blood oranges 

sprigs of rosemary (with flowers if possible), for decoration


Method:

Pre-heat oven to 180 degrees Celsius. Have an angel cake tin ready and nearby but do not grease it. The tin should not be a non-stick tin as the cake needs to cling to the sides of the tin as it cooks. 

Place rosemary into the oil, and leave to infuse. If you have time, leave it for as long as you can. Mix it about and squash into the oil to release some more flavour. 

In a small-medium bowl, sift the flours and cream of tartar three times. 

Using an electric mixer, beat the egg yolks with 1 cup of the sugar, until pale and creamy. If you have a free standing mixer with a paddle attachment, use this attachment for the egg yolks and save the whisk for later. Once pale and creamy, add the vanilla and blood orange zest. Remove the rosemary from the oil, and discard. Place the oil and blood orange juice in a jug and along with the sifted flour mixture, add to the yolk mixture while the mixer is beating on a low speed. Beat only until just combined. 
Using a separate bowl, whisk the egg whites using an electric mixer until soft peaks have formed. Add the remaining sugar, and whisk until the peaks are stiff (but not dry). 

Gently fold the egg yolk mixture into the egg whites with a metal spoon, a third at a time. Continue to gently fold until the mixtures are just combined. Do not over mix. 

Transfer the mixture to the cake tin and bake for 1 hour, or until a skewer inserted comes out clean. 

Immediately upon removing the cake from the oven you must invert the cake (stand it upside down). Using the hollow centre of the cake tin, place the cake upside down on the neck of a bottle and leave to cool. This process will stop the cake collapsing. This is also the reason for not greasing the tin, as you don’t want the cake to slide out at this stage.

Once the cake is completely cool, use a small serrated knife to cut the cake out of the tin. Start with the outer sides then lift the cake out using the bottom of the pan. Then carefully cut the cake off the base of the tin. 

Carefully place cake on serving plate or cake stand. In a medium bowl, sift in the icing sugar. Gradually add the juice of 1 blood orange. Stir until well mixed and add more icing sugar if the mixture is too wet, or more blood orange juice if it is too dry. The consistency shouldn’t be too thick, as it should be able to run down the sides of the cake, and not weight the top of the cake down. Gently drizzle/spread the icing over the cake and arrange the rosemary sprigs around the top of the cake. 

When serving, cut the cake with a serrated knife. 

Reference: ‘The Monday Morning Cooking Club’ by Merelyn Frank Chalmers, Natanya Eskin, Lauren Fink, Lisa Goldberg, Paula Horwitz and Jacqui Israel (2011), p 35.

In Cakes & Slices Tags Blood Orange, Chiffon, Cake, Rosemary, Kitchen renovation, Monday Morning Cooking Club, Dairy Free
Comment
Challah Doughnuts with Blood Orange Glaze - made by Molly Yeh

Challah Doughnuts with Blood Orange Glaze - made by Molly Yeh

Local is Lovely Workshop, July 2016 - A Photo Recap

Kath September 1, 2016

I feel like I'm always saying this, but it's been a while since I posted anything here. If you follow me on Instagram you will have seen what I've been up to in the past month or so, including attending another wonderful weekend away at a Local is Lovely Workshop. 

I was lucky enough to attend the first ever Local is Lovely Workshop back in November 2014 (posts here and here), and always knew I wanted to go back. When I saw Sophie (Local is Lovely) and Luisa would be teaming up with Molly Yeh (My Name is Yeh), I knew this was a best opportunity to go back to Kimbri Farm. Meeting Molly, and all the other workshop participants was just super lovely. I never tire of meeting new like minded people and listening to how food and photography intertwines their lives. I also never tire of Sophie's amazing food, and the wonderful opportunity of being in the country and having an amazing setting to relax in and shoot great photos (almost no styling needed!). 

I have included a few of my favourite photos from the weekend, and yes, those blood orange challah doughnuts were as good as they looked (Molly has the recipe on her blog just FYI!)!

I would also like to recommend a really great podcast called My Open Kitchen, put together by Sophie Hansen and Skye Manson, which has just released it's first episode. During the first episode Molly is interviewed (which was recorded during the time she was here for the workshop), and its a really great interview. The whole podcast is great to listen to and I for one loved listening to it on the train home from work - a much more enjoyable ride than normal!

Apart from spending time at amazing workshops, I have been working and trying to enjoy baking in our new kitchen as much as possible. I have been in the kitchen so much that I have hardly been on the computer (to edit photos and write blog posts!), in a few weeks! I do have recipes in the works and things ready to post here, I just can't stand spending the whole weekend on the computer and not in the kitchen! Especially as I have four months of not cooking to make up for!

Anyway, I have some delicious things coming to the blog soon (or my version of ‘soon’, I should say), including a blood orange cake which I am quite excited about. I made it a couple of weeks ago and I’m pretty sure I ate most of it myself, which when you see the cake you will understand the seriousness of that statement! 
For now I’ll leave you with my photo recap of the wonderful weekend that was the Local is Lovely Workshop. Don’t forget to check out my Instagram and Instagram Story for what I’m up to in the kitchen in between blog posts!

Rhubarb & Olive Oil Cakes - Made by Molly Yeh

Rhubarb & Olive Oil Cakes - Made by Molly Yeh

Molly icing her cake with tahini buttercream

Molly icing her cake with tahini buttercream

Molly decorating her cake - complete with a marzipan kangaroo!

Molly decorating her cake - complete with a marzipan kangaroo!

The beginnings of challah doughnuts - making the dough

The beginnings of challah doughnuts - making the dough

Challah dough

Challah dough

Molly with her freshly fried doughnuts

Molly with her freshly fried doughnuts

Blood orange glaze

Blood orange glaze

Challah doughnuts with Blood Orange glaze

Challah doughnuts with Blood Orange glaze

Making sourdough

Making sourdough

Finished sourdough 

Finished sourdough 

Beautiful fresh produce from Epicurean Harvest

Beautiful fresh produce from Epicurean Harvest

Molly making Shakshuka

Molly making Shakshuka

Shakshuka with homemade sourdough

Shakshuka with homemade sourdough

In Events Tags Local is Lovely, Local is Lovely Workshop, Sophie Hansen, Molly Yeh, My Name is Yeh, Luisa Brimble, Kimbri, Blue Mountains NSW, Photography, Styling, Blood Orange, shakshuka, challah, doughnuts, Epicurean Harvest, sourdough
Comment

How to Make a Blood Orange Cake (Dairy Free)

Kath September 27, 2015

Believe it or not, until recently I had never tried blood oranges before. I now know what I have been missing, and will be eagerly anticipating buying them when they are next in season. 

The first lot I bought were from the Pyrmont Growers Markets. The flesh was a deep purple and they were clearly at their prime. I have since bought more and each time I buy them their colour is lighter and lighter, more a pink-ish hue than the deep purple of the first ones. Their flavour is still great, and I have frozen a fair bit of the juice. I saw a recipe for a blood orange, peach and mango granita in Katie Quinn Davies first book, and will be making it as soon as Australian peaches are in season! 

The idea for this cake came to me after the first thing I baked with the first lot of blood oranges I bought didn’t work out so well. I found the recipe online and it combined the flavours of blood orange and coconut, and they just went together so well. Unfortunately the addition of blood orange juice in the recipe, just made the cakes very wet, soggy and unstable and they just fell apart. 

I then thought about trying another cake with these same flavours, and remembered a lime and coconut cake I made a little while ago (recipe here) that I thought I could adapt to suit the blood oranges. Luckily, this time it worked! While only using the zest in the cake reduces the punchy blood orange flavour a little, the blood orange icing mostly makes up for that (and the cake doesn’t fall apart!). 

I used some coconut blossom sugar in the recipe, just to try it and add to the coconut flavour of the cake, but it can be substituted for caster sugar. Also, if blood oranges aren’t available regular oranges could be used. 

This cake could also easily be made gluten free - try substituting the self raising flour for gluten free flour and baking powder. The quantity of flour in the cake is quite small, so as long as you don’t knock the air out of the egg whites when folding them into the batter, you should still get the same result.

I used a lot of spring blooms when I styled the photos for this cake, and I really like the look they gave. The weekend I made this cake, I went looking around the garden for some flowers to use, and when I saw the weeping cherries we have, I just h…

I used a lot of spring blooms when I styled the photos for this cake, and I really like the look they gave. The weekend I made this cake, I went looking around the garden for some flowers to use, and when I saw the weeping cherries we have, I just had to use them. They had burst into bloom since I had last noticed them and were buzzing with lots of bees.

Blood Orange Cake (Dairy Free)

Ingredients: 

200g almond meal

135g caster sugar

30g coconut blossom sugar

40g self raising flour 

6 large eggs, separated 

45g desiccated coconut 

zest of one small/medium blood orange 


Ingredients for the Icing: 

2 cups icing sugar 

juice from 1/2 to one blood orange 

50g coconut chips 


Method: 

Pre heat oven to 180 degrees Celsius and grease and line the base of a 23cm spring form cake tin. 

Beat the egg yolks and sugars in a bowl for about 3 minutes, or until they are pale and fluffy. Fold in the zest, coconut, flour and almond meal. 

In a separate bowl, whip the egg whites until stiff peaks form. Using a large metal spoon, gently fold the egg whites into the almond mixture, a third at a time. 

Pour the batter into the prepared tin and bake for 40 minutes, or until lightly golden and cooked through. 

Allow the cake to cool in the tin for 5 minutes, then transfer to a wire rack to cool completely. 

While the cake is cooling, toast the coconut chips in the oven for 2-3 minutes. Keep an eye on them as they will toast very quickly. 

To make the icing, sift the icing sugar into a bowl. Juice the blood orange, and pass the juice through a sieve to remove the pulp. Gradually add the juice (not necessarily all of it), until you have a smooth icing. Spread over the cooled cake and use the toasted coconut to decorate. 

Reference: ‘Bills Open Kitchen’ by Bill Granger (Murdoch Books, 2003), p.91.

In Cakes & Slices Tags Blood Orange, Cake, Coconut, Almond, Spring, Flowers, Cherry Blossoms, Dairy Free
Comment

recipes

  • Biscuits/Cookies 39
  • Breads Etc. 9
  • Breakfast 7
  • Cakes & Slices 67
  • Confectionary 5
  • Drinks 6
  • Events 14
  • Food Photography Tips 3
  • From The Mailing List 24
  • Heirloom Recipes 12
  • Holidays 44
  • Ice Cream 9
  • Jams Preserves & Spreads 9
  • Muffins 4
  • Off the Shelf 47
  • Other Desserts 25
  • Savoury Dishes/Meals 15
  • Scones 4
  • Tarts & Pastry 9
  • Travel 13

Sign up to Friday Food Chat with Kath, a weekly newsletter for more food, baking, cookbook chat and more!

Sign Up Here!
instagram-unauth pinterest facebook url

Website Accessibility: To enable text to speech function on the blog, click the sound button to the right of each blog post.

All images & content are the property of Kathryn Vincent, unless stated otherwise. Please do not use without permission.

Kulinary Adventures of Kath

Food Photography, Recipes & Baking

instagram-unauth pinterest facebook url