Kulinary Adventures of Kath

Food Photography, Recipes & Baking
  • home
  • About
  • Work with Kath
  • Shop
  • Blog
    • The Blog
    • Recipe Archive
  • Newsletter
  • Contact
  • home
  • About
  • Work with Kath
  • Shop
    • The Blog
    • Recipe Archive
  • Newsletter
  • Contact
Raspberry Pistachio Rose Cake (23 of 25).jpg

The Blog

Recipes and Food Photography by Kath Vincent.

  • The Blog
  • Recipe Archive
  • All
  • Biscuits/Cookies
  • Breads Etc.
  • Breakfast
  • Cakes & Slices
  • Confectionary
  • Drinks
  • Events
  • Food Photography Tips
  • From The Mailing List
  • Heirloom Recipes
  • Holidays
  • Ice Cream
  • Jams Preserves & Spreads
  • Muffins
  • Off the Shelf
  • Other Desserts
  • Savoury Dishes/Meals
  • Scones
  • Tarts & Pastry
  • Travel
Easy Choc Orange Sheet Cake

Simple Choc Orange Sheet Cake

Kath June 28, 2021

Do you ever bake, just to use a particular ingredient up? Like if the ingredient goes to waste, you’ve failed some kind of kitchen based test?

Sometimes much of my baking is inspired by a tub of yoghurt nearing the end of its life, eggs that need to be used as I over estimated how much I would actually be able to bake or an in season fruit I can’t stand to waste since it’s at its best right now and it would just be rude for it to end up in the bin. 

This chocolate orange cake came about for just that kind of reason. I got a big delivery of citrus later last month, and while I was more interested in the yuzu and bergamots, it also came with some oranges and mandarins. I don’t eat either of these citrus as they make me quite unwell so I had to come up with an idea to use some of them - as even though I don’t eat them, I still don’t want them to go to waste. 

Since I also have a very large supply of cocoa for someone who can’t eat chocolate, I decided to make the ultimate cake that I would never be able to eat - a chocolate and orange cake*! I am told it tastes like Jaffa (a choc orange lolly/candy common in Australia and New Zealand), which is exactly what I was going for. It’s based on the Chocolate Sheet Cake from my cookbook Everyday Bakes, and the recipe is below if you feel like a choc orange inspired bake!

*no cake was harmed during the development of this recipe - it was largely gifted to a good friend who I am glad to say hasn’t got sick of me offloading baked goods onto her and her family. They also took some of the citrus I couldn’t eat, and I now feel like the kitchen test of not wasting food has been passed for another week. Phew!

Simple Choc Orange Sheet Cake

Chocolate Orange Sheet Cake

Ingredients: 

125g unsalted butter, softened

165g caster sugar

1 tsp vanilla extract

finely grated zest of one orange

2 eggs 

230g self raising flour

2 tbsp cocoa powder

135g Greek style yoghurt 

Ingredients for the Icing: 

170g icing mixture

1-2 tbsp fresh orange juice

Method: 

Pre-heat oven to 160 degrees Celsius, and grease and line a 30x20cm rectangular slice or lamington tin with baking paper. 

In a medium bowl whisk together the flour and cocoa powder, then set aside.

In the bowl of an electric mixer, beat the butter, sugar, vanilla and orange zest until light and fluffy.

Beat in the eggs one at a time, then add the flour and the yoghurt and slowly mix until combined.

Tip the mixture into the prepared tray and smooth the top.

Bake for 20-25 minutes, or until the cake spring backs when touched lightly and a skewer comes out clean. The cake will be lightly golden when done. Allow the cake to cool on a wire rack.

To make the icing, mix 1 tbsp of the orange juice with the icing mixture in a medium bowl. Continue to add more orange juice, a little at a time until you have a smooth icing that you can spread over the cake - a slightly thinner consistency is good for this cake as there is more surface area to spread over, if the icing is too thick it might not cover the entire cake!

The big delivery of citrus I bought featuring blood limes, limes, bergamot, yuzu, lemons, mardarins, oranges, a buddhas hand and custard apple.

The big delivery of citrus I bought featuring blood limes, limes, bergamot, yuzu, lemons, mardarins, oranges, a buddhas hand and custard apple.

In Cakes & Slices, From The Mailing List Tags Chocolate, Citrus, oranges, Jaffa, cake, Mixer Free Recipes, Easy Baking
Comment
Homemade Rocky Road Easter Eggs

Rose Rocky Road Easter Eggs

Kath April 8, 2020

The idea for this recipe came to me quite late in the piece. With only two weeks to go until Easter at the time I knew I would be lucky to get everything I needed in time. But with my ability to buy Easter treats severely limited this year, I felt I really needed to make something. And preferably something I would enjoy eating (which means no milk or dark chocolate!). 

I really liked the rocky road I made last year, and felt making it into a more Easter themed shape would be just perfect. I finally found some half Easter egg moulds online, they took ages to arrive hence why this post is only ready two days before Easter! 

I also decided to buy marshmallows rather than make my own. I thought making marshmallows right now just felt a little wasteful in terms of ingredients and since one batch makes so many, and I couldn’t really share them as I usually would, I thought buying some would be best. My favourite bought marshmallows are from Grounded Pleasures, so I bought their massive 700g box which will also hopefully get us through a few Wintery isolation hot chocolates too! 

Grounded Pleasures Marshmallows

Grounded Pleasures Marshmallows

This recipe is mostly an assembly job, and an even easier version of my Rose Rocky Road I posted last year. You can of course use other types of chocolate, and other moulds or cake tins to shape your rocky road. I made a Rocky Road Wreath for Grounded Pleasures at Christmas last year, so there is another idea for how to shape your rocky road.  

I prefer to use good quality chocolate, which is why the recipe is long as it needs to be properly tempered. You can use baking chocolate, just follow the instructions on the packet to melt and you shouldn’t need to temper as below. 

Tempering chocolate can be tricky, and I would definitely recommend a chocolate thermometer if using good quality chocolate. Don’t worry if it doesn’t turn out perfectly, if your chocolate blooms (if using milk or dark chocolate) it will still taste great and if it has trouble setting just store it in the fridge. I am definitely no expert when it comes to properly tempering chocolate, but it always tastes good regardless! Plus there are plenty of resources available online if you want to know more.

I hope everyone has a clam and quiet Easter/long weekend. Let me know in the comments if you have a go at making some rocky road or what other baking adventures you have been up too. 

Rocky Road Ingredients
Rocky Road Easter Basket

Rose Rocky Road Easter Eggs

Ingredients: 

500g good quality white chocolate

pink colouring (suitable for use with chocolate)

rose flavouring (suitable for use with chocolate)

30g slivered almonds, roasted

160-170g marshmallows

dried edible flowers, for decoration (optional)

1 tsp freeze dried raspberry, for decoration (optional)

cooking spray

Method: 

Very lightly spray 6 medium half Easter eggs moulds (approx. 120ml capacity) with the cooking spray. Arrange the moulds on a tray with sides so the moulds aren’t about to move about too much. 

Have all the rocky road elements ready to go next to your prepared moulds.  

Place a small pot with a little water on the stove and allow to very gently simmer. Using another pot or bowl that will comfortably sit over the top of the water pot, measure out 300g of the white chocolate. 

Place this pot over the gently simmering water (ensuring the water does not touch the base of the pot above) and melt the chocolate. Ensure the chocolate is constantly stirred. Once the chocolate reaches 45 degrees Celsius on chocolate thermometer, remove from the heat and continue stirring while gradually adding the remaining 200g of white chocolate. Add a little at a time and allow to melt before adding more. 

Continue to check the temperature of the chocolate, once it has fallen to 34 degrees Celsius, the remaining chocolate should have all been added. Continue stirring to allow the chocolate to cool further to 32 degrees Celsius. Sometimes I find not all my chocolate has melted at this point, it can depend on the room temperature and the temperature of the chocolate to start with. I place my chocolate back over the warm water in the pot I used previously, and turn the heat on to very low. I keep stirring the chocolate and check that the temperature doesn’t rise about 34 degrees Celsius again. Once the chocolate has almost completely melted, remove from the heat again and continue to stir and allow the chocolate to return to 32 degrees Celsius. 

Add a little pink colouring at this point, and a few drops of the rose flavouring. Start small with both and add more if you think it’s necessary. 

Once the chocolate has reached 32 degrees Celsius, it is ready to use. 

Spoon in about a tablespoon of the melted chocolate into each mould. and spread it around so the inside of each mould. Place a few marshmallows into each mould (I found I could fit four marshmallows into each mould), and cover with more chocolate (try to distribute the chocolate evenly amongst each mould). I didn’t fill each mould to the brim, leave a gap at the top as this will help you remove the chocolate later. Tap each mould onto the bench gently to encourage the chocolate to evenly distribute and remove any air bubbles. 

Sprinkle some almonds over the top of each, and follow with the dried petals and freeze dried raspberries if using. 

Leave to set at room temperature if you are in a cool environment, otherwise place in the fridge for about 30 minutes to set. 

Once set remove from the moulds and store in an airtight container.

I prefer to keep the rocky road in the fridge. Keeps for about 2-3 weeks. 

Makes 6 medium half Easter eggs. 

Homemade Rocky Road Easter Eggs

Reference: ‘Bourke Street Bakery All Things Sweet’ by Paul Allam and David McGuinness (Murdoch Books, 2017), pp.104-105 + 119.

Rose Flavoured Chocolate Rocky Road
In Confectionary, Holidays Tags Rose, Rocky Road, Grounded Pleasures, Easter, Chocolate, Rose Chocolate, Holiday Baking
Comment

Easter 2015

Kath April 9, 2015

For this post I wanted to do a little re-cap of the Easter weekend, particularly the baking! Any recipes mentioned will be or are posted on the blog. 

This year I made it my mission to try as many different types of hot cross buns as I could. I didn’t get to every bakery I wanted (fingers crossed for next year), but I tried a few, as well as making my own. 

Homemade Hot Cross Buns - Recipe Here

Homemade Hot Cross Buns - Recipe Here

I went to Black Star Pastry at the Powerhouse Museum a couple of times, and tried their Frankincense glazed hot cross buns. They were full of fruit and flavour, and well worth the walk to get them! 

Some Easter eggs and the Hot Cross Buns from Black Star Pastry.

Some Easter eggs and the Hot Cross Buns from Black Star Pastry.

I also bought a few from Baker’s Delight, because how could you not? These are probably my favourites, as while they have fruit in them, they are not quite as jam packed with it, which I prefer. I think I also like them because they are very easy to go and buy! 

On Easter Saturday, whilst braving the shops with every other person in this part of Sydney, I managed to get some of Jamie Oliver’s Stem Ginger Hot Cross Buns from Woolworths. I had heard about these, but had never managed to get any. They were nice, and I’m glad I got to try them! I found the ginger quite subtle whilst I eating the bun, but then after the spiciness of the ginger really hit me! 

Hot Cross Buns from Baker's Delight (left) and Jamie Oliver's Stem Ginger Hot Cross Buns from Woolworths (right).

Hot Cross Buns from Baker's Delight (left) and Jamie Oliver's Stem Ginger Hot Cross Buns from Woolworths (right).

Over the Easter long weekend I decided to make some Easter biscuits. I had a couple of Easter themed biscuit cutters, that I had never used, so I thought it was time to use them! I had also not long been gifted the book ‘Cookies’ by Peggy Porschen, so it was also a great chance to continue with my cookbook challenge! 

The recipe for the biscuits and icing will be posted over on the blog soon. 

Easter Biscuits.

Easter Biscuits.

I also adapted my favourite scone recipe (originally posted here), and made them into ‘hot cross scones’ for Easter. The full post and recipe can be found here. 

Hot Cross Scones.

Hot Cross Scones.

Here are a few snaps from the long weekend, including one featuring the newest addition to the cookbook collection, thanks to the Easter Bunny! 

Hope everyone had a lovely long weekend.

All baking, styling and photography for this post by Kathryn Vincent of Kulinary Adventures of Kath.

In Holidays Tags Easter, Holidays, Chocolate, Hot Cross Buns, Biscuits, Baking, Scones, Black Star Pastry, Jamie Oliver, Woolworths, Baker's Delight, Long Weekend
Comment

Lamingtons

Kath January 23, 2015

For those who don’t live in Australia, a lamington is made using sponge cake and coating it in chocolate icing and coconut. I think they came about at some point to use up day old sponge. They are definitely worth a try! Sometimes they are sold with a layer of jam and/or cream in the middle as well. I like my lamingtons simple, with no cream or jam. Just made with good ingredients, and probably fresh sponge! Day old sponge is great to use, I just find fresh sponge easier to work with when coating them in the icing. 

This particular recipe comes from my favourite Aussie cook, Bill Granger. I have made them a couple of times before and they have been very popular. I have altered the quantities of chocolate in the icing recipe, as I like the combination of milk and dark chocolate together better than just dark chocolate on its own. You can use whatever you like or have at home, just keep the total chocolate quantity the same. 

Any type of coconut can be used to cover the lamingtons. I really like using coconut chips, however if you can’t find them just use shredded, desiccated or flaked coconut. Also, make sure you have more coconut ready than the recipe indicates. I always find I am grabbing more handfuls of it out the bag when I am decorating the lamingtons. It’s probably just because it’s quite messy and I end up with lots of coconut all over the bench! 

I try to work quite fast when decorating the lamingtons, as the chocolate will start to set before you have used it all up. You also need to get the coconut on each one straight after it has been coated in chocolate so it will stick. Keep stirring the icing to prevent it from setting, and if you need to thin it out a little to make it more liquid, you could a little more milk or some hot water (1 tsp at a time). The icing should be a little thick however, as it will coat the lamington better than a thin icing. 

 Ingredients for the Sponge Cake: 

6 eggs 

150 g caster sugar 

200 g self-raising flour 

30 g unsalted butter, melted

3 tbsp hot water

Ingredients for the Icing: 

500 g icing sugar

100 g dark chocolate melts 

100 g milk chocolate melts 

15 g unsalted butter

125 ml milk 

375 g coconut chips 


Method: 

Pre-heat oven to 180 degrees Celsius and grease and line a lamington tin (rectangle tin with dimensions approx. 18 x 28 cm and about 4 cm deep). 

Beat the eggs in the bowl of an electric mixer on medium speed for about 5 minutes. The eggs should become light and fluffy in this time. Gradually add the sugar and beat until the mixture is thick and the sugar has dissolved.

Sift in the flour and gently fold into the egg mixture with a metal spoon. Add the melted butter and hot water and gently stir to combine. 

Pour the mixture evenly into the prepared tin and bake for 30 mins, or until the sponge is golden and springs back when lightly touched. 

Once cooked, turn the sponge out onto a baking paper lined cooling rack, and allow to cool completely. 

Once the sponge has cooled, cut into squares (about 15-16). Place the coconut in a large shallow bowl, and have four forks ready. You will also need another baking paper lined cooling rack to place the freshly iced lamingtons on to dry. 

To make the icing, heat a sauce pan with a little water until it is simmering. Place all the icing ingredients (not the coconut), in to a heatproof bowl or saucepan that will fit on top of the saucepan of simmering water. Place the bowl with the ingredients over the simmering water and stir continuously until all the ingredients have melted and combined to form a smooth thick icing. Do not allow the simmering water below to touch the base of the bowl above, as the chocolate may burn. 

Remove the icing from the heat. Using two of the forks, dip one of the sponge squares into the icing. Using the remaining two forks, toss the chocolate coated sponge in the coconut, and place on the prepared rack to set. Continue with the remaining sponge squares, stirring the icing occasionally to stop it setting. 

Leave the lamingtons on the baking paper lined rack until the icing dries. They are best eaten the same day they have been made, however will store in an airtight container for a couple of days (in the fridge if the weather is particularly humid or hot). 

Recipe originally from Bill Granger ‘Everyday’  (Murdoch Books, 2006), p.192. 

In Cakes & Slices Tags Lamingtons, Cake, Chocolate, Coconut, Bill Granger
Comment
Date Torte - Kulinary Adventures of Kath

Chocolate & Date Torte (Gluten Free + Passover Friendly)

Kath October 13, 2014

Last month, one of my very good friends got married. It was very exciting! Especially as my friend very kindly asked me to help with the wedding favours and make a gluten-free dessert. I was quite surprised when she asked me. As much as I love baking, I sometimes don’t have the confidence that what I can do will be good enough, or will live up to what people want. My friend however, had complete confidence in me. This particular friend has been so very supportive of what I have been doing lately, and her support has meant so much to me. 

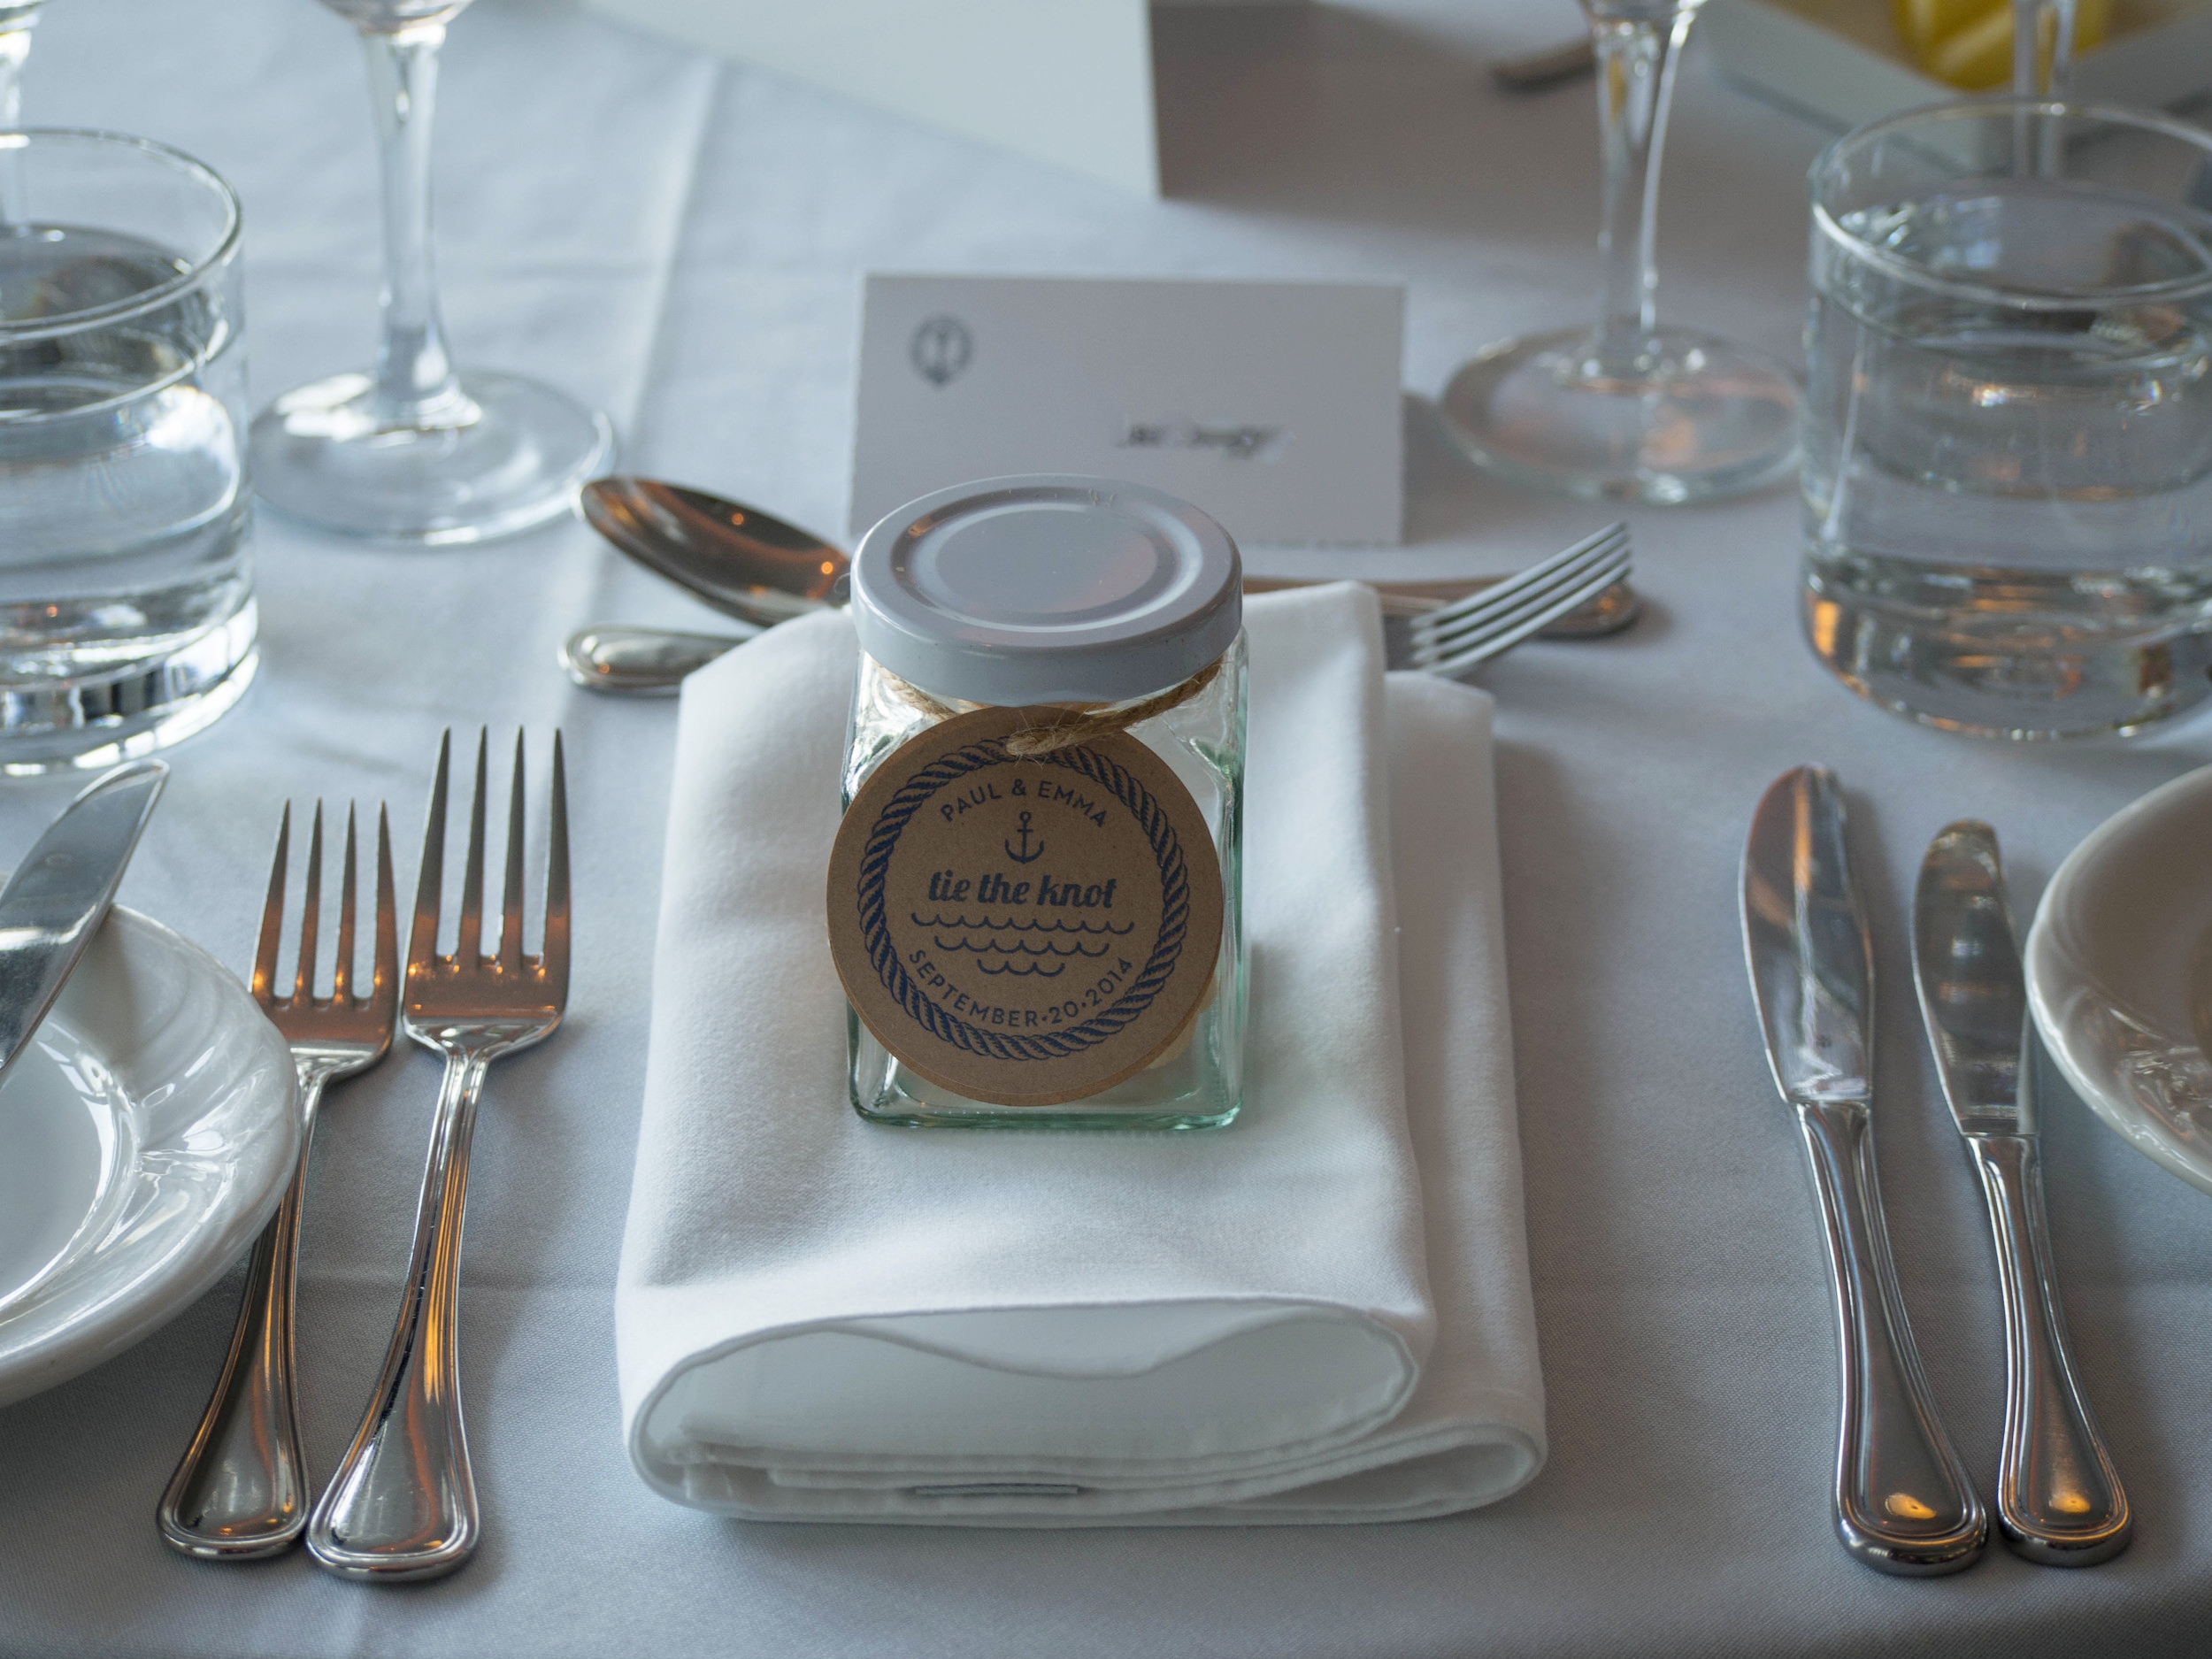
Working with my friend and her lovely mother on this order was lots of fun and really enjoyable. We tossed up a few ideas for the favours, and ended up landing on the rosewater and cardamom macaroons that I make. I liked this option as they are gluten and dairy free so all the wedding guests could enjoy them, and as almonds are a traditional bonbonniere gift I thought this was a nice link. My friend had a fantastic stamp made for her wedding, to use for the invitations and order of service, so we used this as the front of the label for the favours. I think the stamp was the best part of the favours! It looked fantastic and was a nice link to all the other elements of the wedding. 

Thanks so much again to my wonderful friend. I so appreciate your support and for giving me an opportunity to be part of your wedding. Congratulations to you and your husband! 

Congratulations!

Congratulations!

Wedding Favours - Kulinary Adventures of Kath
Wedding Favours 2 - Kulinary Adventures of Kath
Wedding Favours at Reception - Kulinary Adventures of Kath
Wedding Favours at Reception 2 - Kulinary Adventures of Kath
Date Torte 2 - Kulinary Adventures of Kath

Here is the recipe for the gluten free dessert I made for the wedding. It was a really nice torte to make and I am definitely looking forward to making it again soon. The original recipe used all dark chocolate. I changed it a little to include milk chocolate as well, as I often find dark chocolate too bitter. 

* this recipe needs to be started the day before serving.

Ingredients: 

250 g whole blanched almonds

150 g milk chocolate, broken into pieces 

100 g dark chocolate, broken into pieces

6 egg whites

115 g caster sugar

250 g pitted dates, finely chopped


To serve:

100 g milk chocolate

80 g dark chocolate 

250 ml whipped cream 


Method: 

Pre-heat oven to 180 degrees Celsius. Grease and line a 24 cm springform cake tin. 

Place the almonds and chocolate in a food processor and lightly blend. You still want small chunks of almonds and chocolate. 

In a separate bowl, whisk the egg whites until soft peaks form. Gradually add the sugar, and whisk until the whites are thick and glossy. 

Gently fold the almonds, chocolate and the chopped dates into the egg white mixture. Pour mixture into prepared tin, smooth the top if necessary. Bake for 45 minutes. 

Once the torte is cooked leave in the oven, turn the oven off, and leave the oven door propped open. Leave torte in the oven until completely cool. 

Once the torte has cooled, remove from the tin and place on a large plate or platter. Refrigerate overnight. 

The next day, melt the remaining chocolate in a heatproof bowl over a small amount of simmering water (the water should not touch the bottom of the bowl). 

Allow the melted chocolate to cool a little, then drizzle over the cake. 

Serve with whipped cream. 

Date Torte 3 - Kulinary Adventures of Kath

Original Recipe from ‘Monday Morning Cooking Club - The Feast Goes On’ by Lisa Goldberg, Merelyn Frank Chalmers, Natanya Eskin, Lauren Fink, Paula Horwitz and Jacqui Israel, p.187 (Harper Collins, 2014).

Originally Posted October 9, 2014. 

In Other Desserts, Holidays Tags Weddings, Wedding Favours, Gluten Free, Dates, Chocolate, Torte, Cardamom, Rosewater, Macaroons, Passover
Comment
P4050549.jpg

Nigella Lawson's Brownies

Kath October 11, 2014

As promised, order is restored after the first savoury post, with another lovely baking recipe! And you can't get much more sweet and decadent than a chocolate brownie! Definitely makes up for eating vegetables. Even if they were pureed in soup with bacon! Its a tough life, haha. 

Considering I don’t really eat chocolate, I have made a surprising amount of chocolate things this year. I guess when your baking for other people, chocolate is hard to go past. 

After making the brownies by Bill Granger back in March, I was interested to see what another recipe would turn out like. I of course, could not go past a Nigella Lawson recipe. 

When I first made these I think I cooked them a little longer than Nigella stipulated. The brownies were more cake-y, than fudgy, however it was commented that they tasted exactly like Sara Lee chocolate cake, which was considered a good thing!


Ingredients: 

150g unsalted butter 

300g light muscovado sugar

75g cocoa powder

150g plain flour

1 tsp bicarb soda

4 eggs

1 tsp vanilla extract

150g milk chocolate, roughly chopped into chunks 


Method: 

Preheat oven to 190 degrees Celsius. Line a baking tin/tray measuring approx. 25cm/5cm.  

Melt butter over a low heat in a medium saucepan. Once melted, add sugar and stir to combine. 

Sift the cocoa powder, flour and bicarb and stir into the pan. Once it is mixed in, remove from heat. The mixture will be quite dry at this point. 

In a jug, whisk the eggs with the vanilla extract and then add to the brownie mixture. 

Stir in the chopped chocolate and immediately pour mixture into prepared pan. Cook for 20-25 minutes. The idea is to have the brownies still a bit wobbly when they come out of the oven, and a skewer inserted into the centre of the brownies would not come out clean. 

Place the tin on a cooling rack, and allow to cool a little before cutting the brownies. 


Original Recipe from ‘Kitchen: Recipes from the Heart of the Home’ by Nigella Lawson, p.217 (2010). 

Originally Posted May 19, 2014.

In Cakes & Slices Tags Brownies, Chocolate, Nigella Lawson
Comment
  • The Blog
  • Older
  • Newer

recipes

  • Biscuits/Cookies 39
  • Breads Etc. 9
  • Breakfast 7
  • Cakes & Slices 67
  • Confectionary 5
  • Drinks 6
  • Events 14
  • Food Photography Tips 3
  • From The Mailing List 24
  • Heirloom Recipes 12
  • Holidays 44
  • Ice Cream 9
  • Jams Preserves & Spreads 9
  • Muffins 4
  • Off the Shelf 47
  • Other Desserts 25
  • Savoury Dishes/Meals 15
  • Scones 4
  • Tarts & Pastry 9
  • Travel 13

Sign up to Friday Food Chat with Kath, a weekly newsletter for more food, baking, cookbook chat and more!

Sign Up Here!
instagram-unauth pinterest facebook url

Website Accessibility: To enable text to speech function on the blog, click the sound button to the right of each blog post.

All images & content are the property of Kathryn Vincent, unless stated otherwise. Please do not use without permission.

Kulinary Adventures of Kath

Food Photography, Recipes & Baking

instagram-unauth pinterest facebook url