Kulinary Adventures of Kath

Food Photography, Recipes & Baking
  • home
  • About
  • Work with Kath
  • Shop
  • Blog
    • The Blog
    • Recipe Archive
  • Newsletter
  • Contact
  • home
  • About
  • Work with Kath
  • Shop
    • The Blog
    • Recipe Archive
  • Newsletter
  • Contact
Raspberry Pistachio Rose Cake (23 of 25).jpg

The Blog

Recipes and Food Photography by Kath Vincent.

  • The Blog
  • Recipe Archive
  • All
  • Biscuits/Cookies
  • Breads Etc.
  • Breakfast
  • Cakes & Slices
  • Confectionary
  • Drinks
  • Events
  • Food Photography Tips
  • From The Mailing List
  • Heirloom Recipes
  • Holidays
  • Ice Cream
  • Jams Preserves & Spreads
  • Muffins
  • Off the Shelf
  • Other Desserts
  • Savoury Dishes/Meals
  • Scones
  • Tarts & Pastry
  • Travel
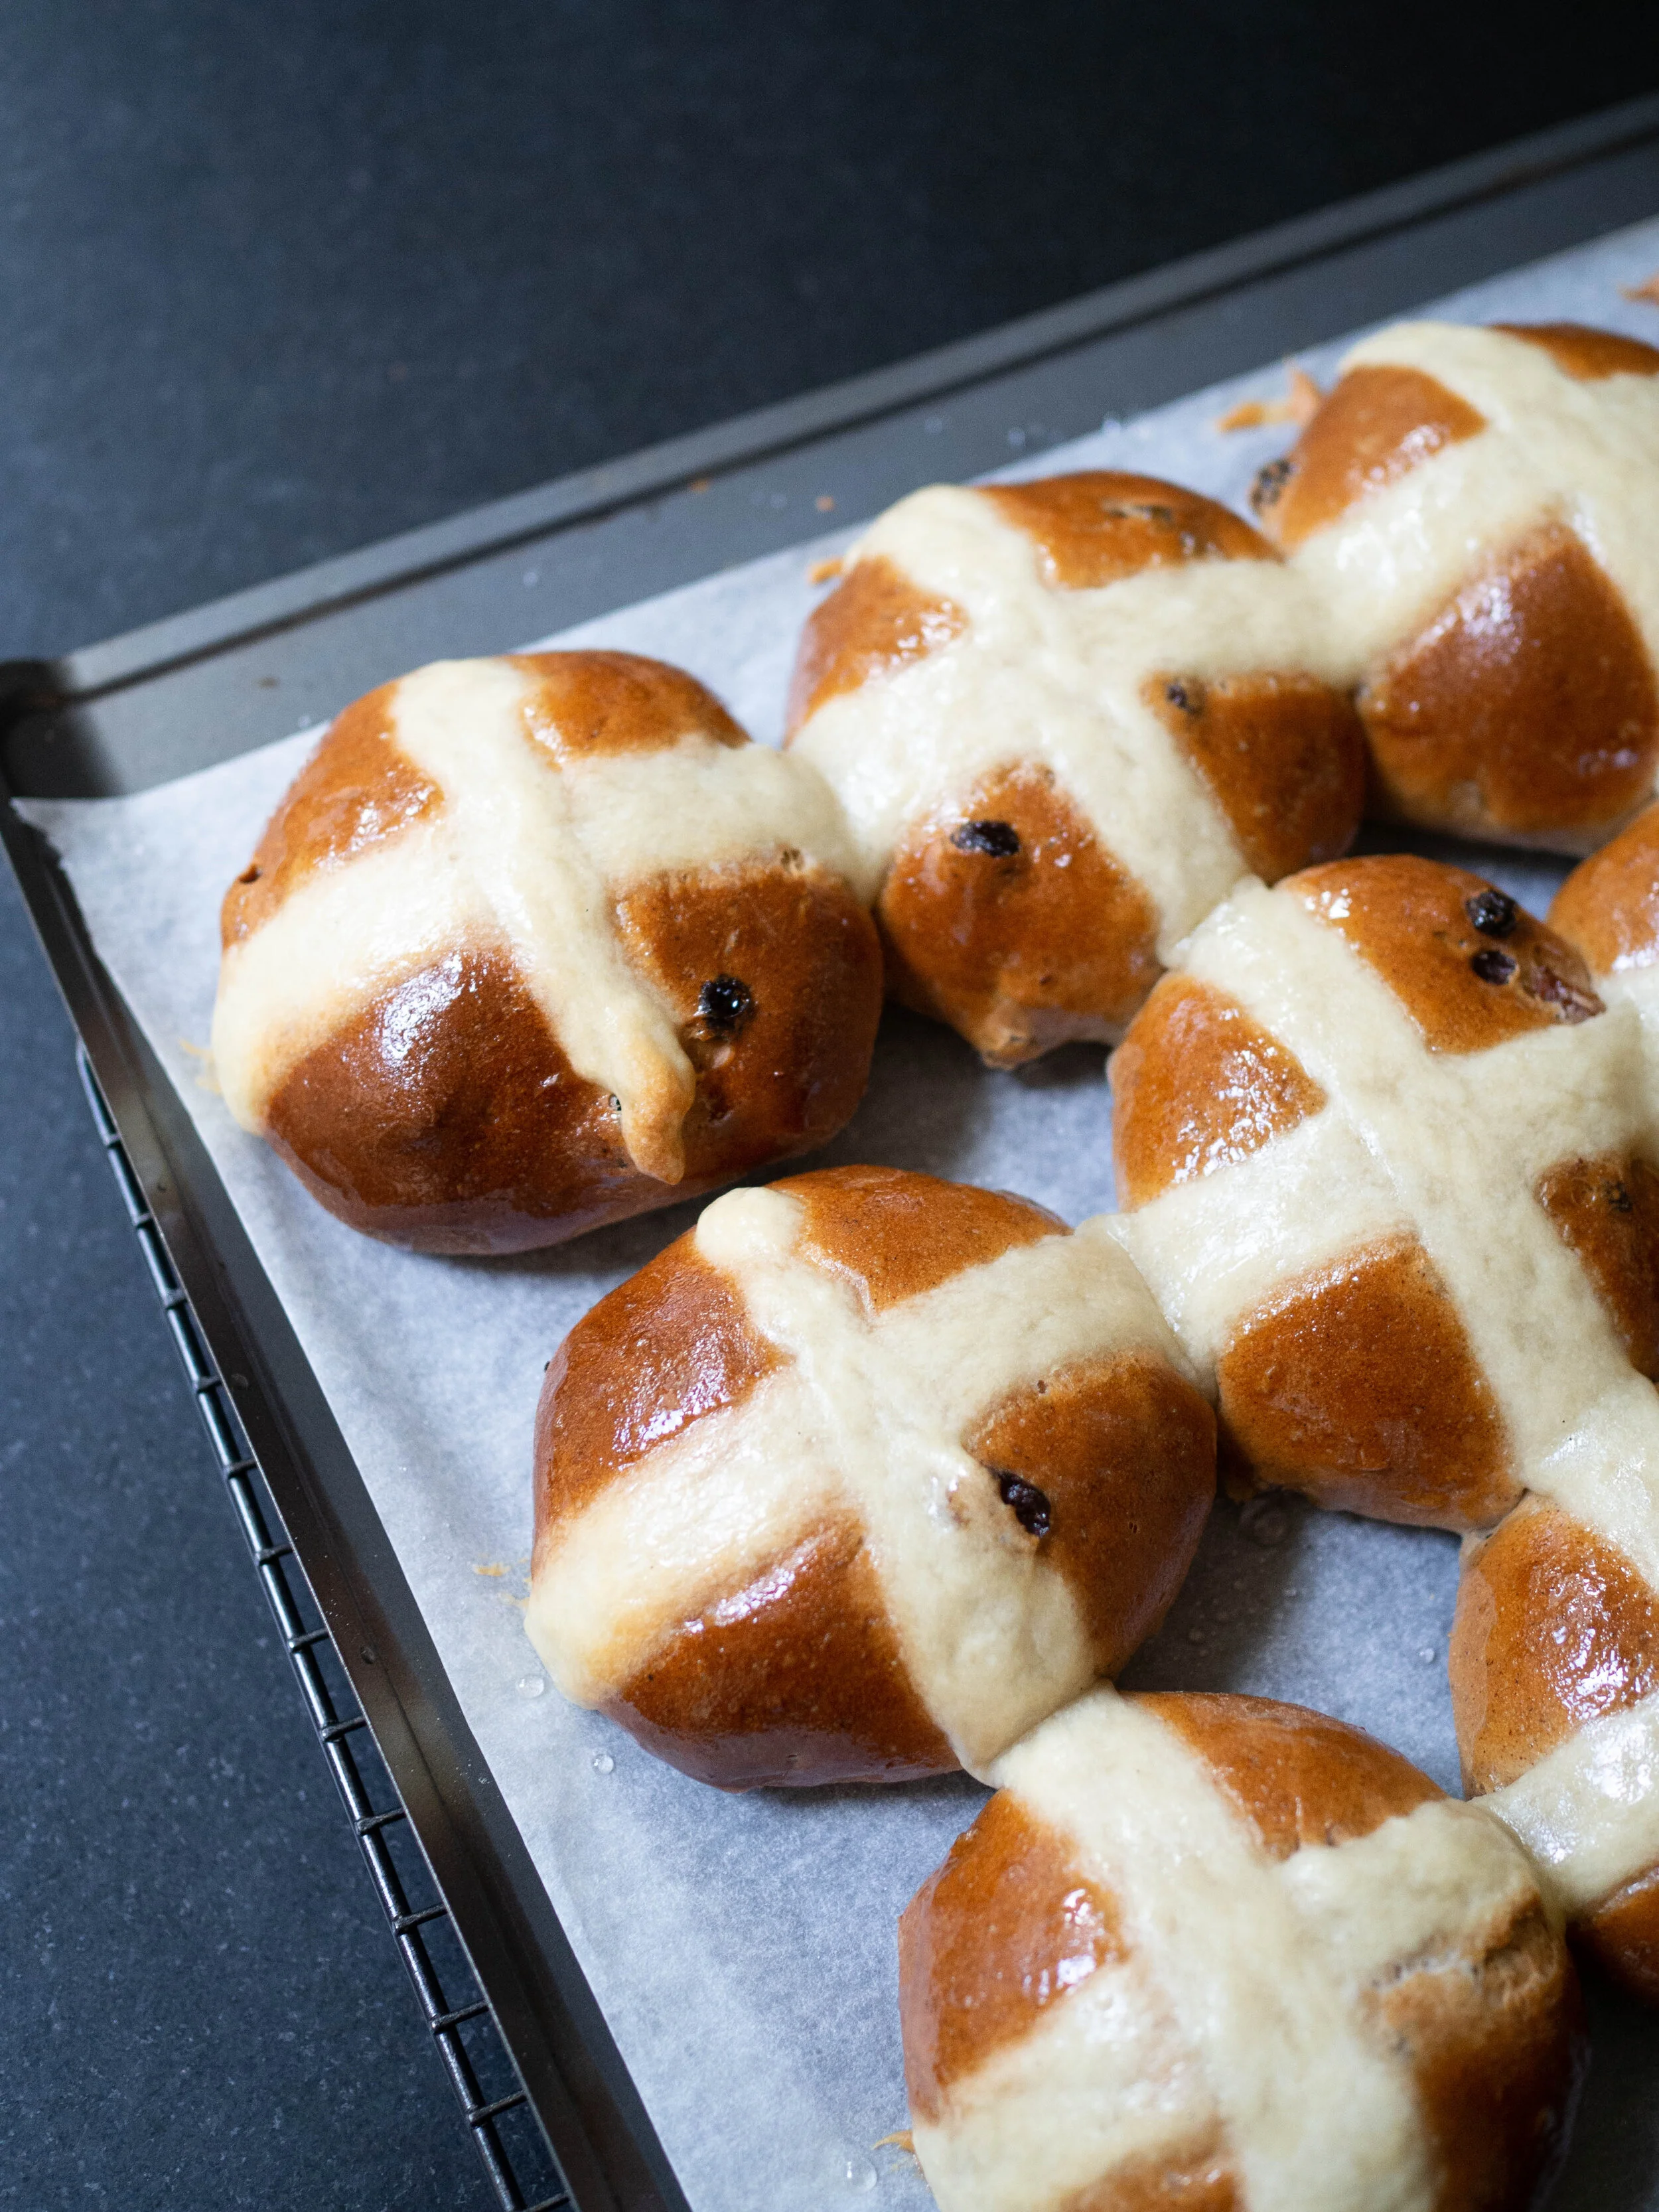
Challah Hot Cross Buns

Vanilla Scented Challah Hot Cross Buns

Kath March 28, 2020

Yes, I know what you are thinking. Again with the challah? I made a babka with challah dough not that long ago, and as I said then, I believe challah is the best type of bread so it could only ever improve a recipe. 

I am also aware that this recipe is in no way ‘kosher’. Challah is a Jewish bread most commonly eaten at Friday night Shabbat, and hot cross buns are made to celebrate the Christian holiday of Easter. I am also quite aware that the Jewish holiday of Passover often falls at the same time as Easter (as it does this year), and that leavened foods such as challah are not eaten during this time. So, definitely not ‘kosher’. 

Despite this, I maintain that challah is the best kind of bread, so trying to make hot cross buns with it was always going to happen for me. And if the religious contradictions are just too much, call them (challah) spiced fruit buns (great for any time of year) and leave it at that.

I often find when making hot cross buns, that I can never get them to look identical, and that using the same recipe doesn’t always yield a batch that looks the same as last time. I have found this occurs for a few reasons. Firstly, I never weigh the dough so I never get my individual buns exactly the same weight/size. I may try this next time I make them (which should be soon since we are socially isolating right not and not going to the shops to specifically buy hot cross buns so homemade is it for now!), and if I do I will update the recipe below. 

Secondly, I find it depends how my dough proofs. When making bread dough in warmer conditions I don’t have any issues with my dough rising. Now the weather has cooled down a bit, I am finding my bread doughs are not rising the same amount in the same time frame. To combat this, the last time I made these, I proofed the dough in our plate warming drawer under our oven, at 30 degrees Celsius (which is it’s lowest temperature) leaving the drawer open as the ideal temperature for proofing dough is about 25-28 degrees Celsius. 

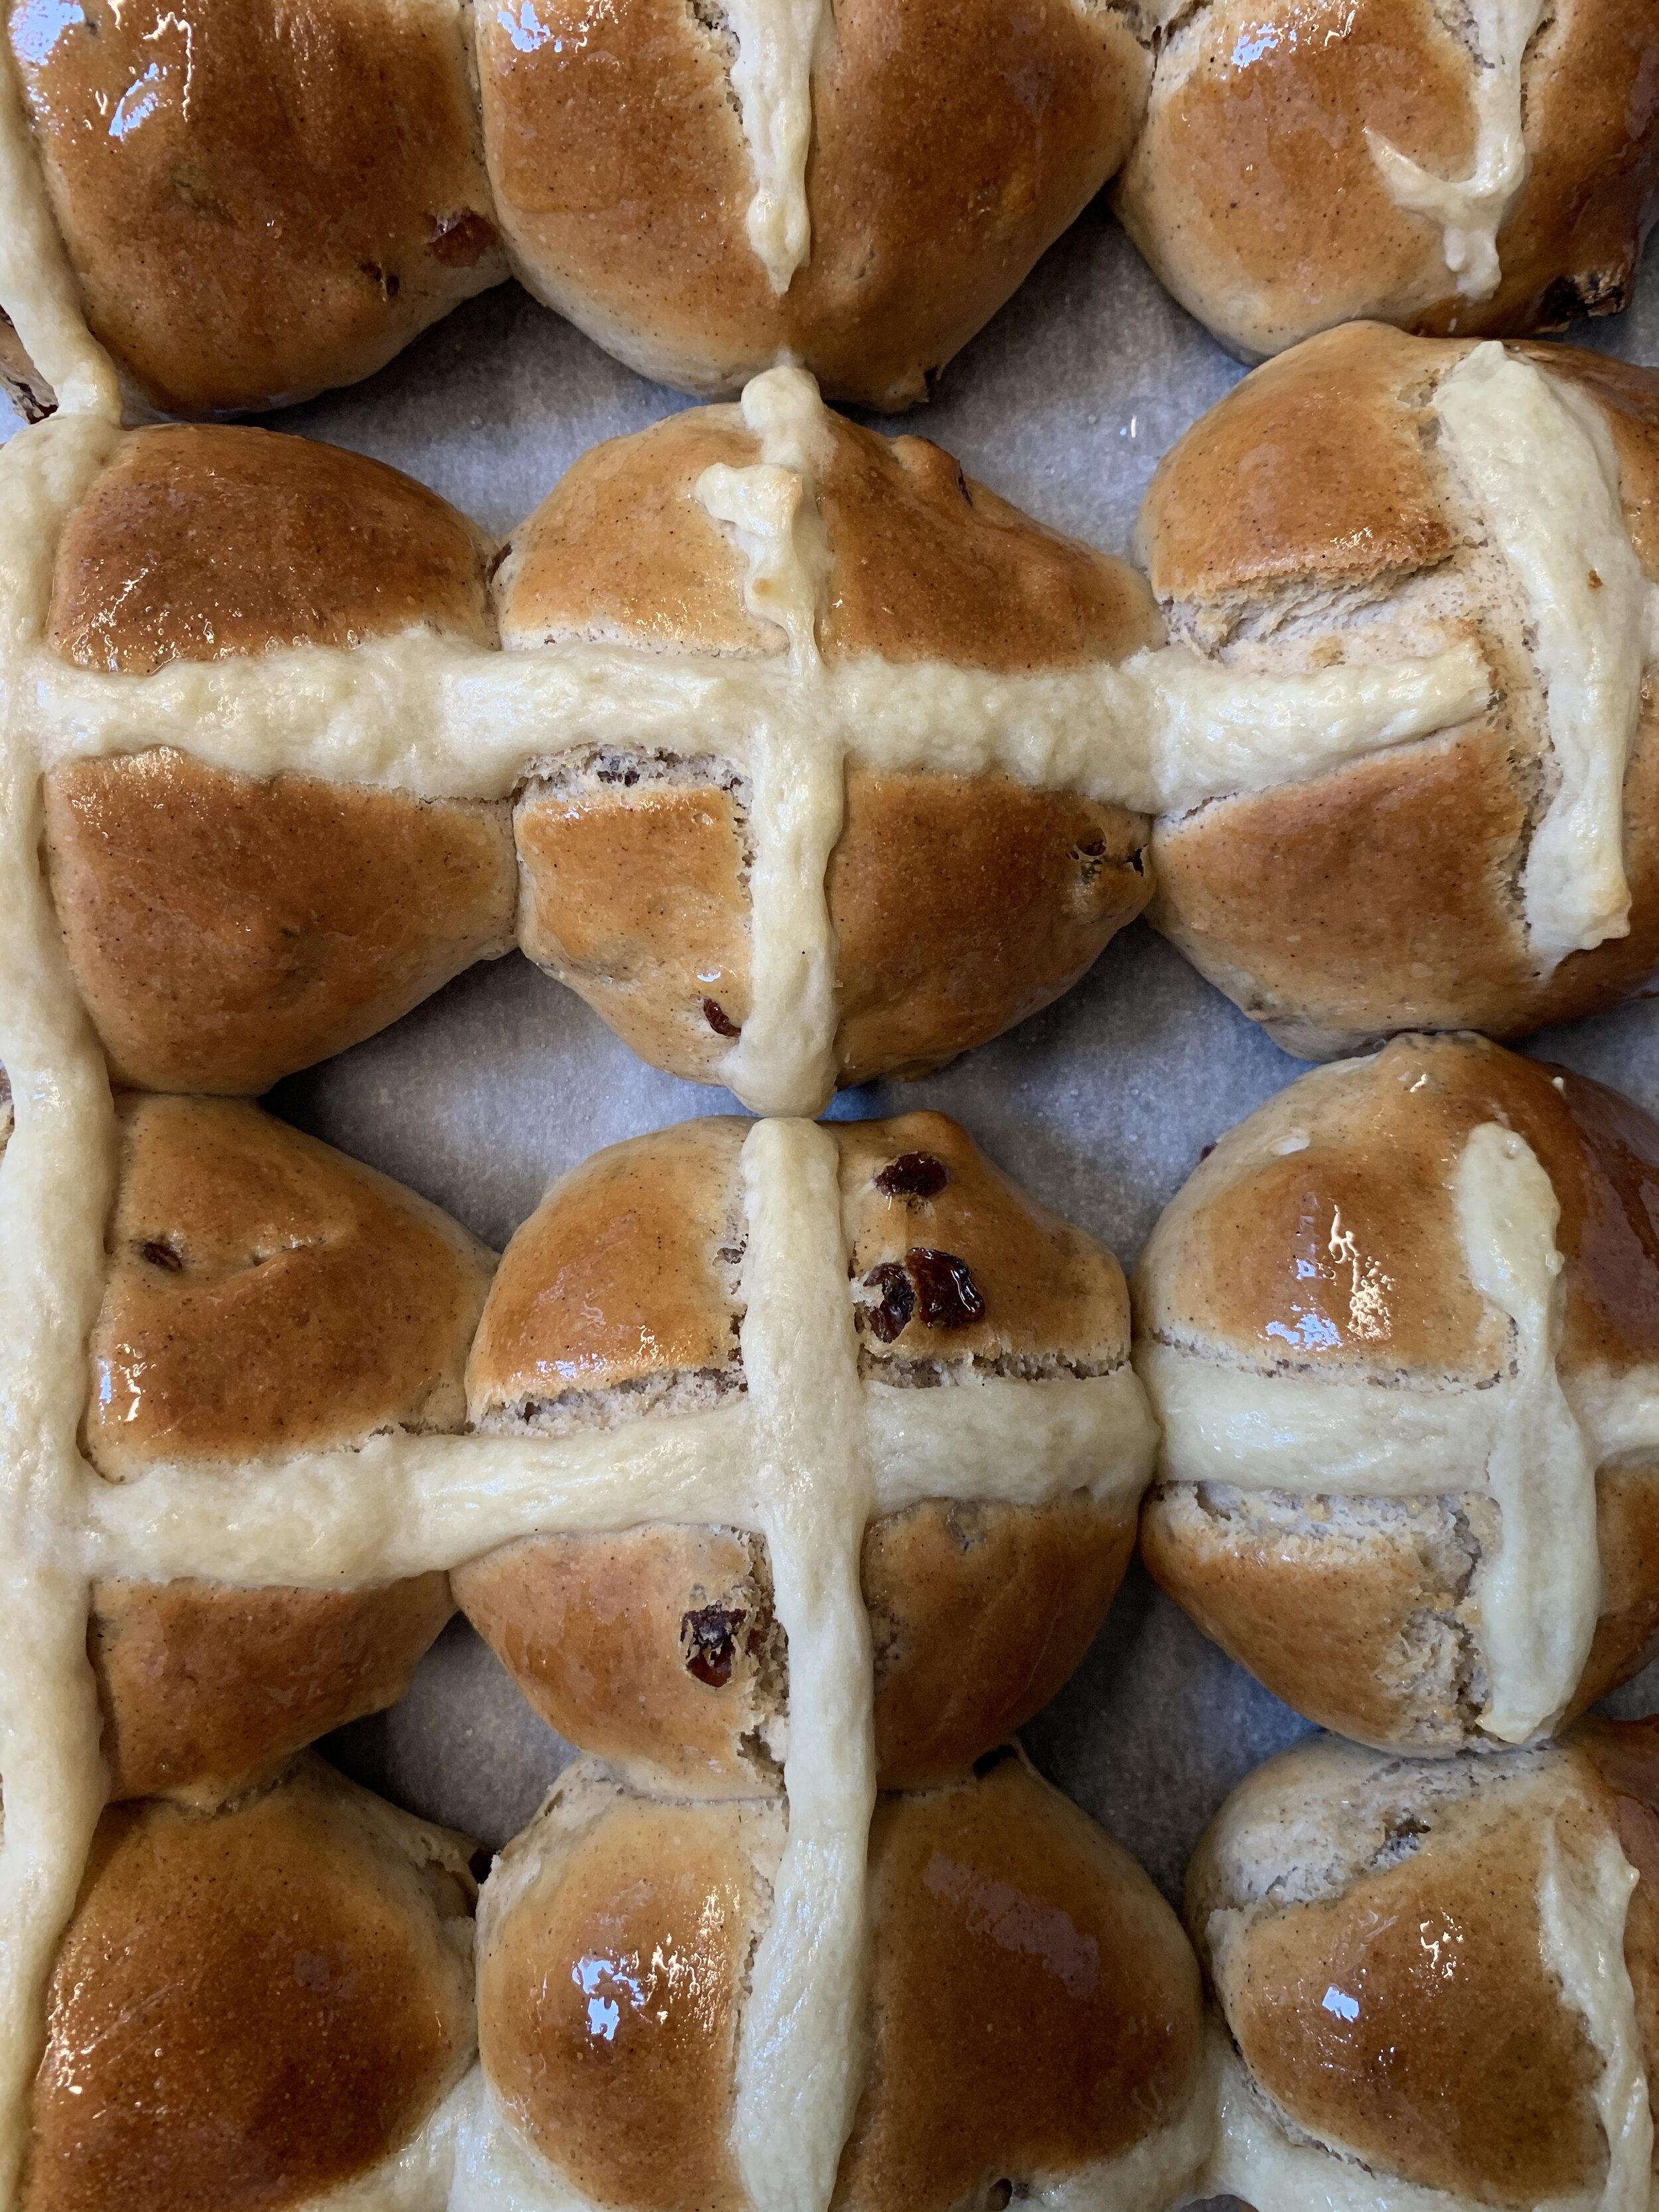
First Attempt
First Attempt
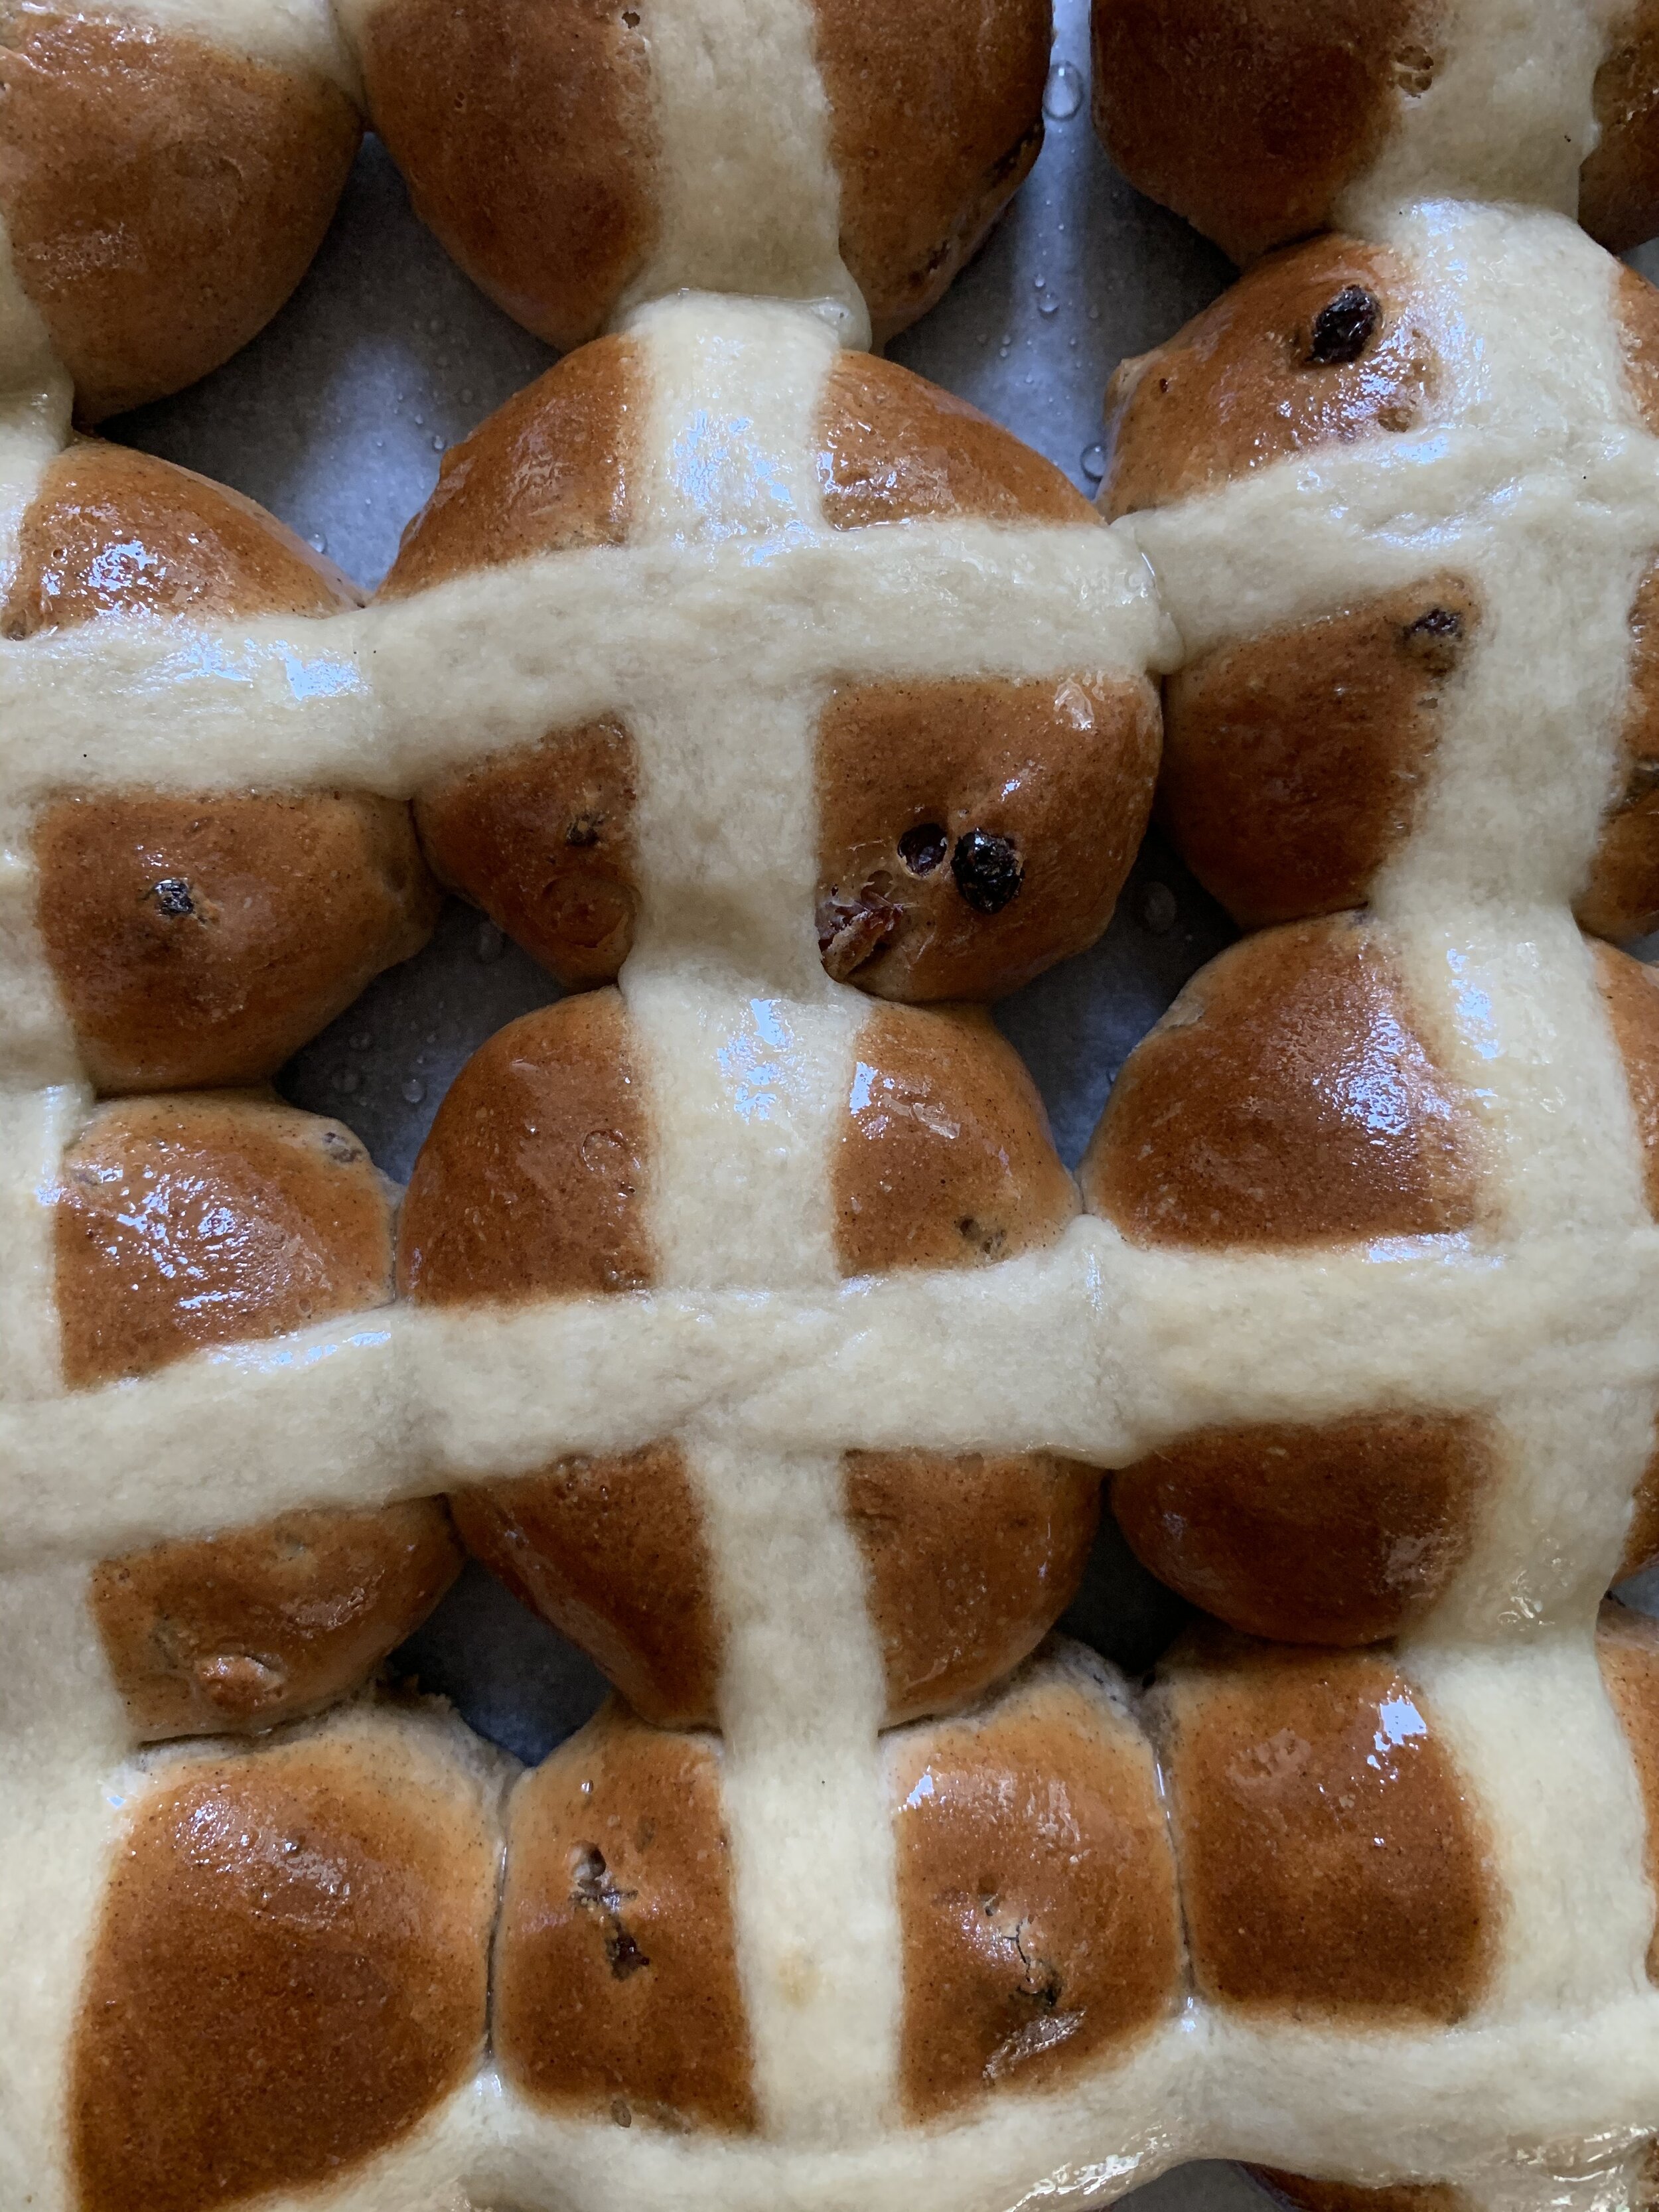
Second Attempt
Second Attempt

This batch of challah hot cross buns turned out larger than the previous batch, which had been proofed closer to room temperature. This first batch were smaller, and had cracks in the dough on the top, which I later found out was a sign that a dough is under proofed. For some more tips on proofing bread dough check out this blog post from BakeClub I found quite helpful. 

Thirdly, I always do the final proof and bake of my hot cross buns on a flat baking tray. This means the dough can spread in away way it wants. Using a baking tray with sides may help get a more even look to my hot cross buns as the dough will not be able to rise and spread in any which way. Again, if I try it this way next time I will update the recipe below. 

On a final note, you don’t have to soak the sultanas in anything but I prefer them to be a little plumped up. The addition of the vanilla when soaking the sultanas is lovely, and the more fragrant the vanilla extract you use the better - I have found using the vanilla extract from Grounded Pleasures yields the best flavour. Just make sure the sultanas are well drained before adding to the dough. And for reference the quantity of spices I use for the dough adds up to approximately 12-13g, so if you wish to alter the quantities of individual spices or types of spices just keep it to that total weight (or add in more plain flour to make up the difference). 

Challah Hot Cross Buns

Vanilla Scented Challah Hot Cross Buns

Ingredients for the Dough: 

200g golden sultanas or raisins (cut in half if very large)

2 tbsp vanilla extract

2 tbsp hot water

490g plain flour, plus extra

250ml warm water

9g dried yeast

85g golden caster sugar

3/4 tsp salt

1 egg, beaten

63ml canola or vegetable oil, plus extra

1 tsp vanilla bean paste

2 tsp ground cinnamon

1 tsp ground ginger

1 tsp ground cardamom

1/2 tsp ground nutmeg

1/2 tsp mixed spice

Ingredients for the Glaze: 

100ml water

50g caster sugar

50g vanilla sugar (see here for how to make your own vanilla sugar)

Ingredients for the Cross (if using): 

90g plain flour

8g icing sugar (confectioners)

pinch of salt

15ml canola or vegetable oil

75ml water (room temperature/tepid is best)

Method:

Place the sultanas in a small bowl, and cover with the hot water and vanilla. Set aside. 

Place the flour into a large bowl (one that fits your stand mixer if you have one). Make a well in the centre of the flour, then pour in the warm water. Add the yeast and 60g of the golden caster sugar and stir (don’t mix in the flour at this stage). Leave for 10-15 minutes, or until the yeast has become foamy. 

Then add the salt and remaining sugar, stir again (don’t mix in the flour at this stage), and wait 5-10 minutes for the yeast to become foamy again. 

Once the yeast is foamy, add the egg, oil and vanilla to the yeast mixture and combine. Then start to gradually incorporate the flour into the wet mixture. Once everything is combined, attach your bowl to your stand mixer fitted with the dough hook, add the spices, and knead on a medium speed for about five minutes. The dough will be smooth and a little sticky once done. If the dough is too sticky, add a little more flour (1-2 tbsp). 

While the dough is kneading, lightly oil a large bowl and drain the raisins well. 

Dust your work surface with flour and tip the dough out. Add the raisins and knead by hand to combine into the dough. Add small amounts of flour if necessary to counterbalance any moisture the sultanas have added and to make the dough a bit less sticky. There is no need to knead the dough for too long, as your stand mixer has done most of the work already. 

Once the sultanas are incorporated into the dough, place into the oiled bowl and cover. Leave in a warm spot for about 1.5 hours, or until the dough has risen and doubled in size. 

While the dough is proofing, make the glaze. Place all ingredients into a small saucepan and place over medium/high heat. Bring to the boil, and allow to bubble for 30 seconds. Remove from the heat and set aside to cool. 

Line a baking tray with baking paper.

Once the dough has risen, flour your work surface and tip the dough out. Lightly flour the top of the dough if necessary. Cut the dough into 12 equal pieces - I do this by shaping the dough into a fat log shape, then cutting it in half, then dividing the two halves into six pieces each. 

Roll each piece of dough into a bun shape by folding the sides of each piece to the centre and pinch to close. This will now be the underside of your bun. Place the pinched side down, and cover your hand over the ball of dough like a loose claw. Rotate the ball of dough under your hand using the claw shape, to gently smooth the dough and form into a nice ball shape.

Place each ball of dough on the prepared tray, in a 4 x 3 formation. I usually leave a little space in between each to allow for more rising during the final proof and during baking. 

Cover the dough again and leave in a warm spot for about 30 minutes, or until the dough has risen. 

While the dough is rising, preheat oven to 180 degrees Celsius.

If using, make the cross paste by whisking together all the ingredients in a medium bowl until it is a smooth yet paste like consistency. The warmer the water is in this the runnier it will be, I often use warm water rather than room temperature, which is why my crosses are thicker and fat as the paste is a little runnier.

Place a piping bag or zip lock bag inside a large glass and turn the edges of the bag over the outside of the glass. Fill the piping bag with the cross mixture, and twist the top to close (I like use a peg to seal the top a bit more). 

Once the dough has risen, cut a small amount of the piping bag tip off and pipe the cross over each bun. Do this by piping one long line over each row of buns, then finish it off doing the same in the other direction. 

Bake for 20-25 minutes, rotating the tray in the oven about half way to help the buns cook and brown more evenly. The buns will be ready when they are golden on top and sound hollow when tapped. 

Remove from the oven, and place the tray on a wire rack. Using a pastry brush, paint the tops of each hot cross bun with the glaze. You will not need all of the glaze - if you think you will make another batch soon, store it in a jar in the fridge and it can be used again (just bring it to room temperature before glazing).  

These challah hot cross buns are delicious served warm from the oven, or toasted under a grill the next day. They also freeze well, and I recommend you do so if they won’t all be eaten soon after baking. 

Recipe Notes (12/04/2020):

  • The next couple of times I made these I have weighed the dough and each bun needed to weigh between 97-100g. I found this did help make them look even more uniform. So I would definitely recommend weighing your dough after the first proofing and dividing that number by 12 to get exactly the weight of each bun based on your dough at the time.

  • I have found that one batch of the sugar syrup is enough for 4 separate batches of hot cross buns.

  • The amount of mixture you need for the cross seems very dependent on how big or small you cut into your piping bag. Sometimes I feel a barely have enough for all the buns as I have cut a larger slit into the bag, other times there are leftovers as I have cut a much smaller slit!

Vanilla Hot Cross Buns

References: ‘Monday Morning Cooking Club - The Food, The Stories, The Sisterhood’ by Merelyn Frank Chalmers, Natanya Eskin, Lauren Fink, Lisa Goldberg, Paula Horwitz and Jacqui Israel (HarperCollins, 2013), p.263; ‘Beatrix Bakes’ by Natalie Paull (Hardie Grant Books, 2020), pp.176 & 192-3.

Vanilla Hot Cross Buns
In Breads Etc., Holidays Tags Hot Cross Buns, challah, Passover, Vanilla, Easter, Breads, Holiday Baking
2 Comments
Passover Charoset Bliss Balls

Passover Charoset Inspired Fig Date and Pistachio Balls

Kath March 17, 2020

I find exploring other cultures through food an endlessly fascinating experience. And mostly, it can be done at home. Through cookbooks, blogs, social media and having a few ingredients at home. 

As I mentioned in a previous post, I received Leah Koenig’s book ‘The Jewish Cookbook’ for Christmas last year (the irony of that statement is still not lost on me I promise!), and it has remained one of the books I have been reading through most since then.

Towards the back of the book, in the chapter ‘Condiments, Spices & Drinks, there are quite a number of recipes for charoset. Charoset is part of the Passover seder, it’s a mixture made of fruits with much symbolic meaning for that particular religious holiday. Like many recipes within the Jewish diaspora, the ingredients change depending on what part of the world the recipe and Jewish community live or have come from. There are six different recipes for charoset in Leah’s book, and she mentions there would be many other variations. 

All of the recipes use fruit, often dried fruit with some fresh apple, some spices and some sweet red wine. Some charoset is chopped, some pureed into a smoother paste and others rolled into balls. This got me thinking - taking a bit of inspiration from each of these recipes, I could make some really nice dried fruit and nut balls. Not like those weird protein (or ‘bliss’) balls, but something really tasty made with great quality dried fruits, and spices like those used in many of these recipes. 

The Kurdish Charoset recipe was rolled into balls, many of the recipes used dates and the Yemenite Charset recipe used dried figs and a great selection of spices (including ground coriander which I never would have thought of using otherwise). I was starting to create a version of my own, taking what I liked from all of these very diverse charoset recipes. I used slivered almonds as the nut inside the balls, as we always seem to have a good supply of them, and the pistachios on the outside just look so good. I substituted vanilla extract for sweet red wine, but if you are making these for Passover, you can still use the wine instead.

Often the best recipes are heavily influenced by the work of others and the foods of other cultures (and what you have in your pantry!). So these are my Passover Charoset Inspired Fig Date and Pistachio balls, that could equally be just Fig Date and Pistachio Balls ready for a nice healthy snack. 

Fig and Date Bliss Balls

Passover Charoset Inspired Fig Date and Pistachio Balls

Ingredients: 

200g black and white dried figs

110g pitted medjool dates

50g golden sultanas

50g slivered almonds, lightly toasted

1 tsp vanilla extract

1/2 tsp ground ginger

1/2 tsp ground cinnamon

1/2 tsp ground coriander

1/2 tsp ground cardamom 

25g blanched or raw pistachios, finely chopped

Method: 

Add all the ingredients, except the pistachios, to the bowl of a food processor. Blitz until all the ingredients are combined and it clumps together. The mixture does not need to be smooth. Some of the almonds will remain in chunks. 

Roll into balls, then roll into the finely chopped pistachios to cover. Place on a tray and leave in the fridge for at least 30 minutes to firm up. The balls can then be stored in an airtight container in the fridge. 

Makes 18-20 balls. 

Passover Charoset Balls

Reference: ‘The Jewish Cookbook’ by Leah Koenig (Phaidon Press Limited, 2019), pp.406-409.

Charoset Balls for Passover
In Holidays, Other Desserts Tags Passover, Charoset, Dried Fruit, Bliss Balls, The Jewish Cookbook, Gluten Free, Dairy Free, Holiday Baking
Comment
White Chocolate Easter Torte (Passover Friendly)

White Chocolate Easter Torte (Passover Friendly)

White Chocolate Easter Torte (Passover Friendly)

Kath April 14, 2019

Since Easter and Passover again fall at the same time this year, I thought I would make a dessert that observed both holidays. My immediate thought was a variation of a Lithuanian Nut Torte I had made a couple of years ago. The recipe uses nuts, grated chocolate and whipped egg whites to make a light cake. 

The time I first made this cake, I made it with dark or milk chocolate, however always thought I should try a white chocolate version of it. Now two years later I am finally doing it! 

The idea to make this cake again reappeared in my mind late one night when I was trying to fall asleep. That day a friend and I had visited Bakedown Cakery in St Leonards, as I was really keen to get some of the new Easter range. We both bought some chocolate, and as we walked home got caught in the worst downpour! We were absolutely saturated once we got back, but our Bakedown goodies had been well protected and survived the journey. 

I had bought some of the Golden Almond Eggs (caramelised white chocolate filled with almond praline - as delicious as it sounds), and some of the Hot Cross Bunnies chocolate bark (white and caramelised white chocolate with Easter spices with cute bunny illustrations printed on top). These chocolates, particularly the bark got me thinking about how it could be used to decorate a cake. 

The Nut Torte I had made so long before popped into my head as the perfect Easter dessert, which could also double as dessert for Passover. I decided I needed to visit Bakedown again to get more of the Hot Cross Bunnies bark, and a couple of blocks of Toasty (Bakedown’s caramelised white chocolate) to use for the torte. Jen at Bakedown also had Toasty Easter Bunnies ready when I went in the second time, and my gosh I was excited! Caramelised white chocolate is one of the best things I have ever tasted, and as someone who can’t eat ‘normal’ chocolate it was so nice to have an Easter treat I could actually enjoy! 

For this Easter Torte, I used Bakedown’s Toasty to grate into the torte, and the Hot Cross Bunnies bark to decorate the outside. I also used a combination of Toasty and regular white chocolate to melt down and decorate the top and use to stick the bark to the sides of the torte. You can of course use any type of chocolate you wish to make this torte, and decorate with your favourite Easter eggs, or just leave the decoration at the chocolate drizzle if you are making this cake for Passover (some toasted nuts scattered over the top would also be lovely). 

White Chocolate Bark from Bakedown Cakery, illustrations by Dawn Tan.

White Chocolate Bark from Bakedown Cakery, illustrations by Dawn Tan.

Hot Cross Bunnies white and caramelised white chocolate by Bakedown Cakery

Hot Cross Bunnies white and caramelised white chocolate by Bakedown Cakery

Caramelised White Chocolate Torte

White Chocolate Easter Torte (Passover Friendly)

Ingredients: 

100g macadamias or almonds, ground

3 tbsp fine matzo meal (or fine dry breadcrumbs if not making for Passover)

100g good quality white chocolate (the kind you would buy to eat) 

3 eggs (large), separated

125g golden caster sugar

1 tbsp lemon juice 

To Decorate: 

50-100g white chocolate 

Easter eggs/chocolate to decorate or some extra toasted nuts (macadamias or almonds) 

Method: 

Pre heat oven to 170 degrees Celsius and line a round 20cm loose bottomed or springform tin with baking paper. 

Grate the chocolate into a medium bowl, then add the ground nuts and matzo meal. Mix to combine then set aside. 

Place the egg whites in the bowl of a stand mixer, fitted with the whisk attachment. Whisk the egg whites until stiff peaks form, then gradually add the sugar. Continue to whisk until the sugar has just incorporated. Briefly whisk in the egg yolks, then fold in the chocolate nut mixture. 

Tip into the prepared tin, and gently smooth the top. 

Bake for 35-45 minutes or until the torte is golden in colour and a skewer inserted into the centre comes out clean. The torte will rise up then sink down a bit as it cooks. 

Leave to cool on a wire rack, removing from the tin once cooled. 

To decorate, melt the chocolate either in the microwave or over a double boiler. If sticking chocolate bark or similar around the edges of your torte use 100g of chocolate, drizzle some over the top, then spread the remaining chocolate around the sides of the cake then sick on the bark. If not, use 50g chocolate to drizzle over the top. Decorate with Easter eggs or toasted nuts. 

Easter Eggs
White Chocolate Passover Torte

Reference: ‘100 Best Jewish Recipes’ by Evelyn Rose with Judi Rose (Pavilion, 2016), p.149. 

Caramelised White Chocolate Torte
Easter Eggs
In Cakes & Slices, Holidays Tags White Chocolate, Caramelised White Chocolate, Bakedown Cakery, Passover, Easter
Comment
Low FODMAP Easter Spiced Brioche Scrolls

Low FODMAP Easter Spiced Brioche Scrolls

Easter Spiced Brioche Scrolls (Low FODMAP)

Kath March 30, 2018

Happy Easter! 

I hope everyone is enjoying celebrating Easter/Passover/the long weekend! It’s about 30 degrees Celsius here in Sydney, so it kinda seems odd that it’s Easter and technically meant to be Autumn. I am very much looking forward to the weather cooling down and really getting back into the kitchen again. Summer was hot here this year, and it definitely kept me away from the kitchen after the necessities of cooking for Christmas were over. Slowly I am finding moments in the kitchen, mostly to prepare for the work week, but also gradually getting back into the habit of baking and cooking purely for the joy if it. 

This long weekend I plan to make my annual lot of hot cross buns and have my first foray into making matzo ball soup. I’m thinking these are the best dishes of the two religious holidays celebrated this weekend so it is only fitting to give it them both a go. I have tried Matzo ball soup only once before, so I have been looking through my cookbooks and comparing the recipes from the likes of Yotam Ottolenghi and the Monday Morning Cooking Club to get all the tips and advice possible! Here’s hoping it goes well!

But now on to the scrolls! 

Low FODMAP Easter Spiced Hot Cross Buns

Low FODMAP Easter Spiced Hot Cross Buns

A couple of weeks ago I was generously sent some of The Healthy Baker’s Low FODMAP Plain Flour, so I decided that I would use that in my Easter baking and see how it goes. 

Since receiving this flour I have done a little research on the low FODMAP diet, and suffice to say the diet cuts out quite a few things across all food groups. 

The low FODMAP diet was developed by Monash University and aims to provide relief for those suffering IBS. Luckily the diet isn’t intended as a long term thing, rather a 6 or so week program to determine what high FODMAP foods someone may be reacting to. They  can then reintroduce other high FODMAP foods to their diet and continue to minimise those that still act as triggers. 

For these scrolls I have used a tried and tested brioche recipe so I could compare how they turned out using this new flour. And honestly, there is no comparison. The texture of the brioche is exactly the same as using regular plain flour. Which is great as it means everyone can enjoy all sorts of homemade baked goods without compromising on the quality of their bakes and not having to feel unwell after. I have tried to make these as hot cross bun inspired as possible by adding the same types of spices as I would to my hot cross buns. You can however use whatever combination you like, or in keeping with these being low FODMAP and for Easter, use dark chocolate instead. 

To make these scrolls Low FODMAP not only can you use The Healthy Baker’s flour but also substitute dairy milk for almond. I was also going to add dried fruit to the dough to make the scrolls even more like hot cross buns, but as dried fruit are high FODMAP I have left them out this time - so I guess these brioche scrolls can be like a better version of a fruitless hot cross bun for Easter! 

To get an idea about what other foods are low or high FODMAP check out the Monash University website which as some really good resources. 

Easter Spiced Brioche Scrolls using The Healthy Baker's Low FODMAP Plain Flour

Easter Spiced Brioche Scrolls using The Healthy Baker's Low FODMAP Plain Flour

Ingredients for the Dough: 

250ml milk (use lactose free for Low FODMAP)

10g dried yeast

75g caster sugar

2 eggs, beaten

485g Healthy Baker Low FODMAP Plain Flour, plus extra for dusting

75g unsalted butter, cubed and softened, plus extra for greasing


Ingredients for the Filling: 

85g unsalted butter, softened

120g panela sugar

1tsp ground cinnamon

1tsp mixed spice

1/2tsp ground ginger 

1/4tsp ground cardamom 

Pearl sugar*, optional 


Method: 

In a small saucepan warm the milk over low heat until lukewarm. Add the yeast, sugar and eggs and stir to combine. 

In the bowl of a stand mixer fitted with a dough hook, add the flour then the milk mixture and mix on a low speed until the ingredients are starting to combine and a dough is beginning to form. Increase the speed to medium-high for 5 minutes. Add the butter and mix on medium speed until it has been incorporated into the dough, and the dough is smooth and elastic. 

Use some butter to lightly grease a large bowl then place the dough inside. Cover with plastic wrap and leave to rise in a warm place for about 40 minutes until the dough has doubled in size. 

While the dough is rising prepare the spiced sugar for the filling by combining the panela sugar, cinnamon, mixed spice, ginger and cardamom in a small bowl. 

Once the dough has doubled in size, lightly flour your work surface and place the dough on top. Gently roll the dough into a rectangle (approx. 25 x 48 cm) allowing it to remain about 1 cm thick. 

Spread the softened butter over the dough then sprinkle over the spiced sugar mix. Roll the dough from the long edge to form a log, then cut into about 12 pieces. Line a large baking sheet with baking paper and place the cut scrolls on the sheet in rows leaving room in between each so they can rise. Loosely cover with plastic wrap and leave to rise again for about 30 minutes until the scrolls have doubled in size. 

While the scrolls are rising, pre-heat oven to 180 degrees Celsius. 

Once the scrolls have doubled in size, sprinkle with pearl sugar if you wish, and bake for 15-20 minutes or until they are golden brown and sound hollow when tapped. 

Serve warm and if there are any leftovers freeze them in zip lock bags to enjoy later. 


*Pearl sugar (or nib sugar) does not melt at high temperatures and can be used to decorate baked goods. It can be found at specialty food shops. 

Easter Spiced Brioche Scrolls

Easter Spiced Brioche Scrolls

Reference: The Cook and Baker by Cherie Bevan and Tass Tauroa (Murdoch Books, 2015), p.124. 

Low FODMAP Baking

Thank you to The Healthy Baker for providing me with some of their fantastic Low FODMAP Plain Flour!

In Breads Etc., Holidays Tags Brioche, Low FODMAP, The Healthy Baker, Sponsored Posts, Easter, Passover, Bread Making
Comment
Date Torte - Kulinary Adventures of Kath

Chocolate & Date Torte (Gluten Free + Passover Friendly)

Kath October 13, 2014

Last month, one of my very good friends got married. It was very exciting! Especially as my friend very kindly asked me to help with the wedding favours and make a gluten-free dessert. I was quite surprised when she asked me. As much as I love baking, I sometimes don’t have the confidence that what I can do will be good enough, or will live up to what people want. My friend however, had complete confidence in me. This particular friend has been so very supportive of what I have been doing lately, and her support has meant so much to me. 

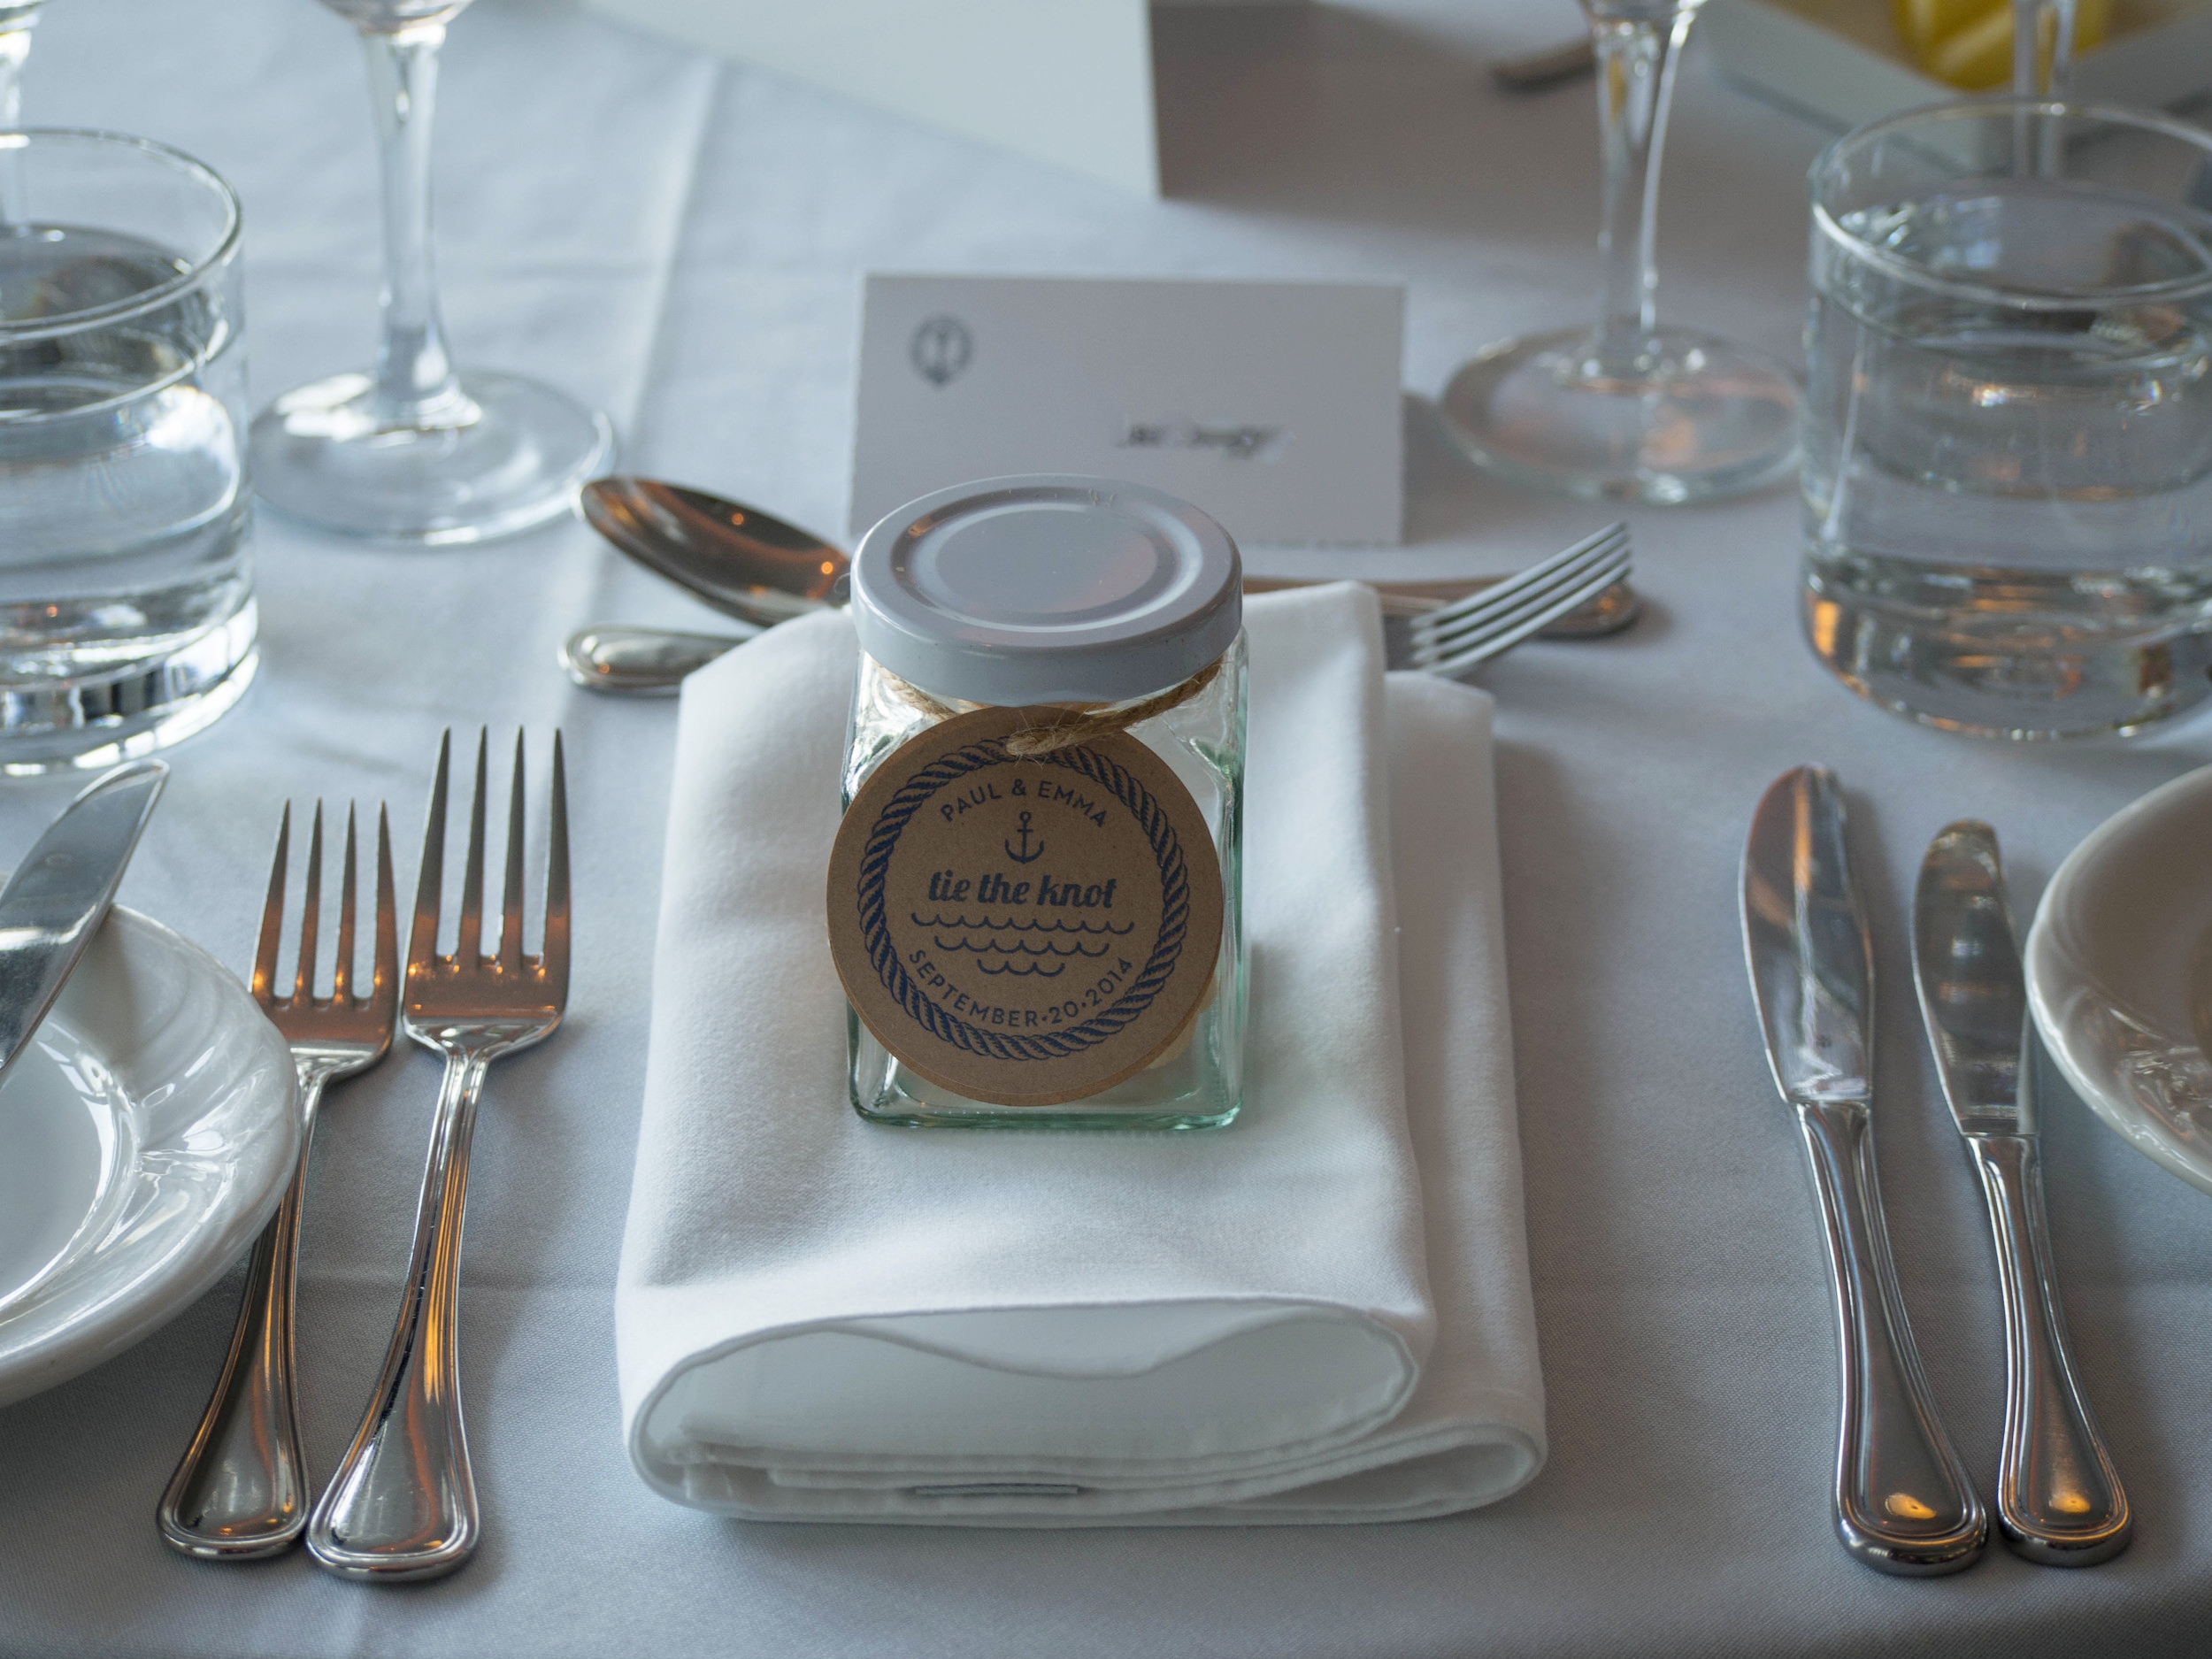
Working with my friend and her lovely mother on this order was lots of fun and really enjoyable. We tossed up a few ideas for the favours, and ended up landing on the rosewater and cardamom macaroons that I make. I liked this option as they are gluten and dairy free so all the wedding guests could enjoy them, and as almonds are a traditional bonbonniere gift I thought this was a nice link. My friend had a fantastic stamp made for her wedding, to use for the invitations and order of service, so we used this as the front of the label for the favours. I think the stamp was the best part of the favours! It looked fantastic and was a nice link to all the other elements of the wedding. 

Thanks so much again to my wonderful friend. I so appreciate your support and for giving me an opportunity to be part of your wedding. Congratulations to you and your husband! 

Congratulations!

Congratulations!

Wedding Favours - Kulinary Adventures of Kath
Wedding Favours 2 - Kulinary Adventures of Kath
Wedding Favours at Reception - Kulinary Adventures of Kath
Wedding Favours at Reception 2 - Kulinary Adventures of Kath
Date Torte 2 - Kulinary Adventures of Kath

Here is the recipe for the gluten free dessert I made for the wedding. It was a really nice torte to make and I am definitely looking forward to making it again soon. The original recipe used all dark chocolate. I changed it a little to include milk chocolate as well, as I often find dark chocolate too bitter. 

* this recipe needs to be started the day before serving.

Ingredients: 

250 g whole blanched almonds

150 g milk chocolate, broken into pieces 

100 g dark chocolate, broken into pieces

6 egg whites

115 g caster sugar

250 g pitted dates, finely chopped


To serve:

100 g milk chocolate

80 g dark chocolate 

250 ml whipped cream 


Method: 

Pre-heat oven to 180 degrees Celsius. Grease and line a 24 cm springform cake tin. 

Place the almonds and chocolate in a food processor and lightly blend. You still want small chunks of almonds and chocolate. 

In a separate bowl, whisk the egg whites until soft peaks form. Gradually add the sugar, and whisk until the whites are thick and glossy. 

Gently fold the almonds, chocolate and the chopped dates into the egg white mixture. Pour mixture into prepared tin, smooth the top if necessary. Bake for 45 minutes. 

Once the torte is cooked leave in the oven, turn the oven off, and leave the oven door propped open. Leave torte in the oven until completely cool. 

Once the torte has cooled, remove from the tin and place on a large plate or platter. Refrigerate overnight. 

The next day, melt the remaining chocolate in a heatproof bowl over a small amount of simmering water (the water should not touch the bottom of the bowl). 

Allow the melted chocolate to cool a little, then drizzle over the cake. 

Serve with whipped cream. 

Date Torte 3 - Kulinary Adventures of Kath

Original Recipe from ‘Monday Morning Cooking Club - The Feast Goes On’ by Lisa Goldberg, Merelyn Frank Chalmers, Natanya Eskin, Lauren Fink, Paula Horwitz and Jacqui Israel, p.187 (Harper Collins, 2014).

Originally Posted October 9, 2014. 

In Other Desserts, Holidays Tags Weddings, Wedding Favours, Gluten Free, Dates, Chocolate, Torte, Cardamom, Rosewater, Macaroons, Passover
Comment
IMG_4522.JPG

Chewy Cardamom & Rosewater Macaroons (Gluten + Dairy Free + Passover Friendly)

Kath October 11, 2014

This recipe is originally from Nigella Lawson’s book ‘Feast’ (p.186), however I have adapted it slightly to suit my tastes. I have made these many, many times, given them as gifts, and Cath (Confessions of a Glutton) and I sold some at our Bake Sale back in September last year. They are really easy to make and are great if you have egg whites left over from something else. The recipe is also really easy to double, and they just happen to be gluten free. 


Need any more reasons to make them or have I convinced you yet?! 


Don’t be put off by the flavours of cardamom and rosewater. They are quite subtle and very lovely. And in my opinion, anything that comes from a Nigella Lawson cookbook must be worth trying. Nigella has a great attitude and creativity towards food that is infectious and very admirable. 


Ingredients:

200g almond meal

200g caster sugar 

1/4 tsp finely ground cardamom

1/4 tsp rosewater

2 egg whites 

1-2 tsp rosewater, extra

25g blanched almonds (enough for each macaroon you make) 


Method: 

Preheat oven to 200 degrees Celsius. Line two large baking trays with baking paper. 

In a free standing mixer, mix the almond meal, sugar, cardamom and egg whites until it forms a coherent paste. This process can also be done by hand, but as Nigella suggests, and I agree, the mixer is best due to the thickness, and stickiness of the mixture. At this point you may add 1/4 tsp of rosewater to the mix. This is my addition because I love rosewater. 


Sprinkle rosewater onto your hands and roll the mixture into little balls (walnut sized). Place on to the baking trays and the squash down a little. Then place a blanched almond in the centre of each biscuit.  


Bake for 10-12 minutes. If they go golden too quickly turn the oven down to 180 degrees celsius. The aim is not to have golden biscuits, but to remove them from the oven before this happens. Inevitably, I find the edges of some biscuits will go a little golden, probably because each rack in the oven I use cooks at a different rate. 


Cool biscuits on a cooling rack.


Makes approx. 28


Originally Posted February 1, 2014.

In Holidays, Biscuits/Cookies Tags Biscuits, Cardamom, Rosewater, Nigella Lawson, Gluten Free, Passover
Comment

recipes

  • Biscuits/Cookies 39
  • Breads Etc. 9
  • Breakfast 7
  • Cakes & Slices 67
  • Confectionary 5
  • Drinks 6
  • Events 14
  • Food Photography Tips 3
  • From The Mailing List 24
  • Heirloom Recipes 12
  • Holidays 44
  • Ice Cream 9
  • Jams Preserves & Spreads 9
  • Muffins 4
  • Off the Shelf 47
  • Other Desserts 25
  • Savoury Dishes/Meals 15
  • Scones 4
  • Tarts & Pastry 9
  • Travel 13

Sign up to Friday Food Chat with Kath, a weekly newsletter for more food, baking, cookbook chat and more!

Sign Up Here!
instagram-unauth pinterest facebook url

Website Accessibility: To enable text to speech function on the blog, click the sound button to the right of each blog post.

All images & content are the property of Kathryn Vincent, unless stated otherwise. Please do not use without permission.

Kulinary Adventures of Kath

Food Photography, Recipes & Baking

instagram-unauth pinterest facebook url