Kulinary Adventures of Kath

Food Photography, Recipes & Baking
  • home
  • About
  • Work with Kath
  • Shop
  • Blog
    • The Blog
    • Recipe Archive
  • Newsletter
  • Contact
  • home
  • About
  • Work with Kath
  • Shop
    • The Blog
    • Recipe Archive
  • Newsletter
  • Contact
Raspberry Pistachio Rose Cake (23 of 25).jpg

The Blog

Recipes and Food Photography by Kath Vincent.

  • The Blog
  • Recipe Archive
  • All
  • Biscuits/Cookies
  • Breads Etc.
  • Breakfast
  • Cakes & Slices
  • Confectionary
  • Drinks
  • Events
  • Food Photography Tips
  • From The Mailing List
  • Heirloom Recipes
  • Holidays
  • Ice Cream
  • Jams Preserves & Spreads
  • Muffins
  • Off the Shelf
  • Other Desserts
  • Savoury Dishes/Meals
  • Scones
  • Tarts & Pastry
  • Travel

Ginger Oat and Raisin Slice

Kath September 28, 2023

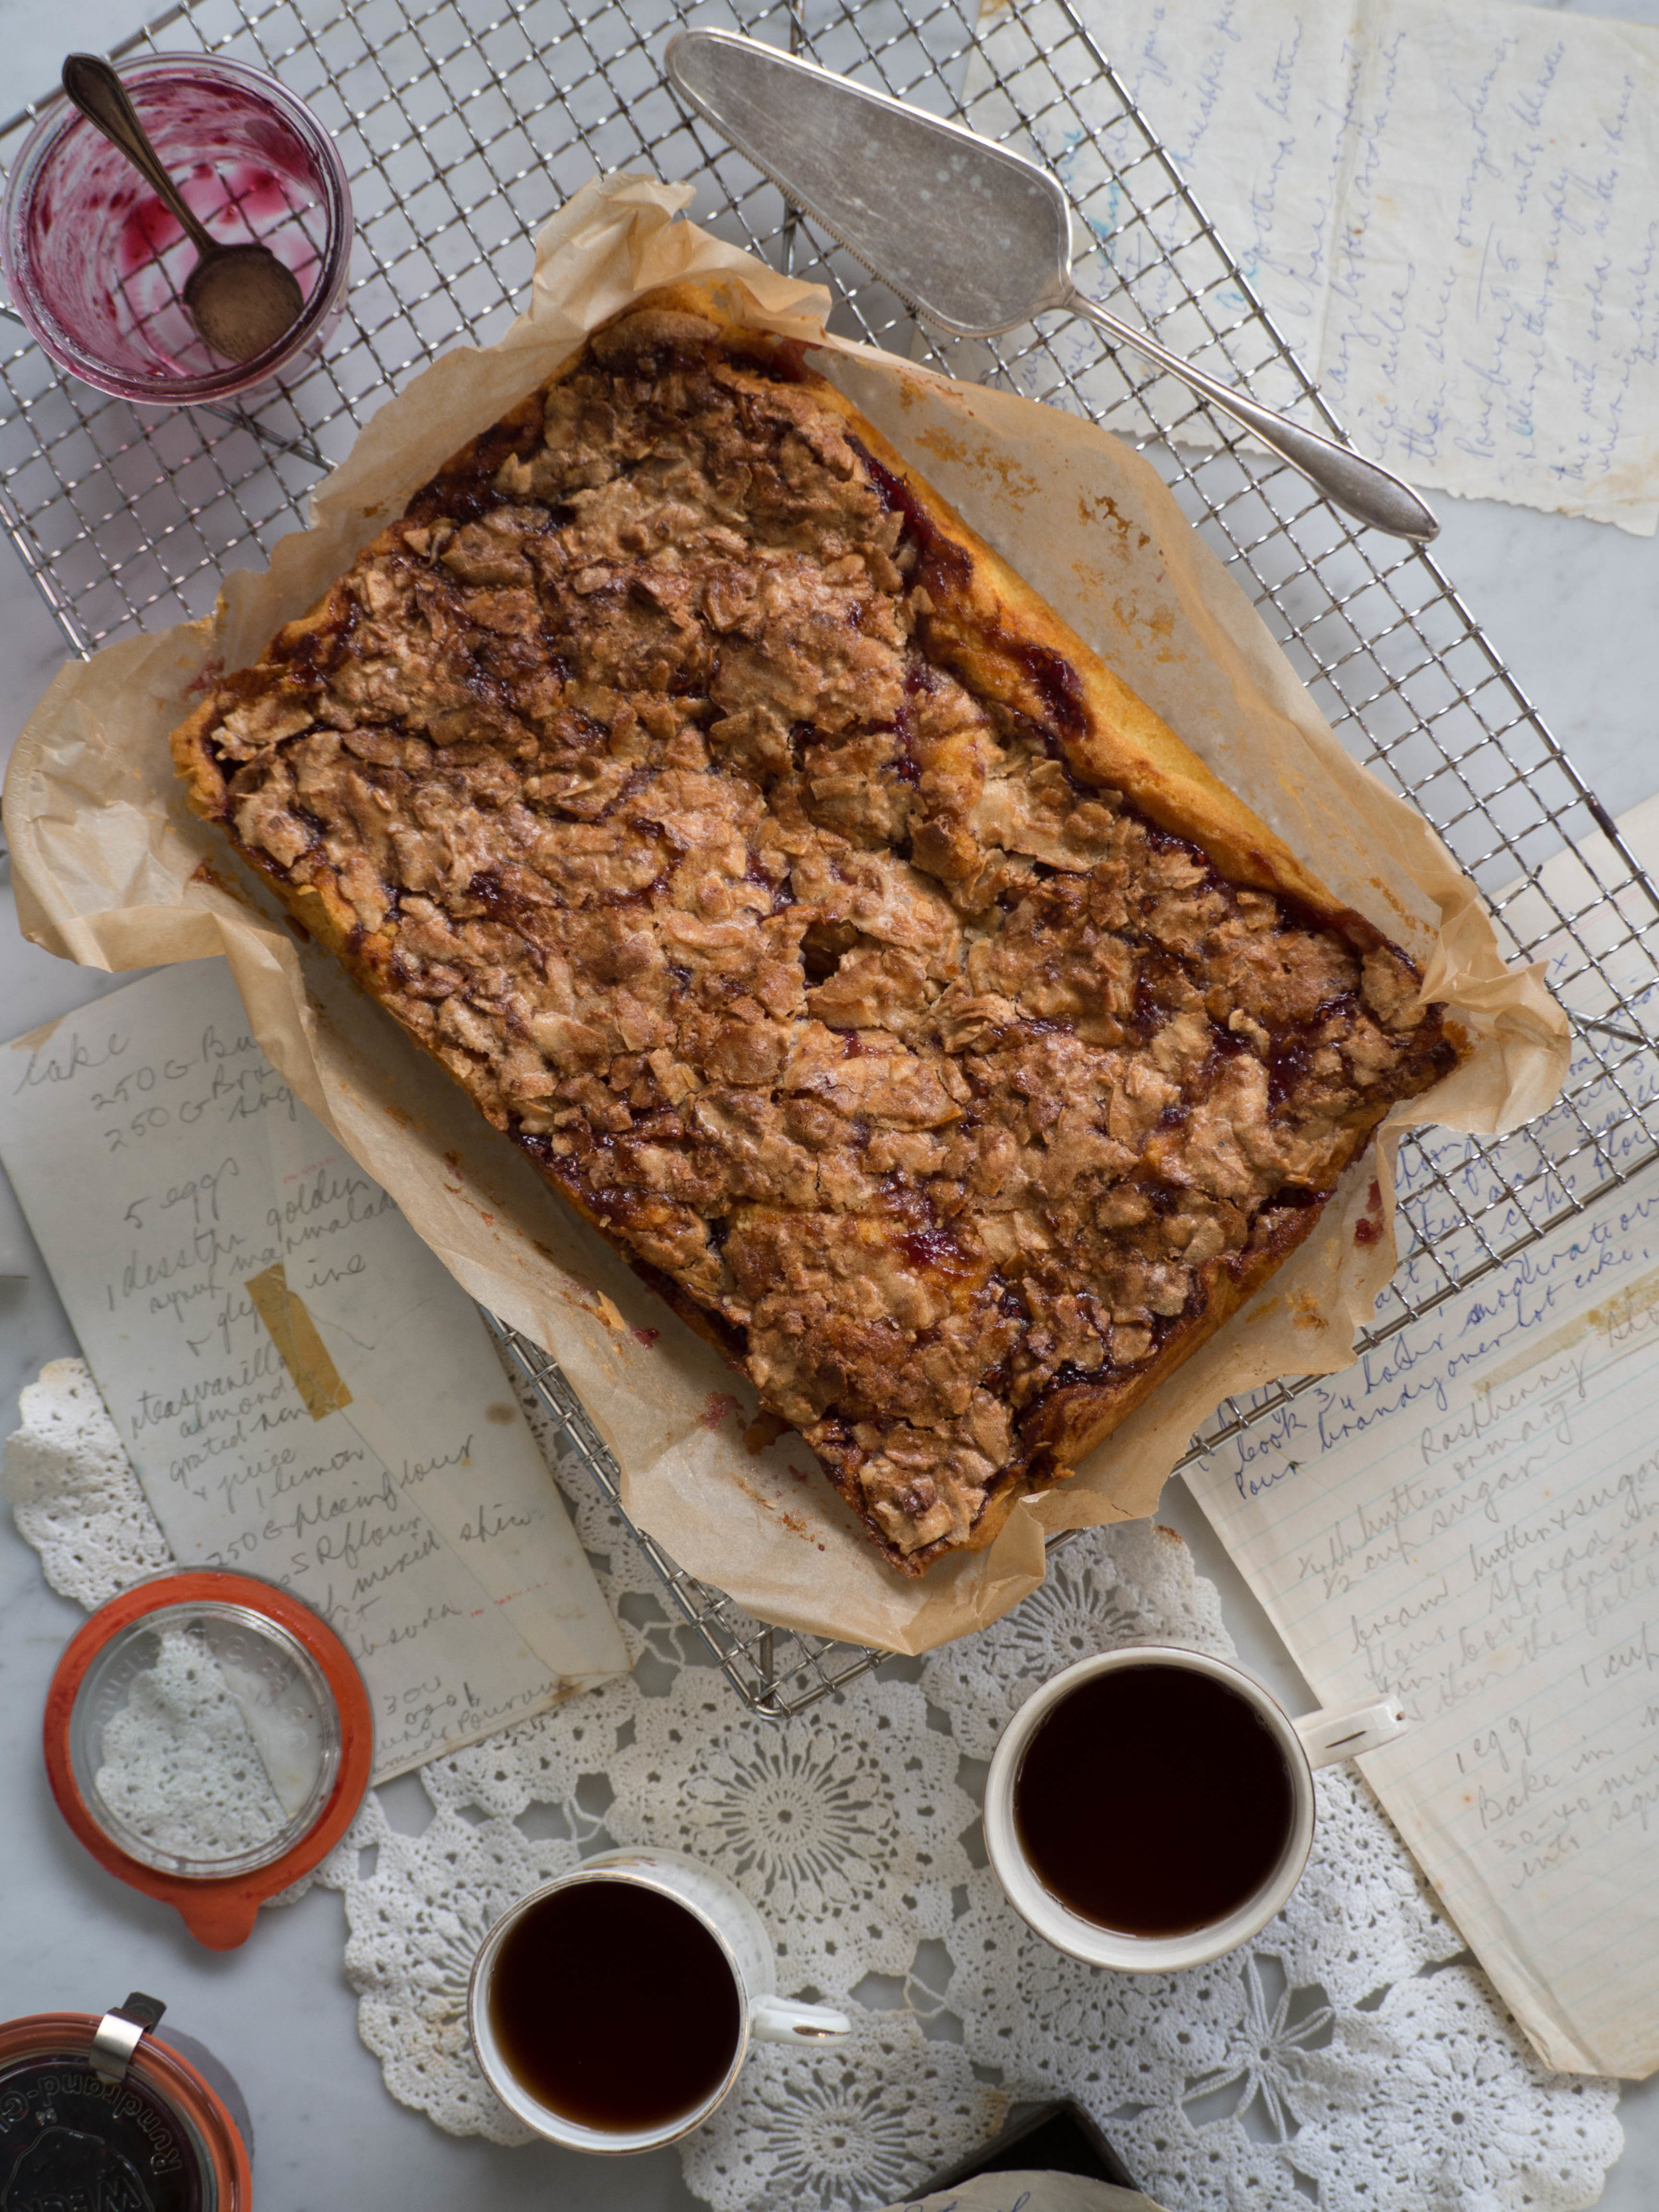
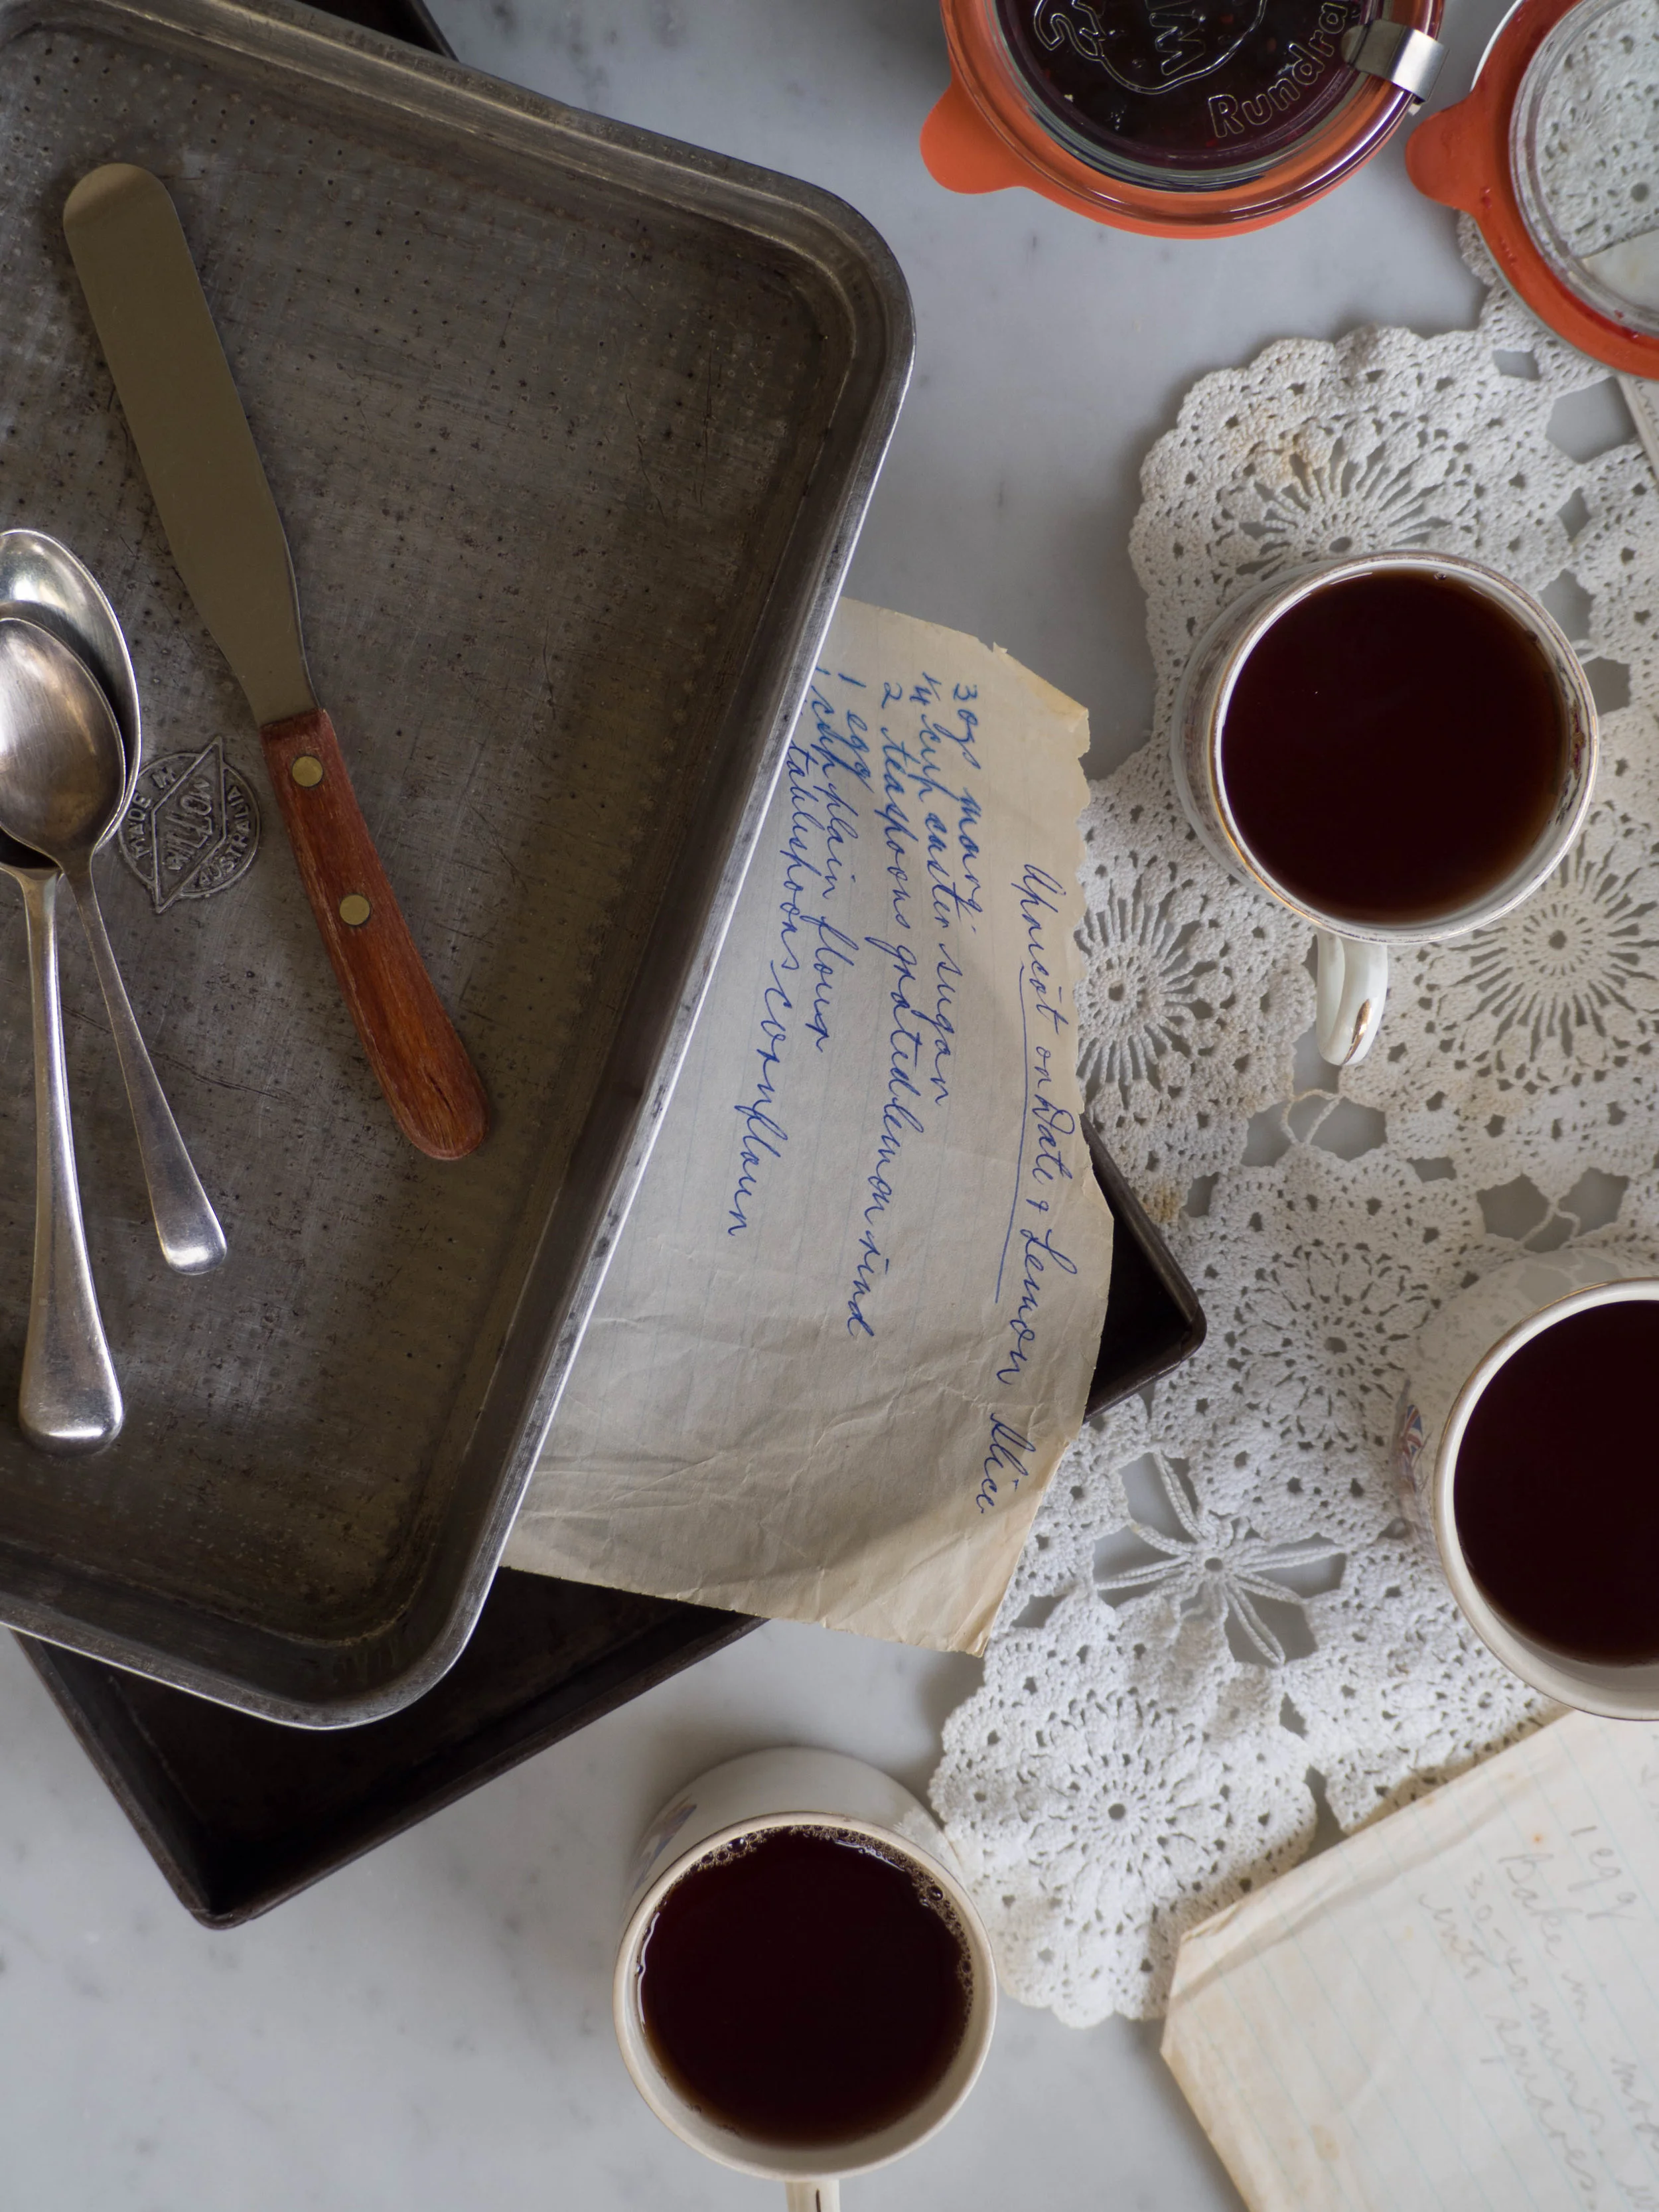
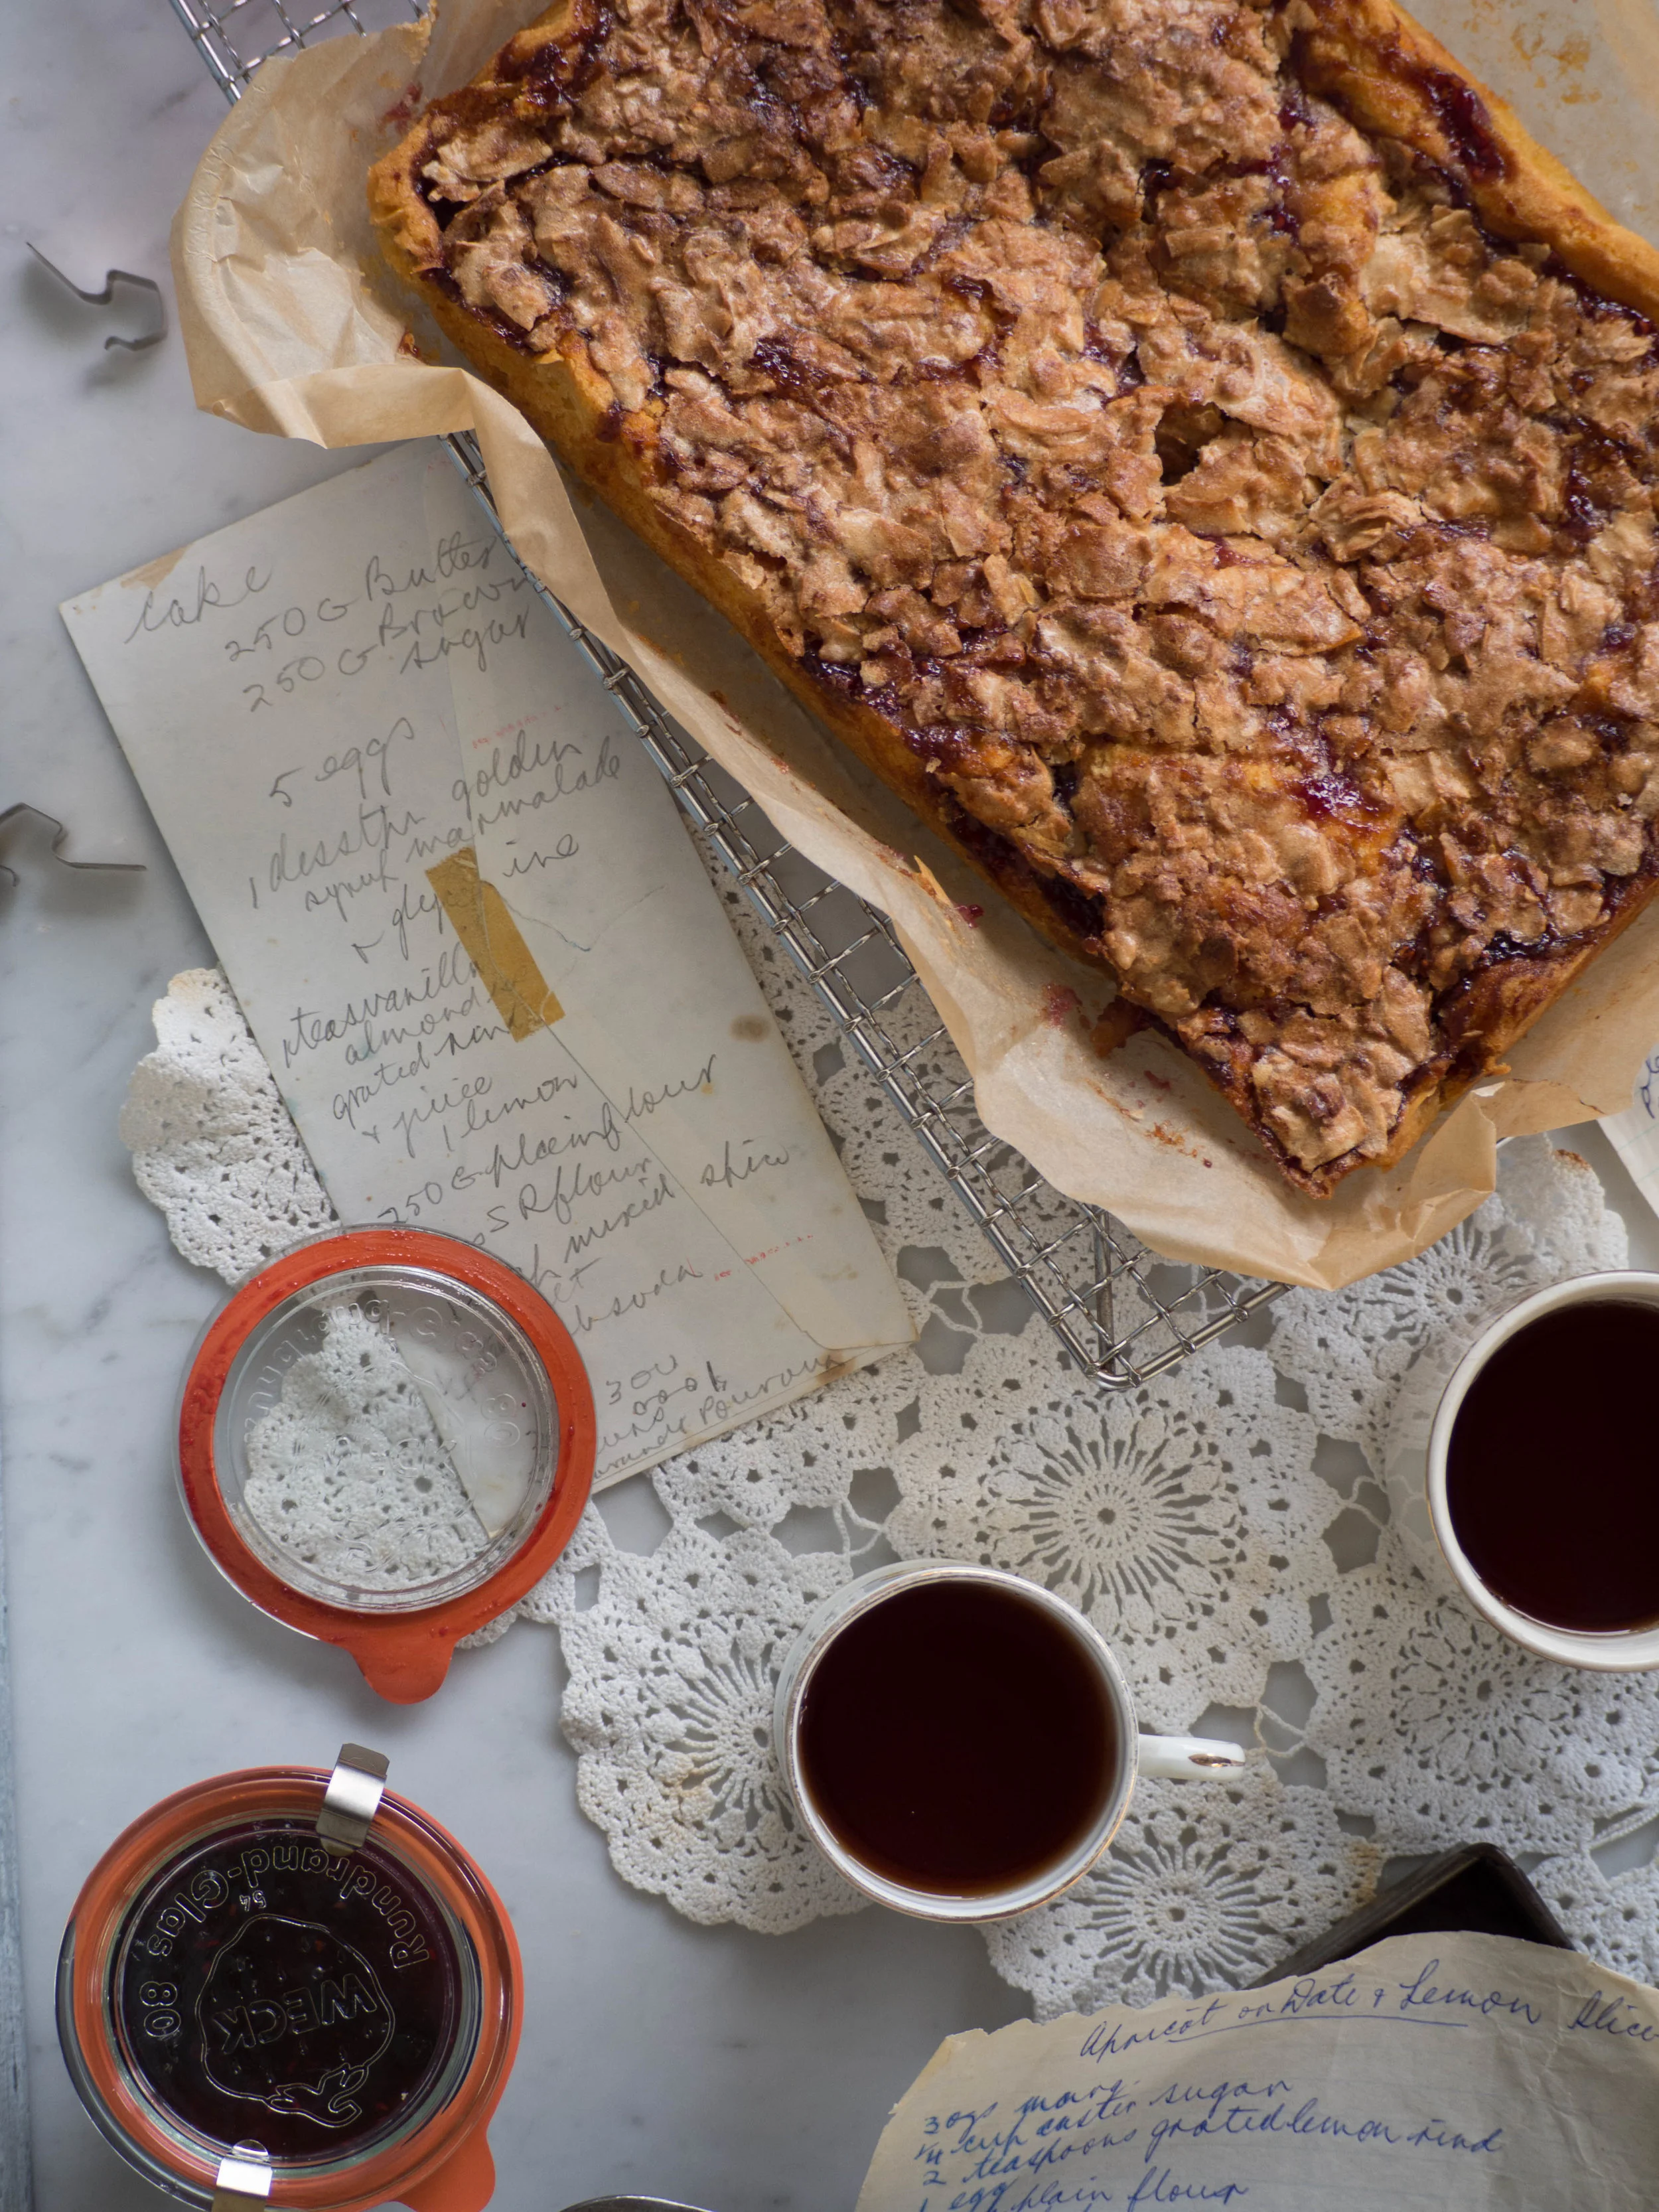
This recipe is loosely based on the Ma Lyn’s Fruit Slice in Amy Minichello’s cookbook Recipes in the Mail (p.71), which in turn comes from Christine O’Neill (and Ma Lyn of course!). 

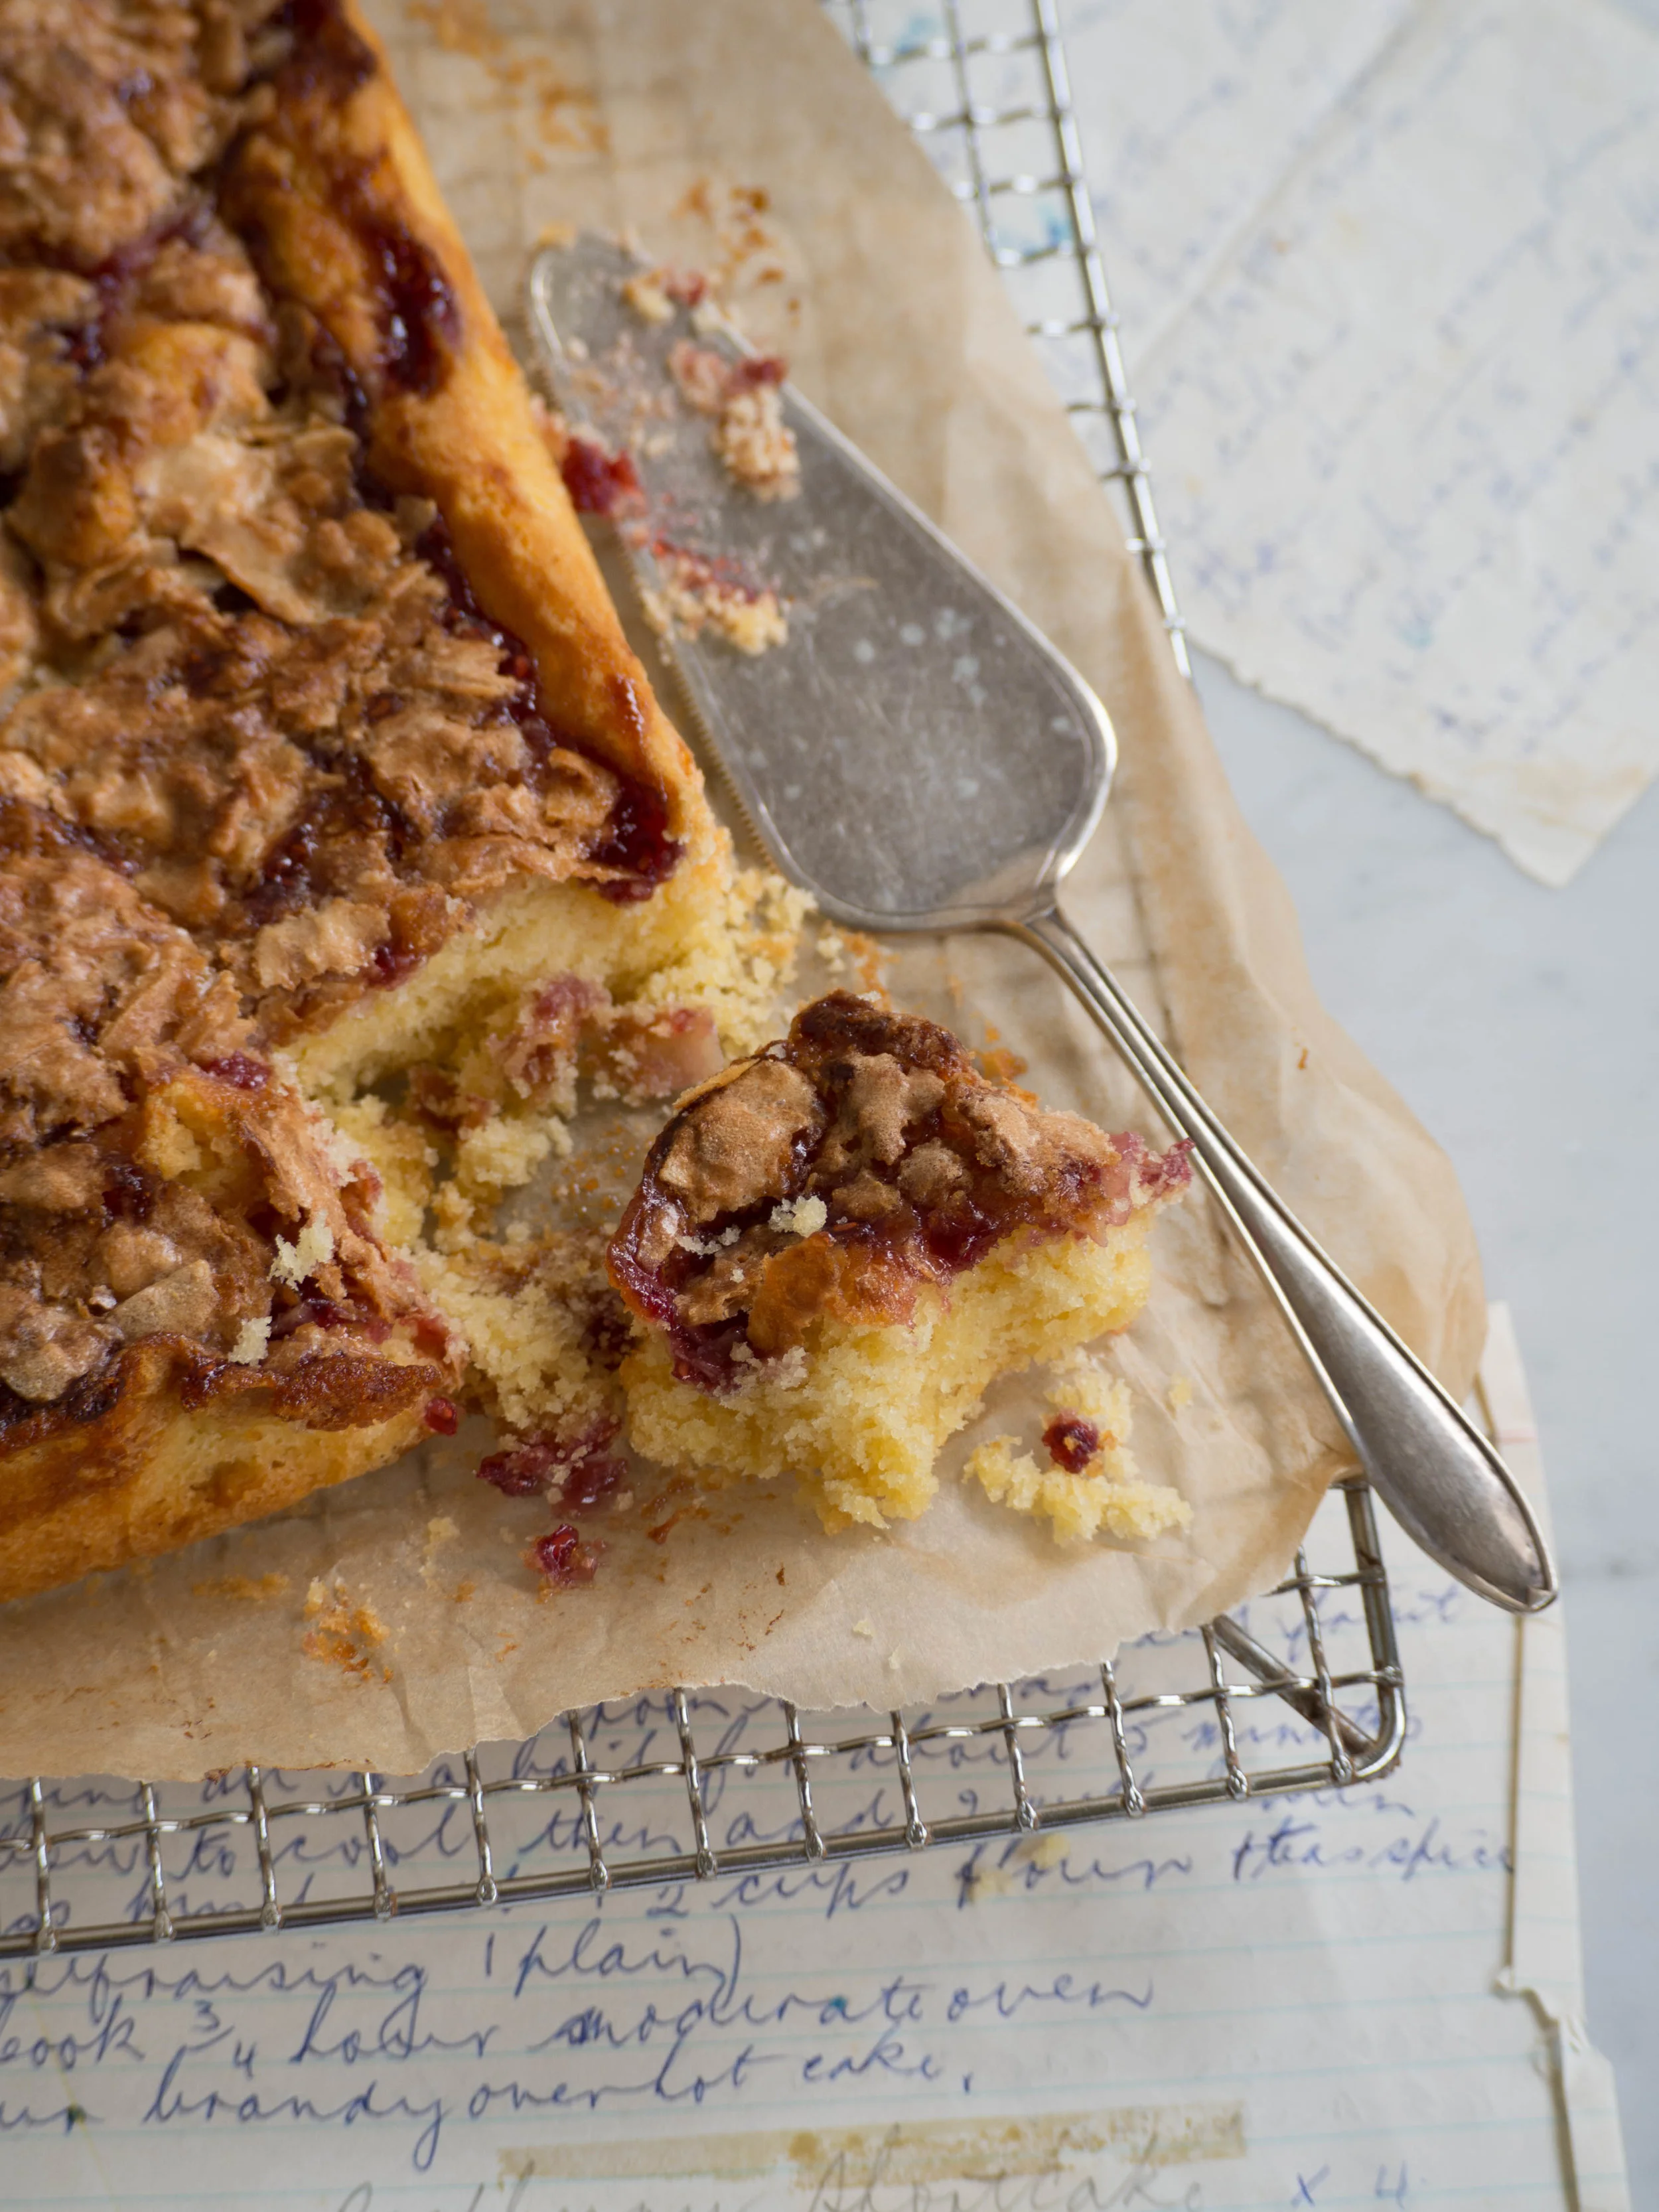
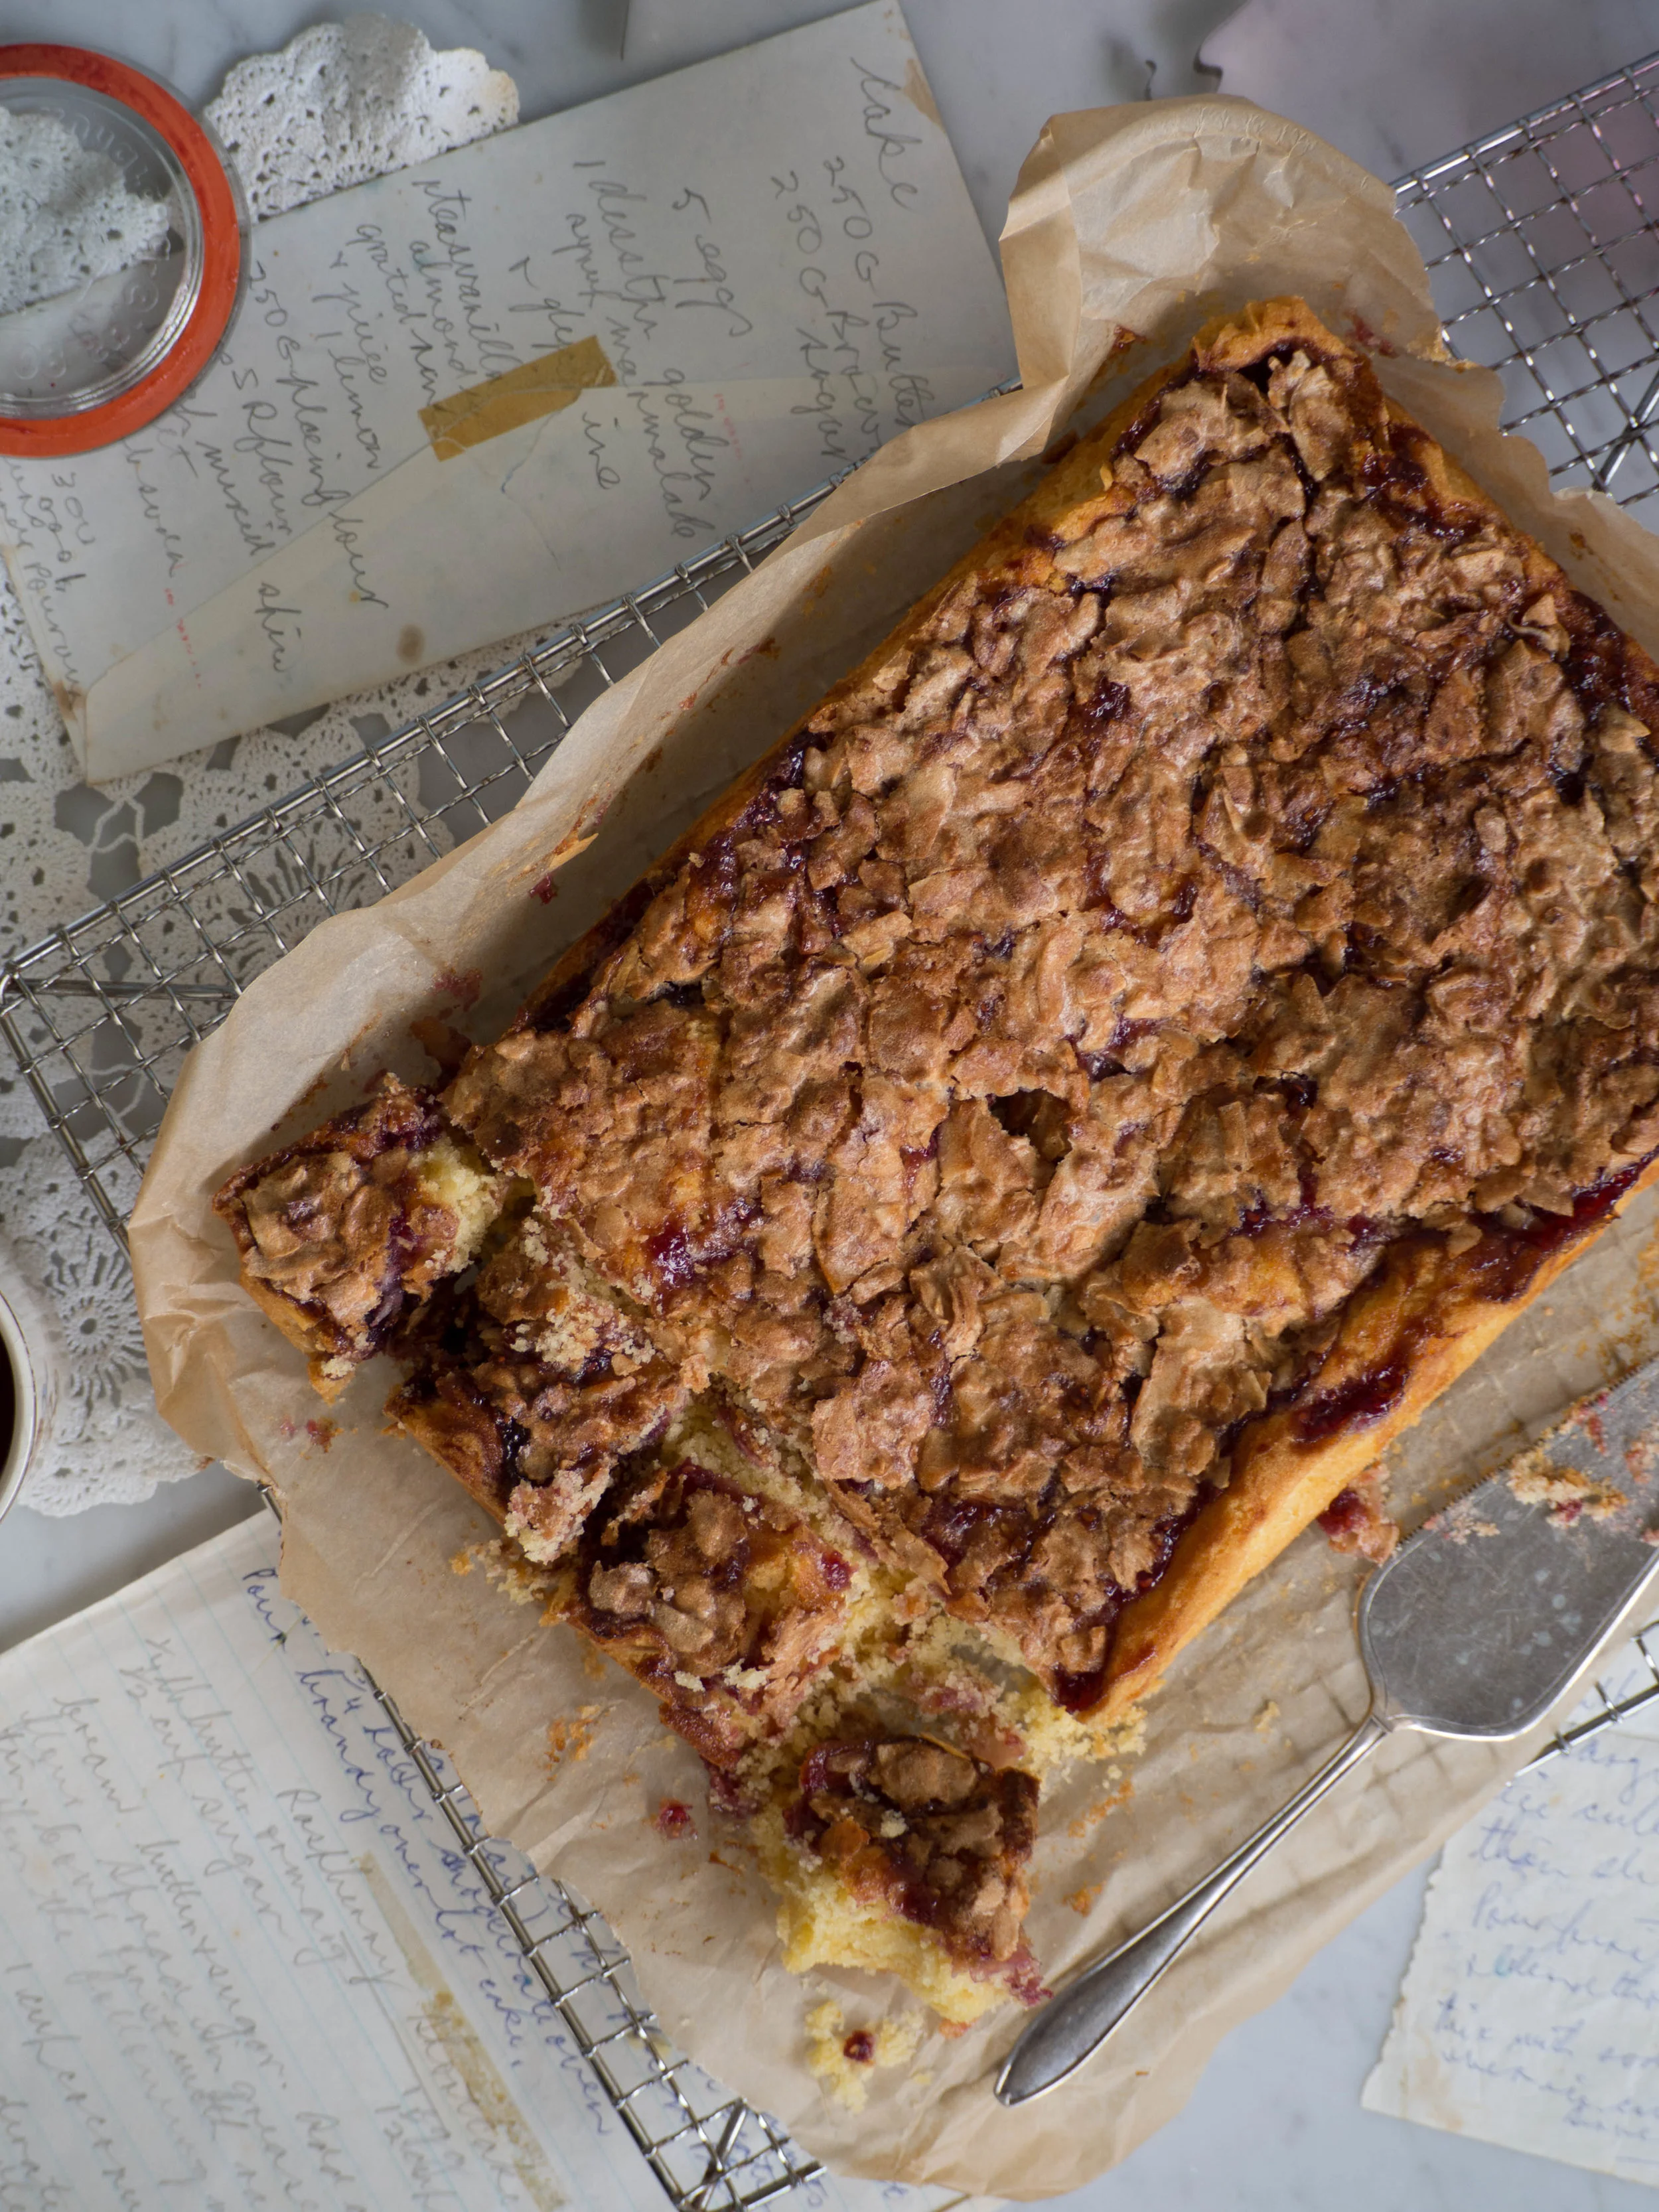
When I was making the slice for the afternoon tea Amy and I hosted in August, the recipe really reminded me of how ANZAC Biscuits are made. The recipe refers to the slice base as a cake, but it really reminded me more of a biscuit. 

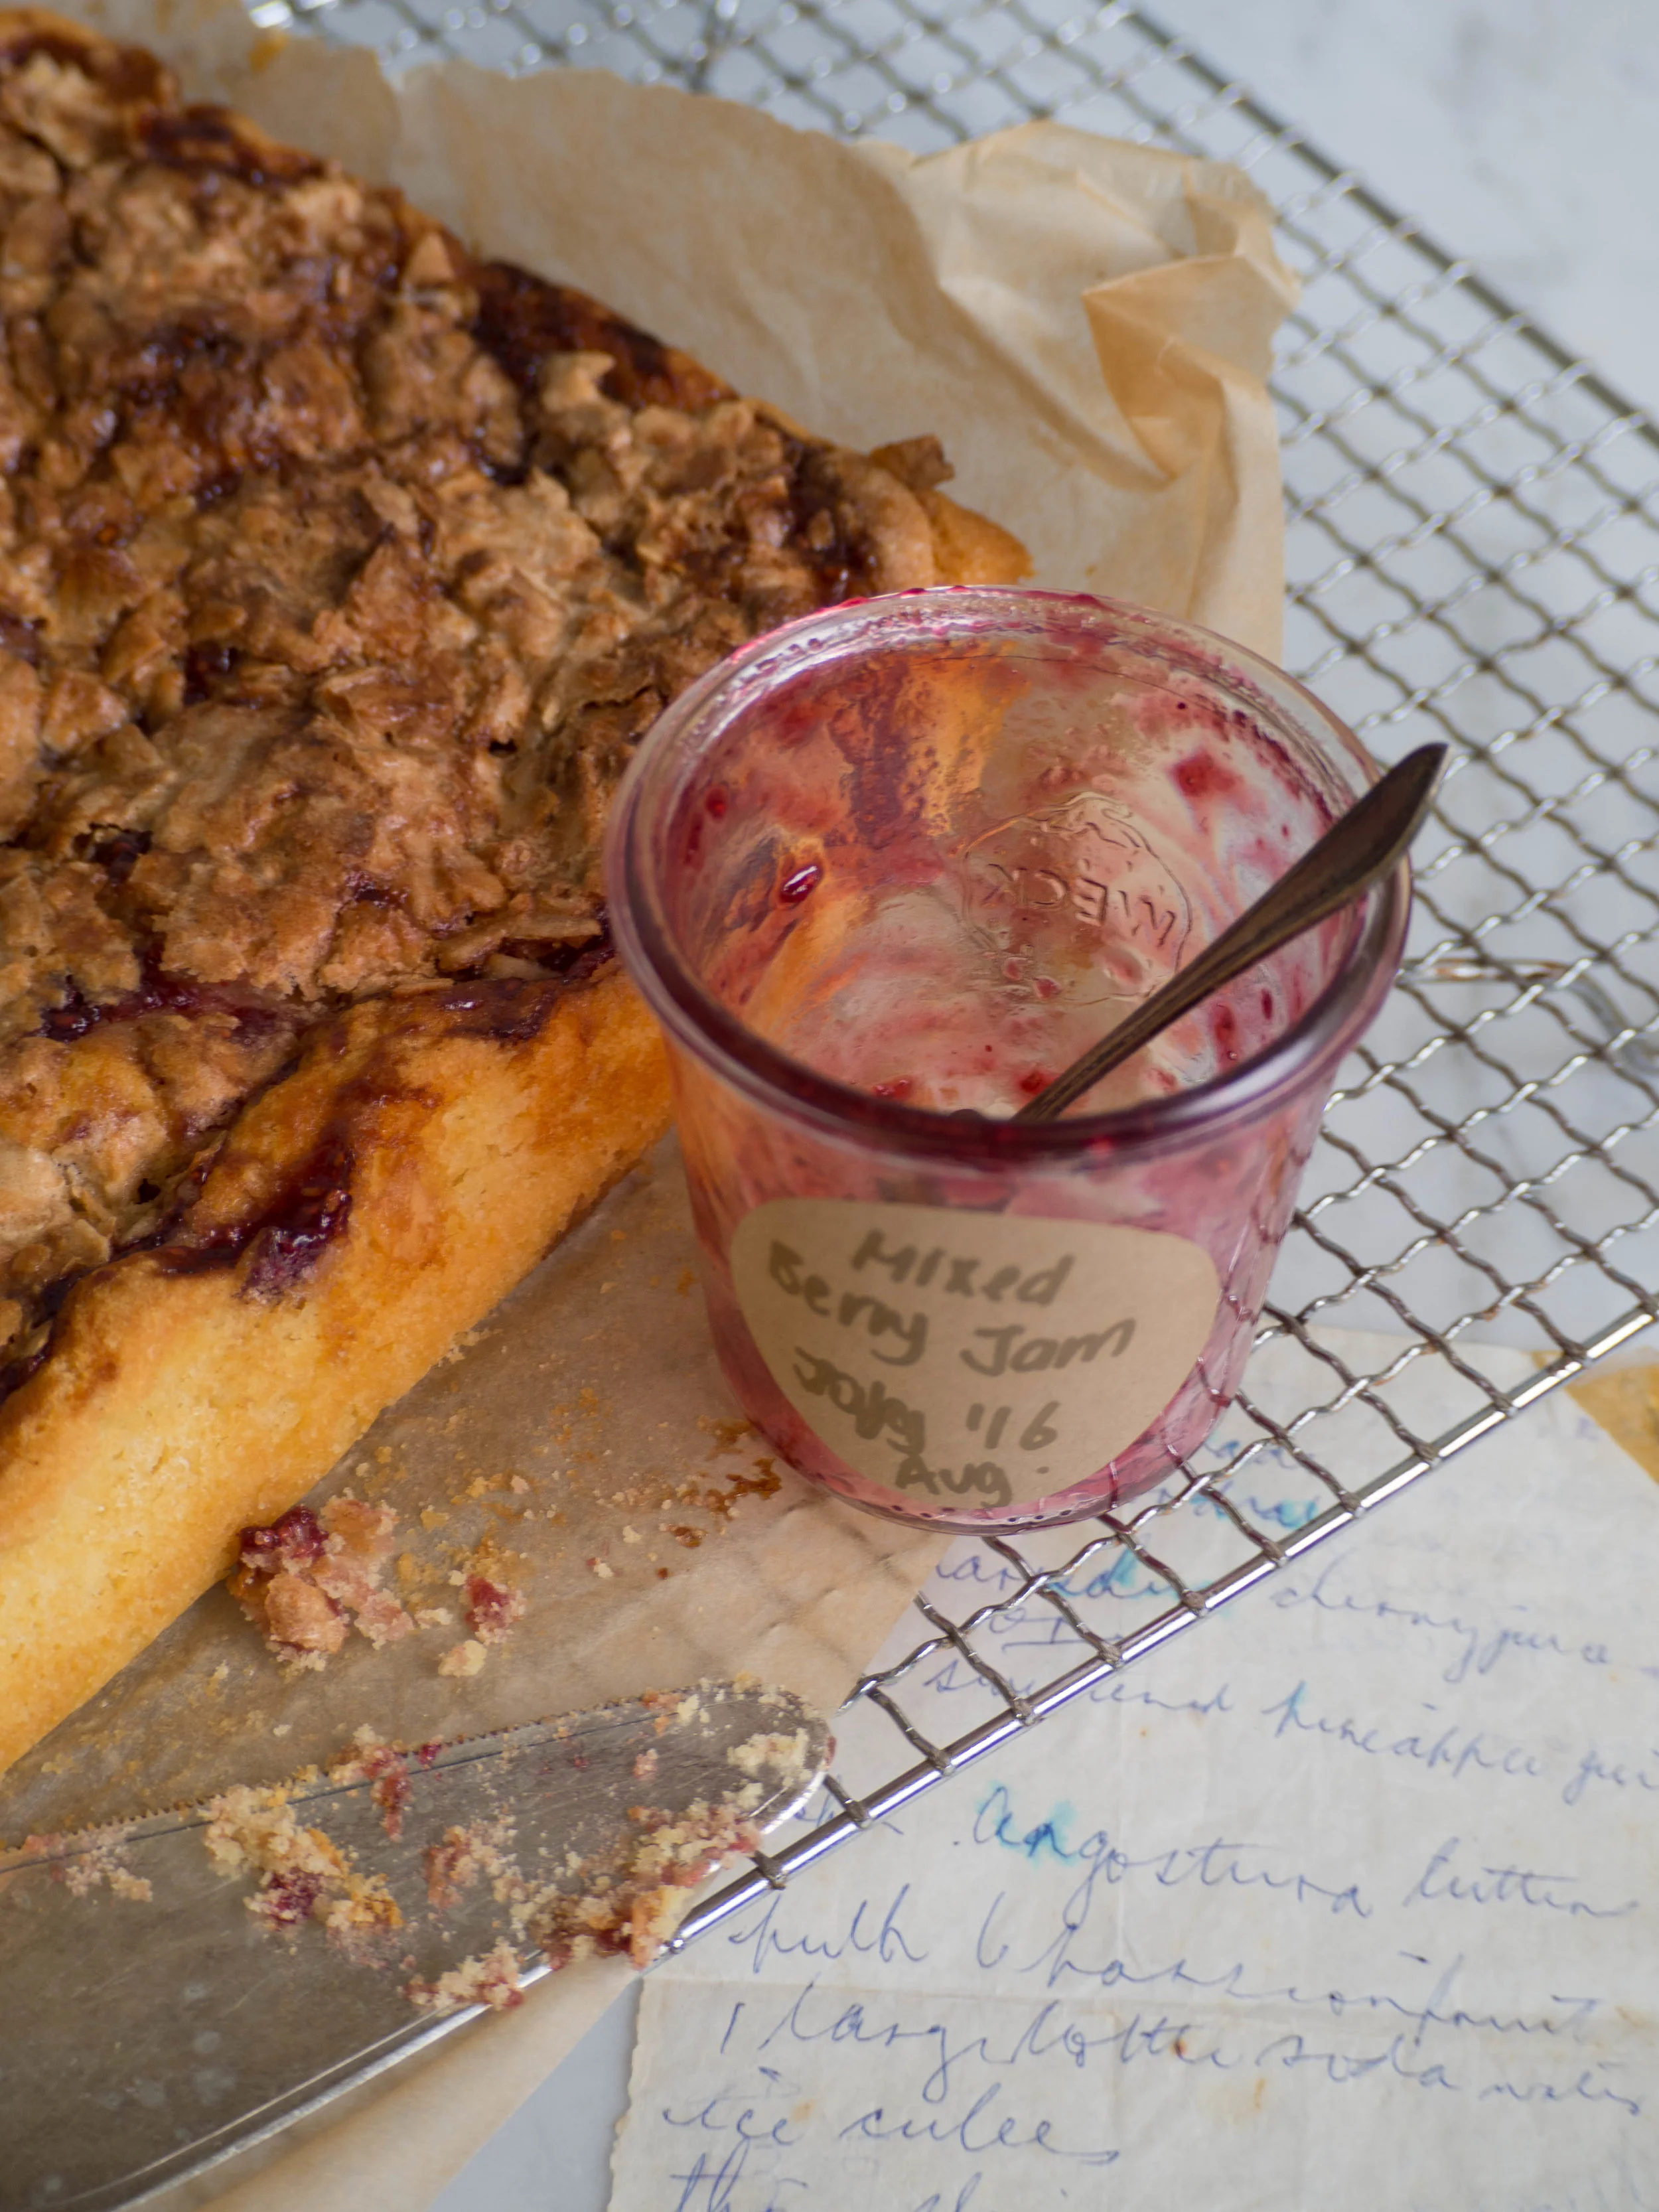
I enjoyed the slice so much, that the following weekend I made it again, and used Singing Magpie Produce’s Quince Syrup in place of the golden syrup, which added a lovely flavour and gave the slice a slighter deeper golden colour. When I was making the slice, the thought suddenly occurred to me, what would this slice be like if I added oats and ginger?

Something about the recipe’s similarities to ANZAC Biscuits, and me having not long used crystallised ginger in another recipe (I made these biscuits here but with crystallised ginger not stem), had my brain thinking up adaptations to Ma Lyn’s Fruit Slice and creating something new. 

I admit I sometimes do find it hard not to think about changes I can make to a recipe, or how a recipe could influence the creation of a new one. It’s not that the original recipe actually needs any changes, it is really really good as it is. However, recipe development and adapting recipes to work out how they could accommodate different flavours and ingredients just comes naturally to me. Recipe ideas come always come from somewhere, and sometimes one perfect recipe can bring many others to life. 

I took some of this slice to my work and one colleague said it reminded them of something their mum used to make, which was lovely to hear that a newly created recipe had some nostalgic value to someone else. Which ties back nicely to Amy’s cookbook and the nostalgia that I believe is what keeps all of us making and enjoying family recipes like those shared with Amy, that have in turn been shared in her book Recipes in the Mail. 

Oat Raisin and Ginger Slice

Ingredients: 

50g rolled oats (not instant oats)

80g golden raisins, chopped 

45g desiccated coconut

155g self raising flour

105g caster sugar

80g crystallised ginger, chopped

1 tsp ground ginger

125g unsalted butter

2 tbsp golden syrup

1 tsp vanilla extract

Method: 

Preheat oven to 160 degrees Celsius, and line a 30 x 20cm slice tin with baking paper, ensuring some hangs over the sides so you can easily get the slice out of the tin later.

In a large bowl, mix the oats, golden raisins, coconut, self-raising flour, sugar, crystallised ginger and ground ginger with a wooden spoon. 

In a small saucepan melt the butter and the golden syrup over low/medium heat until the butter has just melted. 

Add the butter mixture, and the vanilla extract to the dry ingredients and mix together until combined with the wooden spoon you used earlier. 

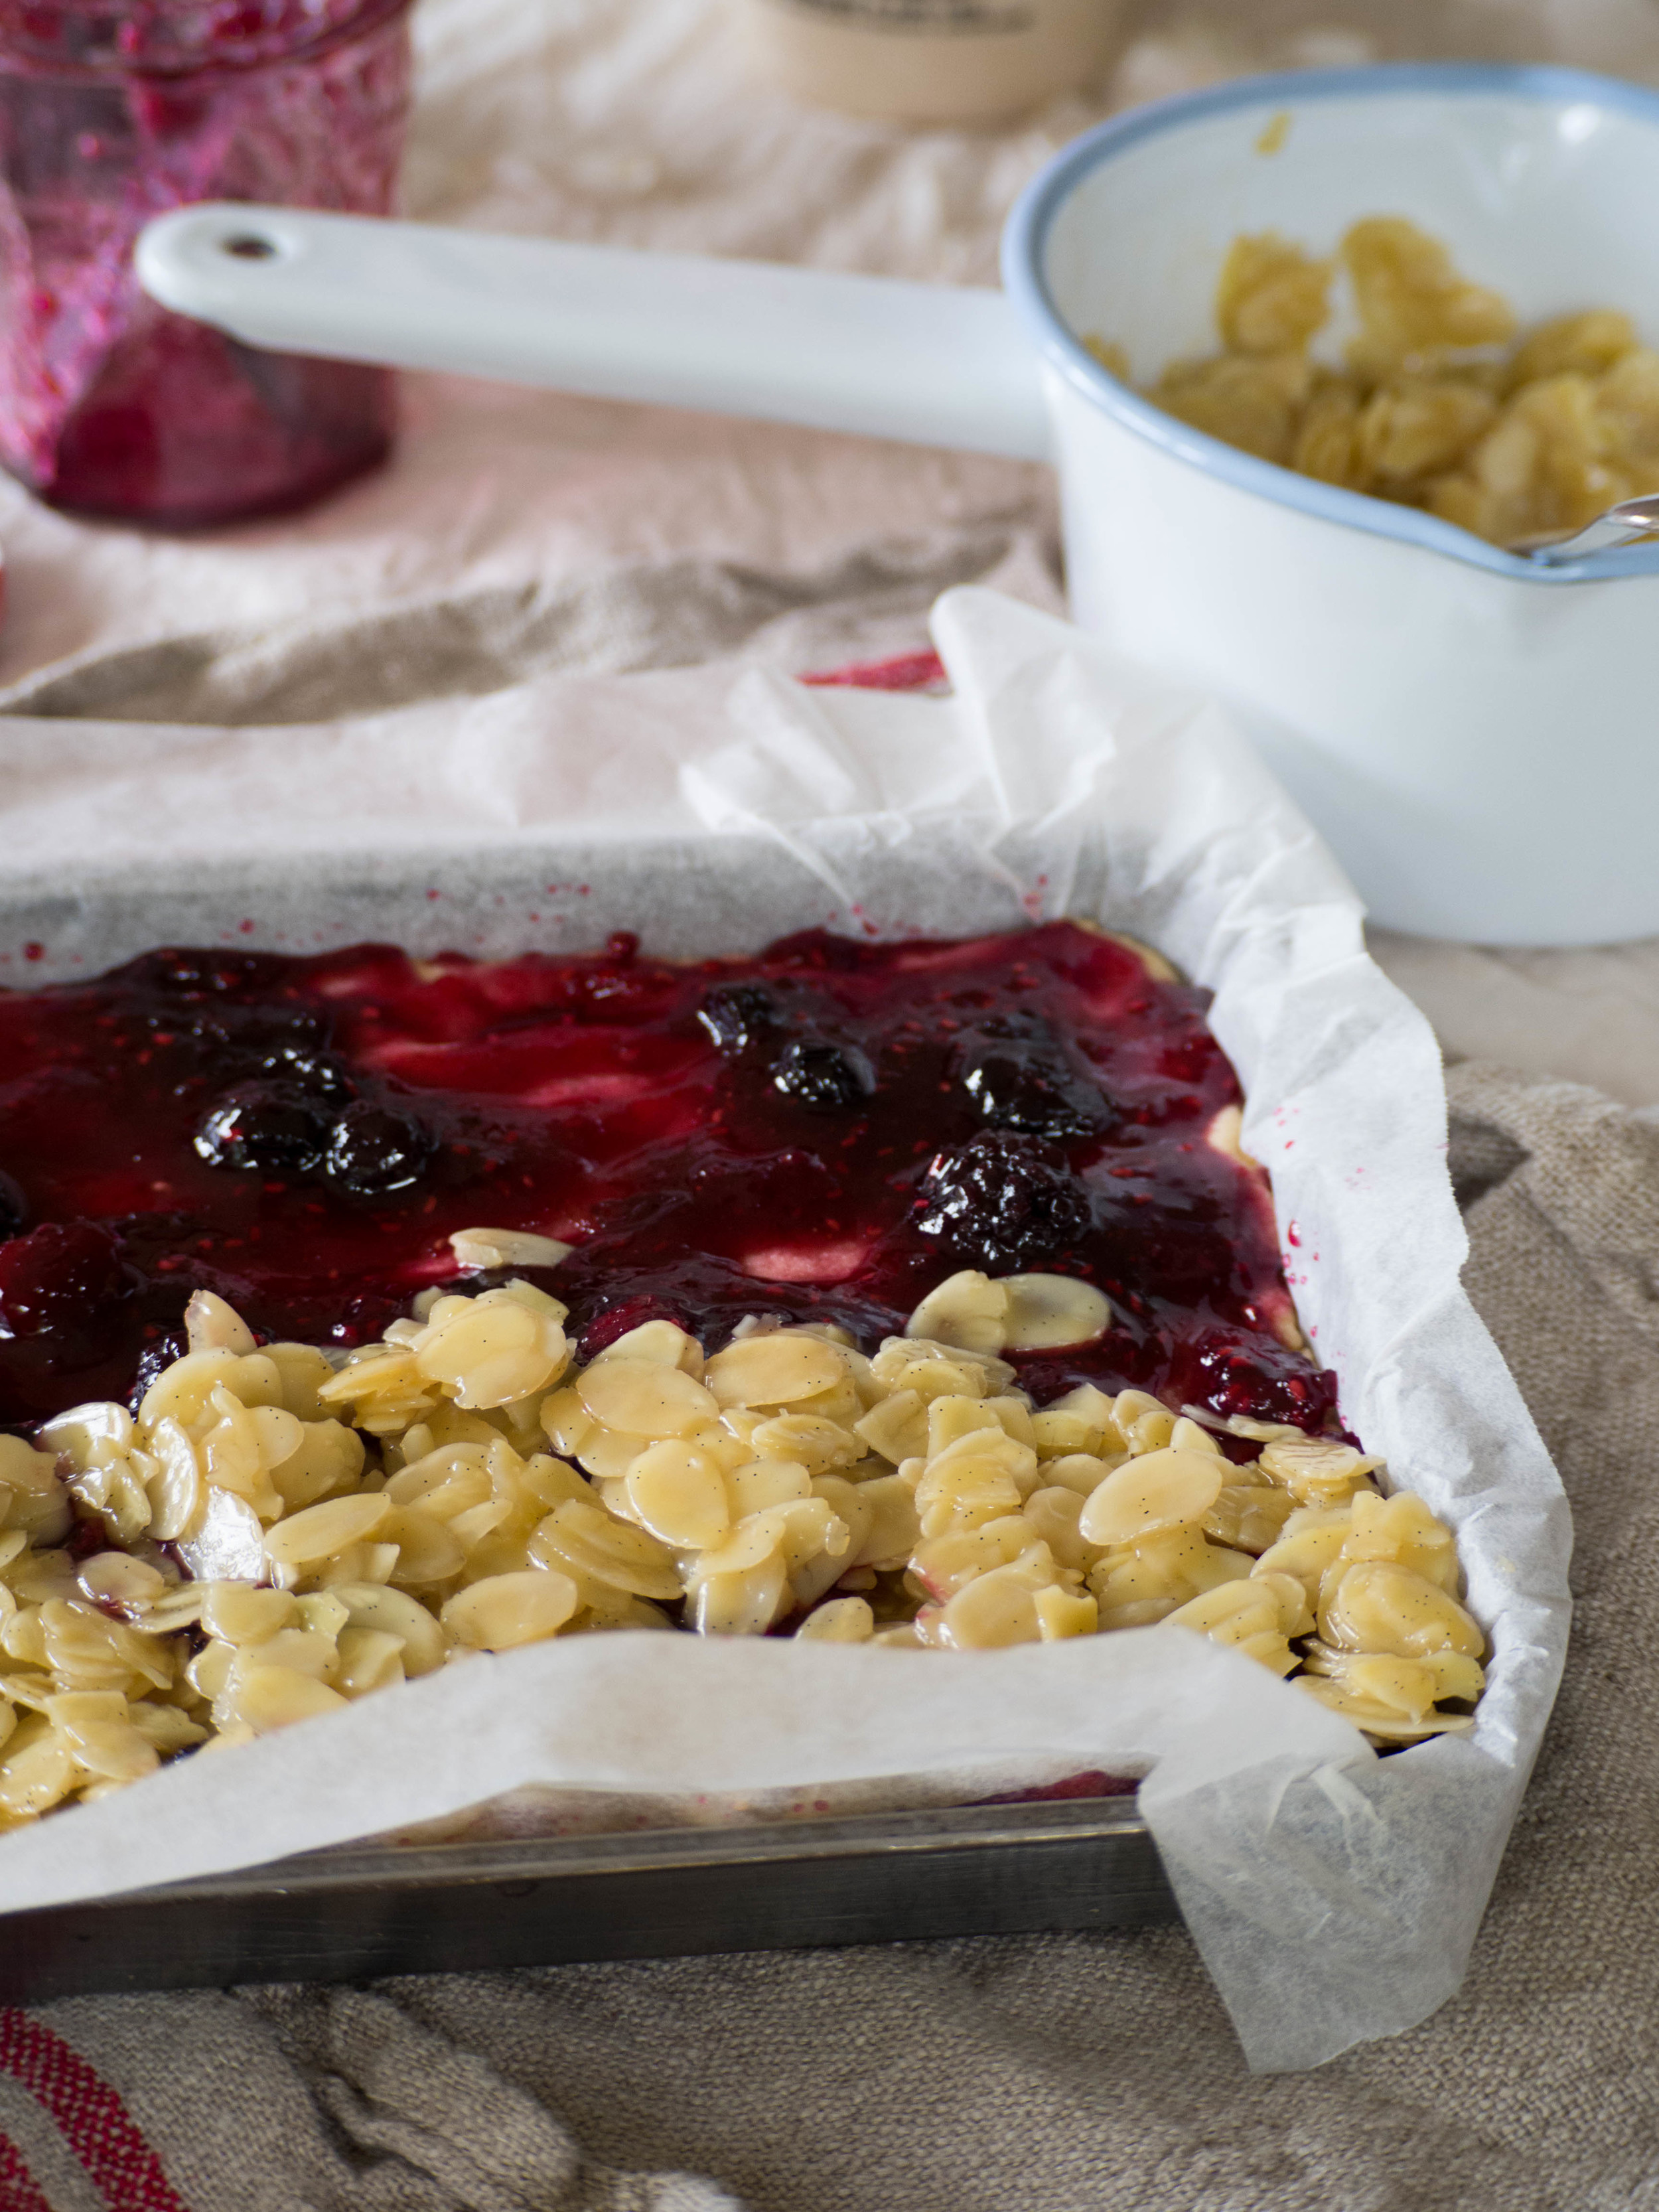
Tip the mixture into the prepared tin, and press it out so it reaches the edges of the tin and has a relatively smooth top. You can use your wooden spoon for this or a spatula.

Bake for 25-30 minutes, or until the slice is nicely golden brown. 

Allow the slice to cool in the tin for about 15-20 minutes, then using the overhanging baking paper, gently transfer the slice to a cooling rack to cool completely. 

Once the slice has cooled completely, you can cut it into however many portions you would like, or you could just cut of bits as you want to eat it.

Makes about 12-15 portions, store in a airtight container. Will keep for 4-6 days. 

In Cakes & Slices Tags Slices, Ginger, Mixer Free Recipes, Easy Baking, Recipes in the Mail, Amy Minichiello
2 Comments

Pistachio White Chocolate Blondie

Kath May 16, 2023

I seem to be incapable of not thinking of recipes that use pistachio, or specifically crema di pistachio spread. I am well and truely obsessed, and I can’t see that changing any time soon. 

While the combination of pistachio and white chocolate is very good, you could also adapt this recipe to use a chocolate hazelnut spread (or similar) if thats more your thing (and it is certainly easier to buy than crema di pistachio) and swap out the chopped pistachios for chopped hazelnuts and the white chocolate could be substituted for milk or dark chocolate as well. 

You can essentially make this blondie recipe your own - as long as you keep the quantities of everything the same it will work a treat. 

I personally steer clear of actual chocolate in my blondie recipes as I can’t eat milk or dark chocolate, and therefore, do not want any in my blondie. For me it’s not a blondie if it has any milk or dark chocolate in it, as to me it becomes as inedible as an actual brownie. However feel free to make any adaptations that suit you, I know I’m most probably in the minority when it comes to not eating proper chocolate (i.e. all chocolate that is not white chocolate). 

And a final note on the recipe, I use panela sugar in my blondie as I much prefer the flavour and texture it gives. It creates a nice slightly caramel flavour without being sickly sweet which I think works really well. You can substitute with light or dark brown sugar if you don’t have any panela - though I do highly recommend you try it!

Pistachio Blondie 

Ingredients: 

135g unsalted butter, melted 

250g panela sugar 

3 eggs

2 tsp vanilla extract

270g plain Flour

1/2 tsp baking powder

1/2 tsp salt

150g white chocolate, chopped

50g + 2 tbsp pistachios, chopped

1/4 cup crema di pistacchio or pistachio butter, optional

Method: 

Preheat oven to 160 degrees Celsius and line a 23cm square cake or brownie tin with baking paper. 

In a large bowl, combine the melted butter, panela sugar, eggs and vanilla extract with a whisk. 

Add the plain flour, baking powder and salt and mix again with a whisk until combined. 

Add in the chopped white chocolate and 50g pistachios and briefly mix together with a spatula or wooden spoon. 

Pour the blondie mixture into your prepared tin, and smooth the top with the spatula or wooden spoon you were just using. 

If using, dollop teaspoonfuls of the pistachio spread over the surface of the blondie, then using a knife, swirl the spread into the blondie. 

Sprinkle with the 2 tbsp of chopped pistachios.

Bake for 20-25 minutes, or until golden and a skewer comes out clean. 

Allow the blondie to cool in its tin, then remove and cut into 9 very generous slices or about 12 slightly less generous slices - or you can cut it however suits you. 

Store in an airtight container.

Serves about 12. 

In Cakes & Slices Tags Pistachio, White Chocolate, Blondie, Crema di Pistacchio, Slices, Mixer Free Recipes, Easy Baking
Comment
Biscoff White Choc Cookie Slice

Biscoff & White Chocolate Cookie Slice

Kath September 28, 2021

I have been thinking a lot lately about the impact of over three months of lockdown, plus restrictions for so long before that with all these ‘unprecedented times’ (or are they just ‘precedented’ times now?) we have been experiencing. 

Some changes have been big, and have taken a lot to adjust to. Others have been smaller and seem to have crept up on me with what feels like little warning. One major change I have noticed since this lockdown began in late June, is that coming up with new recipes has proved more of a challenge. A lot of my inspiration for recipes comes from going to the shops and seeing what is in season and stumbling across a new ingredient I just have to try. In store food shopping these days is few and far between, there is no browsing or looking, its just get in and out as quick as humanly possible. 

Eating out can also prove to be a great inspiration for new recipes too, but that has been almost non-existent for some time now. 

When coming up with new recipes for my blog, technically the possibilities are endless. But somehow that lack of structure means no new ideas come at all, especially when inspiration is few and far between. When I work with clients on recipes they will have their own requirements and ideas on what they want, so there are automatically boundaries around what a new recipe will be. These boundaries help narrow things down and I find it a easy to come up with new ideas. 

The only source of food inspiration now comes from the few special home deliveries I have been able to get, which I spoke about in this recent post. These deliveries prove to be welcome in more ways than one, especially as they provide a tiny element of food inspiration and a window into what might be happening outside my own home. 

This particular slice recipe was inspired by a cookie delivery I got from Butter Boy Bake. I have ordered twice from them now and have really enjoyed them and will definitely miss them if they cease delivering once lockdown ends. 

The combination of cinnamon, white chocolate and biscoff spread forms the basis of Butter Boy’s ‘snickerdoodle’ cookie and the combination got me thinking about how I could made something similar, but even easier. Which then make me think of my Funfetti Cookie Slice and how that could be adapted to incorporating Butter Boy’s ‘snickerdoodle’ cookie flavours. 

I am happy to report that these flavours work so well in a cookie slice and I can now rest easy that even if I never get a delivery from Butter Boy Bake again, or never actually get to visit their store in Manly, I will always be able to recreate at least one of their flavours myself.

I hope you enjoy making this cookie slice as well, it is a lot easier to make than many other baked goods even if you are low on time or motivation, is excellent to snack on and very tasty. 

Biscoff Slice
Snickerdoodle Slice

Biscoff and White Chocolate Cookie Slice 

a.k.a Butter Boy Bake’s Snickerdoodle Cookie but in a Slice

Ingredients:

120g unsalted butter, melted

200g caster sugar 

2 tbsp golden syrup

1 tsp vanilla extract

1 egg

290g self raising flour

2 tsp ground cinnamon

120g Biscoff Spread

120g white chocolate, roughly chopped

Method:

Preheat oven to 180 degrees Celsius and line a 30x20cm brownie or Lamington tin with baking paper. 

In a large bowl whisk together the butter, sugar, golden syrup, vanilla and egg.

Then add the flour and cinnamon and mix to combine with a wooden spoon.

Tip the dough into the prepared tray, and spread it out, pushing it into the sides. Dollop the Biscoff spread over the dough and swirl/push in with a knife. Scatter the chopped white chocolate over the dough, pushing them in a little.

Bake for 15-20 minutes or until golden brown and cooked through. 

Allow to cool completely in the tin. Then remove and cut into slices or chunks of your choice.

Serves 12-15. 

Butter Boy Bake Snickerdoodle Slice
In Biscuits/Cookies, Cakes & Slices Tags Butter Boy Bake, Snickerdoodle, biscoff spread, White Chocolate, Biscuits/Cookies, Slices, Mixer Free Recipes, Easy Baking
Comment
Funfetti Cookie Slice

Funfetti Cookie Slice

Kath July 28, 2021

I’m not usually one for adding food colouring or large amounts of sprinkles to my baked goods, but I think I’m at that point in lockdown where any pop of colour adds a tiny bit of joy to my day. 

As does using up an already opened packet of Jimmies (large sprinkles) and some chocolate no one seemed to be eating. With delivery windows in Sydney few and far between from our major supermarkets at the moment, using up things I already have seemed like a good way to go. So there were a couple of motivations for making this recipe, beyond my usual ‘I’d like something nice to eat but don’t want it to take ages to make’. 

You can leave out the sprinkles if you wish, and use any type of chocolate you want. The sprinkles don’t add any flavour, it’s just for the fun colours. However if you do use some sprinkles, those called Jimmies which are bigger sprinkles than the ones us Aussies are used to buying at supermarket, will work best as their colours won’t bleed through your bake. 

Funfetti Cookie Slice

Funfetti Cookie Slice

Ingredients:

120g butter, melted

200g caster sugar 

2 tbsp golden syrup

1 tsp vanilla bean paste

1 egg

290g self raising flour

3.5 tbsp large sprinkles (aka. Jimmies) 

120g choc chips (white, Caramilk, milk or dark) or roughly chopped chocolate


Method:

Preheat oven to 180 degrees Celsius and line a 30 x 20cm brownie or Lamington tin with baking paper. 

In a large bowl whisk together the butter, sugar, golden syrup, vanilla and egg.

Then add the flour and the sprinkles and mix to combine with a wooden spoon.

Tip the dough into the prepared tray, and spread it out, pushing it into the sides. Scatter the chopped chocolate/choc chips over the dough, pushing them in a little.

Bake for 18-20 minutes or until golden brown. 

Allow to cool completely in the tin. The remove and cut into slices or chunks of your choice.

Serves 15. 

Funfetti Cookie Slice
In Biscuits/Cookies, Cakes & Slices Tags Funfetti, Sprinkles, Cookies, Slices, Easy Baking, Biscuits/Cookies, Mixer Free Recipes
Comment
Mixed Berry Shortcake

Mixed Berry Shortcake

Mixed Berry Shortcake

Kath November 28, 2016

This is another recipe I have found in my Grandma’s collection. I never remember her making it, I think by the time grandchildren came along her baking repertoire had been much refined to her favourites and she didn’t seem to sway from them very often. Not that any of us complained. There was comfort knowing your favourite would be served to you when you visited or brought with her to share when she came over to us. Even if the baked good du jour wasn’t your favourite, it was still one of her well known staples. 

Looking back, it probably would have been slightly shocking if Grandma turned up with some new baked creation - I mean, no one likes change, do they?! Particularly where nostalgic baking is concerned. I remember one time Grandma was inspired by a pavlova made at a cake shop I was working at at the time, which was quite different to hers. When we next had dinner she made a pavlova, but had lightly crushed some toasted hazelnuts and mixed them through the meringue before cooking. I was silently horrified that my beloved pavlova had been altered and didn’t have the heart to tell her that hazelnuts were not the ‘secret ingredient’ of the pavlova she was trying to re-create. In hindsight, I probably should have encouraged my Grandma’s baking creativity a little more. Maybe then more family favourites would have been found and more baking discussions would have been had. But I guess now, I will have to be happy with the cookbooks and handwritten recipes I have from her, and the memories we did create in the kitchen. 

This shortcake, is kind of a slice/cake combination and is very simple to make, and very easy to eat! Many jams would work here, but I can rarely pass up a good berry jam. 

Mixed Berry Shortcake

Ingredients: 

340g margarine (flavourless) or unsalted butter

240g caster sugar 

1 tsp vanilla extract

2 eggs 

250 g self-raising flour 

210g mixed berry jam (I used this homemade jam) 

55g coconut chips or shredded coconut


Method: 

Pre-heat oven to 160 degrees Celsius, and line a 30 x 20 cm (approx.) lamington tin (I use this one). 

Cream together the margarine, 120 g of the sugar and the vanilla until it becomes light and fluffy. Then add 1 egg and mix well to incorporate. Add the flour and mix to combine. 

Evenly spread the mixture into the lamington tin, ensure you push it into the corners. Gently spread over the jam. 

Then in a bowl, gently whisk the remaining egg with a fork, then add the coconut and remaining sugar. Mix well to ensure the ingredients are well incorporated. Gently spread the coconut mixture over the jam. The coconut mixture will only end up being a thin layer over the jam - it may look like there isn’t enough but don’t worry, it will work! 

Bake for about 40 minutes, or until the top has turned golden brown and the cake underneath is cooked through (use a skewer to check). Remove from the oven and leave in the tin for about 5 minutes to start cooling, then transfer to a wire rack to cool completely. 

Cut into squares and serve with tea, and maybe some cream! 

The shortcake will keep in an airtight container for a few days.

In Cakes & Slices, Heirloom Recipes Tags heirloom baking, Berry Jam, Slices, shortcake, Grandma
Comment
Berry Almond Slice with Homemade Triple Berry Jam

Berry Almond Slice with Homemade Triple Berry Jam

Berry Almond Slice + How to Make Homemade Triple Berry Jam

Kath June 6, 2016

This is the first time I have used homemade jam in this slice, and I am pleased to say it is well worth the effort. I have made this slice numerous times in the past, usually using a raspberry jam, mostly one by Bonne Maman. It was always nice, and always something that I was asked to make often. 

Once I decided I was going to make my own jam however, I knew I needed to try some with this slice recipe. I was quite amazed at how much better the flavours were and I don’t think I will be going to back to using bought jam anytime soon. 

If you are worried about making jam, I urge you to give this a go. Its not difficult you just need to be organised and have everything prepared and ready. Make sure you read through the recipe before you begin, and work out how you want to co-ordinate sterilising the jam jars and getting the jam started. I have also added a few extra jam making tips at the end of the recipe which should help. Fresh or frozen berries can be used for the jam, and you can alter the quantities or types of berries used. Just make sure the total quantity adds up to 1 kg. 

I used fresh berries that I had frozen myself for this recipe. When I see berries in season and at a good price, I always buy them and freeze them immediately. I use tupperware containers to store them in the freezer, and try to keep the most recent purchases at the bottom to ensure I use them after the ones I bought less recently. It is often a good idea to label and date these things, I just often forget or can’t be bothered. I bake with berries so often that they don’t tend to stay in the freezer very long. I find they cook much better than the bought frozen berries, as they hold their shape and don’t bleed so much (which is good when making cakes and muffins etc). 

I am very much looking forward to making this jam again. I found it so satisfying that my homemade jam tasted better than the bought stuff, and it was really nice to give as gifts as well. The slice recipe would lend itself to be paired with lots of different types of jams - I’m thinking cherry, or quince for next time. 

Homemade Triple Berry Jam

Homemade Triple Berry Jam

Berry Almond Slice with Homemade Triple Berry Jam
Almond Topping

Almond Topping

Berry Almond Slice with Homemade Triple Berry Jam

Homemade Triple Berry Jam

 If making the homemade jam for the almond slice, make the jam at least one day ahead. 

Ingredients: 

700 g raspberries

175 g blueberries

125 g blackberries

80 ml lemon juice, plus extra 

880 g white sugar 


Method: 

Begin by placing two or three small plates in the freezer. You will need these later to test if the jam is jelling and ready to bottle. 

Then, sterilise at least four 370g capacity jars (I used old Bonne Maman jam jars). There are a few different methods to sterilise jars for preserving, however I prefer to pre-heat the oven to 100-120 degrees Celsius, wash the jars and lids in hot soapy water, then place the jars upside down on an oven shelf. Allow the lids to air dry. Leave the jars in the oven for at least 20 minutes. 

Whilst the jam jars are being sterilised, start making the jam. Using a large heavy based saucepan (preferably enamel, stainless steel or aluminium), mix all the ingredients together and place on the stove over high heat without boiling, until the sugar dissolves, then bring to the boil. Reduce the heat and allow the jam mixture to simmer uncovered for 20 minutes without stirring. The jam mixture should have reduced by the 20 minute mark and will also appear to have thickened. If necessary stir the jam a little ensure it is cooking evenly. 

After 20 minutes test the jam to see if it has reached jelling point. To test the jelling point of the jam, use one of the chilled plates and drop a small amount of the jam onto it. Leave for a couple of minutes, then push your finger through the jam. If a skin has formed over the jam and you can now see it wrinkling, the jam is ready. If it is not ready, leave to cook for a few more minutes and/or add some extra lemon juice. Then use the remaining chilled plates to test if the jam has jelled.

Once the jam has reached jelling point, remove the sterilised jars from the oven and place onto a wooden board. Using a wide mouthed funnel or jam funnel, pour the hot jam into the hot sterilised jars. Fill right to the top and seal immediately. Leave to cool, and store in a cool dark place. This jam should last about 1 year stored correctly and unopened. Once opened keep in the fridge. 

Berry Almond Slice with Homemade Triple Berry Jam

Jam Tips

  • I often sterilise one extra jar just in case I need it, even if its a slightly smaller jar, just in case the recipe makes more jam than I expect.

  • Make sure the jars are filled right to the top with jam. If you do not they may not store as well and could develop mould. If you find you cannot fill a jar to the top, make sure you use that one first.

  • If mould does develop on the surface of the jam during storage, discard that whole jar. It will not be safe to eat any of the jam from that jar, even if the mould is removed from the surface.

  • In very humid conditions jam can be stored in the fridge even before opening.

  • If the jam will not reach jelling point, bring back to the boil and try again. You can also add more lemon juice (which acts as a natural jelling agent), or pectin/jam setter. Jams using apples generally set well as they naturally contain a lot of pectin.

  • Ensure all the utensils you are using, particularly the funnel, are well washed. Any contamination of the jam once it is cooling down could compromise its shelf life.

Berry Almond Slice with Homemade Triple Berry Jam

Berry Almond Slice

Ingredients for the Topping: 

60 g unsalted butter, softened

55 g caster sugar

1 tsp vanilla extract/paste

200 g flaked almonds

2 tbsp milk 


Ingredients for the Base: 

150 g unsalted butter, softened

110 g caster sugar 

1 tsp vanilla extract/paste

225 g plain flour

40 g cornflour

180-200g homemade triple berry jam  


Method: 

Preheat oven to 180 degrees Celsius, and line a 24 x 20 cm baking/lamington tin with baking paper. 

Make the almond topping first by combining all the ingredients in a small/medium saucepan. Place over low heat and stir until the butter has melted. Set aside to cool. 

To make the base of the slice, beat the butter, sugar and vanilla in the bowl of an electric mixer with the paddle attachment, until the mixture is pale and creamy. With the mixer on low speed, sift in the flour and cornflour in two or three batches. Mix until the ingredients are just combined. 

Press the dough mixture into the base of the lined tin, and bake for 12-15 minutes, or until it is light golden in colour. Then remove from the oven and leave to cool for at least 10 minutes. 

Spread the jam over the base, then top with the almond mixture. Cook for a further 25-30 minutes, or until the almond topping has turned golden brown. You may need to turn the slice half way through the cooking time to bake the top evenly. 

Allow to cool in the tin, and cut into slices once cooled. 

Berry Almond Slice with Homemade Triple Berry Jam

References: ‘Made from Scratch’ by the Australian Women’s Weekly (Bauer Media Books, 2015) pp 48-49, 57 & 270; ‘Holiday’ by Bill Granger (Murdoch Books, 2007) p.22. 

Berry Almond Slice with Homemade Triple Berry Jam
In Cakes & Slices, Jams Preserves & Spreads Tags Berry Jam, Berry Almond Slice, Homemade Jam, Bill Granger, Australian Women's Weekly, Almonds, Slices
2 Comments
  • The Blog
  • Older
  • Newer

recipes

  • Biscuits/Cookies 39
  • Breads Etc. 9
  • Breakfast 7
  • Cakes & Slices 68
  • Confectionary 5
  • Drinks 6
  • Events 14
  • Food Photography Tips 3
  • From The Mailing List 24
  • Heirloom Recipes 12
  • Holidays 44
  • Ice Cream 9
  • Jams Preserves & Spreads 9
  • Muffins 4
  • Off the Shelf 48
  • Other Desserts 25
  • Savoury Dishes/Meals 15
  • Scones 4
  • Tarts & Pastry 9
  • Travel 13

Sign up to Friday Food Chat with Kath, a weekly newsletter for more food, baking, cookbook chat and more!

Sign Up Here!
instagram-unauth pinterest facebook url

Website Accessibility: To enable text to speech function on the blog, click the sound button to the right of each blog post.

All images & content are the property of Kathryn Vincent, unless stated otherwise. Please do not use without permission.

Kulinary Adventures of Kath

Food Photography, Recipes & Baking

instagram-unauth pinterest facebook url