Kulinary Adventures of Kath

Food Photography, Recipes & Baking
  • home
  • About
  • Work with Kath
  • Shop
  • Blog
    • The Blog
    • Recipe Archive
  • Newsletter
  • Contact
  • home
  • About
  • Work with Kath
  • Shop
    • The Blog
    • Recipe Archive
  • Newsletter
  • Contact
Raspberry Pistachio Rose Cake (23 of 25).jpg

The Blog

Recipes and Food Photography by Kath Vincent.

  • The Blog
  • Recipe Archive
  • All
  • Biscuits/Cookies
  • Breads Etc.
  • Breakfast
  • Cakes & Slices
  • Confectionary
  • Drinks
  • Events
  • Food Photography Tips
  • From The Mailing List
  • Heirloom Recipes
  • Holidays
  • Ice Cream
  • Jams Preserves & Spreads
  • Muffins
  • Off the Shelf
  • Other Desserts
  • Savoury Dishes/Meals
  • Scones
  • Tarts & Pastry
  • Travel
Duck Egg Pavlova with Fresh Honeycomb

Duck Egg Pavlova with Fresh Honeycomb

Duck Egg Pavlova with Fresh Honeycomb

Kath October 13, 2017

As you may have noticed from the number of times I have posted a recipe for Pavlova on this blog, I love Pavlova! It was my favourite thing my Grandma made, and I seem to be unable to stop coming up with new adaptations to it. 

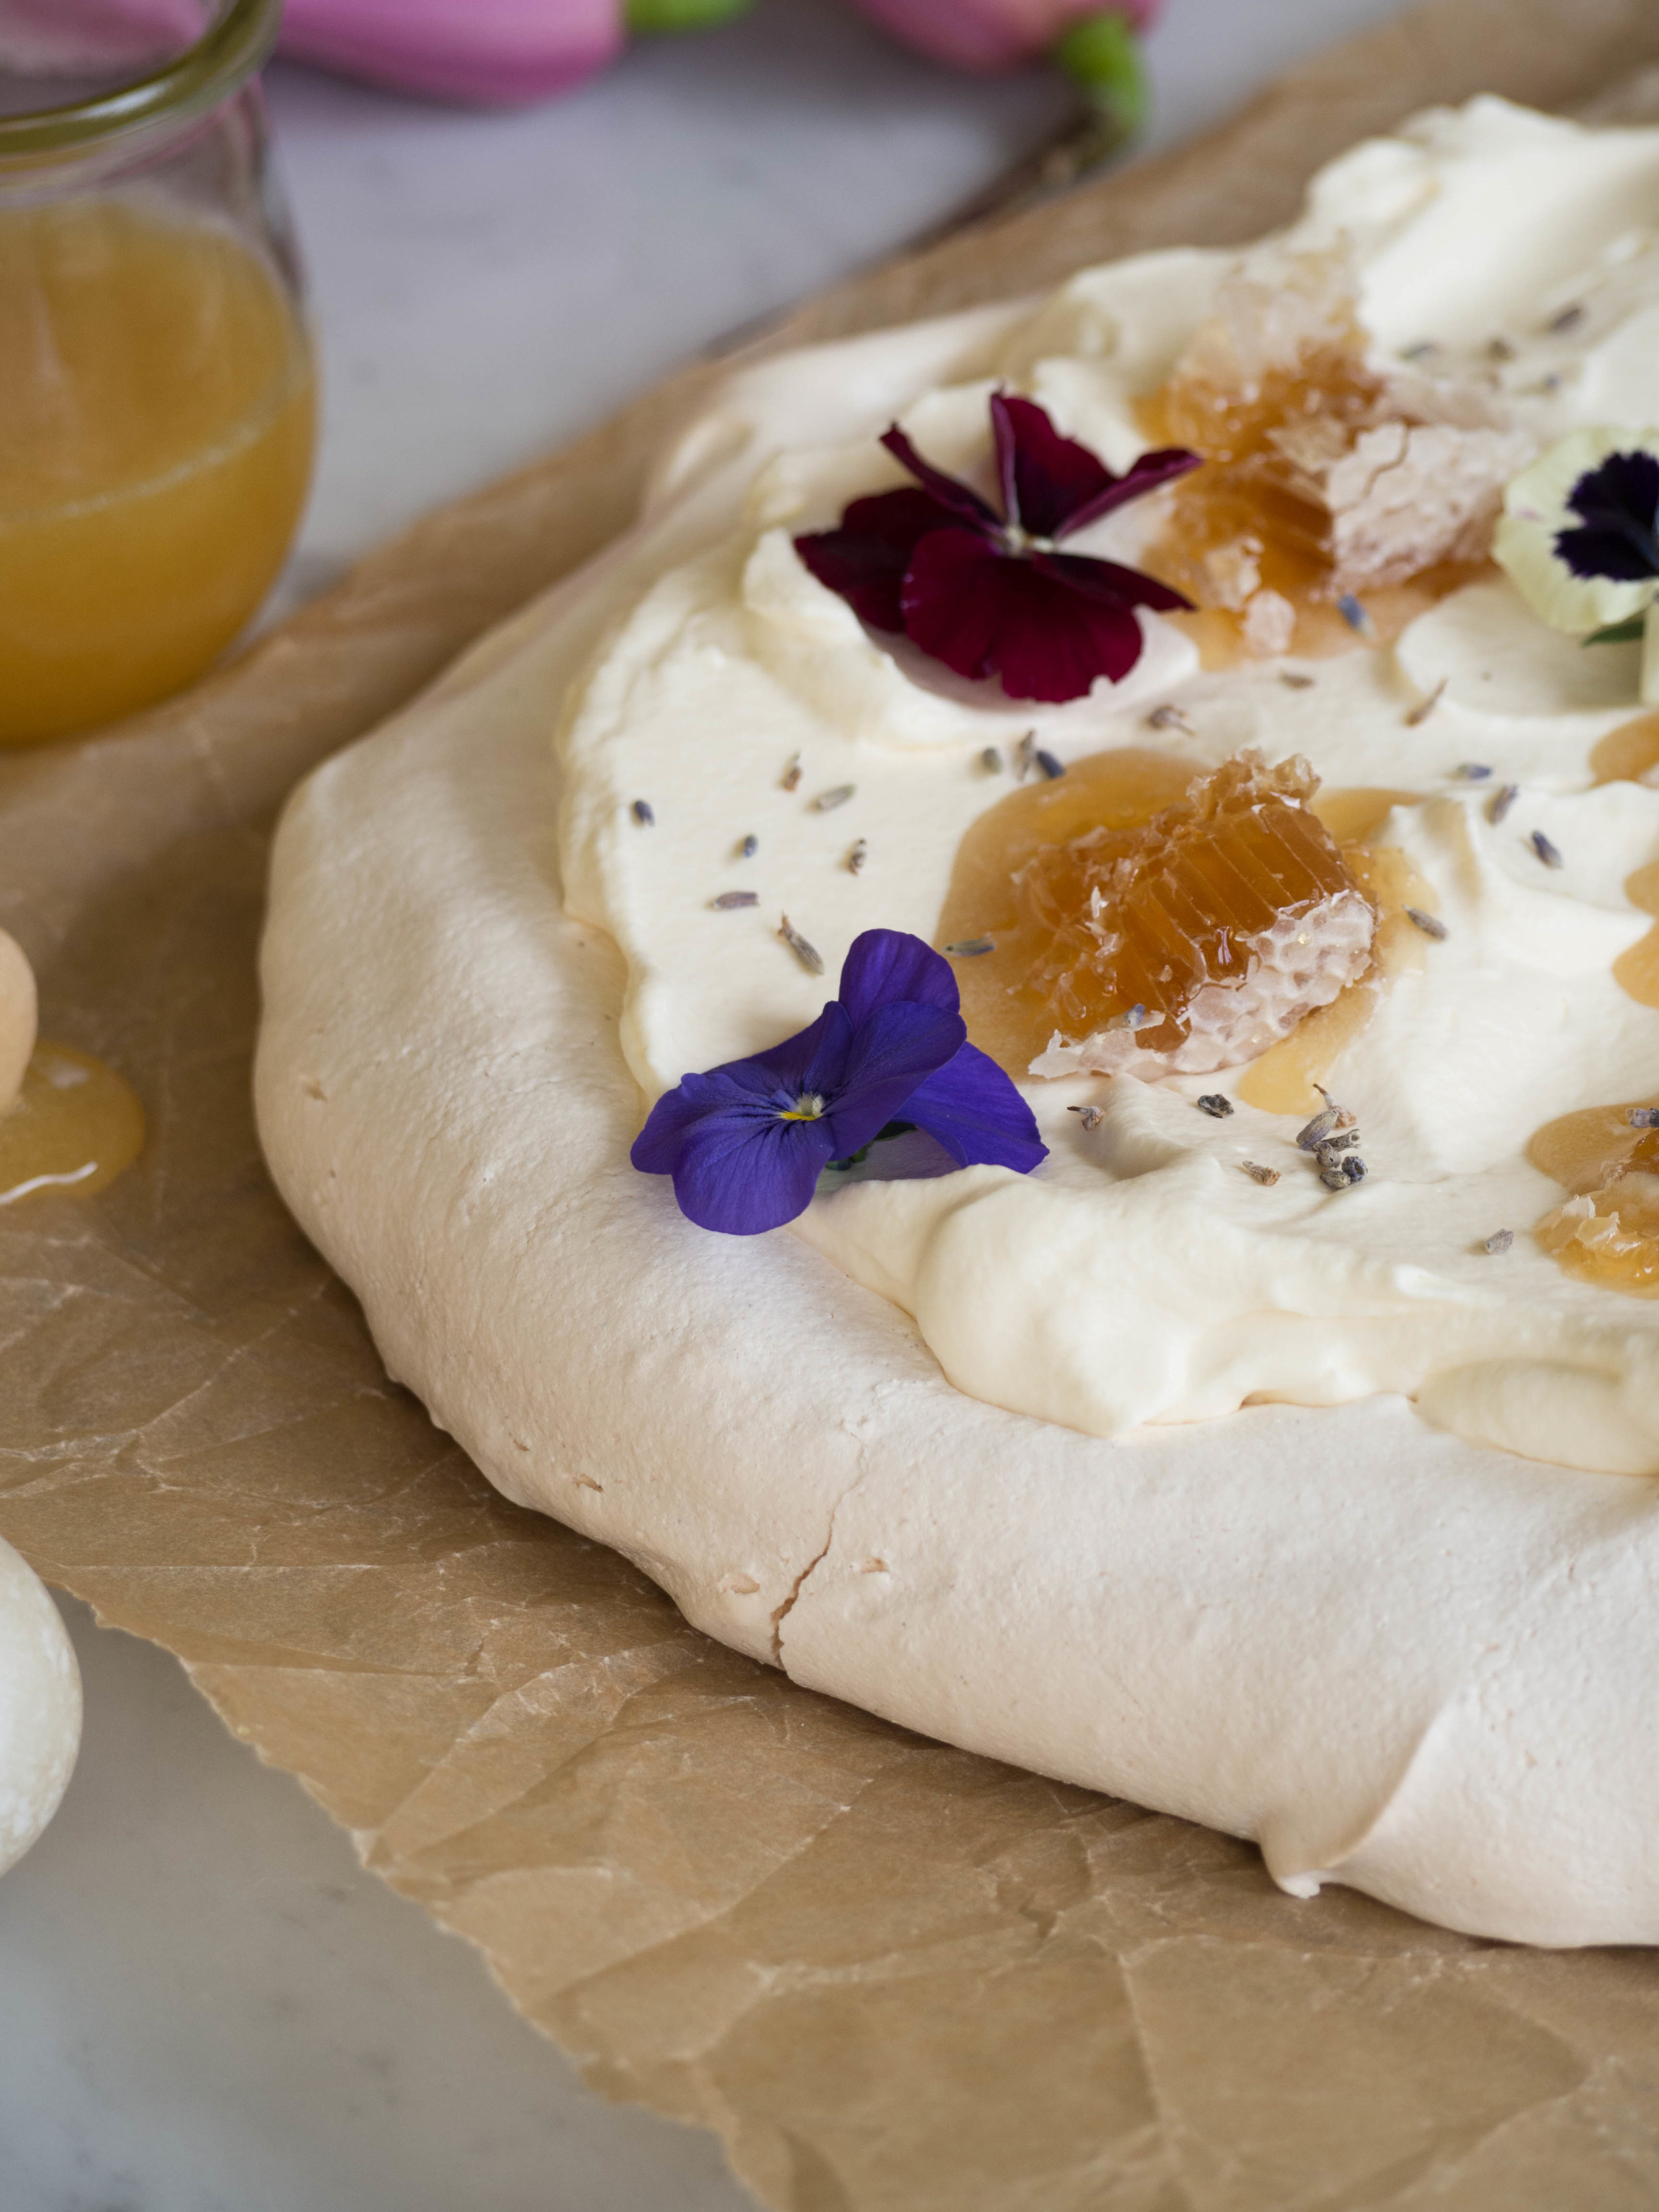
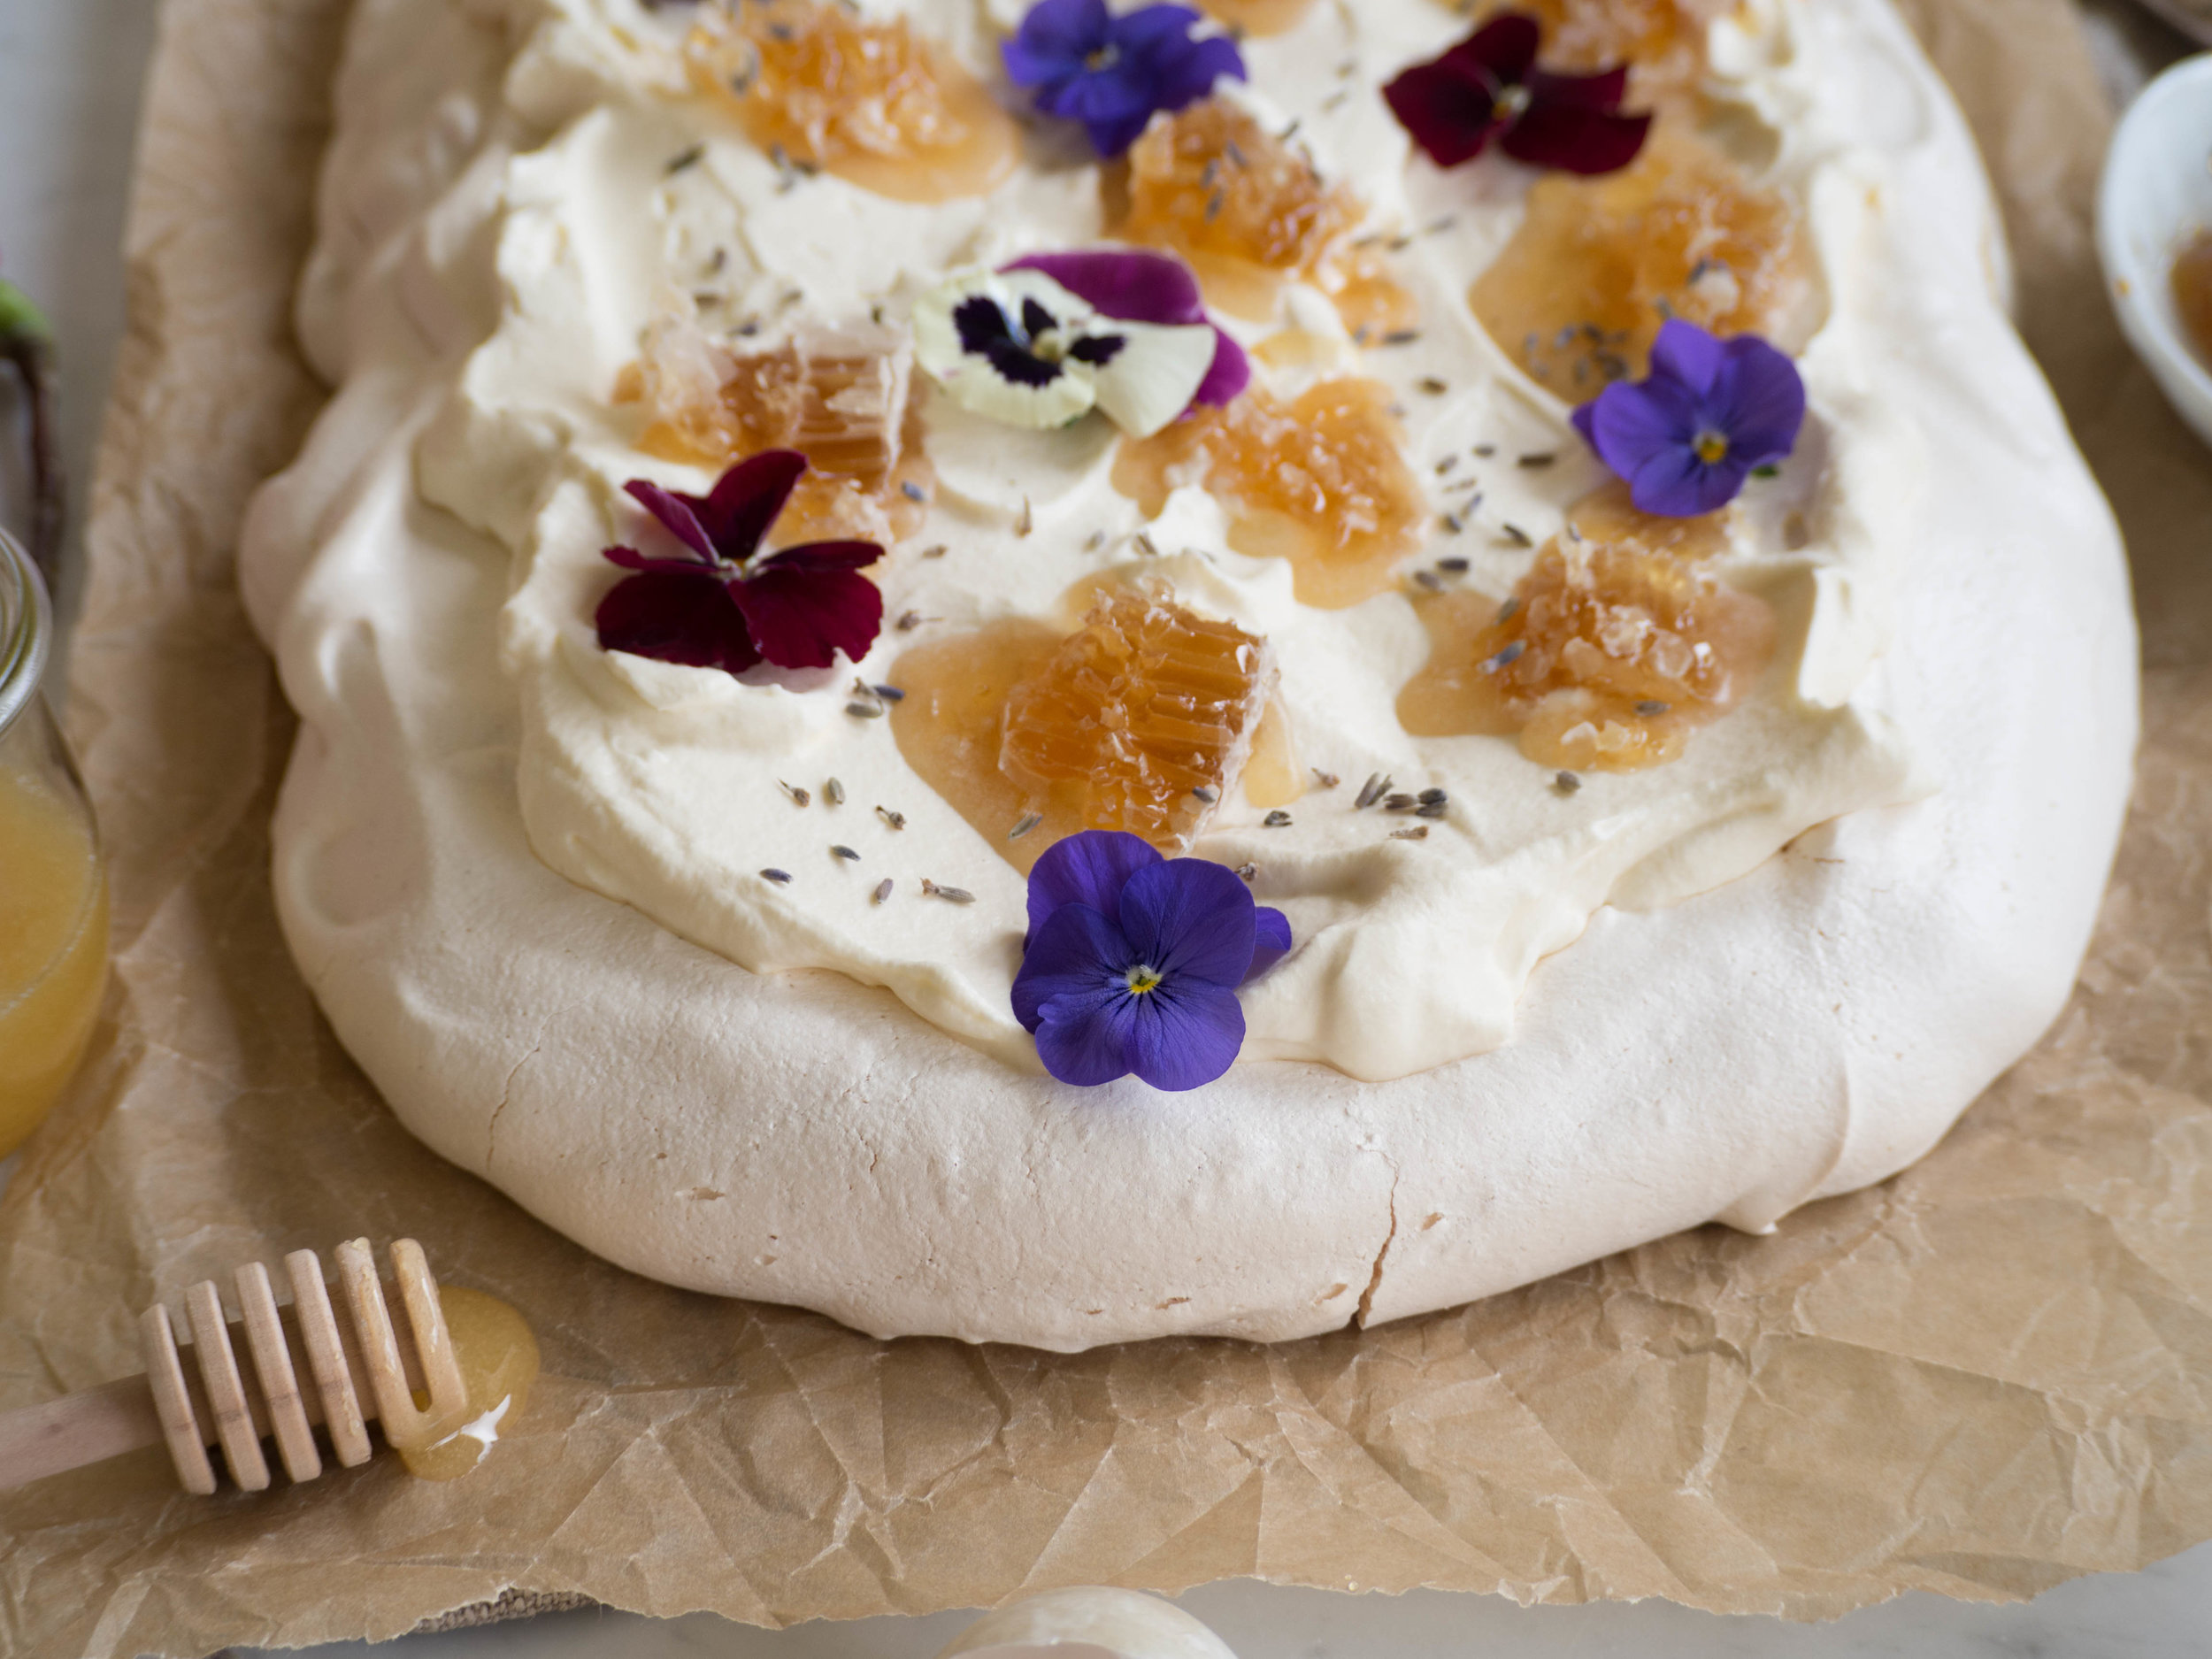
After making a Duck Egg Sponge a little while ago, I knew that next time I was able to find duck eggs I would try and bake something different. So when I finally found them again, I decided to make a duck egg Pavlova! A quick Google told me that duck eggs make great Pavlovas so I was keen to try it out. The flavours for this Pavlova are inspired by the honeyed cream from the Duck Egg Sponge I made. Adding honey to whipped cream is just about the most simple thing to do, but it tastes so good! I also love fresh honeycomb, so I couldn’t resist using some to decorate the Pavlova. 

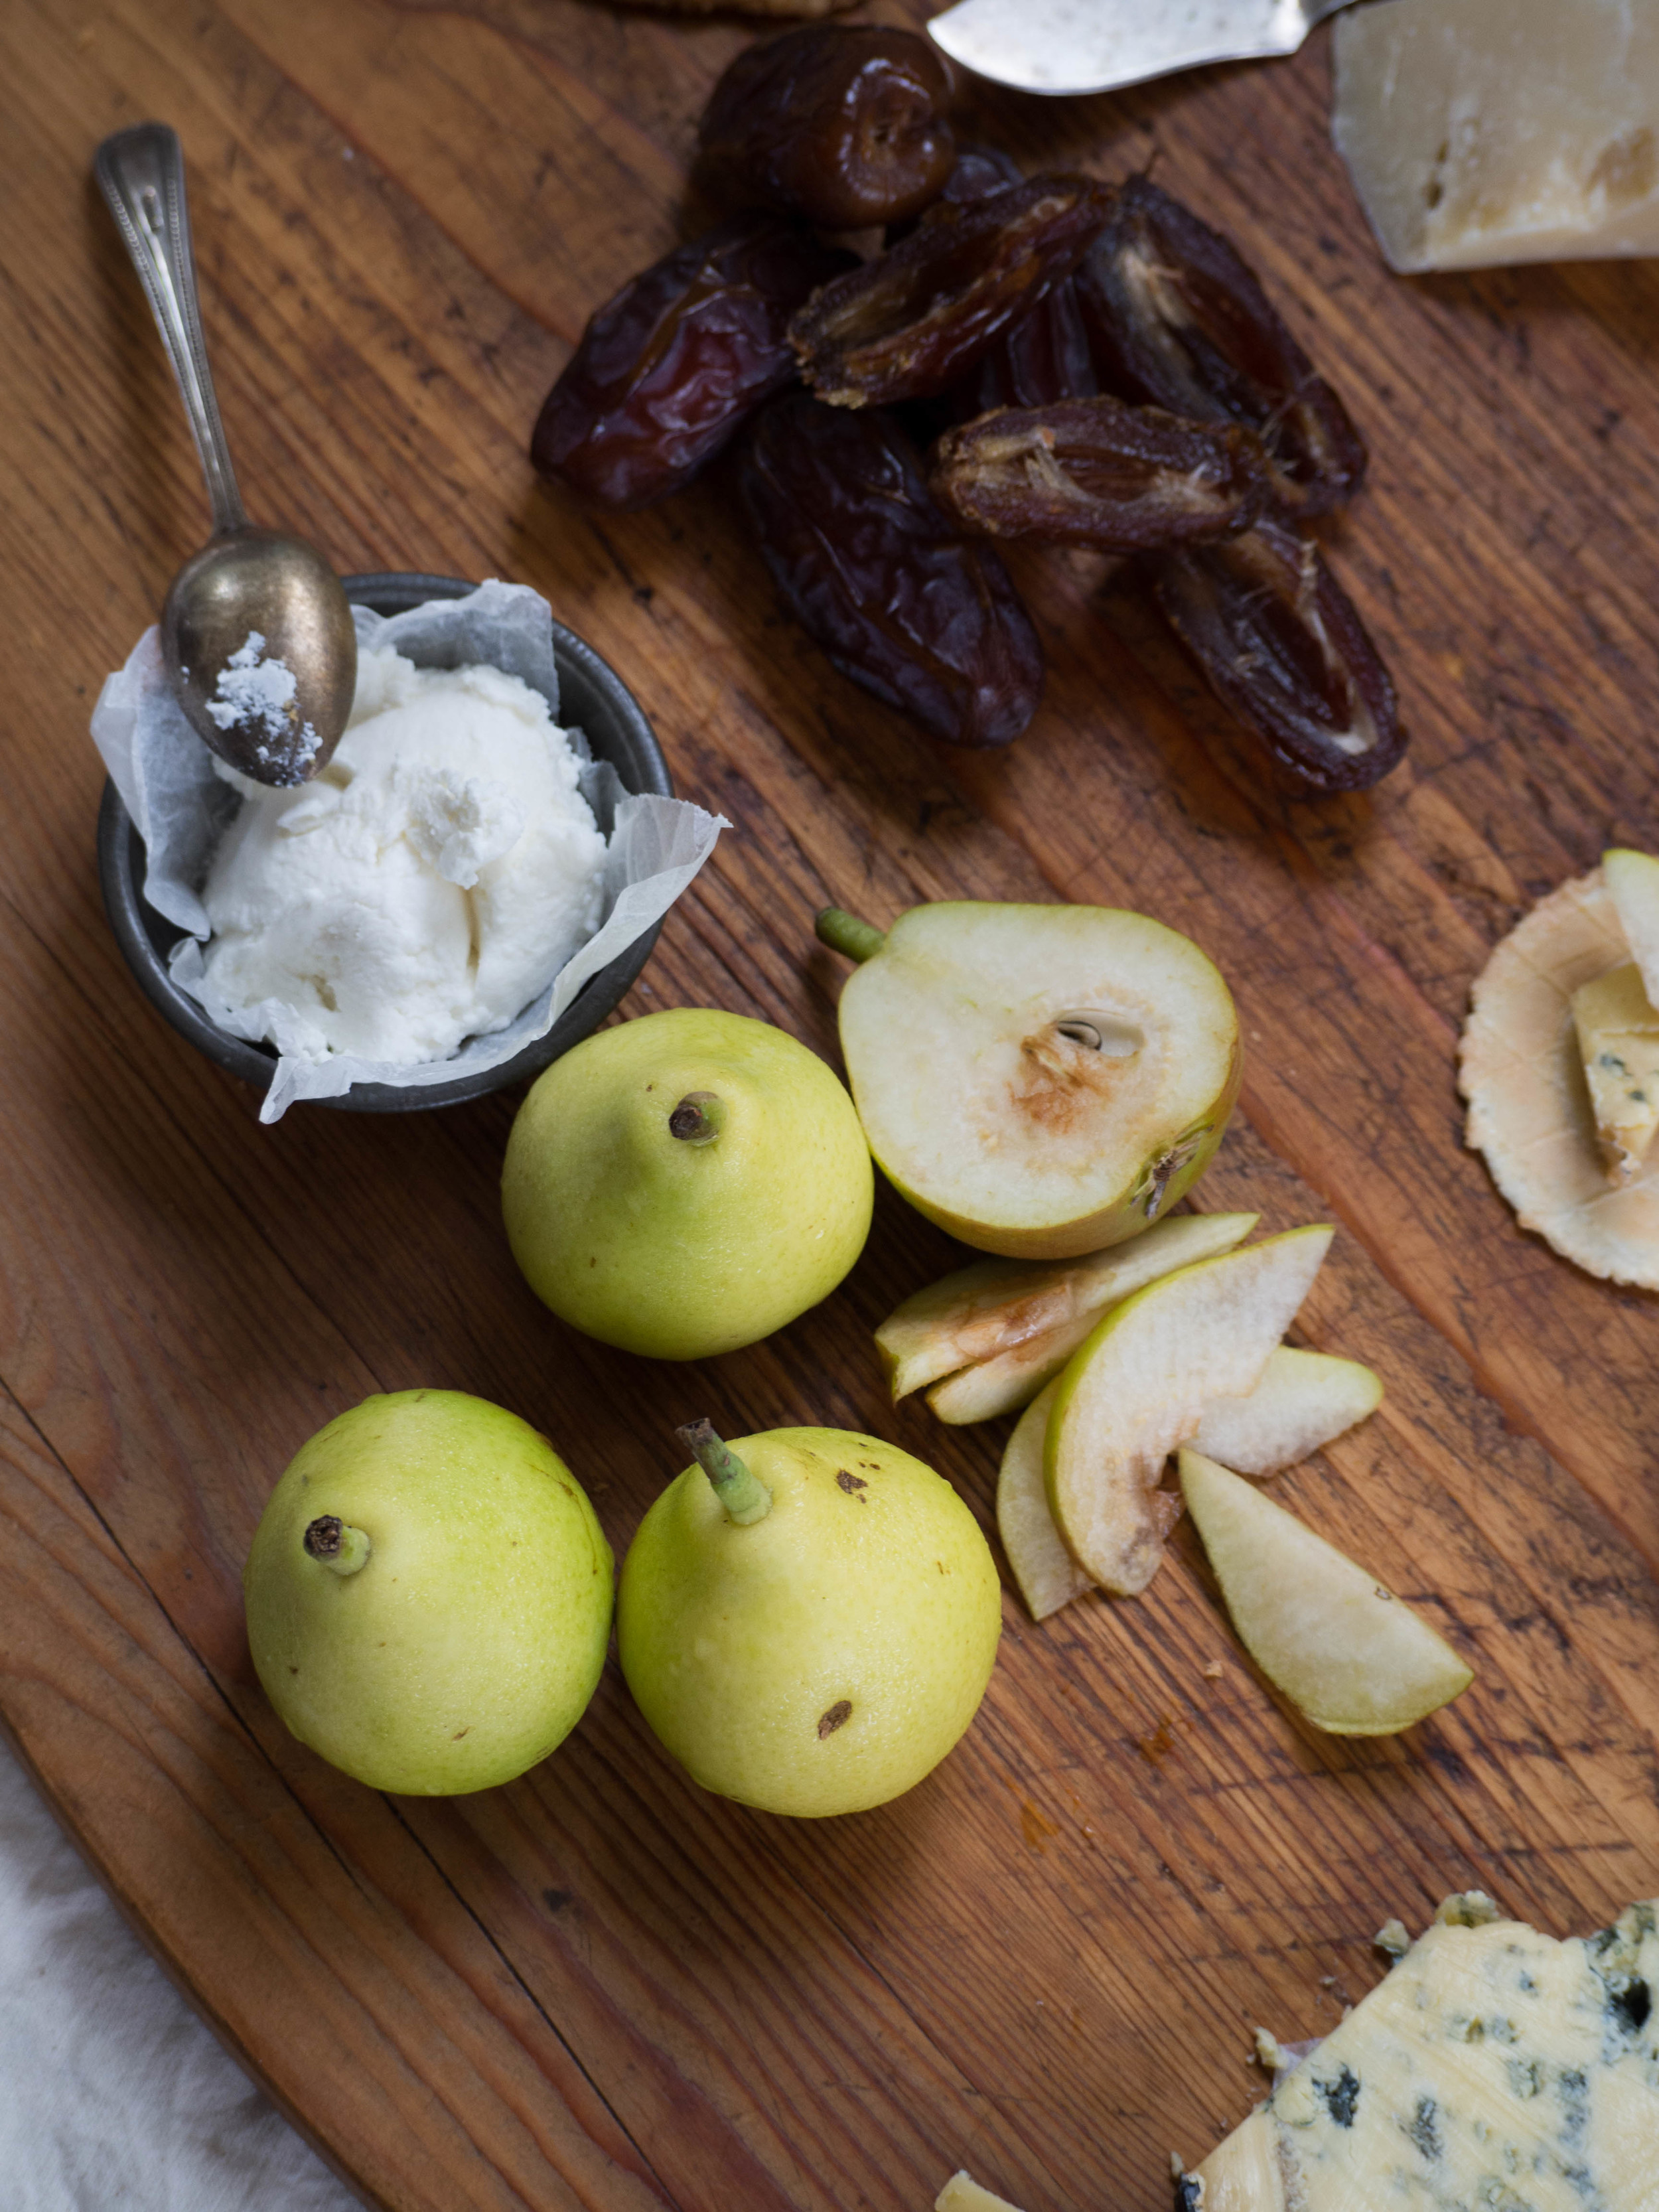
I buy my honeycomb from a farm stand in the north western suburbs of Sydney, and it is super fresh, and not too expensive ($15 for 500g). Fresh honeycomb is the purest form of honey you can eat as it has not gone through any filtering processes. The comb of the honey is fine to eat, and actually contains many beneficial properties. The honey this particular farm stand sells is amazing as well, and is also raw so all the good things are left in the honey rather than being striped out. 

I have found these types of honey’s have a more complex and interesting flavour than the honey sold at supermarkets, and buying it straight from the producer means you can buy it in larger quantities and at a better price than honey’s sold at gourmet food stores. Depending on where you live, you might even be able to find fresh duck eggs at farm stands or farmers markets, its always worth keeping an eye out!

Duck Egg Pavlova with Fresh Honeycomb

Duck Egg Pavlova with Fresh Honeycomb

Duck Egg Pavlova with Fresh Honeycomb 

Duck Egg Pavlova with Fresh Honeycomb 

Duck Egg Pavlova with Fresh Honeycomb

Duck Egg Pavlova with Fresh Honeycomb

Duck Egg Pavlova with Fresh Honeycomb

Duck Egg Pavlova with Fresh Honeycomb

Duck Egg Pavlova with Fresh Honeycomb

Ingredients: 

6 duck egg whites

375g caster sugar

1.5 tsp white vinegar 

1.5 tsp vanilla bean paste 

30g cornflour 


To decorate: 

300ml pouring cream

90ml honey

fresh honeycomb

dried edible lavender

edible flowers, to decorate, optional


Method: 

Pre-heat oven to 200 degrees Celsius. Line a large baking tray with baking paper.

Separate the duck eggs adding the whites to the bowl of a stand mixer. Duck egg shells are tougher than chicken eggs, and take a little more effort to crack, and I have found in the process the shells won’t crack ‘cleanly’. I suggest cracking each over a glass then separating the yolk and the whites over another glass or small bowl so you keep as many shell fragments contained and away from the pavlova mixture as possible! 

Beat the egg whites for 5-6 minutes, whilst gradually adding the sugar. Add the vinegar and vanilla and beat until the mixture is stiff, glossy and holds its peak (for an example of what this looks like see this video on my Facebook page).

Sift cornflour over the mixture, and gently fold to combine. 

Use a little of the mixture to help keep the baking paper in place. Spread the mixture into a rectangle, approximately 20 x 35 cm (this will depend on the size of your tray). If you want a pavlova with a more marshmallowy centre, make the rectangle smaller than 20 x 35 cm, so it will be thicker rather than wide. Try to keep the edges a little higher than the middle so any filling can sit comfortably later. 

Turn the oven down to 125 degrees Celsius, and cook undisturbed for 1.5 hours. 

After 1.5 hours, turn the oven off and leave the pavlova to cool completely in the oven (or overnight). 

Just before you are ready to serve your pavlova, whip the cream until it has thickened and is forming soft peaks. Add the honey and whisk until combined. Spread the cream over the centre of the pavlova. Decorate with a small sprinkling of dried edible lavender, small chunks of fresh honeycomb and some edible flowers. 

Note: If you are preparing the pavlova in advance of serving it, or know you will have left overs, I suggest serving the honeycomb on the side as the honey from the honeycomb will start to drip away when stored in the fridge.

Duck Egg Pavlova with Fresh Honeycomb

Duck Egg Pavlova with Fresh Honeycomb

Duck Egg Pavlova with Fresh Honeycomb

Duck Egg Pavlova with Fresh Honeycomb

Duck Egg Pavlova with Fresh Honeycomb

Duck Egg Pavlova with Fresh Honeycomb

Duck Egg Pavlova with Fresh Honeycomb

Duck Egg Pavlova with Fresh Honeycomb

In Other Desserts Tags Duck Eggs, Pavlova, fresh honeycomb, Edible Flowers
Comment
My Ultimate Cheese Board

My Ultimate Cheese Board

How to Create the Ultimate Cheese Platter

Kath March 21, 2016

This is my idea of the best cheese platter. Whilst still very much a savoury affair, there are definite sweet notes that keep me and my sweet tooth very happy. You don’t have to make your own biscuits, though these Quinoa Flake Biscuits taste one hundred times better than they sound (just ignore the fact they have quinoa in them!). You must, however, include the sweet pickled strawberries. They are the nicest way I have ever eaten strawberries and go so well with the goats curd in particular that I think they end up being the hero of the whole platter.

The real honeycomb is also a real winner here, and this cheese platter has finally given me an opportunity to utilise it. I have searched for recipes that incorporate honeycomb, only to find cakes or sweets that are based on the lolly made using sugar and bicarb soda. 

I read online during my search for recipes that used honeycomb that some people don’t like the texture of it. Maybe it’s the fact it tastes like honey but has a softly crunchy and chewy texture that throws people off, as if they are expecting to eat honey, the crunchy texture may seem strange. I had no problem with the texture and accompanied with some soft goats curd and the pickled strawberries and the crunch of the biscuits, added a welcome sweetness and chewy-ness. I would suggest buying a plain honeycomb, not a eucalyptus or lavender (etc) variety as any other flavours would overpower the rest of the cheese platter. 

I have left off quantities for the actual cheese platter, as it depends how many people you want to feed. The quinoa flake biscuits last at least a week in an air tight container and the pickled strawberries last one week in the fridge, so they don’t all have to be consumed right away. I found we nibbled all week on the biscuits, goats curd, honeycomb and strawberries in particular, once we were home from work (and ruined our dinner appetites every time!), and were quite disappointed when we had eaten it all. This cheese platter would be a nice thing to bring out over the upcoming Easter long weekend to enjoy with guests, or just for a quiet evening to yourselves. 

To Create My Ultimate Cheese Platter You Will Need: 

Mejool dates, pits removed 

Pears (I used the small paradise pears as they were in season)

Honeycomb

Goats curd (goats cheese would work well too)

A nice blue cheese

A hard cheese such as parmesan or a nice aged cheddar 

Quinoa flake biscuits 

Shop bought wafer biscuits (or any other flavourless biscuit)

Pickled strawberries


Serve with drinks, as an casual entree or even as an after dinner cheese course (in place of dessert). 


Quinoa Flake Biscuits

Ingredients: 

50g butter

125g quinoa flakes (found in the health food/gluten free section of the supermarket)

2 eggs, lightly beaten

250g caster sugar

2 tbsp plain flour 

2 tsp baking powder

zest of one small/medium (or half a large) orange 


Method: 

Pre heat oven to 180 degrees Celsius, and line three baking trays with baking paper. 

Melt the butter, then mix in with the quinoa flakes, sugar and eggs. Sift in the remaining dry ingredients and orange zest and mix until combined. 

Using a teaspoon, place small balls of the mixture on to the trays, ensuring there is enough room for them to spread, because they will! I found I could have made mine even smaller after they spread so much in the oven! 

Bake for 10-12 minutes, or until biscuits are golden. Remove from the oven and leave to cool on the trays or on wire racks. 

Pickled Strawberries

Pickled Strawberries

Pickled Strawberries

Ingredients: 

500g strawberries 

185ml verjuice (Maggie Beer has a good verjuice in her range of products, many independent grocers and delis sell it) 

100g caster sugar 

115ml water  

1 vanilla bean

1tsp pink peppercorns

rind of one small/medium (or half a large) orange, peeled in larger chunks 


Method: 

Put the verjuice, sugar, water, orange rind and pink peppercorns into a small saucepan. Split the vanilla bean and add to the saucepan. Place on medium-high heat and bring to the boil. Stir occasionally to ensure the sugar dissolves. 

Set verjuice mixture aside for 10 minutes or so to cool a little.

Hull and halve the strawberries (quarter if they are particularly big) and place into a large jar (about 1l capacity) or two smaller jars (about 500ml each, I used two 1 pint (around 470ml) Ball Mason jars). 

Pour over the verjuice mixture and store pickled strawberries in the fridge. 

References: Sophie Hansen of ‘Local is Lovely’ - http://local-lovely.com/sweet-pickles-the-whey-to-go/

In Savoury Dishes/Meals Tags cheese platter, cheese, fresh honeycomb, honeycomb, pickled strawberries, quinoa, quinoa flake biscuits, Long Weekend
Comment

recipes

  • Biscuits/Cookies 39
  • Breads Etc. 9
  • Breakfast 7
  • Cakes & Slices 67
  • Confectionary 5
  • Drinks 6
  • Events 14
  • Food Photography Tips 3
  • From The Mailing List 24
  • Heirloom Recipes 12
  • Holidays 44
  • Ice Cream 9
  • Jams Preserves & Spreads 9
  • Muffins 4
  • Off the Shelf 46
  • Other Desserts 25
  • Savoury Dishes/Meals 15
  • Scones 4
  • Tarts & Pastry 9
  • Travel 13

Sign up to Friday Food Chat with Kath, a weekly newsletter for more food, baking, cookbook chat and more!

Sign Up Here!
instagram-unauth pinterest facebook url

Website Accessibility: To enable text to speech function on the blog, click the sound button to the right of each blog post.

All images & content are the property of Kathryn Vincent, unless stated otherwise. Please do not use without permission.

Kulinary Adventures of Kath

Food Photography, Recipes & Baking

instagram-unauth pinterest facebook url