Kulinary Adventures of Kath

Food Photography, Recipes & Baking
  • home
  • About
  • Work with Kath
  • Shop
  • Blog
    • The Blog
    • Recipe Archive
  • Newsletter
  • Contact
  • home
  • About
  • Work with Kath
  • Shop
    • The Blog
    • Recipe Archive
  • Newsletter
  • Contact
Raspberry Pistachio Rose Cake (23 of 25).jpg

The Blog

Recipes and Food Photography by Kath Vincent.

  • The Blog
  • Recipe Archive
  • All
  • Biscuits/Cookies
  • Breads Etc.
  • Breakfast
  • Cakes & Slices
  • Confectionary
  • Drinks
  • Events
  • Food Photography Tips
  • From The Mailing List
  • Heirloom Recipes
  • Holidays
  • Ice Cream
  • Jams Preserves & Spreads
  • Muffins
  • Off the Shelf
  • Other Desserts
  • Savoury Dishes/Meals
  • Scones
  • Tarts & Pastry
  • Travel

White Chocolate and Macadamia Cookies

Kath April 20, 2023

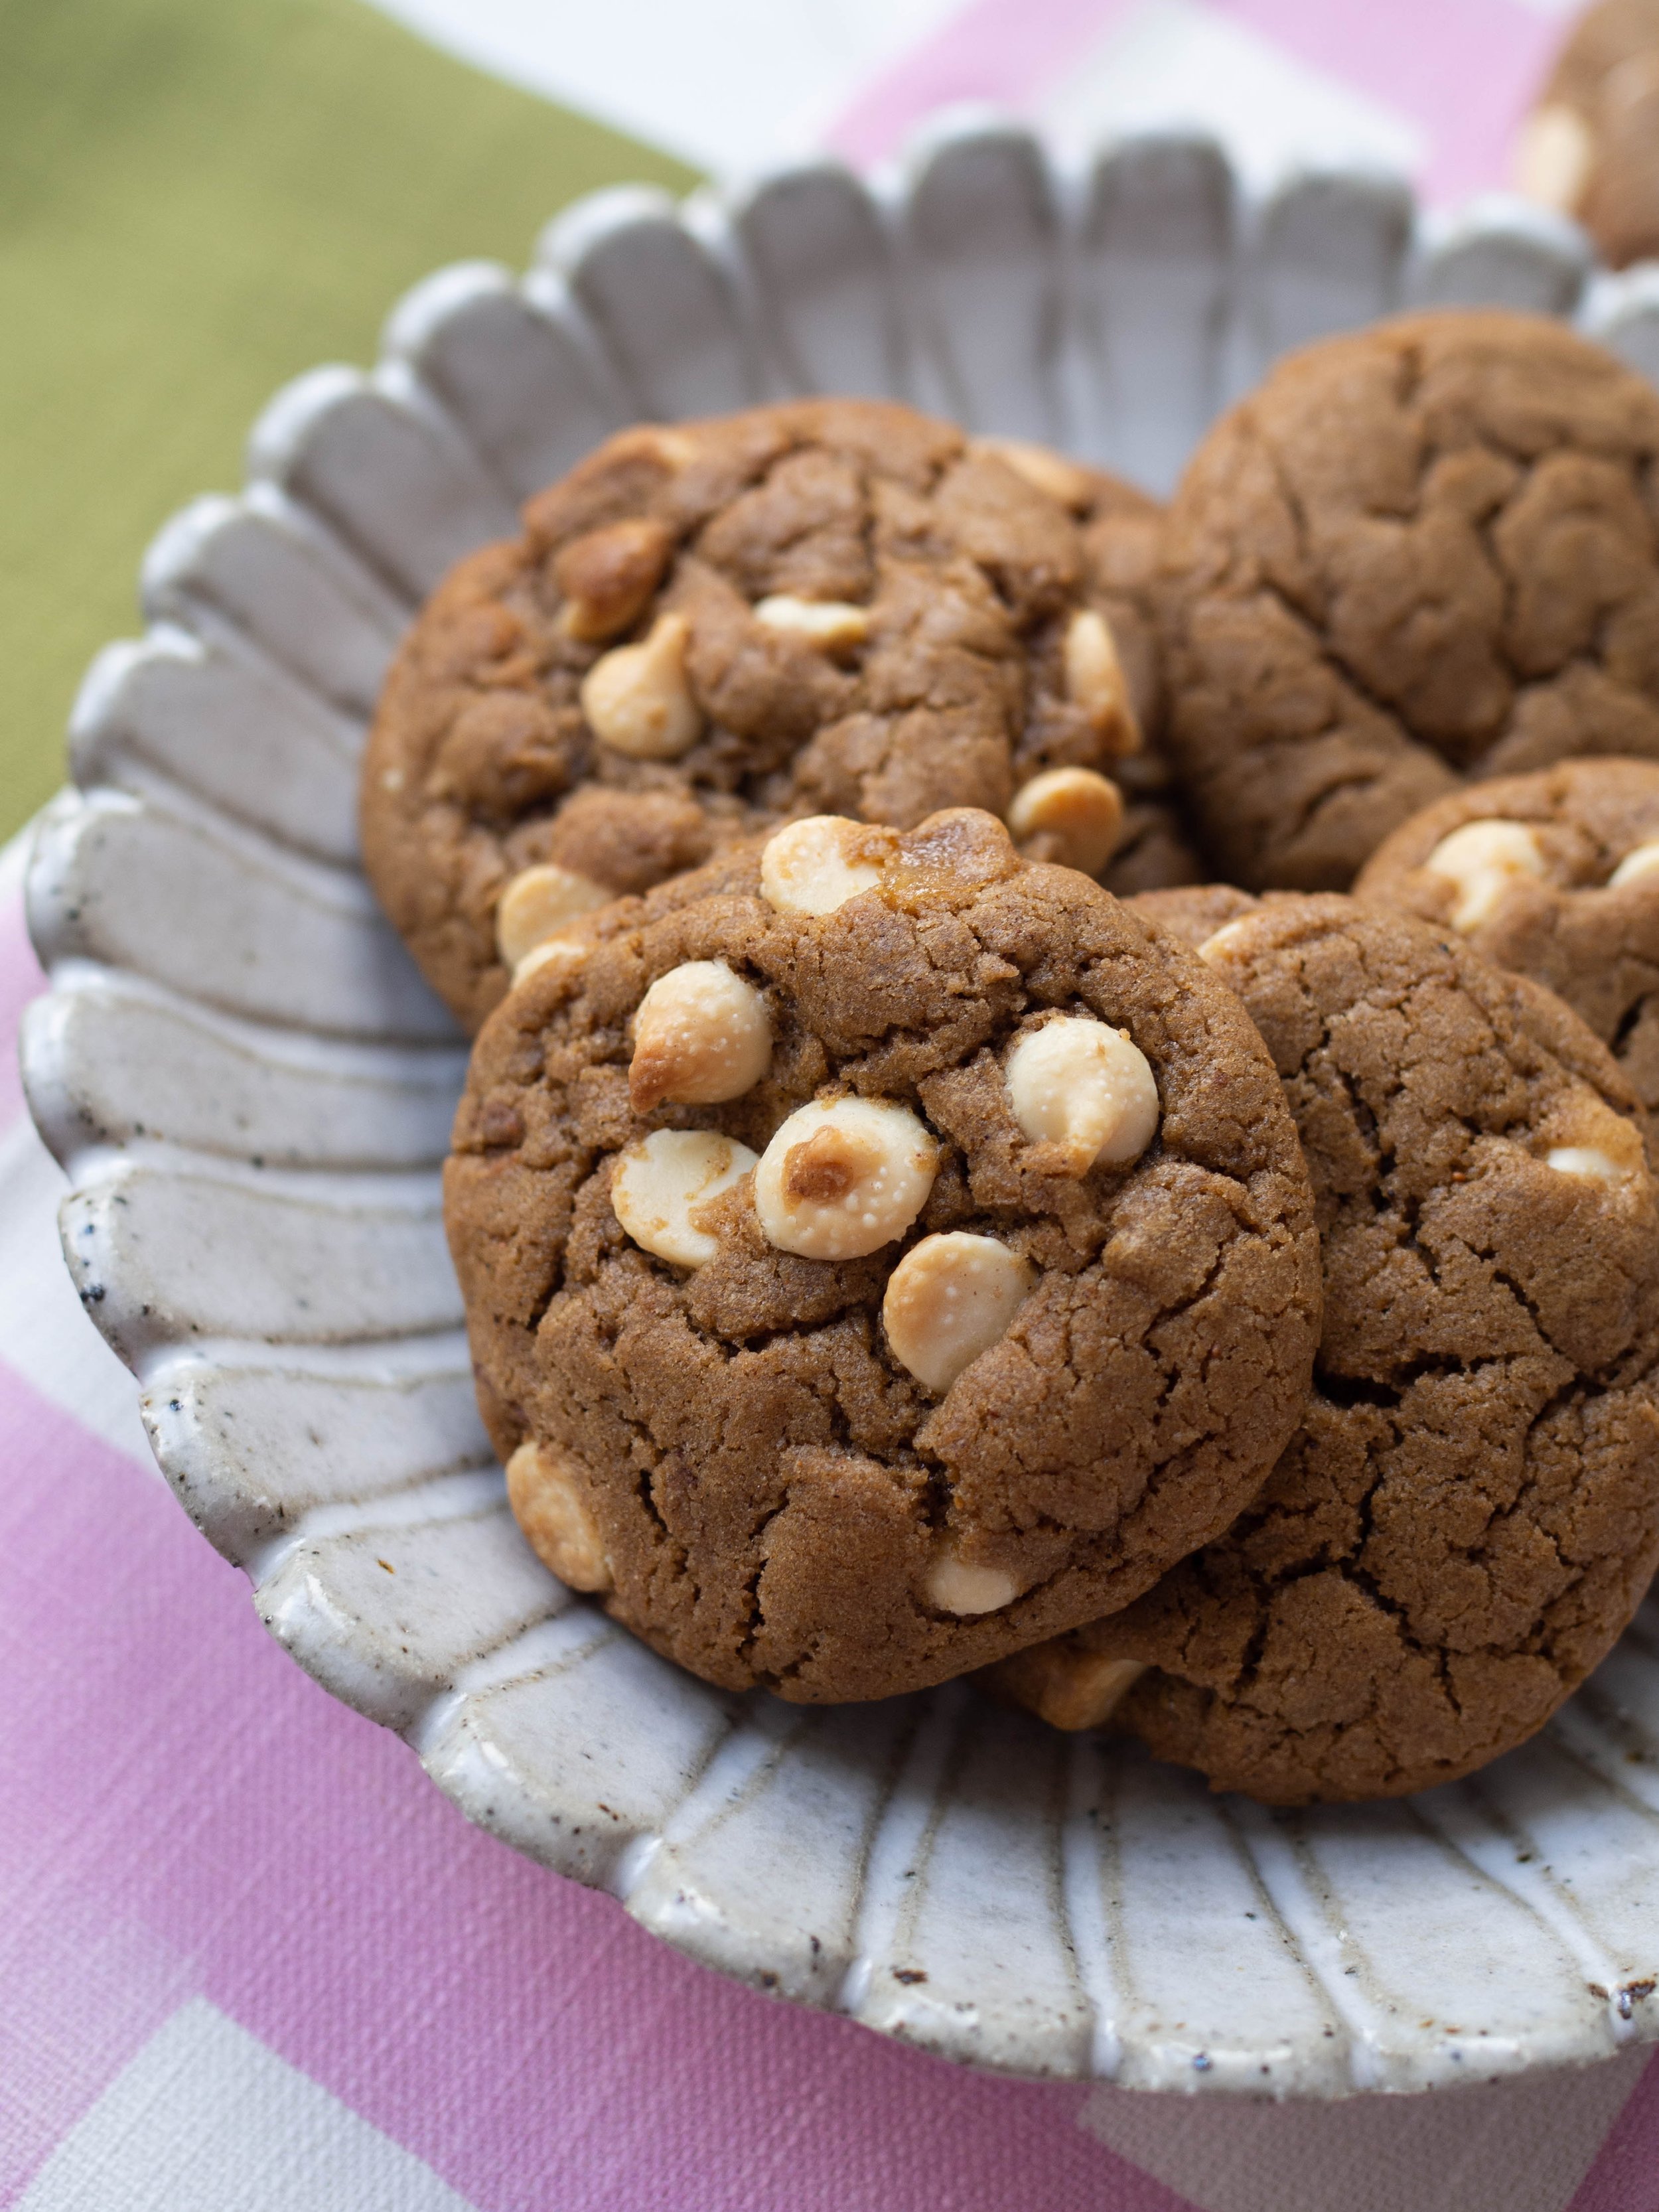
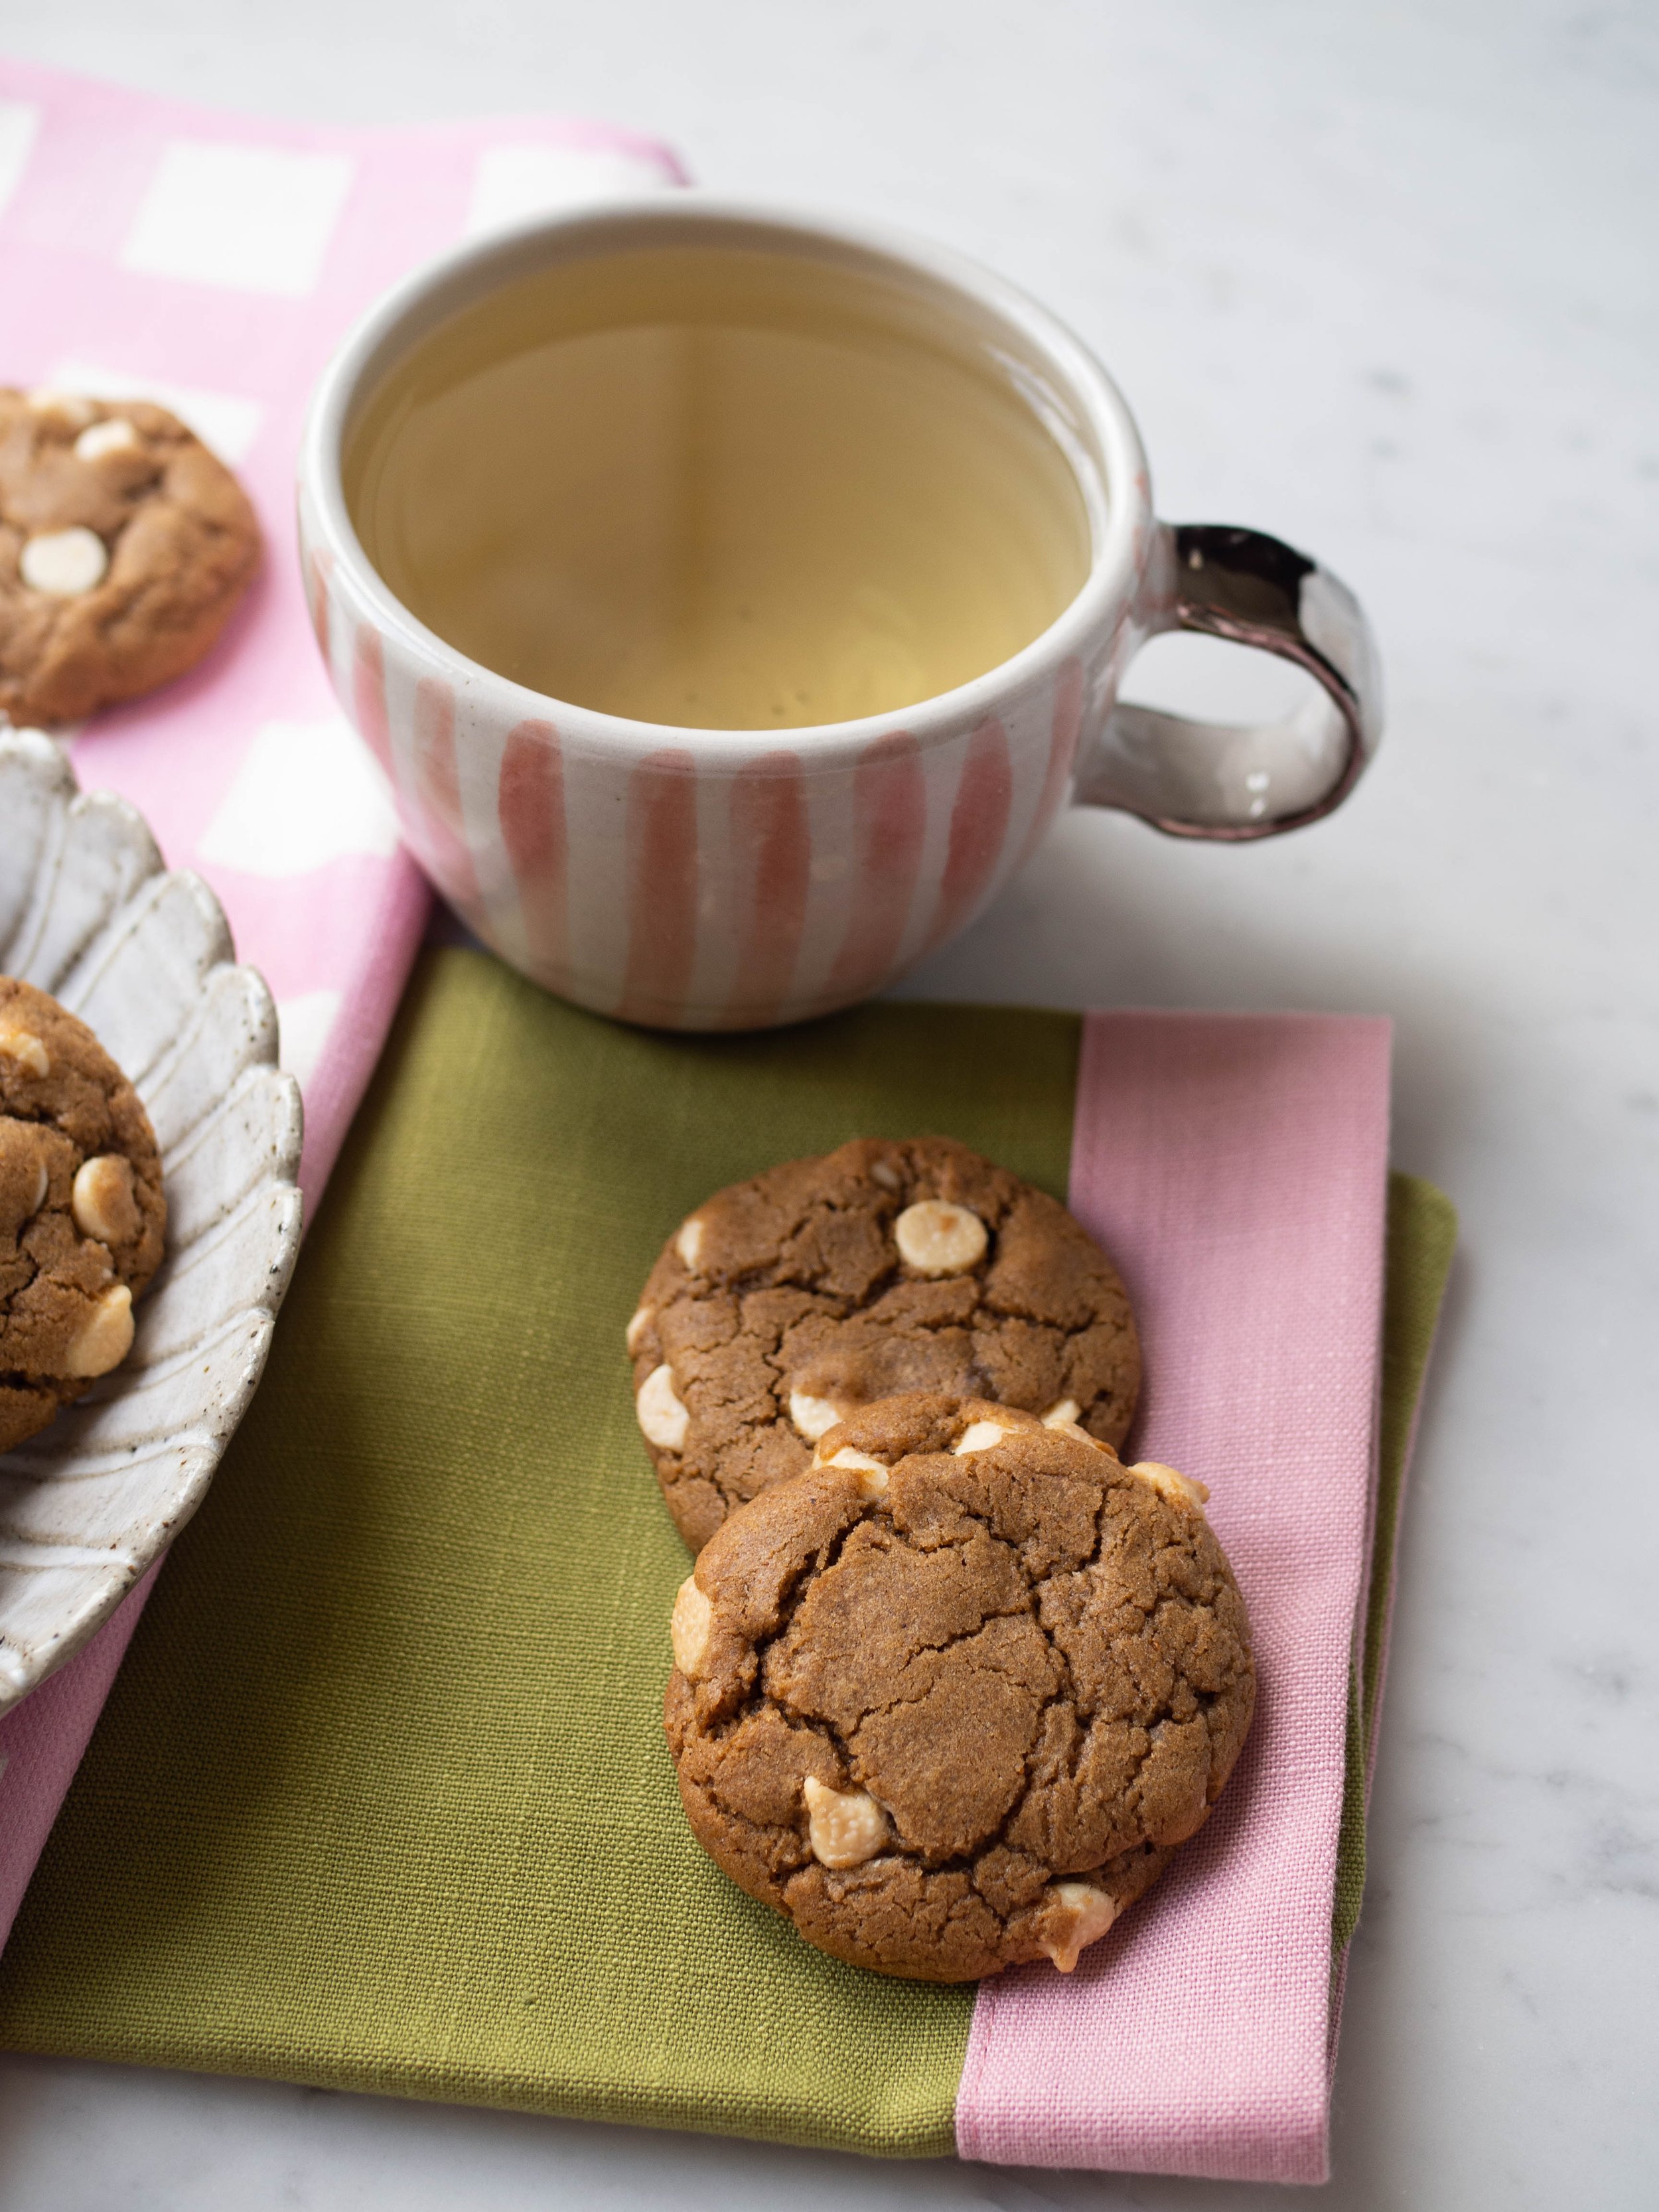
There are probably quite a number of recipes for white chocolate and macadamia cookies around, but I really felt a need to add mine to the mix. 

Originally I was making the recipe by Natalie from Beatrix (Melbourne), who shared her recipe on the TV show Everyday Gourmet. The recipe is online, and I’ve made it a couple of times. It is of course very good, but I have to say it is a more cakey kind of cookie which isn’t my top pick when eating a cookie. The cookie dough is very soft and almost wet, even after chilling in the fridge for 24 hours, it is still quite a messy dough to work with. 

I personally prefer a chewier crunchier cookie, and one that isn’t as messy to roll into balls before baking too. I also found due to the texture of the dough it was hard to make smaller sized cookies, which is usually my preference. Natalies recipe is meant to make really jumbo sized cookies, and even when trying to make them smaller the wetness of the dough prevented me getting them the size I really wanted.

So inspired by the Beatrix recipe, I have created my own, using my trusty cookie base recipe that I have used again and again as I am yet to find something I like as much, and something that is so easy to make. 

I have taken the idea from Natalie’s recipe to toast the macadamias first as it makes such a difference to the flavour. I have also used a combination of light and dark brown sugars as the addition of dark brown sugar adds a nice deeper flavour, without overdoing the sweetness. And this cookie can definitely go overboard with sweetness if you let it, there is something about the combination of white chocolate and macadamias that is inherently sweet so the addition of dark brown sugar tempers that a bit, along with the addition of salt. 

You can also sprinkle a little flakey sea salt over the biscuits before they are baked. I just don’t as I find the salt in the dough enough (I’m not one for adding salt to things on the whole, so it really comes down to personal preference), and I also inevitably forget to do it and realise only once the cookies have been baking for a few minutes and decide its too late now anyway…

I have tried making this recipe with lightly salted butter (the Lurpak brand) and it worked well with that - no need for additional salt sprinkling in this case. 

White Chocolate and Macadamia Cookies

Ingredients:

170g macadamias

125g unsalted butter, melted 

125g caster sugar

50g light brown sugar 

50g dark brown sugar

2 tbsp golden syrup

1 tbsp vanilla bean paste

1 egg

290g self raising flour

1/4 tsp kosher salt

100g white chocolate chips


Method:

Preheat oven to 150 degrees Celsius and line three large baking trays with baking paper.

Toasted the macadamias in the preheated oven for a few minutes (5-8 mins), or until they are nicely golden brown - keep an eye on them as you don’t want over toasted macadamias at this stage as they will go in the oven again later. Once the macadamias have cooled a bit, roughly chop so they are in varying sizes and shapes.

In a large bowl whisk together the melted butter, sugars, golden syrup, vanilla and egg.

Then add the flour, the chocolate chips and chopped macadamias, and mix to combine with a wooden spoon.

Place the dough in the fridge for at least 20 mins, to allow it to firm up a bit.

Increase your oven temp to 170 degrees Celsius.

Once chilled, roll heaped teaspoonfuls of the dough into balls and place on the trays. The cookies will spread as they bake so leave enough room in between. 

If you can’t fit all the dough on your prepared trays (or oven), place the dough back into the fridge until you can bake it.

Bake for 12-14 minutes or until the cookies have spread a bit and are golden brown. Rotate the trays in the oven about halfway through to ensure the cookies cook evenly.  

Allow to cool on their trays, then store in an airtight container. 

Makes about 33 cookies.

In Biscuits/Cookies Tags White Chocolate, Macadamia, Cookies, Beatrix Bakes, Biscuits/Cookies, Mixer Free Recipes, Easy Baking
Comment
Ginger Molasses Cookies

Ginger Molasses White Chocolate Cookies

Kath February 15, 2023

I have had this recipe on my mind since before last Christmas. I bought some cookie dough via Pepe Saya, that was a collab between them and Butterboy. Both are business that I really like, and this festive cookie dough sounded perfect for me - brown butter ginger bread. Filled with white chocolate, spices and rolled in sugar this cookie dough added a nice festive cookie hit that lasted well into January as I had frozen the dough and just baked some as I wanted it. 

This cookie dough got me thinking about creating my own version of this cookie. I needed my version to be heavier on the spices and more flavoursome in that respect, and the Pepe Saya x Butterboy cookies were lacking the ginger flavour for me. I have added 2 tsp of ground ginger to my cookies (you can add just 1 tsp if you want a milder flavour), and I also added some chopped stem ginger to add another layer of that ginger flavour. Crystallised ginger would also work well, but this element can also be left out completely if you wish. 

I also made my cookies a smaller size than the Pepe Saya x Butterboy cookies end up being. Butterboy is known for massive cookies, but when I bake my own I like smaller sized cookies so that one cookie doesn’t end up being almost a full meal (and more than one could comfortably be consumed in one sitting). You can play around with what size you’d like to make your cookies, just keep in mind it may alter the cooking time, you will need to leave more space between each on the trays if making them bigger (which may mean cooking in batches) and your yield for the recipe will also differ from what I have specified below.

This recipe will probably be added to my Christmas baking list when the time comes, but I think they are too good not to bake and eat all year round.

Ginger Molasses Cookies

Ginger Molasses White Chocolate Cookies

Ingredients:

125g unsalted butter, melted

125g caster sugar

100g dark brown sugar 

2 tbsp molasses

1 egg

280g plain flour

1/2 tsp bicarb soda

2 tsp ground ginger

1 tsp ground cinnamon

1/2 tsp ground nutmeg

1/2 tsp all spice 

200g white chocolate chips

2 tbsp chopped stem ginger (drained of syrup) or crystallised ginger, optional 


Method:

Preheat oven to 170 degrees Celsius and line three large baking trays with baking paper.

In a large bowl whisk together the melted butter, sugars, molasses and egg.

Then add the flour, then sift in the bicarb soda and add the spices. Add the chocolate chips and chopped stem ginger (if using), and mix to combine with a wooden spoon.

Place the dough in the fridge for about 20 mins, to allow it to firm up a bit.

Once chilled, roll heaped teaspoonfuls of the dough into balls and place on the trays. The cookies will spread as they bake so leave enough room in between. 

Bake for 12-14 minutes or until the cookies have spread a bit and are golden brown. Rotate the trays in the oven about halfway through to ensure the cookies cook evenly.  

Allow to cool on their trays, then store in an airtight container. 

Makes about 30 cookies.

Ginger Molasses Cookies
In Biscuits/Cookies Tags Ginger, White Chocolate, Cookies, Pepe Saya, Butter Boy Bake, Biscuits/Cookies, Mixer Free Recipes, Easy Baking
4 Comments

Vanilla Sprinkle Melting Moments

Kath November 3, 2022

I was inspired to make these simple vanilla sprinkle melting moments after eating some delicious biscuits made by The Flour Millers Wife. Em of The Flour Millers Wife is based in Manildra NSW and bakes delicious biscuits that are sold in a few stores across the Central West of NSW. 

I have been following Em on Instagram for a little while, and always thought the biscuits she makes look so good. I managed to find some when I was in Orange recently and they tasted as good as they looked! 

I especially enjoyed Em’s Sprinkle Yo-Yos, which are what gave me the inspiration to make these melting moments. I’m not sure exactly what the difference between melting moments and yo-yos are, or even if there is much of a difference. But since I have adapted my original melting moment recipe to make these, I haven’t altered the name. 

Biscuits by The Flour Millers Wife

Biscuits by The Flour Millers Wife I bought in Orange - Two packets of honey jumbles, white chocolate and cranberry biscuits and the Sprinkle Yo-Yo Biscuits.

My version are very different from Em’s which are much smaller and have a softer crumblier style biscuit, but I think that’s the joy of finding inspiration in what other people bake. It’s not about replicating it exactly, but using it as inspiration to create a new recipe. 

And this way I can enjoy my own melting moments, and still look forward to having some of The Flour Miller’s Wife’s creation next time I am in the Central West! Thank you for the inspiration Em! And keep any eye out for her biscuits if you are around Orange, Molong or Carcoar - and in the mean time, have a go at the recipe below!

Vanilla Sprinkle Melting Moments

Ingredients:                                       

300g unsalted butter, softened

1 tsp vanilla bean paste

1 tsp vanilla extract

100g icing sugar/mixture

420g plain flour

50g custard powder

Ingredients for the filling:

80g unsalted butter, softened

200g icing sugar/mixture

1 tsp vanilla bean paste

Sprinkles/100s and 1000s, to decorate

Method: 

Preheat oven to 145 degrees Celsius, and line three large baking trays with baking paper. 

In the bowl of a stand mixer using the paddle attachment, beat the butter, sugar and vanillas until creamy.

Add the flour and custard powder to the creamed butter, and mix on the lowest speed until a dough forms. 

Roll teaspoonfuls of the dough into balls and place on the prepared trays (you should end up with 40-44 individual dough balls/biscuits) leaving a little space in between each (they won’t spread much when baking). Then lightly press down each ball with the back of a fork so they flatten out a little. Dip your fork in flour if it is sticking to the dough.

Bake for 25 minutes. They will be cooked when the undersides of the biscuits are lightly golden. To ensure a even bake, rotate the baking trays in the oven around half way through. 

Allow to cool on their trays.

Once the biscuits have cooled make the filling by beating all the ingredients except the sprinkles in the bowl of a stand mixer using the paddle attachment or by using a hand held mixer. Mix until light and fluffy and everything is well combined. 

Pair up the cooked biscuits, and turn one from each pair over so the underside is facing up. Spread or pipe the filling on to the underside of one biscuit in each biscuit pair, then gently sandwich the paired biscuits together. 

Pour some sprinkles into a bowl and dip the edges of each sandwiched biscuit into it, pushing the sprinkles into the sides of the filling.

Leave the biscuits for half an hour or so for the filling to firm up a bit (you can do this in the fridge in warmer weather). Biscuits will store well in an airtight container for a few days. 

Makes 40-44 individual biscuits and 20-22 sandwiched biscuits. 

In Biscuits/Cookies Tags Melting Moments, Vanilla, Sprinkles, The Flour Millers Wife, Biscuits/Cookies
2 Comments
melting moment sandwich biscuits on pink plate

Bergamot Melting Moments

Kath July 13, 2022

I think melting moments (or yo-yos as they are sometimes known) are such a cheery biscuit. They are wholesome and comforting in a tasty and sturdy way, and are something I think adults and kids alike would enjoy. And they are quite simple to make as well. 

You only need four ingredients, and I thought the longest part of the whole recipe was rolling out the dough into balls to form the biscuits - which honestly wasn’t that long, but the rest of the steps are really quite quick. 

My love for bergamot is probably well known by now, and since we have many to use at the moment these melting moments had to be flavoured with bergamot. However you can use whatever citrus you like instead. 

This recipe is slightly adapted from one I created last year for The Healthy Baker, which you can check out if you want a slightly different take on the traditional melting moment.

melting moment sandwich biscuits on pink plate

Bergamot Melting Moments

Ingredients:                                       

300g unsalted butter, softened

120g icing sugar/mixture

Finely grated zest of 1/2 bergamot

450g plain flour

Ingredients for the filling:

80g unsalted butter, softened

200g icing sugar/mixture

3 tsp fresh bergamot juice

Finely grated zest of 1/2 bergamot 

Method: 

Preheat oven to 145 degrees Celsius, and line three large baking trays with baking paper. 

In the bowl of a stand mixer using the paddle attachment, beat the butter, sugar and bergamot zest until creamy.

Add the flour to the creamed butter, and mix on low speed until a dough forms. 

Roll teaspoonfuls of the dough into balls and place on the prepared trays (you should end up with 40-44 individual dough balls/biscuits) leaving a little space in between each. Then lightly press down each ball with the back of a fork so they flatten out a little. Dip your fork in flour if it is sticking to the dough.

Bake for 25 minutes. They will be cooked when the undersides of the biscuits are lightly golden. To ensure an even bake, rotate the baking trays in the oven around half way through. 

Allow to cool on their trays.

Once the biscuits have cooled make the filling by beating all the ingredients in the bowl of a stand mixer using the paddle attachment or by using a hand held mixer. Mix until light and fluffy and everything is well combined. 

Pair up the cooked biscuits, and turn one from each pair over so the underside is facing up. Spread or pipe the filling on to the underside of one biscuit in each biscuit pair, then gently sandwich the paired biscuits together. 

Leave the biscuits for half an hour or so for the filling to firm up a bit (you can do this in the fridge in warmer weather). Biscuits will store well in an airtight container for a few days. 

Makes 40-44 individual biscuits and 20-22 sandwiched biscuits. 

In Biscuits/Cookies Tags Bergamot, Melting Moments, Biscuits, Citrus, Biscuits/Cookies
Comment
Cookies with sprinkles sitting on a multi coloured spotted tea towel

Birthday Cake Cookies

Kath March 3, 2022

After buying the Birthday Cake cookies from Butterboy last year (read more about that here) I have been thinking about how I could recreate them. 

‘Birthday Cake’ is a strange name for a flavour to me as it gives no real indication of what it actually is. I know ‘Birthday Cake’ may mean something to those who’ve grown up in the US, as I think Birthday Cake is considered a type of cake/flavour there. Like a few other flavours that seem to have originated in the US - Red Velvet and Snickerdoodle come to mind - the name of the flavour or type of cake or cookie, doesn’t give me much idea what to expect when I might actually eat one of these things. 

I still remember over ten years ago, being in the US and trying to work out what exactly a Red Velvet cupcake was. Like what does red velvet actually mean? What flavours should I expect to taste when I bite into one? Everyone we asked gave us some iteration of the answer ‘Well you know, it’s just red velvet?!’. To two Australian’s who had never tasted anything red velvet, that was completely no help, as no, we didn’t just know! It wasn’t till we met up with a fellow Aussie that she said she’d seen her flatmate make red velvet cupcakes and she was sure they had chocolate in them. Once we finally tried a red velvet cupcake, we instantly knew it was chocolatey, and I guess heaped with food colouring to make it red! Finally an answer to our question. 

As for ‘Birthday Cake’ flavoured things, sprinkles seem to be a must. And maybe some element that makes the baked good taste like cake, when it’s not actually a cake. I’m not sure if ‘Birthday Cake’ and funfetti cakes are one and the same, or slightly different in some way, maybe it doesn’t really matter. In the end if you add sprinkles to something it’s instantly more fun and birthday-like even if there’s no birthday to celebrate.

For these cookies I have followed closely my inspiration from Butterboy and added malt to the dough. I think this is the ‘cake’ flavour element and it works well. I’ve also used Caramilk baking chips as not only do Butterboy use caramelised white chocolate in their cookie, but Caramilk makes every cookie excellent. You can also use regular white chocolate chips or white or caramelised white chocolate that is roughly chopped. 

Birthday Cake Cookie from Butterboy
Birthday Cake Cookie Cake from Butterboy
cross section of a cookie with sprinkles

Birthday Cake Cookies a.k.a Cookies with Sprinkles, Caramilk and Malt

Ingredients:

120g unsalted butter

200g caster sugar 

1 tsp vanilla extract

1 egg

290g self raising flour

2 tbsp malt powder

3.5 tbsp large sprinkles (aka. Jimmies) 

120g Caramilk choc chips or roughly chopped caramelised white chocolate

Method:

Preheat oven to 180 degrees Celsius and three large baking trays with baking paper. 

Melt the butter over low/medium heat, then allow to cool slightly.

In a large bowl whisk together the butter, sugar, vanilla and egg.

Then add the flour, malt powder, sprinkles and the Caramilk choc chips, and mix to combine with a wooden spoon.

Place bowl in the fridge to allow the dough to firm up a bit (at least 15 mins).

Roll medium sized balls of the dough (about a generously heaped tablespoon of dough per cookie) and place well spaced out onto the prepared trays.

Bake for 15-18 minutes or until golden brown, rotate the trays in the oven about halfway to help the cookies bake and brown evenly. 

Allow to cool on their trays or on a wire rack.

Makes about 16 cookies.

cookies with sprinkles sitting on a baking paper lined baking tray
cookies with sprinkles sitting on a multi colour spotted tea towel
In Biscuits/Cookies Tags Birthday Cake, Cookies, Biscuits, Butter Boy Bake, Biscuits/Cookies, Mixer Free Recipes, Easy Baking
Comment

Christmas Shortbread Biscuits

Kath December 20, 2021

This recipe for shortbread is exactly how my Grandma made them. Cut into shapes (using the cutters pictured), topped with half a glacé cherry.

I have always loved this recipe, and even though it’s not strictly a festive recipe, I find Christmas is when I most often think of it and want to make it.

Along with Pavlova (you can find my Grandma’s recipe for that here), these shortbread were my favourite thing Grandma made. I recall making them with her as a child, and eating the glacé cherries before they even made it on to the biscuits!

I even remember the last time she ever made them for me. I had an afternoon tea for my 21st birthday and Grandma asked what she could bring. I initially said she didn’t need to bring anything, but I could tell she was a little disappointed at that response.

I then thought of these biscuits and called her back and asked her to make them for my birthday. I’m so glad I did, as even though that was a few years before she died, I don’t recall enjoying her shortbread again.

Now I make them, often at this time of year. I use the cutters she used, and the taste and smell of them reminds me of her. They are simple to make, yet super delicious. Even if you don’t have much time to bake over the holidays, give these a go as the few ingredients and little time needed culminate in the most comforting cheery biscuit.

If you like you can add the seeds of one vanilla bean or 1 tsp of vanilla extract or paste to the biscuit dough when you are mixing the butter and sugar together. I love using vanilla, but since my Grandma didn’t include it in her recipe I have left it out this time.

Christmas Shortbread Biscuits

Ingredients: 

160g unsalted butter, softened (at room temp)

60g caster sugar 

250g plain flour 

14 red glacé cherries, approx.


Method: 

Preheat oven to 150 degrees Celsius, and line two large baking trays with baking paper. 

Place the butter and sugar in the bowl of the stand mixer and beat with the paddle attachment until well combined. 

Add the flour and mix on low until a dough starts to form.

Lightly flour your work surface, and tip the dough out. Bring together with your hands then roll out with a rolling pin until it is about 2mm thick. Dust the top of the dough and the rolling pin with a little flour if the dough sticks to your rolling pin.

Cut out biscuits with a 6cm (approx.) biscuit cutter, and transfer to the prepared trays using a palette knife. Bring the scraps of dough together with your hands, roll out again and cut out more biscuits, repeat until the dough is all used up.

Cut the glacé cherries in half, and gently push half into the centre of each biscuit.

Bake for 15-20 minutes, turning the trays around halfway through to ensure even cooking. 

The shortbread shouldn’t go very golden in the oven, they will be ready when the edges start to colour and if you gently check the underneath of one you can see it has cooked and is a little golden in colour.

Allow to cool on the trays or transfer to a wire rack. 

Makes about 28 biscuits with a 6cm biscuit cutter, however it will depend on the size of the cutter you use.

In Biscuits/Cookies, Holidays Tags Christmas, Shortbread, Grandma, glacé fruit
2 Comments
  • The Blog
  • Older
  • Newer

recipes

  • Biscuits/Cookies 40
  • Breads Etc. 9
  • Breakfast 7
  • Cakes & Slices 68
  • Confectionary 5
  • Drinks 6
  • Events 14
  • Food Photography Tips 3
  • From The Mailing List 24
  • Heirloom Recipes 12
  • Holidays 45
  • Ice Cream 9
  • Jams Preserves & Spreads 9
  • Muffins 4
  • Off the Shelf 50
  • Other Desserts 25
  • Savoury Dishes/Meals 15
  • Scones 4
  • Tarts & Pastry 9
  • Travel 13

Sign up to Friday Food Chat with Kath, a weekly newsletter for more food, baking, cookbook chat and more!

Sign Up Here!
instagram-unauth pinterest facebook url

Website Accessibility: To enable text to speech function on the blog, click the sound button to the right of each blog post.

All images & content are the property of Kathryn Vincent, unless stated otherwise. Please do not use without permission.

Kulinary Adventures of Kath

Food Photography, Recipes & Baking

instagram-unauth pinterest facebook url