Kulinary Adventures of Kath

Food Photography, Recipes & Baking
  • home
  • About
  • Work with Kath
  • Shop
  • Blog
    • The Blog
    • Recipe Archive
  • Newsletter
  • Contact
  • home
  • About
  • Work with Kath
  • Shop
    • The Blog
    • Recipe Archive
  • Newsletter
  • Contact
Raspberry Pistachio Rose Cake (23 of 25).jpg

The Blog

Recipes and Food Photography by Kath Vincent.

  • The Blog
  • Recipe Archive
  • All
  • Biscuits/Cookies
  • Breads Etc.
  • Breakfast
  • Cakes & Slices
  • Confectionary
  • Drinks
  • Events
  • Food Photography Tips
  • From The Mailing List
  • Heirloom Recipes
  • Holidays
  • Ice Cream
  • Jams Preserves & Spreads
  • Muffins
  • Off the Shelf
  • Other Desserts
  • Savoury Dishes/Meals
  • Scones
  • Tarts & Pastry
  • Travel
Lumberjack Cake (aka Queen Elizabeth Cake)

Lumberjack Cake (aka Queen Elizabeth Cake)

Lumberjack Cake

Kath July 11, 2019

To celebrate the imminent arrival of my new eBook, Cosy Winter Bakes, I am sharing one of my favourite Winter cake recipes here on the blog. This new eBook is filled with recipes just like this one - cosy, using seasonal ingredients, and best enjoyed with a warming cup of tea! To be the first to know when this eBook is released, click here to sign up to my mailing list.

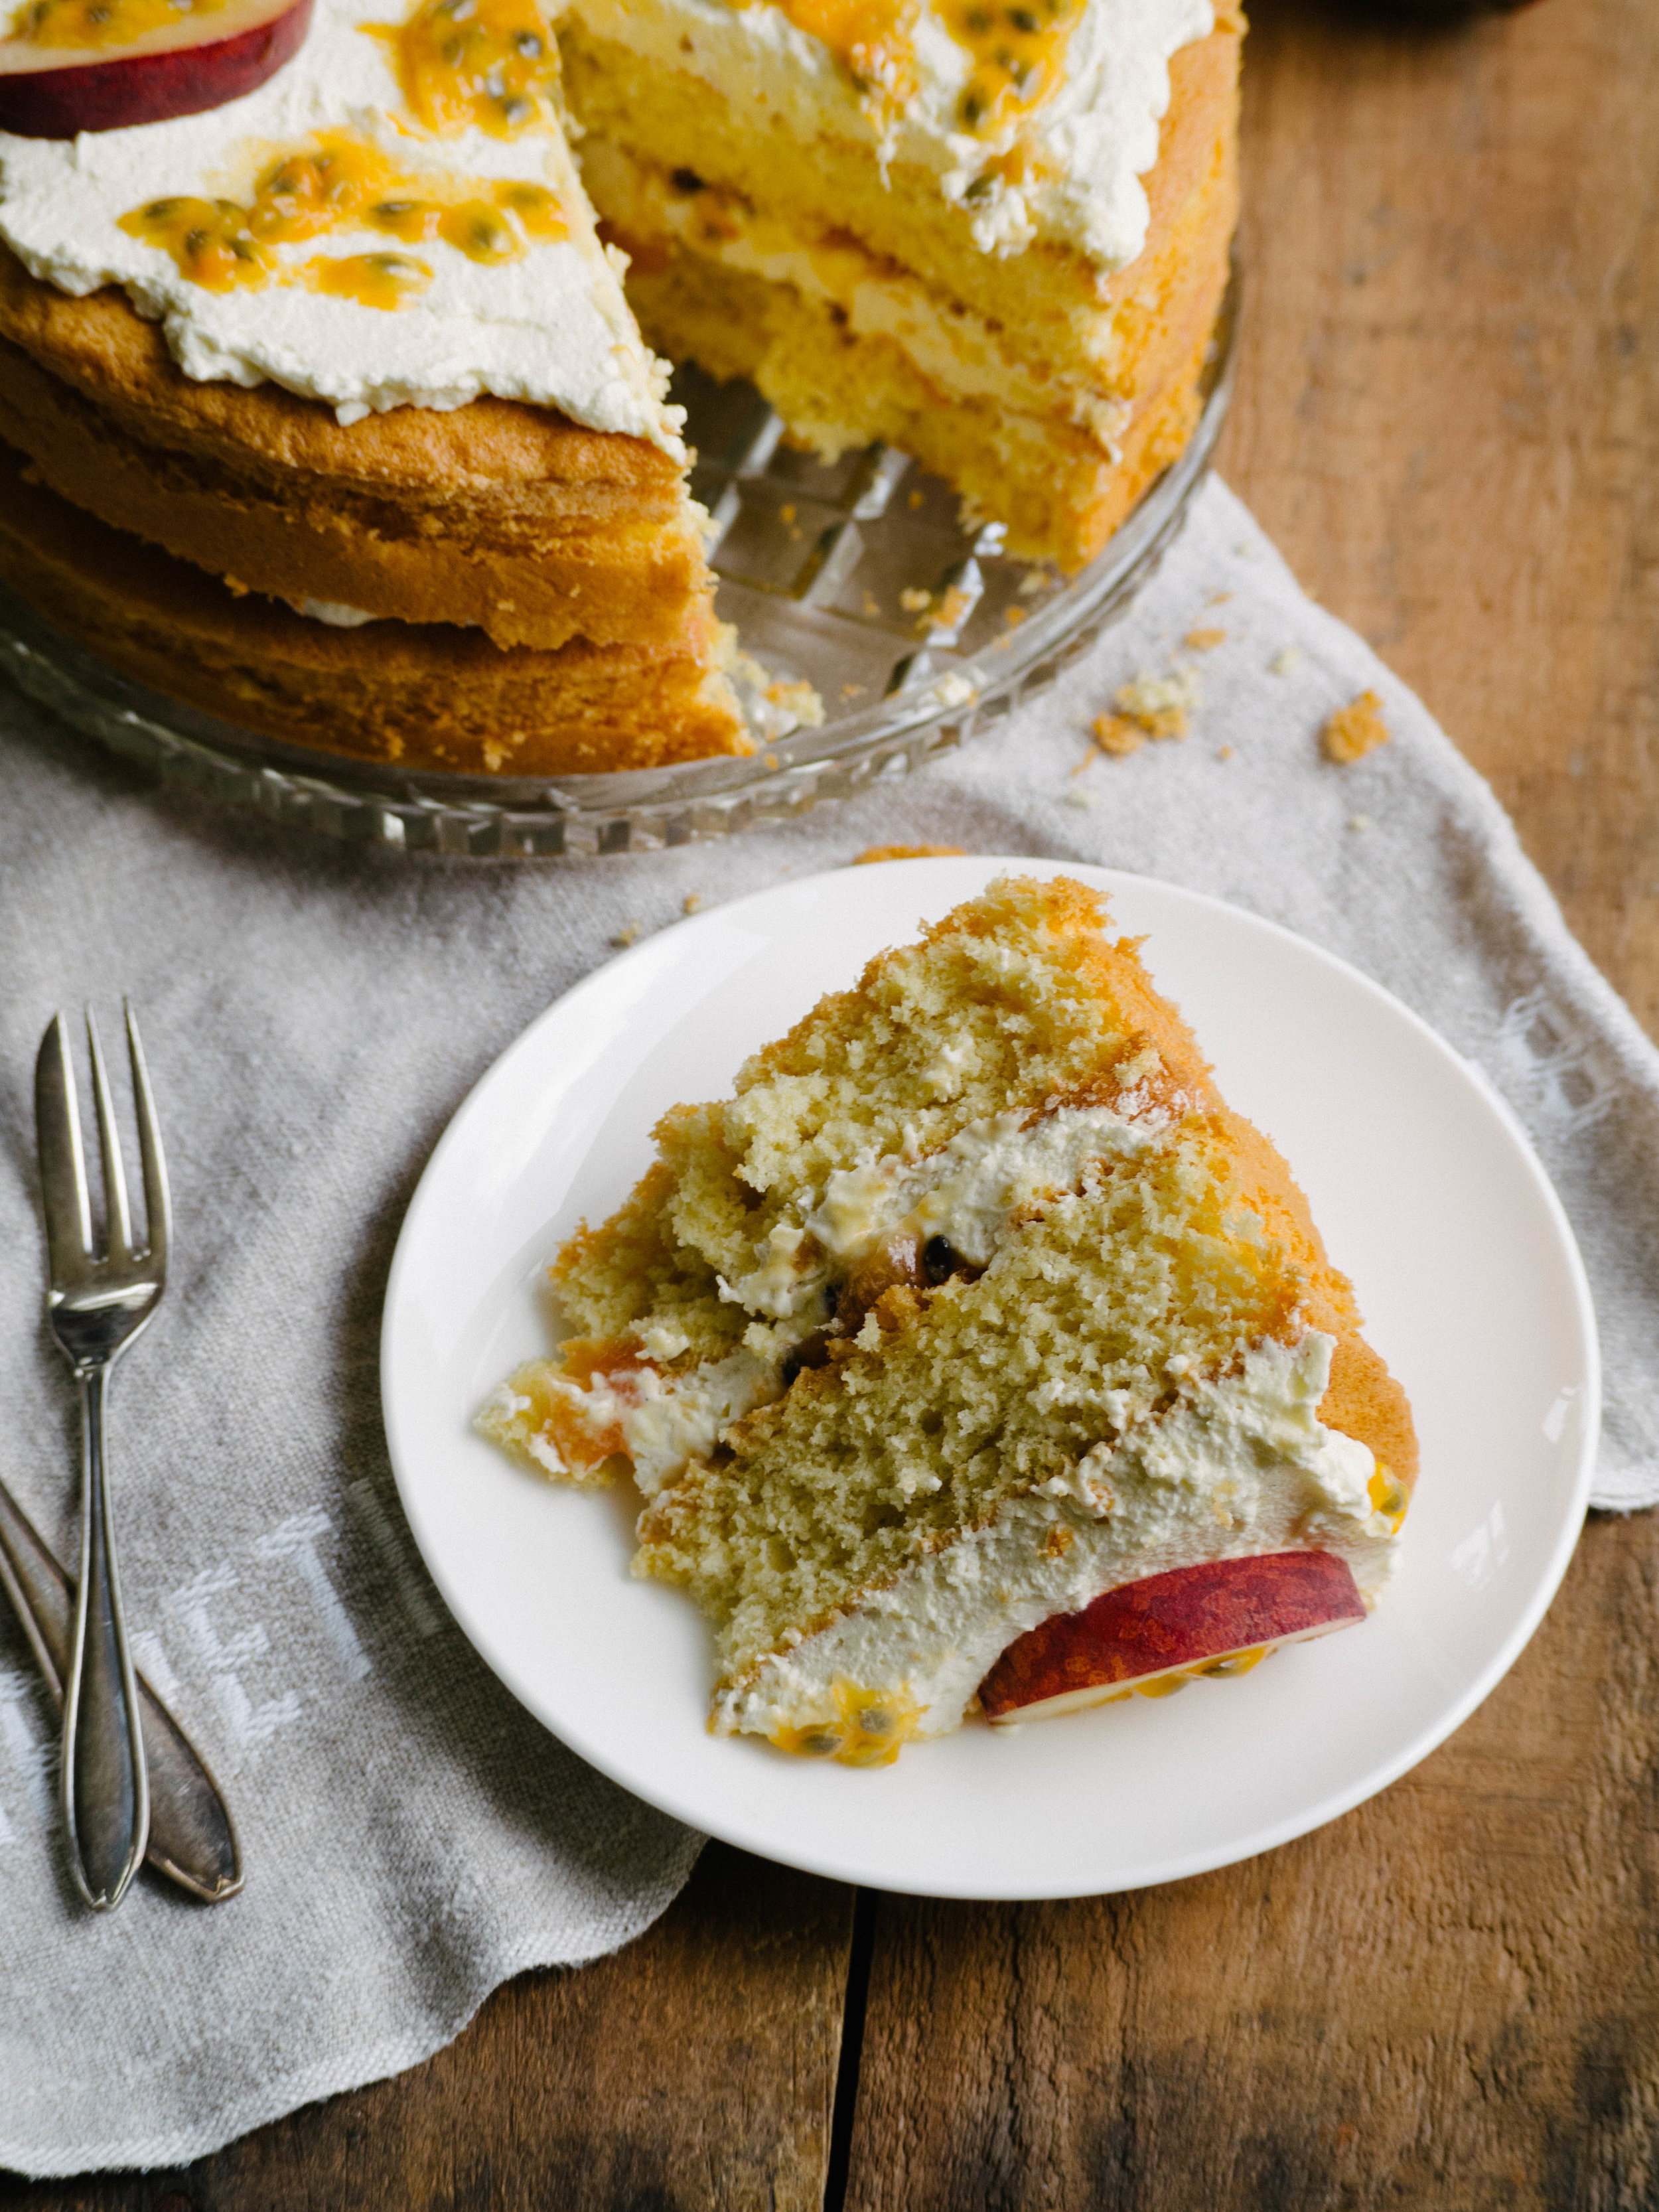
The Lumberjack Cake is a cake made up of apples and dates, with a crunchy maple coconut topping. I first heard of this cake a fair few years ago when I worked at a cafe. One of my colleagues baked for the cafe and a Lumberjack Cake was one of the things she often made. I seem to remember her saying it was something she picked up while she was in Canada, and that it was a Canadian recipe (also known as Queen Elizabeth Cake). It was the perfect cake for a cold Winters day, and I soon found myself a recipe and began creating it at home too. 

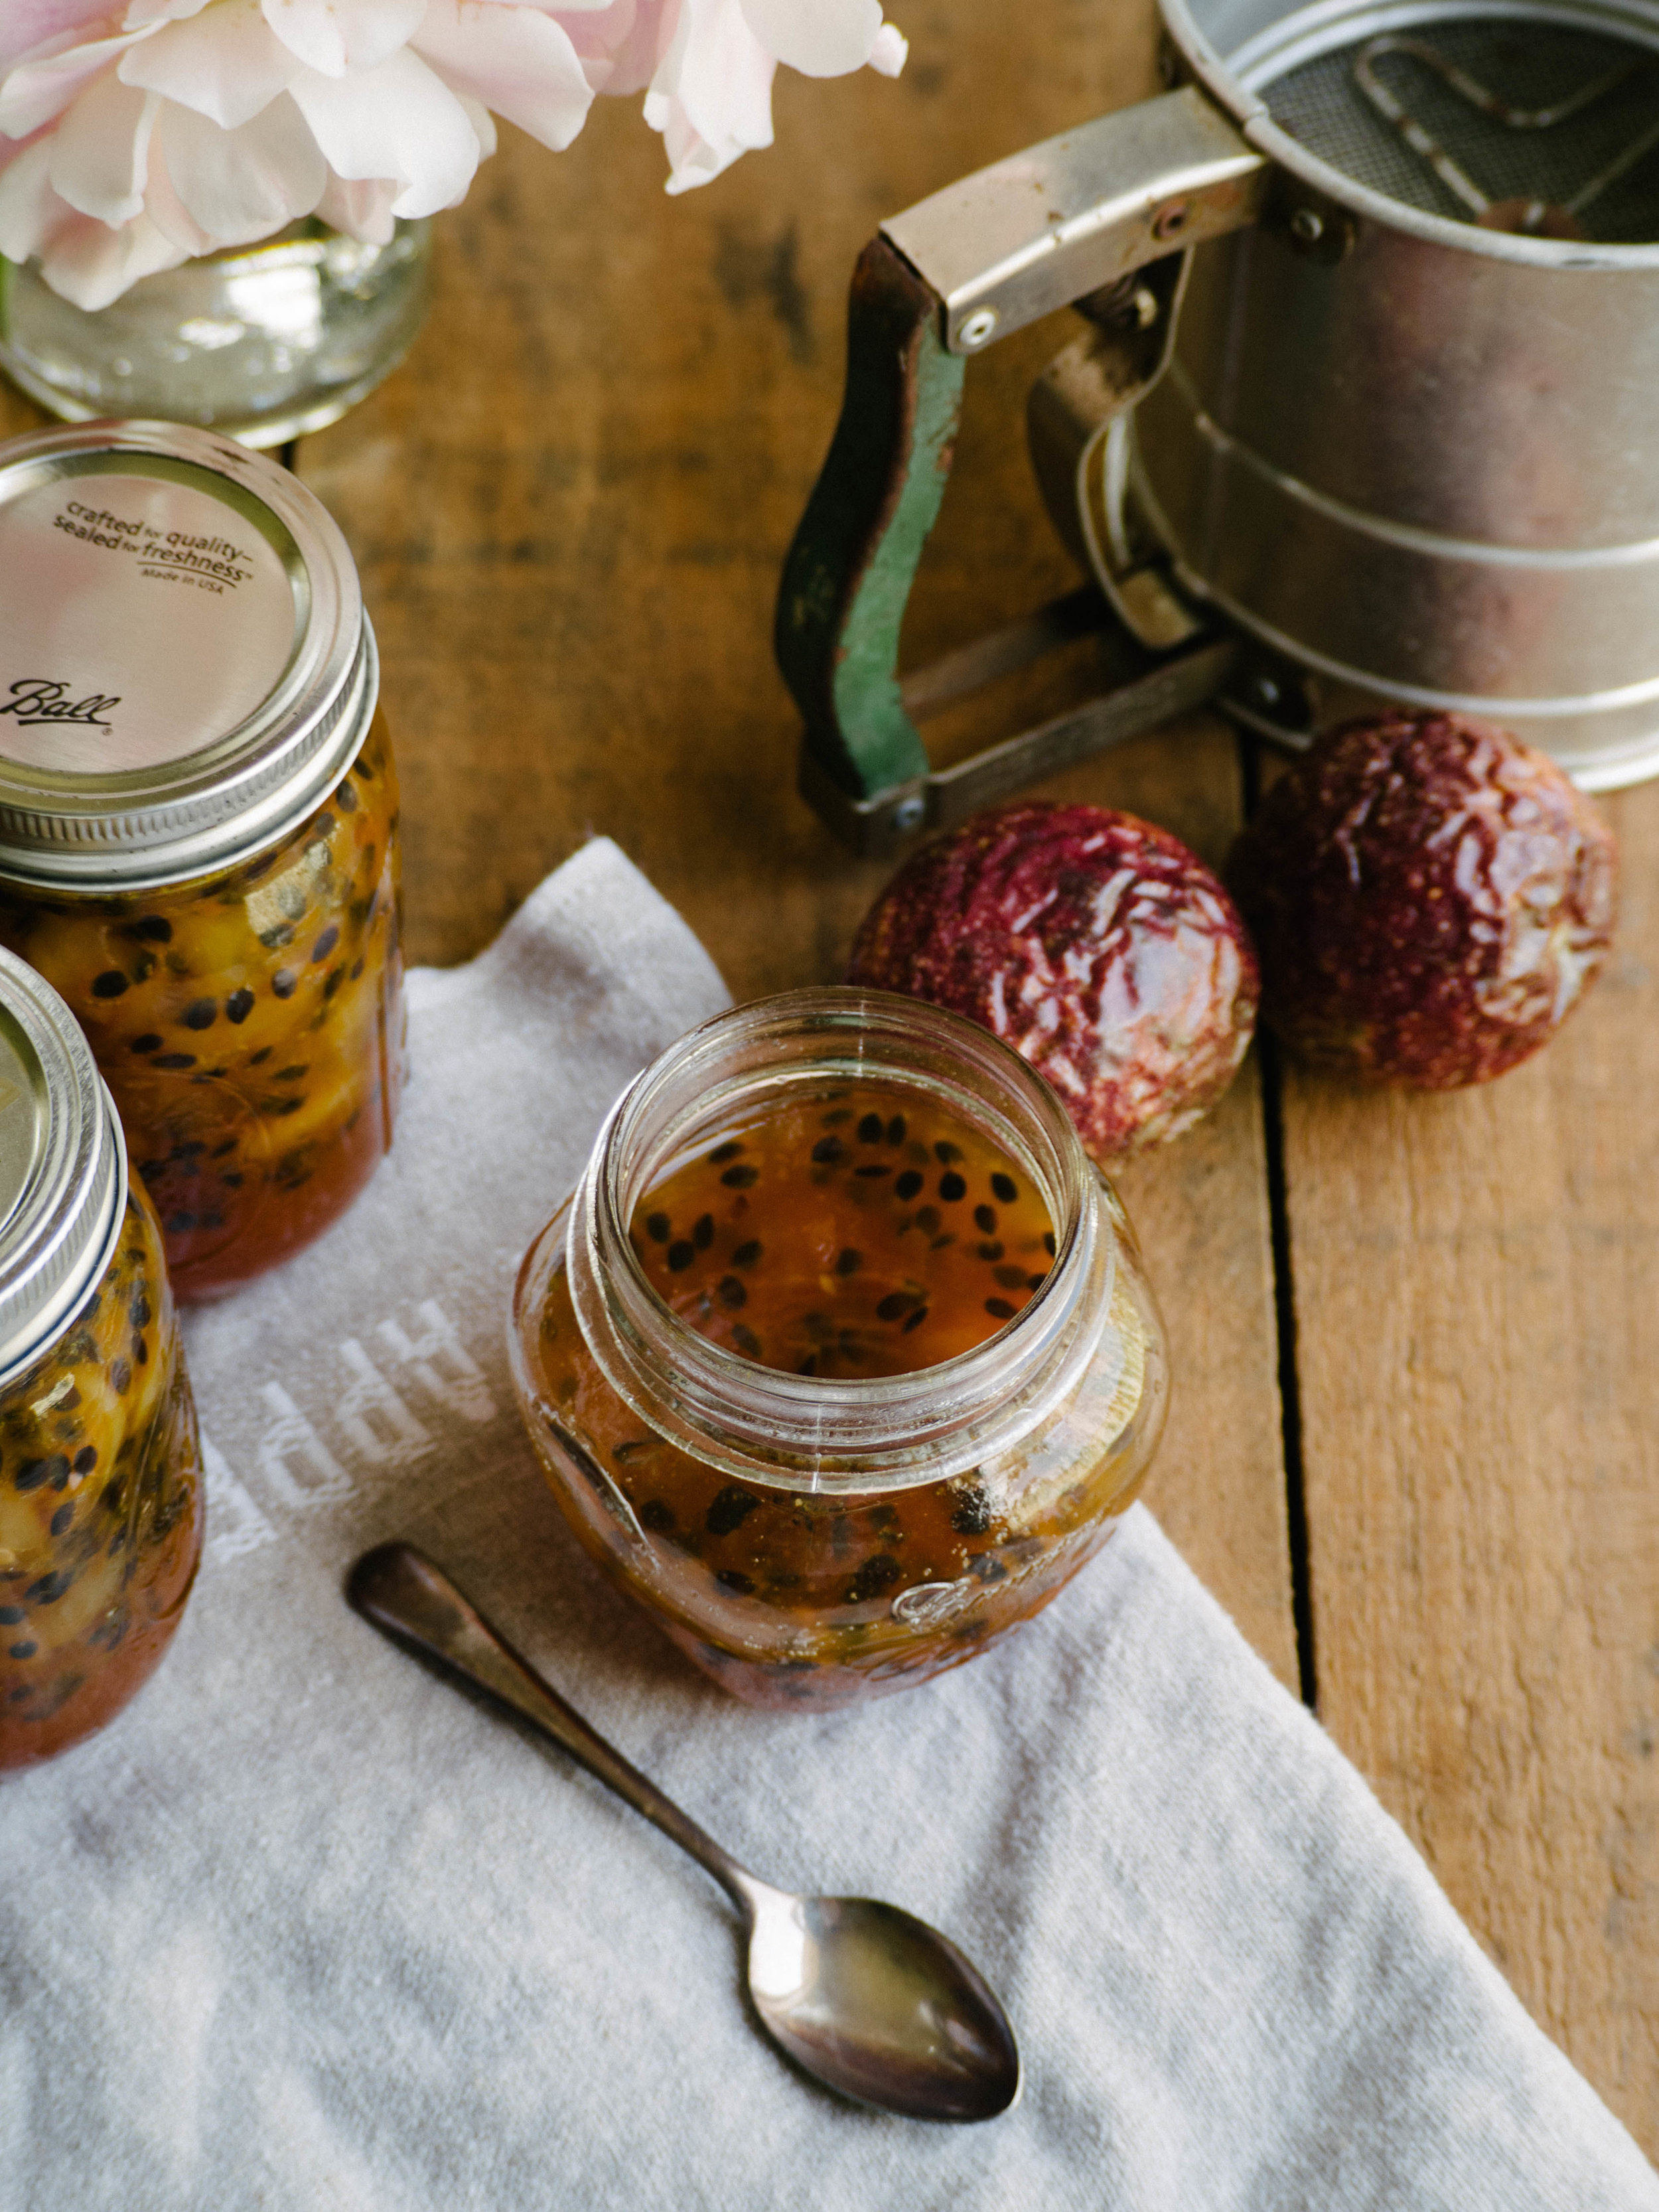
One of the tips my colleague gave me at the time for this cake was to use golden syrup and maple extract in the topping, rather than maple syrup as is more customary. Not only is golden syrup less expensive than maple syrup, but from previous experience I found that pure maple syrup doesn’t work well in this cake as it is too runny. You really need the thickness of a golden syrup, or one of those maple flavoured syrups, to keep the coconut topping from sliding right off the cake! 

Pure maple extract can be found at gourmet food stores, or online.

Lumberjack Cake
Lumberjack Cake

Lumberjack Cake (aka Queen Elizabeth Cake)

Ingredients: 

230g apple (about 2 small/medium apples, I use Pink Lady variety), cored and roughly chopped

185g pitted medjool dates, roughly chopped

250ml boiling water

1 tsp bicarb soda

260g plain flour

1.5 tsp baking powder

2 eggs

145g Panela sugar

125ml canola oil 

1 tsp vanilla extract

Ingredients for the Topping: 

70g unsalted butter, roughly chopped

60ml pouring cream

50g Panela sugar 

120g golden syrup

1 tsp vanilla extract

2 tsp pure maple extract

100g shredded coconut 

Method: 

Preheat oven to 180 degrees Celsius and grease and line a 22cm round springform or loose bottomed cake tin. 

In a medium bowl, place the apples and dates, sprinkle over the bicarb soda and cover with the boiling water. Set aside for about 10 minutes, this will allow the fruit to soften up a bit. 

In another medium bowl, whisk together the plain flour and baking powder as set aside. 

In a large mixing bowl, whisk together the eggs, panela sugar, oil and vanilla extract until well combined. 

Add the soaking apples and dates (including the water) to the oil mix, and stir to combine. Finally add the flour mix and stir until just combined. 

Pour the mixture into the prepared cake tin and bake for about 50 minutes, or until a skewer inserted into the centre comes out clean. 

While the cake is baking make the topping by, placing all the topping ingredients except the coconut into a small saucepan. Place over low/medium heat and stir, allowing the butter to melt and the sugar to dissolve. Allow to mixture to bubble and thicken a little, then turn off the heat and stir in the coconut. Set aside until needed. 

Once the cake has finished baking, remove from the oven and spoon the coconut mixture evenly over the top of the cake. Return to the oven for a further 20 minutes, or until the coconut topping has turned golden brown. 

Allow the cake to cool in its tin for a few minutes, then carefully remove the cake from the tin and leave to cool completely on a wire rack. 

Lumberjack Cake

Reference: Not Quite Nigella. 

Lumberjack Cake
In Cakes & Slices Tags Lumberjack Cake, Queen Elizabeth Cake, Winter Baking
2 Comments
Ginger Date & Rose Cupcake - recipe from my eBook ‘Baking with Rose’

Ginger Date & Rose Cupcake - recipe from my eBook ‘Baking with Rose’

Ginger Date & Rose Cupcakes + Baking with Rose eBook is Here!

Kath May 1, 2019

My new eBook, ‘Baking with Rose’ is here! And to celebrate I am sharing one of my favourite recipes from the book, these Ginger Date and Rose Cupcakes.

It wasn’t until recently I discovered rose and ginger go really well together. While I like both flavours a lot, I had never thought to put them together. That changed when I saw this recipe for Gingersnaps with Rose icing. I made them, and loved them! I then began to think of all the other ways I could use ginger and rose together and these cupcakes are one of the ideas I came up with.

I love the flavour combination of these cupcakes, and the rose is fairly subtle as it’s only in the icing. The date molasses and panela sugar add a gentle sweet flavour, however regular molasses or brown sugar would be good substitutes if you don’t have date molasses or panela.

For more rose recipes like this, check out my new eBook ‘Baking with Rose’!

View fullsize Ginger Date and Rose Cupcakes
View fullsize Baking with Rose eBook
purchase ebook!
Fresh Edible Rose Petals

Fresh Edible Rose Petals

Ginger Date and Rose Cupcakes

Ingredients: 

250g softened unsalted butter

200g panela sugar 

2 eggs

310g date molasses

230ml water

410g plain flour 

1 1/2 tsp ground cinnamon 

1 tsp baking powder

1 tsp bicarb soda

1 tsp ground ginger

1 tsp ground nutmeg

1/2 tsp ground all spice 

1/2 tsp ground cardamom 

2cm piece of fresh ginger, finely grated

Ingredients for Icing: 

170g icing sugar

1.5-2tbsp rosewater

fresh edible rose petals to decorate, optional

Method: 

Line two 12 capacity cupcake trays with cupcake cases and pre heat oven to 160 degrees Celsius. 

In a large bowl, cream butter and panela sugar until light and fluffy. Beat in the eggs. Then beat in the water and date molasses. 

Sift flour, baking powder, bicarb and the spices and add to the mixture. Add the fresh ginger. Beat on a low speed until the flour begins to combine, then beat on a medium speed for 2 minutes or until mixed well. 

Pour the batter into the prepared cupcake tins and bake for 20-30 minutes or until cupcakes are cooked through and are springy to the touch. Remove from the oven, and remove cakes from the tins and allow to cool on a cooling rack. 

To make the icing, mix together the icing sugar and 1 tbsp of the rosewater in a medium bowl, to form a paste. If the icing is too thick gradually add a little more rosewater. Spread icing over each cake, allow to dry a little before decorating with the rose petals. 

Makes 24.

Ginger Date and Rose Cupcakes
Fresh Edible Rose Petals

Fresh Edible Rose Petals

Recipe is an extract from ‘Baking with Rose - Recipes Showcasing the Best of Rose in Baking and Confectionary’ by Kath Vincent (kulinaryadventuresofkath.com, 2019), p.7.

purchase ebook!
In Cakes & Slices Tags Rose, Dates, Ginger, Cupcakes, E-Book
Comment
White Chocolate Easter Torte (Passover Friendly)

White Chocolate Easter Torte (Passover Friendly)

White Chocolate Easter Torte (Passover Friendly)

Kath April 14, 2019

Since Easter and Passover again fall at the same time this year, I thought I would make a dessert that observed both holidays. My immediate thought was a variation of a Lithuanian Nut Torte I had made a couple of years ago. The recipe uses nuts, grated chocolate and whipped egg whites to make a light cake. 

The time I first made this cake, I made it with dark or milk chocolate, however always thought I should try a white chocolate version of it. Now two years later I am finally doing it! 

The idea to make this cake again reappeared in my mind late one night when I was trying to fall asleep. That day a friend and I had visited Bakedown Cakery in St Leonards, as I was really keen to get some of the new Easter range. We both bought some chocolate, and as we walked home got caught in the worst downpour! We were absolutely saturated once we got back, but our Bakedown goodies had been well protected and survived the journey. 

I had bought some of the Golden Almond Eggs (caramelised white chocolate filled with almond praline - as delicious as it sounds), and some of the Hot Cross Bunnies chocolate bark (white and caramelised white chocolate with Easter spices with cute bunny illustrations printed on top). These chocolates, particularly the bark got me thinking about how it could be used to decorate a cake. 

The Nut Torte I had made so long before popped into my head as the perfect Easter dessert, which could also double as dessert for Passover. I decided I needed to visit Bakedown again to get more of the Hot Cross Bunnies bark, and a couple of blocks of Toasty (Bakedown’s caramelised white chocolate) to use for the torte. Jen at Bakedown also had Toasty Easter Bunnies ready when I went in the second time, and my gosh I was excited! Caramelised white chocolate is one of the best things I have ever tasted, and as someone who can’t eat ‘normal’ chocolate it was so nice to have an Easter treat I could actually enjoy! 

For this Easter Torte, I used Bakedown’s Toasty to grate into the torte, and the Hot Cross Bunnies bark to decorate the outside. I also used a combination of Toasty and regular white chocolate to melt down and decorate the top and use to stick the bark to the sides of the torte. You can of course use any type of chocolate you wish to make this torte, and decorate with your favourite Easter eggs, or just leave the decoration at the chocolate drizzle if you are making this cake for Passover (some toasted nuts scattered over the top would also be lovely). 

White Chocolate Bark from Bakedown Cakery, illustrations by Dawn Tan.

White Chocolate Bark from Bakedown Cakery, illustrations by Dawn Tan.

Hot Cross Bunnies white and caramelised white chocolate by Bakedown Cakery

Hot Cross Bunnies white and caramelised white chocolate by Bakedown Cakery

Caramelised White Chocolate Torte

White Chocolate Easter Torte (Passover Friendly)

Ingredients: 

100g macadamias or almonds, ground

3 tbsp fine matzo meal (or fine dry breadcrumbs if not making for Passover)

100g good quality white chocolate (the kind you would buy to eat) 

3 eggs (large), separated

125g golden caster sugar

1 tbsp lemon juice 

To Decorate: 

50-100g white chocolate 

Easter eggs/chocolate to decorate or some extra toasted nuts (macadamias or almonds) 

Method: 

Pre heat oven to 170 degrees Celsius and line a round 20cm loose bottomed or springform tin with baking paper. 

Grate the chocolate into a medium bowl, then add the ground nuts and matzo meal. Mix to combine then set aside. 

Place the egg whites in the bowl of a stand mixer, fitted with the whisk attachment. Whisk the egg whites until stiff peaks form, then gradually add the sugar. Continue to whisk until the sugar has just incorporated. Briefly whisk in the egg yolks, then fold in the chocolate nut mixture. 

Tip into the prepared tin, and gently smooth the top. 

Bake for 35-45 minutes or until the torte is golden in colour and a skewer inserted into the centre comes out clean. The torte will rise up then sink down a bit as it cooks. 

Leave to cool on a wire rack, removing from the tin once cooled. 

To decorate, melt the chocolate either in the microwave or over a double boiler. If sticking chocolate bark or similar around the edges of your torte use 100g of chocolate, drizzle some over the top, then spread the remaining chocolate around the sides of the cake then sick on the bark. If not, use 50g chocolate to drizzle over the top. Decorate with Easter eggs or toasted nuts. 

Easter Eggs
White Chocolate Passover Torte

Reference: ‘100 Best Jewish Recipes’ by Evelyn Rose with Judi Rose (Pavilion, 2016), p.149. 

Caramelised White Chocolate Torte
Easter Eggs
In Cakes & Slices, Holidays Tags White Chocolate, Caramelised White Chocolate, Bakedown Cakery, Passover, Easter
Comment
Stained Glass Window Christmas Fruit Cake

Stained Glass Window Christmas Fruit Cake

Stained Glass Window Christmas Fruit Cake

Kath November 23, 2018

I first tried a slice of this cake when a former colleague brought some into to work around Christmas last year. Her Mum, a keen baker and CWA member had made it.The cake was cut thinly, so the glacé fruit and the nuts were really obvious and it was clear why the cake was called a Stained Glass Window Cake! I was hesitant at first to try some as I never like Christmas style fruit cakes, but this one has definitely become an exception. 

I asked my friend what the cake was called and she text her Mum to check. Her Mum came back saying it was called a Stained Glass Window Cake (sometimes known as an American Fruit Cake or Bishops Cake). My colleague also told me how in the past her Mum would make the trip to David Jones Food Hall in the city to get all the glacé fruit. I quickly wrote all that down on a post it note and took it home so I would remember all the details. 

Stained Glass Window Christmas Fruit Cake

Stained Glass Window Christmas Fruit Cake

Lighter in colour and flavour than a regular Christmas fruit cake, this style of cake is heavy on glacé fruit rather than alcohol soaked dried fruit, which gives the cake a distinctly different flavour and look.

Since the flavour of the alcohols used in fruit cakes is what I really don’t like, I was pleased when I tasted the cake that alcohol wasn’t evident at all. Since having looked at recipes for this type of cake, most call for about 1tbsp of some kind of alcohol (significantly less than a traditional fruit cake!), and some recipes suggested orange juice could be used as a substitute. 

Another reason I love this cake is because I have been a fan of glacé fruit for a long time, having grown up eating glacé cherries a lot as a child. My Grandma used them to decorate her Christmas shortbread, and I would always sneak a couple from the open packet in the fridge (much to Grandma’s dismay I think!). 

Stained Glass Window Christmas Fruit Cake

Stained Glass Window Christmas Fruit Cake

I set about finding my glacé fruit for this cake the same as my colleague’s Mum used to. I went to the David Jones Food Hall after work and searched for some. I finally found a very small selection in the deli area where the cheeses etc are sold. There were red glacé cherries and pineapple sold by weight and a packet of mixed glacé fruit. I got the mixed packet, and a few extra slices of pineapple. I have a feeling the selection may have been a bit better in the past when my colleague’s Mum used to go!

I then bought some more at The Source Bulk Foods, who have a good selection of glacé fruits, however not a large quantity of each (not great if you are making something big, but good for this recipe as you only need a few bits of each fruit). I also went to Harris Farm Markets who have a great selection of glacé fruits this time of year. 

What kind of Christmas fruit cake do you prefer? Or are you a fan of them at all? Let me know in the comments! 

View fullsize Almonds and Glacé Fruit
View fullsize Brazil Nuts & Macadamias
Stained Glass Window Christmas Cake (12 of 15).jpg

Stained Glass Window Christmas Fruit Cake

Ingredients: 

115g glacé pineapple, roughly chopped

125g glacé apricot and/or peach, roughly chopped

250g glacé pear and/or fig, roughly chopped

110g whole red and green glacé cherries

110g roughly chopped pitted dates and/or dried quince (I used dried quince from Singing Magpie Produce)

75g macadamias

85g whole blanched almonds

85g brazil nuts

110g dark brown sugar 

2 eggs

zest of one lemon

1tbsp fresh lemon juice

100g butter, melted and cooled

1tsp cinnamon

50g plain flour 

35g self-raising flour 


Ingredients for the Topping: 

75g mixed glacé fruit, roughly chopped (I used pineapple, peach & pear)

55g whole red glacé cherries

55g whole green glacé cherries

40g brazil nuts

35g macadamias 


Method: 

Pre-heat oven to 150 degrees Celsius/130 degrees Celsius fan-forced. Grease and line a 20cm round ring pan allowing the baking paper to extend a few centimetres above the tin (preferably one with a flat base, not a bundt tin).

Mix together the glacé fruit and the nuts in a large bowl. 

In a small bowl whisk together the flours and the cinnamon. 

Then in a small/medium bowl, beat the eggs and the sugar with electric beaters (or in a stand mixer) until well combined. Add the lemon juice, melted butter and flour mixture and beat until just combined. 

Gently stir the egg mixture into the fruit and nuts. Spoon into the prepared pan, pressing the mixture into the tin. Press down so the top is level. Then press in all the topping ingredients into the top of the cake, ensuring they aren’t sitting loose. 

Loosely cover the cake with foil, and bake for 1 hour. 

After the hour, remove the foil, and bake for a further 45 minutes. If using a fan forced oven and the cake is not cooked through after 45 minutes, turn the temperature up to 150 degrees Celsius and continue to cook for a further 15 minutes. 

Once the cake is done, remove from the oven and allow to sit in the tin for 10 minutes before carefully removing from the tin and allowing to cool on a wire rack. Keep in mind the top side of the cake when it is in the tin, will remain the top side of the cake once removed from the tin. 

The cake slices best when completely cooled (even better when it comes straight from the fridge). Store in the fridge (wrapped in plastic wrap inside an airtight container) if conditions are humid. 

Stained Glass Window Christmas Cake

Reference: ‘Christmas Food & Craft’ The Australia Women’s Weekly (ACP Books, 2006), p. 95. 

Stained Glass Window Christmas Fruit Cake
In Cakes & Slices, Holidays Tags Christmas, Christmas Fruit Cake, Stained Glass Window Cake, Bishops Cake, American Fruit Cake, glacé fruit
8 Comments
Pistachio Raspberry & Rose Cake

Pistachio Raspberry & Rose Cake

Pistachio Raspberry & Rose Cake

Kath November 23, 2018

Pistachio, raspberry and rose are three flavours that are made for each other in my opinion. They go so well together and the colours of each look so pretty and appealing too.

I used fresh raspberries for this cake, however if you are using frozen, only take them out of the freezer just before you want to use them so they don’t bleed into the cake batter too much. 

You can buy freeze dried raspberries from a few places now - I have bought them online from Fresh As (a New Zealand company), and Bakedown Cakery often sells them in their St Leonards store as well. I have also bought them from About Life in the past too. Alternatively, freeze dried strawberries are a little easier to come by, so they would be a good alternative to use. Otherwise dried edible rose petals would be a good option for the decoration. 

Also - how gorgeous are the white peonies in these photos?! Every year when peonies are in season I can’t help but buy some. I think they are some of the most beautiful flowers, and I have found if you buy them before the flower has opened you can get a good week or more out of them. Which is great, as they aren’t exactly the cheapest of flowers to buy! But their beauty is certainly worth it, particularly if like me, you don’t buy flowers all that often.

Happy Baking! xoxo

Pistachio Raspberry & Rose Cake

Pistachio Raspberry & Rose Cake

Ingredients: 

175g margarine or softened unsalted butter

175g light brown sugar

2 eggs

1 tsp rosewater

125g + 1 tbsp pistachios

175g plain flour

2 tsp baking powder

250g fresh raspberries


Ingredients for the Icing:

200g icing sugar, confectioners

1.5-2 tbsp rosewater

1 tsp freeze dried raspberries, lightly crushed


Method: 

Pre-heat oven to 160 degrees Celsius and grease and line a 22-23cm springform cake tin.

Using a food processor, grind the all pistachios into a fine crumb/meal (the same consistency as almond meal). Don’t over process or you may end up with pistachio nut butter, rather than pistachio meal. Remove 1 tbsp of the ground pistachios and set aside. 

In the bowl of a stand mixer add the margarine and sugar. Beat using the paddle attachment until light and fluffy. Add the eggs separately, beating well after each. Add the rosewater and the ground pistachios and mix until combined.

In a separate bowl whisk together the flour and baking powder, then gently fold into the main cake batter. 

Transfer the cake batter into the tin and smooth the top. Push each raspberry into the top of the cake so that cake is evenly covered with raspberries. Smooth the top if possible. 

Bake for about 50 minutes or until the cake is springy to the touch and a skewer comes out clean when inserted into the cake. 

Leave the cake to cool before removing from the tin. 

Once the cake has cooled make the icing by whisking the icing sugar and 1 tbsp of the rosewater together. Gradually add more rosewater if the mixture is to dry, and more icing sugar if the icing is too runny. Ice the cake with the icing, then sprinkle over the 1 tbsp of crushed pistachios and the freeze dried raspberries to decorate. 

Pistachio Raspberry & Rose Cake

Pistachio Raspberry & Rose Cake

Pistachio Raspberry & Rose Cake

Reference: The Violet Bakery Cookbook’ by Claire Ptak (Ten Speed Press, 2015), p.137.

Pistachio Raspberry & Rose Cake
Pistachio Raspberry & Rose Cake with White Peonies

Pistachio Raspberry & Rose Cake with White Peonies

For more recipes showcasing the best of rose, check out my eBook Baking with Rose by clicking the link below!

get your ebook!
In Cakes & Slices Tags Pistachio, Raspberry, Rose, Rose Cake, Rosewater, Freeze Dried Raspberries, White Peonies
6 Comments
White Peach & Passionfruit Sponge Cake

White Peach & Passionfruit Sponge Cake

White Peach & Passionfruit Sponge Cake

Kath November 16, 2018

The idea for this cake came to me when I went into a new fruit and veg shop and saw some donut peaches from the USA. Usually, I really try to stick to what is in season, however there are some things (white cherries and donut peaches in particular) that I can’t resist no matter what season or where they have come from. 

After I bought them I realised they wouldn’t last long enough for me to end up eating all of them fresh. Then I remembered this White Peach & Passionfruit Jam recipe I had made last year. I already had lots of passionfruit pulp in the freezer so I set about making the jam with the donut peaches. The jam is so tasty, just like Summer in a jar. 

I usually serve it with scones, but this time I thought adding it to the filling of a sponge would make a lovely Summery cake for this time of year. I used the same sponge recipe as the Duck Egg Sponge I have previously posted here on the blog, but with regular chicken eggs (5 eggs rather than the 4 duck eggs). If you can find duck eggs I highly recommend using them for a sponge cake like this one, the rise and the texture you get with them are really something else. 

Make the jam a day or so before you intend to have the sponge. And since the festive season will soon be upon us, I would recommend putting the jam into smaller jam jars and gifting it to others. It would be such a lovely gift to receive and a great showcase of the Australian produce that is now in season. 

If you don’t feel like making the jam, use some extra peach and passionfruit to fill the middle of the sponge as well as decorating the top.

White Peach & Passionfruit Sponge Cake
White Peach & Passionfruit Jam

White Peach & Passionfruit Jam 

Ingredients: 

1kg white or donut peaches (just ripe)

10 passionfruit

600g white sugar or jam sugar

100g brown sugar 

juice of 1/2 lemon


Method: 

Sterilise 3-4 jam jars (about 280-300ml capacity) by washing them in hot soapy water and then placing them in the oven to dry (upside down) at 90 degrees Celsius. Jars can be left for 20 minutes or until they are ready to be used. 

Place two small plates in the freezer for later.

Remove the skins from the peaches (if proving difficult don’t worry about it too much), and deseed. Roughly chop and place in a large heavy based saucepan. Scoop the pulp out of each passionfruit and add to the pot, along with the remaining ingredients. 

Sit the pot over low heat and stir until the sugar has dissolved and the juices start coming out of the fruit. Increase the heat and stop stirring. Allow the jam to simmer for about 15-20 minutes, then check if it has reaching setting point. Remove one of the plates from the freezer and drop some of the jam onto the plate. Leave for a moment, then run your finger through the jam, If the jam creases it is ready. If not, keep the jam over the heat and test again after another 10 minutes or so. The rate at which the jam sets will depend on the ripeness of the peaches. 

Once the jam has reached setting point, remove the jam jars from the oven. Using a ladle and a jam funnel, fill each jar with the jam and secure the lids. 

Allow to cool at room temperature, then store in a cool dry place for up to six months. Refrigerate once opened, or if conditions are hot and humid. 

White Peach & Passionfruit Sponge Cake

White Peach & Passionfruit Sponge Cake

White Peach and Passionfruit Sponge Cake

Ingredients: 

x5 eggs, room temperature

140g golden caster sugar 

160g plain flour, plus extra for the tin

2 tsp baking powder 

300ml pouring cream

butter, to grease the tin

5 tbsp White Peach & Passionfruit Jam, approx.

1 white or donut peach, to decorate

pulp of 1/2 passionfruit, to decorate


Method: 

Preheat oven to 180 degrees Celsius, and butter and flour two 20 cm loose bottomed cake tins. 

In the bowl of a stand mixer, add the eggs and sugar. Whisk for about 10 minutes, on medium to high speed. The mixture will triple in size and become pale and fluffy. 

While the eggs are whisking, measure the flour and baking powder into a separate bowl and whisk together to remove any lumps. Carefully add the flour and baking powder to the whisked eggs, gently and quickly folding it into the eggs with a large metal spoon.

Divide the mixture evenly between the two prepared tins, and bake for 15-20 minutes. The cakes will be golden in colour and spring back when lightly touched. 

Leave the cakes to cool in their tins for a couple of minutes. Place a sheet of baking paper on a cooling rack, and remove each cake from their tins on to the paper. This will prevent the cakes sticking to the cooling racks. Alternatively, you can leave the baking paper that is already on the base of each cake, and place them straight on the racks. 

Once the cakes have cooled (this shouldn’t take too long), prepare the cream filling. Whip the cream until it has thickened and soft peaks are forming. Place one of the cakes on a cake stand or serving plate, and top with half of the cream. Dollop over the White Peach and Passionfruit Jam, ensuring it is evenly placed over the cream. Place the second sponge on top and finish with the remaining cream. Slice up the peach and use to decorate the rim of the cake. Sprinkle over the passionfruit pulp to finish. 

Serve immediately.

White Peach & Passionfruit Sponge Cake

References: ‘Real Food Projects’ by Kate Walsh (Murdoch Books, 2016), p.62; ‘Local is Lovely’ by Sophie Hansen (Hachette Australia, 2014), p.50.

White Peach & Passionfruit Sponge Cake
In Cakes & Slices, Jams Preserves & Spreads Tags White Peach, Donut Peach, Passionfruit, Sponge Cake
Comment
  • The Blog
  • Older
  • Newer

recipes

  • Biscuits/Cookies 39
  • Breads Etc. 9
  • Breakfast 7
  • Cakes & Slices 67
  • Confectionary 5
  • Drinks 6
  • Events 14
  • Food Photography Tips 3
  • From The Mailing List 24
  • Heirloom Recipes 12
  • Holidays 44
  • Ice Cream 9
  • Jams Preserves & Spreads 9
  • Muffins 4
  • Off the Shelf 48
  • Other Desserts 25
  • Savoury Dishes/Meals 15
  • Scones 4
  • Tarts & Pastry 9
  • Travel 13

Sign up to Friday Food Chat with Kath, a weekly newsletter for more food, baking, cookbook chat and more!

Sign Up Here!
instagram-unauth pinterest facebook url

Website Accessibility: To enable text to speech function on the blog, click the sound button to the right of each blog post.

All images & content are the property of Kathryn Vincent, unless stated otherwise. Please do not use without permission.

Kulinary Adventures of Kath

Food Photography, Recipes & Baking

instagram-unauth pinterest facebook url