Kulinary Adventures of Kath

Food Photography, Recipes & Baking
  • home
  • About
  • Work with Kath
  • Shop
  • Blog
    • The Blog
    • Recipe Archive
  • Newsletter
  • Contact
  • home
  • About
  • Work with Kath
  • Shop
    • The Blog
    • Recipe Archive
  • Newsletter
  • Contact
Raspberry Pistachio Rose Cake (23 of 25).jpg

The Blog

Recipes and Food Photography by Kath Vincent.

  • The Blog
  • Recipe Archive
  • All
  • Biscuits/Cookies
  • Breads Etc.
  • Breakfast
  • Cakes & Slices
  • Confectionary
  • Drinks
  • Events
  • Food Photography Tips
  • From The Mailing List
  • Heirloom Recipes
  • Holidays
  • Ice Cream
  • Jams Preserves & Spreads
  • Muffins
  • Off the Shelf
  • Other Desserts
  • Savoury Dishes/Meals
  • Scones
  • Tarts & Pastry
  • Travel
Easy Choc Orange Sheet Cake

Simple Choc Orange Sheet Cake

Kath June 28, 2021

Do you ever bake, just to use a particular ingredient up? Like if the ingredient goes to waste, you’ve failed some kind of kitchen based test?

Sometimes much of my baking is inspired by a tub of yoghurt nearing the end of its life, eggs that need to be used as I over estimated how much I would actually be able to bake or an in season fruit I can’t stand to waste since it’s at its best right now and it would just be rude for it to end up in the bin. 

This chocolate orange cake came about for just that kind of reason. I got a big delivery of citrus later last month, and while I was more interested in the yuzu and bergamots, it also came with some oranges and mandarins. I don’t eat either of these citrus as they make me quite unwell so I had to come up with an idea to use some of them - as even though I don’t eat them, I still don’t want them to go to waste. 

Since I also have a very large supply of cocoa for someone who can’t eat chocolate, I decided to make the ultimate cake that I would never be able to eat - a chocolate and orange cake*! I am told it tastes like Jaffa (a choc orange lolly/candy common in Australia and New Zealand), which is exactly what I was going for. It’s based on the Chocolate Sheet Cake from my cookbook Everyday Bakes, and the recipe is below if you feel like a choc orange inspired bake!

*no cake was harmed during the development of this recipe - it was largely gifted to a good friend who I am glad to say hasn’t got sick of me offloading baked goods onto her and her family. They also took some of the citrus I couldn’t eat, and I now feel like the kitchen test of not wasting food has been passed for another week. Phew!

Simple Choc Orange Sheet Cake

Chocolate Orange Sheet Cake

Ingredients: 

125g unsalted butter, softened

165g caster sugar

1 tsp vanilla extract

finely grated zest of one orange

2 eggs 

230g self raising flour

2 tbsp cocoa powder

135g Greek style yoghurt 

Ingredients for the Icing: 

170g icing mixture

1-2 tbsp fresh orange juice

Method: 

Pre-heat oven to 160 degrees Celsius, and grease and line a 30x20cm rectangular slice or lamington tin with baking paper. 

In a medium bowl whisk together the flour and cocoa powder, then set aside.

In the bowl of an electric mixer, beat the butter, sugar, vanilla and orange zest until light and fluffy.

Beat in the eggs one at a time, then add the flour and the yoghurt and slowly mix until combined.

Tip the mixture into the prepared tray and smooth the top.

Bake for 20-25 minutes, or until the cake spring backs when touched lightly and a skewer comes out clean. The cake will be lightly golden when done. Allow the cake to cool on a wire rack.

To make the icing, mix 1 tbsp of the orange juice with the icing mixture in a medium bowl. Continue to add more orange juice, a little at a time until you have a smooth icing that you can spread over the cake - a slightly thinner consistency is good for this cake as there is more surface area to spread over, if the icing is too thick it might not cover the entire cake!

The big delivery of citrus I bought featuring blood limes, limes, bergamot, yuzu, lemons, mardarins, oranges, a buddhas hand and custard apple.

The big delivery of citrus I bought featuring blood limes, limes, bergamot, yuzu, lemons, mardarins, oranges, a buddhas hand and custard apple.

In Cakes & Slices, From The Mailing List Tags Chocolate, Citrus, oranges, Jaffa, cake, Mixer Free Recipes, Easy Baking
Comment
Carrot Cake with Biscoff Buttercream

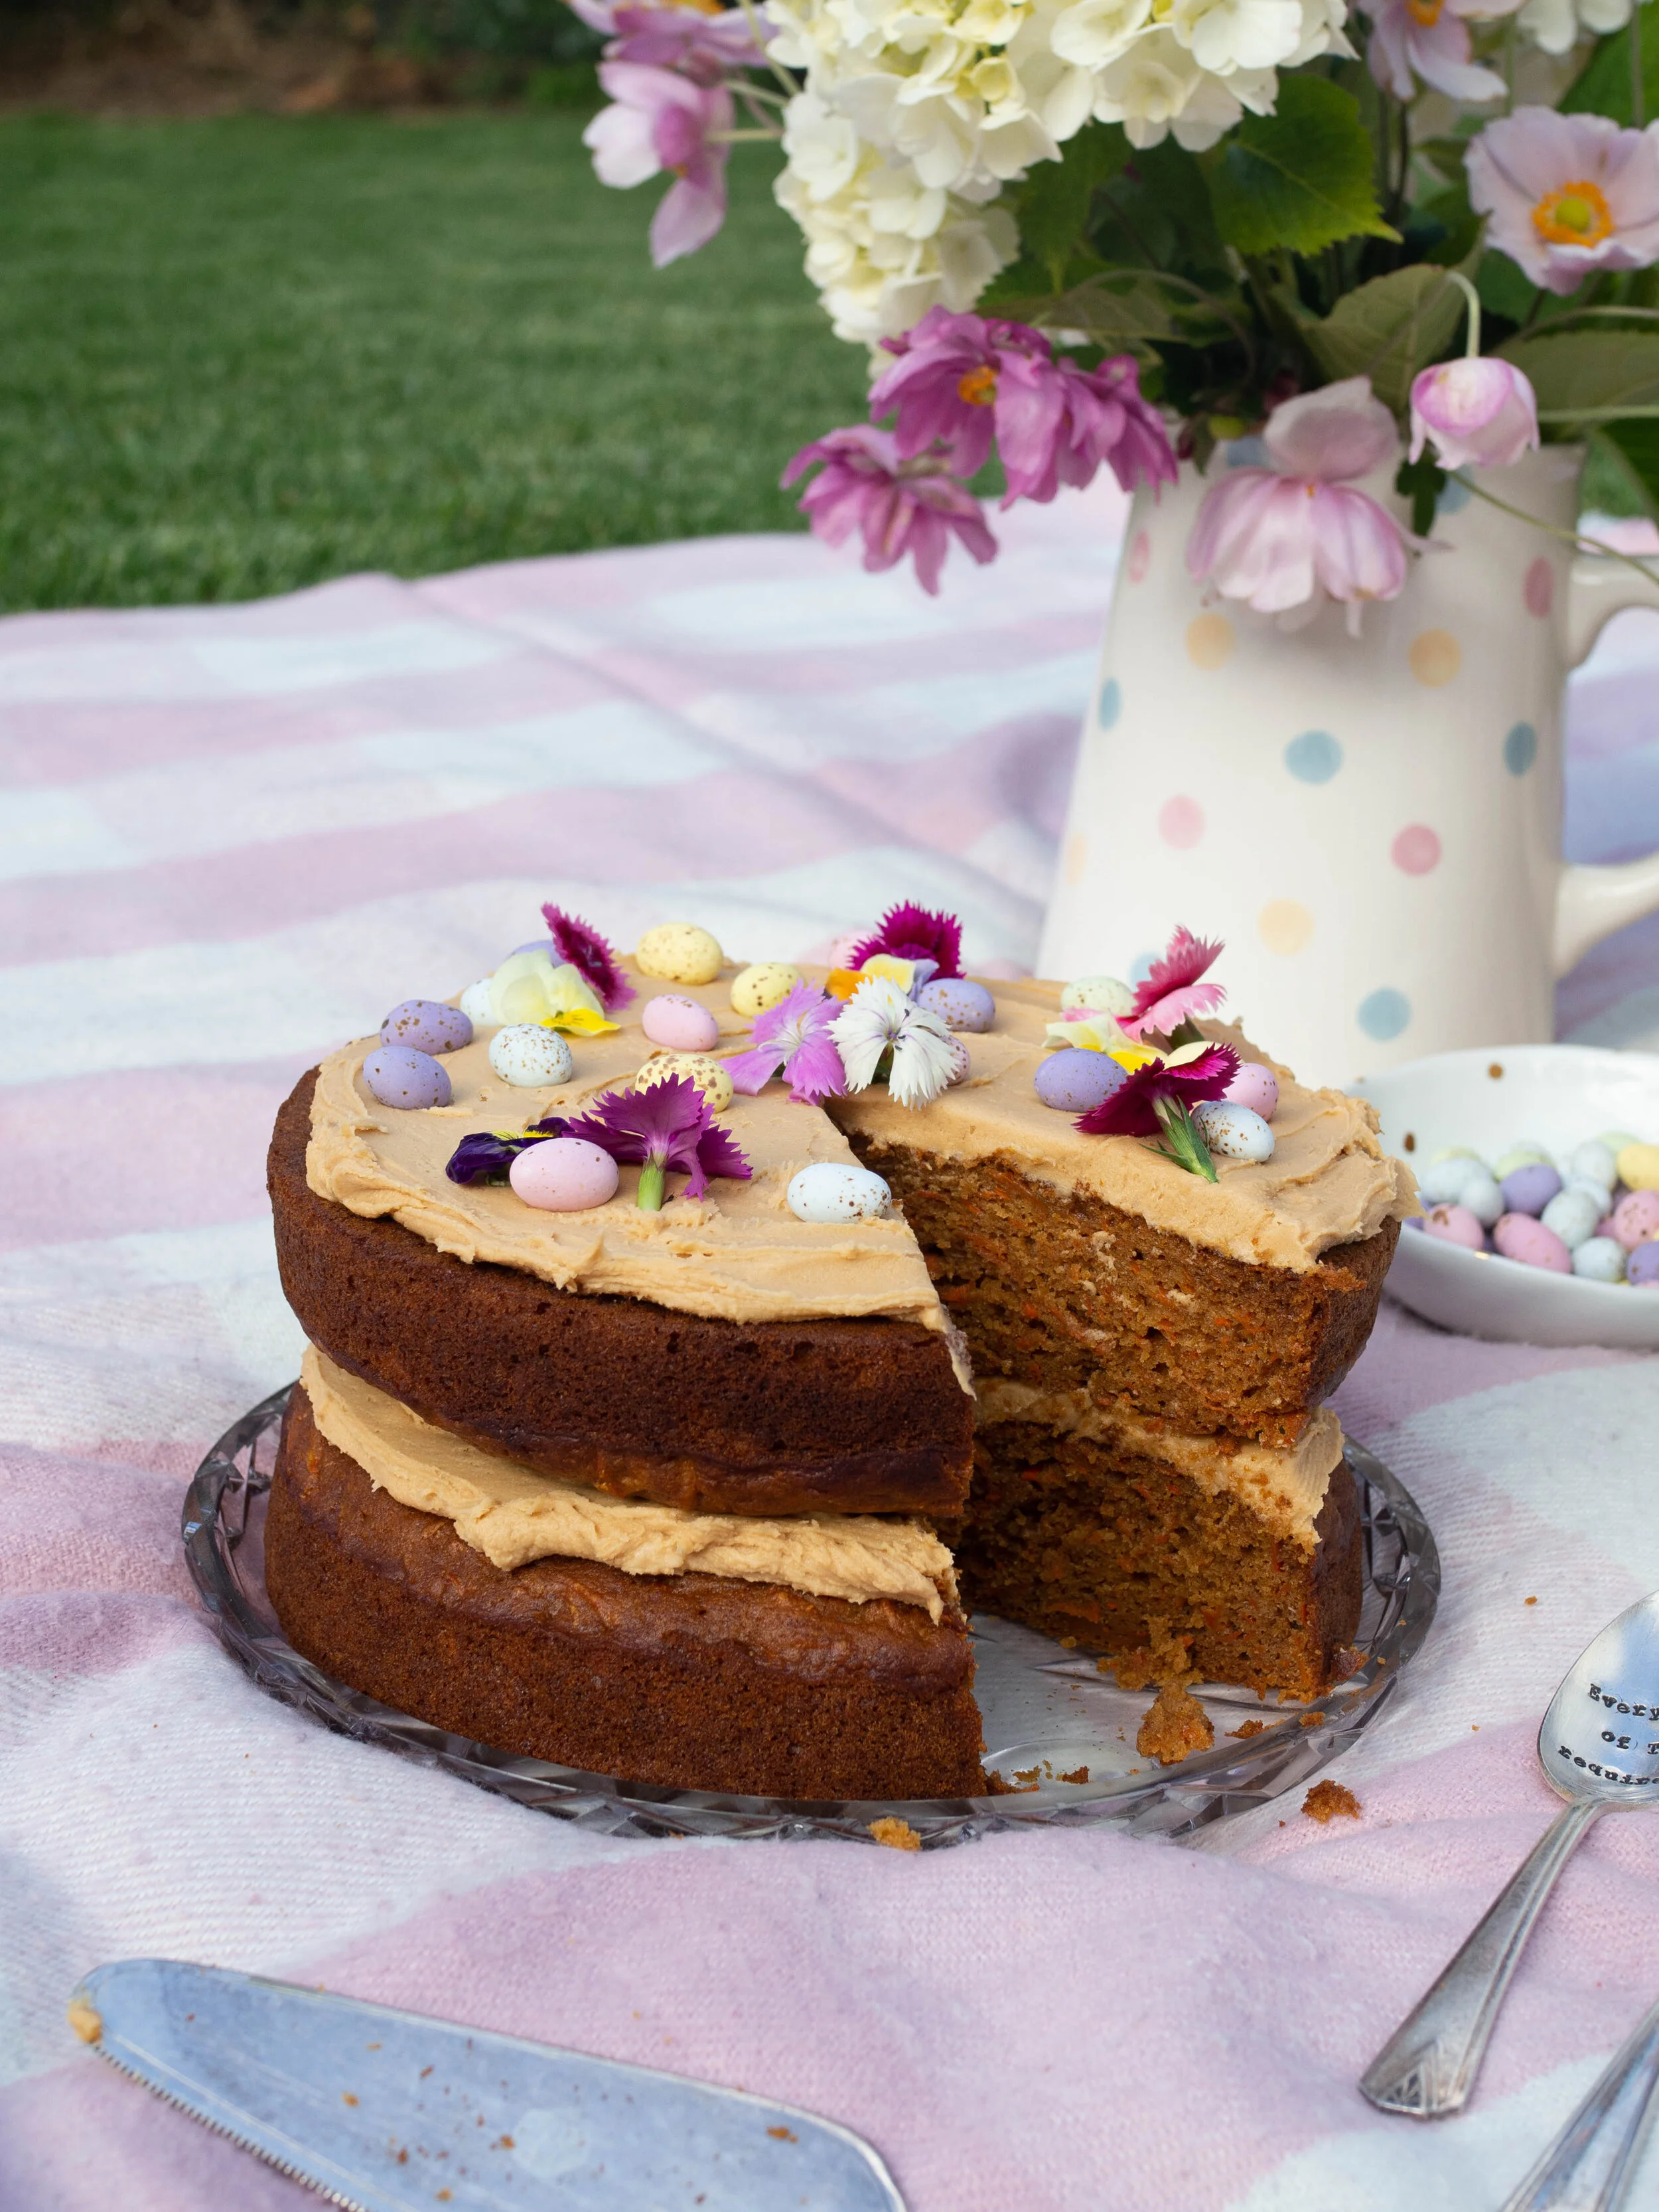
Carrot Cake with Biscoff Buttercream for Easter

Kath April 2, 2021

Yes, I know. Again with the Biscoff Spread!

Since discovering this caramelised biscuit spread, I have had many ideas for what I could do with it, apart from just using it as a spread. Adding it to a buttercream was one of them, and I can confirm it is delicious!

Since I don’t eat chocolate, I always need to think of something a little different to enjoy at Easter. I thought a carrot cake was quite a fitting alternative, especially decorated with a few pastel Easter eggs.

I have used panela sugar in this recipe as I love the caramel flavour it gives, however you can use the same quantity of brown sugar. I have also used some date syrup to add a little deeper flavour and colour to the cake, but if you don’t have any it can be substituted for more honey.

I hope you have a lovely long weekend, and get to enjoy a slice of cake, Easter egg or hot cross bun - or even better get to spend some time in the kitchen and bake some for yourself!

Carrot Cake with Biscoff Buttercream
Easter Picnic

Carrot Cake with Biscoff Buttercream

Ingredients: 

110g panela sugar (or light/dark brown sugar) 

185ml canola/vegetable oil 

85ml date syrup

100ml honey

4 eggs 

1.5 tsp vanilla bean paste 

335g plain flour

3 tsp baking powder

1.5 tsp bicarb soda 

2 tsp Hot Cross Bun spice*

4 large carrots, grated

Ingredients for the Buttercream: 

150g unsalted butter, at room temp

190g icing mixture/sugar 

130g (approx. 1/2 cup) smooth Biscoff spread

pastel Easter eggs, optional

edible flowers, optional

Method: 

Preheat oven to 170 degrees Celsius and line two 20 cm round springform baking tins with baking paper. 

In a large bowl whisk together the sugar, oil, date syrup, honey, eggs and vanilla.

Then add the flour, baking powder and Hot Cross Bun Spice. Sift in the bicarb soda and whisk together until combined.

Then add the grated carrots to the cake mixture and mix to combine. 

Equally divide the batter between the two prepared tins and bake for about 35-40 minutes, or until each cake is springy to the touch and a skewer inserted in the centre comes out clean.

Leave the cakes the cool on a wire rack for about 30 minutes, then remove from the tin and leave to cool completely. 

To make the icing, beat the butter using a stand mixer and the whisk or paddle attachment for 1-2 minutes, or until it is pale and creamy (if your butter is still a bit cold, you will need to beat it a bit longer than this). Add in the icing sugar, and beat for another 1-2 minutes or until the icing is fluffy.

Add the Biscoff spread and beat until combined.

Place one of the cakes on a plate or cake stand, and spread half the buttercream over the top. Top with the second cake, and spread over the remaining buttercream. Decorate with pastel Easter eggs and edible flowers if you wish.

Serves about 8.

*I have used the Hot Cross Bun Spice from Gewurzhaus, as they kindly sent me some. This spice is a combination of cassia, coriander, ginger and clove. You can substitute with your own mixture of these spices or just add 1tsp cinnamon and 1tsp mixed spice.

Carrot Cake with Biscoff Buttercream
In Cakes & Slices, Holidays Tags carrot cake, carrot, biscoff spread, Easter, bicoff buttercream, Holiday Baking, cake
2 Comments
Rose Petal and Pistachio Cake

Rose Petal and Pistachio Cake

Rose Petal and Pistachio Cake

Kath September 10, 2020

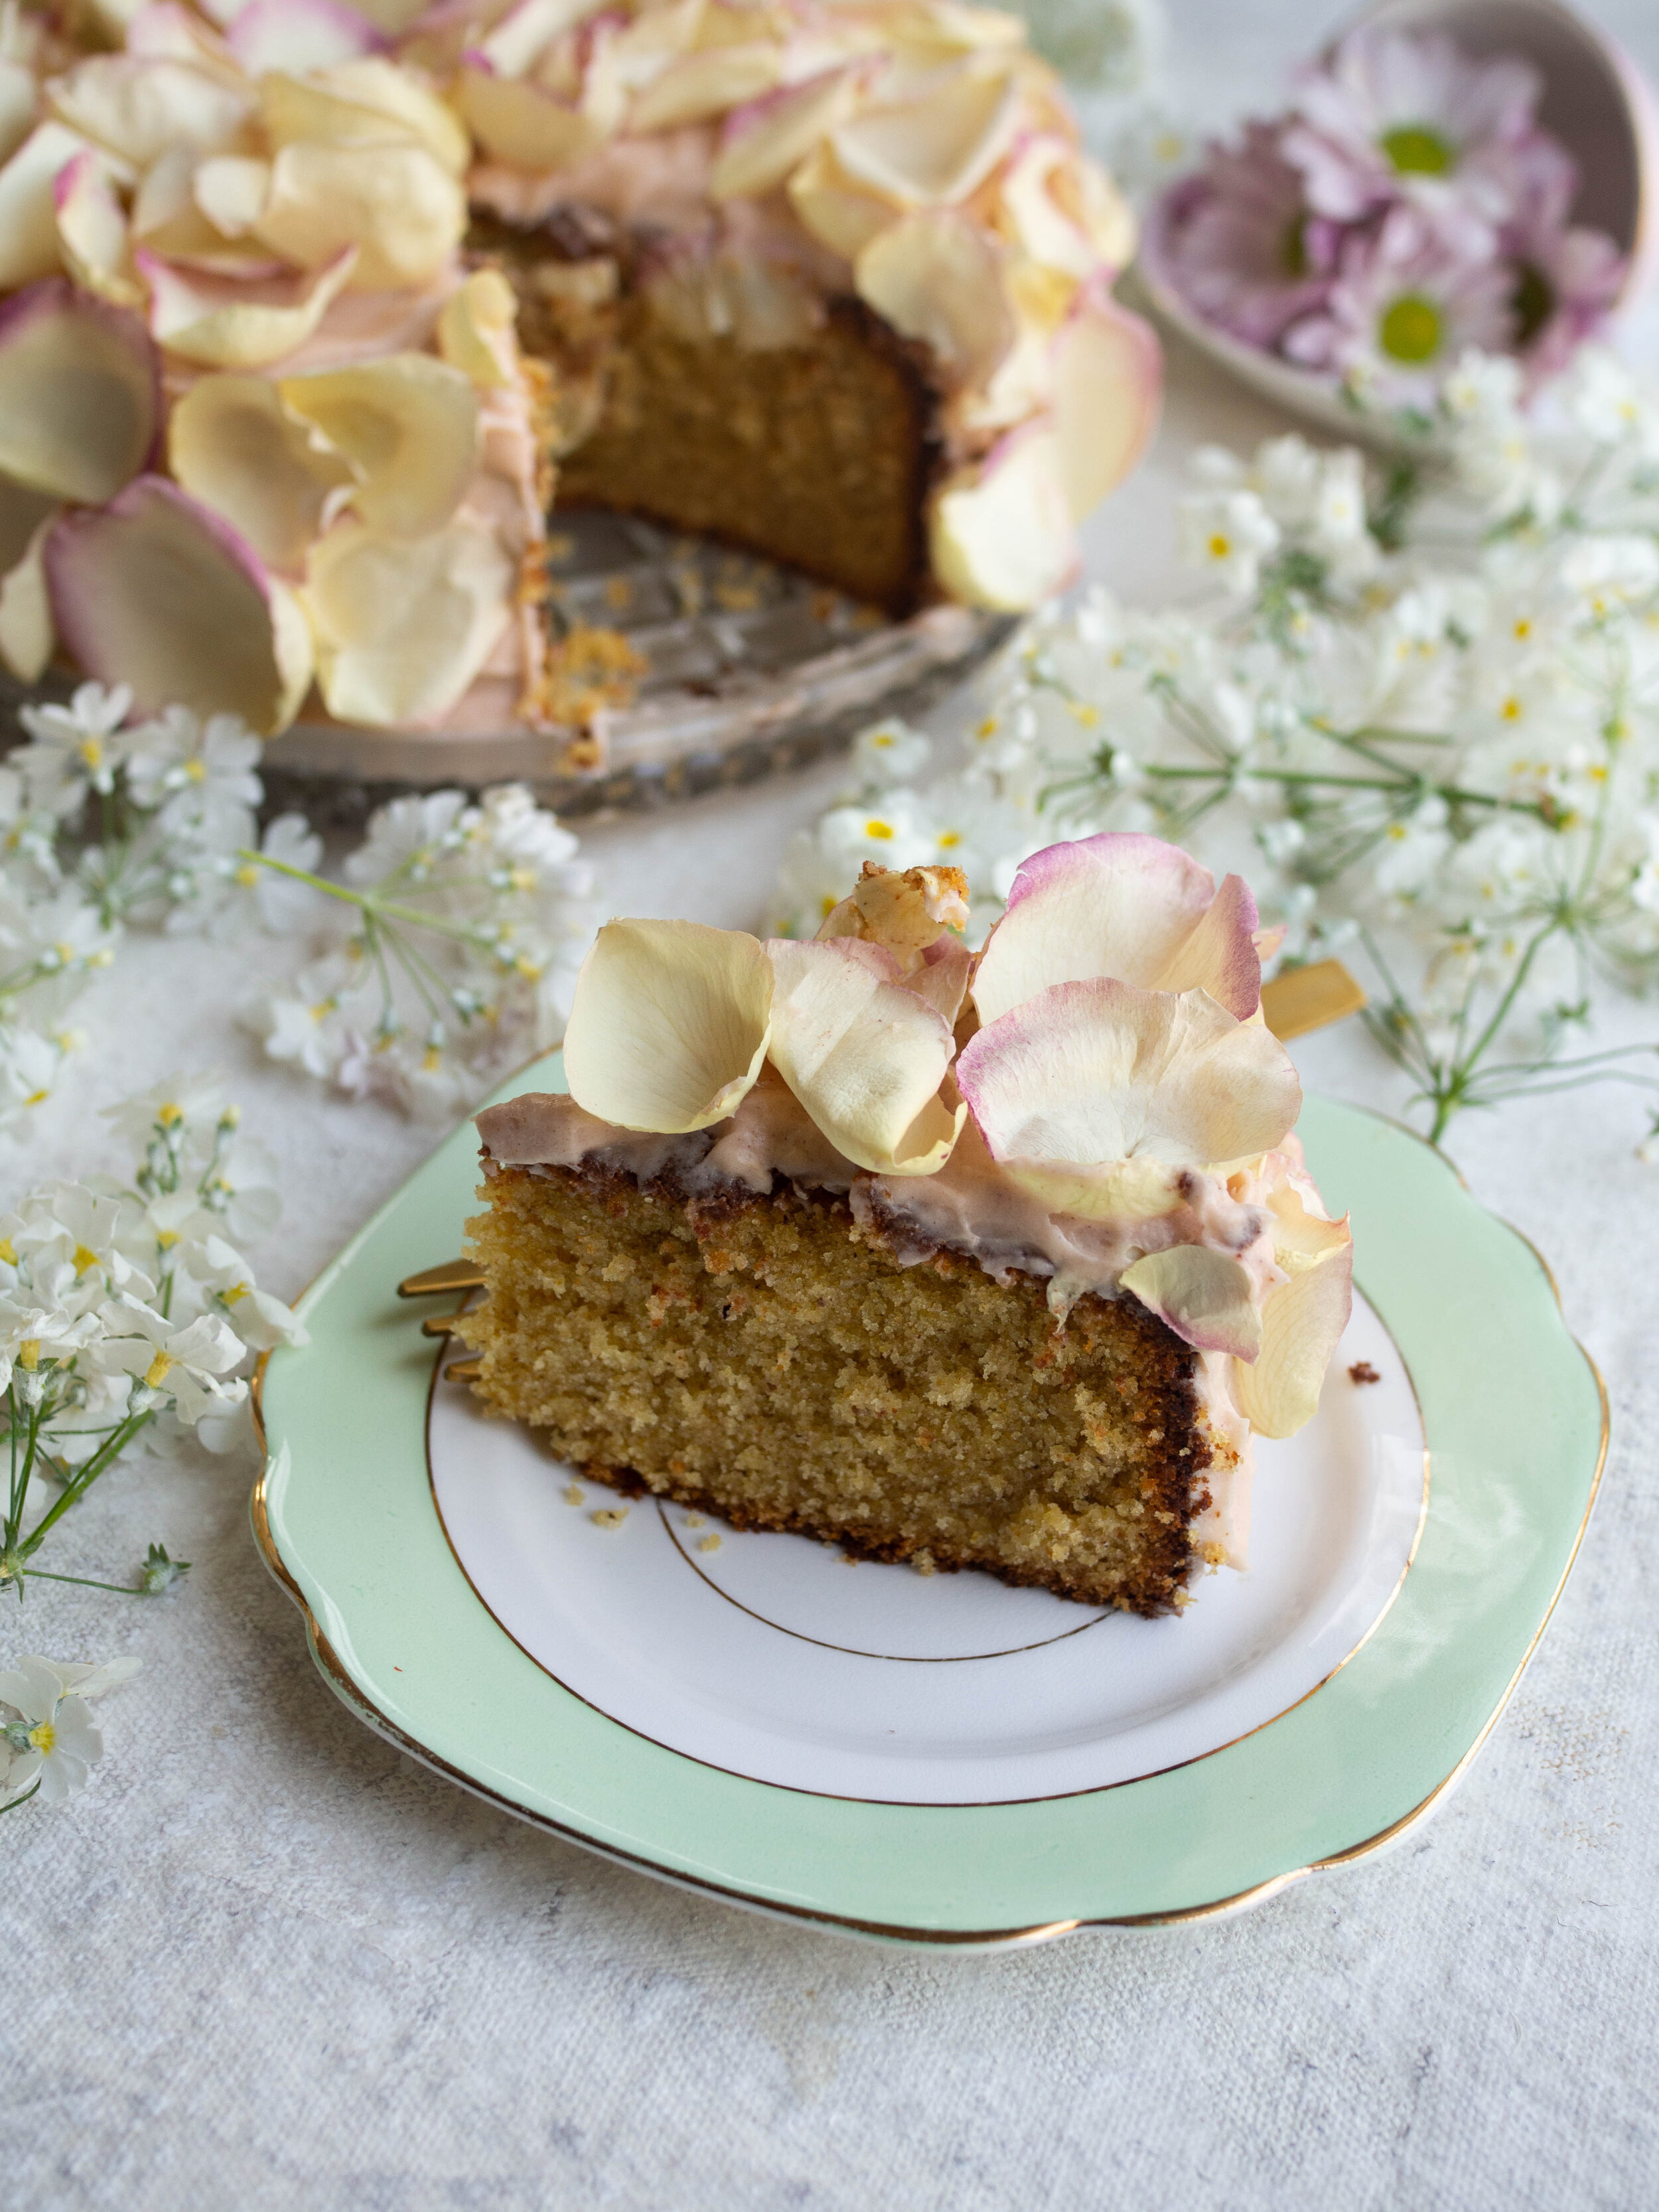
The idea for this cake came about as my lovely Instagram friend Lauren (@foldgently)had an idea for a week of floral inspired cakes to mark the beginning of Spring - check out #fgfloralweek on Instagram for more gorgeous floral cakes.

As I’m sure is quite obvious, I jumped at the chance to create a floral inspired cake - it doesn't take much (or any) persuading for me to add rose to just about everything! I had an idea to use a pistachio cake recipe I’ve been using a lot over the past year or so, then ice it in rose icing then completely cover the cake in edible rose petals (I used some from Simply Rose Petals).

I think this could be the ultimate celebration cake, though while I am celebrating absolutely nothing (except maybe finishing a new series on Netflix), it was still a joyous cake to eat. I don’t think there are any small problems or bad moods that can’t be helped with a slice of cake like this one (and a cup of tea).

I have added links to some of the ingredients I have used in case you have trouble finding them. You can also make your own pistachio butter by lighting roasting 120g raw unsalted or blanched pistachios then blitzing them in a food processor until it becomes a nice nut butter consistency.

A light pink food colouring can also be used instead of the rose powder to add some colour to the icing.

Rose Petal and Pistachio Cake

Rose Petal and Pistachio Cake

Ingredients: 

200g unsalted butter, softened

200g caster sugar

1 tsp rose water (I use this one)

120g pistachio butter (I use this one)

60g white chocolate, melted

3 eggs

120ml buttermilk or 120g plain Greek style yoghurt

200g self raising flour

Ingredients for the Icing: 

200g icing sugar (confectioners)

125g unsalted butter, at room temp

120g cream cheese, at room temp

2 tsp rose powder (I use this one)

1 tsp rose water 

Fresh, dried or freeze dried rose petals for decoration

Method: 

Preheat oven to 170 degrees Celsius and line a 20cm round cake tin. 

In the bowl of a stand mixer beat the butter, sugar and rose water until pale and creamy. Mix together the pistachio butter and melted white chocolate, then add to the butter mixture and mix until combined. 

Add in the eggs one at a time, then add the buttermilk/yoghurt and mix until well combined. Add the flour and mix on low speed until combined and the batter is smooth.

Transfer the batter to the prepared cake tin and bake for 50 minutes. Then cover the cake with foil and bake for a further 20-25 minutes, or until the cake is cooked through. 

Allow the cake to cool in its tin for a few minutes, then turn out on a wire rack to cool further. I like to keep the bottom side of the cake at the top as it is nice and flat to put the icing on a little later. 

Once the cake has cooled completely, make the icing by mixing together all the ingredients (except the rose petals) in a stand mixer or with a hand held mixer, until the icing is smooth. 

Spread over the top and sides of the cake, and decorate with the rose petals if using.

Serves about 8, store in fridge if using the cream cheese icing.

Rose Petal and Pistachio Cake

Reference: ‘A Table for Friends’ by Skye McAlpine (Bloomsbury Publishing, 2020) p.232.

Rose Petal and Pistachio Cake
In Cakes & Slices Tags Rose Cake, Rose, Pistachio Cake, Pistachio, Pistachio Butter, cake
Comment
Easy Homemade Lamington

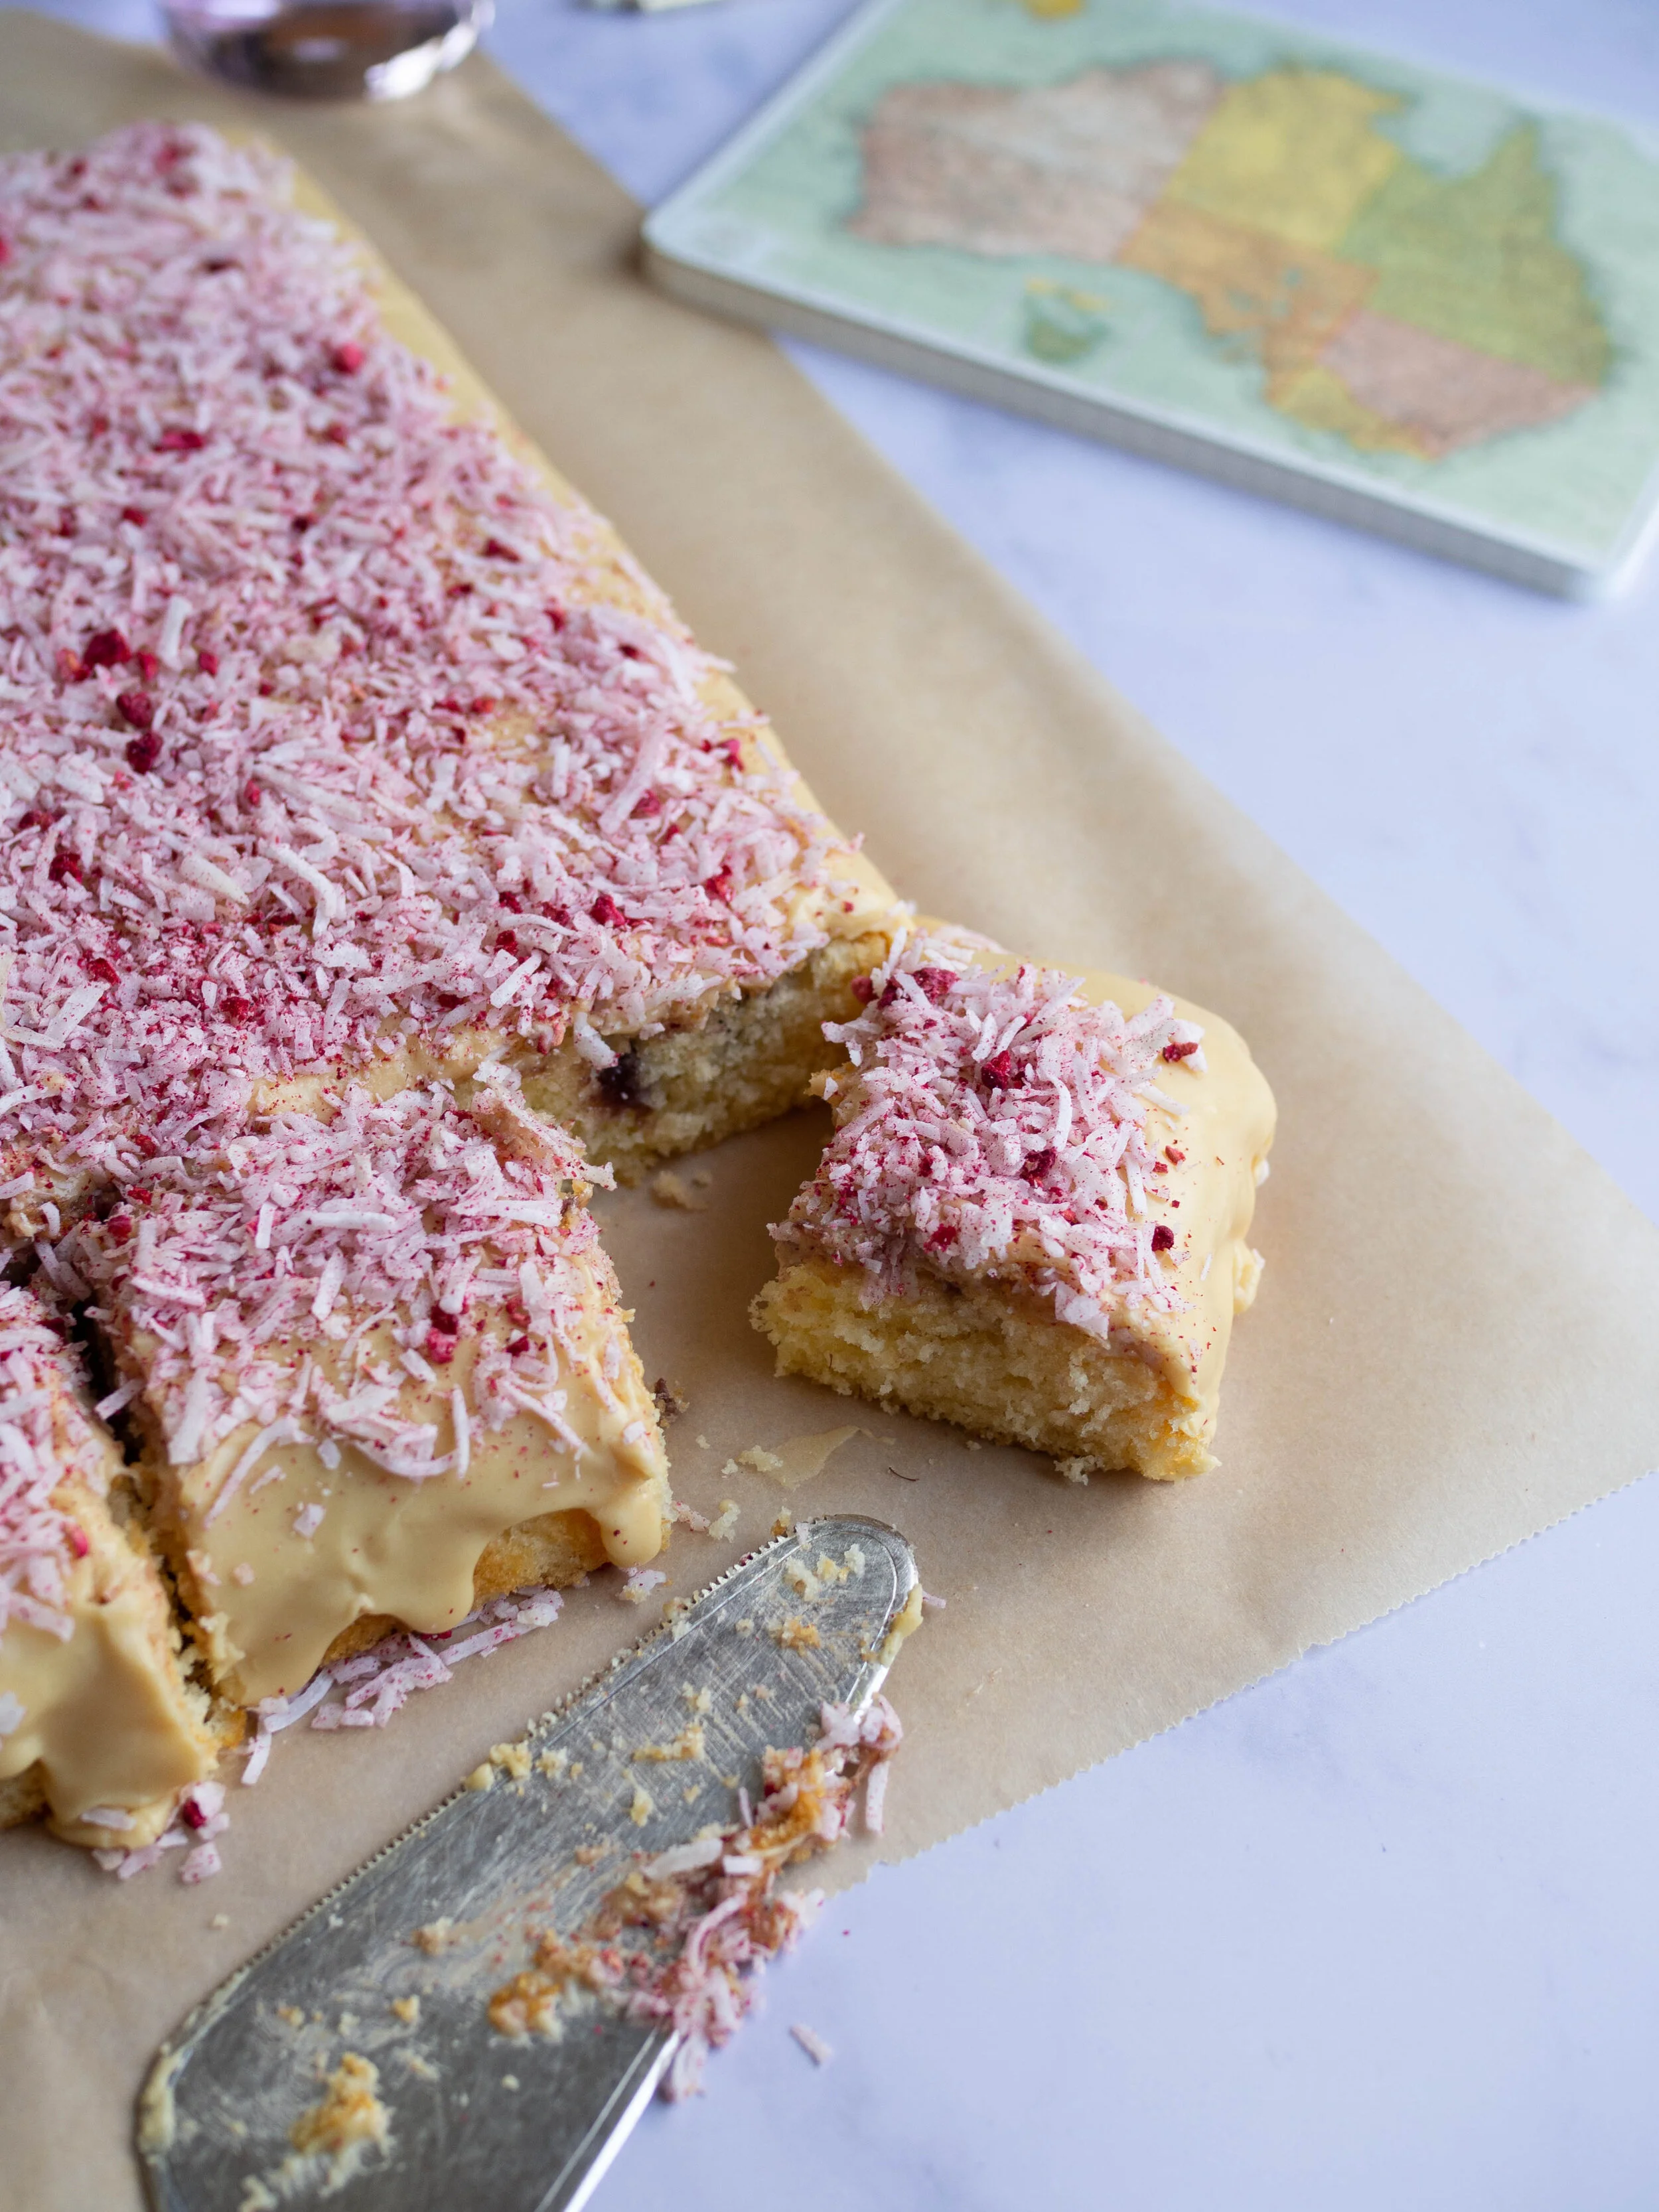
Caramelised White Chocolate Lamington Slice

Kath January 21, 2020

I love lamingtons so much. They were probably my favourite treat as a kid, and probably the only thing that contained chocolate that I genuinely really loved. 

I loved when I found a lamington at a bakery that had lovely soft icing, not the kind that set really firmly. I remember taking a Chinese exchange student who stayed with us a week or two to the local French bakery and insisted that she try one - she was only in Australia for a couple of weeks after all, and tasting a lamington is a must do when someone visits! And oddly the French bakery made very good lamingtons!

I also remember getting those small lamingtons from a packet in the supermarket in my lunch box sometimes at school. I’d probably hate them if I tried one now, but back then they felt like I had hit the lunchbox jackpot.

Quite a few years ago I realised chocolate was no friend to me, and decided I must stop eating it (in any form) to avoid the side effects I was experiencing. And one of the most difficult things to give up was lamingtons. I made them at home a couple of times (recipe here), and they are well worth the effort, but sadly not if you actually can’t eat them. 

I’ve been thinking about a white chocolate version for a while, and finally I have given it a go. I have made the whole lamington making process much more simple by making a slice rather than individual lamingtons. I have also incorporated one of my favourite things, caramelised white chocolate. Please use good quality white chocolate (Lindt couverture or similar with a cocoa butter content of around 30%) for this. 

I am really happy with how this lamington slice has turned out, and to have a new version of a lamington I can enjoy!

Let me know in the comments if you give this recipe a go!

NB. Do not try using any white ‘baking’ chocolate you can find in the baking isle at the supermarket. As these chocolates are not pure white chocolate, the caramelisation process will not work.

White Chocolate Lamington Slice
Caramelised White Chocolate Lamington

Caramelised White Chocolate Lamington Slice

Ingredients:

125g unsalted butter (softened) or margarine

165g caster sugar

1 tsp vanilla extract

2 eggs 

250g self-raising flour

105ml milk

80g mixed berry or raspberry jam

Ingredients for the Icing: 

100g good quality white chocolate (see note above recipe)

280g icing sugar

7g unsalted butter, softened

65ml milk 

40g shredded coconut

freeze dried raspberry, about 1 tsp if powdered or 4 raspberries if whole

Method: 

Pre-heat oven to 160 degrees Celsius, and line a lamington tin (rectangle tin with dimensions approx. 30 x 20cm) with baking paper.

In the bowl of an electric mixer, beat the butter, sugar and vanilla until light and fluffy. 

Beat in the eggs one at a time, then add half the flour and half the milk and mix. Add the remaining flour and milk and mix on medium speed until combined.

Pour the mixture into the prepared tray and smooth the top. Place teaspoons of jam over the mixture, and using a knife to swirl the jam into the batter.

Bake for 20 minutes or until the cake is light golden in colour and springs back to the touch. 

Allow to cool in the tin for a few minutes before transferring to a cooling rack. 

Allow to cool completely before making the icing. 

To make the icing, preheat oven to 120 degrees Celsius/110 degrees Celsius fan. 

Line a small baking tray completely with foil, and place the chocolate in a single layer in the centre of the tray. 

Place in the oven for 5 minutes, then stir. Repeat every 5 minutes for about 25 minutes or until the chocolate has smoothly melted as is a lovely golden colour. 

The chocolate will seem grainy for the first 10-15 minutes, don’t worry just keep stirring every five minutes and the chocolate will become a smooth consistency again.

In the last five or so minutes you can decide how caramelised you want your chocolate - leave in the oven for an extra five minutes after stirring for a slightly deeper golden colour, and caramelised flavour. 

Once you have caramelised your chocolate place in a medium bowl, and whisk together with the icing sugar, butter and milk until it reaches a smooth consistency. Cover the cake with the icing, allowing it to fall over the sides. 

In a small bowl mix the coconut with the freeze dried raspberry (crush up any whole raspberries between your fingers before mixing), then cover the cake with the coconut. 

Cake can be stored in an airtight container for a few days.

Easy Homemade Lamington
Caramelised White Chocolate Lamingtons
In Cakes & Slices Tags Lamingtons, Caramelised White Chocolate, Lamington Slice, cake
Comment
Easy Christmas Fruit Loaf Cake

Easy Christmas Fruit Loaf Cake

Kath November 5, 2019

I am going to preface this recipe with, this is not a traditional Christmas fruit cake. 

That is the exact reason however, that I love this cake. 

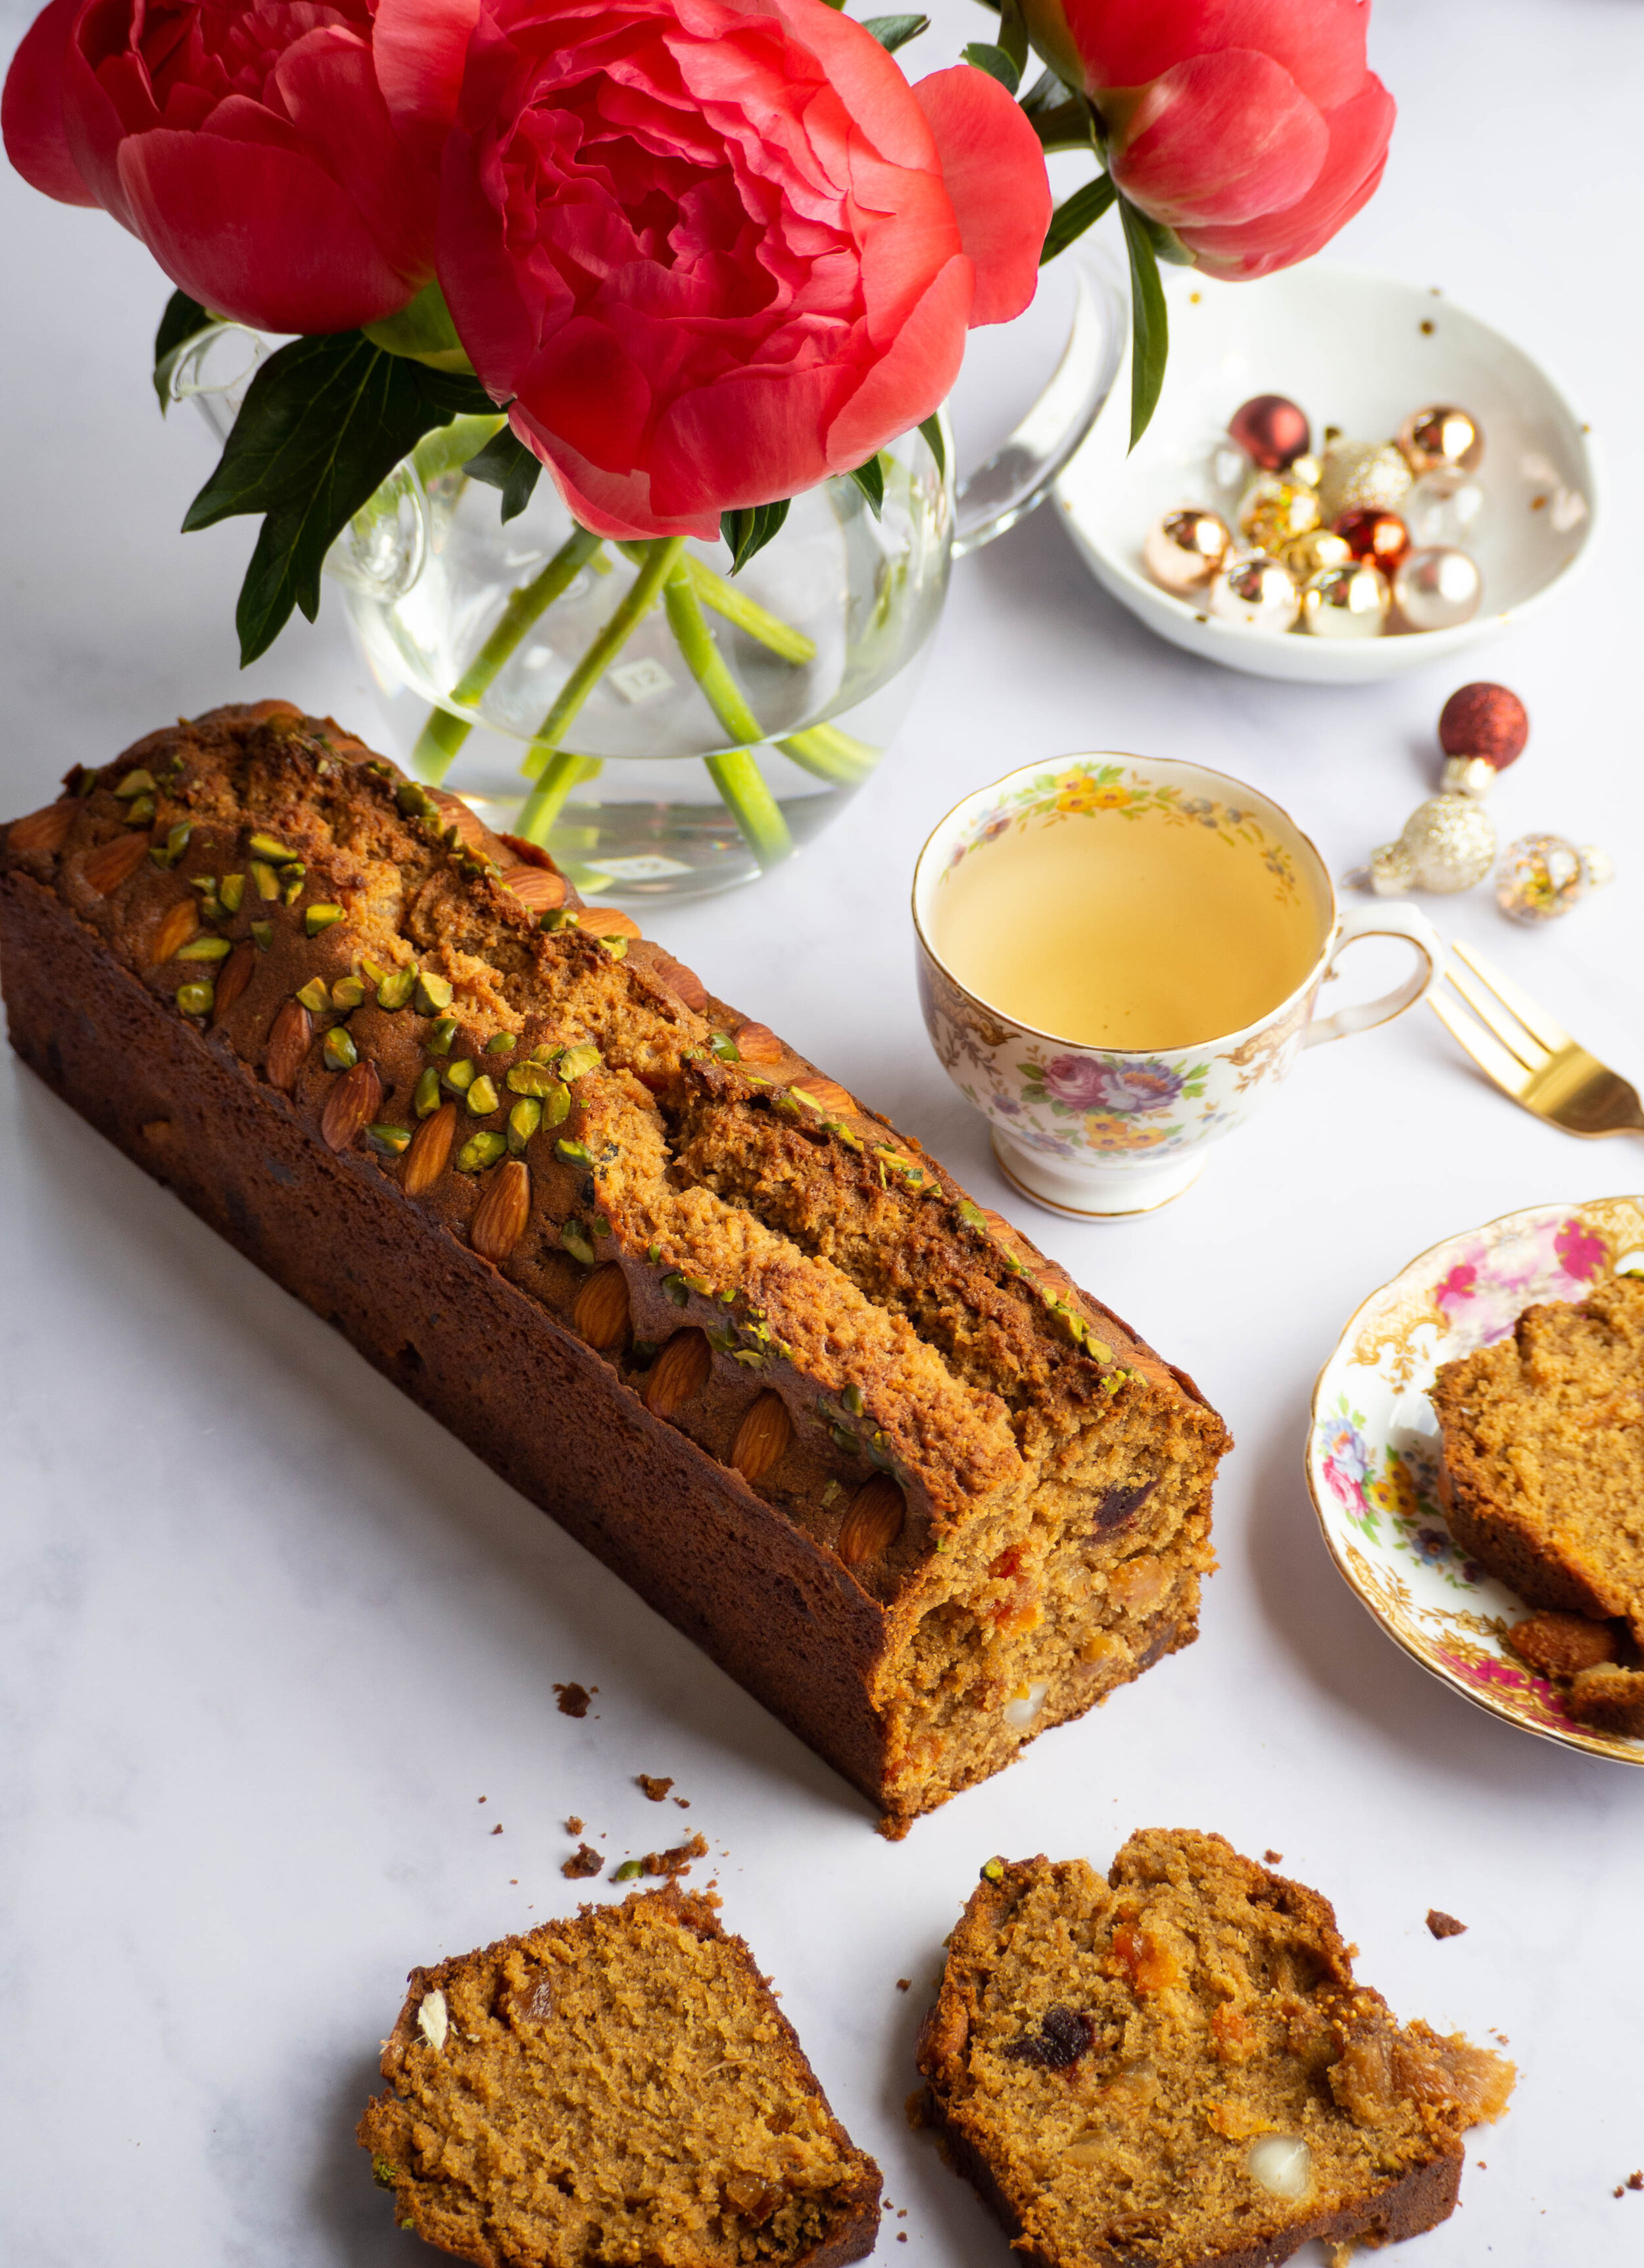
I have always severely disliked heavy alcohol laden Christmas cakes, and this is my much lighter take on the traditional. This cake uses delicious dried fruit, but the cake is more cake-y than fruit heavy. 

This cake is not alcohol free (but could easily be made so), but by using a large quantity of good quality vanilla extract (which contains alcohol) to soak the dried fruit you get an intense vanilla, only slightly alcoholic taste to the cake. All in all a much lighter flavour and texture than a traditional Christmas fruit cake. 

I have cooked it in a particularly skinny loaf tin as this creates the perfect serve when cutting slices of the cake (unfortunately the shape of the cake makes it much harder to photograph!). You could use something similar in size, just keep in mind a different shaped tin may change the cooking time for this cake.

I have used making this Christmas cake as a great opportunity to bake with some really great ingredients from some Australian businesses I really love. 

Riverland Melange and Sticky Quince Syrup from Singing Magpie Produce

Riverland Melange and Sticky Quince Syrup from Singing Magpie Produce

The mixed dried fruit is from Singing Magpie Produce and is called their Riverland Melange. It is a combination of sun dried quince, pears, apricots, peaches, black figs and white figs. While I highly recommend using a dried fruit mix like this, you can of course use any kind of mixed dried fruit for this cake. I also used Singing Magpie Produce’s soon to be released sticky quince syrup. As a lover of quince I bought this as soon as I could, when Sue at Singing Magpie Produce put together a limited run of a ‘Christmas Bakers Box’ containing this syrup, dried citrus and the Riverland Melange. It is delicious in both sweet and savoury recipes, and can be substituted with honey or date syrup. 

View fullsize Grounded Pleasures Vanilla
View fullsize St Nicolas Spekulaas Spice

I am a big fan of the Ballarat business, Grounded Pleasures and use their panela sugar at every opportunity. So this cake was no exception. Light brown or muscovado sugar could be substituted for the panela however. I also used some of their vanilla extract to soak my dried fruit in. This vanilla has a strong flavour, with the PNG sourced vanilla beans being paired with PNG white rum to create the extract. Any good quality vanilla extract can be used. Alcohol free vanilla extracts could also be used, to make this cake alcohol free.

Finally I used the Gewurzhaus St Nicolas Spekulaas spice for this cake, to give it a lovely festive edge. However you could also substitute with 1/2 tsp cinnamon and 1/2 tsp mixed spice.

Easy Christmas Fruit Cake

Easy Christmas Fruit Cake

Easy Christmas Fruit Loaf Cake

Ingredients: 

260g mixed dried fruit (I used Singing Magpie Produce Riverland Melange) 

50ml good quality vanilla extract (I used Grounded Pleasures Vanilla Extract)

75ml boiling water

300g plain flour

1.5 tsp baking powder

1 tsp Spekulaas Spice (I used Gewurzhaus St Nicolas Spekulaas ground spice); alternatively use 1/2 tsp cinnamon and 1/2 tsp mixed spice

250g unsalted butter, softened

240g panela sugar (I used Grounded Pleasures Panela), or brown sugar

3 eggs

1 tbsp sticky quince syrup (I used Singing Magpie Produce) or honey

50g mixed nuts such as almonds, pistachios or macadamias

35g (approx.) natural almonds, for decoration

10g blanched pistachios, roughly chopped, for decoration 

Method: 

Chop the dried fruit, and place into a bowl. Cover with the vanilla extract and boiling water and leave to soak for about half an hour. 

Preheat oven to 160 degrees Celsius, and line a 31 x 7.5 x 8cm loaf tin with baking paper. 

Combine the flour, baking powder and spice in a medium sized bowl and briefly whisk to combine and remove any lumps. 

In the bowl of a stand mixer, beat the butter and sugar together until well combined and fluffy. 

Add the eggs one at a time, ensuring they are well combined after each addition.

Add the sticky quince syrup and the flour mix and mix until combined. 

Remove the bowl from the stand mixer, add the soaked fruit along with any liquid left in the bowl and mix into the batter using a large wooden spoon or a spatula. Then add the nuts. 

Transfer the mixture to the prepared loaf tin and arrange the almonds around the outside. Sprinkle over the chopped pistachios, and bake for about 1 hour 15min. Check the cake at around 45min-1hour, and cover with foil if necessary. The cake will be ready when the top is golden and a skewer comes out clean. 

Allow the cake to cool in the tin for 20-30mins, then remove onto a wire rack.

Easy Christmas Fruit Loaf Cake

Easy Christmas Fruit Loaf Cake

Easy Christmas Cake

Reference: ‘Piri Piri Starfish - Portugal Found’ by Tessa Kiros (Murdoch Books, 2008), pp.191-2.

Easy Christmas Fruit Loaf Cake

Easy Christmas Fruit Loaf Cake

Easy Christmas Fruit Cake
In Cakes & Slices, Holidays Tags Christmas Fruit Cake, Christmas, Singing Magpie Produce, Grounded Pleasures, Gewurzhaus, Easy Baking, Holiday Baking, cake
2 Comments
Pistachio and Lemon Layer Cake inspired by Beatrix, North Melbourne

Pistachio and Lemon Layer Cake inspired by Beatrix, North Melbourne

Beatrix Inspired Pistachio + Lemon Layer Cake

Kath October 12, 2019

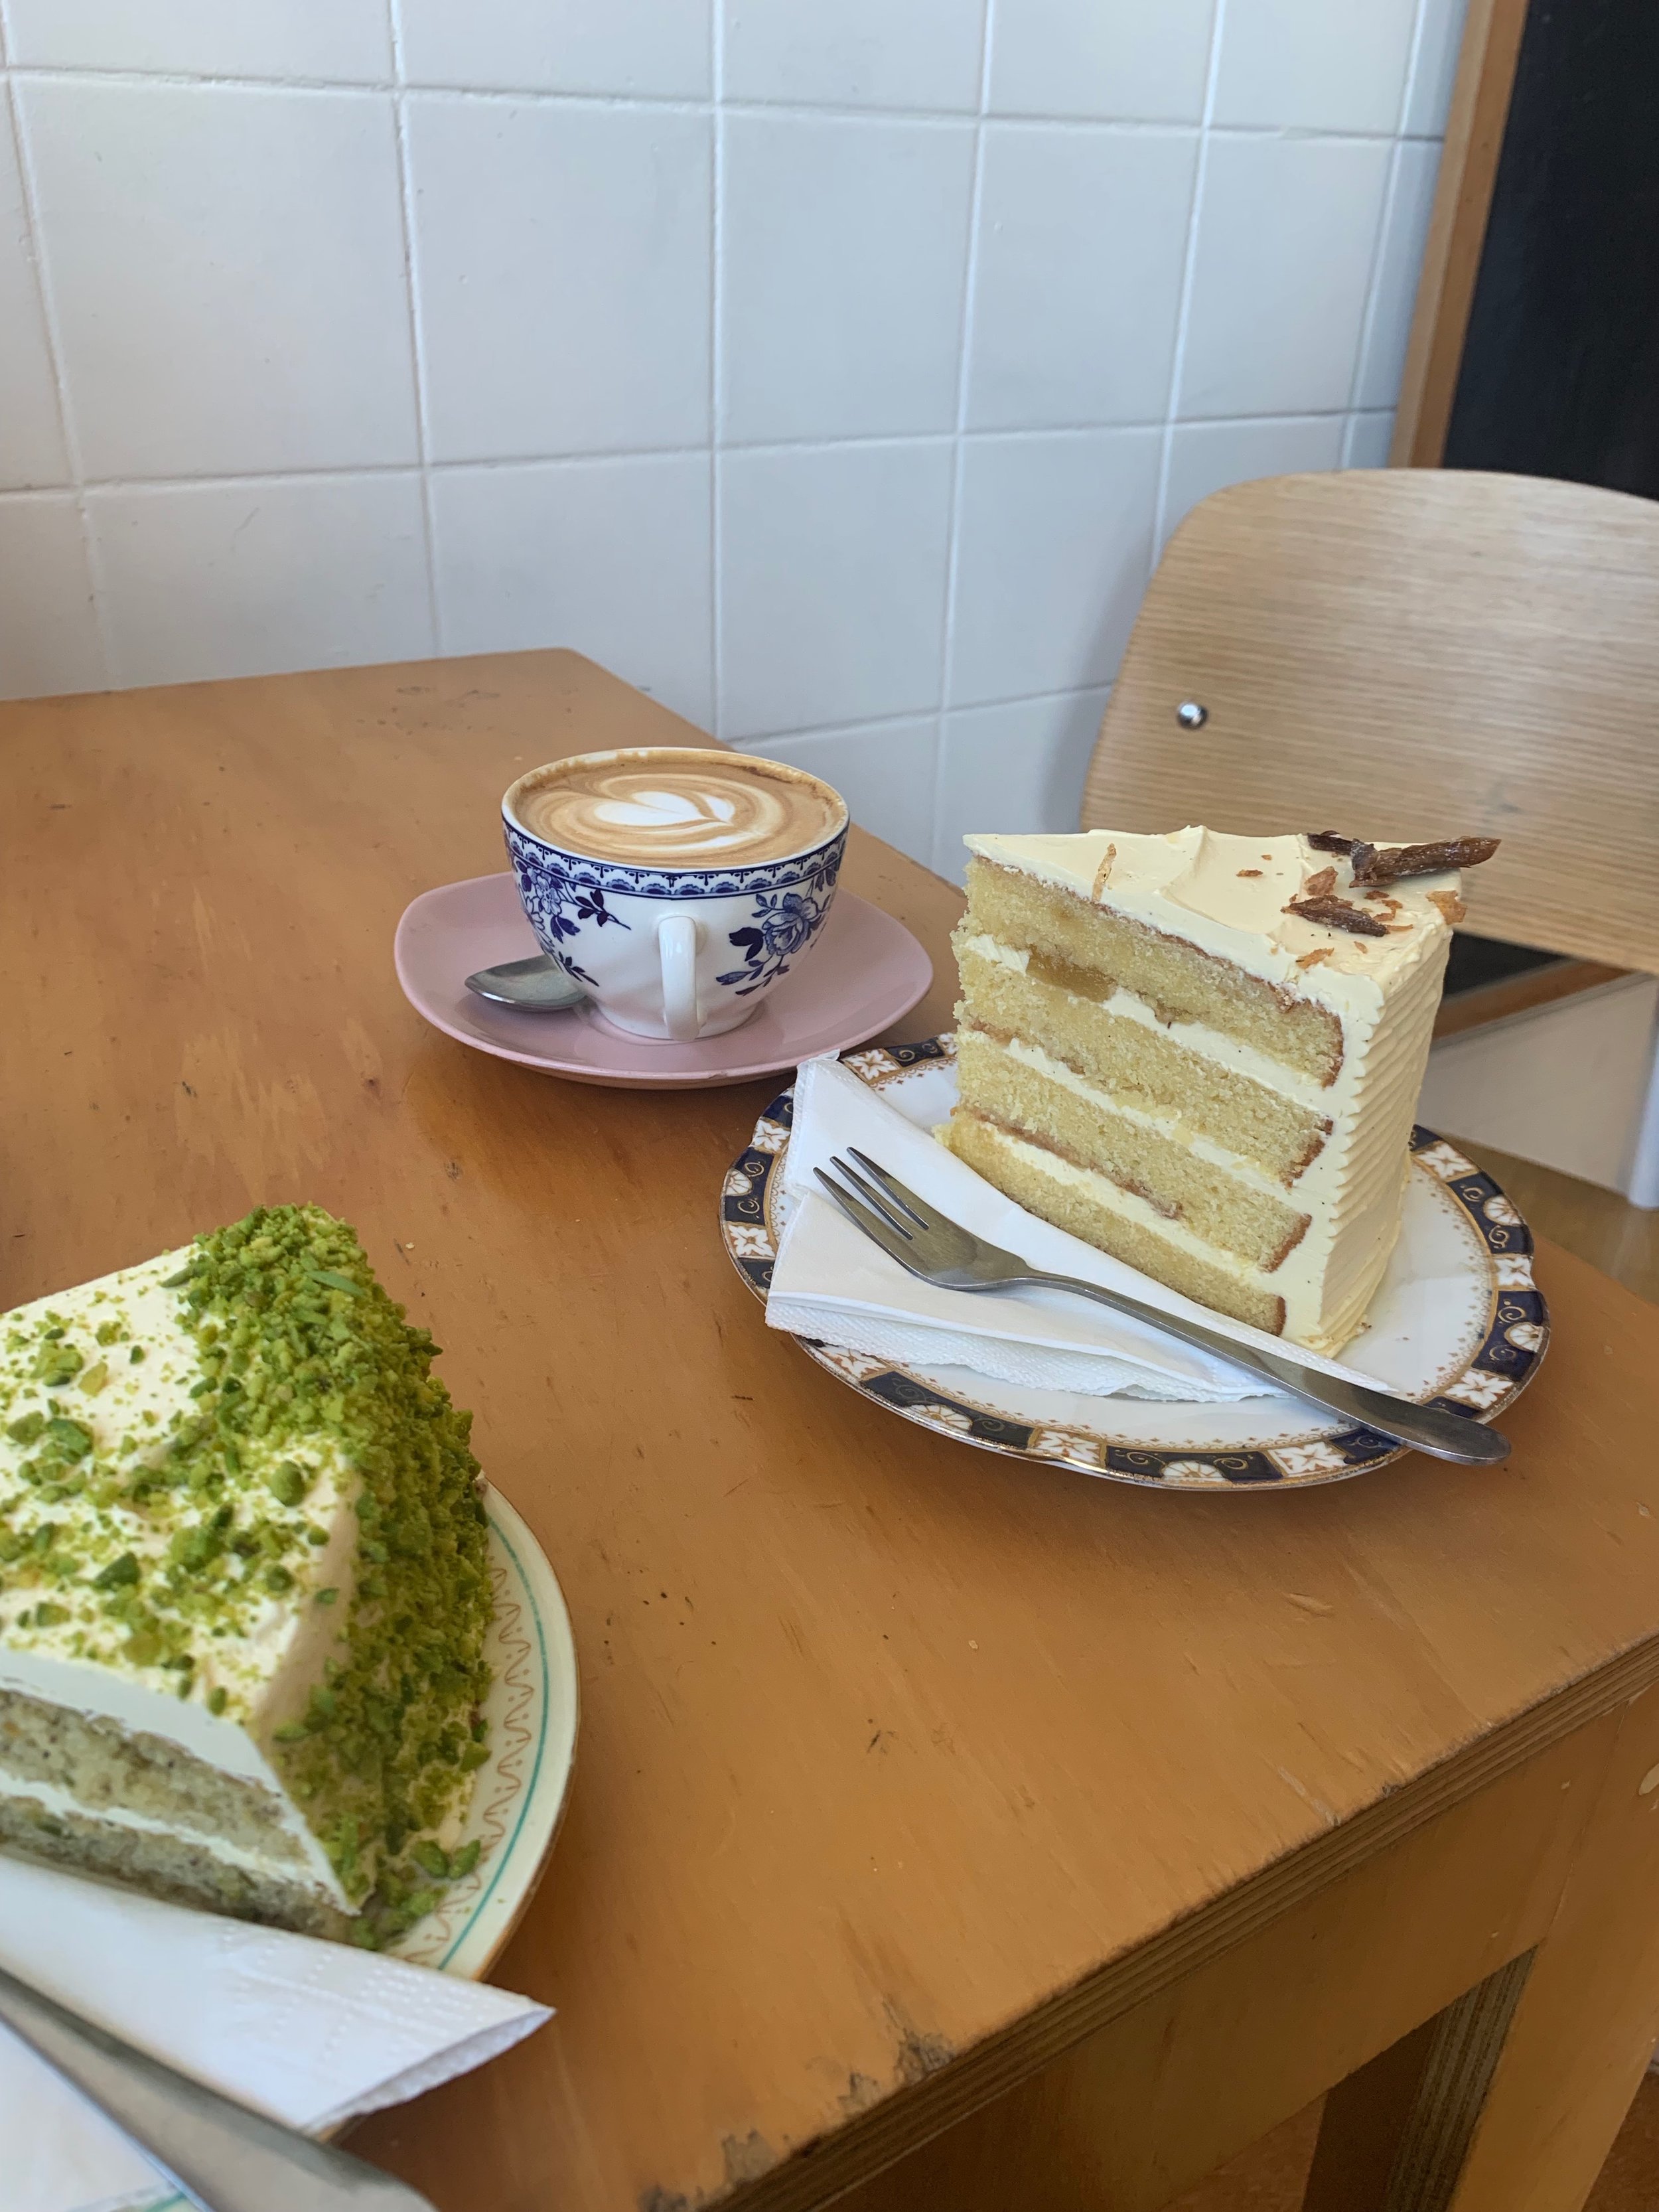
Attempting to make this cake has been on my mind since I visited Beatrix, a bakery in North Melbourne in late August. When I put the call out on social media for any tips on where to eat in Melbourne, this bakery was mentioned again and again. And for good reason! 

The cakes not only look amazing, but they taste great too. The shop itself is small and cute, with a wall of old egg beaters hanging behind the retro style wooden cake cabinet. Small white paper doilies are used to label each cake on the outside of the counter, and there seemed to be a steady steam of people coming visit even on a weekday. 

As soon as I saw the Pistachio and Lemon cake in the counter I knew that was the cake for me. I ordered it with a pot of peppermint tea, and my friend Sally ordered Apple Pie Cake with a coffee. Both cakes were delicious, and we sat and chatted for a while in the lovely calm cake-filled space. 

View fullsize IMG_8729.jpeg
View fullsize IMG_8728.jpeg
View fullsize IMG_8727.jpeg
View fullsize IMG_8737.jpeg

As I walked to my next stop of the day, I had already began thinking about recreating the Pistachio and Lemon Cake once I got home. Once I was home, I started researching through lots of my cookbooks and finally found recipes I could begin to recreate the Beatrix cake with. 

Even though I posted a recipe for Yuzu Curd not that long ago, and I could have easily made that recipe again but with lemon, I have had my eye on an easy lemon curd recipe I saw on Instagram from Jordan of Thistle + Whey. Jordan posted this recipe back in July as part of her Slow Saturday series. It immediately got my attention, and I screen shotted the recipe and the tips she posted on Stories too. 

Since this cake has a few steps to make it, I decided an easy option for the lemon curd would be most welcome! And not only is this recipe for lemon curd super easy, it produces the thickest tangiest lemon curd I have ever made! I am always hoping the lemon curds I make will be thicker than they end up, and the only time I achieved this before was when I used a recipe that contained gelatine. 

The taste and consistency of this lemon curd was just perfect for this layer cake, as it held its shape and didn’t drip everywhere, and the super tangy lemon flavour goes really well with the buttery sweet icing. So it’s win win all around, and Jordan’s Super Easy Lemon Curd is now my go to recipe! Thanks Jordan!

And a note on the meringue buttercream - if you like me, aren’t a big fan of the stock standard buttercream icing, this one is not like that! When I ate the Pistachio and Lemon Cake at Beatrix, I knew they had used a type of meringue buttercream as, not only did I actually enjoy eating it, but it had that slightly more white colour that comes from the meringue element. This recipe replicates theirs pretty well, and it is lighter and less buttery and dense than its regular buttercream counterpart, and well worth the effort in making it.

Beatrix Inspired Pistachio and Lemon Cake
Jordan’s Super Easy Lemon Curd

Jordan’s Super Easy Lemon Curd

Jordan’s Super Easy Lemon Curd 

Ingredients: 

2-3 lemons (medium to large sized, I used 4 very small lemons) 

160g caster sugar 

110g unsalted butter

5 egg yolks (save the whites for the meringue buttercream icing below)

Method: 

Slice the lemons into quarters, and place in the bowl of a food processor. Process the lemons until they have become pulpy and almost smooth. 

Cut the butter into cubes, add to the food processor along with the caster sugar and egg yolks. Process until everything is well combined and as smooth as possible. 
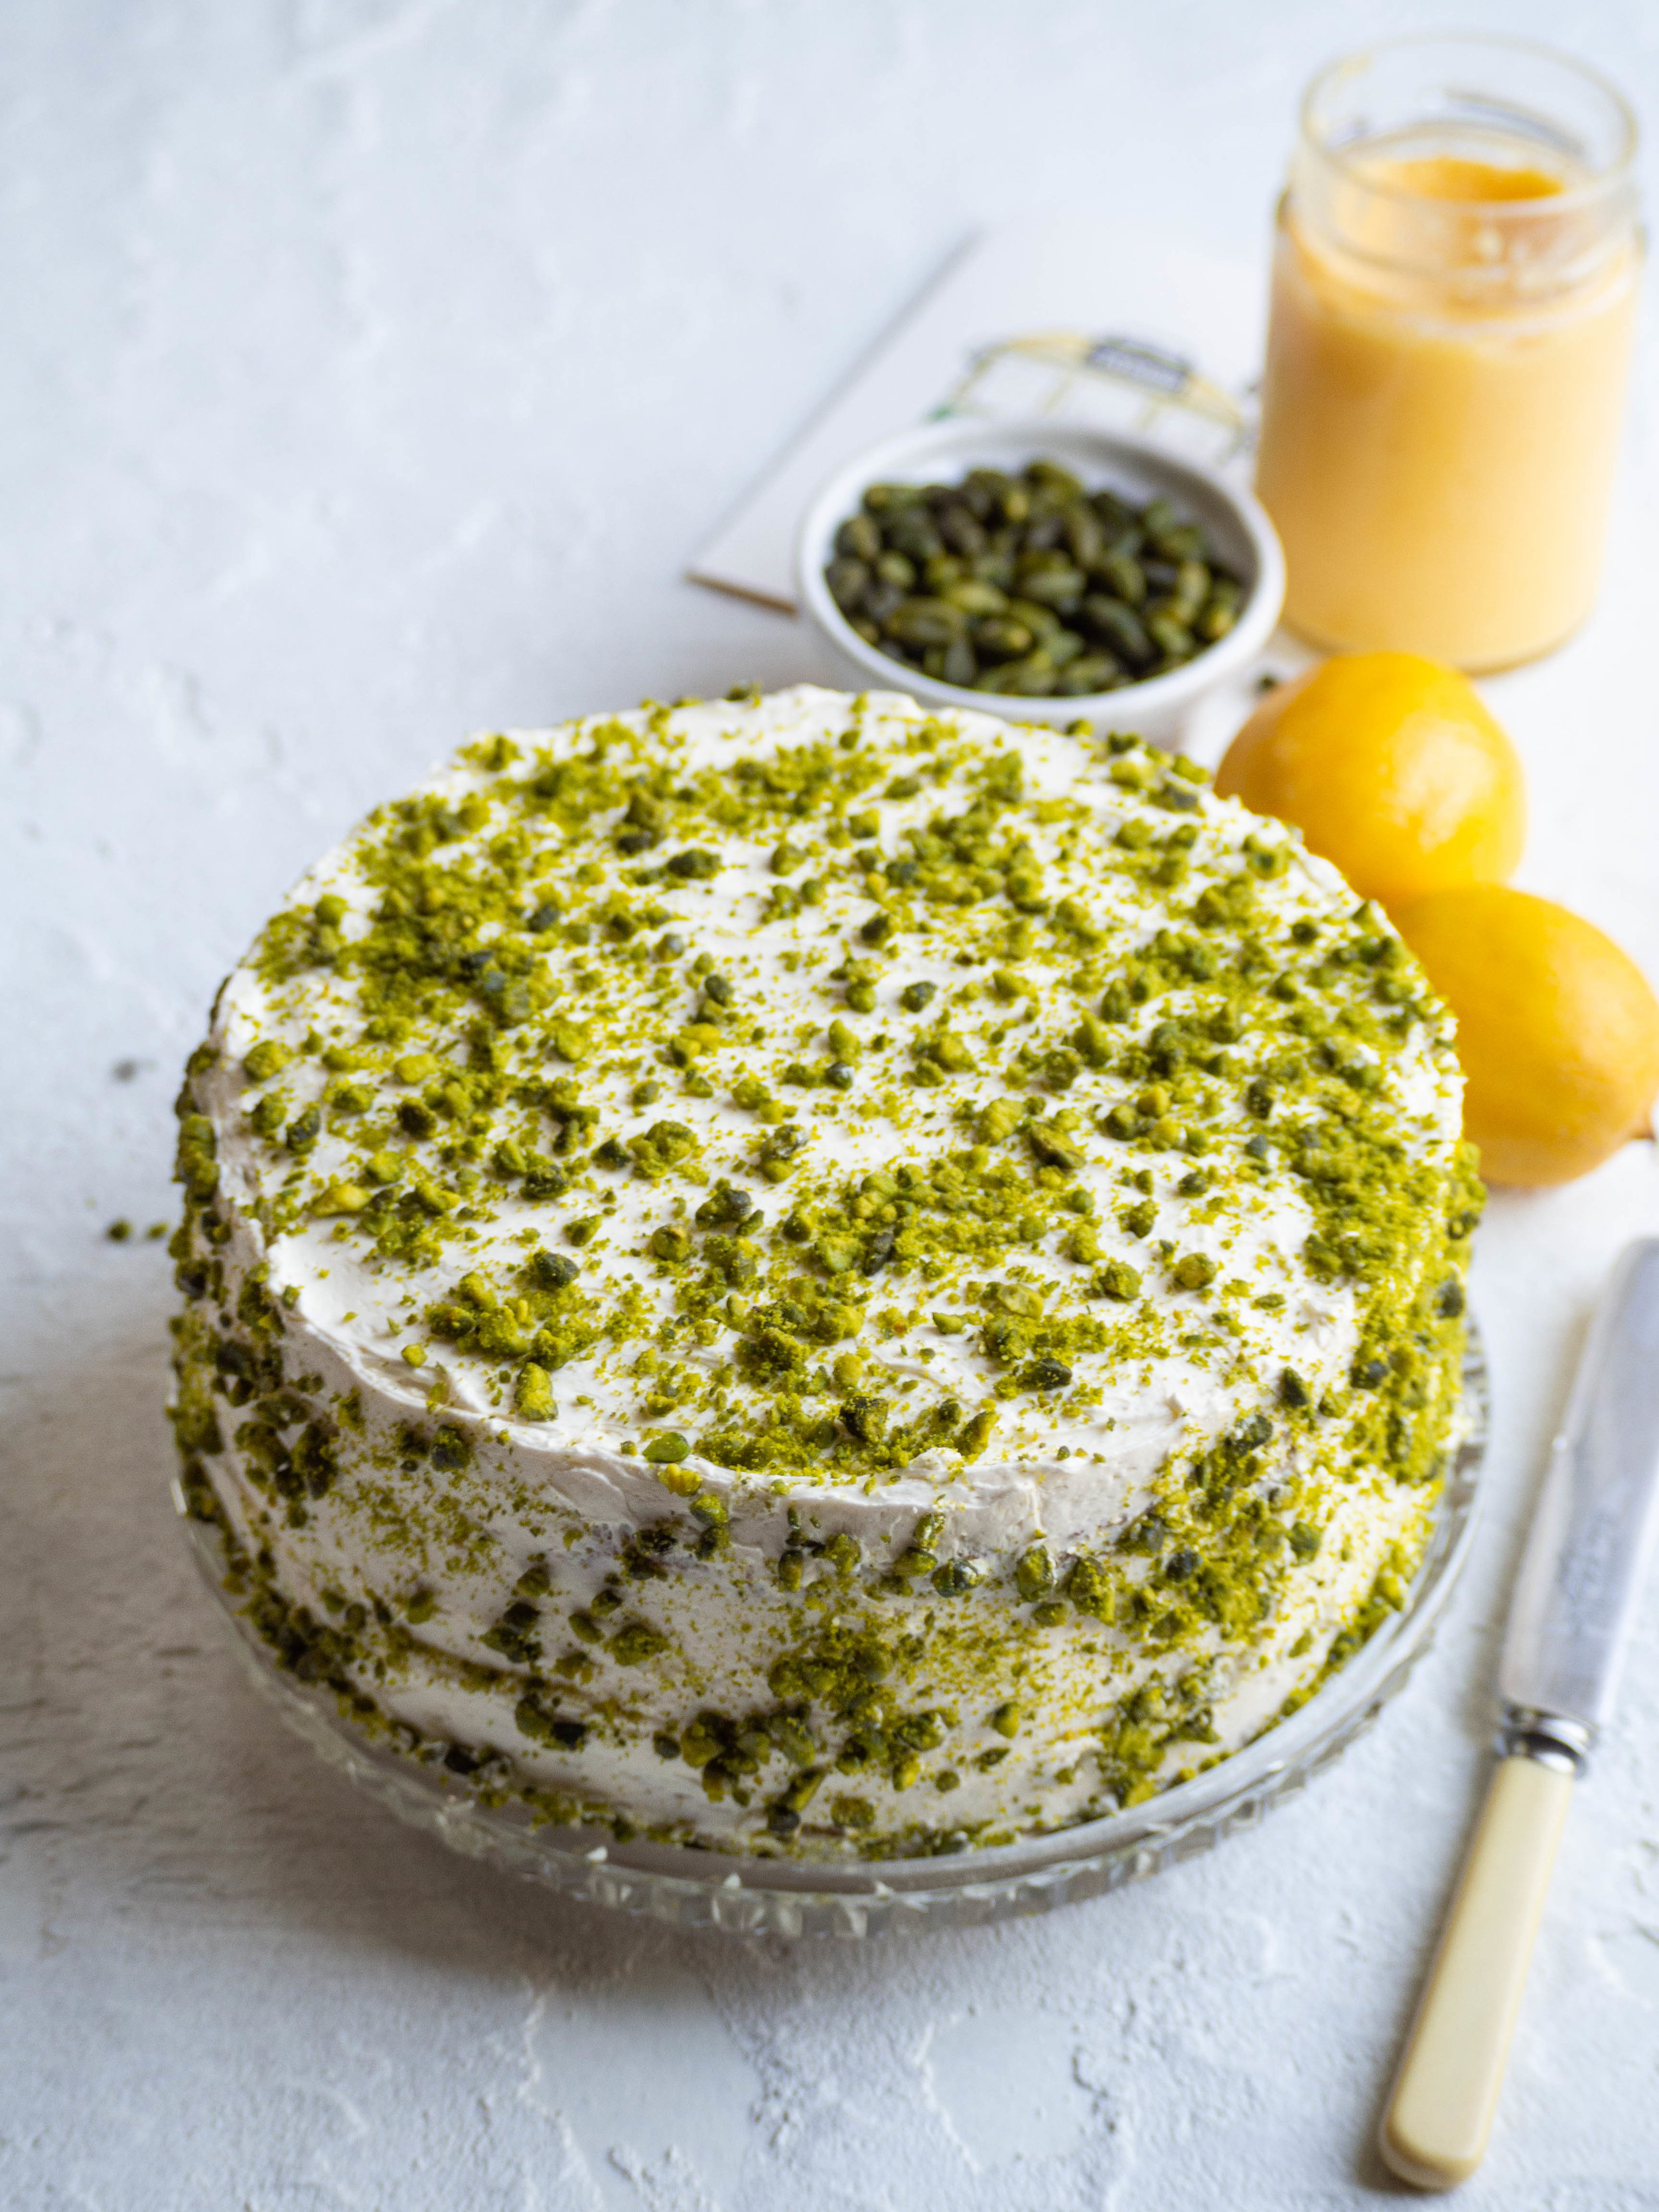
Transfer this lemon mixture into a medium saucepan, and stir over a low heat. The curd will look curdled at first but it will thin out as the butter melts, then thicken up again as the eggs cook. Once the curd has thickened and coats the back of your spoon or spatula it is done (this should take around 5 minutes). 

Pour through a sieve and discard any bits the sieve catches. Transfer to a large glass jar and allow too cool to room temperature before storing in the fridge. 
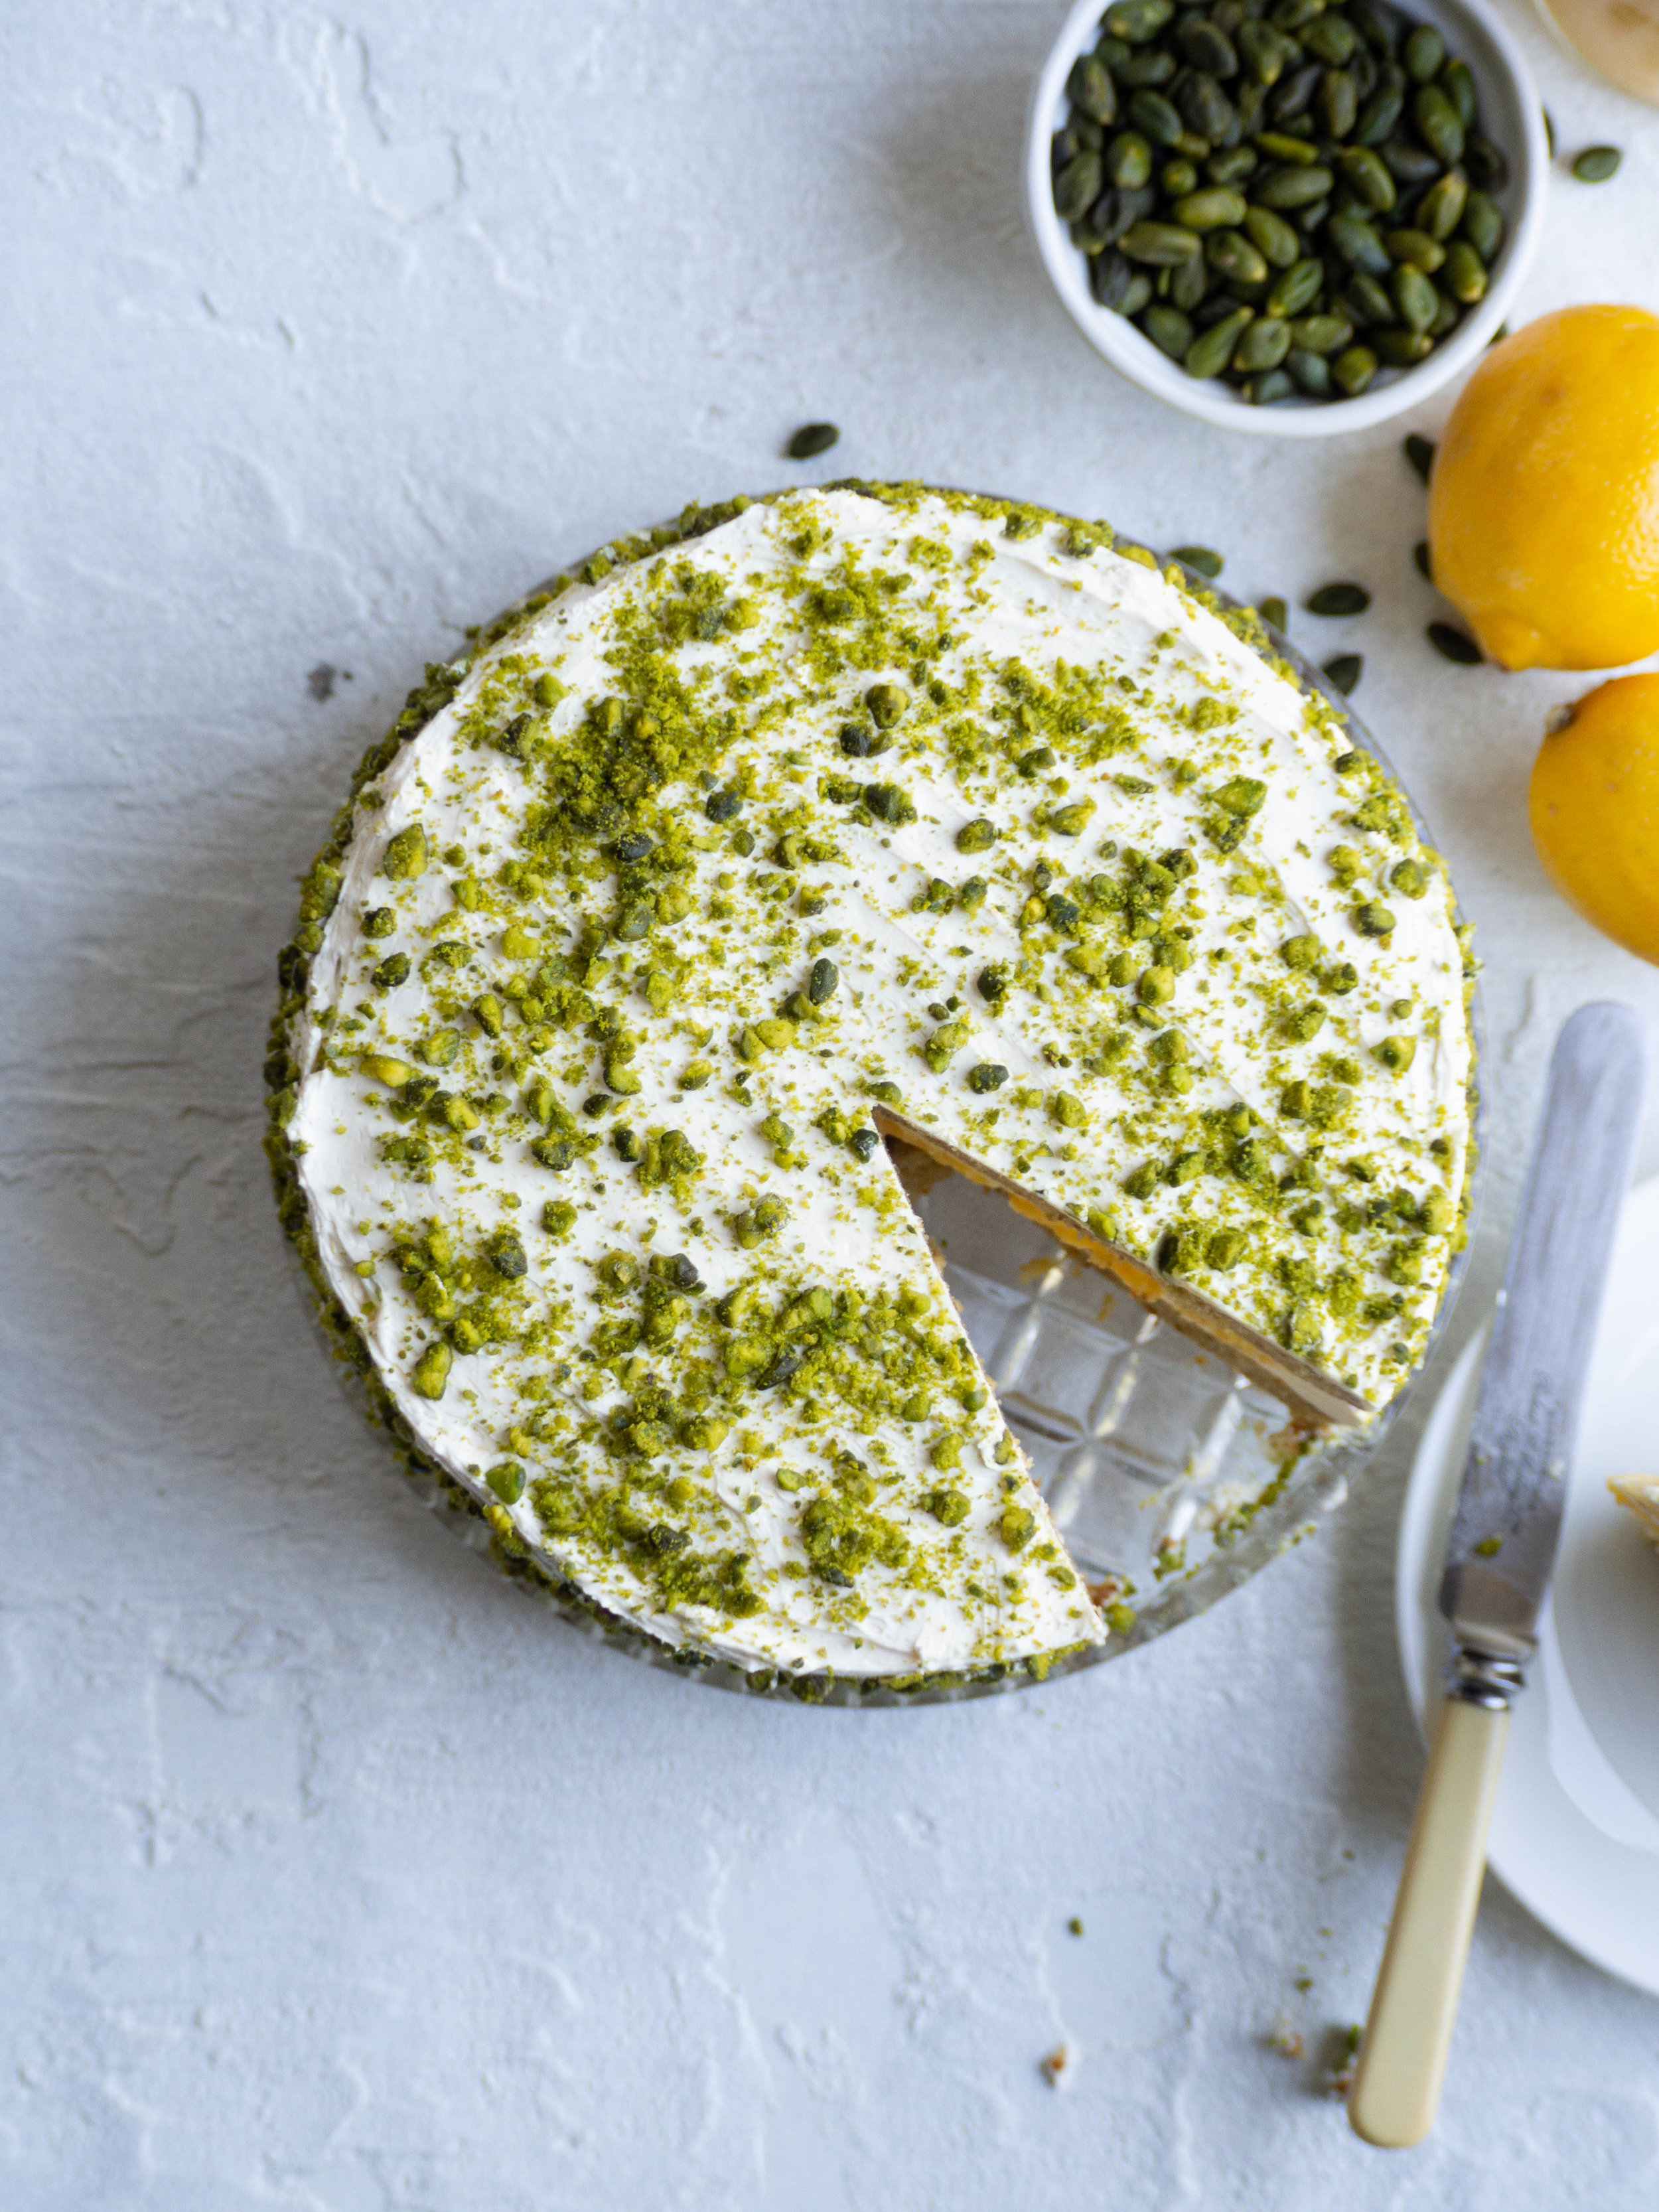
Makes about 400g, and will keep in the fridge for about 5 days. 

Pistachio and Lemon Cake

Pistachio and Lemon Cake

Beatrix Inspired Pistachio and Lemon Cake

Ingredients for the Cake: 

200g unsalted butter, softened

200g caster sugar

30g pistachio paste (see here for homemade version)

4 eggs

100g raw shelled pistachios

200g self raising flour

Ingredients for the Meringue Buttercream Icing + Assembly: 

270g caster sugar

67ml water

135g egg whites (3-4 egg whites approx. (but do measure specifically), use leftovers from making the lemon curd)

330g unsalted butter, softened 

1/2 tsp vanilla extract

130g (approx.) Jordan’s Super Easy Lemon Curd

50g blanched pistachios 

Method: 

Preheat oven to 160 degrees Celsius and grease and line two 20cm round baking tins. 

Place the pistachios on a small tray and lightly toast in the oven for 5 minutes. Remove, and allow to cool a little, then blitz into fine crumbs (similar to the consistency of almond meal) using a food processor. 

In the bowl of a stand mixer, place the butter, sugar and pistachio paste. Beat on medium speed until well combined and fluffy. 

Gently whisk the eggs in a jug, and add to the butter mixture with the mixer running on a low/medium speed. Add the ground pistachios and continue to beat on medium speed until combined. 

Measure out the self raising flour into a separate bowl and briefly whisk to remove any lumps. Add the flour to the batter, and mix on the lowest speed. Finnish mixing by hand to avoid over working the batter. 

Evenly transfer the cake batter between the two prepared tins, and bake for 30 minutes or until cooked through and golden in colour. 

Leave the cakes too cool in their tins for a few minutes, then remove from the tins and allow to cool completely on a wire rack. 

To make the icing, place the water and sugar in a small saucepan over high heat and allow to come to a rapid boil. Using a candy thermometer keep an eye on the temperature of the sugar syrup - it will be ready once it reaches 121 degrees Celsius. 

Place the egg whites in the bowl of a stand mixer, and gently whisk until foamy (start this once the sugar syrup is at around 100 degrees Celsius). 

Once the sugar syrup has reached 121 degrees Celsius, remove from the heat, and with the mixer running on low pour it over the whisked egg whites (avoiding the whisk itself as much as possible). 

Increase the speed of the mixer to medium, and continue to whisk until the meringue has cooled right down - this will take at least 5-10 minutes. 

Cut the butter into cubes, and add a cube or two at a time with the mixer still running. Allow each cube to incorporate into the mixture before adding more. Continue to beat until the meringue buttercream is completely smooth. Briefly beat in the vanilla extract. 

Place one of the cooled cakes on to a plate or cake stand (or a cake turntable if you have one) top side up. Spread a thin layer of the buttercream over the cake, then using a piping bag pipe a rim of icing around the edge - this will contain the lemon curd and create a more even surface for the second cake layer to sit on. Pipe a second rim inside the first if you think the cake needs more height around the edges to make it even.  

Spoon the lemon curd into the centre of the cake, pushing to the edge of the buttercream rim you have piped. Pipe over some more of the buttercream over the top of the lemon curd and gently smooth it out with a spatula. 

Trim the top of the second cake if necessary (so it will sit as flat as possible), and place top side down, over the curd and buttercream layer. 

Cover the top of the cake with more meringue buttercream, then spread down the sides and around the entirety of the cake. Try to make the buttercream as smooth and even as possible, using a spatula or palette knife. It doesn’t need to be perfect, as you will now cover the icing with some pistachios. 

Briefly blitz the blanched pistachios in a food processor so you get large crumbs (alternately you could chop them up with a knife). Cover the entire cake in the pistachio crumbs, sprinkling them over the top and pressing them into the sides of the cake. 

Place the cake into the fridge for about 30-60 minutes, to allow the icing the firm up - this will allow you to get some nice clean slices when you cut the cake. Any excess meringue buttercream icing can be stored for one week in an airtight container in the fridge. 

Store cake in the fridge, will keep for about 5 days. 

Serves 8-10.

Pistachio and Lemon Layer Cake

References: Thistle + Whey Lemon Curd (posted 21/07/2019); ‘Love Layer Cakes’ by Peggy Porschen (Quadrille Publishing, 2015), pp.10 & 26-28.

Pistachio and Lemon Cake Inspired by Beatrix Melbourne
Beatrix Pistachio and Lemon Cake
In Cakes & Slices, Jams Preserves & Spreads Tags Beatrix, Pistachio Paste, Pistachio Cake, Lemon Curd, Melbourne, cake
6 Comments
  • The Blog
  • Older
  • Newer

recipes

  • Biscuits/Cookies 39
  • Breads Etc. 9
  • Breakfast 7
  • Cakes & Slices 67
  • Confectionary 5
  • Drinks 6
  • Events 14
  • Food Photography Tips 3
  • From The Mailing List 24
  • Heirloom Recipes 12
  • Holidays 44
  • Ice Cream 9
  • Jams Preserves & Spreads 9
  • Muffins 4
  • Off the Shelf 48
  • Other Desserts 25
  • Savoury Dishes/Meals 15
  • Scones 4
  • Tarts & Pastry 9
  • Travel 13

Sign up to Friday Food Chat with Kath, a weekly newsletter for more food, baking, cookbook chat and more!

Sign Up Here!
instagram-unauth pinterest facebook url

Website Accessibility: To enable text to speech function on the blog, click the sound button to the right of each blog post.

All images & content are the property of Kathryn Vincent, unless stated otherwise. Please do not use without permission.

Kulinary Adventures of Kath

Food Photography, Recipes & Baking

instagram-unauth pinterest facebook url