Kulinary Adventures of Kath

Food Photography, Recipes & Baking
  • home
  • About
  • Work with Kath
  • Shop
  • Blog
    • The Blog
    • Recipe Archive
  • Newsletter
  • Contact
  • home
  • About
  • Work with Kath
  • Shop
    • The Blog
    • Recipe Archive
  • Newsletter
  • Contact
Raspberry Pistachio Rose Cake (23 of 25).jpg

The Blog

Recipes and Food Photography by Kath Vincent.

  • The Blog
  • Recipe Archive
  • All
  • Biscuits/Cookies
  • Breads Etc.
  • Breakfast
  • Cakes & Slices
  • Confectionary
  • Drinks
  • Events
  • Food Photography Tips
  • From The Mailing List
  • Heirloom Recipes
  • Holidays
  • Ice Cream
  • Jams Preserves & Spreads
  • Muffins
  • Off the Shelf
  • Other Desserts
  • Savoury Dishes/Meals
  • Scones
  • Tarts & Pastry
  • Travel

Homemade Marshmallows (Gluten + Dairy Free)

Kath December 10, 2015

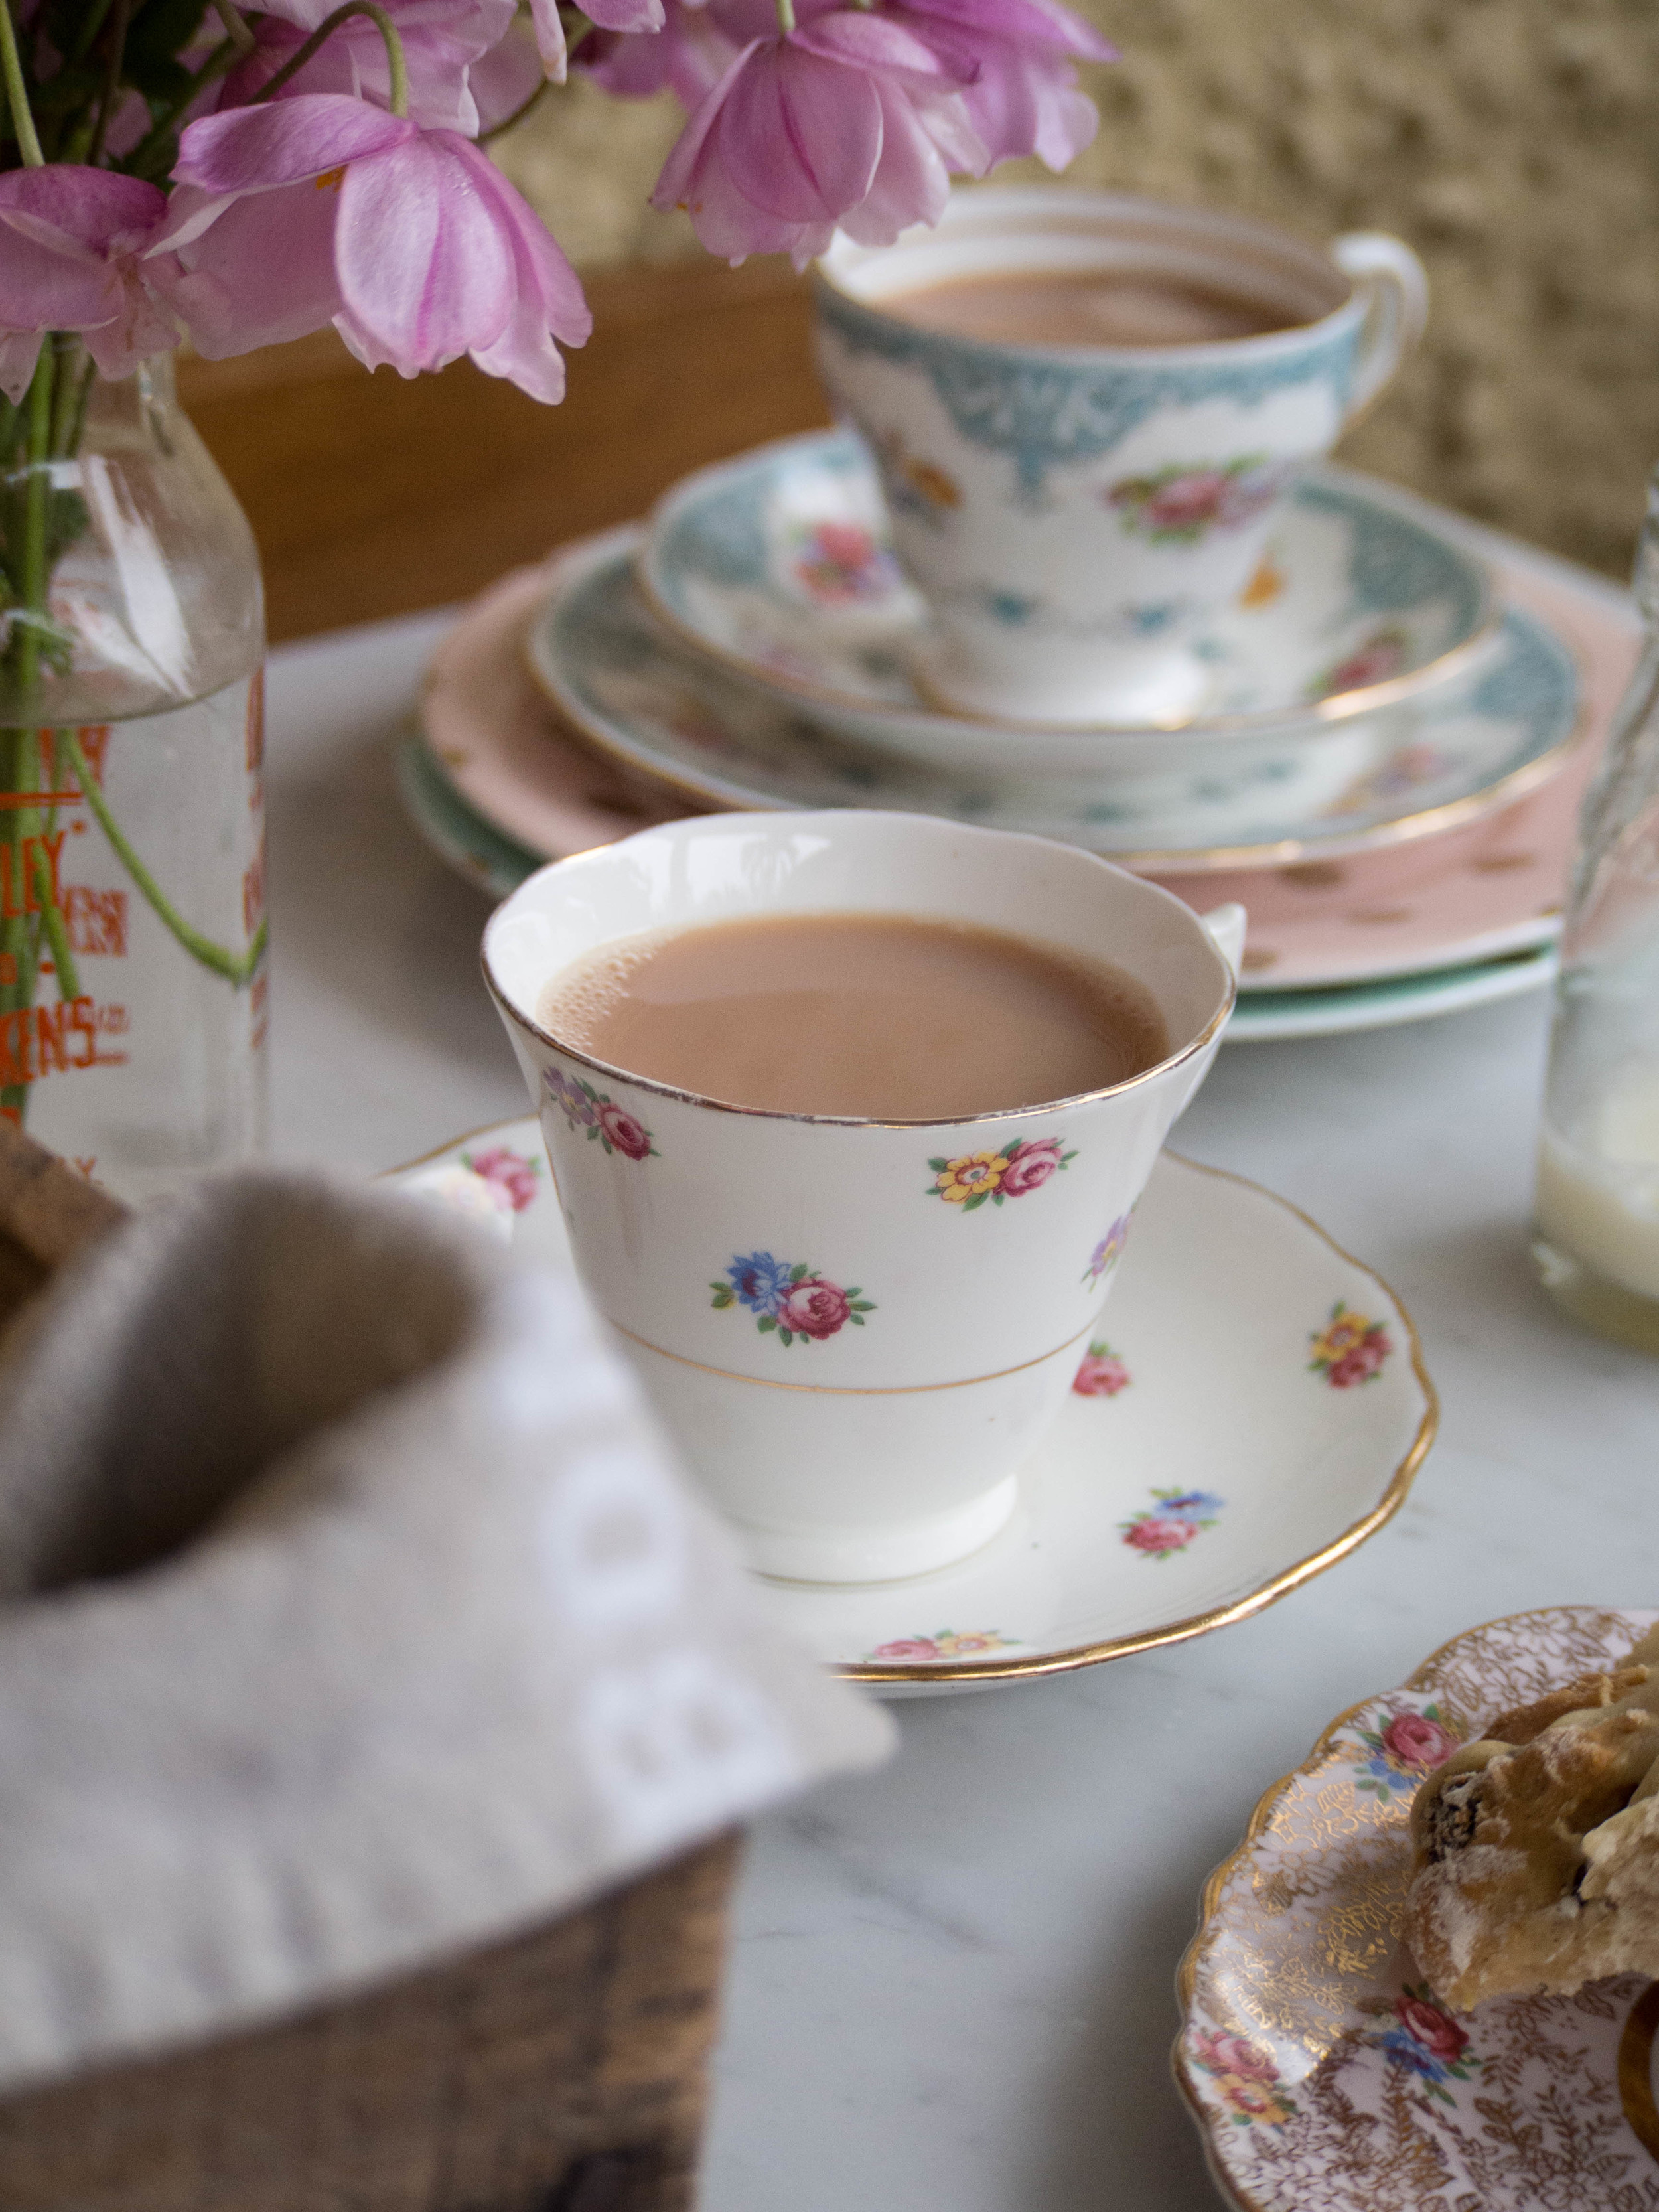
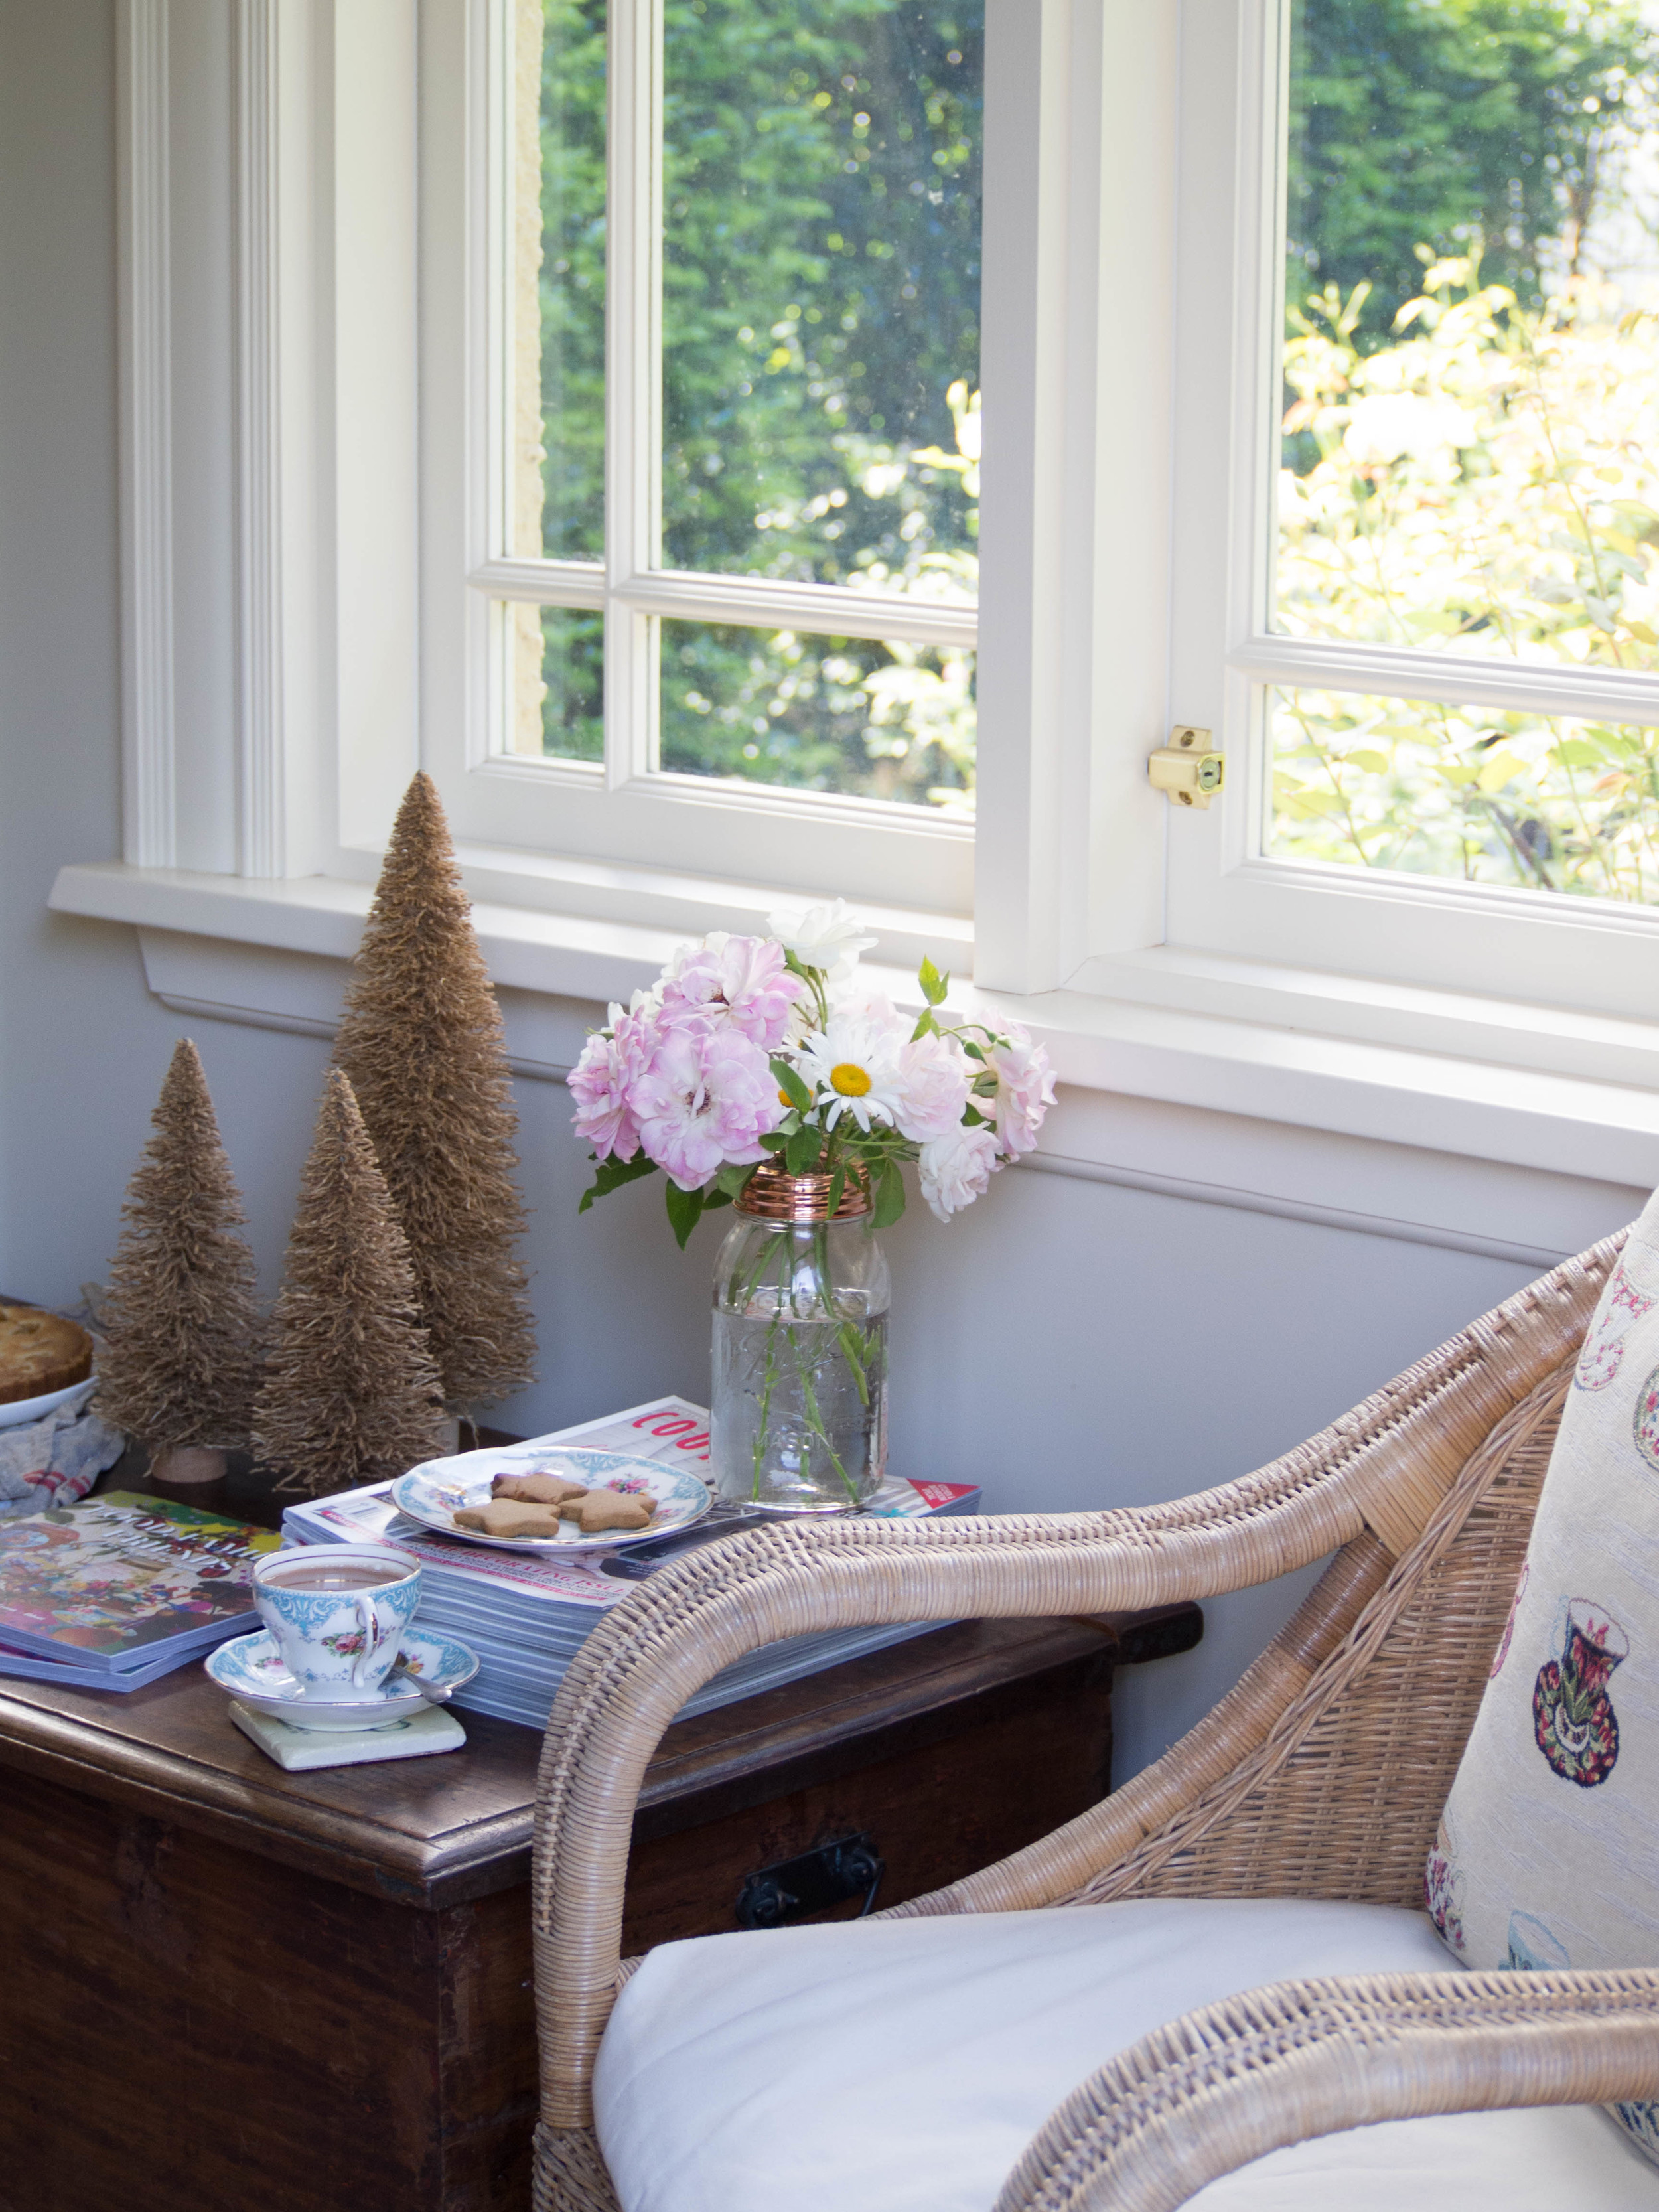
I have always loved marshmallows. I would eat them by the bowlful as a kid, much to my Mum’s dismay. I’d often melt them in the microwave, add Rice Bubbles, and eat them like a massive LCM (or rice crispy treat), but with much more marshmallow! 

Then while I was at uni, a friend introduced me to Sweetness the Patisserie in Sydney, who make their own marshmallows, known as Sweet Mallows. They are made with natural flavours, and come in an amazing variety of flavour combinations. These homemade, (much) more natural versions of the marshmallows you buy in the lolly isle at the supermarket, make you never ever want to eat the supermarket variety again.

I then stumbled across the below recipe in the recipe book from the Parisian confectioners,  À La Mère de Famille (check out this post for more on the Parisian confectioners). Its not an overly complicated recipe, you just need to be organised, work quickly and have a sugar thermometer. So once I bought a sugar thermometer, there was nothing stopping me finally making marshmallows for myself! 

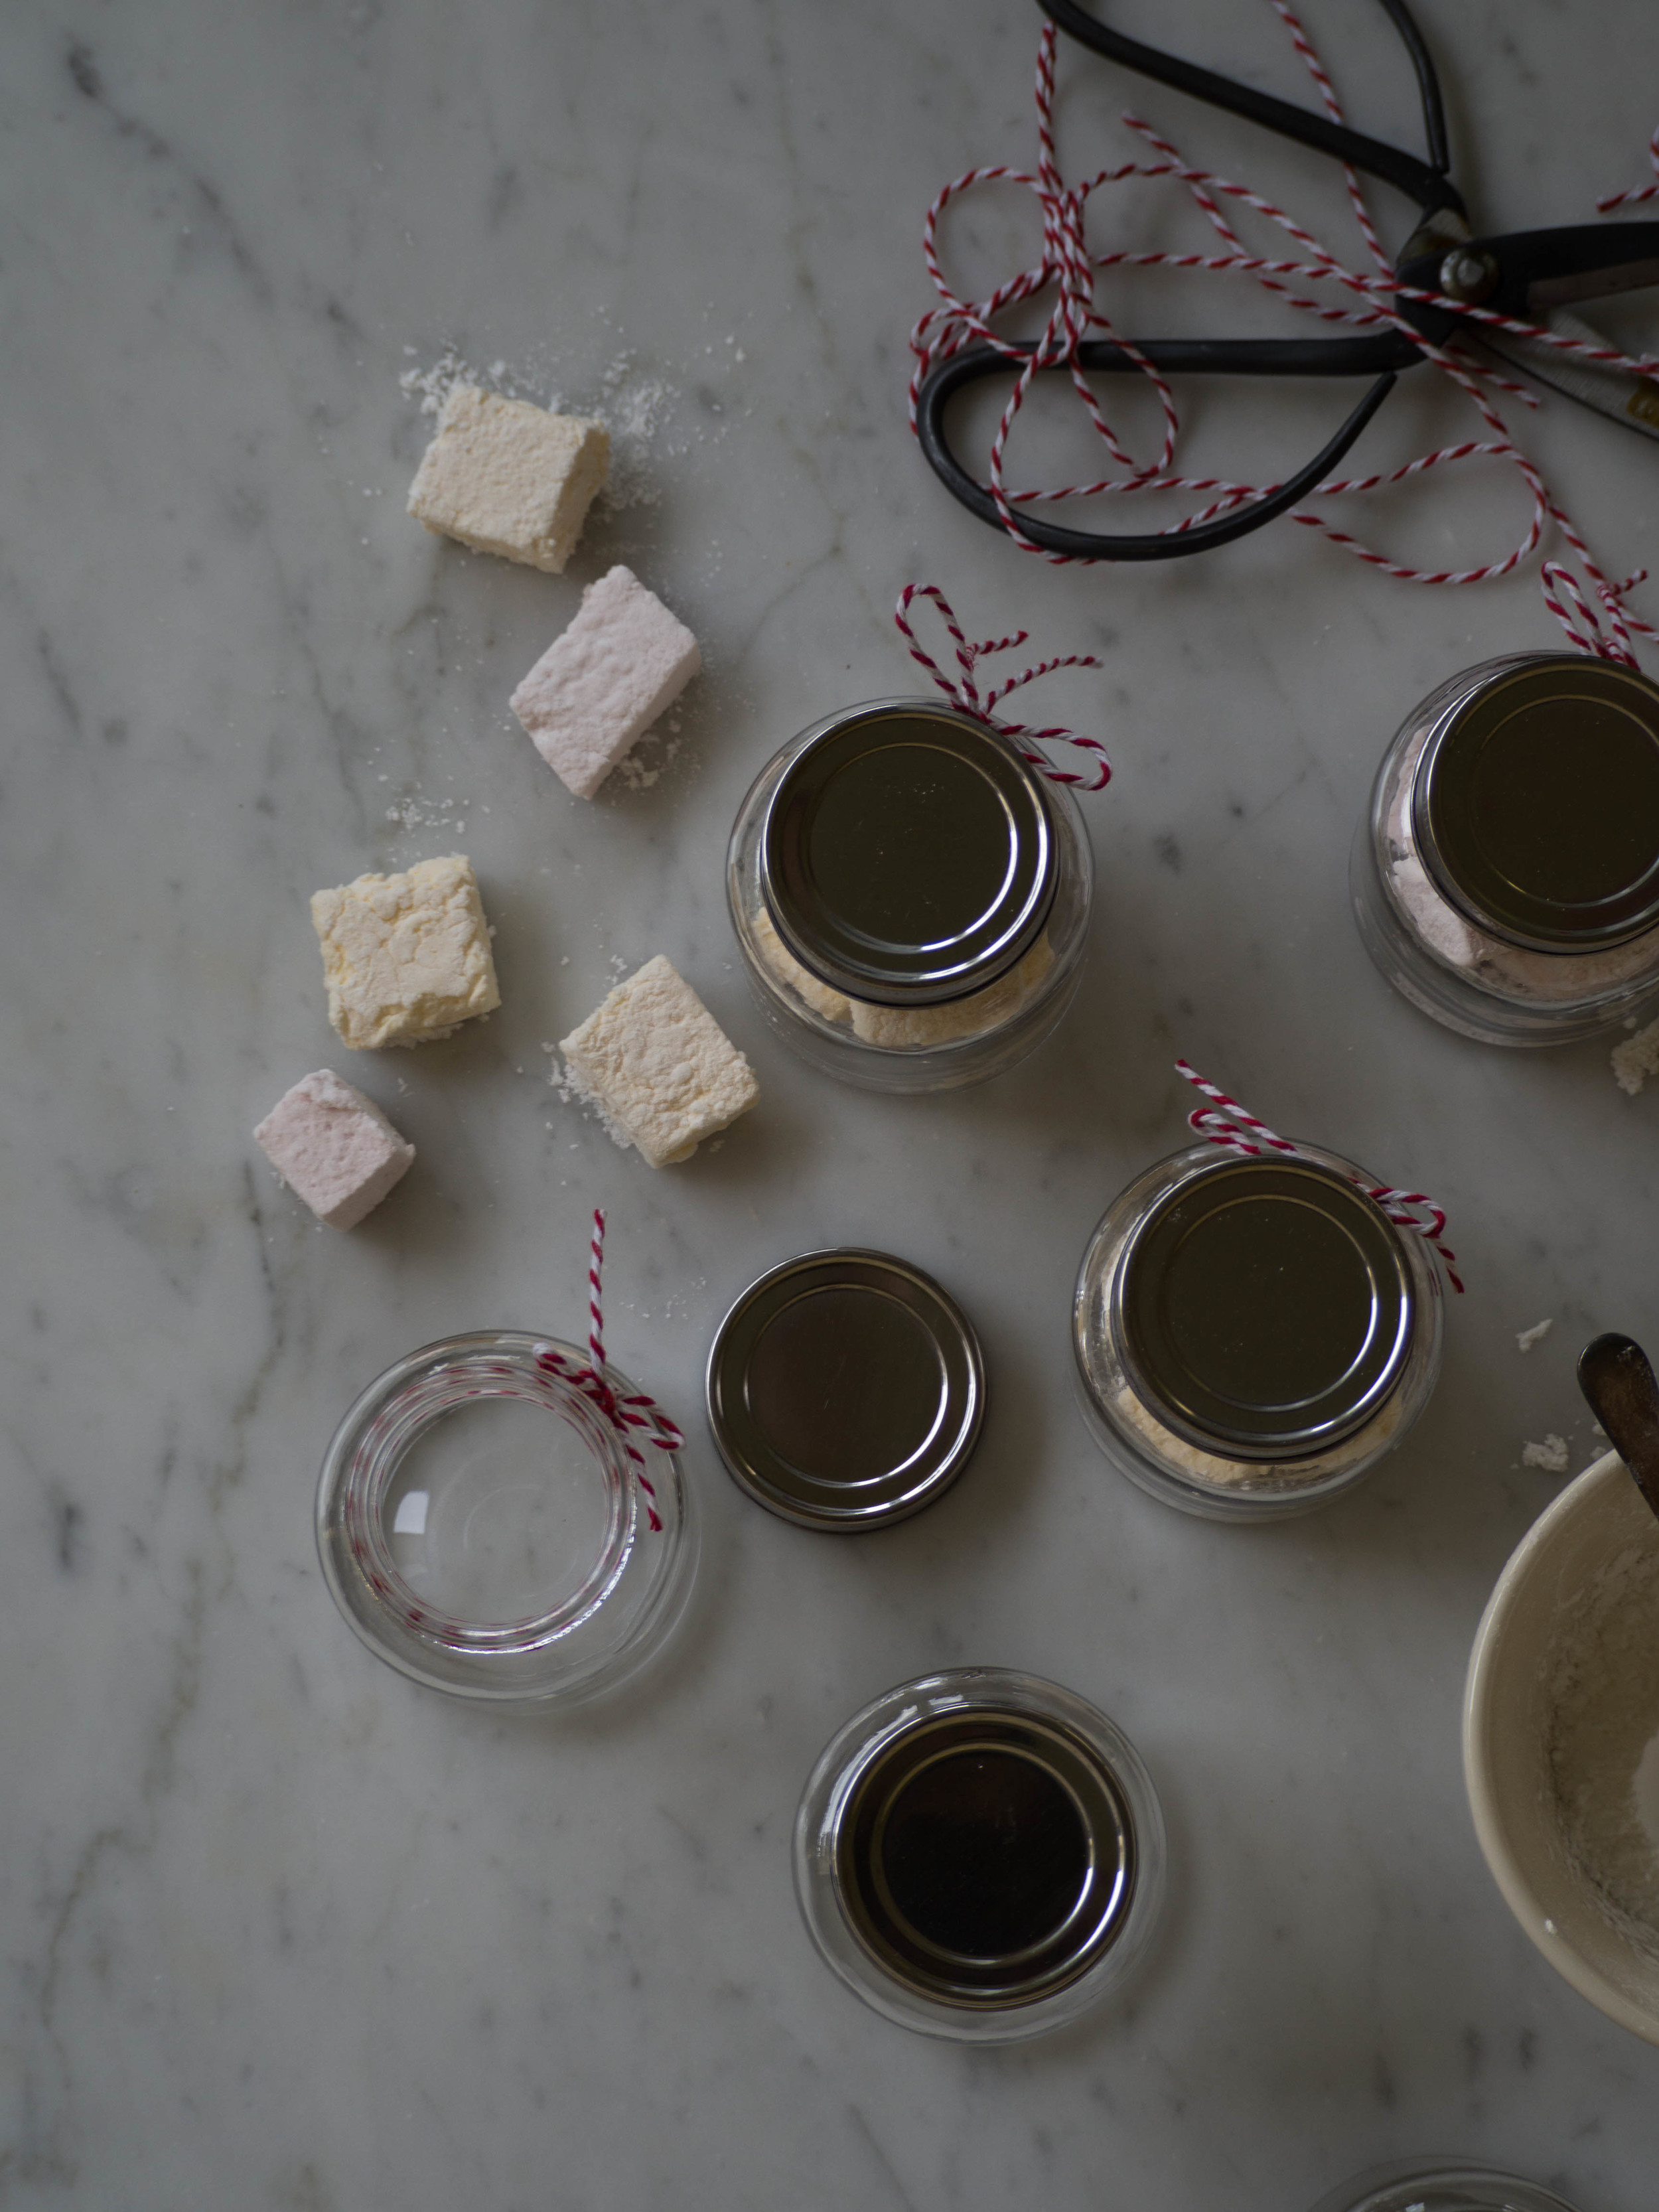
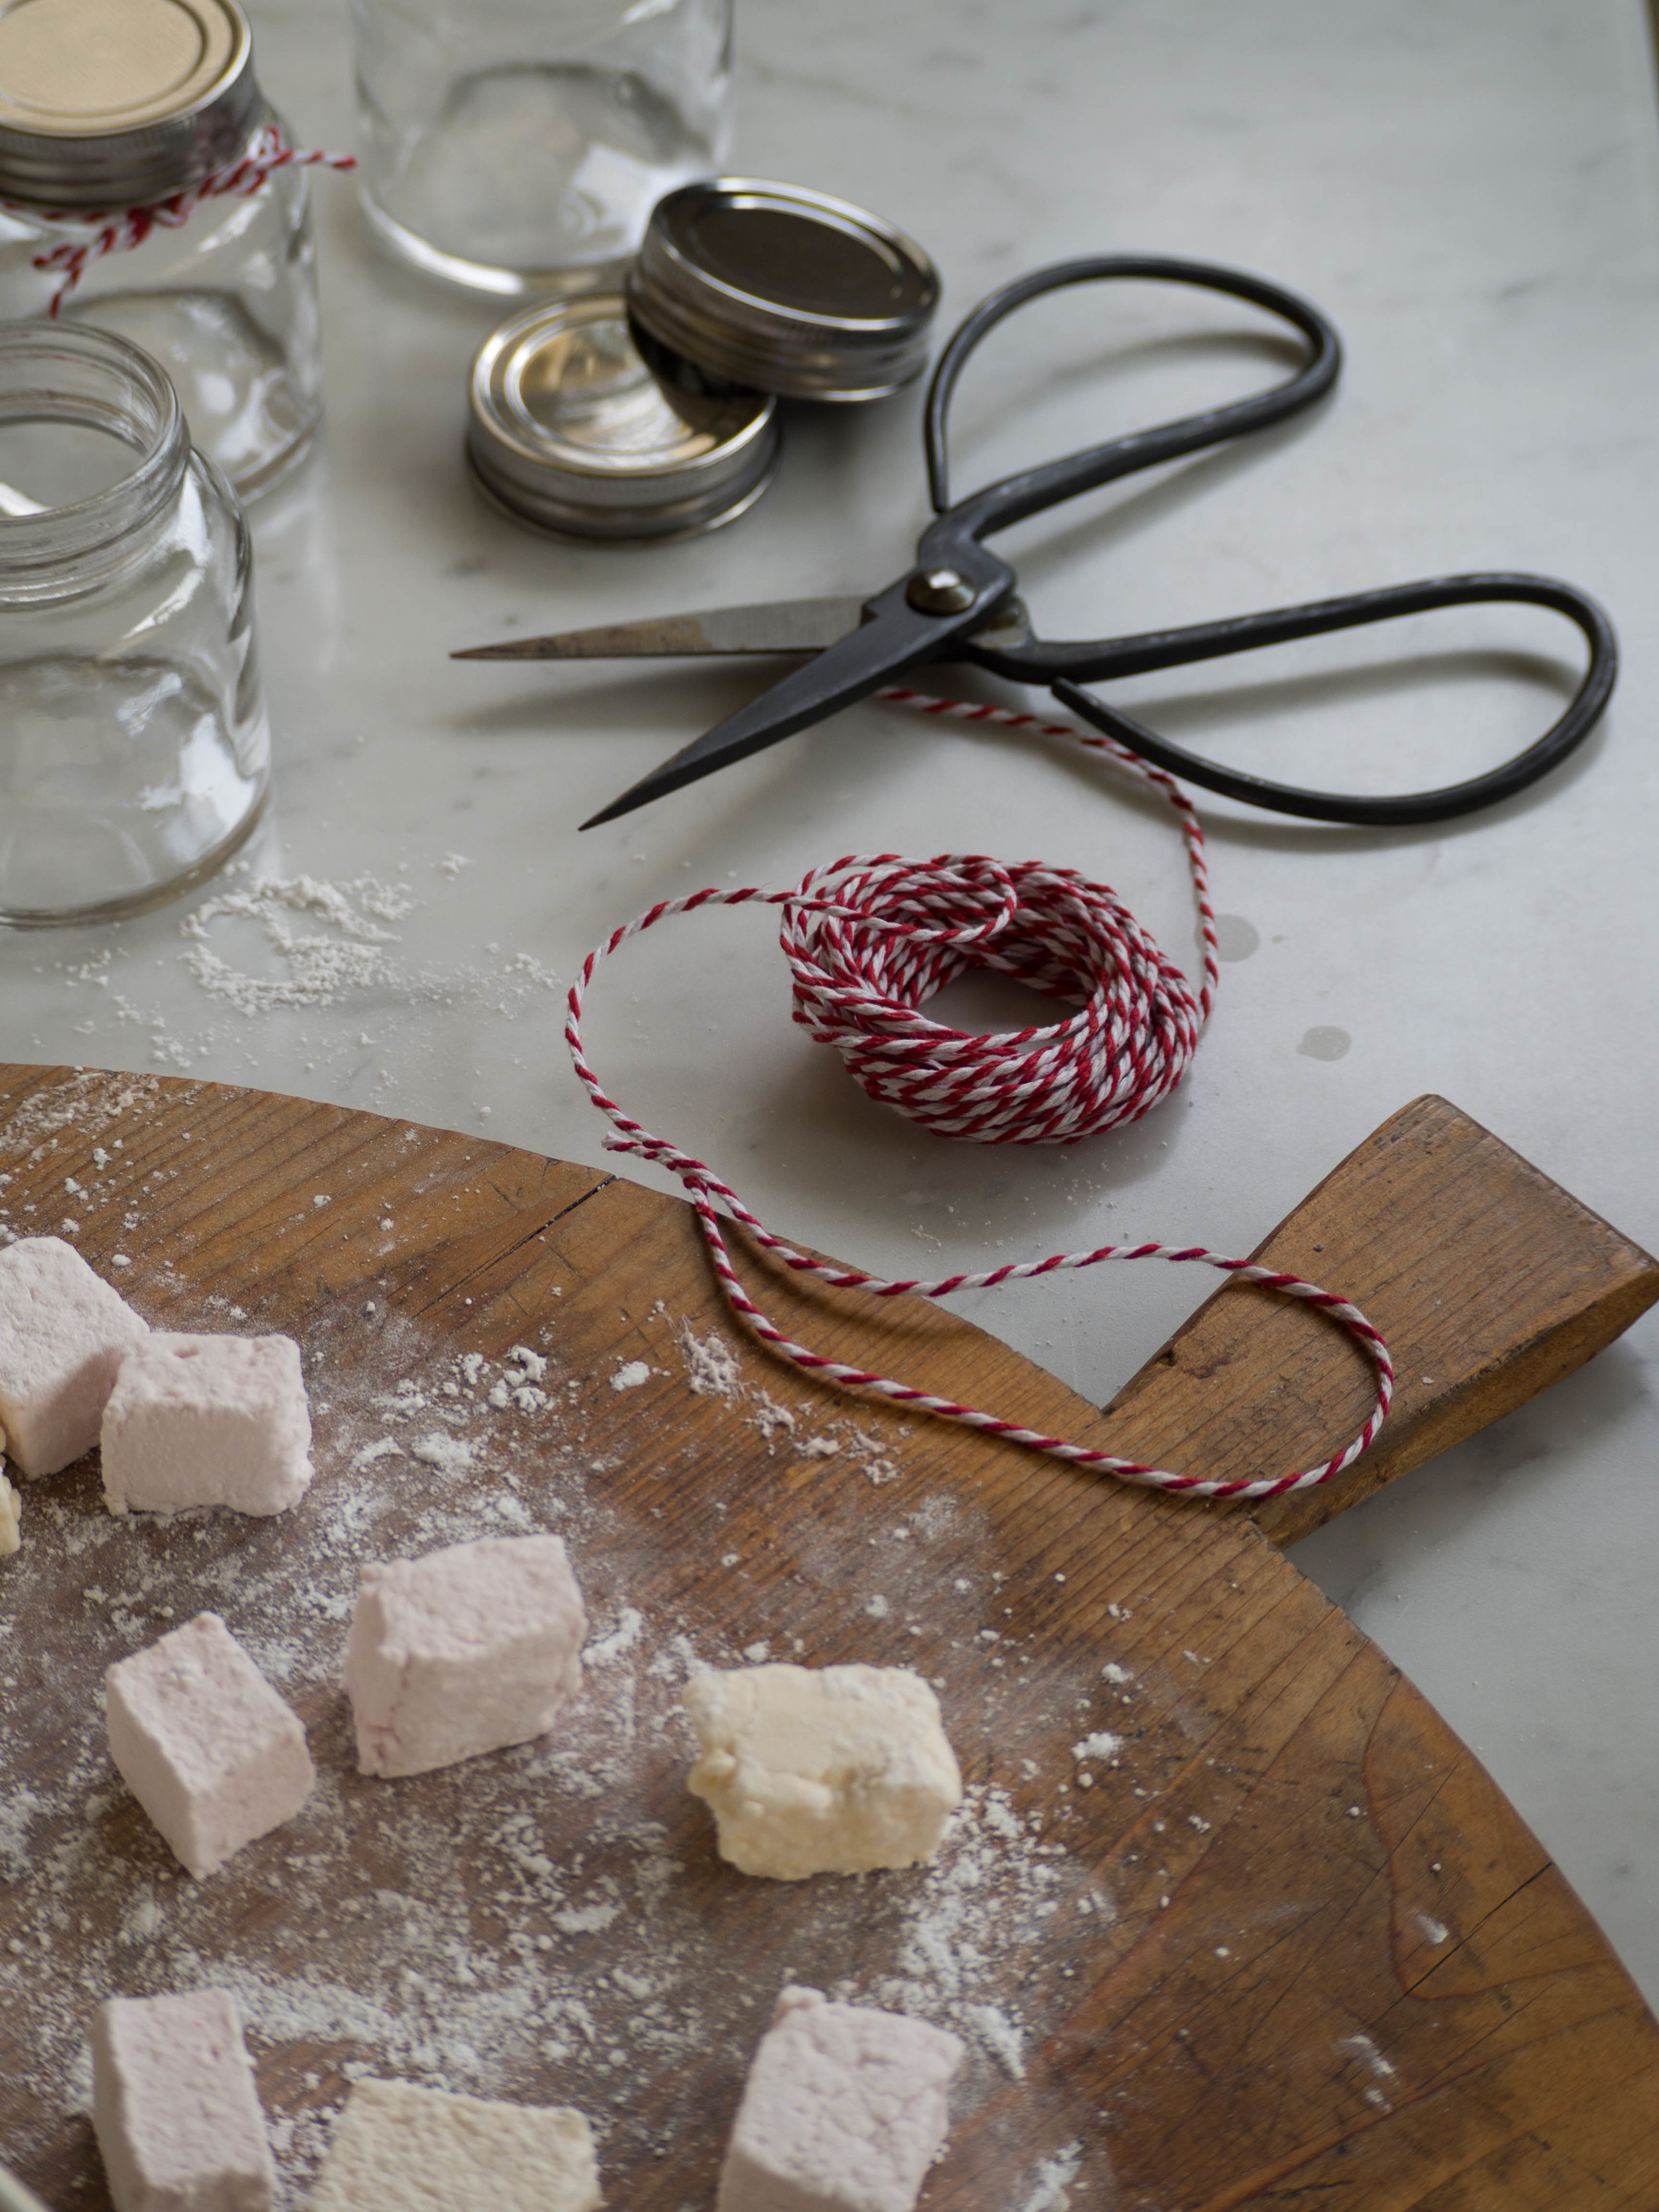
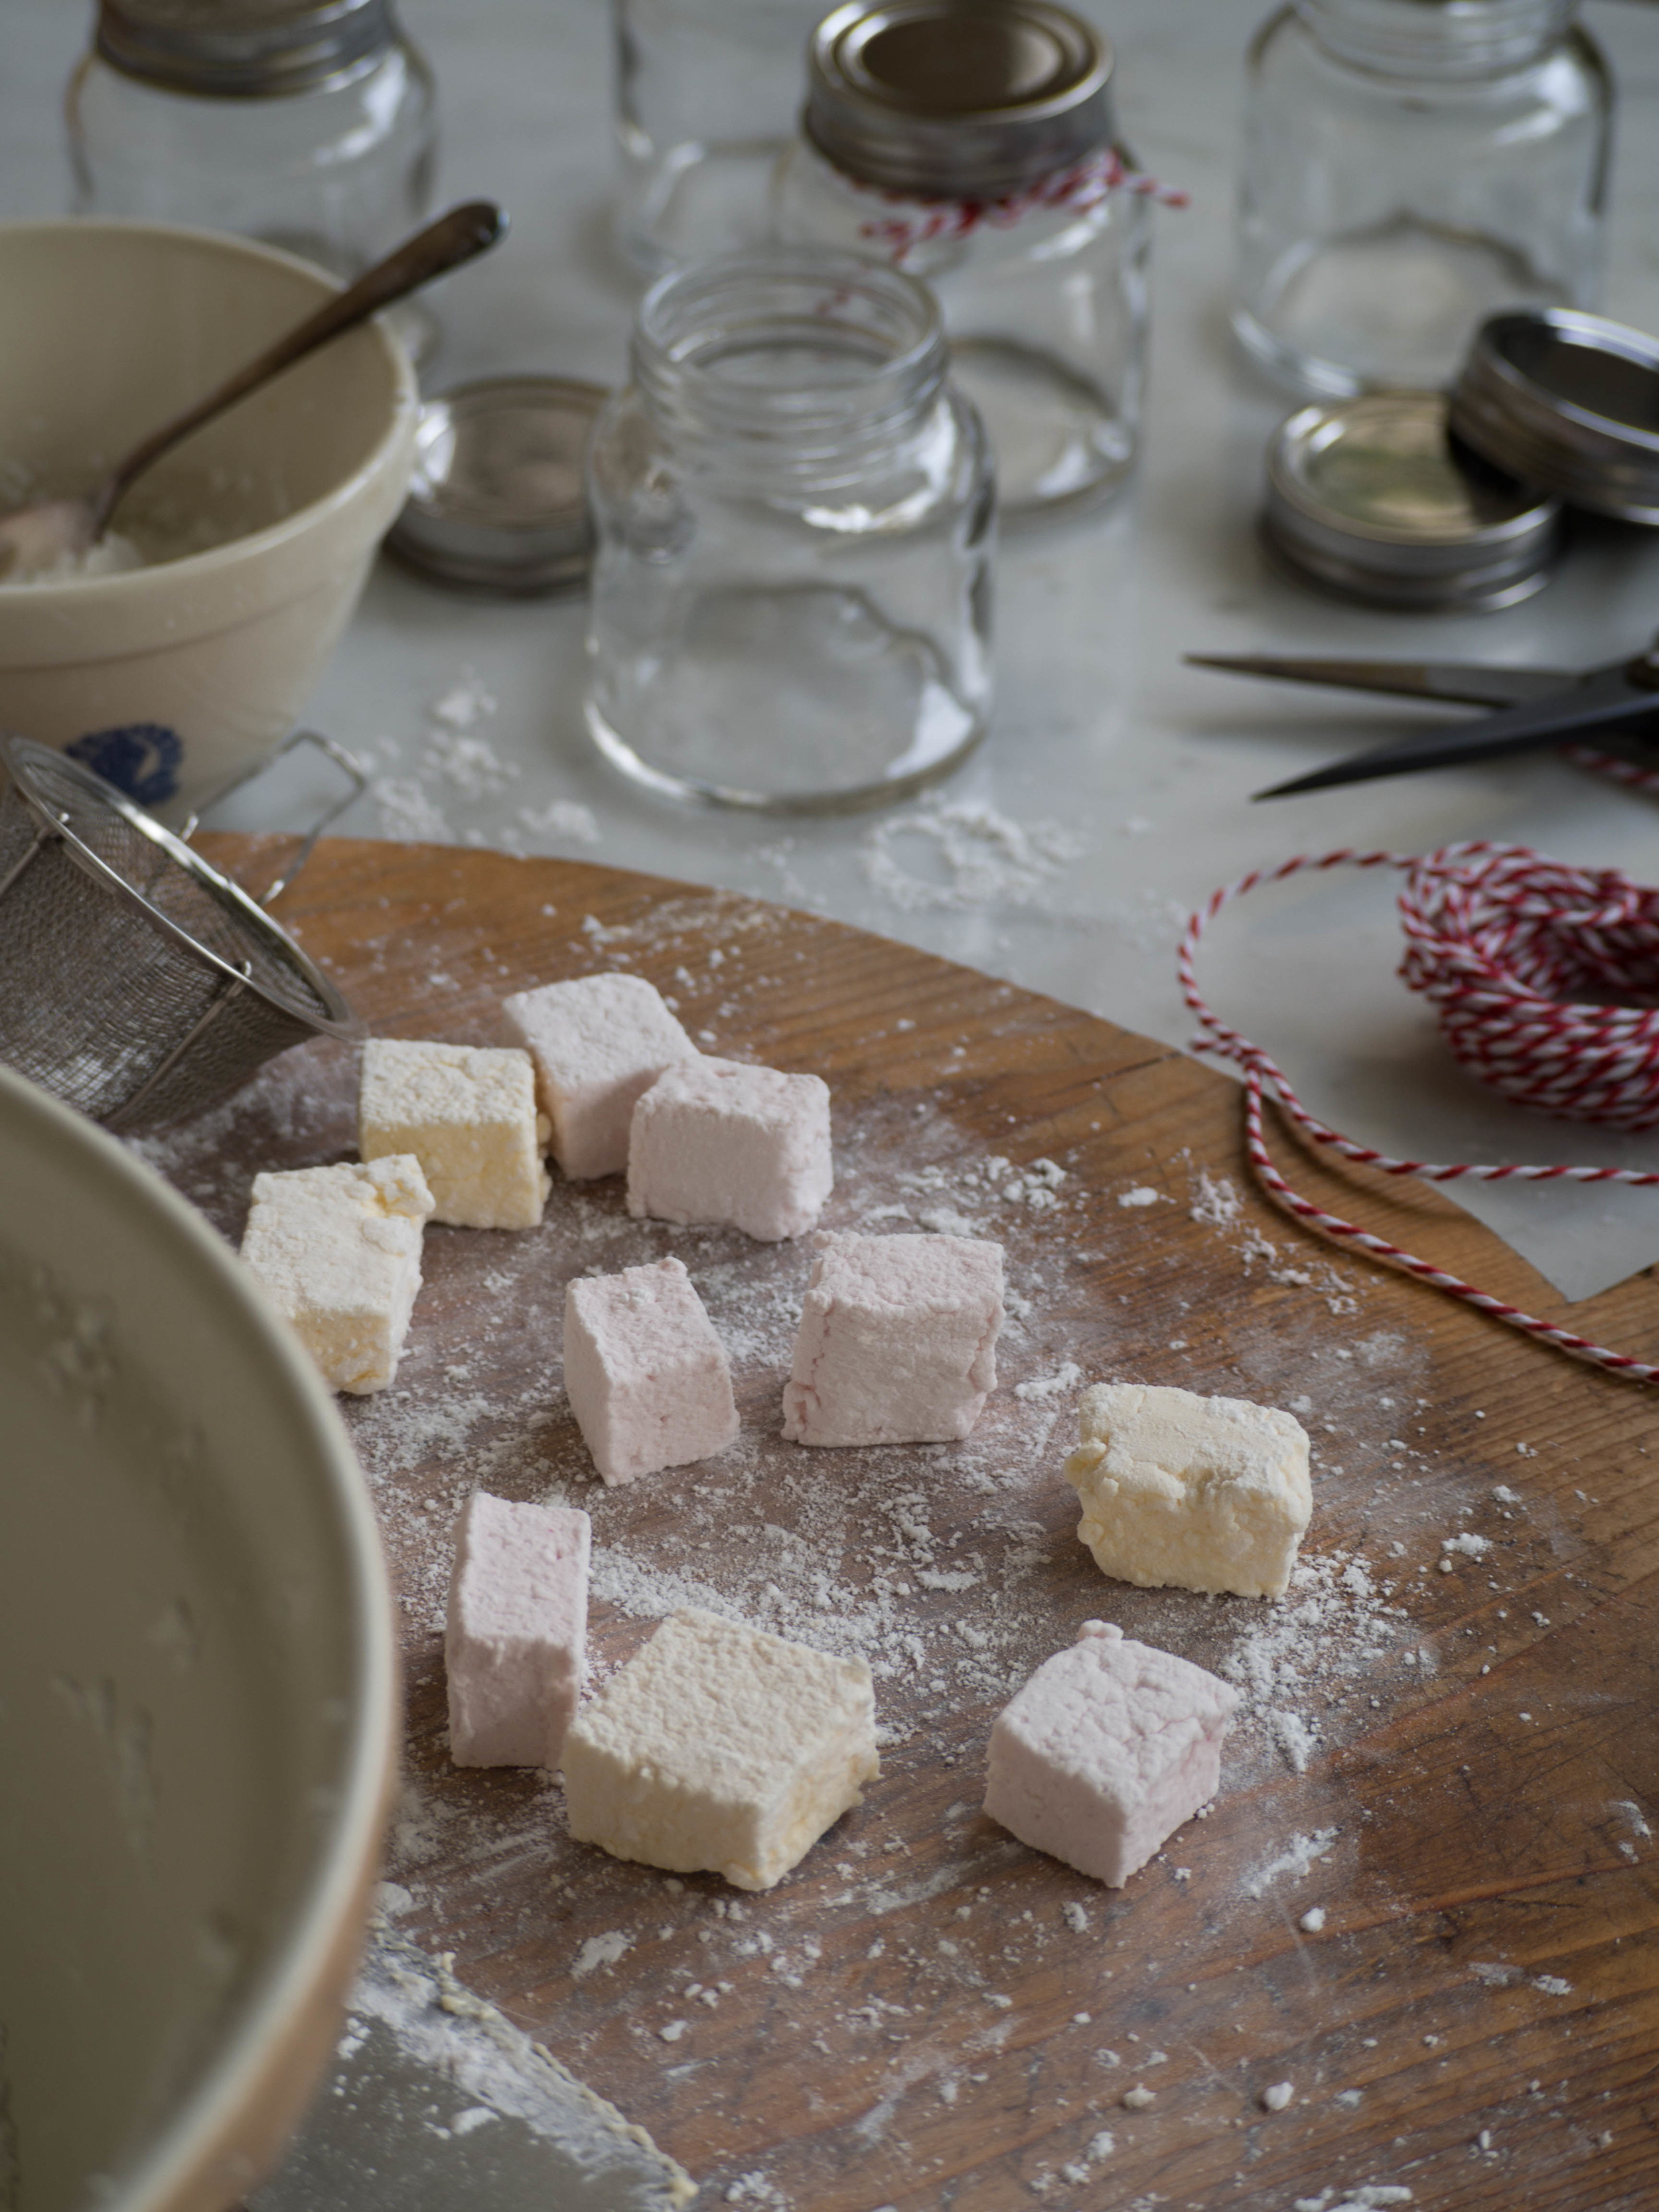
The flavour combinations are really quite endless, and I think they make cute gifts (cue impending holiday season!). The flavour of the marshmallows develops a lot after a day or so, so I would recommend making them a day or two in advance before giving them as gifts. They also require tossing in the icing sugar and potato flour mix more than once over the first couple of days, particularly in humid conditions. They will otherwise absorb the first lot of icing sugar and potato flour quite quickly and become wet and sticky. And let’s face it, its always handy when you are making gifts, or just cooking generally, to have things that can be prepared in advance! 

Homemade Marshmallows

Ingredients for Raspberry Marshmallows: 

15g gelatine sheets

100g raspberry pulp

20g water

50g mild honey

240g sugar

100g egg whites

1 tsp freeze dried raspberry powder, sifted, optional

75g icing sugar

75g potato flour/starch 


Ingredients for Passionfruit Marshmallows:

15g gelatine sheets 

70g strained passionfruit pulp

40g water

50g mild honey

240g sugar

100g egg whites

1 tsp freeze dried passionfruit powder, optional

75g icing sugar

75g potato flour/starch 


Method: 

Place the gelatine in bowl of cold water, and leave to soak for 5 minutes. Then drain and set aside. 

Place the egg whites in a bowl, and have everything ready to whip them once the sugar syrup starts to heat up (see following step).

In a large saucepan heat, the raspberry pulp or passionfruit pulp, water, honey and sugar until it reaches 114 degrees Celsius on a sugar thermometer. The sugar syrup will start rapidly boiling and increase in size, so make sure you use a large enough saucepan. This shouldn’t take too long, so once the mixture starts to increase in temperature, start whipping the egg whites on a low/medium speed.

Once the sugar mixture has reached 114 degrees Celsius, and the egg whites are whipped to stiff peaks, gently fold the sugar mixture and gelatine in to the egg whites. 

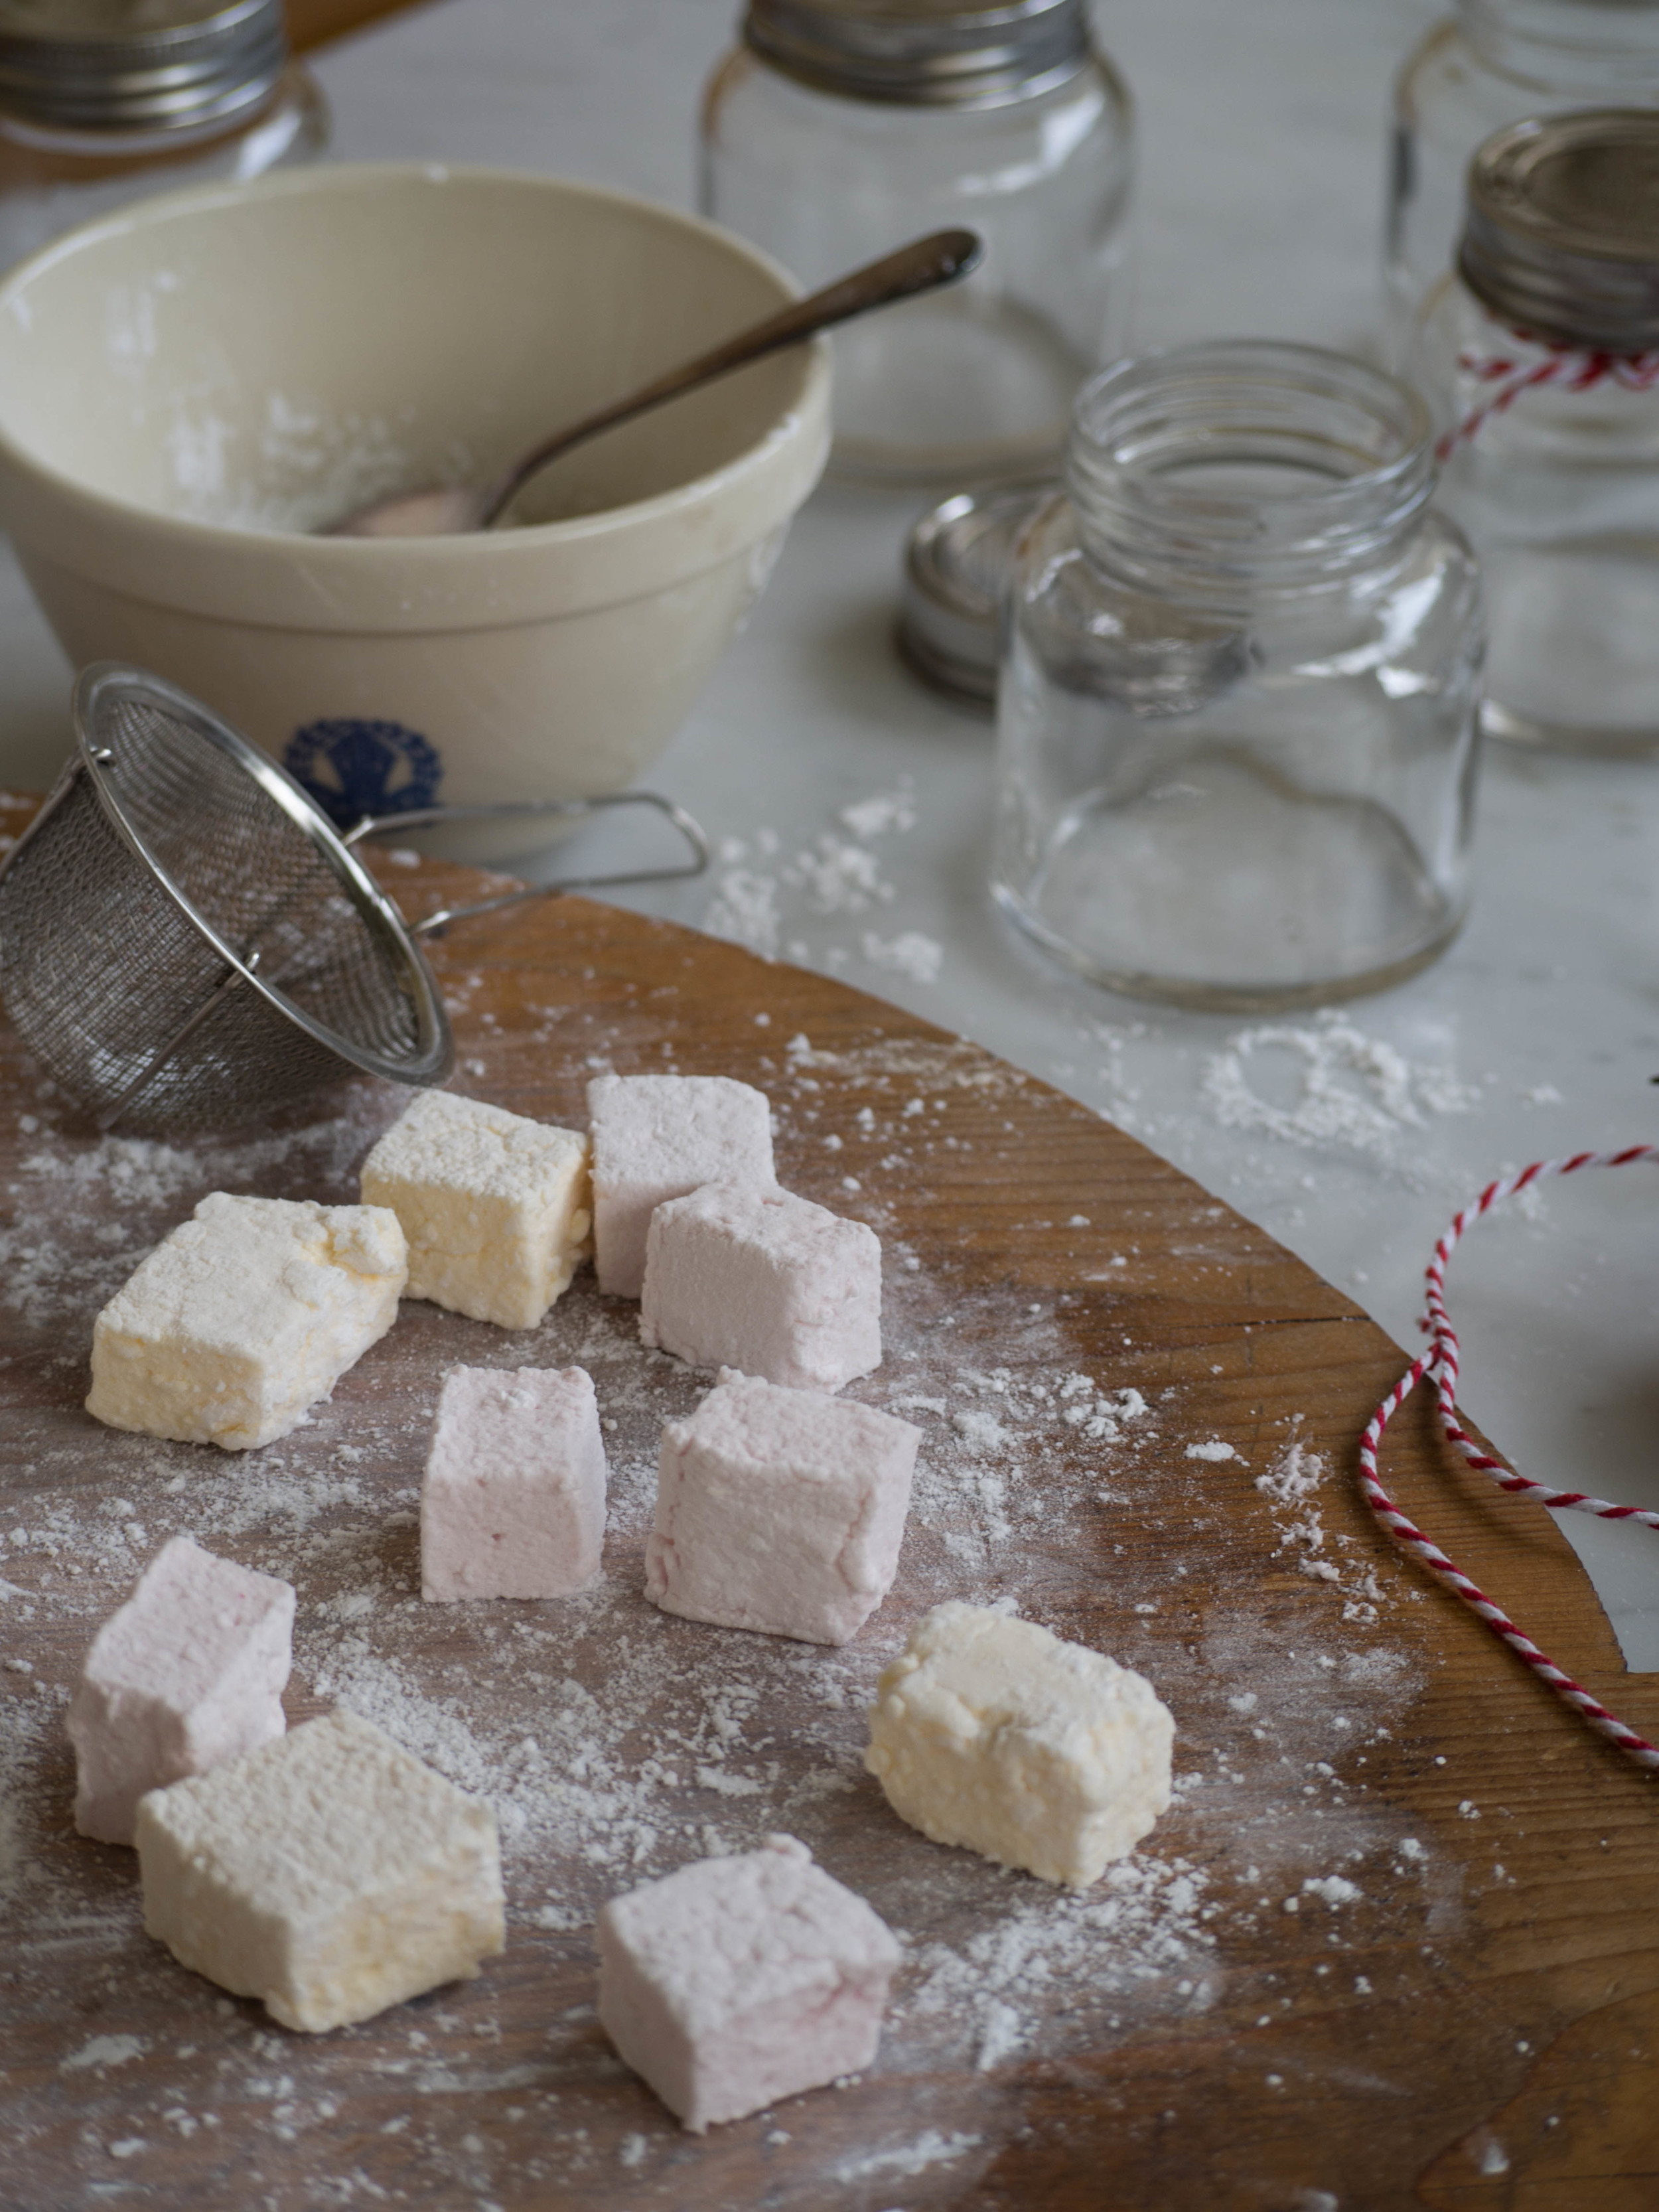
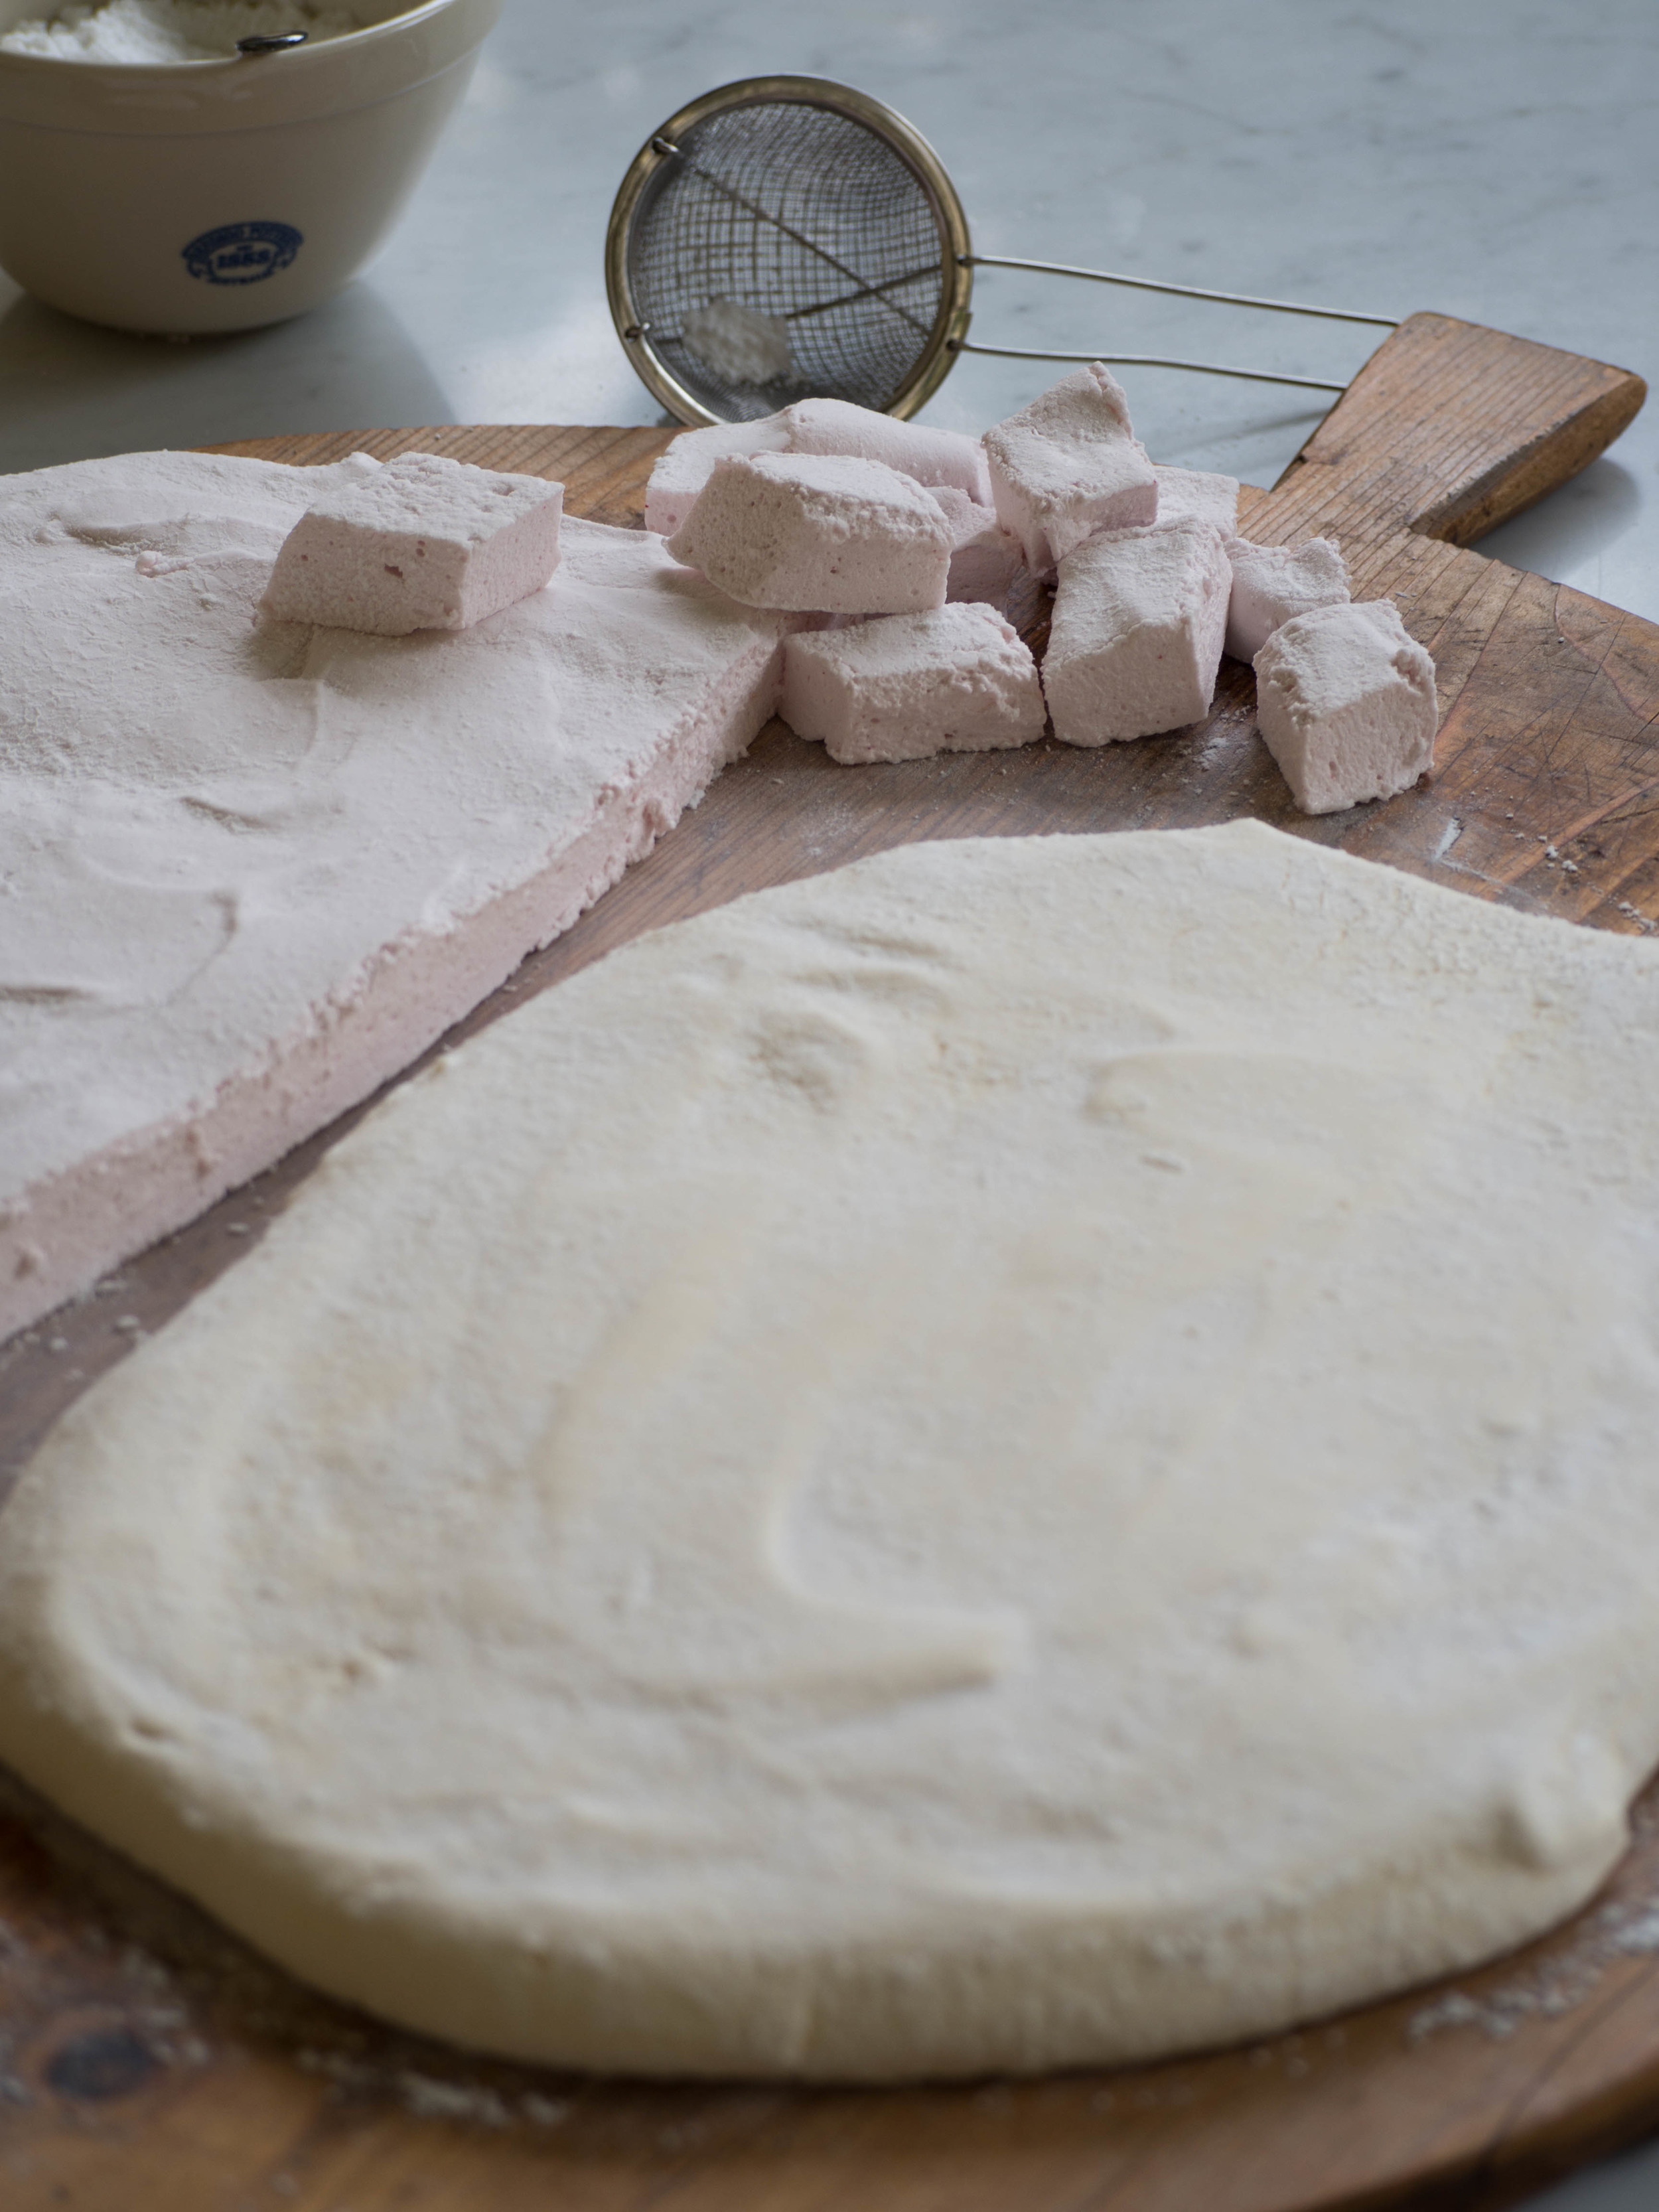
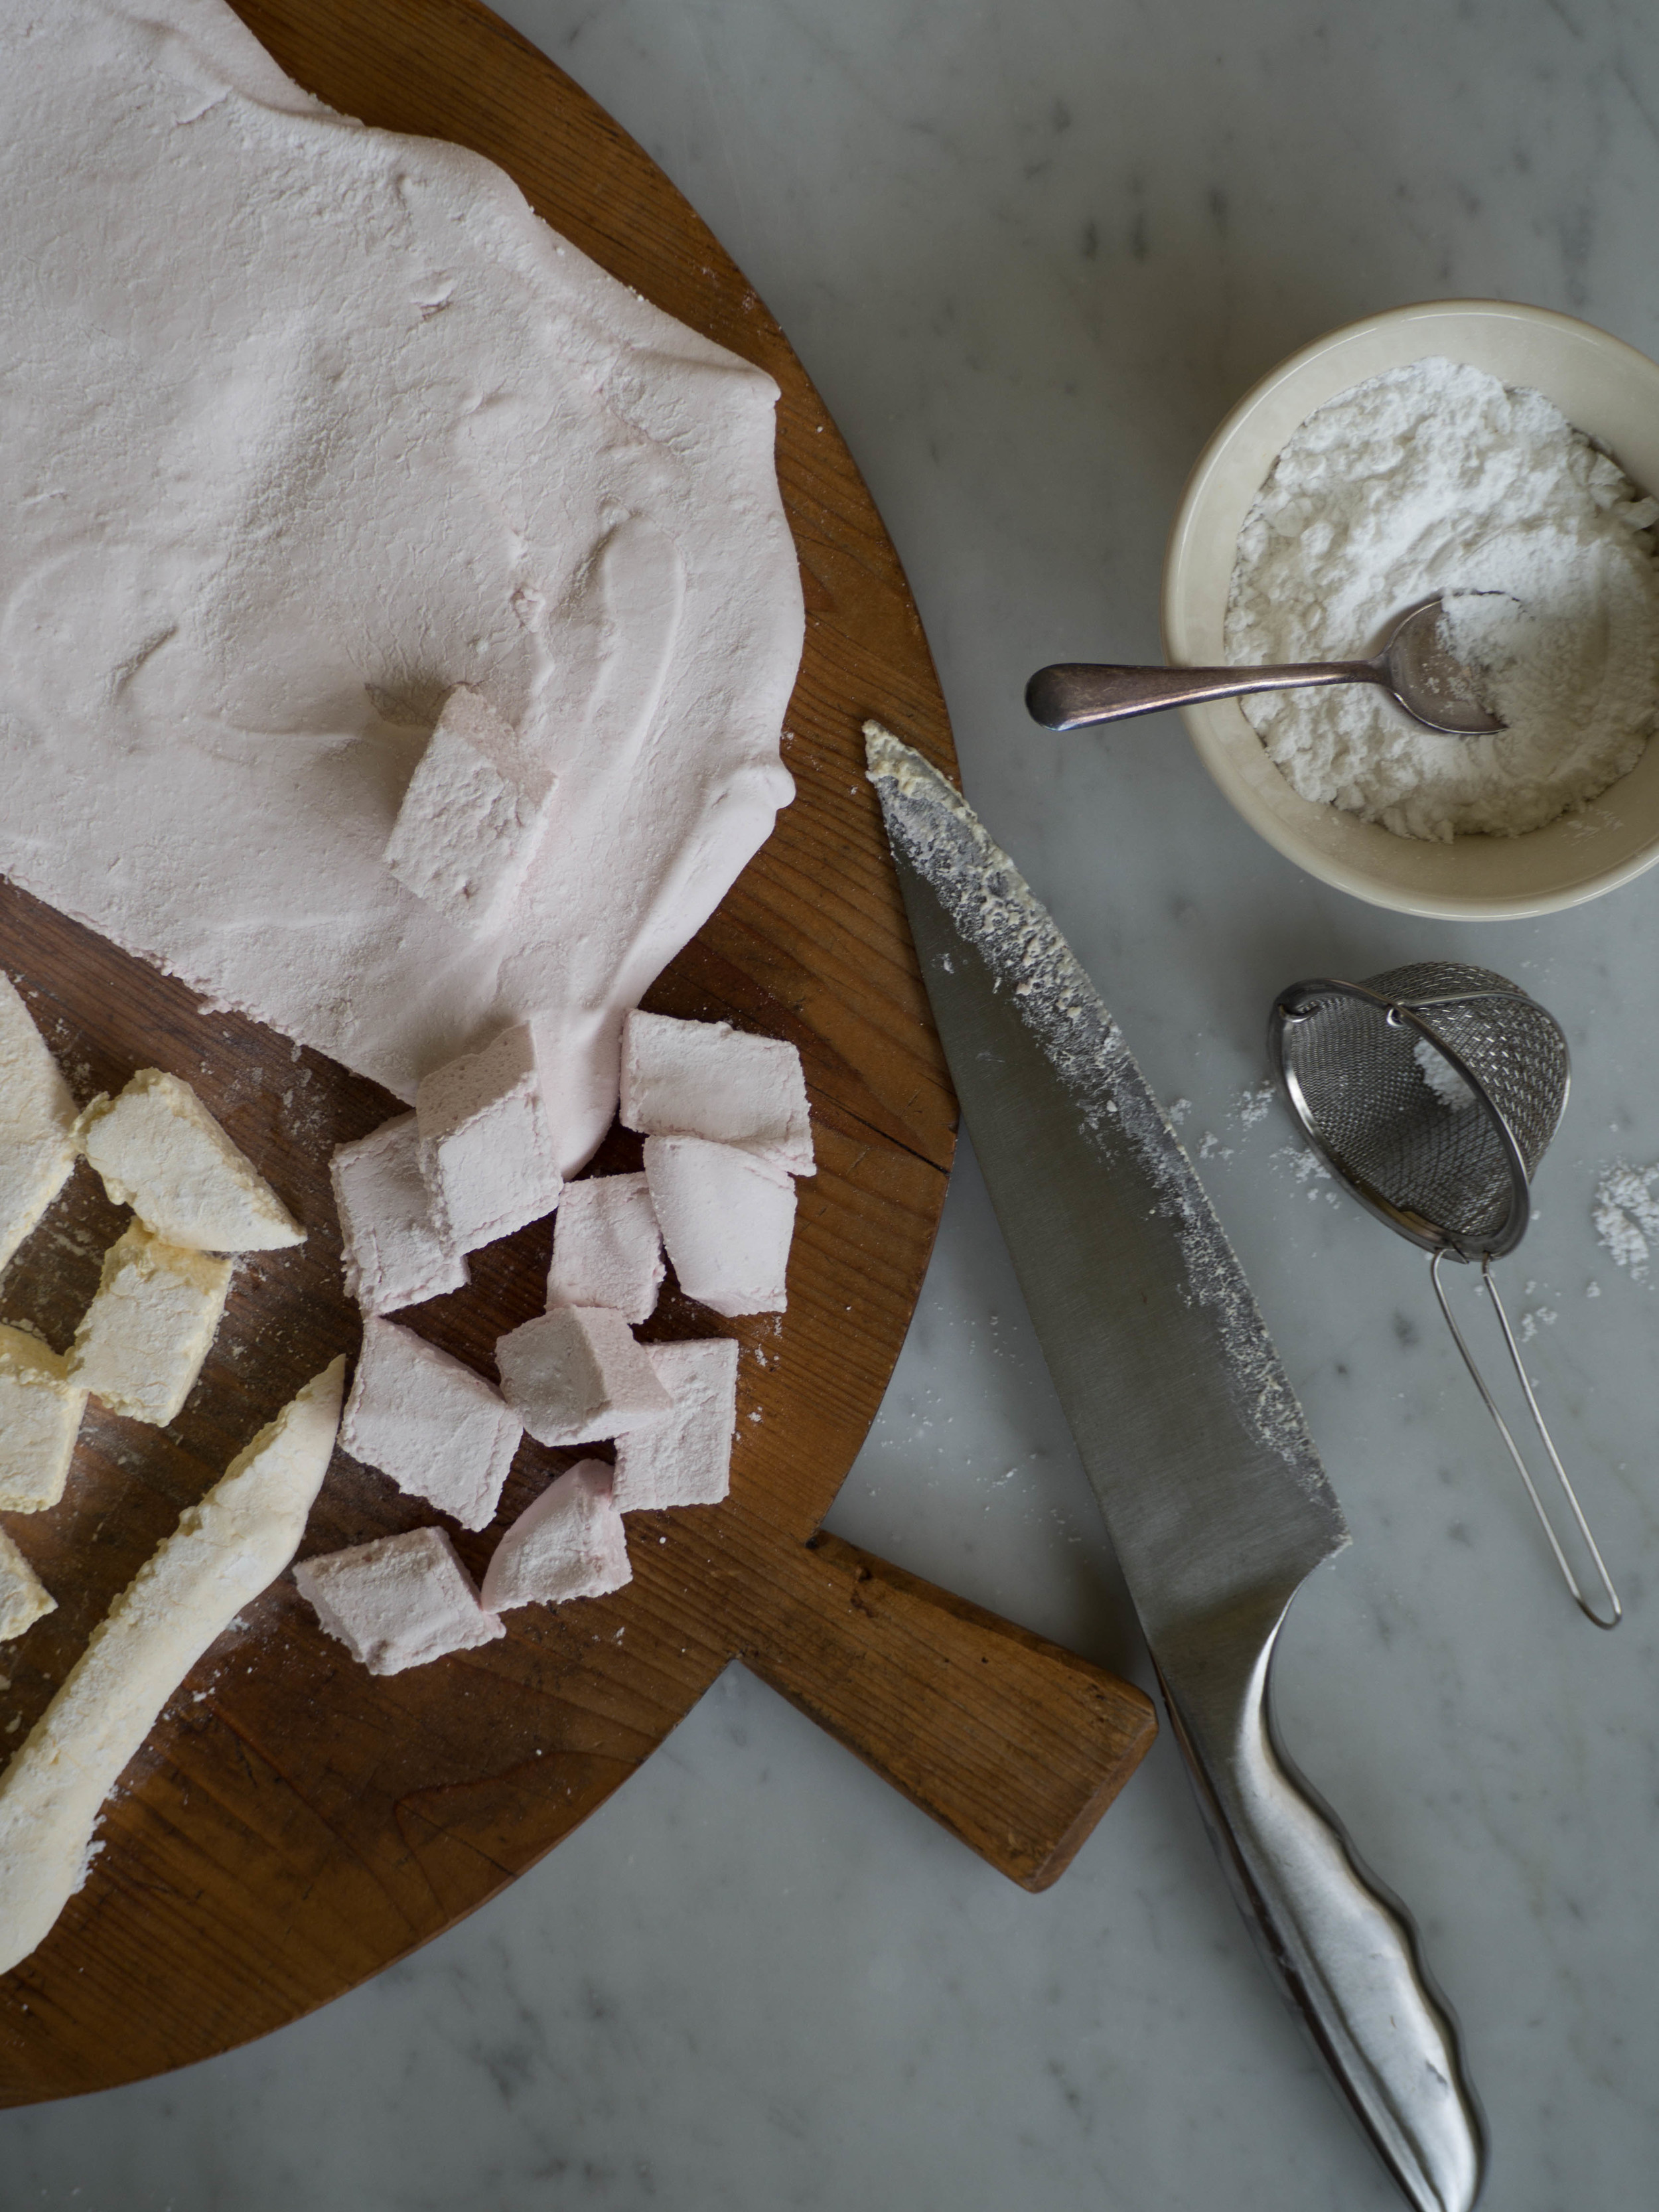
Increase the speed of the mixer (medium to high speed), and allow the marshmallow to thicken and cool. This will take a few minutes. Add the freeze dried raspberry powder or passionfruit powder, if using, and continue to whip the marshmallow until it has cooled to at least 40 degrees Celsius. Whilst the marshmallow is thickening and cooling, lay a sheet of baking paper on a clean dry surface and generously dust with combination of the icing sugar and potato flour. 

Once the marshmallow has thickened and cooled, pour it onto the prepared surface and spread into a rectangular shape, about 1.5-2cm in thickness. Dust with more icing sugar and potato flour, and leave to set. 

I found it didn’t take very long for the marshmallow to set, but leave it about 30 mins to be sure - it will be set when it bounces back when pressed and the outside area dusted with the icing sugar and potato flour is no longer sticky. You may need to dust the marshmallow more than once depending on the humidity. 

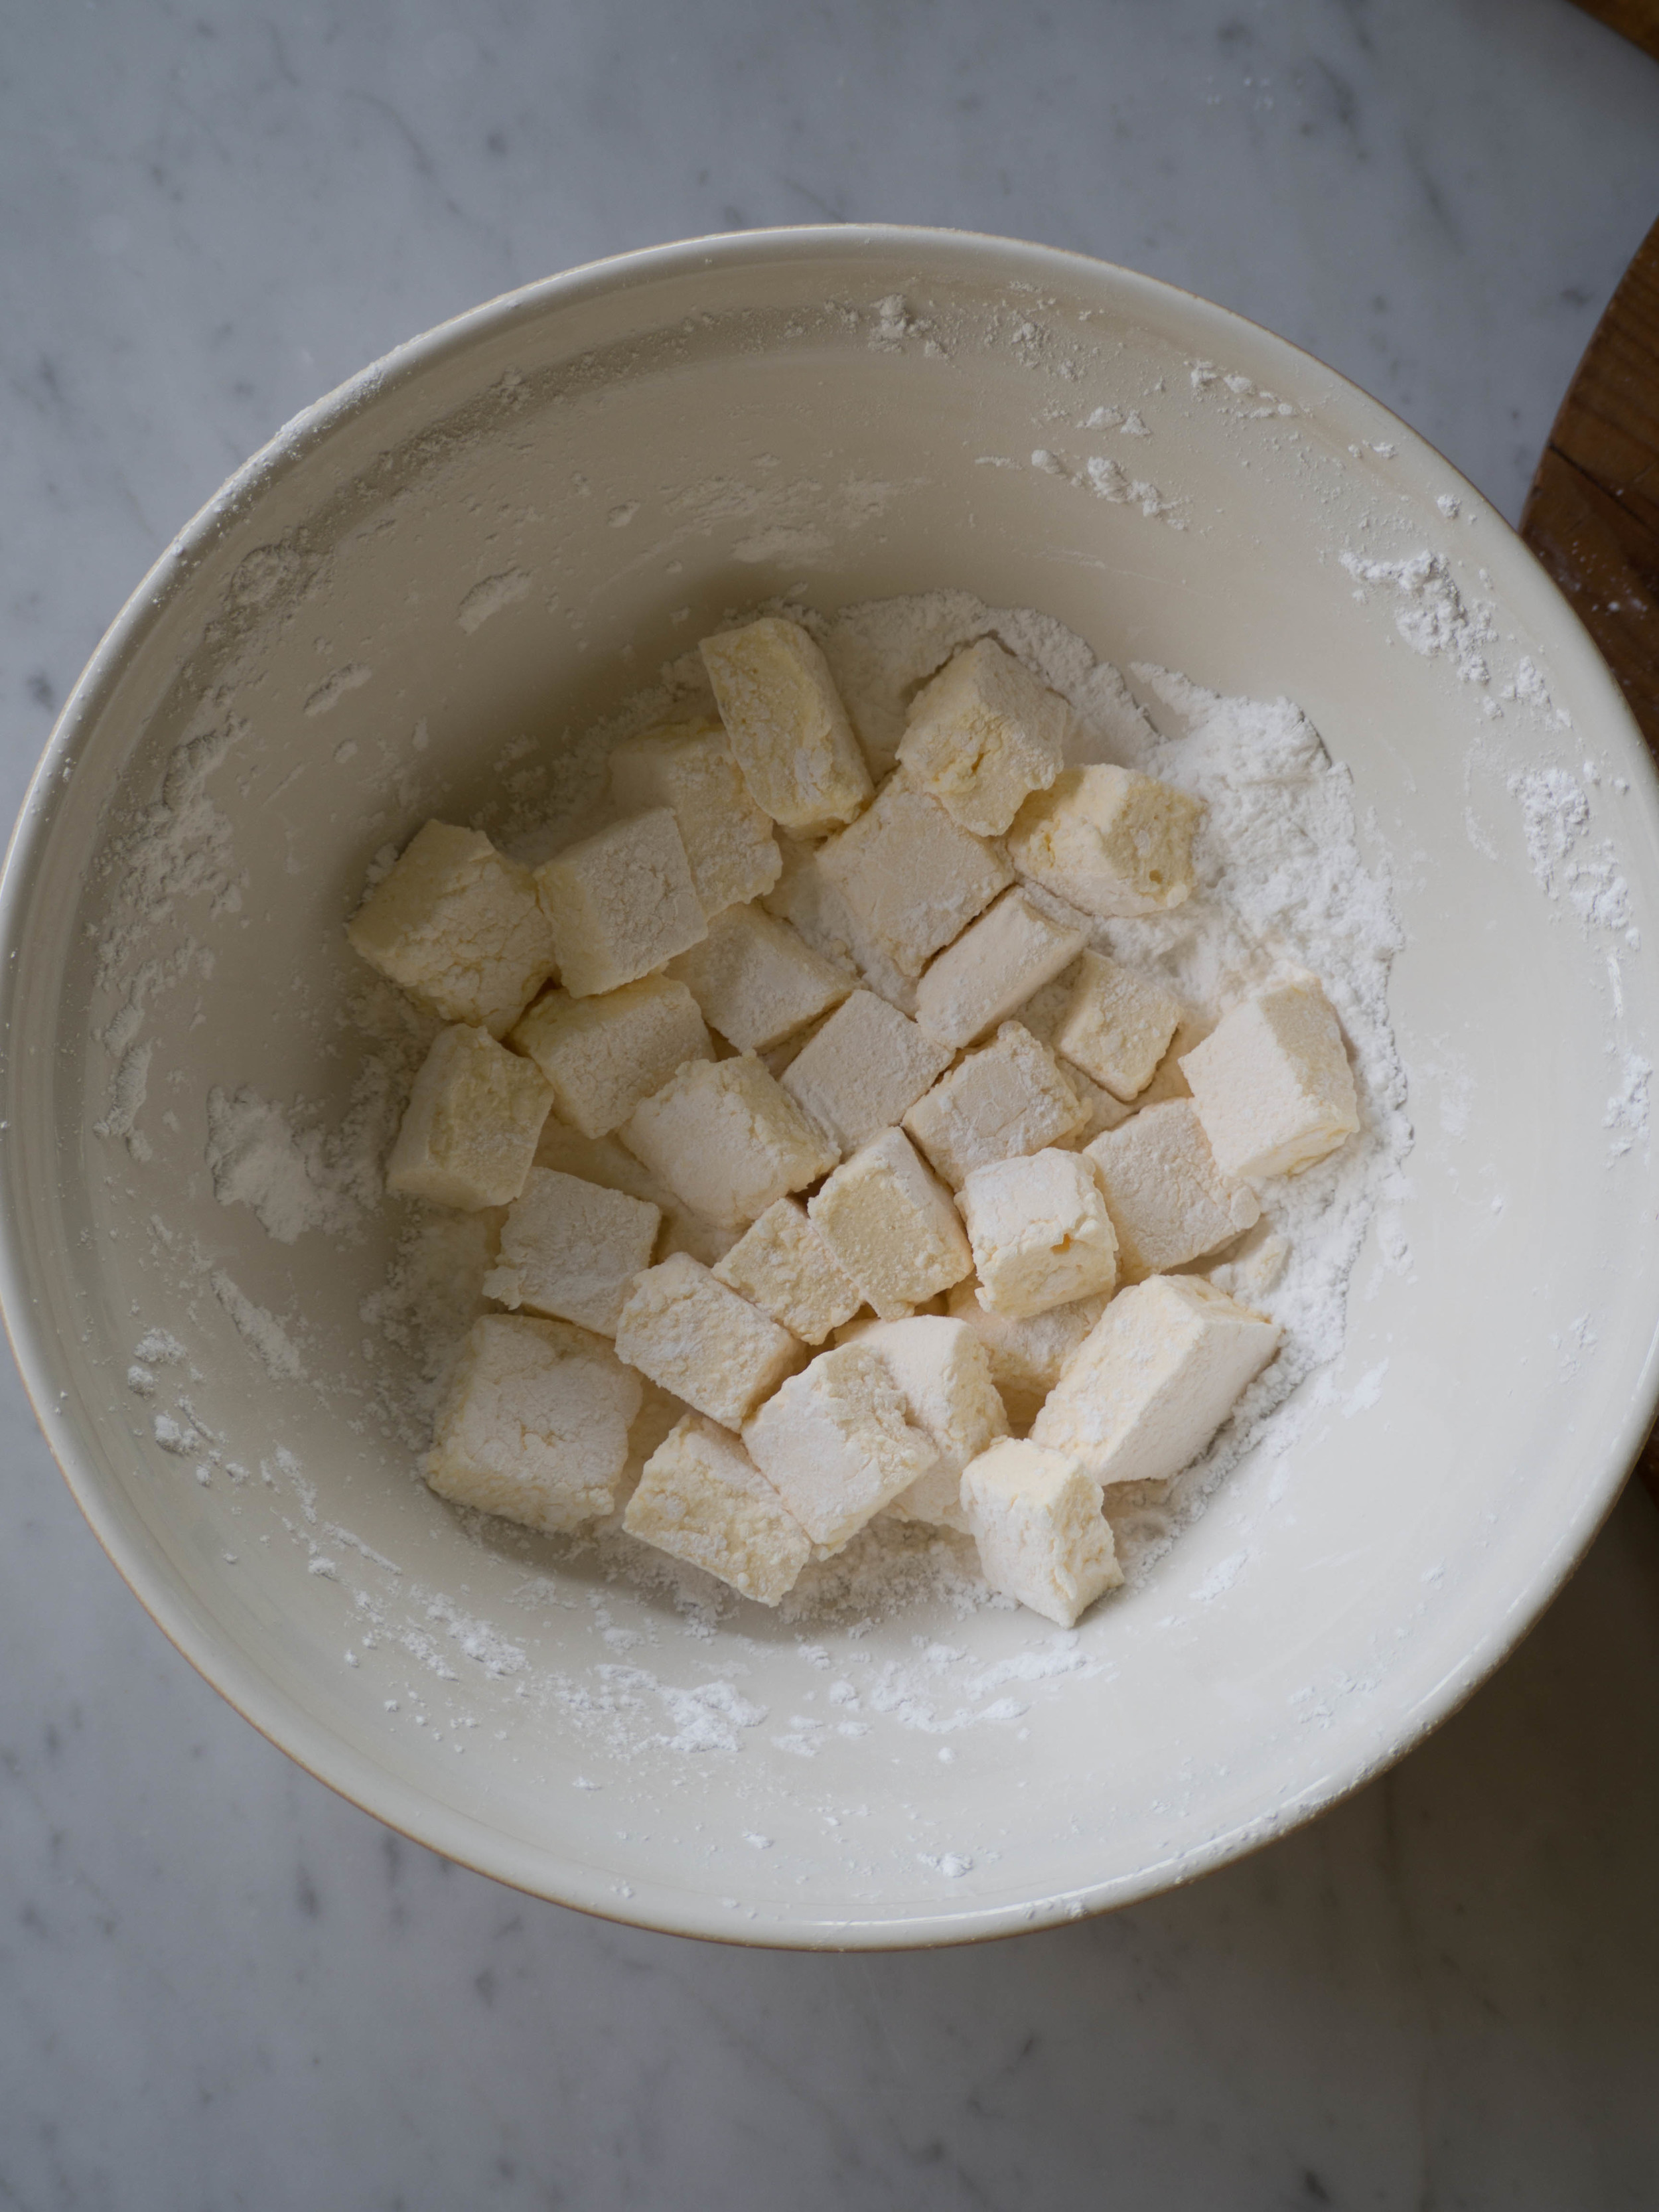
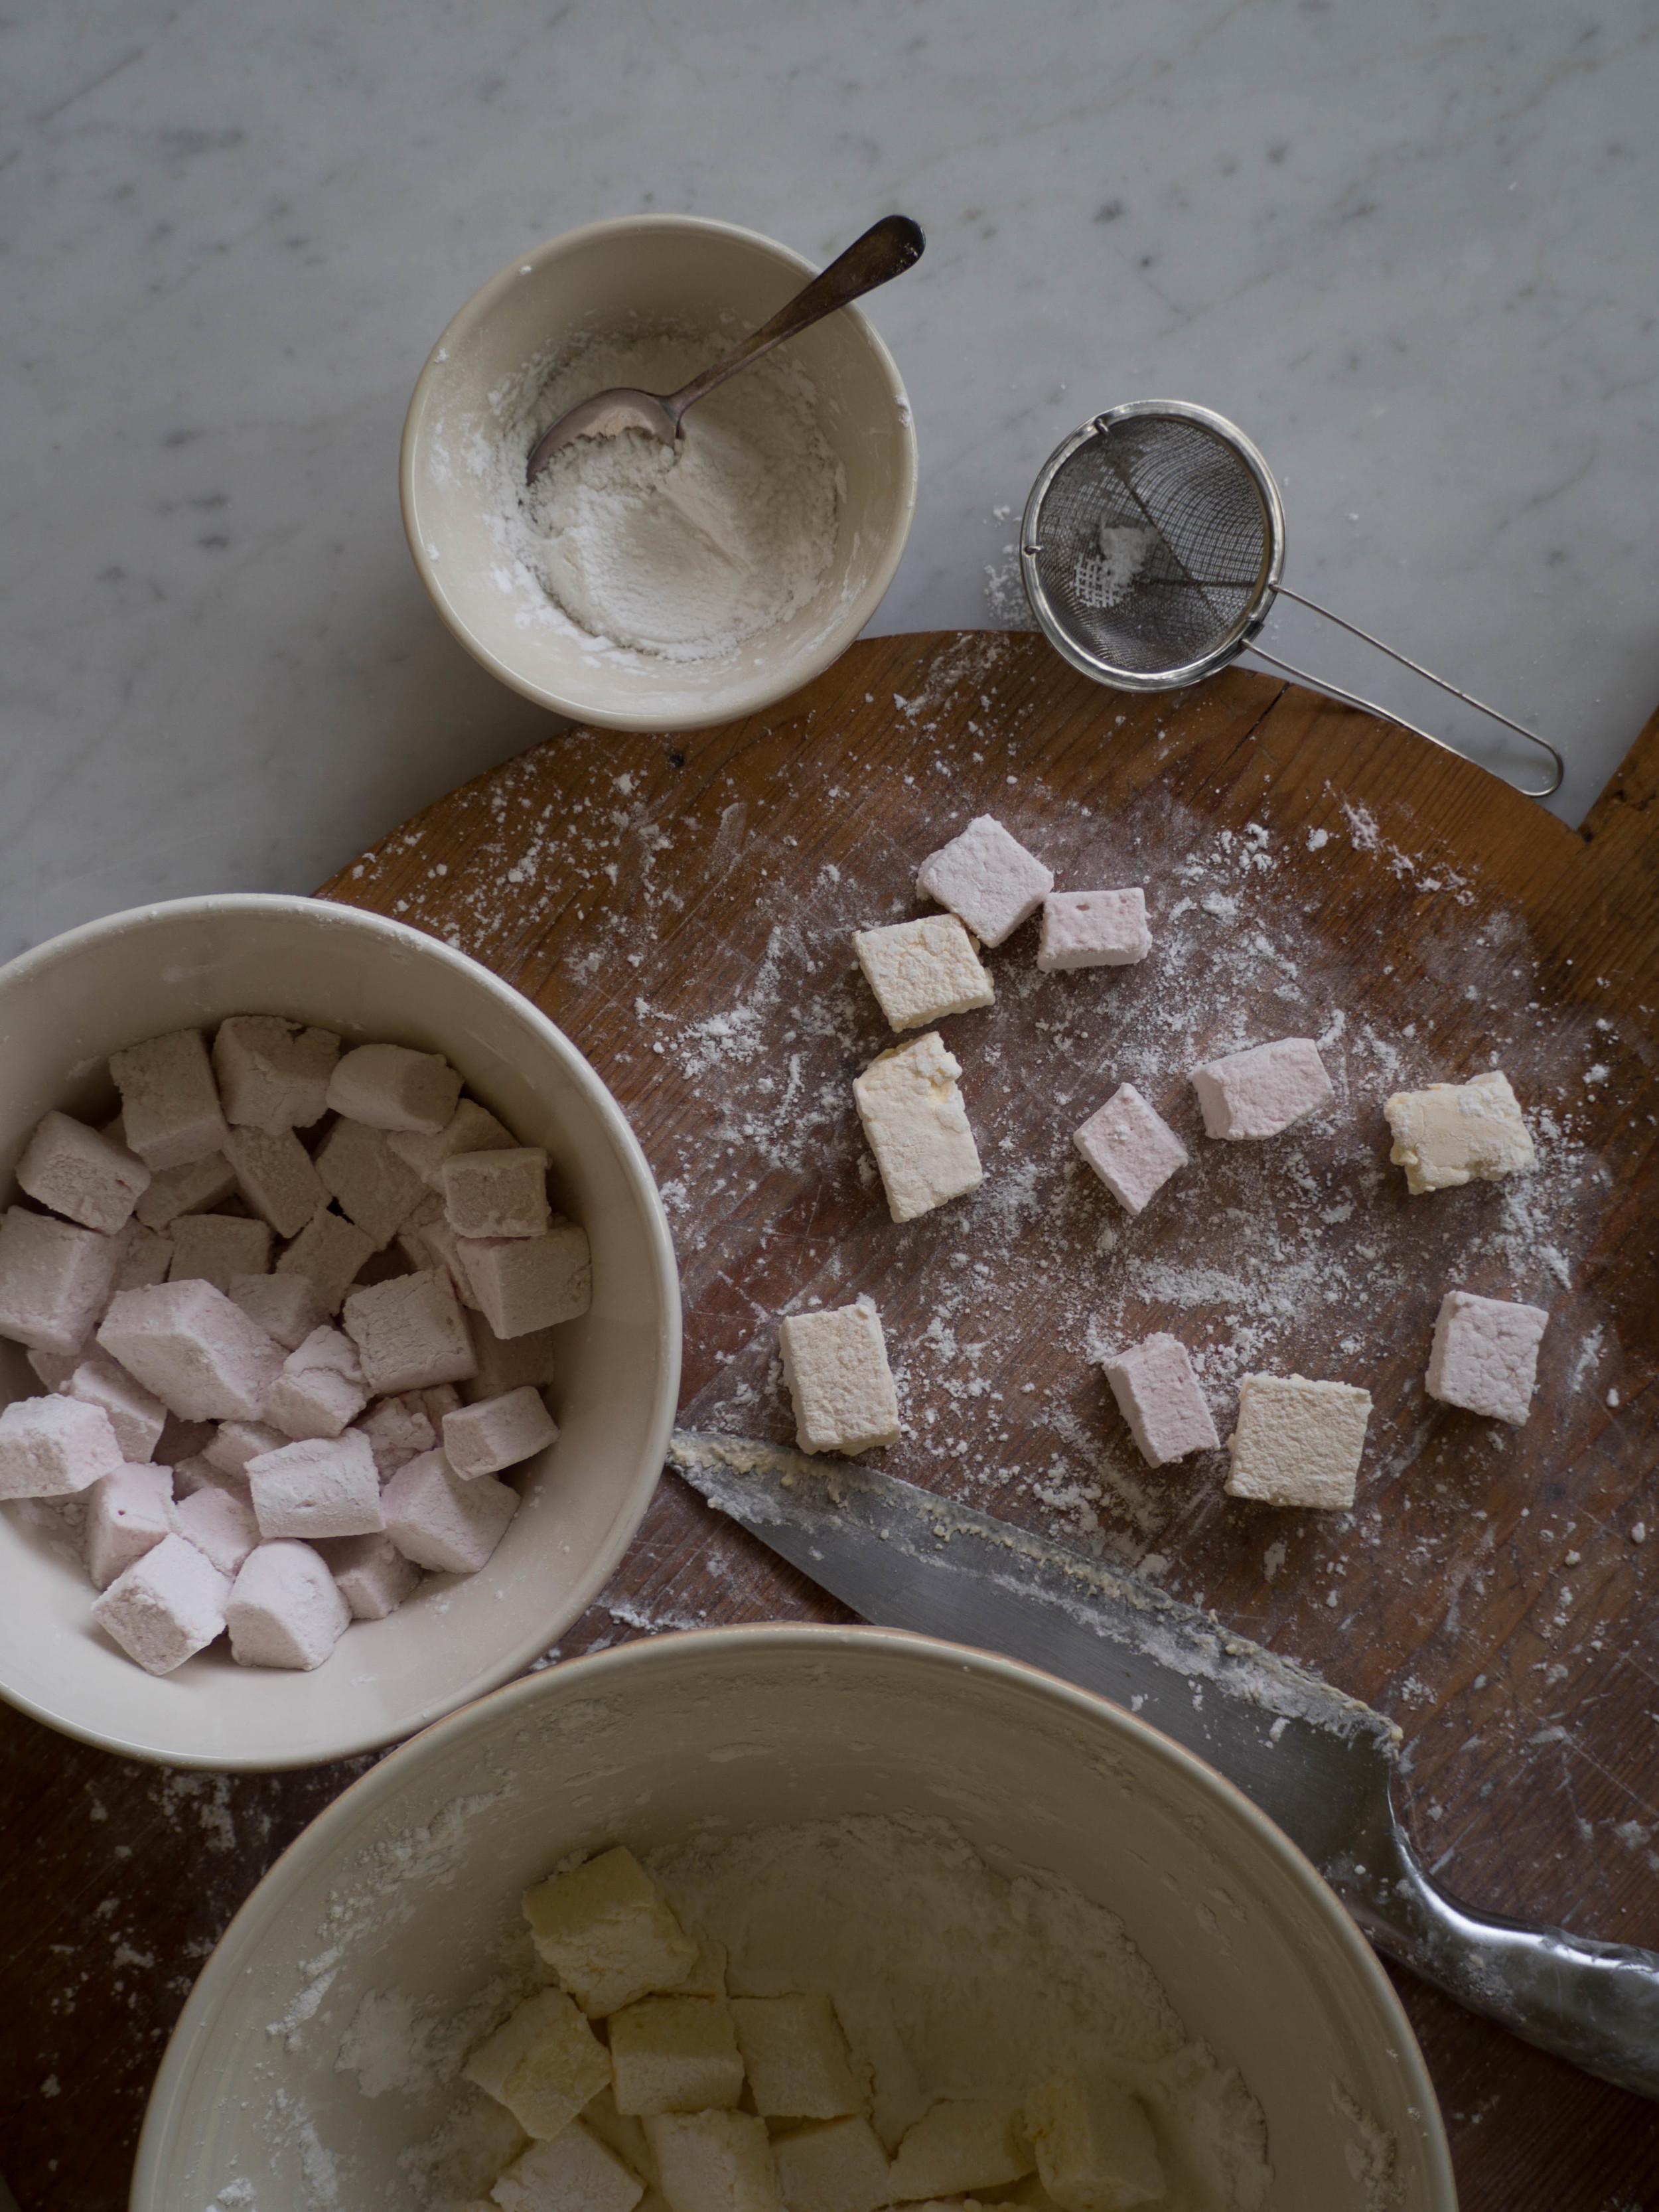
Once the marshmallow has set, cut into cubes, and toss cut marshmallows in a bowl filled with icing sugar and potato flour. Cut cubes of marshmallow may need dusting a couple more times as the first lot tends to be absorbed after a few hours (particularly in humid conditions). Keep a bowl or container of the icing sugar and potato flour handy so the marshmallows can be re-dusted if needed. 

Reference: ‘À La Mère de Famille: Artisanal Recipes’ by Julien Merceron (2013, Hardie Grant Books), pp.108-112. 

In Holidays, Confectionary Tags marshmallow, Raspberries, Passionfruit, confectionary, Christmas, edible gifts, A La Mere de Famille, Gluten Free, Dairy Free
Comment

Peggy Porschen London + How to Make Peggy Porschen Style Easter Biscuits

Kath April 27, 2015

I made these biscuits over Easter, hence the Easter egg and bunny shapes. But they would be lovely in any shape you would like! The book the recipe is from ‘Cookies’ by Peggy Porschen, has many wonderfully suggestions on what shapes to use and how to decorate the biscuits. Most of the biscuits are intricate and probably require a bit more skill and patience than I am will to provide, so I decided to use sprinkles to decorate the biscuits (and hide any evidence of poor piping skills!). 

I came across Peggy Porschen, her cookies, shop and books, via Sweet Bake Shop, who now has her own store in Canada. Peggy is based in London, and when I was there just over a year ago, Mum and I walked all the way to Belgravia to go to her shop. 

Peggy Porschen's Parlour - 116 Edbury St Belgravia, London.

Peggy Porschen's Parlour - 116 Edbury St Belgravia, London.

I think we both agreed the walk was worth it. The shop was very cute, the cakes were lovely and the tea was good too. The areas of Chelsea and Belgravia are also quite nice to have walk around in as well. We ate cupcakes and sipped on tea, on some outside seats in the cold, but thoroughly enjoyed the experience! 

I walked away with one of Peggy’s iced biscuits, a biscuit cutter and a copy of her ‘Cupcakes’ book. This ‘Cookies’ book came out later, as was given to me for my birthday last year. There are lots of hints and tips in the book about making the biscuits and icing them, and gives step by step instructions on how to do all of it. I used the vanilla biscuit recipe, and learnt that for such ‘sugar cookies’, you should chill the cut biscuits on their trays before baking for at least 30 minutes to ensure they don’t spread in the oven. 

Tea and cake at Peggy Porschen, London.

Tea and cake at Peggy Porschen, London.

I kept the icing for these biscuits white, as I wanted to decorate them with sprinkles. If you want to add colour, add it at the first stage of the icing, before you add more water to create soft peak icing for piping the edges or flooding icing to fill the biscuits. Add a small amount of colour to the mixture, and gently mix together with a palette knife. If you want multiple colours for the biscuits, you will have to divide the royal icing up at the first stage, and add the colours separately, and continue on with the following stages for each colour. Keep a bit of the white royal icing to the side (covered with a damp cloth), so you can adjust the shades of the icing colours. 

I served these biscuits with simple flavoured milks, but now that the weather has got chillier, they would probably be best with a nice hot chocolate! 

Ingredients for the Biscuits: 

200 g unsalted butter, softened

200 g caster sugar

1 tbsp vanilla bean paste 

pinch of salt

1 egg, lightly beaten 

400 g plain flour, plus extra for dusting 


Method: 

Line 3 baking trays with baking paper. 

Cream the butter, sugar, vanilla and salt in a large bowl until combined. Beat the egg in a glass or jug, and add slowly to the butter mixture. Mix until well incorporated. Sift in the flour and mix until just combined. Pull the dough together, and wrap in cling film and chill in the fridge for at least 30 minutes. 

Place the dough on a lightly floured surface and knead briefly. Roll the dough out, until it’s about 4-5mm thick. 

Cut out shapes with biscuit cutters, and place on the prepared trays. Once all the dough has been used, place the trays in the fridge so the dough can chill for a further 30 minutes before going into the oven. 

Pre-heat oven to 200 degrees Celsius. 

Bake the biscuits for 8-10 minutes, or until they are slightly golden around the edges and spring back when lightly touched. You may need to rotate the trays in the oven to evenly bake all the biscuits. 

Place on a wire rack to cool. 

Ingredients for the Icing: 

500 g icing sugar, sifted

small squeeze of lemon juice 

2 egg whites 

sprinkles to decorate


Method: 

In a large clean bowl of an electric mixed, place the icing sugar, lemon juice and three-quarters of the egg whites. 

Mix on the lowest speed until the ingredients are well combined. If the mixture is too dry add more egg white. The mixture should be smooth but not wet. Scrape down the sides of the bowl after a couple of minutes, to ensure all the ingredients mix together properly. If the mixture is too runny, add a little more sifted icing sugar. 

Continue to mix on the lowest speed for 4-5 minutes, ensuring the mixture doesn’t become too aerated. The mixture will be ready when stiff peaks form around the edges of the bowl, and has a smooth satiny texture. 

To get the icing to a pipe-able consistency, run a palette knife under water and use to mix the icing. The icing should become glossier and the peaks should be softer. 

Place some of the royal icing in a piping bag, with either a small nozzle or a small cut at the end. Cover the remaining royal icing with a damp cloth so it doesn’t dry out. 

Draw an outline around the edge of each biscuit shape with the icing in the piping bag. 

Now the remaining royal icing needs to be made into ‘flooding’ icing. Add a little water to the mixture, and mix with a spatula. The icing will flow, become shiny and flatten out within a few seconds after it has been mixed (i.e. it will no longer ‘hold its peak’ in any way). Tap the bowl on a bench or table to remove any air bubbles, then fill another piping bag with the icing. This piping bag should have a slightly bigger nozzle, or a slightly larger hole cut at the end. 

If decorating with sprinkles, have a shallow bowl filled with the sprinkles ready, so you can dip the biscuits into it while the icing is still wet.

Flood each biscuit with the icing, keeping within the border you have already piped. Don’t over fill the bordered area of the biscuit with flooding icing or it may run over the piped outline. You may need to use a small palette knife or cocktail stick to push the icing in to small corners of the biscuit. Dip the biscuits (icing side down) in to the sprinkles.

Leave to dry for a few hours (or overnight), or until the icing has dried hard. 

Original recipes from ‘Cookies’ by Peggy Porschen (Quadrille Publishing, 2014), pp.8 & 56-60.

In Travel, Biscuits/Cookies, Holidays Tags Peggy Porschen, Biscuits, Cookies, London, Easter, Sprinkles, Royal Icing
Comment

Easter 2015

Kath April 9, 2015

For this post I wanted to do a little re-cap of the Easter weekend, particularly the baking! Any recipes mentioned will be or are posted on the blog. 

This year I made it my mission to try as many different types of hot cross buns as I could. I didn’t get to every bakery I wanted (fingers crossed for next year), but I tried a few, as well as making my own. 

Homemade Hot Cross Buns - Recipe Here

Homemade Hot Cross Buns - Recipe Here

I went to Black Star Pastry at the Powerhouse Museum a couple of times, and tried their Frankincense glazed hot cross buns. They were full of fruit and flavour, and well worth the walk to get them! 

Some Easter eggs and the Hot Cross Buns from Black Star Pastry.

Some Easter eggs and the Hot Cross Buns from Black Star Pastry.

I also bought a few from Baker’s Delight, because how could you not? These are probably my favourites, as while they have fruit in them, they are not quite as jam packed with it, which I prefer. I think I also like them because they are very easy to go and buy! 

On Easter Saturday, whilst braving the shops with every other person in this part of Sydney, I managed to get some of Jamie Oliver’s Stem Ginger Hot Cross Buns from Woolworths. I had heard about these, but had never managed to get any. They were nice, and I’m glad I got to try them! I found the ginger quite subtle whilst I eating the bun, but then after the spiciness of the ginger really hit me! 

Hot Cross Buns from Baker's Delight (left) and Jamie Oliver's Stem Ginger Hot Cross Buns from Woolworths (right).

Hot Cross Buns from Baker's Delight (left) and Jamie Oliver's Stem Ginger Hot Cross Buns from Woolworths (right).

Over the Easter long weekend I decided to make some Easter biscuits. I had a couple of Easter themed biscuit cutters, that I had never used, so I thought it was time to use them! I had also not long been gifted the book ‘Cookies’ by Peggy Porschen, so it was also a great chance to continue with my cookbook challenge! 

The recipe for the biscuits and icing will be posted over on the blog soon. 

Easter Biscuits.

Easter Biscuits.

I also adapted my favourite scone recipe (originally posted here), and made them into ‘hot cross scones’ for Easter. The full post and recipe can be found here. 

Hot Cross Scones.

Hot Cross Scones.

Here are a few snaps from the long weekend, including one featuring the newest addition to the cookbook collection, thanks to the Easter Bunny! 

Hope everyone had a lovely long weekend.

All baking, styling and photography for this post by Kathryn Vincent of Kulinary Adventures of Kath.

In Holidays Tags Easter, Holidays, Chocolate, Hot Cross Buns, Biscuits, Baking, Scones, Black Star Pastry, Jamie Oliver, Woolworths, Baker's Delight, Long Weekend
Comment

Hot Cross Scones

Kath April 5, 2015

Having made hot cross buns last year and posted the recipe here, I was slightly at a loss as how to celebrate Easter with baked goods (which is clearly the only way I celebrate anything). Not being able to eat chocolate, also messes with the whole Easter/Easter baking thing too. 

However, inspiration struck last weekend, whilst out with friends. My friends and I are regulars at The Tea Salon in Sydney Westfield. We love it, and nine times out of ten we will end up there when we meet up in the city. We were there in February, and they had a scone of the month which was rose and white chocolate, to celebrate Valentine’s Day. It was so good, that I now actually look at what the specials are! 

While we were there last weekend, one friend immediately saw the new scone of the month, and pointed it out to me. The scone was a ‘hot cross scone’ to celebrate Easter. In that moment, I suddenly thought, I could make something like this! This could be exactly the Easter baking I had been looking for. 

I ordered the hot cross scone, and needless to say it was great. It was served with orange marmalade, which although I’m not a fan of marmalade, a very small scraping of it definitely complemented the spices and sultanas in the scone. 

On the train journey home all I could think about was how to recreate this scone. I decided on merging my favourite scone recipe (recently posted here) and the hot cross bun recipe I like to use.

They are quite quick and easy to make, and would make a nice last minute Easter baking treat. Without the cross piped over the top, they become less hot cross scones, and more spiced sultana scones, making them great year round. Once cooled they freeze well in a zip-lock bag. 

Ingredients: 

4 cups self-raising flour 

1/2 tsp salt

1 cup pouring or thickened cream 

375-400 ml milk 

1 tsp ground cinnamon

1/2 tsp mixed spice

1 tsp lemon zest

1 tsp orange zest 

120 g sultanas 


Ingredients for the Cross: 

75 g plain flour

1/2 tsp sunflower or vegetable oil 

105 ml cold water 


butter or margarine, to serve 


Method: 

Pre-heat oven to 250 degrees Celsius, and line a large baking tray with baking paper. 

In a large bowl, combine the flour, salt, spices, zests and sultanas, then add the cream and 375 ml of the milk. Stir using a flat bladed knife or icing spatula to form a soft dough, adding more milk if the dough is too dry. 

Dust a work surface with flour, and turn the dough out. Lightly knead until the dough comes together. 

Press the dough out to 2cm thick. Using a 5 cm (approx.) round cutter, cut out scones from the dough and place onto the prepared tray so they are just touching. Pull dough scraps together and press out to 2.5cm thick. Cut out remaining scones, and continue to use the scraps (adding .5cm to the thickness each time when pressed out), if necessary. 

In a small bowl mix together the oil, flour and most of the water to form a smooth, slightly runny paste. If the mixture is too dry gradually add more water and mix well. 

Spoon the paste into a piping bag, and pipe a cross over each scone.

Bake for 12-15 minutes. Scones will be risen and golden when ready. Serve warm with butter or margarine.

References to original versions of both recipes can be found in earlier posts, linked in above text.  

All baking, styling and photography for this post by Kathryn Vincent of Kulinary Adventures of Kath. 

In Scones, Holidays Tags Scones, Easter, Hot Cross Scones, Baking
Comment

Raspberry & Rose Pavlova (Gluten Free) + Christmas 2014

Kath January 2, 2015

This year for Christmas I baked a lot! We don’t have a big family, so we decided to make food the focus for Christmas Day. While the heat and humidity of our Sydney Summer provided a few challenges to my baking efforts, I really enjoyed having the time to bake and cook whatever I wanted, with Christmas being the ‘excuse.’ 

I made four batches of gingerbread, using this recipe, which remains my favourite. A made a gingerbread house, with varying levels of success. I was concerned about is structural soundness, however after just over a week of standing upright and remaining standing once a meat mallet was taken to it, I feel these concerns were slightly unfounded! Mostly, I would have liked it to look prettier, however for my first ever attempt, it’s probably not so bad. 

PC230455.jpg

A few tarts were made as well. All of them stemmed from using up lovely summer fruits that we had bought. Using the same case and filling recipe as the white cherry tart I made in my last post, I used raspberries and peaches, which was so good, then just plain raspberry, then I used up the last of the Christmas cherries to make a cherry tart for New Years Eve. I also just made a plum upside-down cake to use up the last of the plums. It’s safe to say that this holiday season has not been short of cake and sweet treats! 

Peach & Raspberry Tart

Peach & Raspberry Tart

Cherry Tart for New Years Eve

Cherry Tart for New Years Eve

On Christmas morning I had prepared some of Sophie Hansen’s Buttermilk Jam Scrolls, which we ate with tea and some lovely fresh fruits. For Christmas Day lunch my Mum made a glazed ham, turkey wellington and a pear and goats curd salad. I made my favourite Summer Iced Tea. For dessert I created an Epic Pavlova. I call it epic as it was just something I thought I would try and see if it worked. And it ended up being the best pavlova I have ever made! I changed some of the ingredients from my Grandma’s original recipe, after looking at lots of other pavlova recipes. I wanted it to look a little festive, so I decided to decorate it with mostly red berries, and was particularly excited when I found red currants in the green grocer (first time I had ever seen them!). 

Breakfast

Breakfast

Christmas Lunch

Christmas Lunch

Dessert!

Dessert!

Unfortunately, I didn’t get to take many photos of the pavlova, as when I was assembling it, the Christmas Day weather began to turn bad. Thus there was no good light to shoot in. The shots I got were taken at a doorway to the balcony, door open to get as much natural light in as possible, rain coming down just beyond where the pavlova sat! 

Here is the recipe for my pavlova. I used up some of the remaining egg yolks to make the frangipane fruit tarts (substitute one whole egg for two yolks), otherwise you could make some gingerbread or maybe some custard. The quantities for the fruit to decorate are just guides, as you can put as little or as much as you would like, there are no rules! Lots of different fruits are great for pavlova, however I would stick to things that complement rosewater for this recipe. 

I made the pavlova layers on Christmas Eve and left them to cool in the oven overnight, and assembled just before serving on Christmas Day. 

Raspberry & Rose Pavlova

Ingredients for the Pavlova: 

8 egg whites 

500 g caster sugar

2 tsp raspberry vinegar 

1 tsp rosewater 

40g cornflour


To Decorate: 

450 ml cream 

1 tbsp rosewater 

1-2 punnet raspberries

1 punnet blueberries

seeds from 1-2 pomegranates

1 punnet red currants 


Method: 

Pre-heat oven to 200 degrees Celsius. Line two large baking trays with baking paper, and trace a circle on each, approx. 26 cm in diameter (I used a dinner plate). 

In a clean dry bowl, beat the egg whites for 5-6 minutes, whilst gradually adding the sugar. Add the raspberry vinegar and rosewater and beat until the mixture is stiff and glossy. 

Sift cornflour over the mixture, and gently fold to combine. 

Place half the mixture on one tray, using the circle as a guide. Push the mixture around to form a circle, leaving a small border around the edges. Repeat with the remaining mixture on the other tray. 

Turn the oven down to 125 degrees Celsius, and cook undisturbed for 1.5 hours. 

After 1.5 hours, turn the oven off and leave the pavlova layers to cool completely in the oven. 

When ready to assemble the pavlova, whip the cream and rosewater together. Spread half over one of the pavlovas and sprinkle with half the pomegranate seeds, half the raspberries and half the blueberries. Place the remaining pavlova shell on top. Fill the top layer with the remaining cream, and berries, using the red currants to form a border around the fruit on the top layer. 


What did you make during the festive season? Let me know in the comments below!


For more recipes showcasing the best of rose, check out my eBook Baking with Rose by clicking the link below!

get your ebook!
In Other Desserts, Heirloom Recipes, Holidays Tags Christmas, Baking, Tart, Pavlova, Gingerbread Biscuits, Gingerbread House, 2014
2 Comments

A White Cherry Tart for Christmas & A Cookbook

Kath December 22, 2014

This cherry tart is an amalgamation of two very good recipes. The pastry comes from Bill Granger’s book ‘Holiday’, and the filling comes from Sophie Hansen’s book ‘Local is Lovely.’ The pastry is easy to make as it doesn’t involve using a food processor, doesn’t need chilling or rolling out. It also has a lovely shortbread-like quality, so is quite crisp and buttery once cooked. 

Many different fruits or berries could be used for this kind of tart. I chose white cherries, as I saw them in a green grocer and had never tried them or heard of them before. A couple of days later I picked up some more at a local produce market. Cherries are also quite a staple for the Australian Christmas, so I think this tart would make a nice addition to any Christmas Day. It’s also a good way to use up any leftover cherries after Christmas. 

Most tarts I have made before contained a fair few eggs and some cream, so this frangipane version made quite a welcome change. It also meant that apart from the cherries, I already had everything I needed for the tart at home already. 

My only problem with using white cherries for this tart, is that once they are cooked, they do look a bit like tomatoes! Which wasn’t exactly the look I was going for, but it does taste good! 


Ingredients for the Pastry: 

125 g unsalted butter, melted & cooled 

90 g caster sugar

175 g plain flour 

1 tbsp almond meal 


Ingredients for the Filling: 

120 g unsalted butter, softened

115g caster sugar 

80g almond meal 

1 tbsp plain flour 

1 tsp vanilla extract

1 egg 

165 g white cherries (approx. 18 cherries), rinsed, halved & pitted

Method: 

Pre-heat oven to 180 degrees Celsius. To make the pastry, combine the melted butter and sugar, in a large bowl. Add the flour and stir until combined. Press the dough evenly into a 24 cm loose bottomed tart tin, ensuring you cover the base and sides of the tin. Place in the oven for 12-15 minutes, or until the pastry has puffed up a little. 

Remove from the oven and sprinkle over the almond meal. Set aside. 

To make the frangipane filling, cream the butter and sugar in an electric mixer until they are pale and fluffy. Add the almond meal, vanilla, egg and flour and mix until combined. 

Place the frangipane mix into the prepared pastry case, and smooth it out. Place the cherries into the frangipane mix, pressing them down slightly. 

Return the tart to the oven for a further 25-30 minutes or until the frangipane filling is golden. 

PC190132.jpg

Recipe for pastry originally found in ‘Holiday’ by Bill Granger (2007), p. 34. 

Recipe for frangipane filling originally found in ‘Local is Lovely’ by Sophie Hansen (2014), p.79. 

My next piece of exciting news, is the cookbook I have helped put together has been published this past week. 

This project has been in progress for about 18 months, and I have been assisting with it for just over a year now. I helped compile the recipes, and write short introductions for each recipe or person. 

All recipes were donated by clients of The Maxx Hair Salon in St Ives, Sydney. All profits are being donated to Barnardos Australia. 

Click here to purchase the book, or contact me on kulinaryadventuresofkath@gmail.com and I can sort something out for you. 

All baking, styling & photography for this post by Kathryn Vincent of Kulinary Adventures of Kath. 

In Tarts & Pastry, Holidays Tags Cherries, Christmas, Tart, White Cherries, Cookbook, Local is Lovely, Bill Granger, Barnardos Australia
Comment
  • The Blog
  • Older
  • Newer

recipes

  • Biscuits/Cookies 40
  • Breads Etc. 9
  • Breakfast 7
  • Cakes & Slices 68
  • Confectionary 5
  • Drinks 6
  • Events 14
  • Food Photography Tips 3
  • From The Mailing List 24
  • Heirloom Recipes 12
  • Holidays 45
  • Ice Cream 9
  • Jams Preserves & Spreads 9
  • Muffins 4
  • Off the Shelf 50
  • Other Desserts 25
  • Savoury Dishes/Meals 15
  • Scones 4
  • Tarts & Pastry 9
  • Travel 13

Sign up to Friday Food Chat with Kath, a weekly newsletter for more food, baking, cookbook chat and more!

Sign Up Here!
instagram-unauth pinterest facebook url

Website Accessibility: To enable text to speech function on the blog, click the sound button to the right of each blog post.

All images & content are the property of Kathryn Vincent, unless stated otherwise. Please do not use without permission.

Kulinary Adventures of Kath

Food Photography, Recipes & Baking

instagram-unauth pinterest facebook url