Kulinary Adventures of Kath

Food Photography, Recipes & Baking
  • home
  • About
  • Work with Kath
  • Shop
  • Blog
    • The Blog
    • Recipe Archive
  • Newsletter
  • Contact
  • home
  • About
  • Work with Kath
  • Shop
    • The Blog
    • Recipe Archive
  • Newsletter
  • Contact
Raspberry Pistachio Rose Cake (23 of 25).jpg

The Blog

Recipes and Food Photography by Kath Vincent.

  • The Blog
  • Recipe Archive
  • All
  • Biscuits/Cookies
  • Breads Etc.
  • Breakfast
  • Cakes & Slices
  • Confectionary
  • Drinks
  • Events
  • Food Photography Tips
  • From The Mailing List
  • Heirloom Recipes
  • Holidays
  • Ice Cream
  • Jams Preserves & Spreads
  • Muffins
  • Off the Shelf
  • Other Desserts
  • Savoury Dishes/Meals
  • Scones
  • Tarts & Pastry
  • Travel
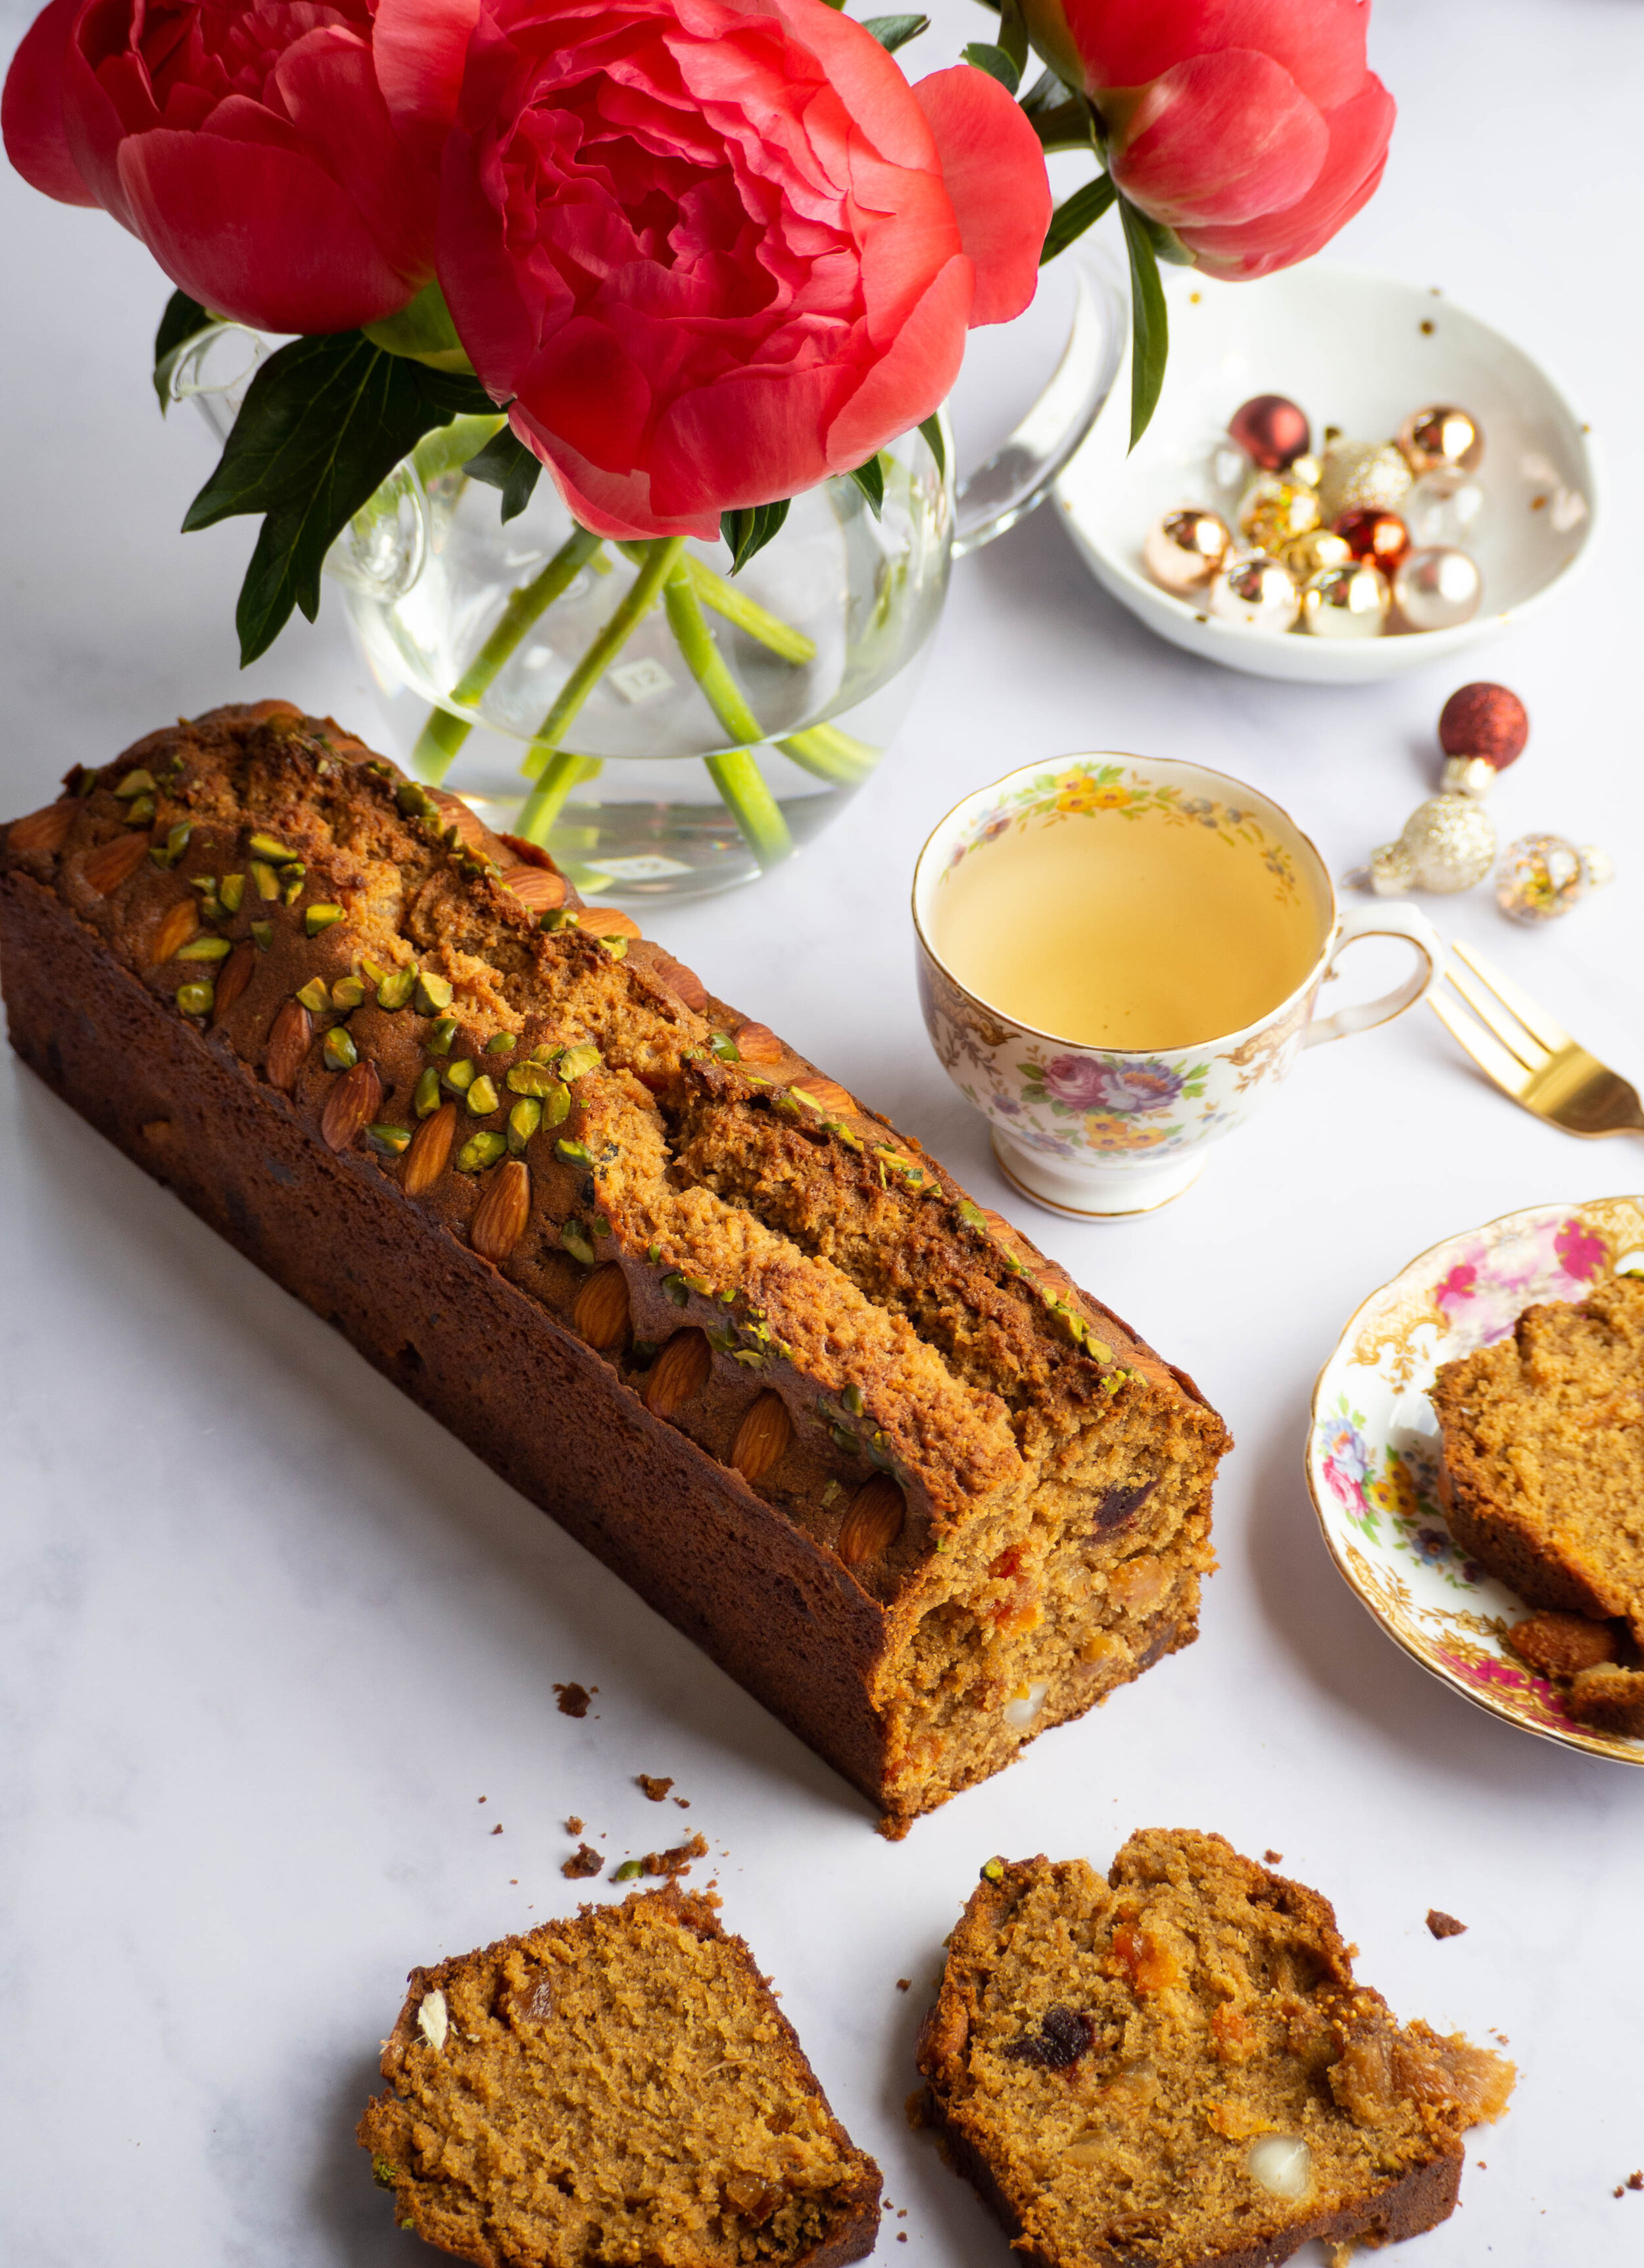
Easy Christmas Fruit Loaf Cake

Easy Christmas Fruit Loaf Cake

Kath November 5, 2019

I am going to preface this recipe with, this is not a traditional Christmas fruit cake. 

That is the exact reason however, that I love this cake. 

I have always severely disliked heavy alcohol laden Christmas cakes, and this is my much lighter take on the traditional. This cake uses delicious dried fruit, but the cake is more cake-y than fruit heavy. 

This cake is not alcohol free (but could easily be made so), but by using a large quantity of good quality vanilla extract (which contains alcohol) to soak the dried fruit you get an intense vanilla, only slightly alcoholic taste to the cake. All in all a much lighter flavour and texture than a traditional Christmas fruit cake. 

I have cooked it in a particularly skinny loaf tin as this creates the perfect serve when cutting slices of the cake (unfortunately the shape of the cake makes it much harder to photograph!). You could use something similar in size, just keep in mind a different shaped tin may change the cooking time for this cake.

I have used making this Christmas cake as a great opportunity to bake with some really great ingredients from some Australian businesses I really love. 

Riverland Melange and Sticky Quince Syrup from Singing Magpie Produce

Riverland Melange and Sticky Quince Syrup from Singing Magpie Produce

The mixed dried fruit is from Singing Magpie Produce and is called their Riverland Melange. It is a combination of sun dried quince, pears, apricots, peaches, black figs and white figs. While I highly recommend using a dried fruit mix like this, you can of course use any kind of mixed dried fruit for this cake. I also used Singing Magpie Produce’s soon to be released sticky quince syrup. As a lover of quince I bought this as soon as I could, when Sue at Singing Magpie Produce put together a limited run of a ‘Christmas Bakers Box’ containing this syrup, dried citrus and the Riverland Melange. It is delicious in both sweet and savoury recipes, and can be substituted with honey or date syrup. 

View fullsize Grounded Pleasures Vanilla
View fullsize St Nicolas Spekulaas Spice

I am a big fan of the Ballarat business, Grounded Pleasures and use their panela sugar at every opportunity. So this cake was no exception. Light brown or muscovado sugar could be substituted for the panela however. I also used some of their vanilla extract to soak my dried fruit in. This vanilla has a strong flavour, with the PNG sourced vanilla beans being paired with PNG white rum to create the extract. Any good quality vanilla extract can be used. Alcohol free vanilla extracts could also be used, to make this cake alcohol free.

Finally I used the Gewurzhaus St Nicolas Spekulaas spice for this cake, to give it a lovely festive edge. However you could also substitute with 1/2 tsp cinnamon and 1/2 tsp mixed spice.

Easy Christmas Fruit Cake

Easy Christmas Fruit Cake

Easy Christmas Fruit Loaf Cake

Ingredients: 

260g mixed dried fruit (I used Singing Magpie Produce Riverland Melange) 

50ml good quality vanilla extract (I used Grounded Pleasures Vanilla Extract)

75ml boiling water

300g plain flour

1.5 tsp baking powder

1 tsp Spekulaas Spice (I used Gewurzhaus St Nicolas Spekulaas ground spice); alternatively use 1/2 tsp cinnamon and 1/2 tsp mixed spice

250g unsalted butter, softened

240g panela sugar (I used Grounded Pleasures Panela), or brown sugar

3 eggs

1 tbsp sticky quince syrup (I used Singing Magpie Produce) or honey

50g mixed nuts such as almonds, pistachios or macadamias

35g (approx.) natural almonds, for decoration

10g blanched pistachios, roughly chopped, for decoration 

Method: 

Chop the dried fruit, and place into a bowl. Cover with the vanilla extract and boiling water and leave to soak for about half an hour. 

Preheat oven to 160 degrees Celsius, and line a 31 x 7.5 x 8cm loaf tin with baking paper. 

Combine the flour, baking powder and spice in a medium sized bowl and briefly whisk to combine and remove any lumps. 

In the bowl of a stand mixer, beat the butter and sugar together until well combined and fluffy. 

Add the eggs one at a time, ensuring they are well combined after each addition.

Add the sticky quince syrup and the flour mix and mix until combined. 

Remove the bowl from the stand mixer, add the soaked fruit along with any liquid left in the bowl and mix into the batter using a large wooden spoon or a spatula. Then add the nuts. 

Transfer the mixture to the prepared loaf tin and arrange the almonds around the outside. Sprinkle over the chopped pistachios, and bake for about 1 hour 15min. Check the cake at around 45min-1hour, and cover with foil if necessary. The cake will be ready when the top is golden and a skewer comes out clean. 

Allow the cake to cool in the tin for 20-30mins, then remove onto a wire rack.

Easy Christmas Fruit Loaf Cake

Easy Christmas Fruit Loaf Cake

Easy Christmas Cake

Reference: ‘Piri Piri Starfish - Portugal Found’ by Tessa Kiros (Murdoch Books, 2008), pp.191-2.

Easy Christmas Fruit Loaf Cake

Easy Christmas Fruit Loaf Cake

Easy Christmas Fruit Cake
In Cakes & Slices, Holidays Tags Christmas Fruit Cake, Christmas, Singing Magpie Produce, Grounded Pleasures, Gewurzhaus, Easy Baking, Holiday Baking, cake
2 Comments
White Chocolate Easter Torte (Passover Friendly)

White Chocolate Easter Torte (Passover Friendly)

White Chocolate Easter Torte (Passover Friendly)

Kath April 14, 2019

Since Easter and Passover again fall at the same time this year, I thought I would make a dessert that observed both holidays. My immediate thought was a variation of a Lithuanian Nut Torte I had made a couple of years ago. The recipe uses nuts, grated chocolate and whipped egg whites to make a light cake. 

The time I first made this cake, I made it with dark or milk chocolate, however always thought I should try a white chocolate version of it. Now two years later I am finally doing it! 

The idea to make this cake again reappeared in my mind late one night when I was trying to fall asleep. That day a friend and I had visited Bakedown Cakery in St Leonards, as I was really keen to get some of the new Easter range. We both bought some chocolate, and as we walked home got caught in the worst downpour! We were absolutely saturated once we got back, but our Bakedown goodies had been well protected and survived the journey. 

I had bought some of the Golden Almond Eggs (caramelised white chocolate filled with almond praline - as delicious as it sounds), and some of the Hot Cross Bunnies chocolate bark (white and caramelised white chocolate with Easter spices with cute bunny illustrations printed on top). These chocolates, particularly the bark got me thinking about how it could be used to decorate a cake. 

The Nut Torte I had made so long before popped into my head as the perfect Easter dessert, which could also double as dessert for Passover. I decided I needed to visit Bakedown again to get more of the Hot Cross Bunnies bark, and a couple of blocks of Toasty (Bakedown’s caramelised white chocolate) to use for the torte. Jen at Bakedown also had Toasty Easter Bunnies ready when I went in the second time, and my gosh I was excited! Caramelised white chocolate is one of the best things I have ever tasted, and as someone who can’t eat ‘normal’ chocolate it was so nice to have an Easter treat I could actually enjoy! 

For this Easter Torte, I used Bakedown’s Toasty to grate into the torte, and the Hot Cross Bunnies bark to decorate the outside. I also used a combination of Toasty and regular white chocolate to melt down and decorate the top and use to stick the bark to the sides of the torte. You can of course use any type of chocolate you wish to make this torte, and decorate with your favourite Easter eggs, or just leave the decoration at the chocolate drizzle if you are making this cake for Passover (some toasted nuts scattered over the top would also be lovely). 

White Chocolate Bark from Bakedown Cakery, illustrations by Dawn Tan.

White Chocolate Bark from Bakedown Cakery, illustrations by Dawn Tan.

Hot Cross Bunnies white and caramelised white chocolate by Bakedown Cakery

Hot Cross Bunnies white and caramelised white chocolate by Bakedown Cakery

Caramelised White Chocolate Torte

White Chocolate Easter Torte (Passover Friendly)

Ingredients: 

100g macadamias or almonds, ground

3 tbsp fine matzo meal (or fine dry breadcrumbs if not making for Passover)

100g good quality white chocolate (the kind you would buy to eat) 

3 eggs (large), separated

125g golden caster sugar

1 tbsp lemon juice 

To Decorate: 

50-100g white chocolate 

Easter eggs/chocolate to decorate or some extra toasted nuts (macadamias or almonds) 

Method: 

Pre heat oven to 170 degrees Celsius and line a round 20cm loose bottomed or springform tin with baking paper. 

Grate the chocolate into a medium bowl, then add the ground nuts and matzo meal. Mix to combine then set aside. 

Place the egg whites in the bowl of a stand mixer, fitted with the whisk attachment. Whisk the egg whites until stiff peaks form, then gradually add the sugar. Continue to whisk until the sugar has just incorporated. Briefly whisk in the egg yolks, then fold in the chocolate nut mixture. 

Tip into the prepared tin, and gently smooth the top. 

Bake for 35-45 minutes or until the torte is golden in colour and a skewer inserted into the centre comes out clean. The torte will rise up then sink down a bit as it cooks. 

Leave to cool on a wire rack, removing from the tin once cooled. 

To decorate, melt the chocolate either in the microwave or over a double boiler. If sticking chocolate bark or similar around the edges of your torte use 100g of chocolate, drizzle some over the top, then spread the remaining chocolate around the sides of the cake then sick on the bark. If not, use 50g chocolate to drizzle over the top. Decorate with Easter eggs or toasted nuts. 

Easter Eggs
White Chocolate Passover Torte

Reference: ‘100 Best Jewish Recipes’ by Evelyn Rose with Judi Rose (Pavilion, 2016), p.149. 

Caramelised White Chocolate Torte
Easter Eggs
In Cakes & Slices, Holidays Tags White Chocolate, Caramelised White Chocolate, Bakedown Cakery, Passover, Easter
Comment
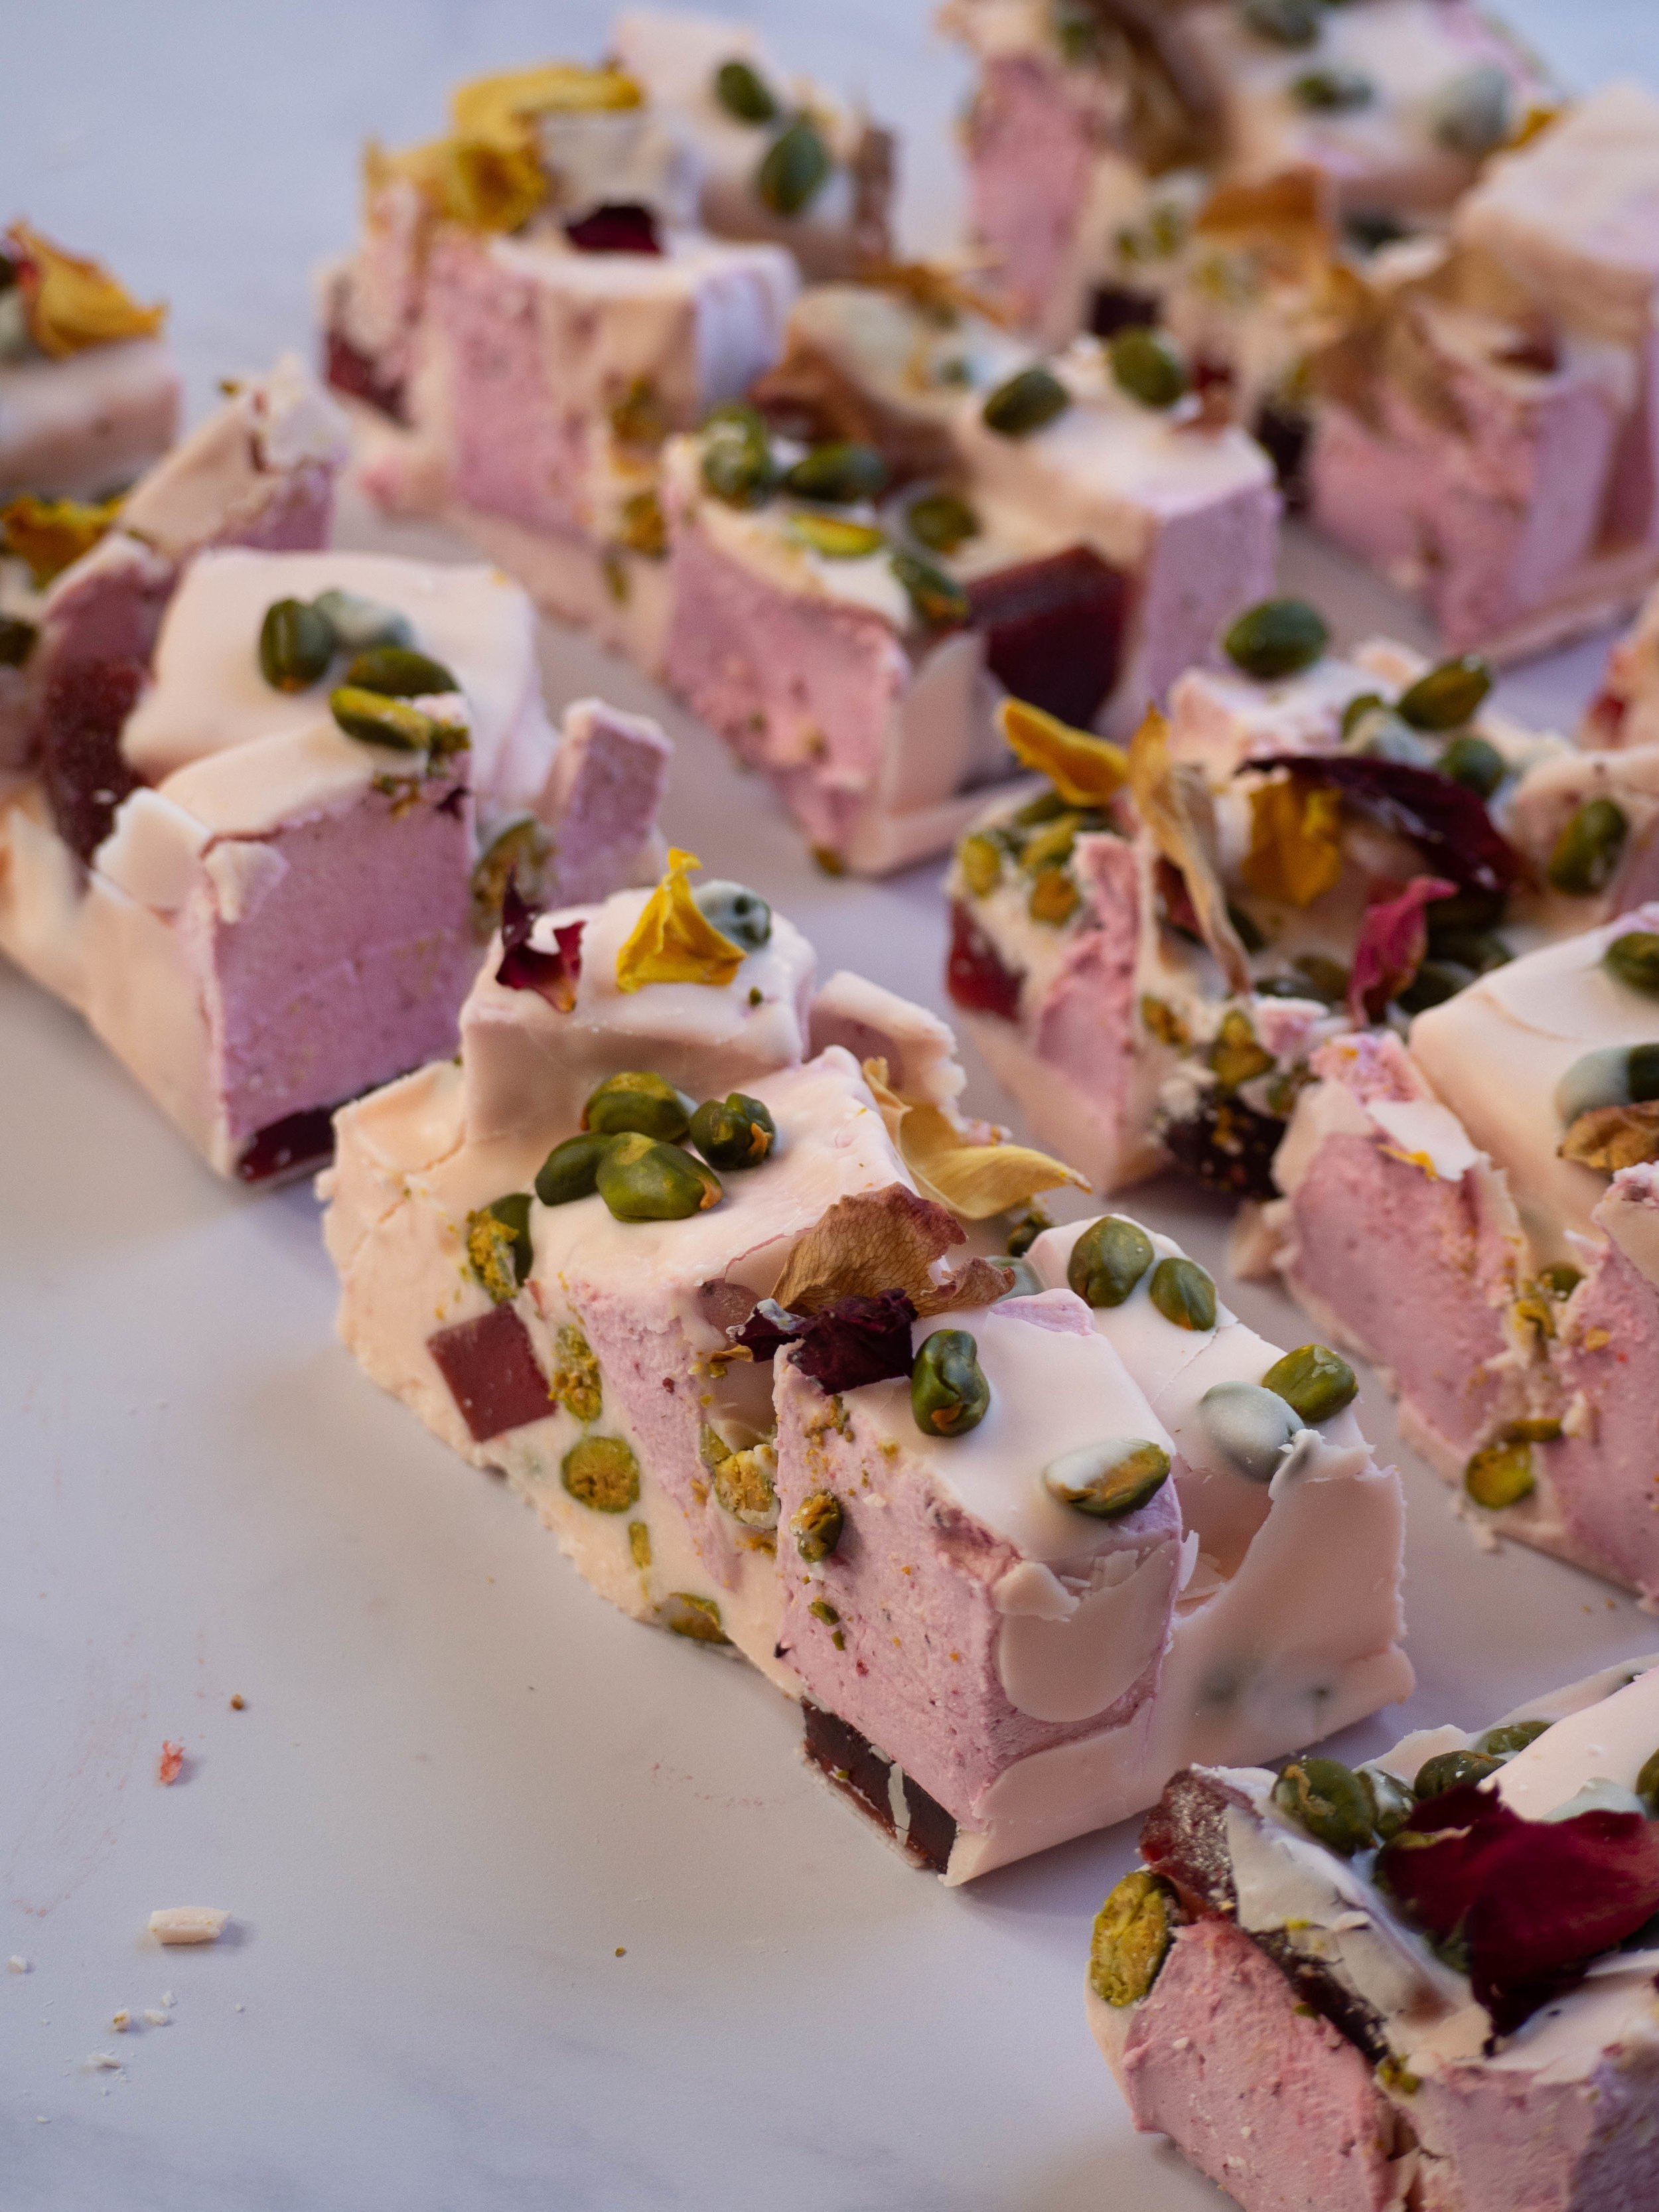
Pink Rocky Road with Blackberry Marshmallows and Raspberry Jubes

Pink Rocky Road with Blackberry Marshmallows and Raspberry Jubes

Pink Rocky Road with Homemade Blackberry Marshmallows + Homemade Raspberry Jubes for Easter

Kath April 8, 2019

This recipe has been a long time coming for me. 

I have always been obsessed with marshmallows, so making them myself was always going to happen. I used to melt bowls of them in the microwave as a kid and eat them (sometimes with rice bubbles added too!). 

After enjoying the white chocolate rocky road by Sweetness The Patisserie (now owned by Adora Handmade Chocolates), for years and gifting many a milk or dark chocolate rocky road, I really wanted to make a good rocky road at home. Years ago I bought marshmallows and patê de fruits from Sweetness and assembled it myself. But after having made my own marshmallows for quite a while, I really wanted to do the whole thing myself. 

I have been keeping an eye out for a good patê de fruits or jube recipe for a while now. And I finally found one, that actually looked achievable in Bourke Street Bakery’s book ‘All Things Sweet’. I immediately put the book on my wish list, and luckily was gifted it for Christmas last year. 

Now I had the marshmallows and the jubes covered, I had to tackle the chocolate! I don’t eat chocolate, unless its white chocolate, so I don’t have a lot of experience with tempering etc. The main thing I can say about it now I’ve done it is, buy good quality chocolate with a high cocoa butter content, and get yourself a chocolate thermometer. I made the mistake of thinking I could use my candy thermometer, only to realise it doesn’t read temperatures under 40 degrees Celsius, which is not helpful for tempering chocolate! 

I bought this thermometer from Peter’s of Kensington, which is great as it’s a thermometer and spatula in one. If you want to know more about tempering chocolate I would recommend the above Bourke Street Bakery book and Katherine Sabbath’s pop up book ‘Greatest Hits’. 

This recipe does look a bit daunting I know, but I found making the marshmallows and the jubes on one day quite achievable. They both need to set overnight at least, so the next day all you need to do is temper the chocolate and assemble the rocky road. I add a very small amount of pink colouring and rose flavouring which is suitable for use with chocolate, however this is completely optional. You could of course use any type of chocolate you like (I think ruby chocolate would be great here!). 

Along with the chocolate thermometer, a candy (sugar) thermometer is also necessary to make the marshmallows and jubes. 

I hope you have a go at this recipe (or one of the elements of it!), I think homemade rocky road would make great gifts to give this Easter - and if you can’t fathom all that effort I would recommend checking out the Easter ranges at Adora Handmade Chocolates (who also make a stellar rocky road!) and Bakedown Cakery for any Easter gifts you may need.

Rose Rocky Road
Blackberry Marshmallows

Blackberry Marshmallows

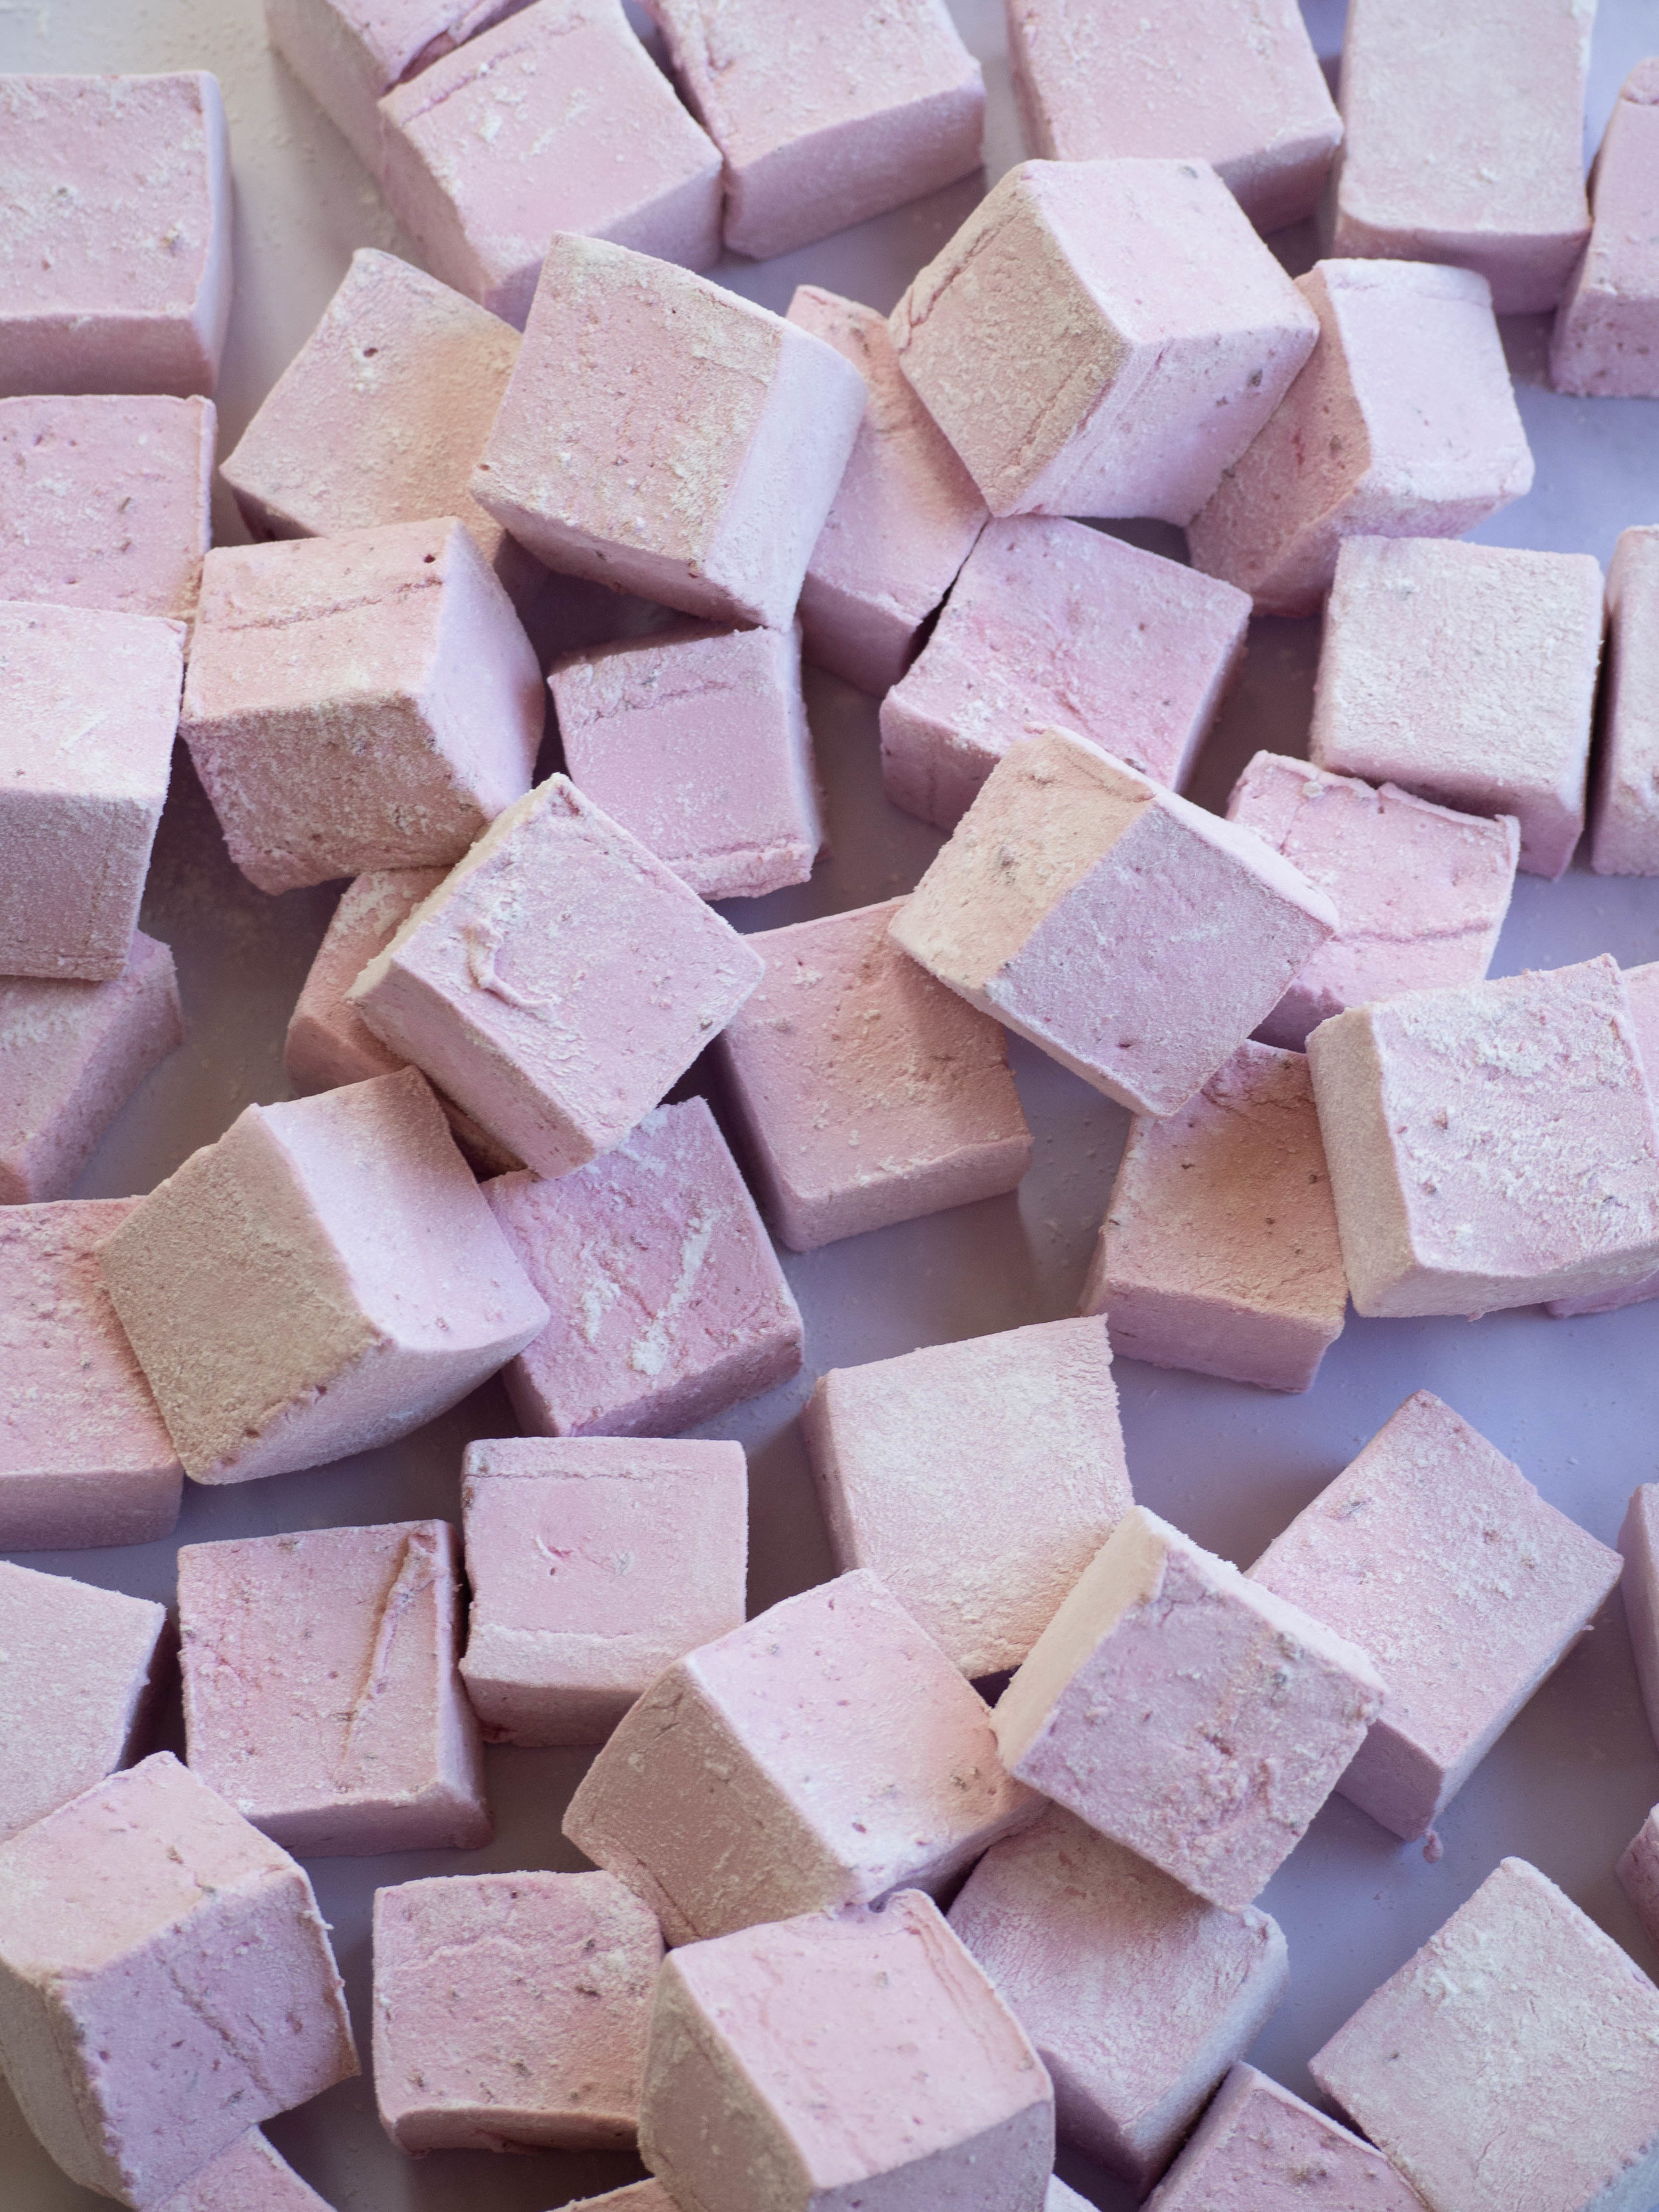
Homemade Blackberry Marshmallows

Ingredients: 

275g pureed fresh blackberries (the seeds can be strained if you wish, however the total weight still needs to be 275g)

50g gelatine powder

115ml water

820g white/granulated sugar 

320g glucose 

50g potato flour/starch

50g icing sugar (pure or confectioners)

cooking spray

Method: 

Spray a slice tin or lamington tray (at least 30x20cm) with the cooking spray and set aside.

In the bowl of a stand mixer, briefly mix together the blackberry puree and the gelatine powder. Leave for now, ensuring the whisk attachment is fitted and everything is ready to go once your sugar syrup is ready. 

In a medium/large saucepan place the water, then the sugar, then the glucose. Place over high heat and cook until the syrup reaches 120 degrees Celsius on a candy thermometer.

With the mixer on low, gradually pour the sugar syrup into the blackberry mix. Whisk on medium speed for about 3 minutes, until the mixture turns a more opaque colour. The mixture will also start to thicken. Then increase mixer to high speed for about 8 minutes, until the marshmallow has tripled in volume and has thickened. 

Pour marshmallow into the prepared tray, tapping it down on the bench to remove any air bubbles and to ensure it is sitting in the tray evenly. 

Leave to set overnight before cutting (room temperature is best, preferably covered with a food net or cover).

Once the marshmallow is ready to cut, in a small bowl whisk together the potato flour and the icing sugar (sift if necessary). 

Dust some of this mixture onto your clean work surface. Remove the slab of marshmallow from the tin, use a spatula to pull the sides away from the tin and tip it onto the dusted work surface. 

Dust more of the icing sugar mix over the top of the marshmallow slab, and around the sides. Using a large sharp knife, cut into cubes, by cutting the slab into rows, then cutting rows in the other direction. Dust your knife regularly with the icing sugar mix, and continue to dust the marshmallows as they are cut. The size you cut the marshmallows is completely up to you, I like cutting them into larger cubes (as pictured). 

Ensure every part of the cut marshmallows are covered in the potato flour and icing sugar mix. Toss them around on the bench to remove any excess.

Store in an airtight container. The marshmallows will keep for about 3 weeks. 

Homemade Blackberry Marshmallows
Raspberry Jubes

Raspberry Jubes

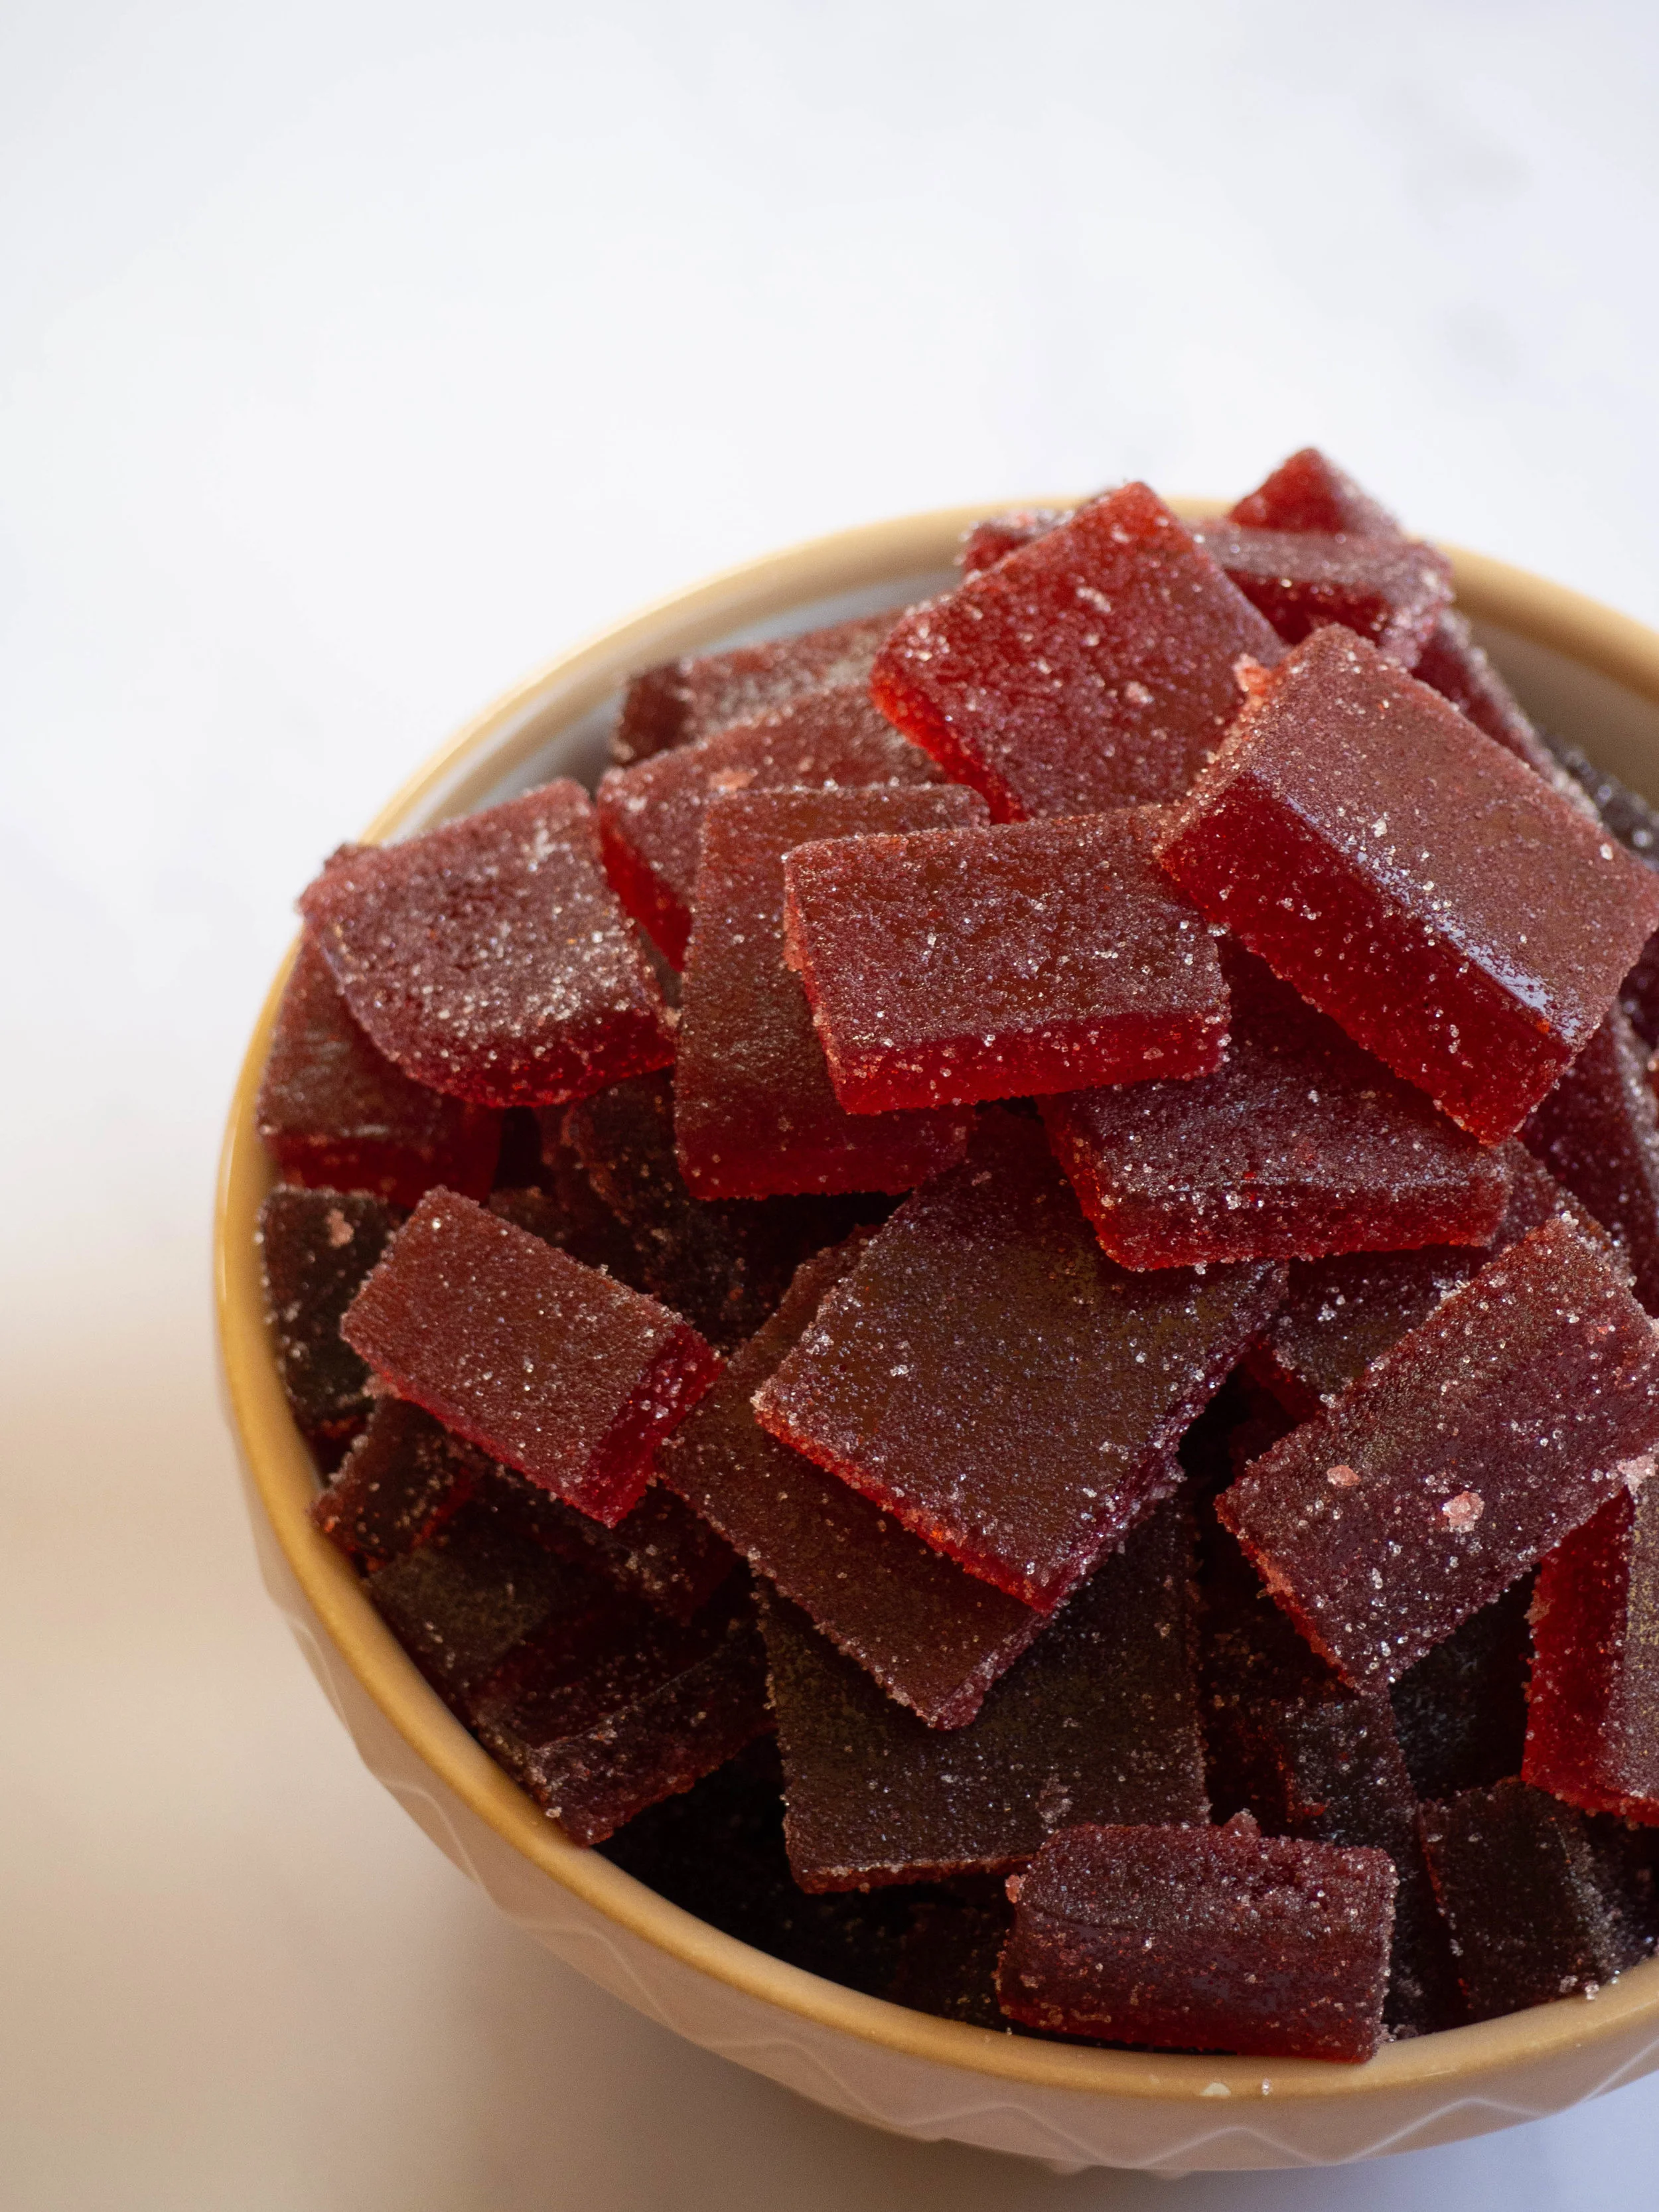
Homemade Raspberry Jubes 

Ingredients: 

550g caster sugar, plus extra

15g pectin (citrus pectin)

15g citric acid

300g pureed raspberries, seeds removed (from about 400g fresh/frozen raspberries)

75g raspberry or mixed berry jam (sieved if lumpy)

juice of 1 lemon

1 tsp vanilla bean paste

75g glucose

80ml water

Method: 

Line the base of a large baking tray with baking paper (approx. 30x20cm) 

In a small bowl combine 50g of the sugar, with the pectin and citric acid. 

In a medium saucepan, place the pureed raspberries, jam, lemon juice and vanilla bean paste. Place on medium to high heat and bring to the boil. Add the pectin mixture and stir to combine. Allow the mixture to come back to the boil, the remove from the heat and set aside (keep near your stove as you will need it again soon). This fruit mixture should have thickened up by now, and will continue to do so as it cools. 

Place the remaining sugar (500g), along with the glucose and water, in a large saucepan and bring to the boil. Allow the mixture to continue boiling until it reaches 121 degrees Celsius on a candy thermometer. 

Once this point is reached, add the raspberry mixture and whisk to combine. Leave on the heat until it reaches 108 degrees Celsius. Once this point is reached, pour into the prepared tray, ensuring the mixture sits evenly in the tray. 

Leave to set overnight, at room temperature (preferably with a food net or cover sitting over it). 

When ready to cut, dust your clean work surface with some of the extra caster sugar, and tip the jube slab out of the tin. Cut into desired shapes, it’s really up to you. Sprinkle with more caster sugar until they are all well coated. 

Store in an airtight container. Will keep for about 2 weeks. 

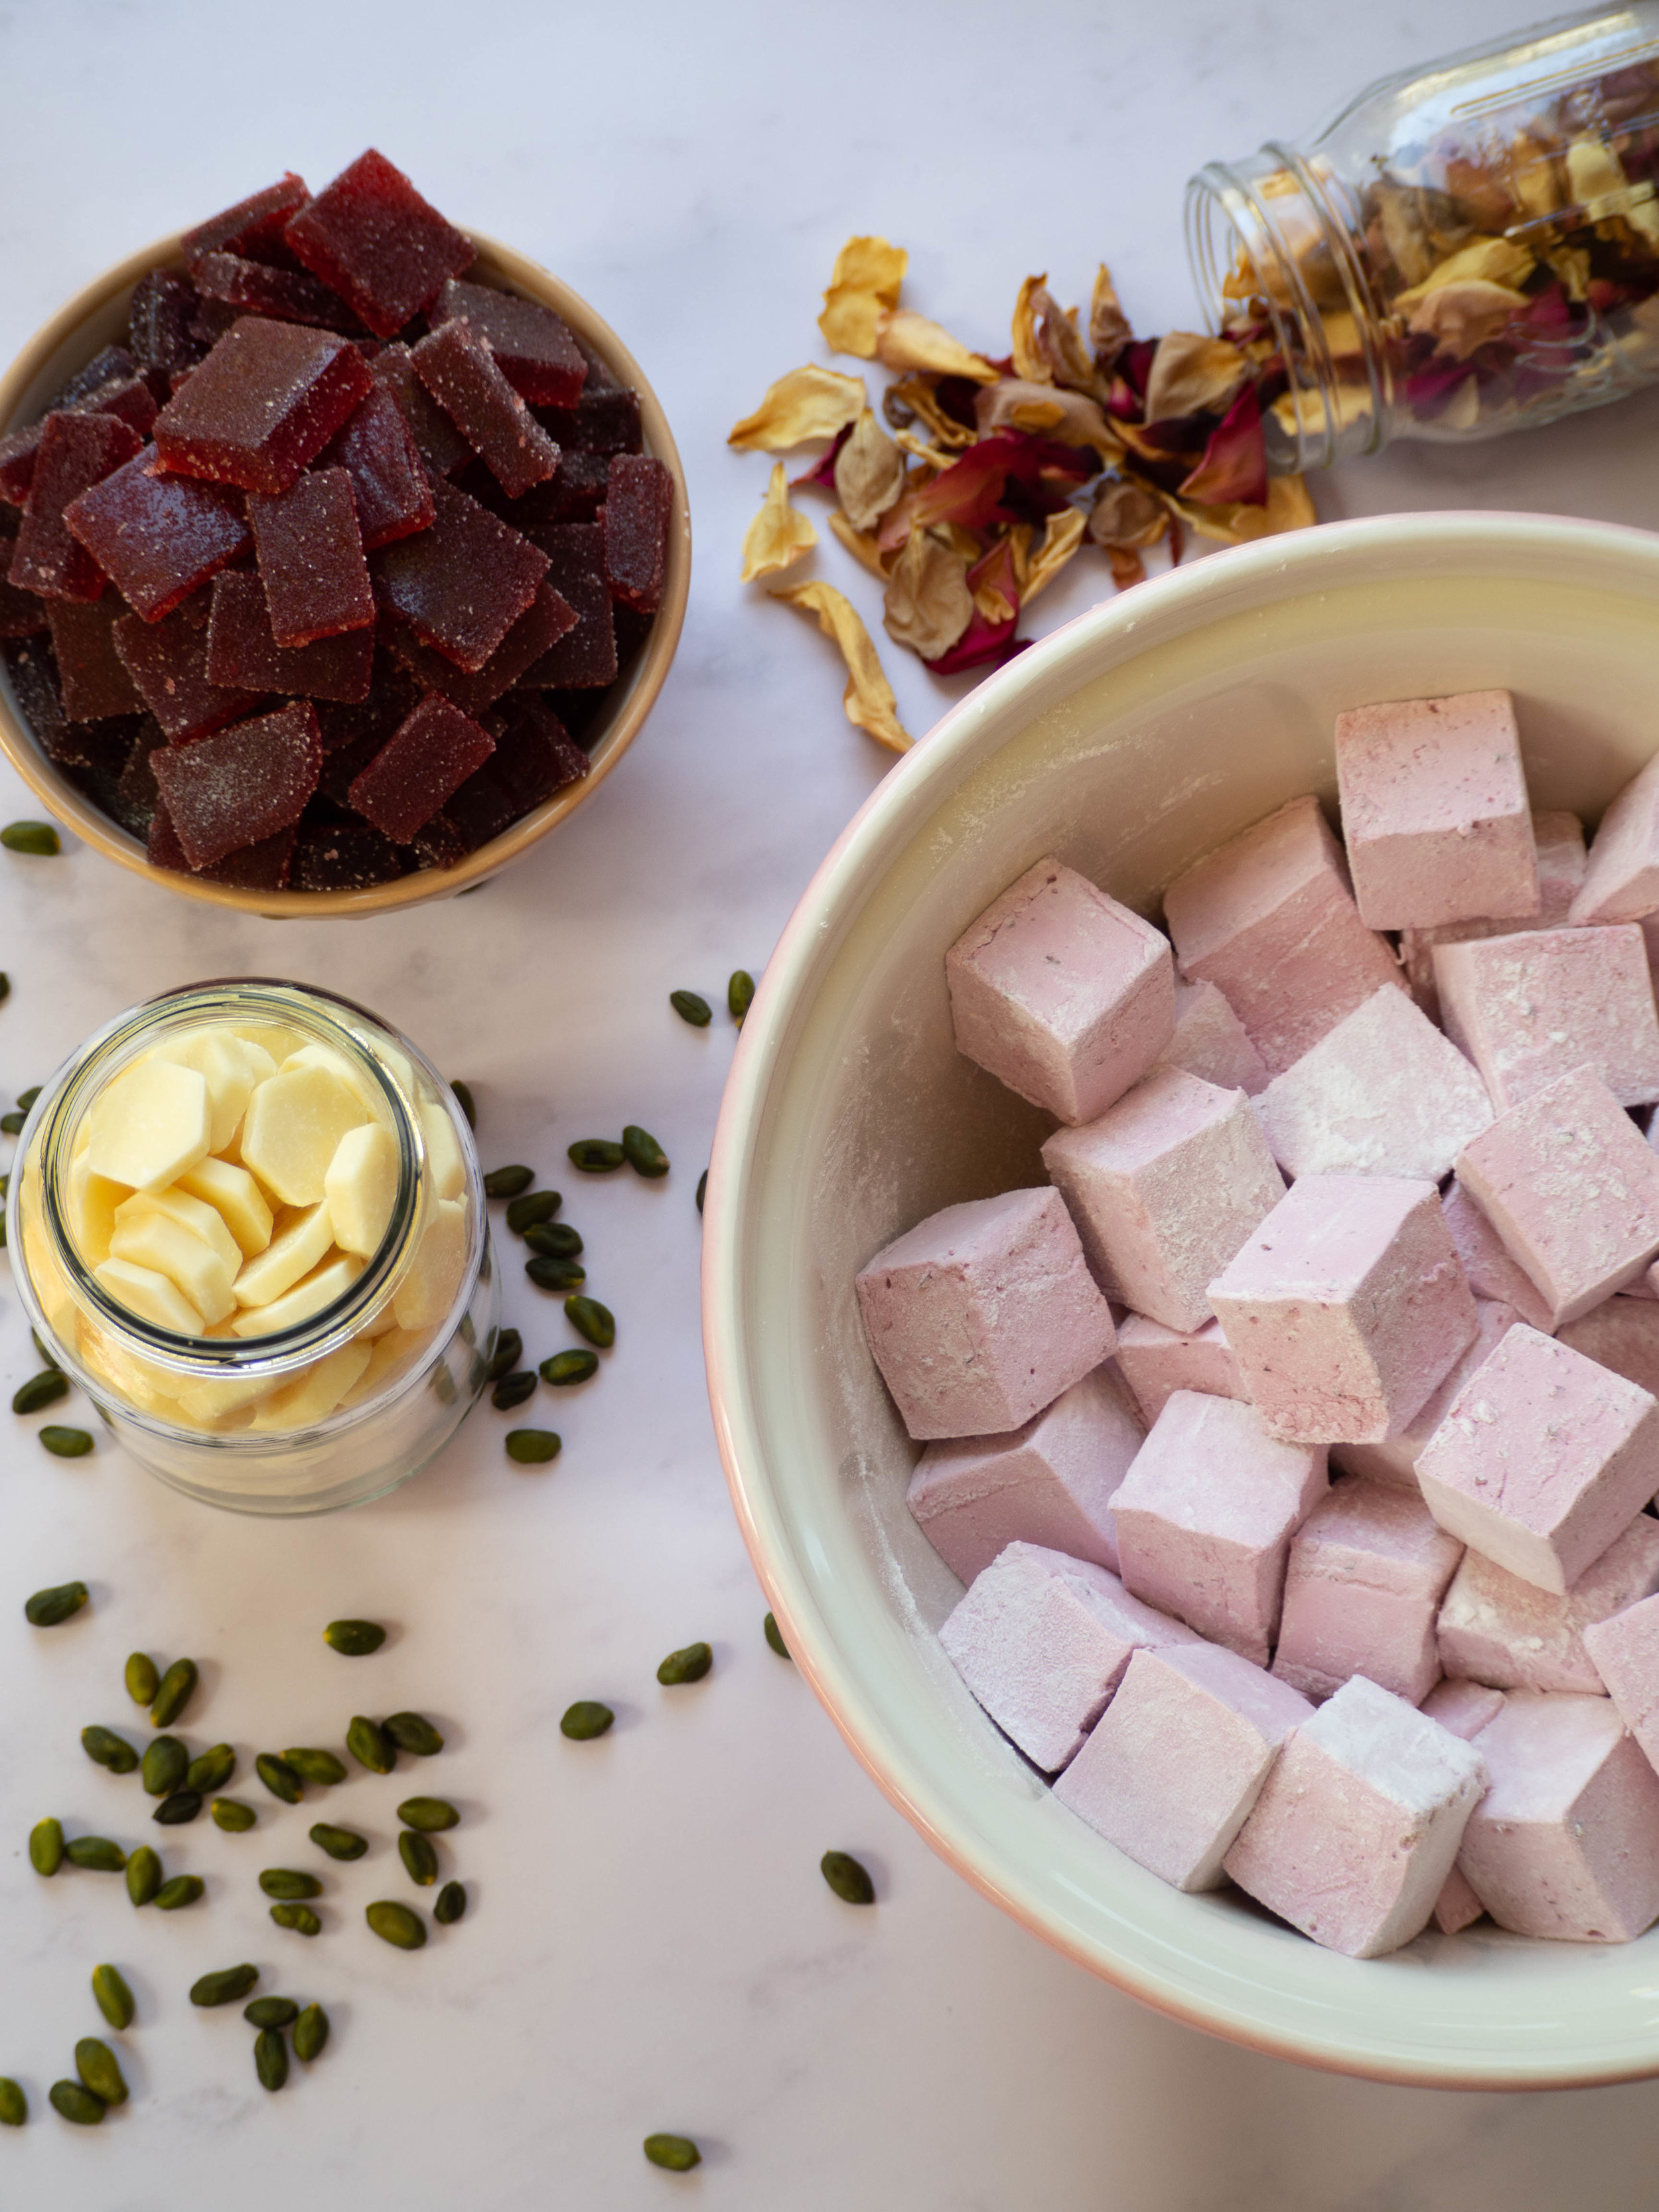
Rocky Road Ingredients

Rocky Road Ingredients

Pink Rocky Road

Pink Rocky Road

Rose Rocky Road

Pink Rocky Road

Ingredients: 

700g good quality white chocolate

pink colouring (suitable for use with chocolate)

rose flavouring (suitable for use with chocolate)

80g raw or blanched pistachios

265g homemade raspberry jubes

500g homemade blackberry marshmallows 

dried edible rose petals, for decoration

Method: 

Line a square baking tin (approx. 22cm) with baking paper - I like to use small bulldog clips to hold the paper in place. 

Preheat oven to 160 degrees Celsius. Roast the pistachios on a lined baking tray for 10 minutes. Remove from the oven and set aside to cool.

Have all the rocky road elements ready to go next to your prepared tin. 

Place a small pot with a little water on the stove and allow to simmer. Using another pot or bowl that will comfortably sit over the top of the water pot, measure out 450g of the white chocolate. 

Place this pot over the simmering water (ensuring the water does not touch the base of the pot above) and melt the chocolate. Ensure the chocolate is constantly stirred. Once the chocolate reaches 45 degrees Celsius on chocolate thermometer, remove from the heat and continue stirring while gradually adding the remaining 250g of white chocolate. Add a little at a time and allow to melt before adding more. 

Continue to check the temperature of the chocolate, once it has fallen to 34 degrees Celsius, the remaining chocolate should have all been added. Continue stirring to allow the chocolate to cool further to 32 degrees Celsius. Add a little pink colouring at this point, and a few drops of the rose flavouring. Start small with both and add more if you think it’s necessary. 

Once the chocolate has reached 32 degrees Celsius, it is ready to use. 

Pour about a third of the chocolate into the base of the prepared tin and allow it cover the base completely. Scatter in half the marshmallows and half the jubes. Scatter in a third of the pistachios. Cover with another third of the chocolate, then place the remaining marshmallows and jubes in, and another third of the pistachios. Cover with the remaining chocolate, and scatter over the remaining pistachios. Decorate with some dried edible rose petals. 

Place in the fridge for about 30 minutes to set (especially if you are working in warm or humid conditions). 

Once set use a large sharp knife to cut the rocky road into desired sizes. 

I prefer to keep the rocky road in the fridge. Keeps for about 2-3 weeks. 

Makes 8 generous blocks of rocky road. 

Rose Rocky Road
Rose Rocky Road

References: ‘Bourke Street Bakery All Things Sweet’ by Paul Allam and David McGuinness (Murdoch Books, 2017), pp.104-105 + 119; ‘Greatest Hits - The Pop Edition’ by Katherine Sabbath (Katherine Sabbath, 2017) Recipe Card #40; Heilala Vanilla SWEETNESS Vanilla Bean Marshmallow. 

Rose Rocky Road

For more recipes showcasing the best of rose, check out my ebook Baking with Rose by clicking the link below!

get your ebook!
In Confectionary, Holidays Tags Rose, Homemade Marshmallows, Jubes, Rose Chocolate, White Chocolate, Sweetness by Adora, Rocky Road, Easter
Comment
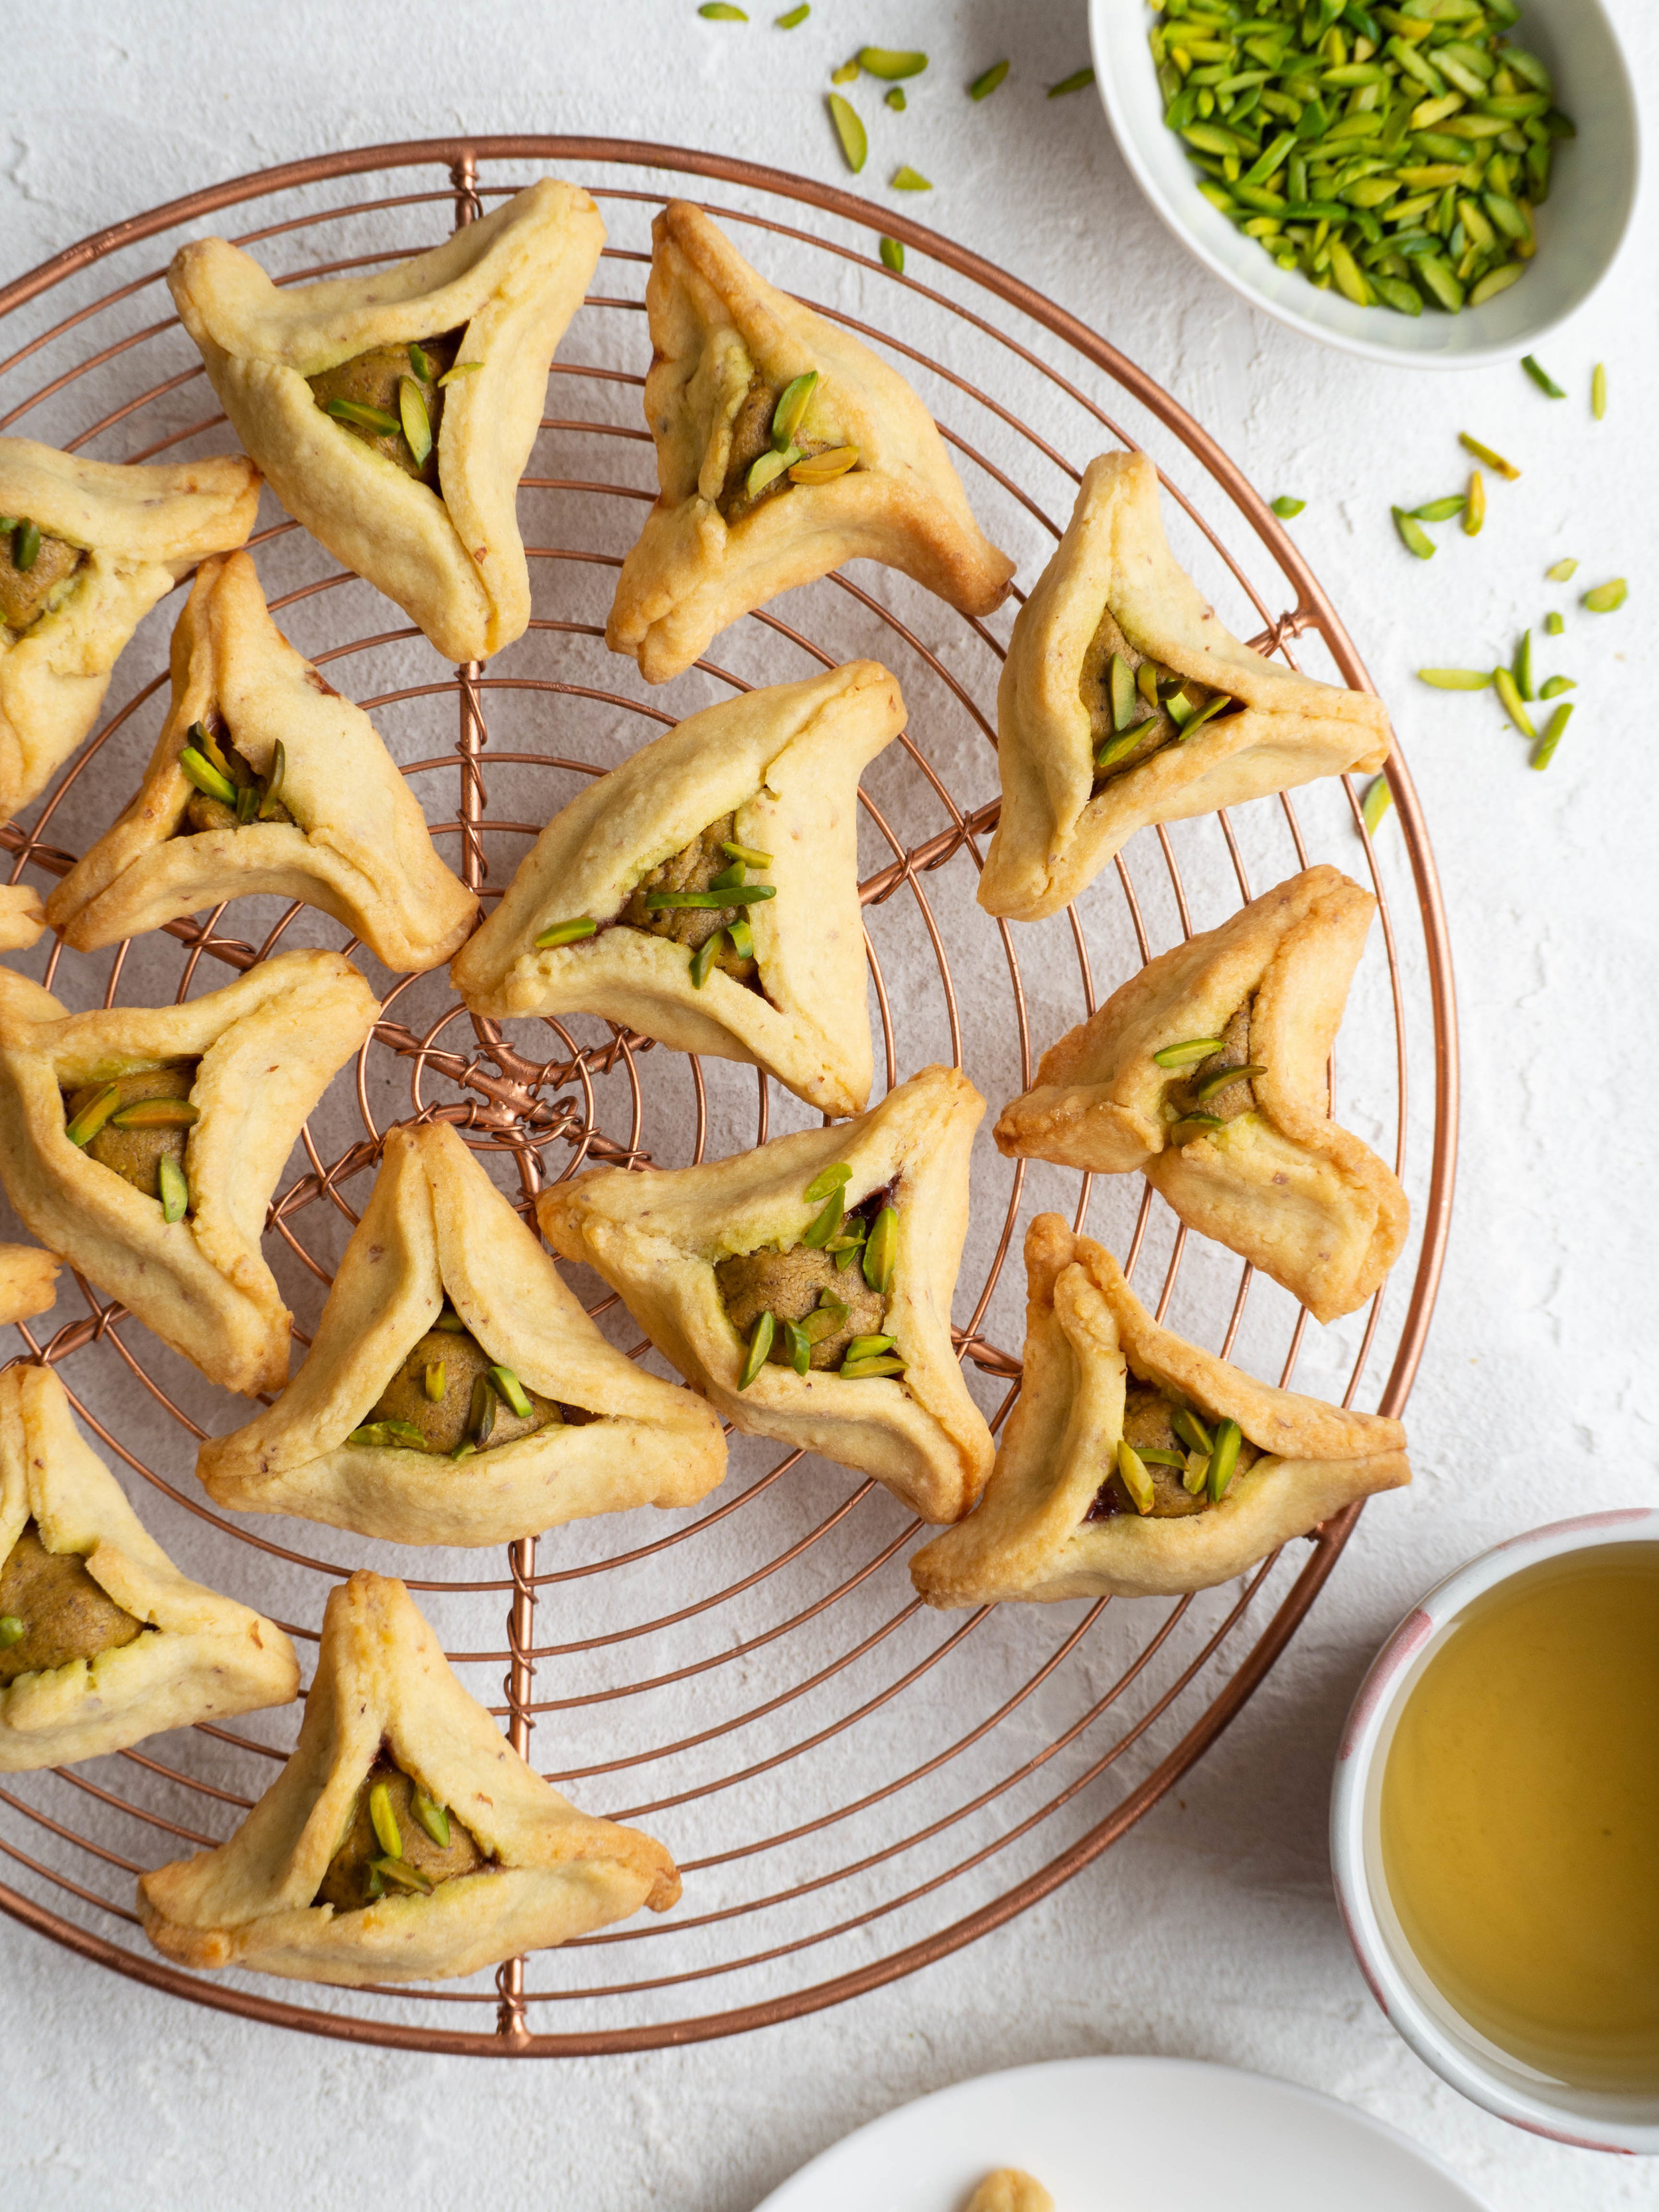
Pistachio Hamantaschen

Pistachio Hamantaschen

Pistachio Hamantaschen + How to Make Pistachio Paste

Kath March 17, 2019

Purists look away now, these are not traditional hamantaschen! Hamantaschen (made during the Jewish festival of Purim) are only a recent discovery for me, so I don’t have any preconceived ideas or traditions to guide me as to how they ‘should’ be. My only experience with them is seeing pictures pop up on Instagram the week or so before Purim. And many of the ones I have seen are variants on the traditional versions. The recipes from Molly Yeh’s blog ‘My Name is Yeh’ are a great example of this. Last year I made her Marzipan Sprinkle Hamantaschen and they were delightfully fun.

This year I have been baking with pistachios a lot, and trying to perfect a homemade pistachio paste (since none seems to be available to buy at any store I have so far looked at!). When I noticed Purim was fast approaching I thought a pistachio version with my newly perfected pistachio paste would be great. 

Great, if you aren’t set on a traditional hamantaschen that is! After speaking to a few people, I have since discovered that firstly, traditionally hamantaschen are filled with a poppyseed filling. Secondly, the shortbread like pastry sometimes used nowadays (like the one below), is definitely not traditional! A yeasted dough is the traditional way to make them. 

Well, that had me seriously questioning my hamantaschen idea, and for a moment considered making this version and a traditional poppyseed one with yeasted dough. After more discussion and some research online and in a few of my cookbooks, I decided to forge ahead with my super untraditional hamantaschen recipe. 

From my research on hamantaschen the shortbread like dough was a 20th century adaptation of the original, as it was easier to make and had a slightly longer shelf life. From my observations it looks like the shortbread like dough is quite common in America and in US based recipes. Which is where the below recipe originates. After some trial and error I finally settled on the dough recipe by Uri Scheft from his book ‘Breaking Breads’. Uri has bakeries in Israel and New York, and based on the types of recipes in this book, I definitely need to visit one of these bakeries one day!

So to those celebrating, Chag Purim Sameach! And for everyone else, I hope you give these a go! They are worth it just for the pistachio paste alone 😀.

If you want to know more about Purim or Hamantaschen here are a few good links! 

  • All You Need to Know About Hamantaschen 

  • The OG Hamantaschen: Yeast Dough Poppy Triangles 

  • A Purim Classic: Sugar Cookie Hamantaschen 

  • Molly Yeh’s Hamantaschen Recipes 

NB. The leftover pistachio paste can be used to flavour ice creams or gelato, cakes, icings, milkshakes etc. 

Also! The Pisacahio Paste requires blending by a fairly powerful food processor! If you don’t think yours is up to the task, or don’t feel like making it I would recommend making the marzipan from Molly’s Marzipan and Sprinkle Hamantaschen but with ground pistachios instead of almonds. 

View fullsize IMG_7378.JPG
View fullsize IMG_7339.JPG
View fullsize IMG_7368.JPG
Hamantaschen ready for the oven

Hamantaschen ready for the oven

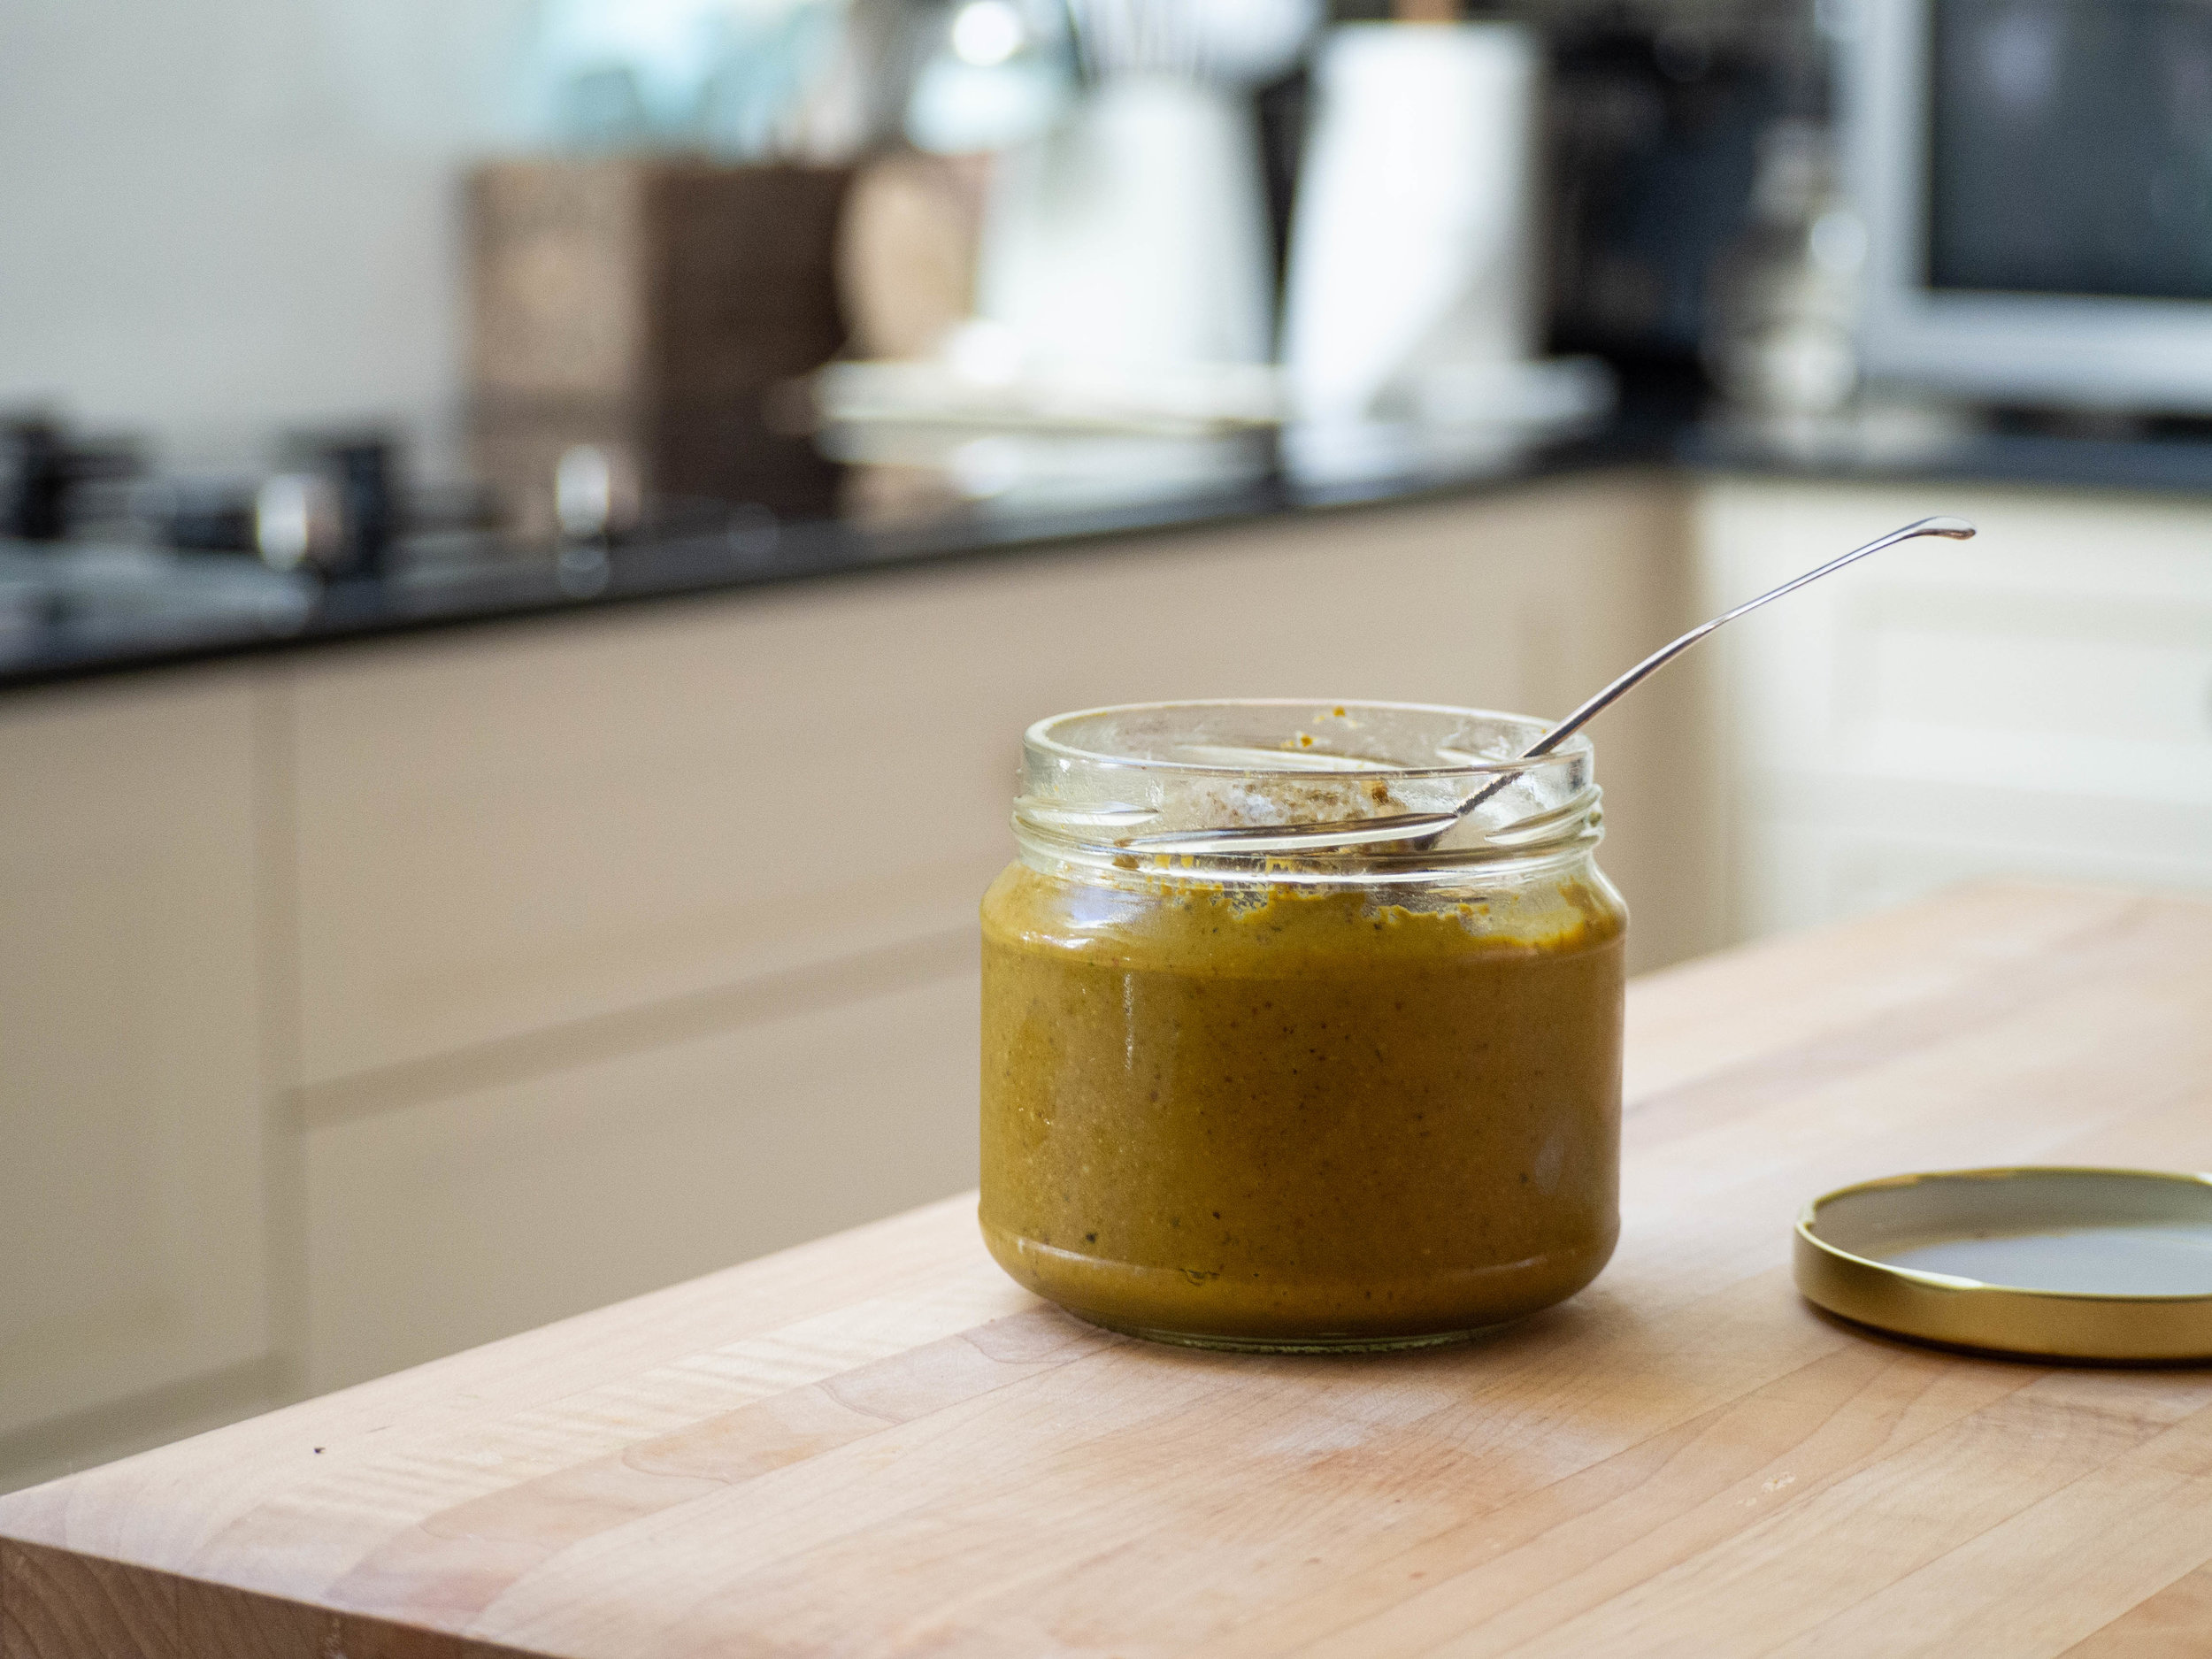
Homemade Pistachio Paste

Homemade Pistachio Paste

How to Make Pistachio Paste

Ingredients: 

250g raw or blanched pistachios 

100g white sugar 

30ml water

60ml (4tbsp) pistachio oil 

Method: 

Pre heat oven to 160 degrees Celsius, and place the pistachios on a baking tray. Roast in the oven for 10 minutes. Once done set aside to cool a little. 

Place the sugar and water into a small/medium saucepan and heat until it reaches 120 degrees on a sugar thermometer. Whilst the sugar syrup is heating, place the roasted pistachios in the bowl of a food processor and blitz until they form a fine crumb. 

Once the sugar syrup has reached 120 degrees Celsius, gradually pour into the food processor whilst it is running. Gradually add the pistachio oil, and continue to process until a smooth paste forms. This should take between 5 and 10 minutes. Scrape down the sides of the food processor bowl at regular intervals if necessary. The finished product will be a smooth paste, similar to a nut butter. When the paste initially combines it will form a smooth ball, continue processing until a more paste like consistency is reached. 

Once a smooth paste has formed, decant into plastic containers or glass jars and store in the fridge until needed. It should last about 1 month refrigerated. If the oils in the paste separate a little during storage, mix the paste briefly before using.

Makes about 390g. 

Homemade Pistachio Paste

Homemade Pistachio Paste

Pistachio Hamantaschen

Pistachio Hamantaschen

Pistachio Hamantaschen 

Ingredients: 

230g unsalted butter (cold not room temp)

100g icing sugar (confectioners)

50g white sugar

2 eggs 

400g plain flour

50g almond meal

salt


Ingredients for the Filling: 

1/2 tbsp water

salt

60g mixed berry jam

250g pistachio paste 

slivered pistachios, to decorate

Method: 

Place the butter in between two sheets of baking paper and bash with the end of a rolling pin. This tenderises the butter without warming it up too much. 

Place the butter and both sugars in the bowl of a stand mixer and beat with the paddle attachment on a low speed until just combined. Increase the speed a little for a few moments longer to ensure everything is well mixed. 

In a glass, add one of the eggs and lightly beat. Tip half of this into another glass and add the other egg to one of the egg halves and beat until combined. Only 1.5 eggs is necessary for the dough, however keep the other half for the egg wash later. 

Add the beaten 1.5 eggs to the butter and mix on low until combined. Add the flour, almond meal and a pinch of salt then mix until almost combined. 

Tip your dough onto a work surface and bring the dough together with your hands, until everything is combined. Wrap in plastic wrap or baking paper and place in the fridge for at least 1 hour (however you can do up to this step on one day and finish off the rest the next). 

Once the dough has chilled, pre heat oven to 160 degrees Celsius and line three large baking trays with baking paper. 

Flour your work surface and roll the dough out with a rolling pin until it is about 0.5cm thick. Continue to dust with more flour if the dough is sticky. 

Cut out rounds of the dough using a 7.5-8cm (3 inch) round biscuit/cookie cutter and place on the prepared trays. Place these trays in the fridge if the dough has softened too much for a few minutes. Bring the scraps of dough together and flatten out again. If the dough is too soft re-wrap and place in the fridge for a few minutes, then continue to cut out more rounds of dough. 

Remove the trays from the fridge. Get your beaten half egg from earlier and add the water and a pinch of salt. Whisk until combined. Brush this mixture over each round of dough. 

Then spread a little of the jam in the centre of each round, then place a 1tsp sized ball of pistachio paste on top. 

Shape the rounds of dough into the characteristic triangle shape by pinching one side into a corner, then folding the other side up to form two more corners. Sprinkle the middle of each with a few slivered pistachios.

Bake for about 20-23 minutes, rotating the racks a couple of times during baking to ensure an even bake. The hamantaschen will be lightly golden when they are done. 

Cool on trays or on wire racks. 

Makes about 40. 

Pistachio Hamantaschen

References: ‘À La Mère de Famille’ by Julien Merceron (Hardie Grant Books, 2013), p.160; ‘Breaking Breads’ by Uri Scheft (Artisan, 2016), pp.258-260.

Pistachio Hamantaschen
In Tarts & Pastry, Holidays, Jams Preserves & Spreads Tags Hamantaschen, Jewish Baking, Pistachio Paste, Pistachio, Purim
2 Comments
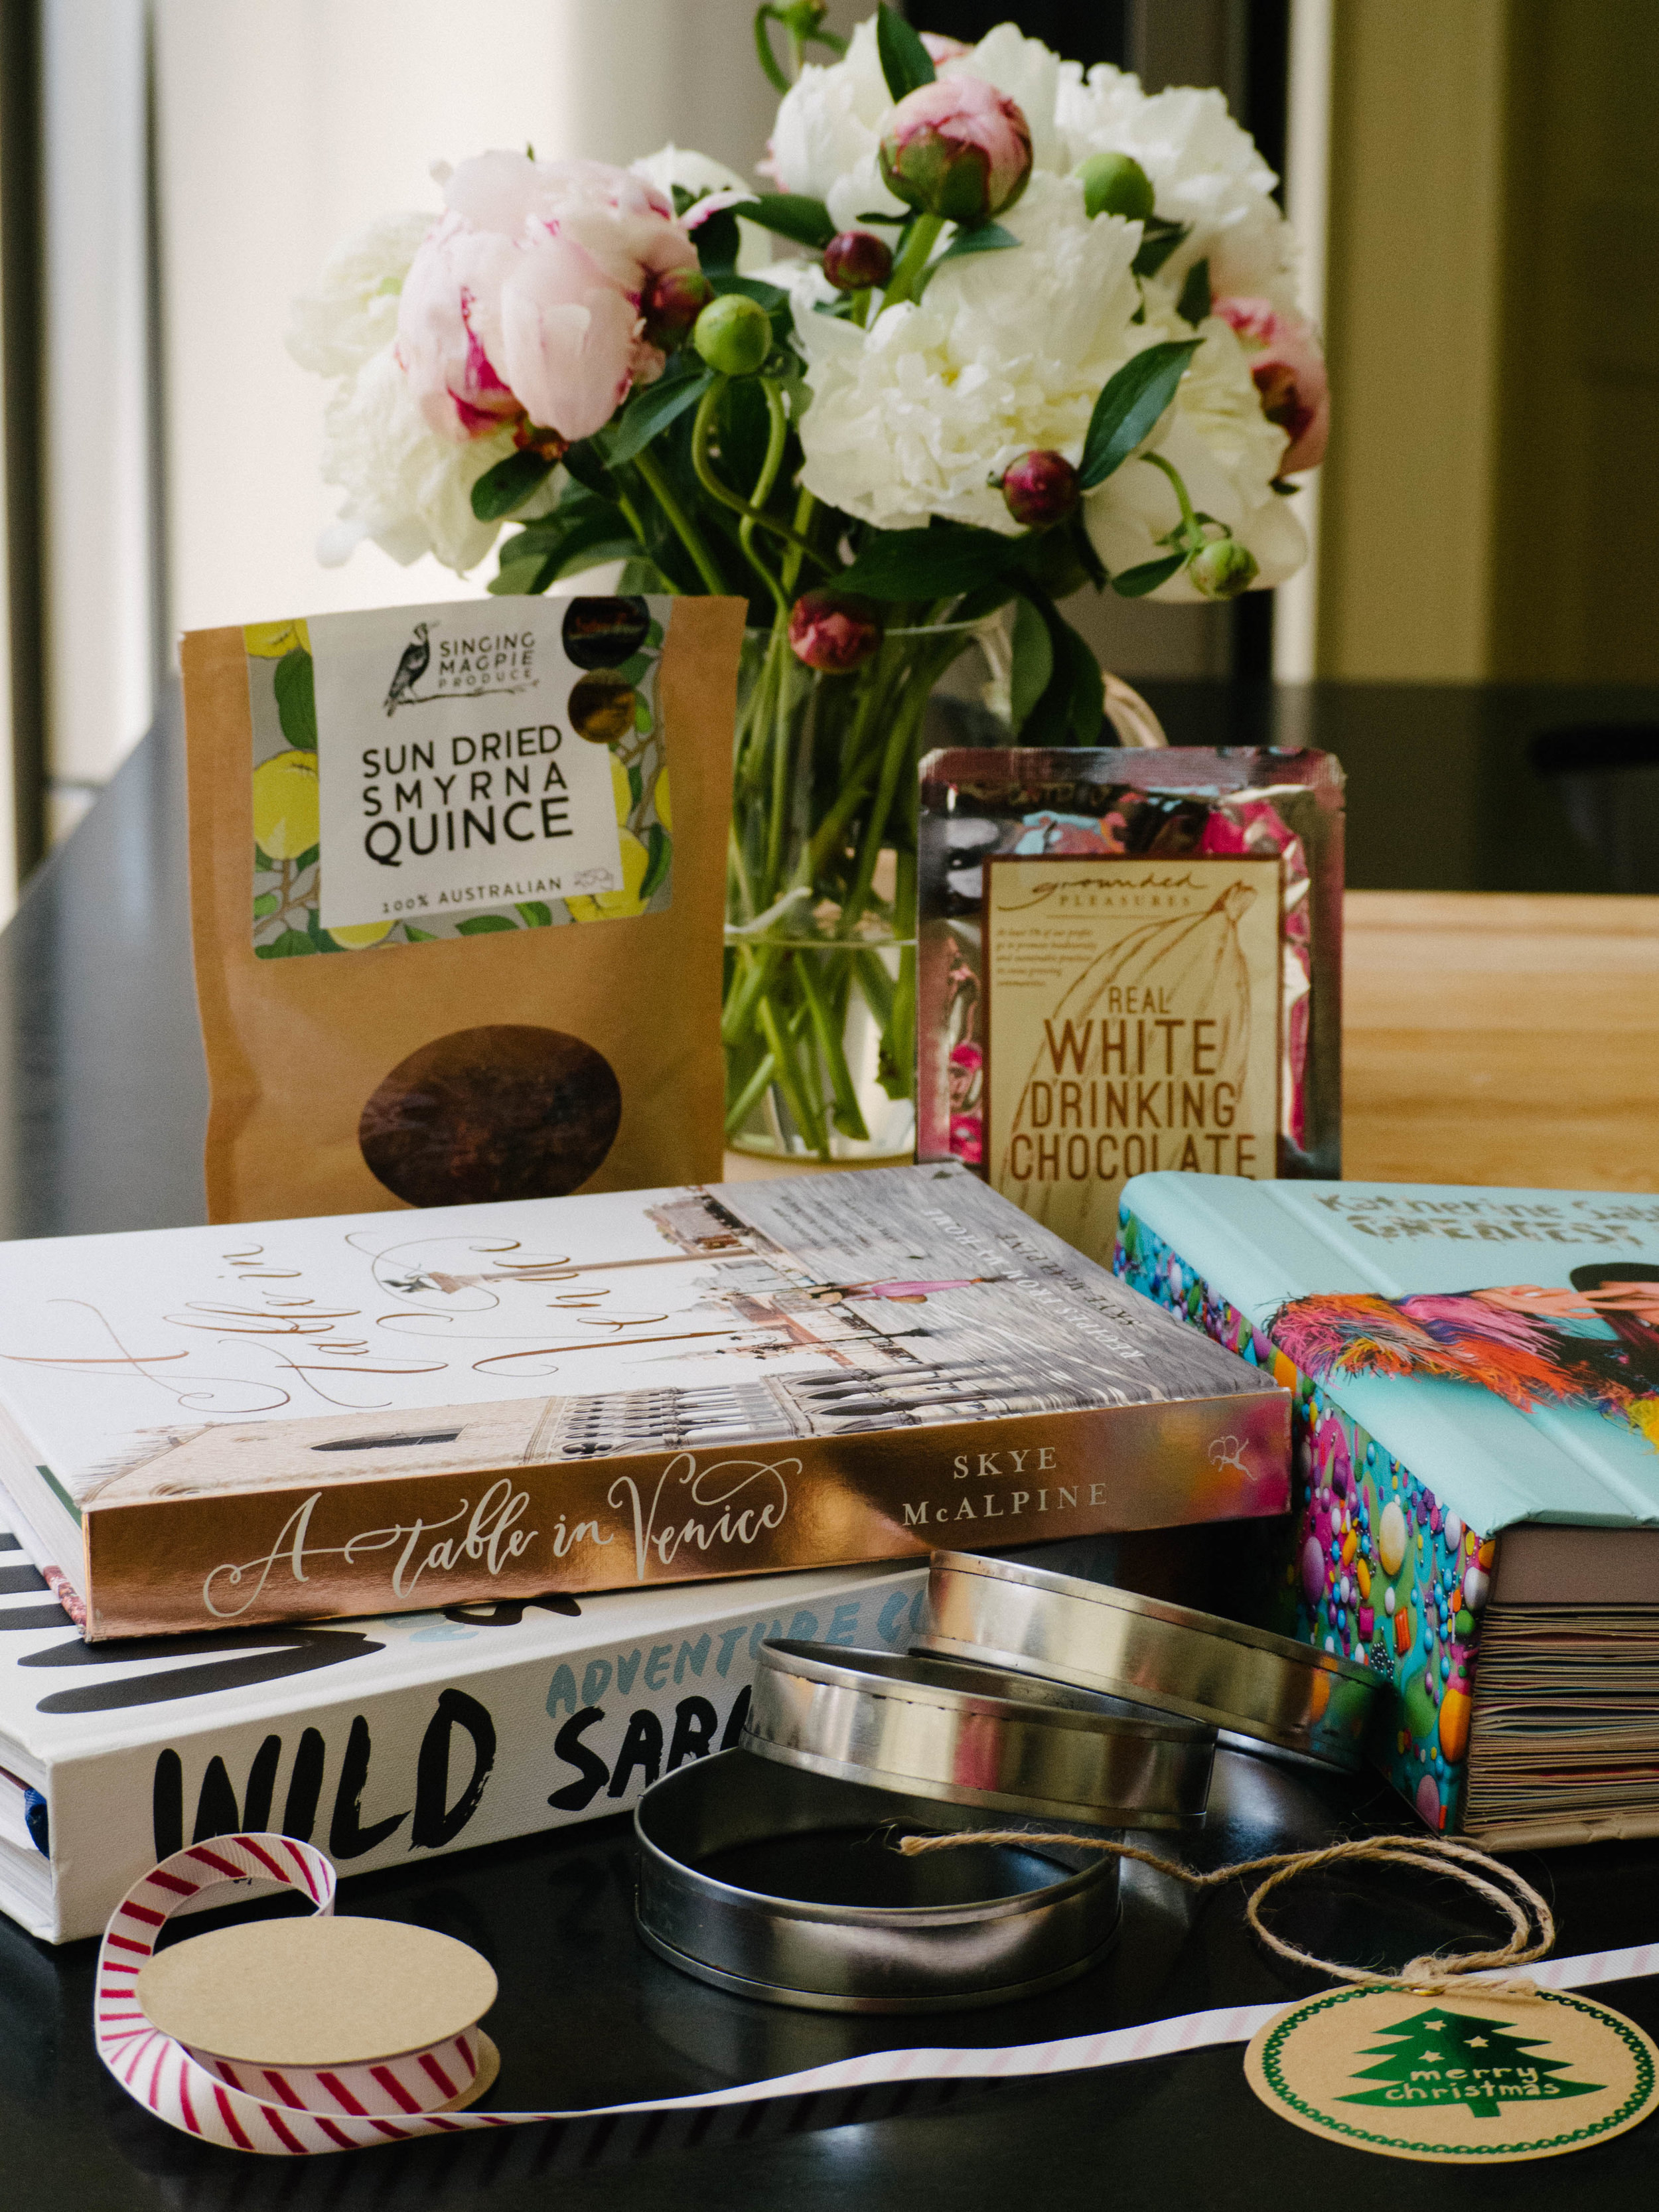
Christmas Gift Guide for Foodies 2018 - details below

Christmas Gift Guide for Foodies 2018 - details below

A Christmas Gift Guide for Foodies

Kath November 23, 2018

Heavily inspired by Betty Magazine’s lust worthy gift guide, and after much deliberation over what I will be buying people for Christmas, I thought I would put together a Christmas Gift Guide for the foodies in your life (or for yourself of course!). 

These are a selection of my favourite cookbooks I love to give as gifts and one’s that are on my wish list this year!

I have also included a selection of food or food related gifts from Australian based small business that I love, to give you some extra inspiration for the festive season.

Each picture has click through link, so if you want more information about any of the books or products, click their picture.

NB: If buying online from these great small businesses, please note their Christmas delivery cut off dates so you aren’t disappointed. 

Farmer - The Cookbook
WILD Adventure Cookbook - by Sarah Glover
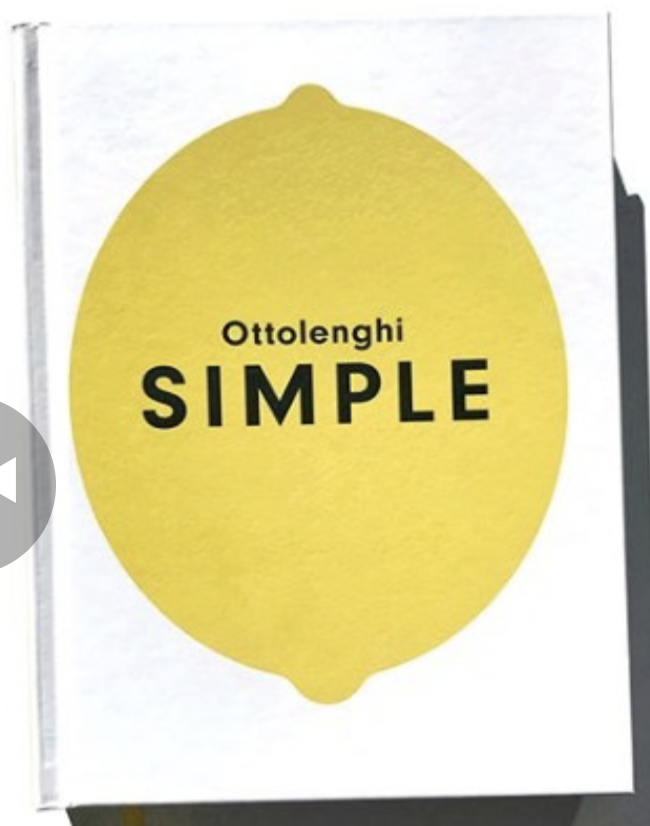
Ottolenghi Simple - by Yotam Ottolenghi
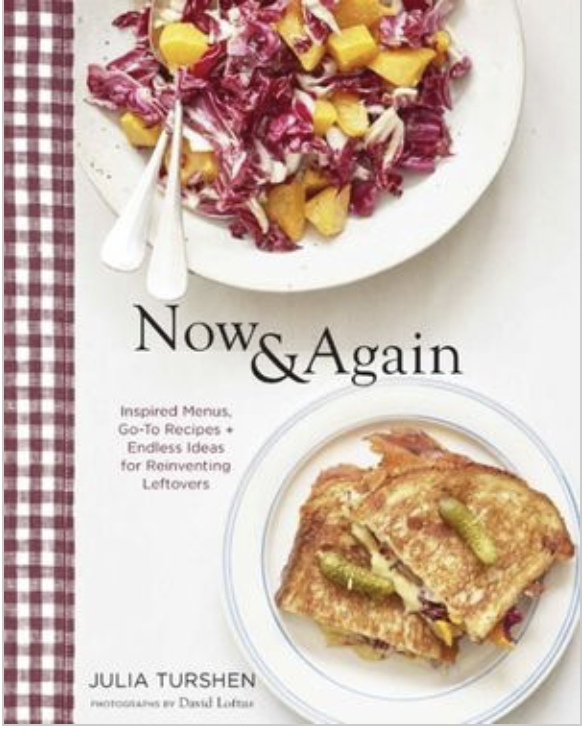
Now & Again - by Julia Turshen
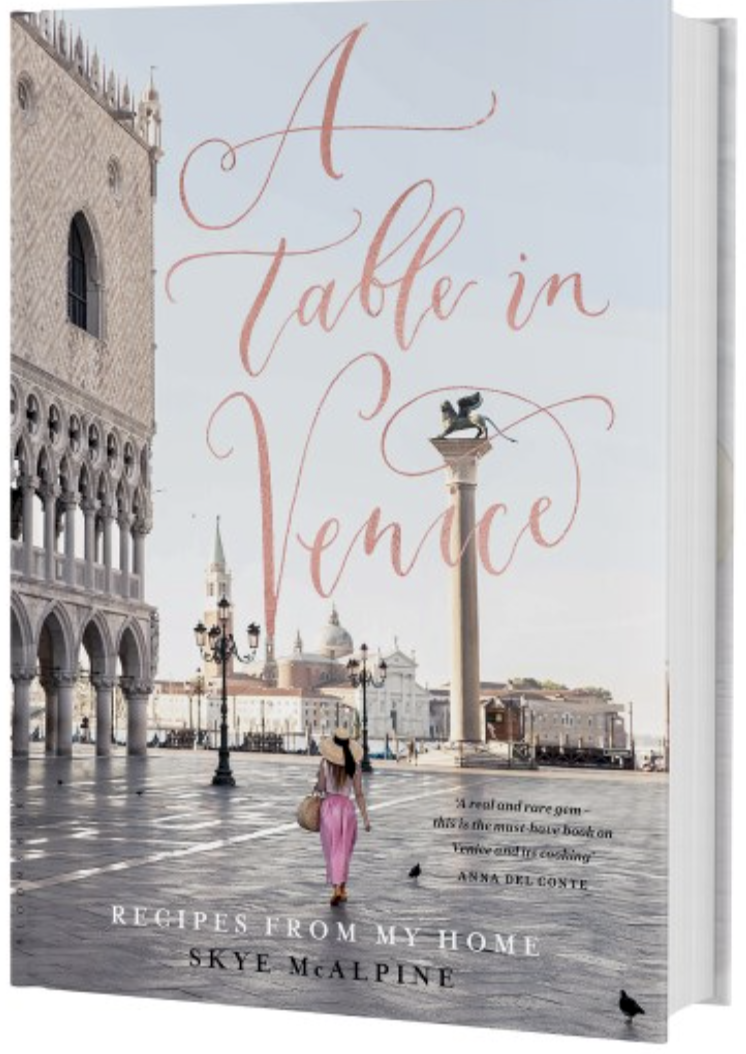
A Table in Venice - by Skye McAlpine
Greatest Hits - Katherine Sabbath
  1. Farmer - The Cookbook, starting at $40. This book is a charity project supporting Rural Aid for farmers affected by the drought. The book is due to be released in February 2019, however there is a great Christmas gift option for $50, where you get a Gift Voucher mailed to you to give to the recipient for Christmas, and the book itself will get mailed to them come February next year. For more information check out their Chuffed fundraising page.

  2. WILD Adventure Cookbook by Sarah Glover, $69.95. This book started as a Kickstarter project between Sarah Glover and photographer Luisa Brimble, and since then gone on to be released in the USA and is also available in bookstores here in Australia (David Jones and Booktopia to name a couple). This is a really different style of cookbook and is filled with beautiful images of food being cooked outdoors.

  3. Ottolenghi Simple - by Yotam Ottolenghi, $34.95. I don’t know many who don’t want this book! Yotam Ottlenghi’s recipes are always fantastic and this book has an edge of comfort and simplicity, whilst maintaining his characteristic flavour combinations and interesting ingredients.

  4. Now & Again - by Julia Turshen, $40.75. Julia’s recipes and food writing are so enjoyable, and I can’t imagine anyone not getting some good use out of this book. This book creates magic from leftovers in Julia’s trademark friendly and inviting style.

  5. A Table in Venice - by Skye McAlpine, $46.25. This book is a dream, visually and in terms of the recipes. The photography and design of the book are stunning and would make a lovely gift for any lover of Italian food.

  6. Greatest Hits - by Katherine Sabbath, $125. This book is like nothing else you’ve seen before! A pop-up cookbook filled with Katherine’s fun and colourful creations would be the perfect gift for any keen baker.

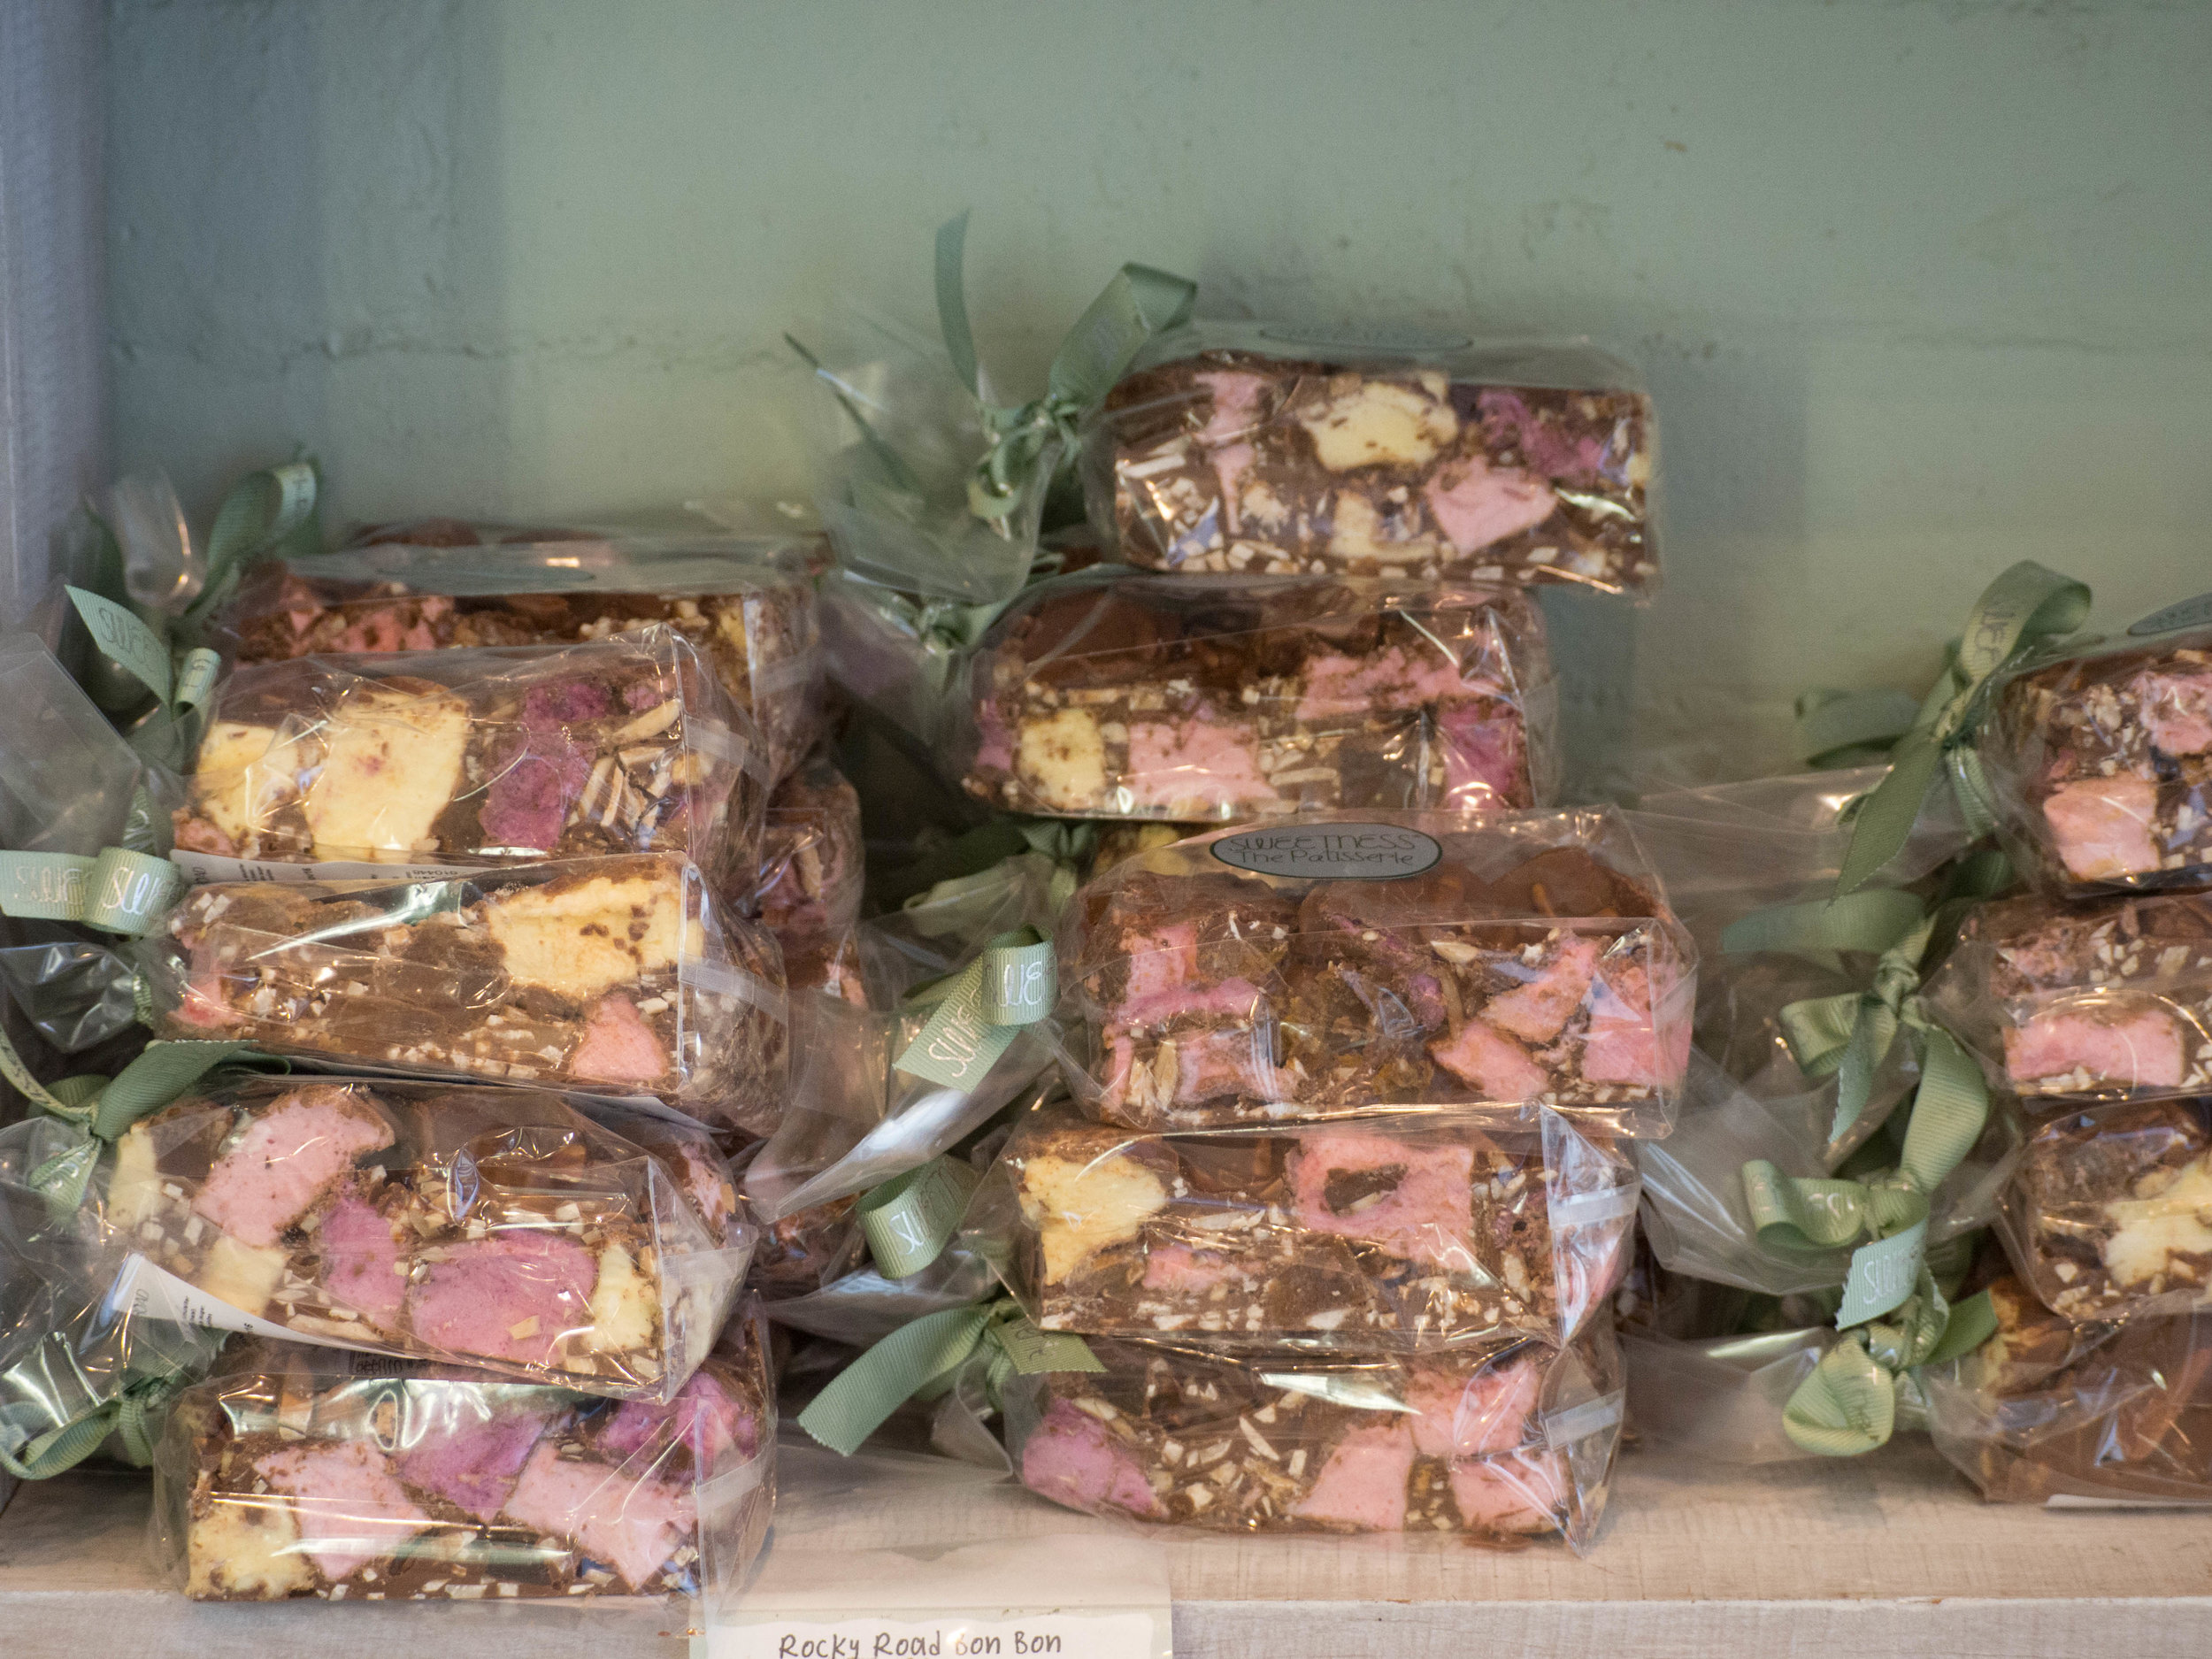
Rocky Road Bon Bon -Sweetness by Adora
Toasty Block-O-Choc - Bakedown Cakery
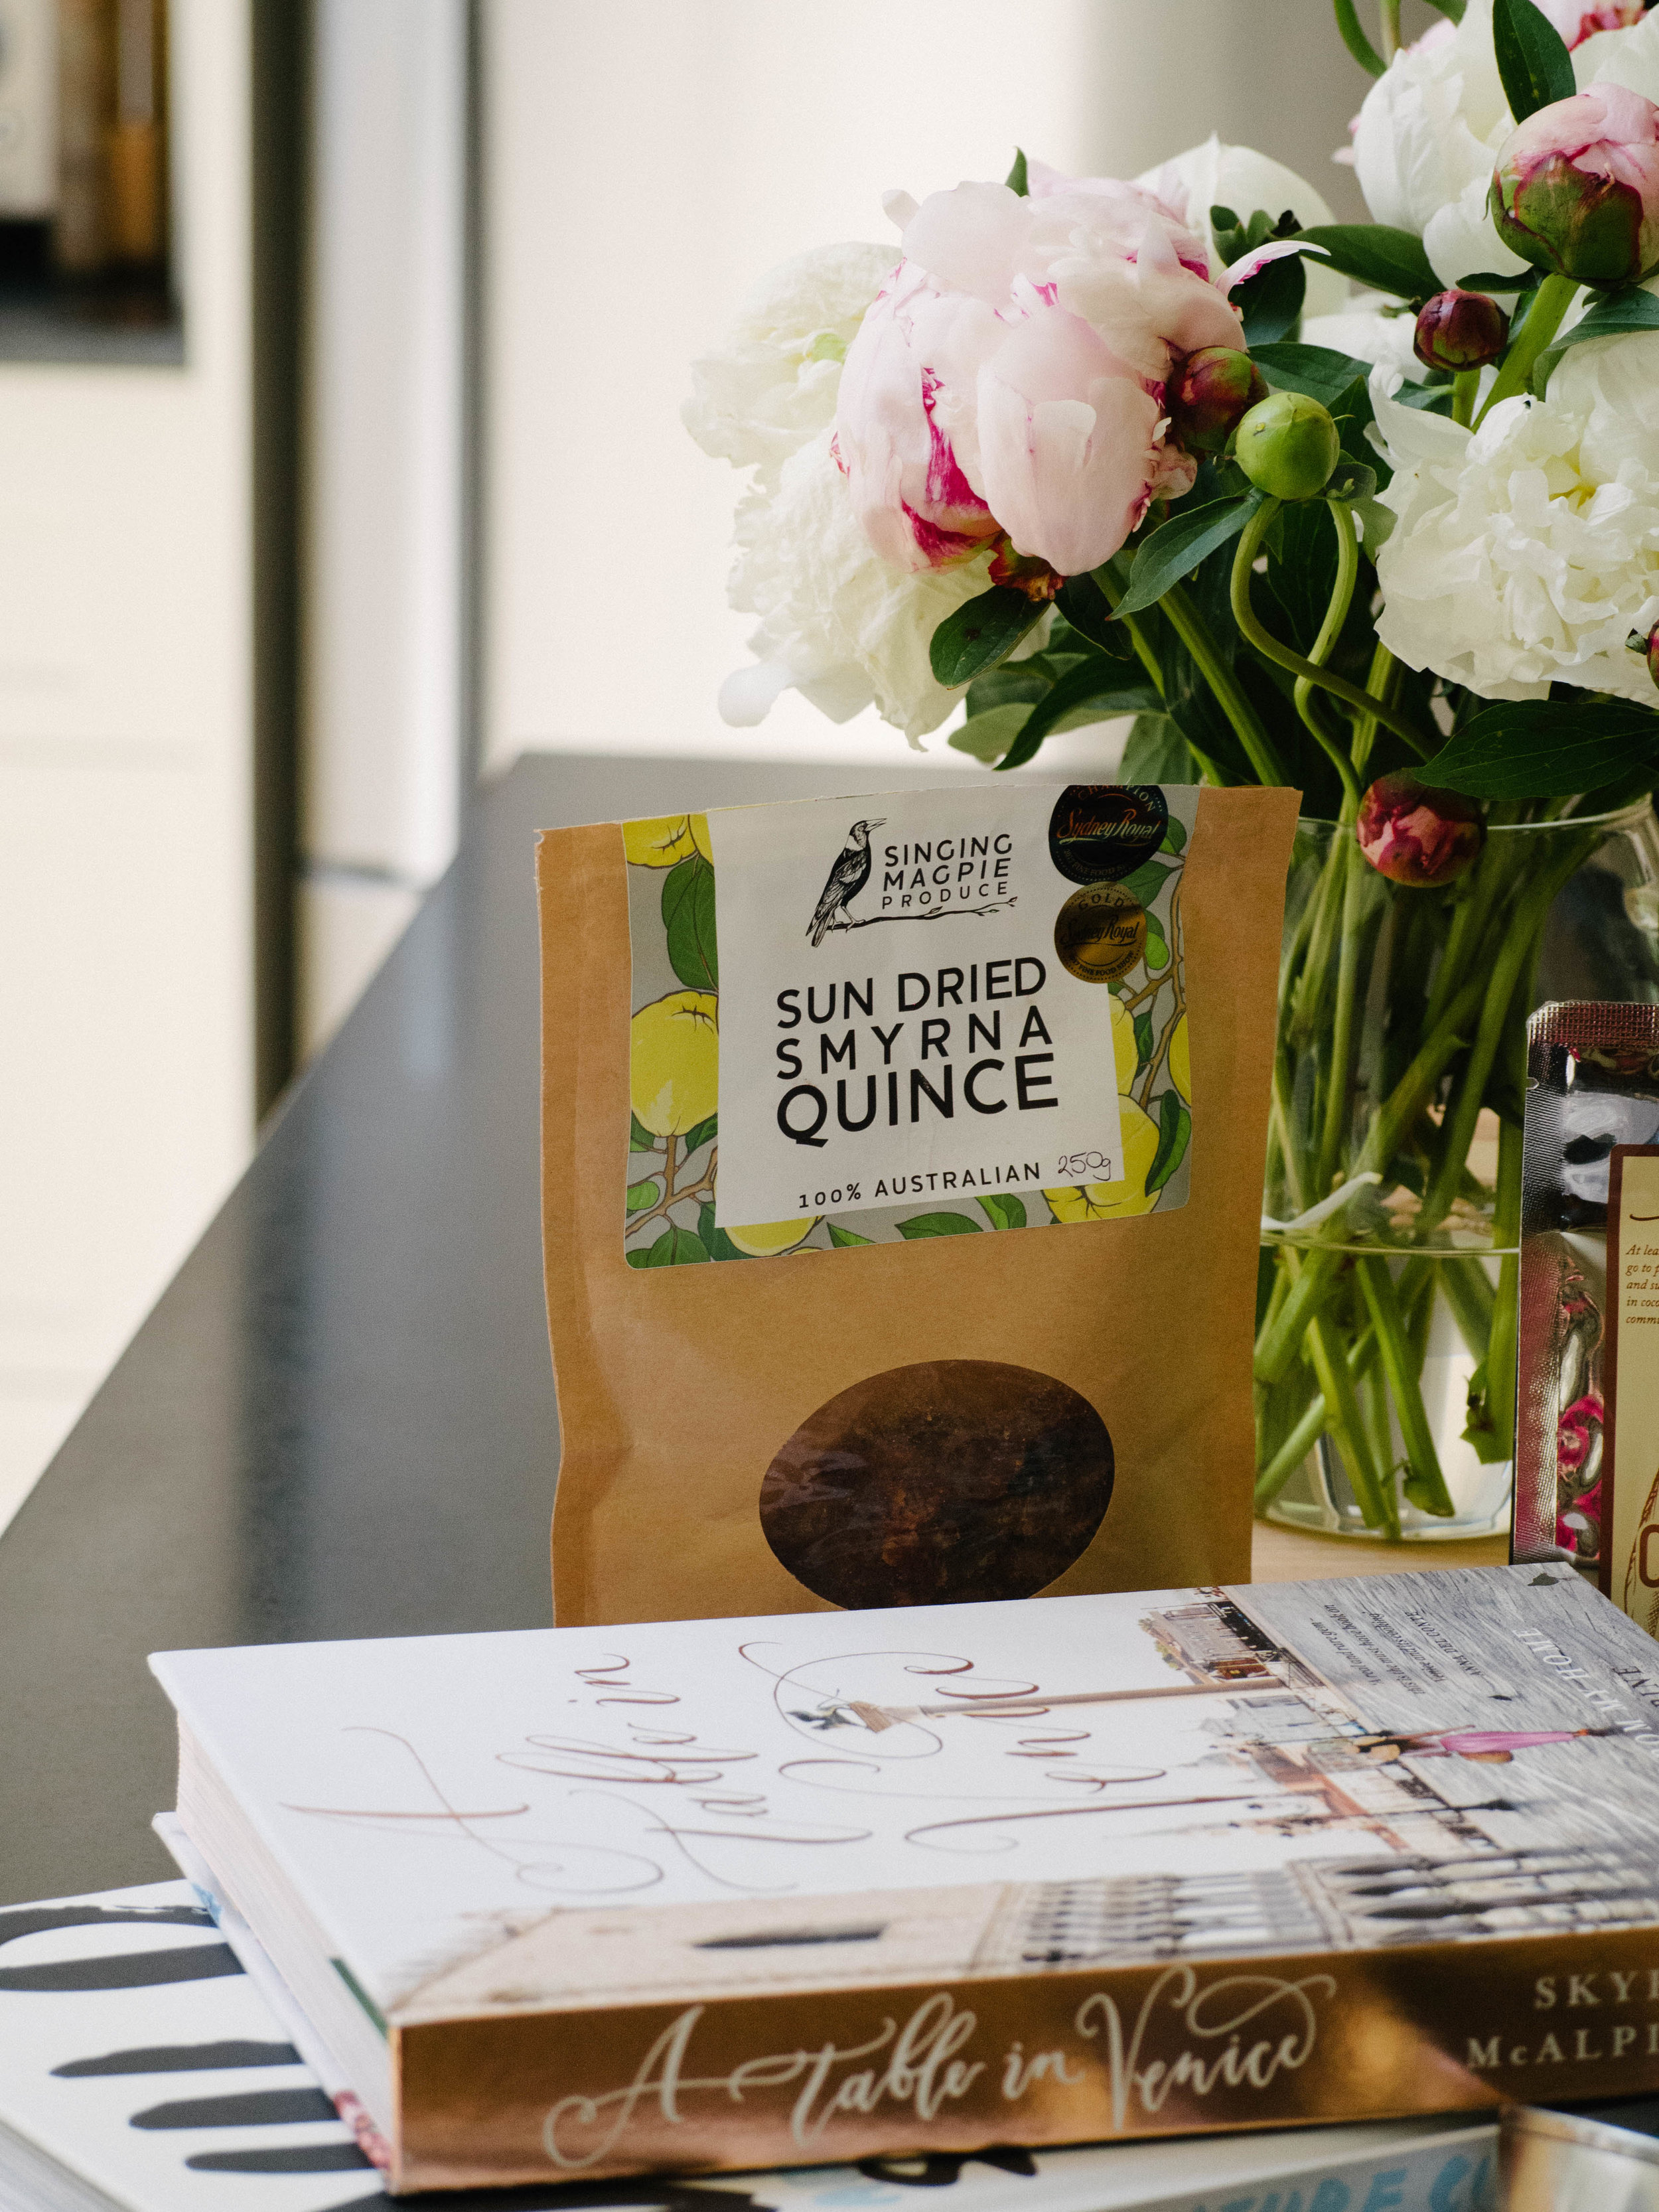
Sun Dried Smyrna Quince - Singing Magpie Produce
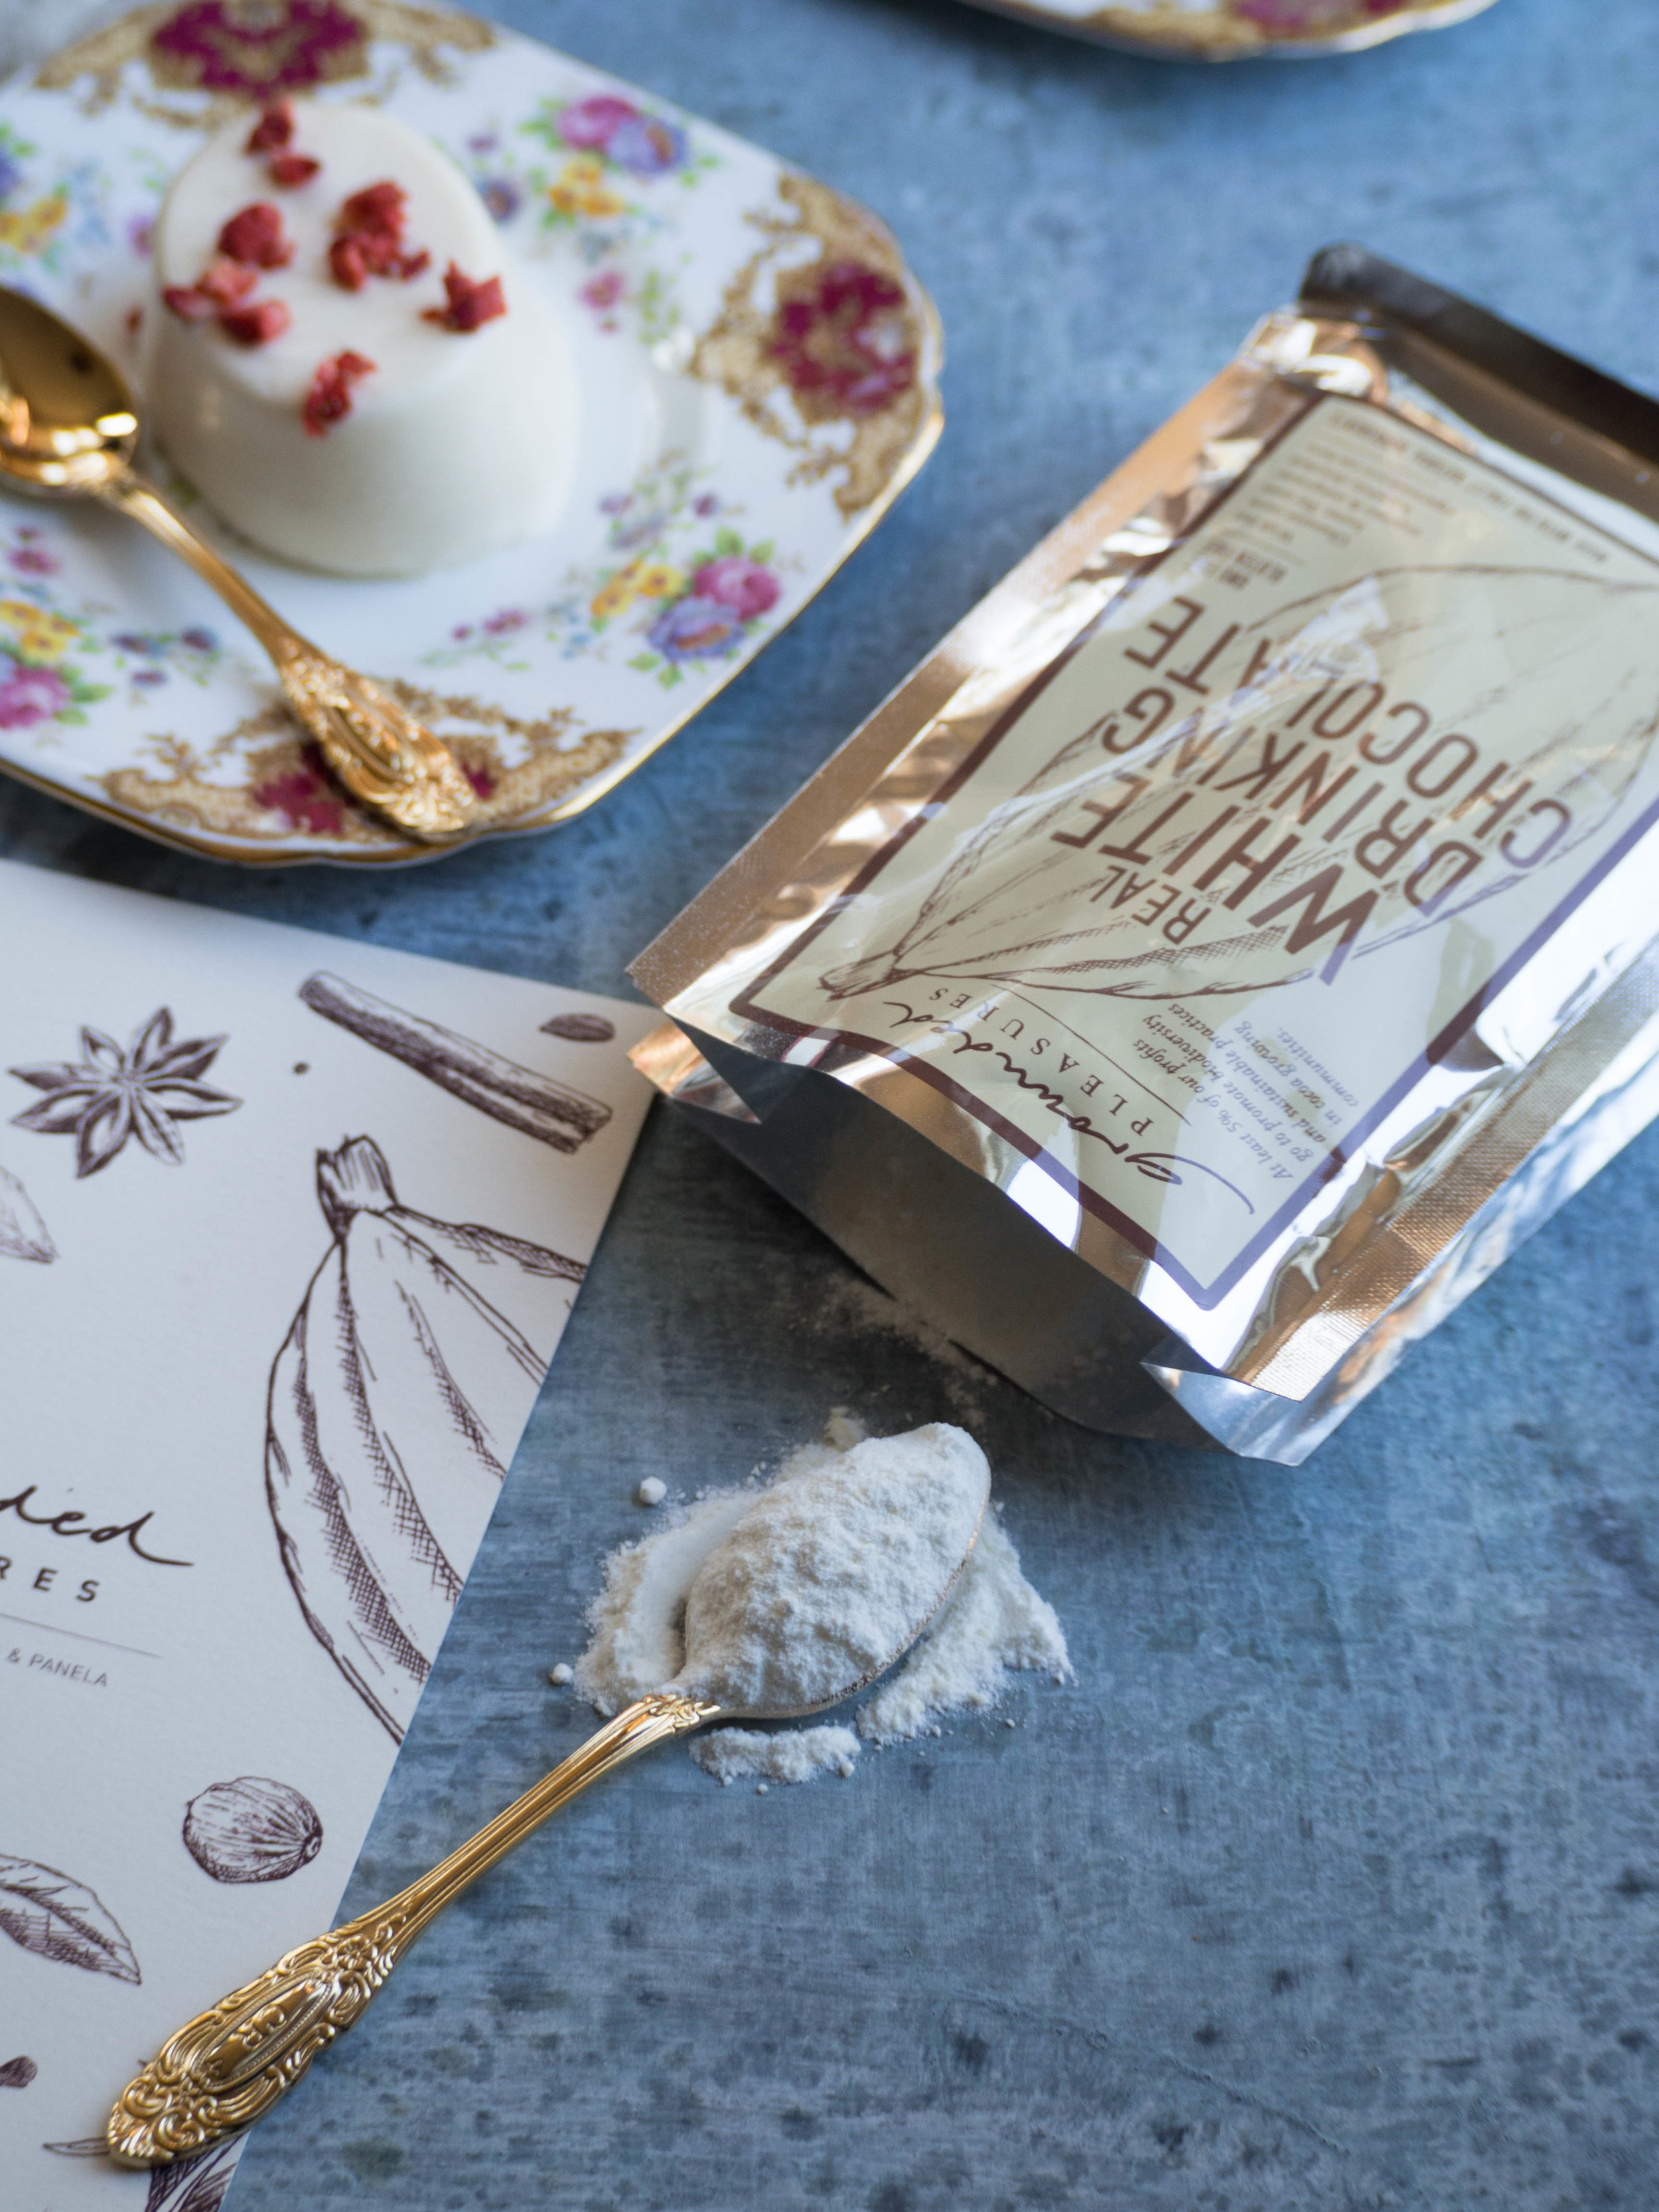
Real White Drinking Chocolate - Grounded Pleasures
Cornersmith Gift Voucher
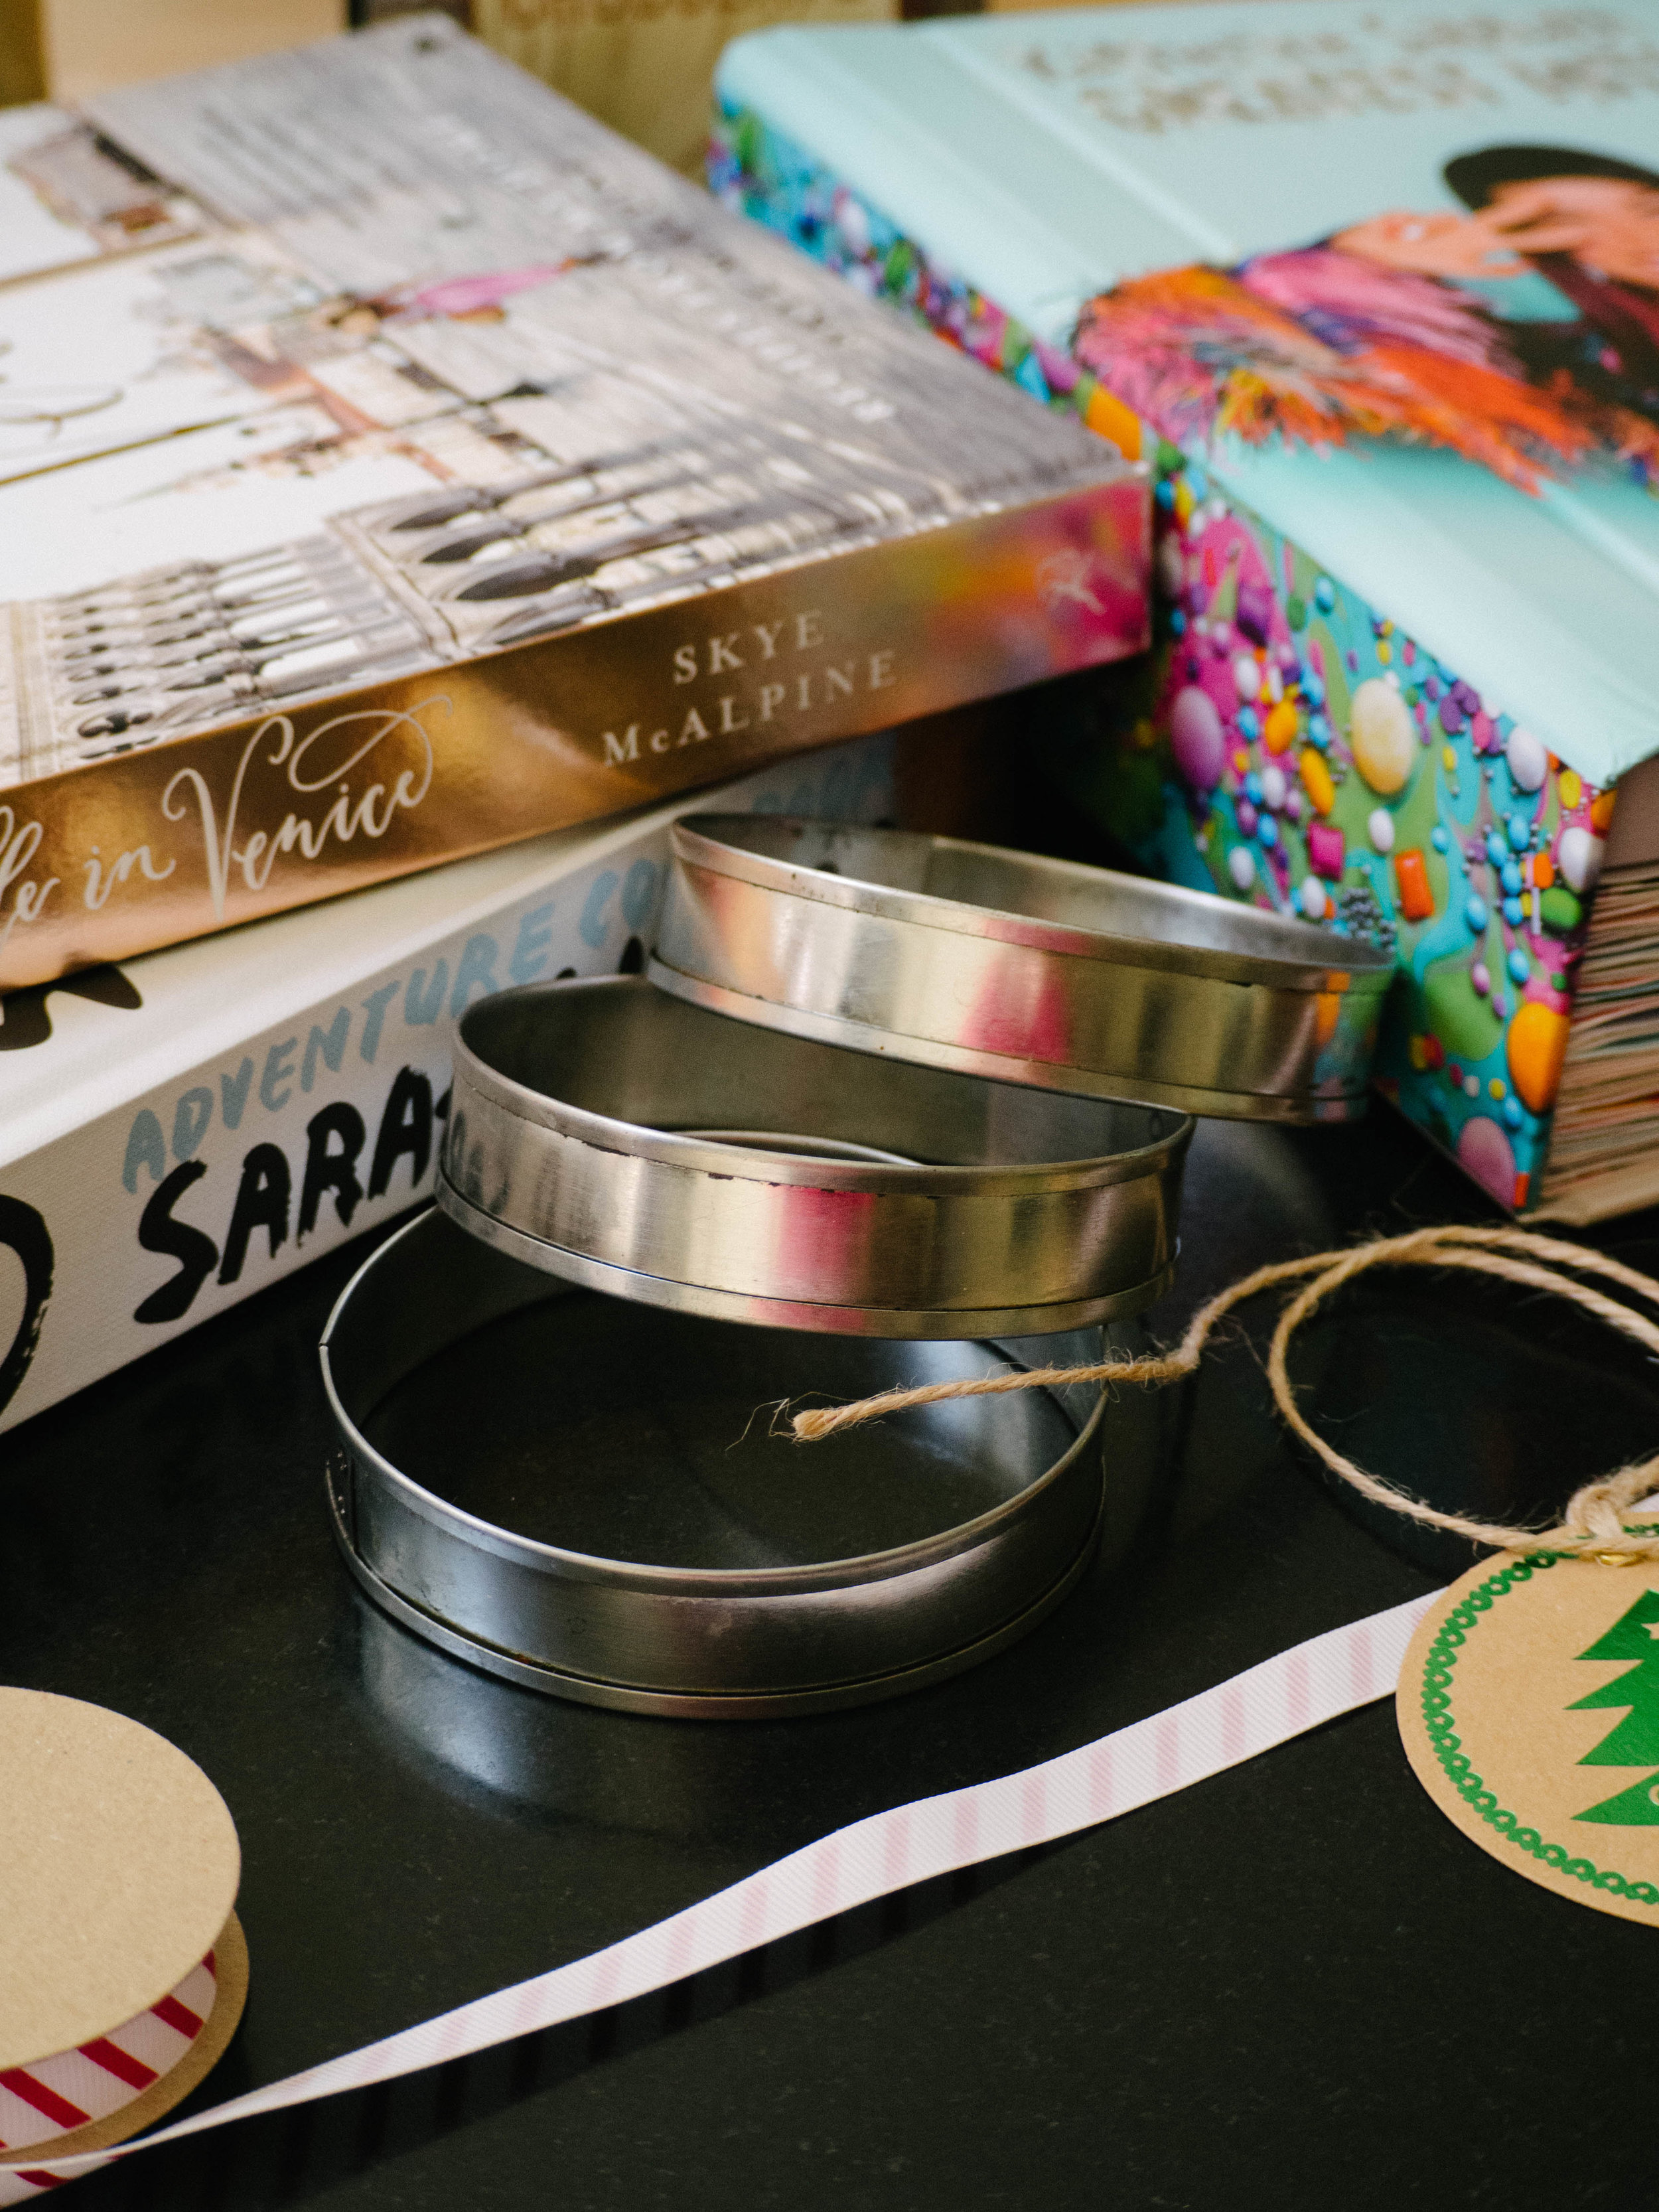
Crumpet Rings - The Lost & Found Department
  1. Rocky Road Bon Bon from Sweetness by Adora Chocolates, $12. These are the best rocky road you can get. Coming in dark, milk and white chocolate each bar contains handmade SweetMallows (Sweetness by Adora’s handmade marshmallows) along with their handmade pâte de fruit.

  2. Toasty Block O Choc from Bakedown Cakery, $12. This chocolate bar is unlike any other - it’s caramelised white chocolate! Much more addictive than it’s regular white chocolate sibling, this bar is well worth a try. But get in quick as Bakedown are changing their chocolate offering in 2019 and Toasty will be no more! All Bakedown chocolate bars come in beautifully designed packaging so they make the perfect gift.

  3. Sun Dried Smyrna Quince from Singing Magpie Produce, $33. You've probably heard me go on about this dried fruit before, but they are just so good! Sun dried in Monash, South Australia these quinces come from trees planted over 100 years ago, and have won many a food award, and for good reason!

  4. Real White Drinking Chocolate from Grounded Pleasures, $12.90. I love this white drinking chocolate! White drinking chocolate can be very hard to find, but Grounded Pleasures has you covered. The chocolate is beautiful and creamy, yet not too rich and is great for a warming winter drink. It can also be used in baking and for iced drinks too. Grounded Pleasures also make a variety of other drinking chocolates which are well worth checking out.

  5. Cornersmith Gift Voucher from Cornersmith, from $50. Who wouldn’t want to do a cooking class at Cornersmith? From bread making to pickling and preserving Cornersmith offers a wide range of classes during the year which are super enjoyable and informative.

  6. Crumpet Rings from The Lost and Found Department, $2.50 each. The Lost and Found Department sells a range of baking ware handmade in Tasmania, and one of these products are these crumpet rings. Used to cook crumpets on the stove, these rings are a rare gem as they are otherwise extremely hard to come by! The are a great little present for any keen baker.

Toasty Bloc-O-Choc by Bakedown Cakery (stars are Christmas Limited Edition Toasty Caramel & Praline by Bakedown Cakery)

Toasty Bloc-O-Choc by Bakedown Cakery (stars are Christmas Limited Edition Toasty Caramel & Praline by Bakedown Cakery)

Greatest Hits The Pop Edition by Katherine Sabbath

Greatest Hits The Pop Edition by Katherine Sabbath

Christmas Gift Guide for Foodies - Kulinary Adventures of Kath
In Holidays Tags Christmas, Gift Guide, Christmas Gift Guide for Foodies, Christmas 2018, Wild Adventure Cookbook, Farmer - The Cookbook, A Table in Venice, Ottolenghi Simple, Greatest Hits by Katherine Sabbath, Now & Again by Julia Turshen, Bakedown Cakery, Sweetness by Adora, Singing Magpie Produce, Grounded Pleasures, Cornersmith Picklery, The Lost & Found Department
Comment
Stained Glass Window Christmas Fruit Cake

Stained Glass Window Christmas Fruit Cake

Stained Glass Window Christmas Fruit Cake

Kath November 23, 2018

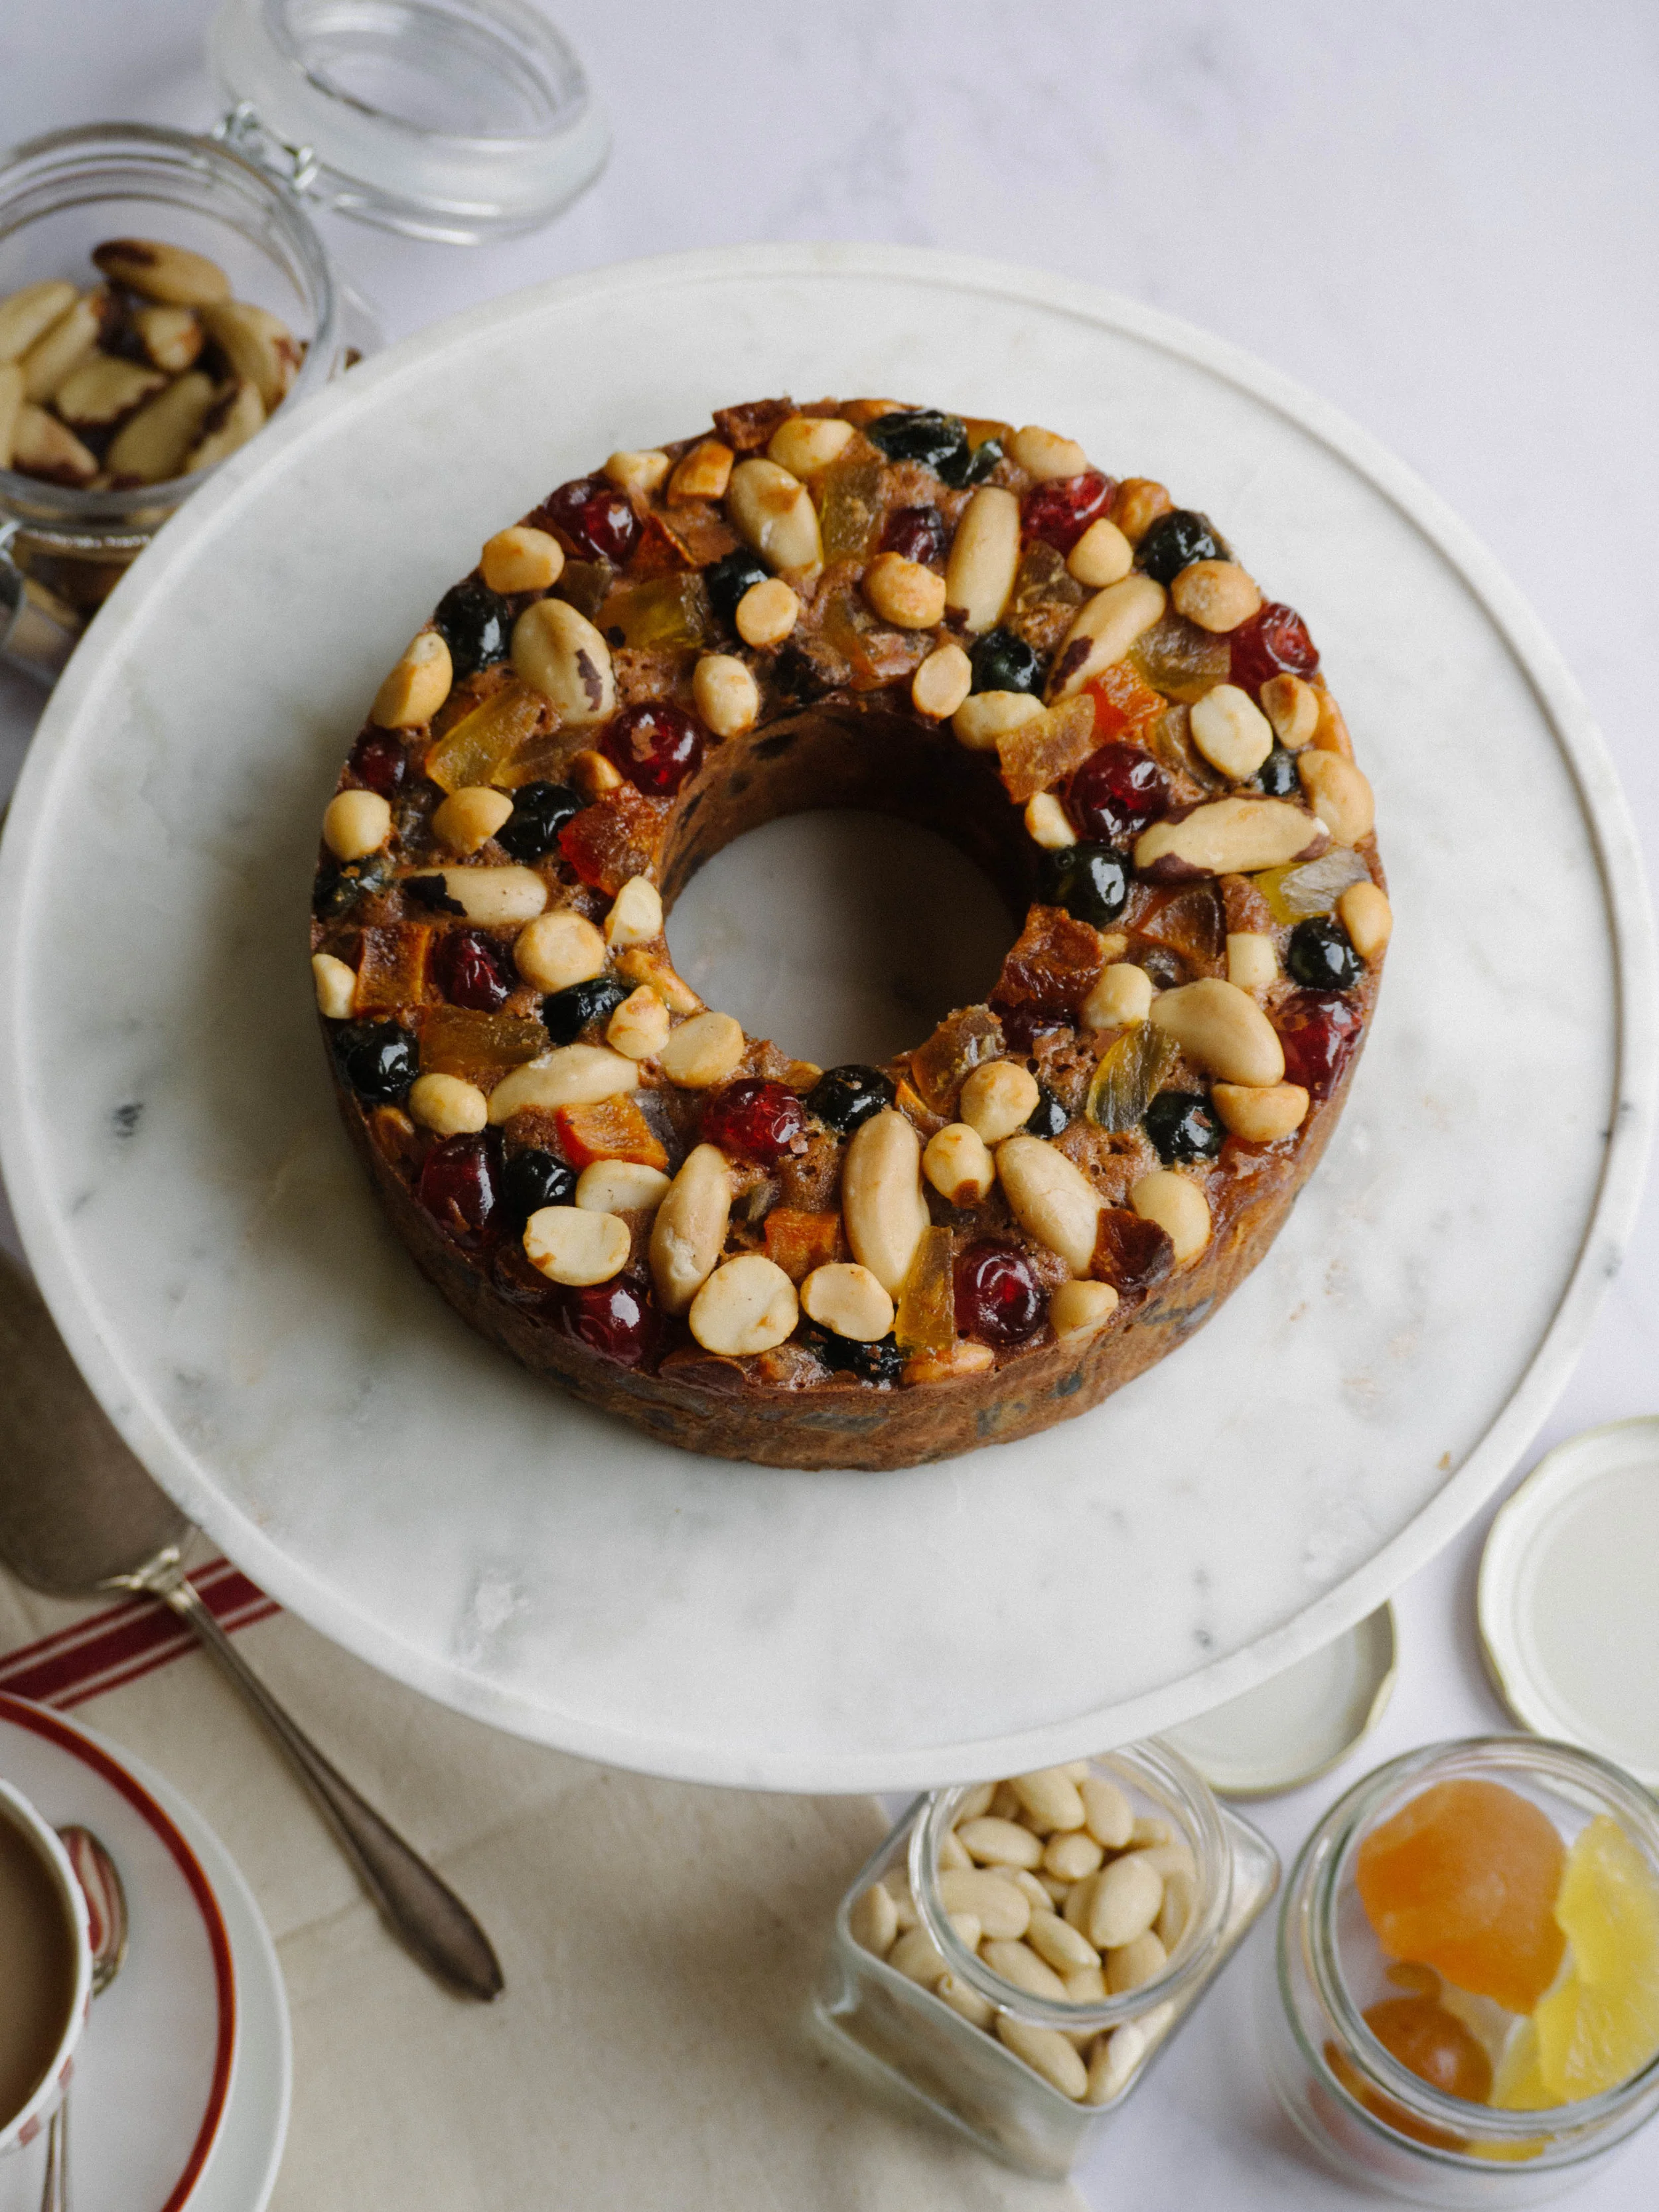
I first tried a slice of this cake when a former colleague brought some into to work around Christmas last year. Her Mum, a keen baker and CWA member had made it.The cake was cut thinly, so the glacé fruit and the nuts were really obvious and it was clear why the cake was called a Stained Glass Window Cake! I was hesitant at first to try some as I never like Christmas style fruit cakes, but this one has definitely become an exception. 

I asked my friend what the cake was called and she text her Mum to check. Her Mum came back saying it was called a Stained Glass Window Cake (sometimes known as an American Fruit Cake or Bishops Cake). My colleague also told me how in the past her Mum would make the trip to David Jones Food Hall in the city to get all the glacé fruit. I quickly wrote all that down on a post it note and took it home so I would remember all the details. 

Stained Glass Window Christmas Fruit Cake

Stained Glass Window Christmas Fruit Cake

Lighter in colour and flavour than a regular Christmas fruit cake, this style of cake is heavy on glacé fruit rather than alcohol soaked dried fruit, which gives the cake a distinctly different flavour and look.

Since the flavour of the alcohols used in fruit cakes is what I really don’t like, I was pleased when I tasted the cake that alcohol wasn’t evident at all. Since having looked at recipes for this type of cake, most call for about 1tbsp of some kind of alcohol (significantly less than a traditional fruit cake!), and some recipes suggested orange juice could be used as a substitute. 

Another reason I love this cake is because I have been a fan of glacé fruit for a long time, having grown up eating glacé cherries a lot as a child. My Grandma used them to decorate her Christmas shortbread, and I would always sneak a couple from the open packet in the fridge (much to Grandma’s dismay I think!). 

Stained Glass Window Christmas Fruit Cake

Stained Glass Window Christmas Fruit Cake

I set about finding my glacé fruit for this cake the same as my colleague’s Mum used to. I went to the David Jones Food Hall after work and searched for some. I finally found a very small selection in the deli area where the cheeses etc are sold. There were red glacé cherries and pineapple sold by weight and a packet of mixed glacé fruit. I got the mixed packet, and a few extra slices of pineapple. I have a feeling the selection may have been a bit better in the past when my colleague’s Mum used to go!

I then bought some more at The Source Bulk Foods, who have a good selection of glacé fruits, however not a large quantity of each (not great if you are making something big, but good for this recipe as you only need a few bits of each fruit). I also went to Harris Farm Markets who have a great selection of glacé fruits this time of year. 

What kind of Christmas fruit cake do you prefer? Or are you a fan of them at all? Let me know in the comments! 

View fullsize Almonds and Glacé Fruit
View fullsize Brazil Nuts & Macadamias
Stained Glass Window Christmas Cake (12 of 15).jpg

Stained Glass Window Christmas Fruit Cake

Ingredients: 

115g glacé pineapple, roughly chopped

125g glacé apricot and/or peach, roughly chopped

250g glacé pear and/or fig, roughly chopped

110g whole red and green glacé cherries

110g roughly chopped pitted dates and/or dried quince (I used dried quince from Singing Magpie Produce)

75g macadamias

85g whole blanched almonds

85g brazil nuts

110g dark brown sugar 

2 eggs

zest of one lemon

1tbsp fresh lemon juice

100g butter, melted and cooled

1tsp cinnamon

50g plain flour 

35g self-raising flour 


Ingredients for the Topping: 

75g mixed glacé fruit, roughly chopped (I used pineapple, peach & pear)

55g whole red glacé cherries

55g whole green glacé cherries

40g brazil nuts

35g macadamias 


Method: 

Pre-heat oven to 150 degrees Celsius/130 degrees Celsius fan-forced. Grease and line a 20cm round ring pan allowing the baking paper to extend a few centimetres above the tin (preferably one with a flat base, not a bundt tin).

Mix together the glacé fruit and the nuts in a large bowl. 

In a small bowl whisk together the flours and the cinnamon. 

Then in a small/medium bowl, beat the eggs and the sugar with electric beaters (or in a stand mixer) until well combined. Add the lemon juice, melted butter and flour mixture and beat until just combined. 

Gently stir the egg mixture into the fruit and nuts. Spoon into the prepared pan, pressing the mixture into the tin. Press down so the top is level. Then press in all the topping ingredients into the top of the cake, ensuring they aren’t sitting loose. 

Loosely cover the cake with foil, and bake for 1 hour. 

After the hour, remove the foil, and bake for a further 45 minutes. If using a fan forced oven and the cake is not cooked through after 45 minutes, turn the temperature up to 150 degrees Celsius and continue to cook for a further 15 minutes. 

Once the cake is done, remove from the oven and allow to sit in the tin for 10 minutes before carefully removing from the tin and allowing to cool on a wire rack. Keep in mind the top side of the cake when it is in the tin, will remain the top side of the cake once removed from the tin. 

The cake slices best when completely cooled (even better when it comes straight from the fridge). Store in the fridge (wrapped in plastic wrap inside an airtight container) if conditions are humid. 

Stained Glass Window Christmas Cake

Reference: ‘Christmas Food & Craft’ The Australia Women’s Weekly (ACP Books, 2006), p. 95. 

Stained Glass Window Christmas Fruit Cake
In Cakes & Slices, Holidays Tags Christmas, Christmas Fruit Cake, Stained Glass Window Cake, Bishops Cake, American Fruit Cake, glacé fruit
8 Comments
  • The Blog
  • Older
  • Newer

recipes

  • Biscuits/Cookies 39
  • Breads Etc. 9
  • Breakfast 7
  • Cakes & Slices 67
  • Confectionary 5
  • Drinks 6
  • Events 14
  • Food Photography Tips 3
  • From The Mailing List 24
  • Heirloom Recipes 12
  • Holidays 44
  • Ice Cream 9
  • Jams Preserves & Spreads 9
  • Muffins 4
  • Off the Shelf 48
  • Other Desserts 25
  • Savoury Dishes/Meals 15
  • Scones 4
  • Tarts & Pastry 9
  • Travel 13

Sign up to Friday Food Chat with Kath, a weekly newsletter for more food, baking, cookbook chat and more!

Sign Up Here!
instagram-unauth pinterest facebook url

Website Accessibility: To enable text to speech function on the blog, click the sound button to the right of each blog post.

All images & content are the property of Kathryn Vincent, unless stated otherwise. Please do not use without permission.

Kulinary Adventures of Kath

Food Photography, Recipes & Baking

instagram-unauth pinterest facebook url