Kulinary Adventures of Kath

Food Photography, Recipes & Baking
  • home
  • About
  • Work with Kath
  • Shop
  • Blog
    • The Blog
    • Recipe Archive
  • Newsletter
  • Contact
  • home
  • About
  • Work with Kath
  • Shop
    • The Blog
    • Recipe Archive
  • Newsletter
  • Contact
Raspberry Pistachio Rose Cake (23 of 25).jpg

The Blog

Recipes and Food Photography by Kath Vincent.

  • The Blog
  • Recipe Archive
  • All
  • Biscuits/Cookies
  • Breads Etc.
  • Breakfast
  • Cakes & Slices
  • Confectionary
  • Drinks
  • Events
  • Food Photography Tips
  • From The Mailing List
  • Heirloom Recipes
  • Holidays
  • Ice Cream
  • Jams Preserves & Spreads
  • Muffins
  • Off the Shelf
  • Other Desserts
  • Savoury Dishes/Meals
  • Scones
  • Tarts & Pastry
  • Travel
Caramilk Cherry and Pistachio Cookies

Caramilk Dried Cherry and Pistachio Cookies

Kath December 16, 2020

These cookies came about as I have had in my mind for the past year that a dried cherry and pistachio nougat would be an excellent Christmas recipe, but as it always does by this time of the year, time did not allow for a thorough testing of the recipe. 

As it started to become clear that my nougat Christmas dreams weren’t going to come true, I decided my Plan B for a new Christmas recipe would be a cookie with the same flavours. 

Of course, a cookie and nougat are hardly comparable, but what cookies lack in finesse and wide eyed compliments on how much effort you went to, they gain on the fact that they don’t take much effort but are extremely delicious. 

Like the Caramilk Cookies I posted this year on which this recipe is based, these cookies require very little prep, and need no time to chill in the fridge. You could make these in about half an hour. Which at this time of year, sounds pretty good to me. 

You can swap the dried cherries (also labelled as sour cherries sometimes) for dried cranberries and you can use any type of chocolate you wish if you don’t have Caramilk - though I do highly recommend Caramilk for baking as it tastes so good and is considerably cheaper to buy than better quality caramelised white chocolates which I personally find can be a bit lost in baking (save those ones for snacking!). 

So if you have unexpected guests this festive season, or want to drop off homemade goodies if you are socially isolating still, these cookies will have your back and won’t eat up all your time!

Caramilk Cherry and Pistachio Cookies

Caramilk Dried Cherry and Pistachio Cookies

Ingredients:

120ml canola oil

225g caster sugar 

2 tbsp golden syrup

1 tsp vanilla bean paste

1 egg, beaten

290g self raising flour

120g Cadbury Caramilk, roughly chopped

120g dried cherries, roughly chopped

1-2 tbsp slivered or roughly chopped pistachios

Method:

Preheat oven to 170 degrees Celsius and line three large baking trays with baking paper.

In a large bowl whisk together the oil, sugar, golden syrup, vanilla and egg.

Then add the flour and the chopped Caramilk and cherries, and mix to combine with a wooden spoon.

Roll heaped teaspoonfuls of the dough into balls and place on the trays. The cookies will spread as they bake so leave enough room in between. 

Sprinkle the tops of each cookie with some of the pistachio, pressing it in gently so they don’t fall off. 

Bake for 12-15 minutes or until golden brown. Rotate the trays in the oven about halfway through to ensure the cookies cook evenly.  

Allow to cool on their trays, then store in an airtight container (they will last 5-7 days). 

Makes about 30 cookies.

Caramilk Cherry and Pistachio Cookies
In Biscuits/Cookies, Holidays Tags Caramilk, Dried Cherry, Pistachio, Christmas, Cookies, Biscuits/Cookies, Easy Baking, Mixer Free Recipes, Holiday Baking
Comment
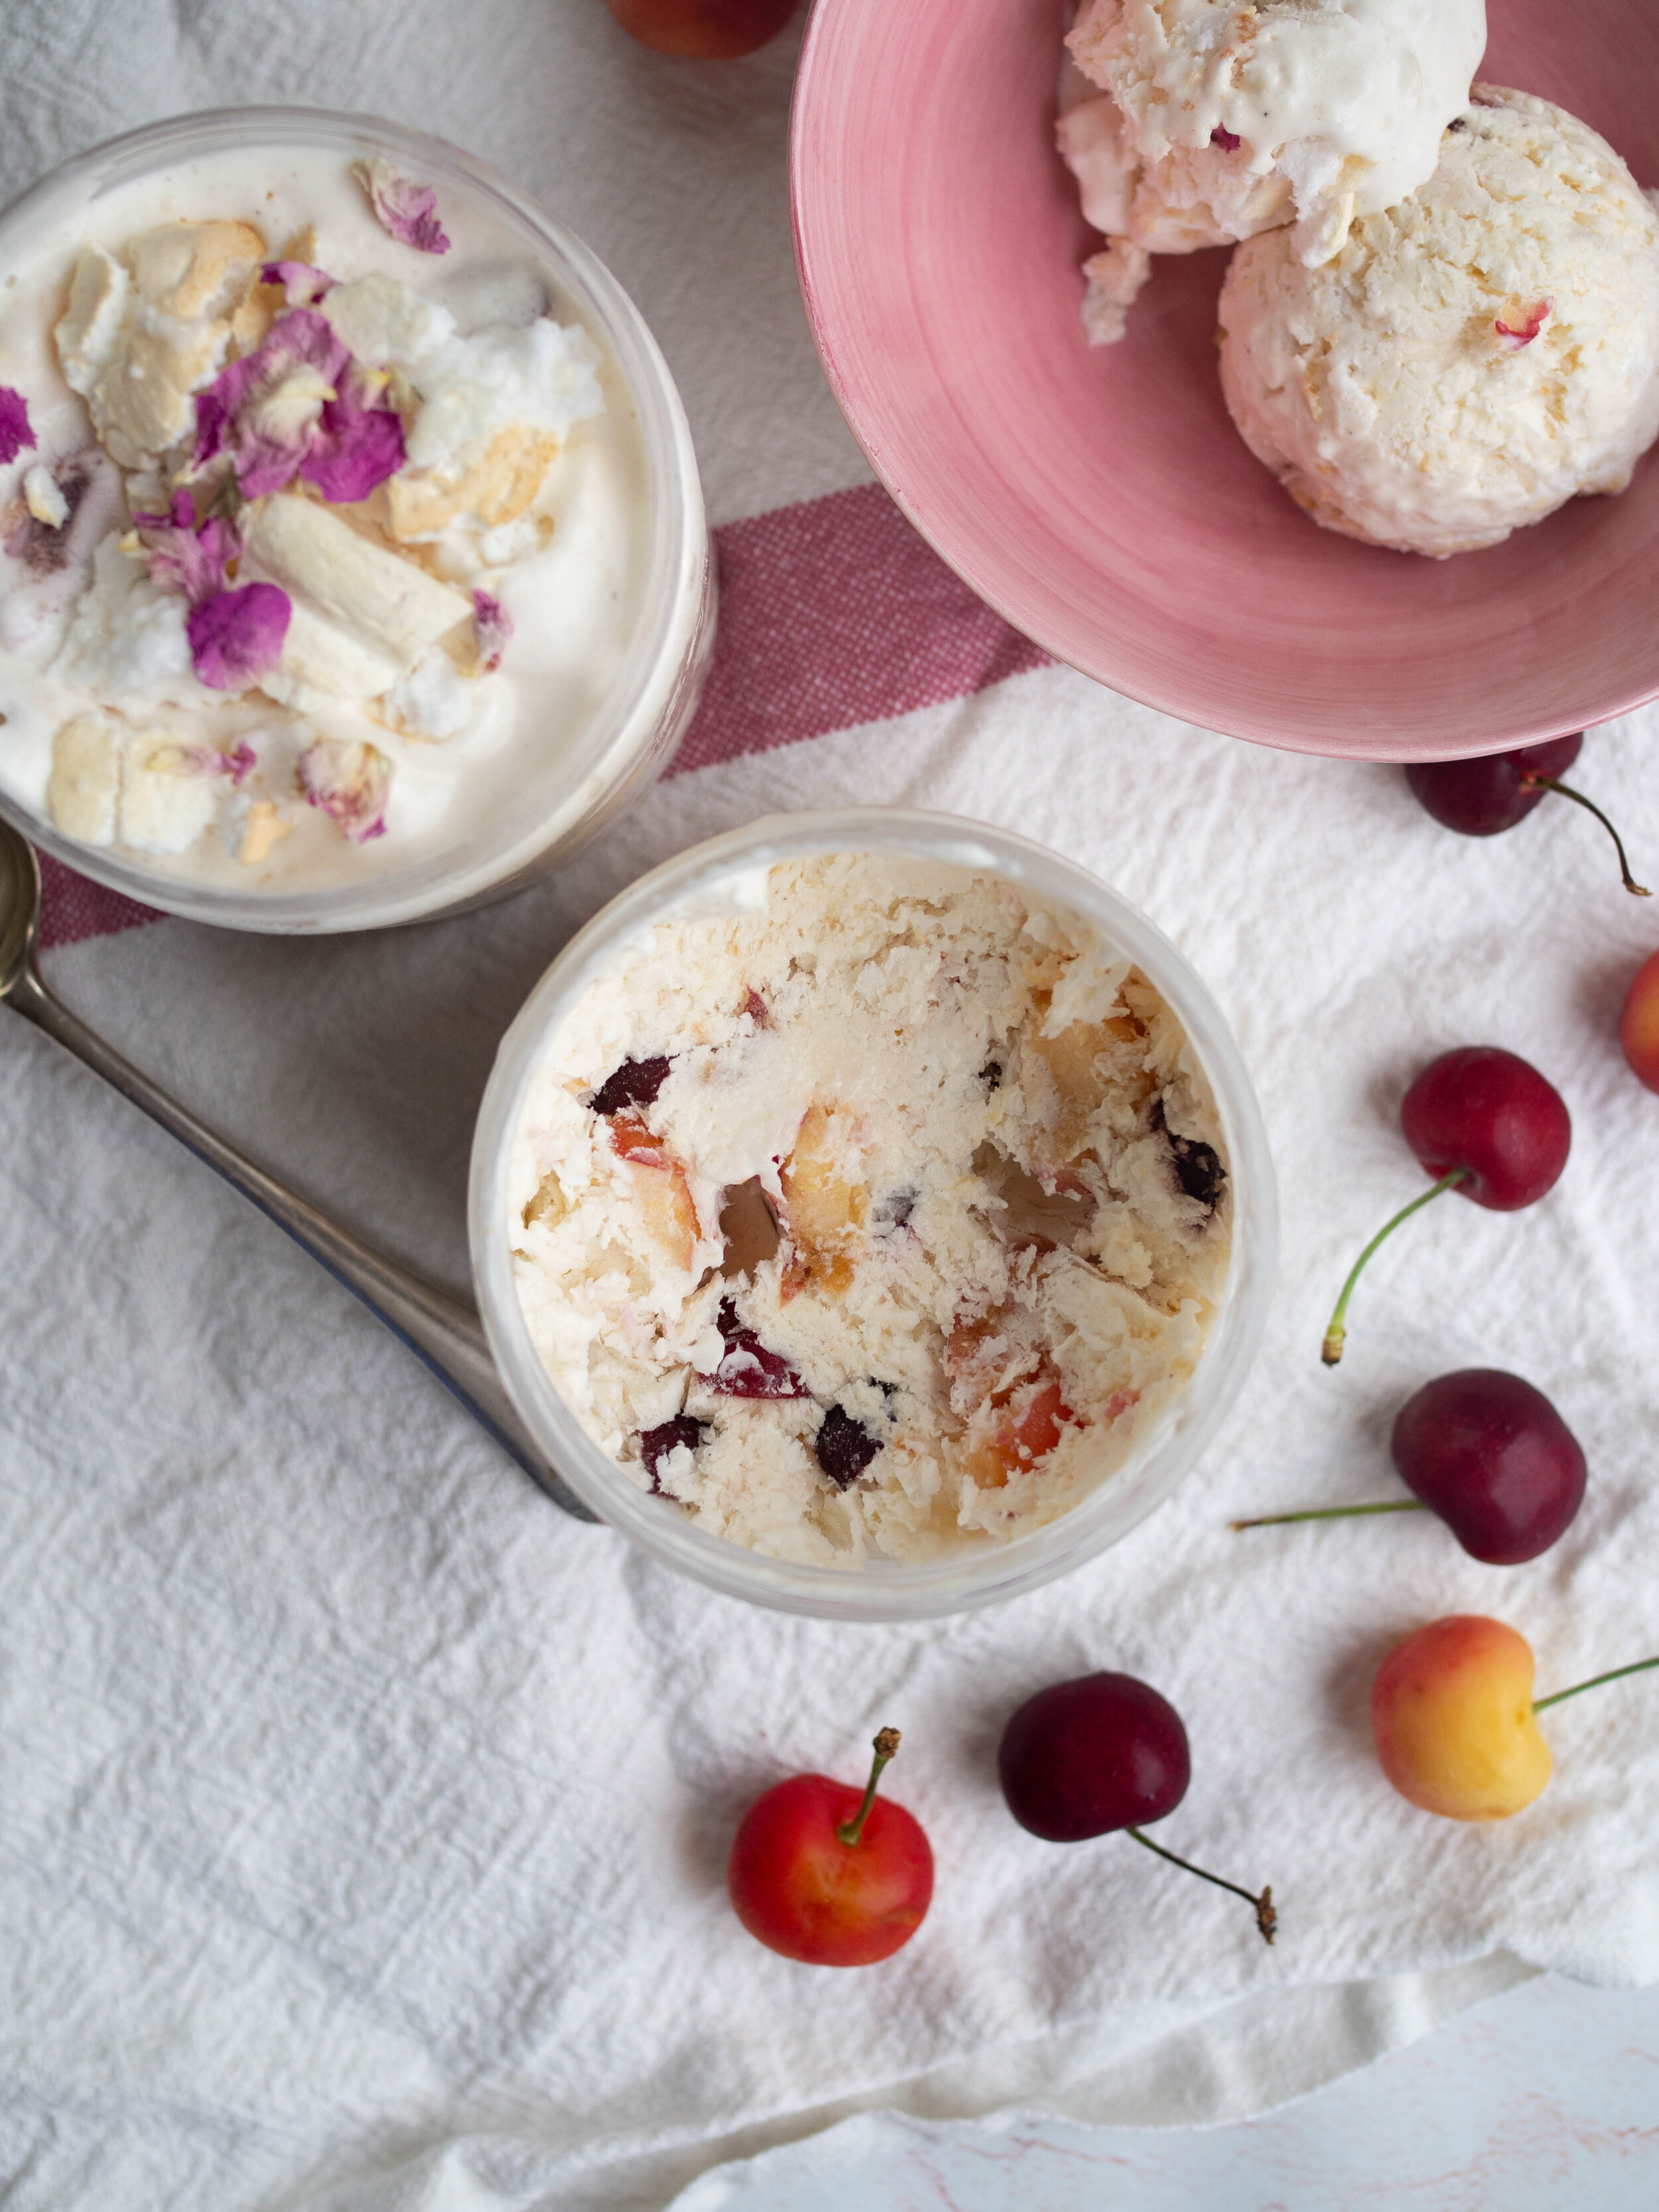
Cherry Pavlova Ice Cream

Cherry Pavlova Ice Cream

Kath December 9, 2020

This recipe came about as a way to use up some leftovers from a Christmas shoot I did for Little Big Dairy Co recently. I had a lot of milk (20 litres to be precise!), and some additional Christmas-y things like cherries and pre-made mini pavlovas that were used for the shoot. I hate things going to waste, especially good quality produce like Little Big Dairy Co milk and Australian cherries so I decided I would go on a ice cream making spree in an attempt to at least use up some of the milk that had been sent to me for the shoot. 

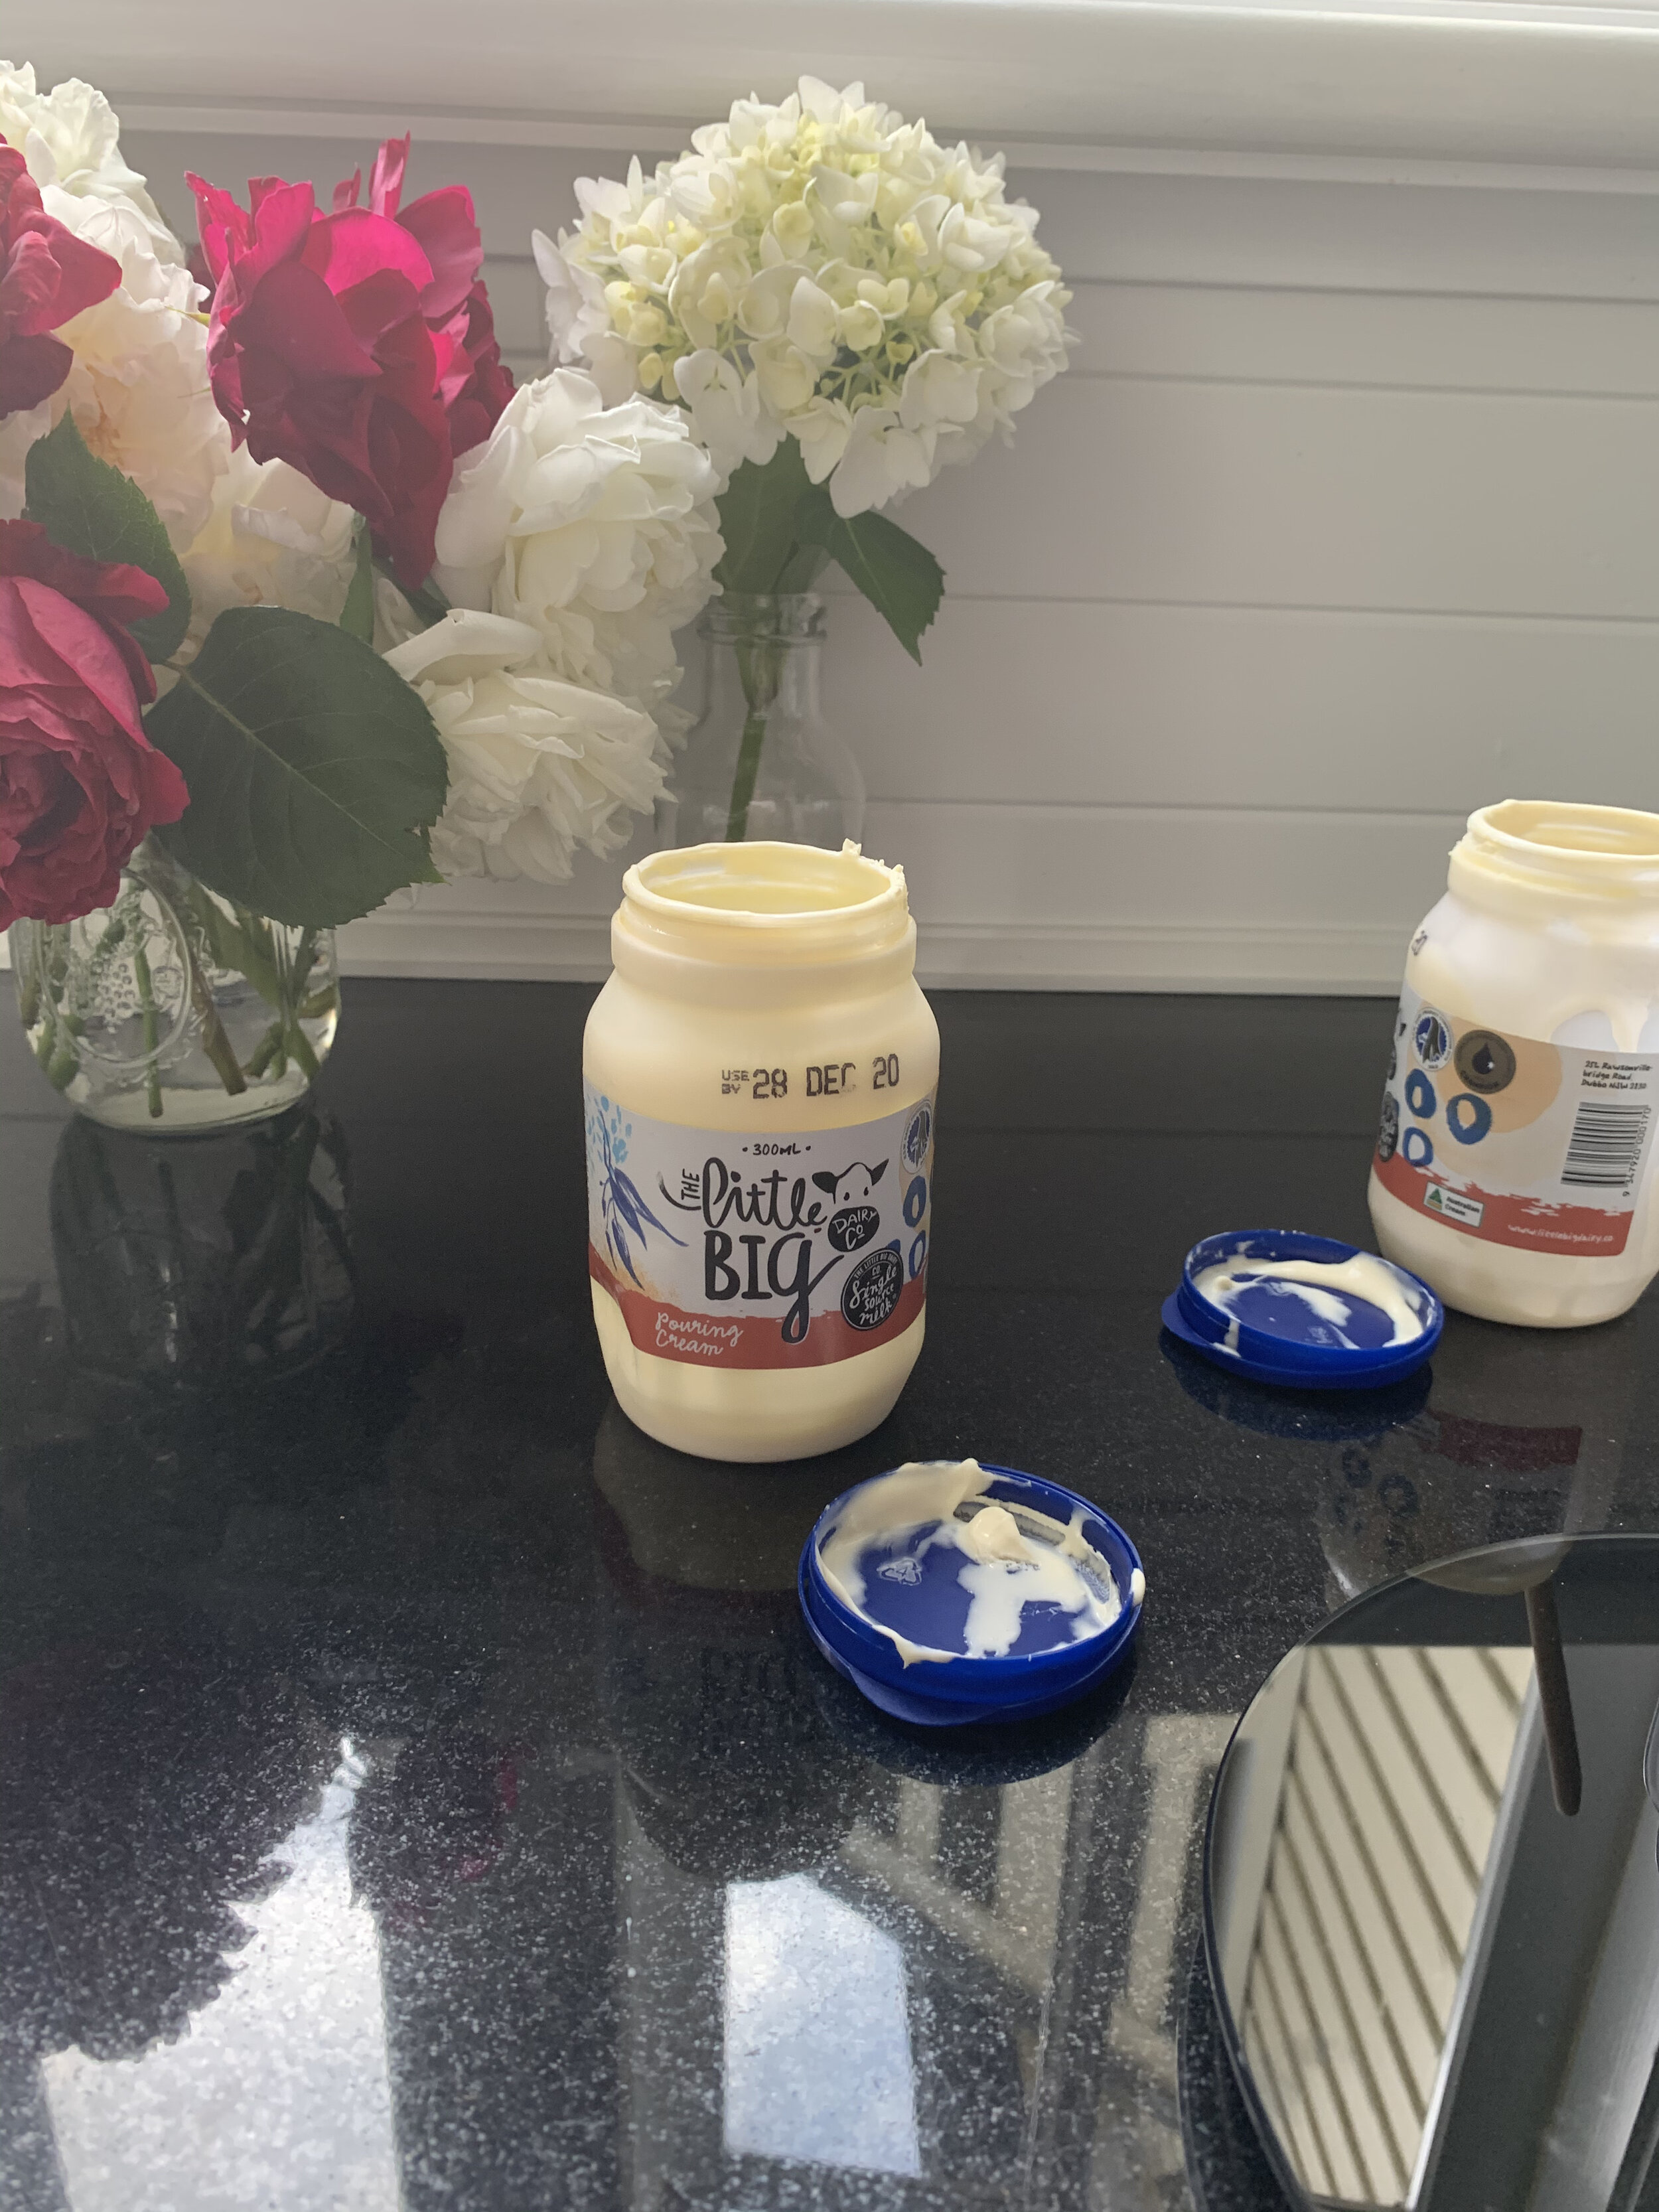
I bought some Little Big Dairy Co cream to use with my ice cream, and I made one lot of this ice cream plus some vanilla ice cream at the house I was staying in for the shoot. I then brought back one 300ml jar of the cream I had left, and needed to make it last for 4 different types of ice cream I wanted to make (all in an attempt to thoughtfully use up some of the delicious milk I had!).

So for this recipe I have split the amount of cream needed between pouring cream and plain Greek style yoghurt. Greek style yoghurt works well in homemade ice creams along side cream, however if you have enough cream you can just use that (250ml total). 

View fullsize Little Big Dairy Co non-homogenised milk
View fullsize Little Big Dairy Co Pouring Cream
View fullsize Australian White Cherries
View fullsize Ice Cream based being whipped before churning
View fullsize Ice Cream Churning
View fullsize All the Ice Creams!
Cherry Pavlova Ice Cream

Cherry Pavlova Ice Cream

Ingredients:

165ml milk

5 tbsp caster or white sugar

150ml pouring cream

100ml plain Greek Style Yoghurt

1 tsp vanilla extract or paste

365g cherries (unpitted weight), pitted and roughly chopped

70-75g pavlova*, roughly chopped, plus extra

Edible dried rose petals, optional

Method: 

In a large bowl, whisk together the milk and sugar until the milk is frothy and the sugar has dissolved. I use an electric hand held mixer for this, but you can also use a stand mixer if you prefer. 

Once the sugar has dissolved into the milk, add the cream, yoghurt and vanilla. Whisk on medium speed until everything is combined and the cream has thickened to form soft mousse like peaks. 

Transfer the mixture to your ice cream maker, and churn according to your machines instructions.  I use the ice cream bowl attachment to my KitchenAid stand mixer and I find this ice cream takes about 5-10 minutes to churn. I find the ice cream is ready once it has frozen/thickened and is clinging to the paddle of the machine. 

Once the has been churned fold through the cherries and pavlova using a spatula. Transfer the mixture to a freezer safe container (about 1.5L capacity). Sprinkle any extra crushed up pavlova over the top, and sprinkle over some dried rose petals if desired.

Allow ice cream to freeze for a few hours before serving. 

*I used about 6 pre made mini pavlovas (I got mine from Woolworths). You could also use pre made meringues. 

Cherry Pavlova Ice Cream
In Ice Cream, Holidays Tags Ice Cream, Cherries, Pavlova, Little Big Dairy Co, Dessert
Comment
Everyday Bakes by Kath Vincent of Kulinary Adventures of Kath

Everyday Bakes by Kath Vincent of Kulinary Adventures of Kath

Christmas Gift Guide for Foodies 2020

Kath December 3, 2020

For the past couple of years I have put together a small Christmas gift guide aimed at the foodies in your life.

This year I have curated a list of gifts, cards and stationary that are predominately by small businesses or creatives. I don’t know about you, but I think Christmas and gift giving generally is a great time to shop small and support cool people (especially women) doing really fun and interesting things.

Enjoy!

. . .

For more ideas check out my previous gift guides: Gift Guide 2018 & Gift Guide 2019.

Books

View fullsize Everyday Bakes
Everyday Bakes
View fullsize Olive and the Larder
Olive and the Larder
View fullsize The Art of Cake
The Art of Cake
  1. The Art of Cake by Alice Oehr - I have fallen in love with Alice’s illustrations this year and this book contains so many of them! And they are all of cake! Perfect for a cake loving friend. This book contains a short history of each cake along with the colourful illustrations, plus a few recipes from Alice at the end of the book too.

  2. Everyday Bakes by Kath Vincent (me!) - I couldn't not recommend by own recently published cookbook Everyday Bakes! I really believe in the usefulness of this book and the recipes inside. They are all fairly simple and many can be made in an hour or less. These recipes will see you through busy weeks, tough times and sweet craving time and again, great for yourself or as a gift to a avid baker or baker to be. Select the Everyday Bakes Bundle to get the cookbook and Everyday Bakes tea towel (and save $5!).

  3. Oliver and the Larder by Bianca Tzatzagos - my friend Bianca created this all ages picture book this year (along with a gorgeous set of cards too) with illustrator Inga Campbell. The short story follows Olive, a gentle food loving lady who has the most amazing larder (and garden!).

  4. Graziher Magazine - I discovered this magazine this year, and have been really enjoying it. The stories from the bush are engaging, the photography and design is stunning and each issue I have has excellent recipes too. You can buy Graziher as single editions or as a subscription.

  5. The New Way to Cake by Benjamina Ebuehi - This book by UK based Benjamina, has a stunning collection of cake recipes. I haven’t had a chance to bake any myself yet, but I have multiple post it notes marking the pages of recipes I desperately want to try. I love the way the book is set out, each section is based on a type of ingredient e.g. spices, floral and citrus. This is a great gift for yourself or for a cookbook loving friend.

Foodie Gifts

View fullsize Fairy Bread Iconic Tea Towel
Fairy Bread Iconic Tea Towel
View fullsize Everyday Bakes Tea Towel
Everyday Bakes Tea Towel
View fullsize Bikkies Iconic Tea Towel
Bikkies Iconic Tea Towel
  1. Garlic from Longview Garlic - sign up to Lee’s newsletter and you can then place your order with her once the garlic is ready. Great for an avid cook and lover of all things organic and Australian.

  2. Fairy Bread and Bikkies Iconic Tea Towels from Add to Cart by BabyMac - These are so fun, and extremely nostalgic if you grew up eating fairy bread at birthday parties and assorted Arnott’s biscuits like I did.

  3. The Somewhere Co Picnic Cooler Bag - I bought one of these earlier in the year, thinking it would make a great work lunch bag. I was very wrong about that (besides working from home most of the year, this bag is very much a large sized cooler bag, not a lunch bag!), however it has come in handy when I’ve been taking food to a gathering or transporting shopping home. If you know someone who loves a good picnic or outdoor event, this is the gift for them!

  4. Baked Goods from the Sweet Chick, Sydney - While I am yet to get to this bakery in Sydney’s Surry Hills, the Christmas menu looks amazing. If you aren’t into baking or just don’t feel like it/have time this year you can get a selection of things from a bakery like Sweet Chick and give them as gifts or use them as your Christmas Day dessert. Keep an eye out in your area for independently run bakeries and delis, you will find some great food gift ideas in there whilst supporting a local business.

  5. Everyday Bakes Tea Towel - My tea towel! 100% cotton tea towel screen printed here in Australia, with the Everyday Bakes motto ‘bake share eat repeat’. A trusty and sturdy piece for your kitchen, or a great addition to a gift for a baking loving mate. Select the Everyday Bakes Bundle option if you would like to buy the teat towel and Everyday Bakes cookbook together (and save $5).

Cards and Stationary

View fullsize Cards by Borrow Street
Cards by Borrow Street
View fullsize Cards by Tilly's Table
Cards by Tilly's Table
  1. Christmas Cards from Borrow Street - I stumbled across this brand recently which is designed and printed in Adelaide. I love the fun, very Australian designs and bright colours. Borrow Street also prints wrapping paper with the same designs, which I know I will have trouble giving away it’s so nice!

  2. Cards by Tilly’s Table - Lovely stylist and creative Tilly has these wonderful botanical cards, some Christmas themed some that would suit any occasion. I adore Tilly’s styling and photography and was so happy to stumble across these cards in the Blue Mountains recently. Tilly also sells tea towels with the same prints, which would also make a lovely gift.

  3. Xmas Cakes Cards by Alice Oehr - As soon as I saw these cards by Alice I ordered some. These are the perfect cards for all your food loving friends and family, featuring Alice’s illustrations of plum pudding, ice cream bombe, pandoro, panettone and classic fruit cake. Printed in Melbourne.

  4. Bespoke Letterpress - There is nothing Bespoke Letterpress does that I don’t like. I love their classic and rather romantic style, and they have a great range of cards and paper for your Christmas presents. Printed in Bowral, NSW.

  5. Farmers Market Food Calendar by Naomi Bulger - This is the perfect gift for any avid market goers in your life, or anyone who is new to cooking and wants to know more about seasonal produce. Naomi has illustrated the calendar herself, and I think it would make a lovely addition to any kitchen wall.

In Holidays Tags Christmas Gift Guide for Foodies, Christmas
Comment
Honey Jumbles with Pomegranate Icing

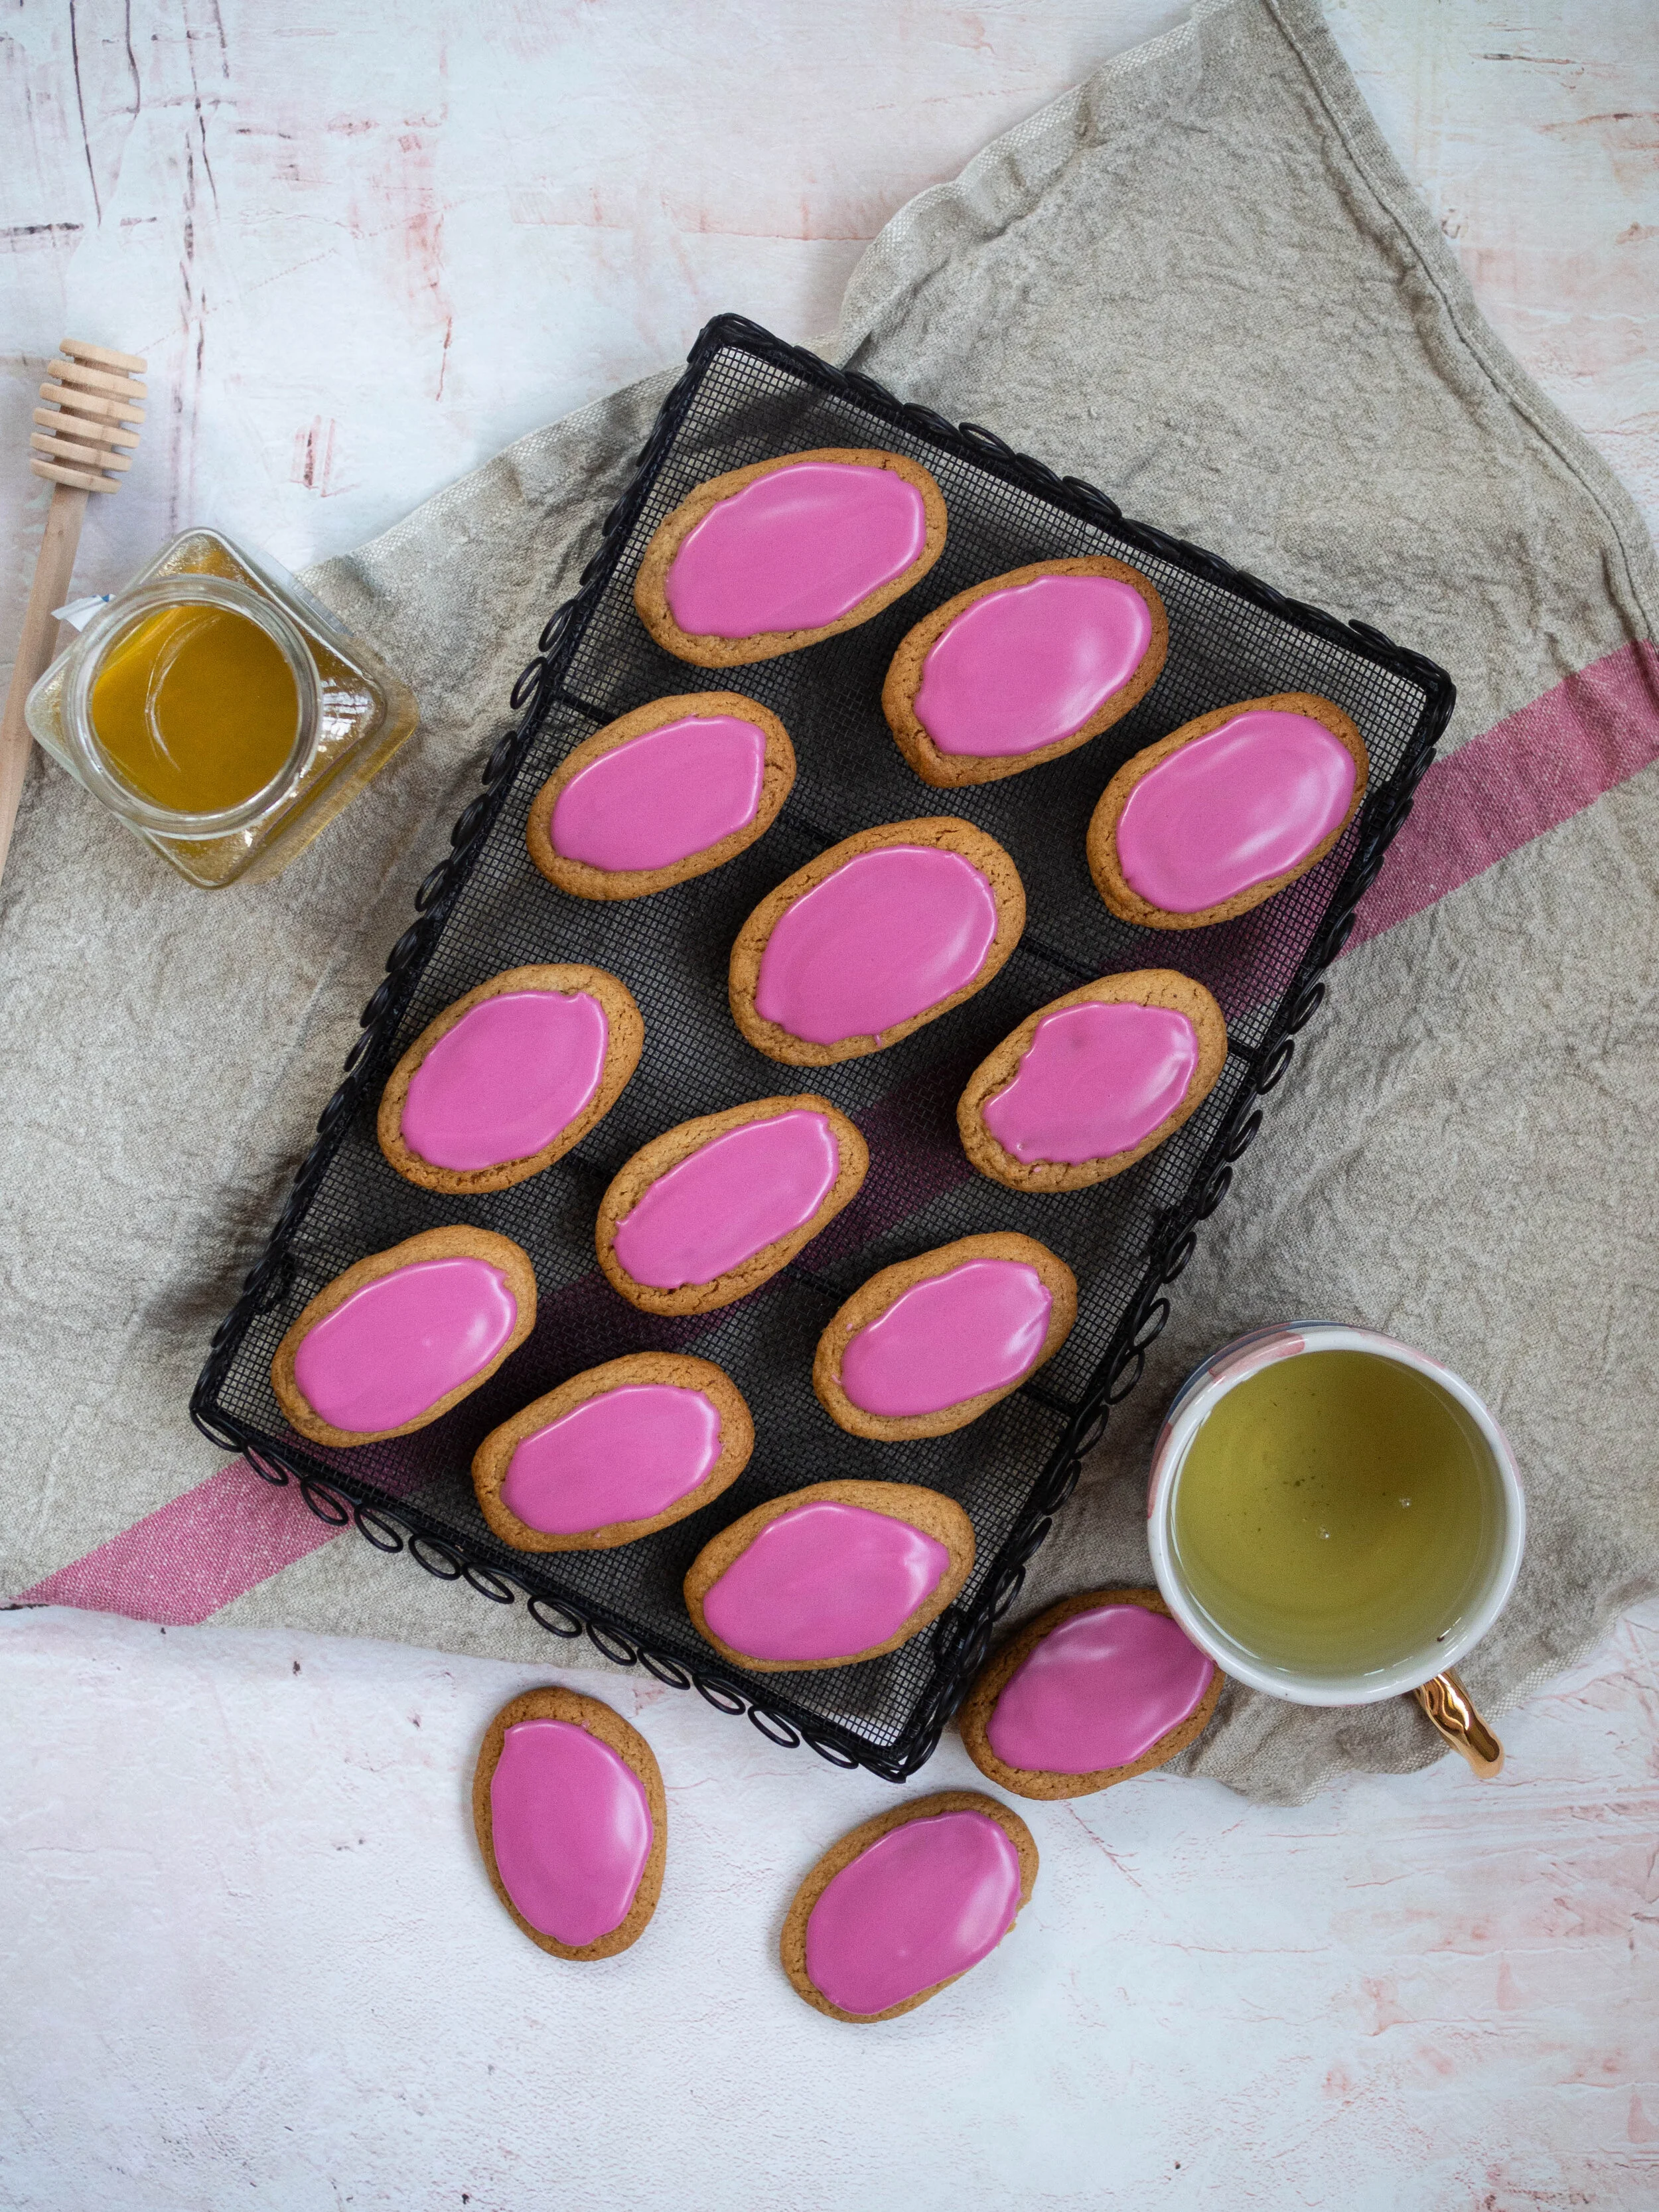
Honey Jumbles with Pomegranate Icing

Honey Jumbles with Pomegranate Icing

Kath September 17, 2020

I always enjoyed honey jumbles as a child, mostly the store bought ones from Arnott’s that I’m sure a lot of Aussie kids grew up with too. But like many things I liked as a child, the store bought version just doesn’t seem as good now. So it was time to make my own. 

Honey Jumbles are a spiced biscuit shaped in a log, with either pink or white icing. Oddly, lots of honey jumble recipes don’t use honey, but golden syrup. While golden syrup can give baked goods a great flavour, I don’t see why honey jumbles wouldn’t actually have honey in them. So for my attempt I have used honey, and I think they taste great - and do what they say on the tin so to speak. 

I had the idea to make honey jumbles with pomegranate icing many months ago. A friend gave me a 2020 planner for my birthday late last year and since I had already bought myself a diary, I decided to use the planner for blog, recipe development and photography work. It’s been great to use (even if having a planner/diary for 2020 has been a little ironic and redundant at times!), and around Christmas last year I sat down and in the notes page before each month listed what holidays etc fell in that month. 

I like using holidays (both ones I celebrate and ones I don’t) as recipe inspiration, and when it came to September, a few honey based recipes for Jewish New Year, Rosh Hashanah, came to mind. Including this one. Both honey and pomegranates are important foods at this holiday, and I thought the combination of the two would be great. Especially considering honey jumbles traditionally have pink icing, and let’s face it the pink ones were the best anyway (everyone fought over them in our house anyway!). 

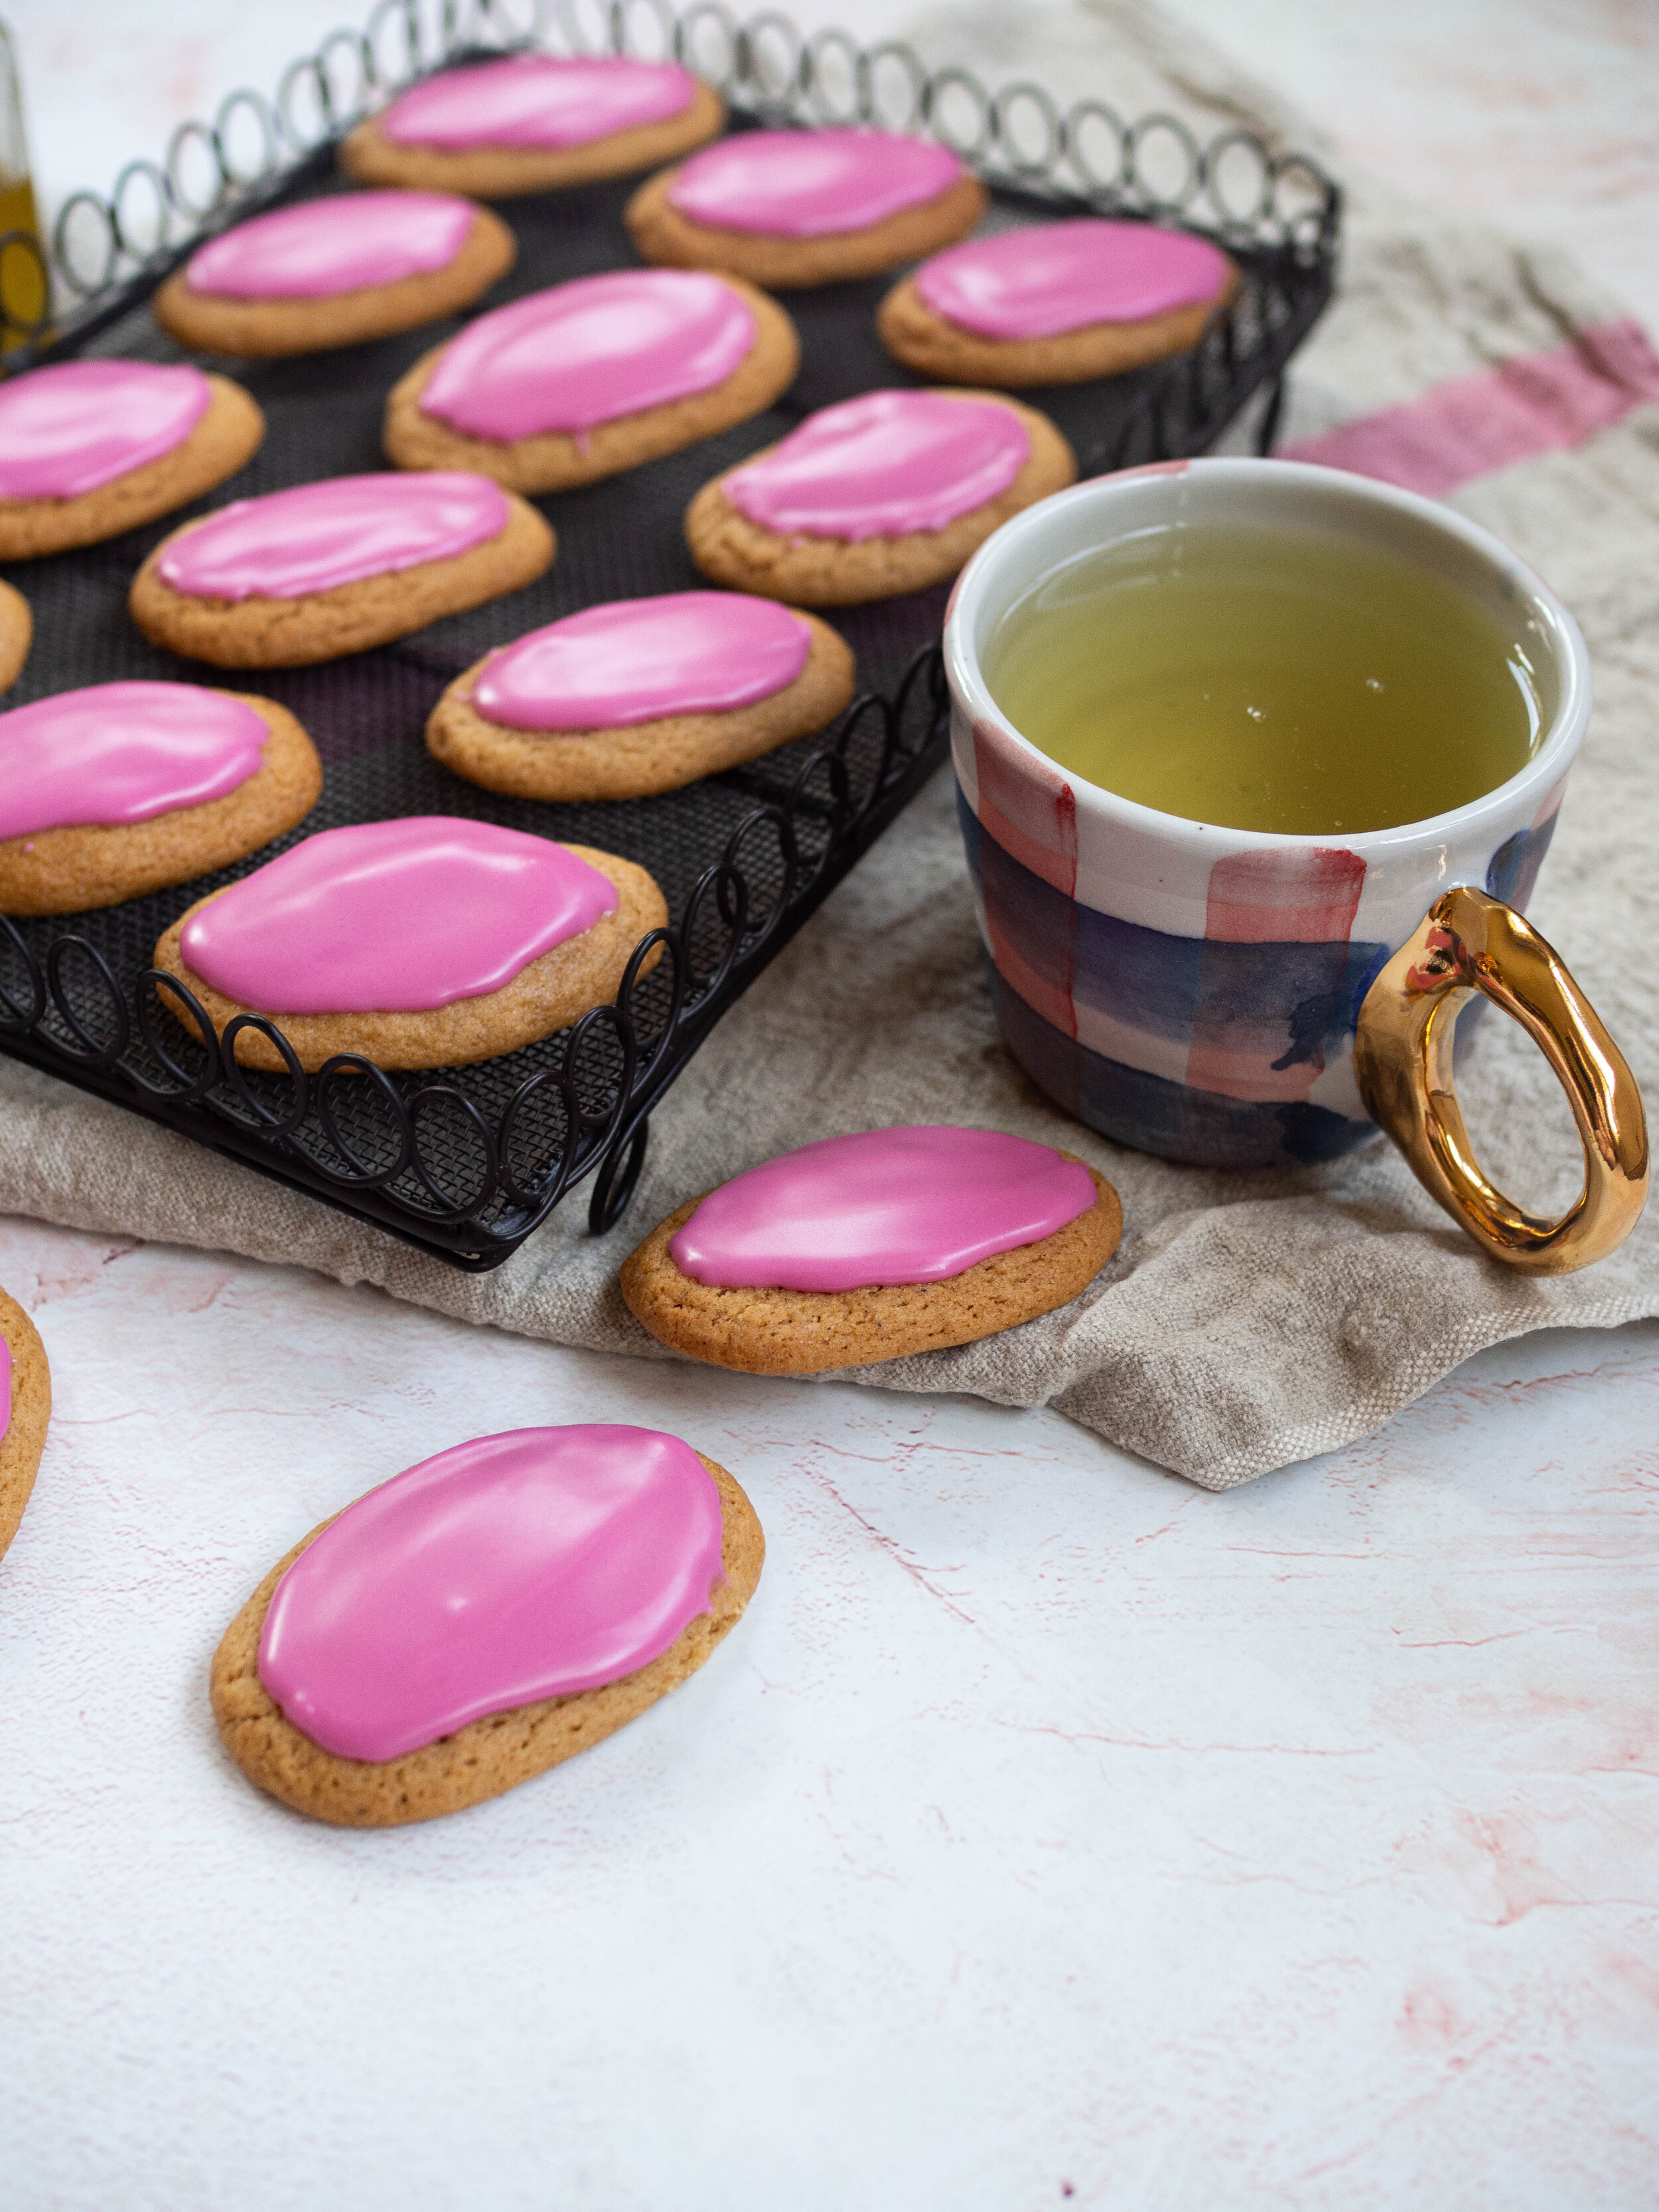
Using pomegranate juice in a glaze icing like this is also a great way to get a fantastic natural colour in an icing. It doesn’t add much to the taste, but I think it’s well worth it for the amazing natural colour. You could do half the honey jumbles with pomegranate icing, then make a lemon glaze for the rest if you wanted some pink and some white. 

When I first tested this recipe the honey jumbles baked into a jumbo size biscuit. And while everyone said the size was fine, I still felt I needed to perfect the recipe! So this is the final recipe, with honey in like it should, and a bit more regular sized too. If you want to make jumbo ones use all self raising flour instead of the self raising and plain combo, and roll the dough into slighter bigger logs - and leave lots of room in between each on your baking trays as they will be massive (and make a few less than the recipe below)!

NB. You will need three or four large trays to cook these all at once. If you don’t have that many trays or the oven space, bake half and leave the remaining dough in the fridge until you can bake it.

View fullsize Honey Jumbles with Pomegranate Icing
Honey Jumbles with Pomegranate Icing
View fullsize Jumbo Honey Jumbles
Jumbo Honey Jumbles

Honey Jumbles with Pomegranate Icing for Rosh Hashanah

Ingredients:

120g unsalted butter

175g caster sugar

50g dark brown sugar 

50g (2 tbsp) honey

1 tsp vanilla extract

1 egg, beaten

190g self raising flour

100g plain flour

2 tsp ground ginger

1 tsp ground cinnamon

1 tsp mixed spice

1/2 tsp ground cloves

Ingredients for the Icing: 

250g icing sugar (confectioners)

3 tbsp pomegranate juice

Method:

Preheat oven to 160 degrees Celsius and line three large baking trays with baking paper.

In a small/medium saucepan over low heat, mix together the butter, sugars, honey and vanilla extract. Mix until everything has melted and is well combined. Remove from the heat and allow to cool down a bit. 

In a large bowl combined the flour and spices, whisk to remove any lumps.

Once the butter mixture has cooled a little, mix in the egg. Then add to the flour and mix with a wooden spoon until combined.

Cover the bowl and place in the fridge for at least 30-45 minutes so the dough has time to chill and firm up.

Roll small teaspoonfuls of the dough into balls, then shape into a small narrow log and place on the trays, about 3cm long and no more than 1cm wide. The cookies will spread as they bake so leave enough room in between. 

Bake for 12-15 minutes or until the edges are golden brown. Rotate the trays in the oven about halfway through to ensure the cookies cook evenly.  

Allow to cool on their trays. 

Once the honey jumbles have cooled, make the icing by mixing together the icing sugar and 2 tbsp of the pomegranate juice. Continue to add pomegranate juice a little at a time until you have a thick, smooth spreadable icing. If the icing is too runny it will run off the biscuits, so add a little more icing sugar if needed. 

Spread a thick layer of icing over the middle of each biscuit, and leave to set for 2-3 hours. 

Makes about 40-42 biscuits. Store in an airtight container

Rosh Hashanah Honey Cookies
Honey Cookies Rosh Hashanah
In Biscuits/Cookies, Holidays Tags Rosh Hashanah, Honey, Honey Jumbles, Pomegranate, Biscuits/Cookies, Easy Baking, Mixer Free Recipes, Holiday Baking
Comment
Homemade Rocky Road Easter Eggs

Rose Rocky Road Easter Eggs

Kath April 8, 2020

The idea for this recipe came to me quite late in the piece. With only two weeks to go until Easter at the time I knew I would be lucky to get everything I needed in time. But with my ability to buy Easter treats severely limited this year, I felt I really needed to make something. And preferably something I would enjoy eating (which means no milk or dark chocolate!). 

I really liked the rocky road I made last year, and felt making it into a more Easter themed shape would be just perfect. I finally found some half Easter egg moulds online, they took ages to arrive hence why this post is only ready two days before Easter! 

I also decided to buy marshmallows rather than make my own. I thought making marshmallows right now just felt a little wasteful in terms of ingredients and since one batch makes so many, and I couldn’t really share them as I usually would, I thought buying some would be best. My favourite bought marshmallows are from Grounded Pleasures, so I bought their massive 700g box which will also hopefully get us through a few Wintery isolation hot chocolates too! 

Grounded Pleasures Marshmallows

Grounded Pleasures Marshmallows

This recipe is mostly an assembly job, and an even easier version of my Rose Rocky Road I posted last year. You can of course use other types of chocolate, and other moulds or cake tins to shape your rocky road. I made a Rocky Road Wreath for Grounded Pleasures at Christmas last year, so there is another idea for how to shape your rocky road.  

I prefer to use good quality chocolate, which is why the recipe is long as it needs to be properly tempered. You can use baking chocolate, just follow the instructions on the packet to melt and you shouldn’t need to temper as below. 

Tempering chocolate can be tricky, and I would definitely recommend a chocolate thermometer if using good quality chocolate. Don’t worry if it doesn’t turn out perfectly, if your chocolate blooms (if using milk or dark chocolate) it will still taste great and if it has trouble setting just store it in the fridge. I am definitely no expert when it comes to properly tempering chocolate, but it always tastes good regardless! Plus there are plenty of resources available online if you want to know more.

I hope everyone has a clam and quiet Easter/long weekend. Let me know in the comments if you have a go at making some rocky road or what other baking adventures you have been up too. 

Rocky Road Ingredients
Rocky Road Easter Basket

Rose Rocky Road Easter Eggs

Ingredients: 

500g good quality white chocolate

pink colouring (suitable for use with chocolate)

rose flavouring (suitable for use with chocolate)

30g slivered almonds, roasted

160-170g marshmallows

dried edible flowers, for decoration (optional)

1 tsp freeze dried raspberry, for decoration (optional)

cooking spray

Method: 

Very lightly spray 6 medium half Easter eggs moulds (approx. 120ml capacity) with the cooking spray. Arrange the moulds on a tray with sides so the moulds aren’t about to move about too much. 

Have all the rocky road elements ready to go next to your prepared moulds.  

Place a small pot with a little water on the stove and allow to very gently simmer. Using another pot or bowl that will comfortably sit over the top of the water pot, measure out 300g of the white chocolate. 

Place this pot over the gently simmering water (ensuring the water does not touch the base of the pot above) and melt the chocolate. Ensure the chocolate is constantly stirred. Once the chocolate reaches 45 degrees Celsius on chocolate thermometer, remove from the heat and continue stirring while gradually adding the remaining 200g of white chocolate. Add a little at a time and allow to melt before adding more. 

Continue to check the temperature of the chocolate, once it has fallen to 34 degrees Celsius, the remaining chocolate should have all been added. Continue stirring to allow the chocolate to cool further to 32 degrees Celsius. Sometimes I find not all my chocolate has melted at this point, it can depend on the room temperature and the temperature of the chocolate to start with. I place my chocolate back over the warm water in the pot I used previously, and turn the heat on to very low. I keep stirring the chocolate and check that the temperature doesn’t rise about 34 degrees Celsius again. Once the chocolate has almost completely melted, remove from the heat again and continue to stir and allow the chocolate to return to 32 degrees Celsius. 

Add a little pink colouring at this point, and a few drops of the rose flavouring. Start small with both and add more if you think it’s necessary. 

Once the chocolate has reached 32 degrees Celsius, it is ready to use. 

Spoon in about a tablespoon of the melted chocolate into each mould. and spread it around so the inside of each mould. Place a few marshmallows into each mould (I found I could fit four marshmallows into each mould), and cover with more chocolate (try to distribute the chocolate evenly amongst each mould). I didn’t fill each mould to the brim, leave a gap at the top as this will help you remove the chocolate later. Tap each mould onto the bench gently to encourage the chocolate to evenly distribute and remove any air bubbles. 

Sprinkle some almonds over the top of each, and follow with the dried petals and freeze dried raspberries if using. 

Leave to set at room temperature if you are in a cool environment, otherwise place in the fridge for about 30 minutes to set. 

Once set remove from the moulds and store in an airtight container.

I prefer to keep the rocky road in the fridge. Keeps for about 2-3 weeks. 

Makes 6 medium half Easter eggs. 

Homemade Rocky Road Easter Eggs

Reference: ‘Bourke Street Bakery All Things Sweet’ by Paul Allam and David McGuinness (Murdoch Books, 2017), pp.104-105 + 119.

Rose Flavoured Chocolate Rocky Road
In Confectionary, Holidays Tags Rose, Rocky Road, Grounded Pleasures, Easter, Chocolate, Rose Chocolate, Holiday Baking
Comment
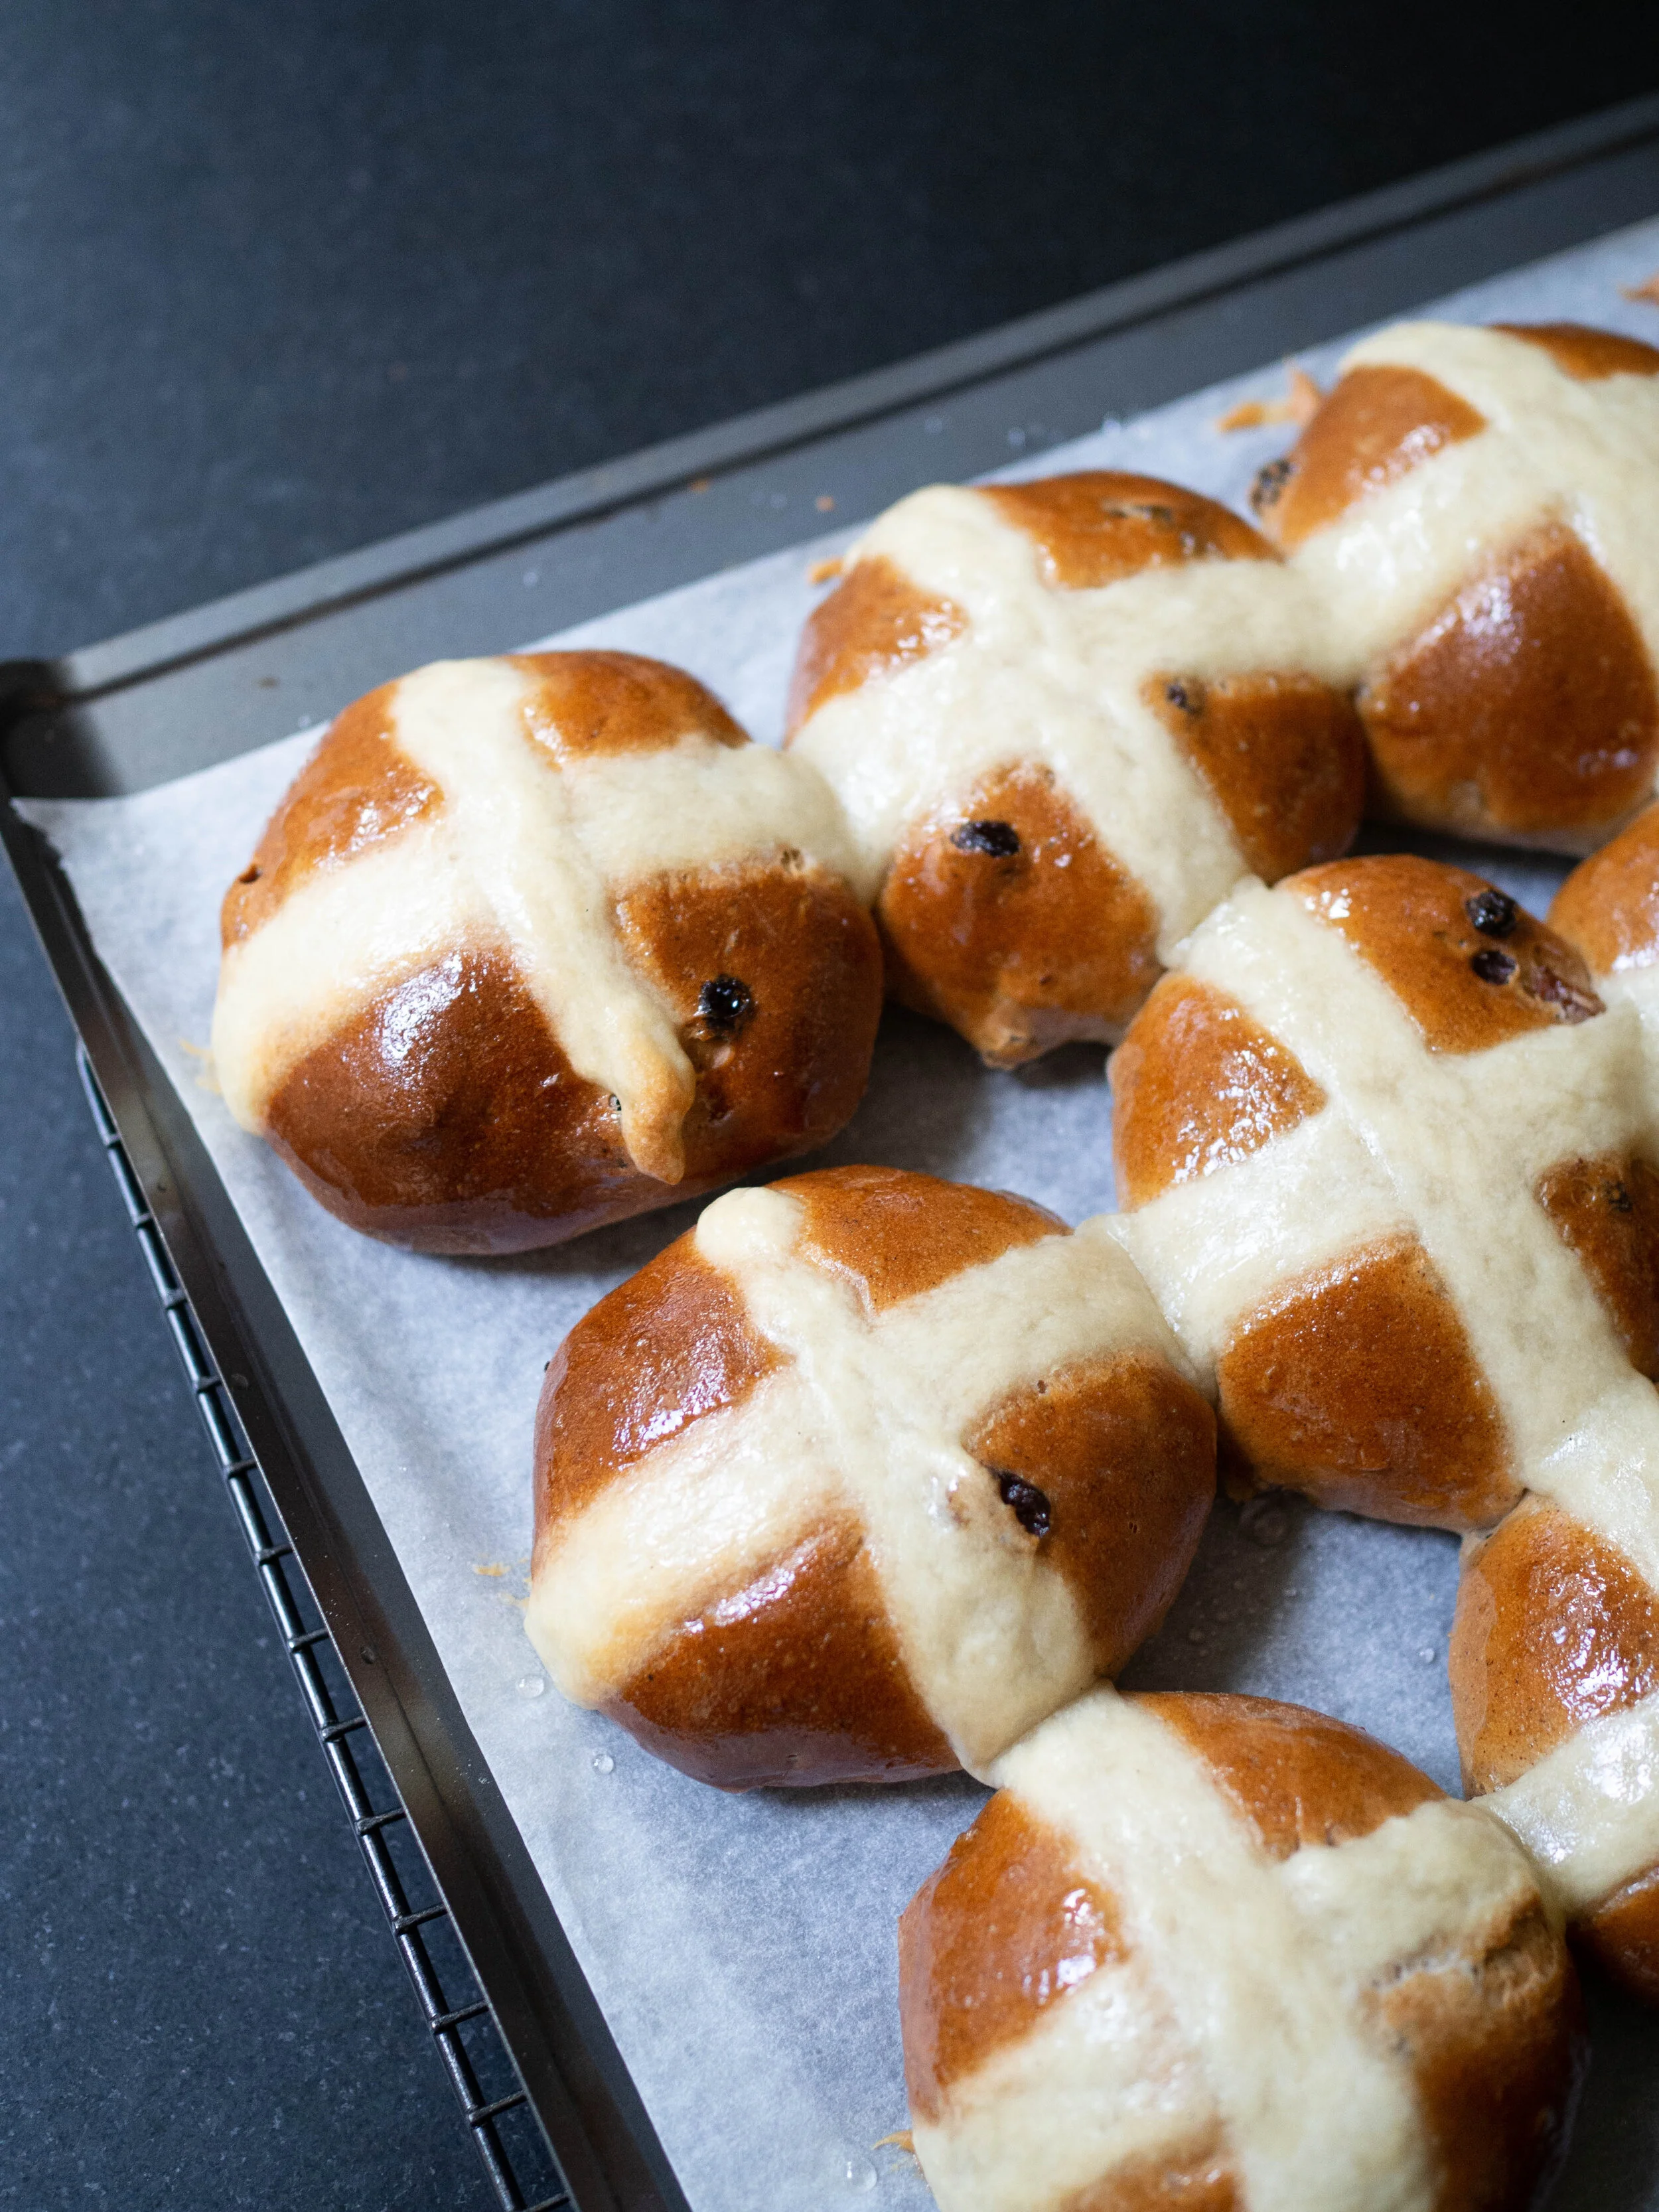
Challah Hot Cross Buns

Vanilla Scented Challah Hot Cross Buns

Kath March 28, 2020

Yes, I know what you are thinking. Again with the challah? I made a babka with challah dough not that long ago, and as I said then, I believe challah is the best type of bread so it could only ever improve a recipe. 

I am also aware that this recipe is in no way ‘kosher’. Challah is a Jewish bread most commonly eaten at Friday night Shabbat, and hot cross buns are made to celebrate the Christian holiday of Easter. I am also quite aware that the Jewish holiday of Passover often falls at the same time as Easter (as it does this year), and that leavened foods such as challah are not eaten during this time. So, definitely not ‘kosher’. 

Despite this, I maintain that challah is the best kind of bread, so trying to make hot cross buns with it was always going to happen for me. And if the religious contradictions are just too much, call them (challah) spiced fruit buns (great for any time of year) and leave it at that.

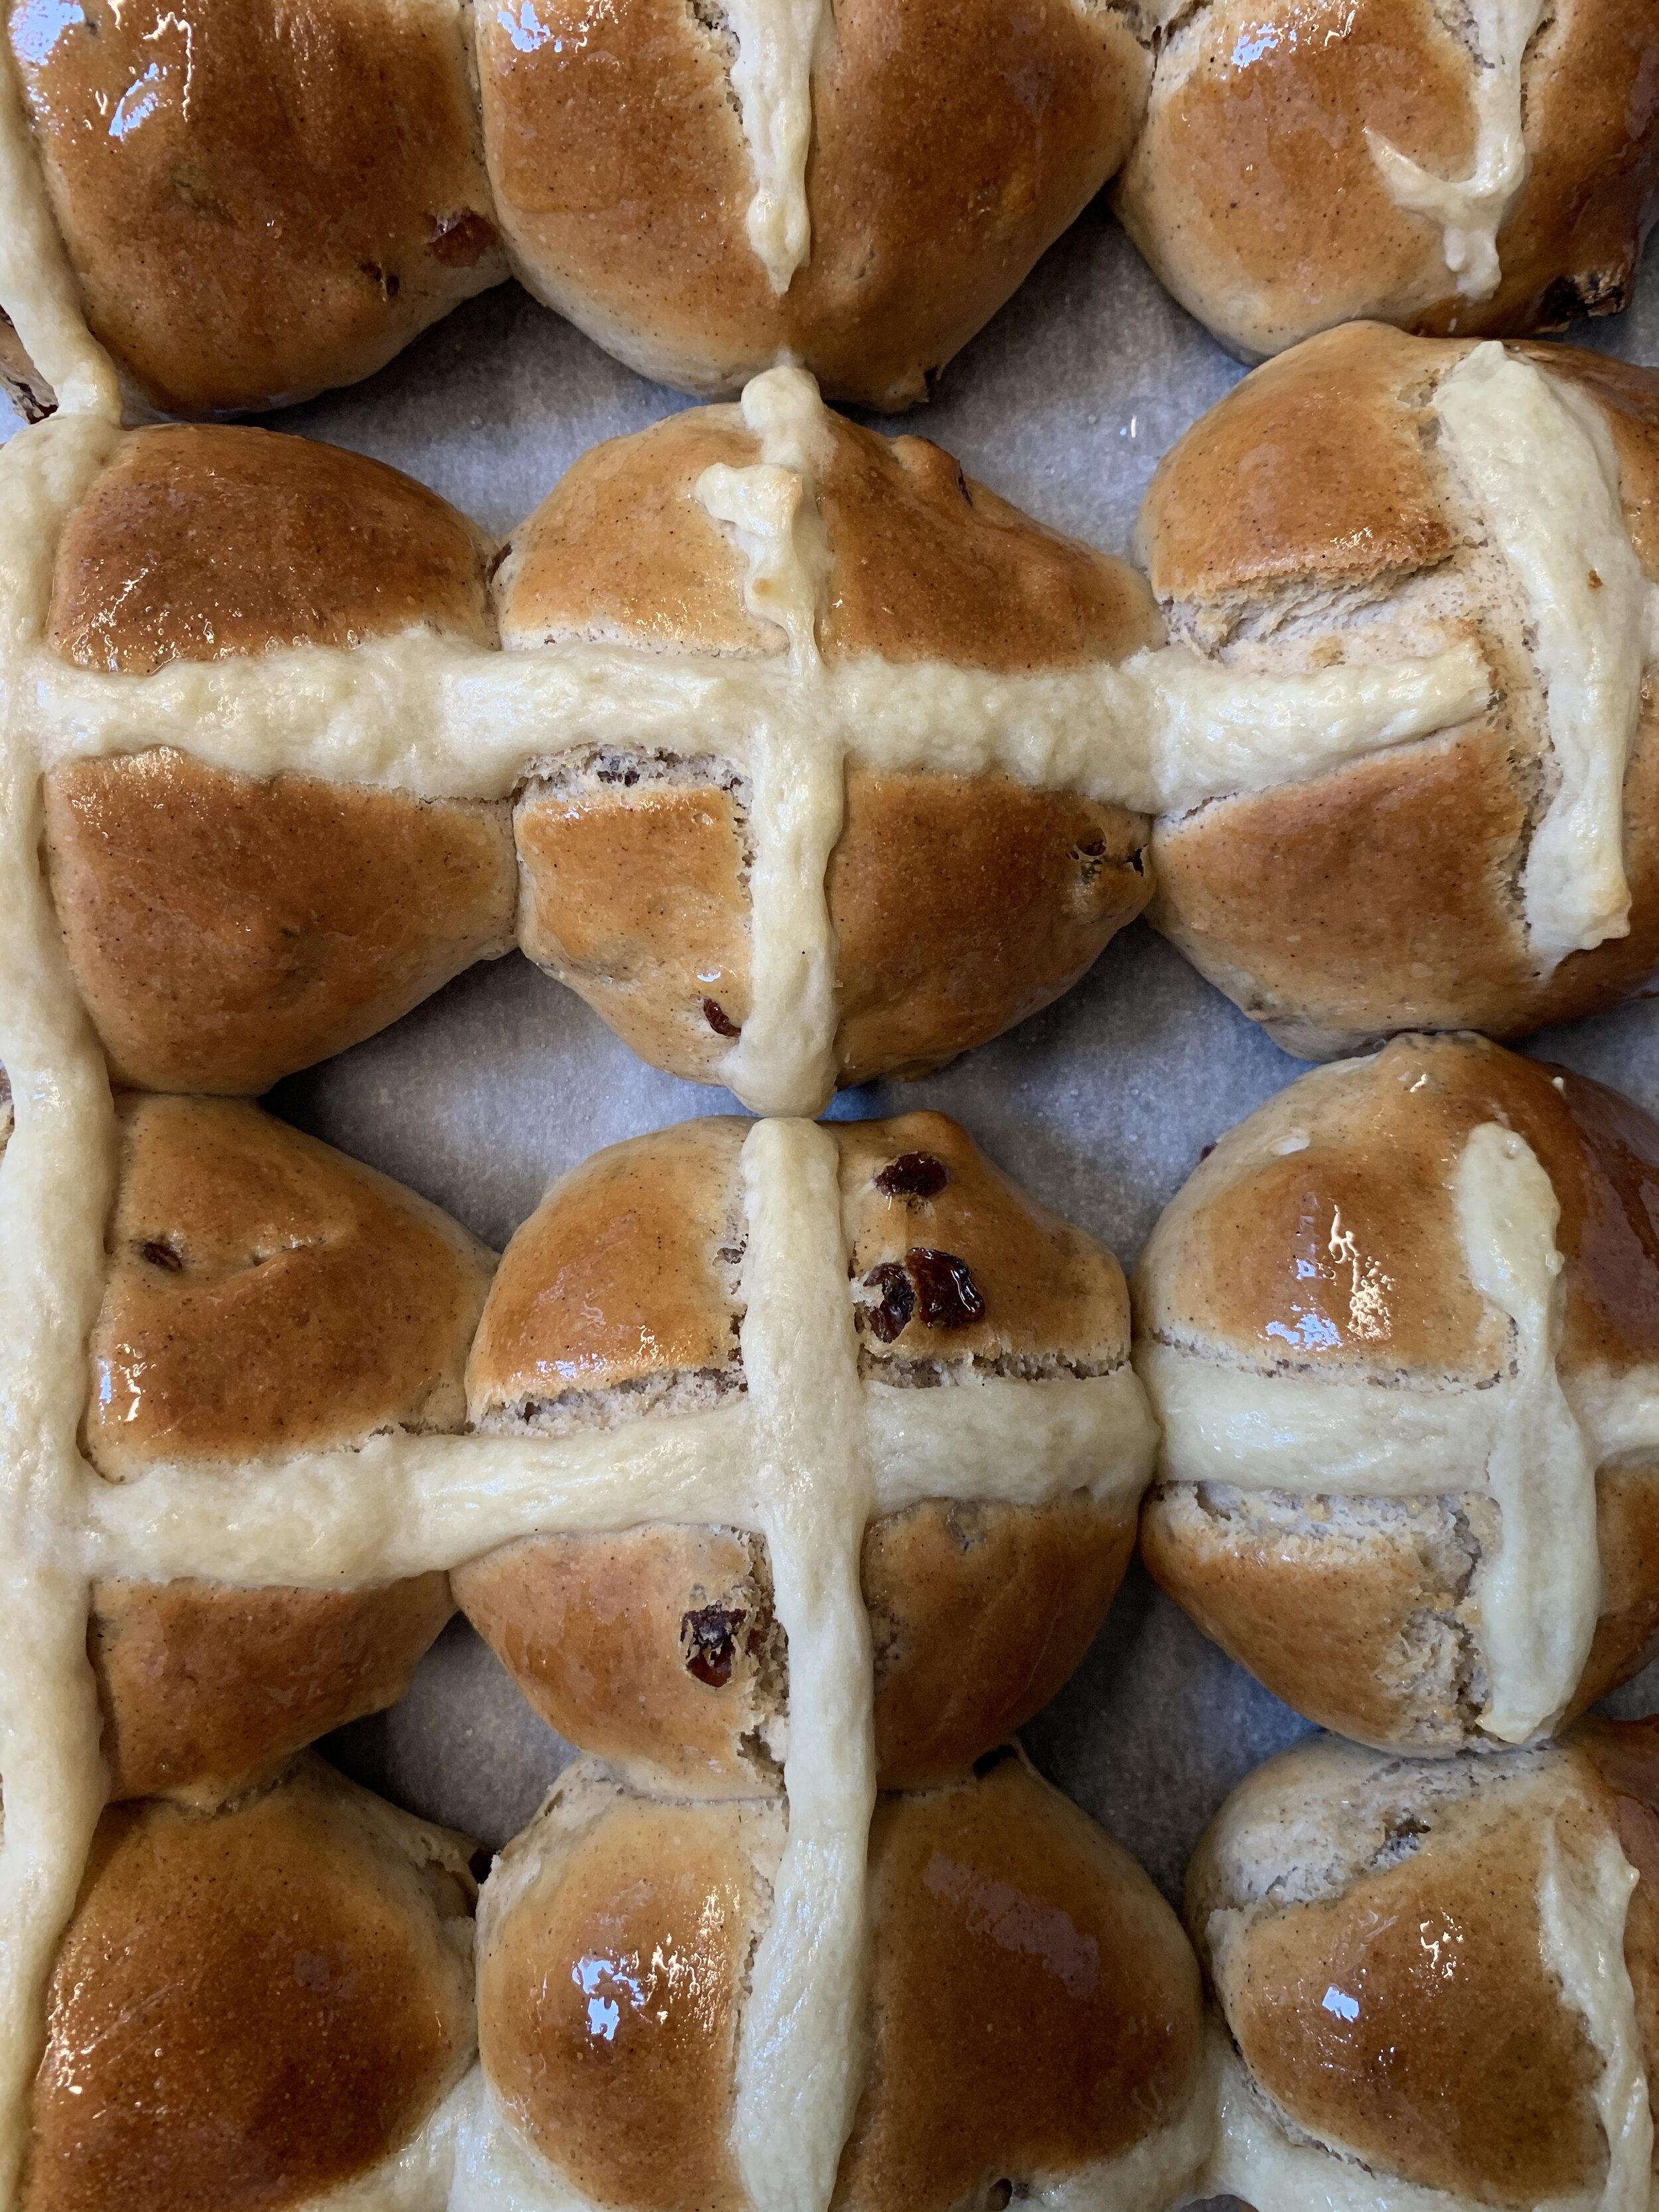
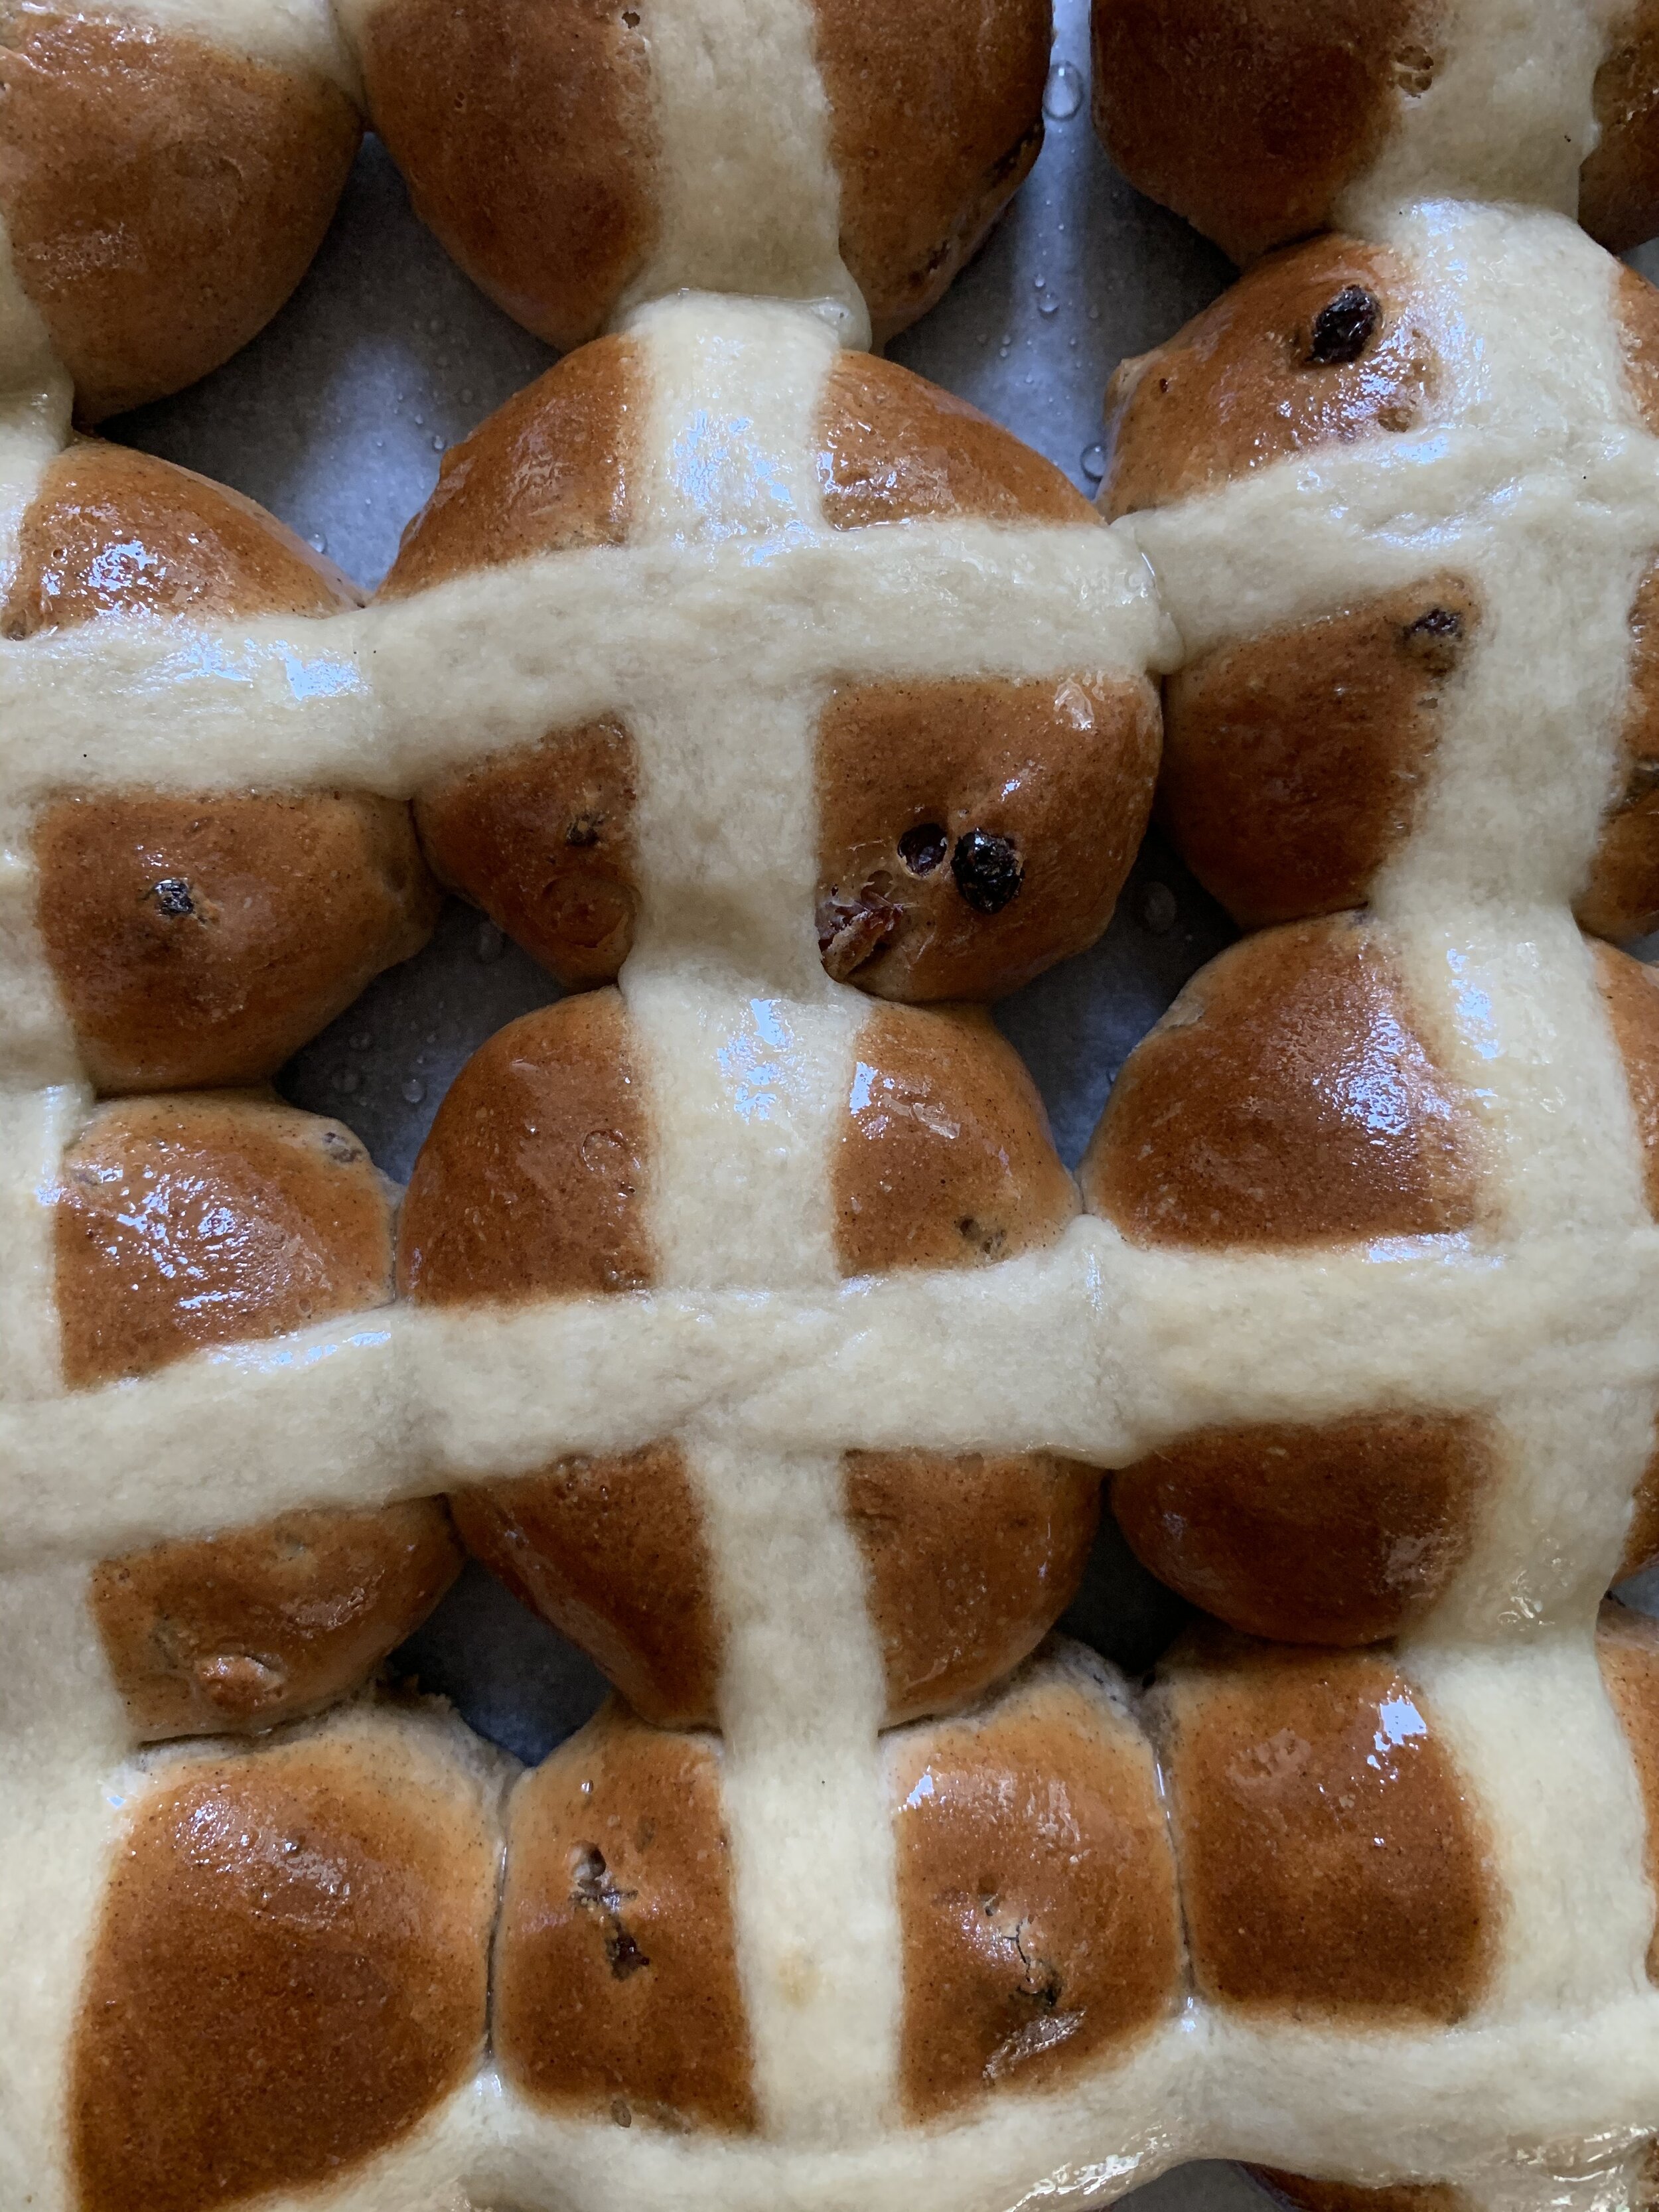
I often find when making hot cross buns, that I can never get them to look identical, and that using the same recipe doesn’t always yield a batch that looks the same as last time. I have found this occurs for a few reasons. Firstly, I never weigh the dough so I never get my individual buns exactly the same weight/size. I may try this next time I make them (which should be soon since we are socially isolating right not and not going to the shops to specifically buy hot cross buns so homemade is it for now!), and if I do I will update the recipe below. 

Secondly, I find it depends how my dough proofs. When making bread dough in warmer conditions I don’t have any issues with my dough rising. Now the weather has cooled down a bit, I am finding my bread doughs are not rising the same amount in the same time frame. To combat this, the last time I made these, I proofed the dough in our plate warming drawer under our oven, at 30 degrees Celsius (which is it’s lowest temperature) leaving the drawer open as the ideal temperature for proofing dough is about 25-28 degrees Celsius. 

First Attempt
First Attempt
Second Attempt
Second Attempt

This batch of challah hot cross buns turned out larger than the previous batch, which had been proofed closer to room temperature. This first batch were smaller, and had cracks in the dough on the top, which I later found out was a sign that a dough is under proofed. For some more tips on proofing bread dough check out this blog post from BakeClub I found quite helpful. 

Thirdly, I always do the final proof and bake of my hot cross buns on a flat baking tray. This means the dough can spread in away way it wants. Using a baking tray with sides may help get a more even look to my hot cross buns as the dough will not be able to rise and spread in any which way. Again, if I try it this way next time I will update the recipe below. 

On a final note, you don’t have to soak the sultanas in anything but I prefer them to be a little plumped up. The addition of the vanilla when soaking the sultanas is lovely, and the more fragrant the vanilla extract you use the better - I have found using the vanilla extract from Grounded Pleasures yields the best flavour. Just make sure the sultanas are well drained before adding to the dough. And for reference the quantity of spices I use for the dough adds up to approximately 12-13g, so if you wish to alter the quantities of individual spices or types of spices just keep it to that total weight (or add in more plain flour to make up the difference). 

Challah Hot Cross Buns

Vanilla Scented Challah Hot Cross Buns

Ingredients for the Dough: 

200g golden sultanas or raisins (cut in half if very large)

2 tbsp vanilla extract

2 tbsp hot water

490g plain flour, plus extra

250ml warm water

9g dried yeast

85g golden caster sugar

3/4 tsp salt

1 egg, beaten

63ml canola or vegetable oil, plus extra

1 tsp vanilla bean paste

2 tsp ground cinnamon

1 tsp ground ginger

1 tsp ground cardamom

1/2 tsp ground nutmeg

1/2 tsp mixed spice

Ingredients for the Glaze: 

100ml water

50g caster sugar

50g vanilla sugar (see here for how to make your own vanilla sugar)

Ingredients for the Cross (if using): 

90g plain flour

8g icing sugar (confectioners)

pinch of salt

15ml canola or vegetable oil

75ml water (room temperature/tepid is best)

Method:

Place the sultanas in a small bowl, and cover with the hot water and vanilla. Set aside. 

Place the flour into a large bowl (one that fits your stand mixer if you have one). Make a well in the centre of the flour, then pour in the warm water. Add the yeast and 60g of the golden caster sugar and stir (don’t mix in the flour at this stage). Leave for 10-15 minutes, or until the yeast has become foamy. 

Then add the salt and remaining sugar, stir again (don’t mix in the flour at this stage), and wait 5-10 minutes for the yeast to become foamy again. 

Once the yeast is foamy, add the egg, oil and vanilla to the yeast mixture and combine. Then start to gradually incorporate the flour into the wet mixture. Once everything is combined, attach your bowl to your stand mixer fitted with the dough hook, add the spices, and knead on a medium speed for about five minutes. The dough will be smooth and a little sticky once done. If the dough is too sticky, add a little more flour (1-2 tbsp). 

While the dough is kneading, lightly oil a large bowl and drain the raisins well. 

Dust your work surface with flour and tip the dough out. Add the raisins and knead by hand to combine into the dough. Add small amounts of flour if necessary to counterbalance any moisture the sultanas have added and to make the dough a bit less sticky. There is no need to knead the dough for too long, as your stand mixer has done most of the work already. 

Once the sultanas are incorporated into the dough, place into the oiled bowl and cover. Leave in a warm spot for about 1.5 hours, or until the dough has risen and doubled in size. 

While the dough is proofing, make the glaze. Place all ingredients into a small saucepan and place over medium/high heat. Bring to the boil, and allow to bubble for 30 seconds. Remove from the heat and set aside to cool. 

Line a baking tray with baking paper.

Once the dough has risen, flour your work surface and tip the dough out. Lightly flour the top of the dough if necessary. Cut the dough into 12 equal pieces - I do this by shaping the dough into a fat log shape, then cutting it in half, then dividing the two halves into six pieces each. 

Roll each piece of dough into a bun shape by folding the sides of each piece to the centre and pinch to close. This will now be the underside of your bun. Place the pinched side down, and cover your hand over the ball of dough like a loose claw. Rotate the ball of dough under your hand using the claw shape, to gently smooth the dough and form into a nice ball shape.

Place each ball of dough on the prepared tray, in a 4 x 3 formation. I usually leave a little space in between each to allow for more rising during the final proof and during baking. 

Cover the dough again and leave in a warm spot for about 30 minutes, or until the dough has risen. 

While the dough is rising, preheat oven to 180 degrees Celsius.

If using, make the cross paste by whisking together all the ingredients in a medium bowl until it is a smooth yet paste like consistency. The warmer the water is in this the runnier it will be, I often use warm water rather than room temperature, which is why my crosses are thicker and fat as the paste is a little runnier.

Place a piping bag or zip lock bag inside a large glass and turn the edges of the bag over the outside of the glass. Fill the piping bag with the cross mixture, and twist the top to close (I like use a peg to seal the top a bit more). 

Once the dough has risen, cut a small amount of the piping bag tip off and pipe the cross over each bun. Do this by piping one long line over each row of buns, then finish it off doing the same in the other direction. 

Bake for 20-25 minutes, rotating the tray in the oven about half way to help the buns cook and brown more evenly. The buns will be ready when they are golden on top and sound hollow when tapped. 

Remove from the oven, and place the tray on a wire rack. Using a pastry brush, paint the tops of each hot cross bun with the glaze. You will not need all of the glaze - if you think you will make another batch soon, store it in a jar in the fridge and it can be used again (just bring it to room temperature before glazing).  

These challah hot cross buns are delicious served warm from the oven, or toasted under a grill the next day. They also freeze well, and I recommend you do so if they won’t all be eaten soon after baking. 

Recipe Notes (12/04/2020):

  • The next couple of times I made these I have weighed the dough and each bun needed to weigh between 97-100g. I found this did help make them look even more uniform. So I would definitely recommend weighing your dough after the first proofing and dividing that number by 12 to get exactly the weight of each bun based on your dough at the time.

  • I have found that one batch of the sugar syrup is enough for 4 separate batches of hot cross buns.

  • The amount of mixture you need for the cross seems very dependent on how big or small you cut into your piping bag. Sometimes I feel a barely have enough for all the buns as I have cut a larger slit into the bag, other times there are leftovers as I have cut a much smaller slit!

Vanilla Hot Cross Buns

References: ‘Monday Morning Cooking Club - The Food, The Stories, The Sisterhood’ by Merelyn Frank Chalmers, Natanya Eskin, Lauren Fink, Lisa Goldberg, Paula Horwitz and Jacqui Israel (HarperCollins, 2013), p.263; ‘Beatrix Bakes’ by Natalie Paull (Hardie Grant Books, 2020), pp.176 & 192-3.

Vanilla Hot Cross Buns
In Breads Etc., Holidays Tags Hot Cross Buns, challah, Passover, Vanilla, Easter, Breads, Holiday Baking
2 Comments
  • The Blog
  • Older
  • Newer

recipes

  • Biscuits/Cookies 39
  • Breads Etc. 9
  • Breakfast 7
  • Cakes & Slices 67
  • Confectionary 5
  • Drinks 6
  • Events 14
  • Food Photography Tips 3
  • From The Mailing List 24
  • Heirloom Recipes 12
  • Holidays 44
  • Ice Cream 9
  • Jams Preserves & Spreads 9
  • Muffins 4
  • Off the Shelf 48
  • Other Desserts 25
  • Savoury Dishes/Meals 15
  • Scones 4
  • Tarts & Pastry 9
  • Travel 13

Sign up to Friday Food Chat with Kath, a weekly newsletter for more food, baking, cookbook chat and more!

Sign Up Here!
instagram-unauth pinterest facebook url

Website Accessibility: To enable text to speech function on the blog, click the sound button to the right of each blog post.

All images & content are the property of Kathryn Vincent, unless stated otherwise. Please do not use without permission.

Kulinary Adventures of Kath

Food Photography, Recipes & Baking

instagram-unauth pinterest facebook url