This cake is guaranteed to bring lots of Christmas cheer to your Christmas Day feast, with minimal effort. If you are going all out with your main course for lunch or dinner on the big day, an easy and festive cake like this one could be just what you need to make the Christmas preparation a little easier.
I have been using this recipe for a few years now, after a good friend of mine showed me the original recipe about three years ago. The original recipe is for gingerbread cupcakes with a maple cream cheese icing. I go back to it again and again, as it is easy and just a little different from other cupcakes I tend to make. And at this time of year, it makes a great festive addition to any occasion.
This year I decided to adapt the recipe a little, and make it into a larger cake. I love how the cake has turned out, as with the addition of red currants, it looks a little like a Christmas pudding and very festive! I know red currants can be hard to find (I was just lucky to come across them), so you could substitute them for smaller cherries or cranberries. I also used maple extract in the icing (which I found a few months ago at Salt Meat Cheese), but maple syrup (the pure kind) would work too, you might just have to up the amount of icing sugar you use.
I hope everyone enjoys the holiday season! Let me know what you bake, I’d love to see photos of what you create to celebrate the holidays!
And if you are still looking for some Christmas baking inspiration, here are some links to a few older posts, including my Epic Pavlova from last year, that might help you decide what to bake this holiday season!


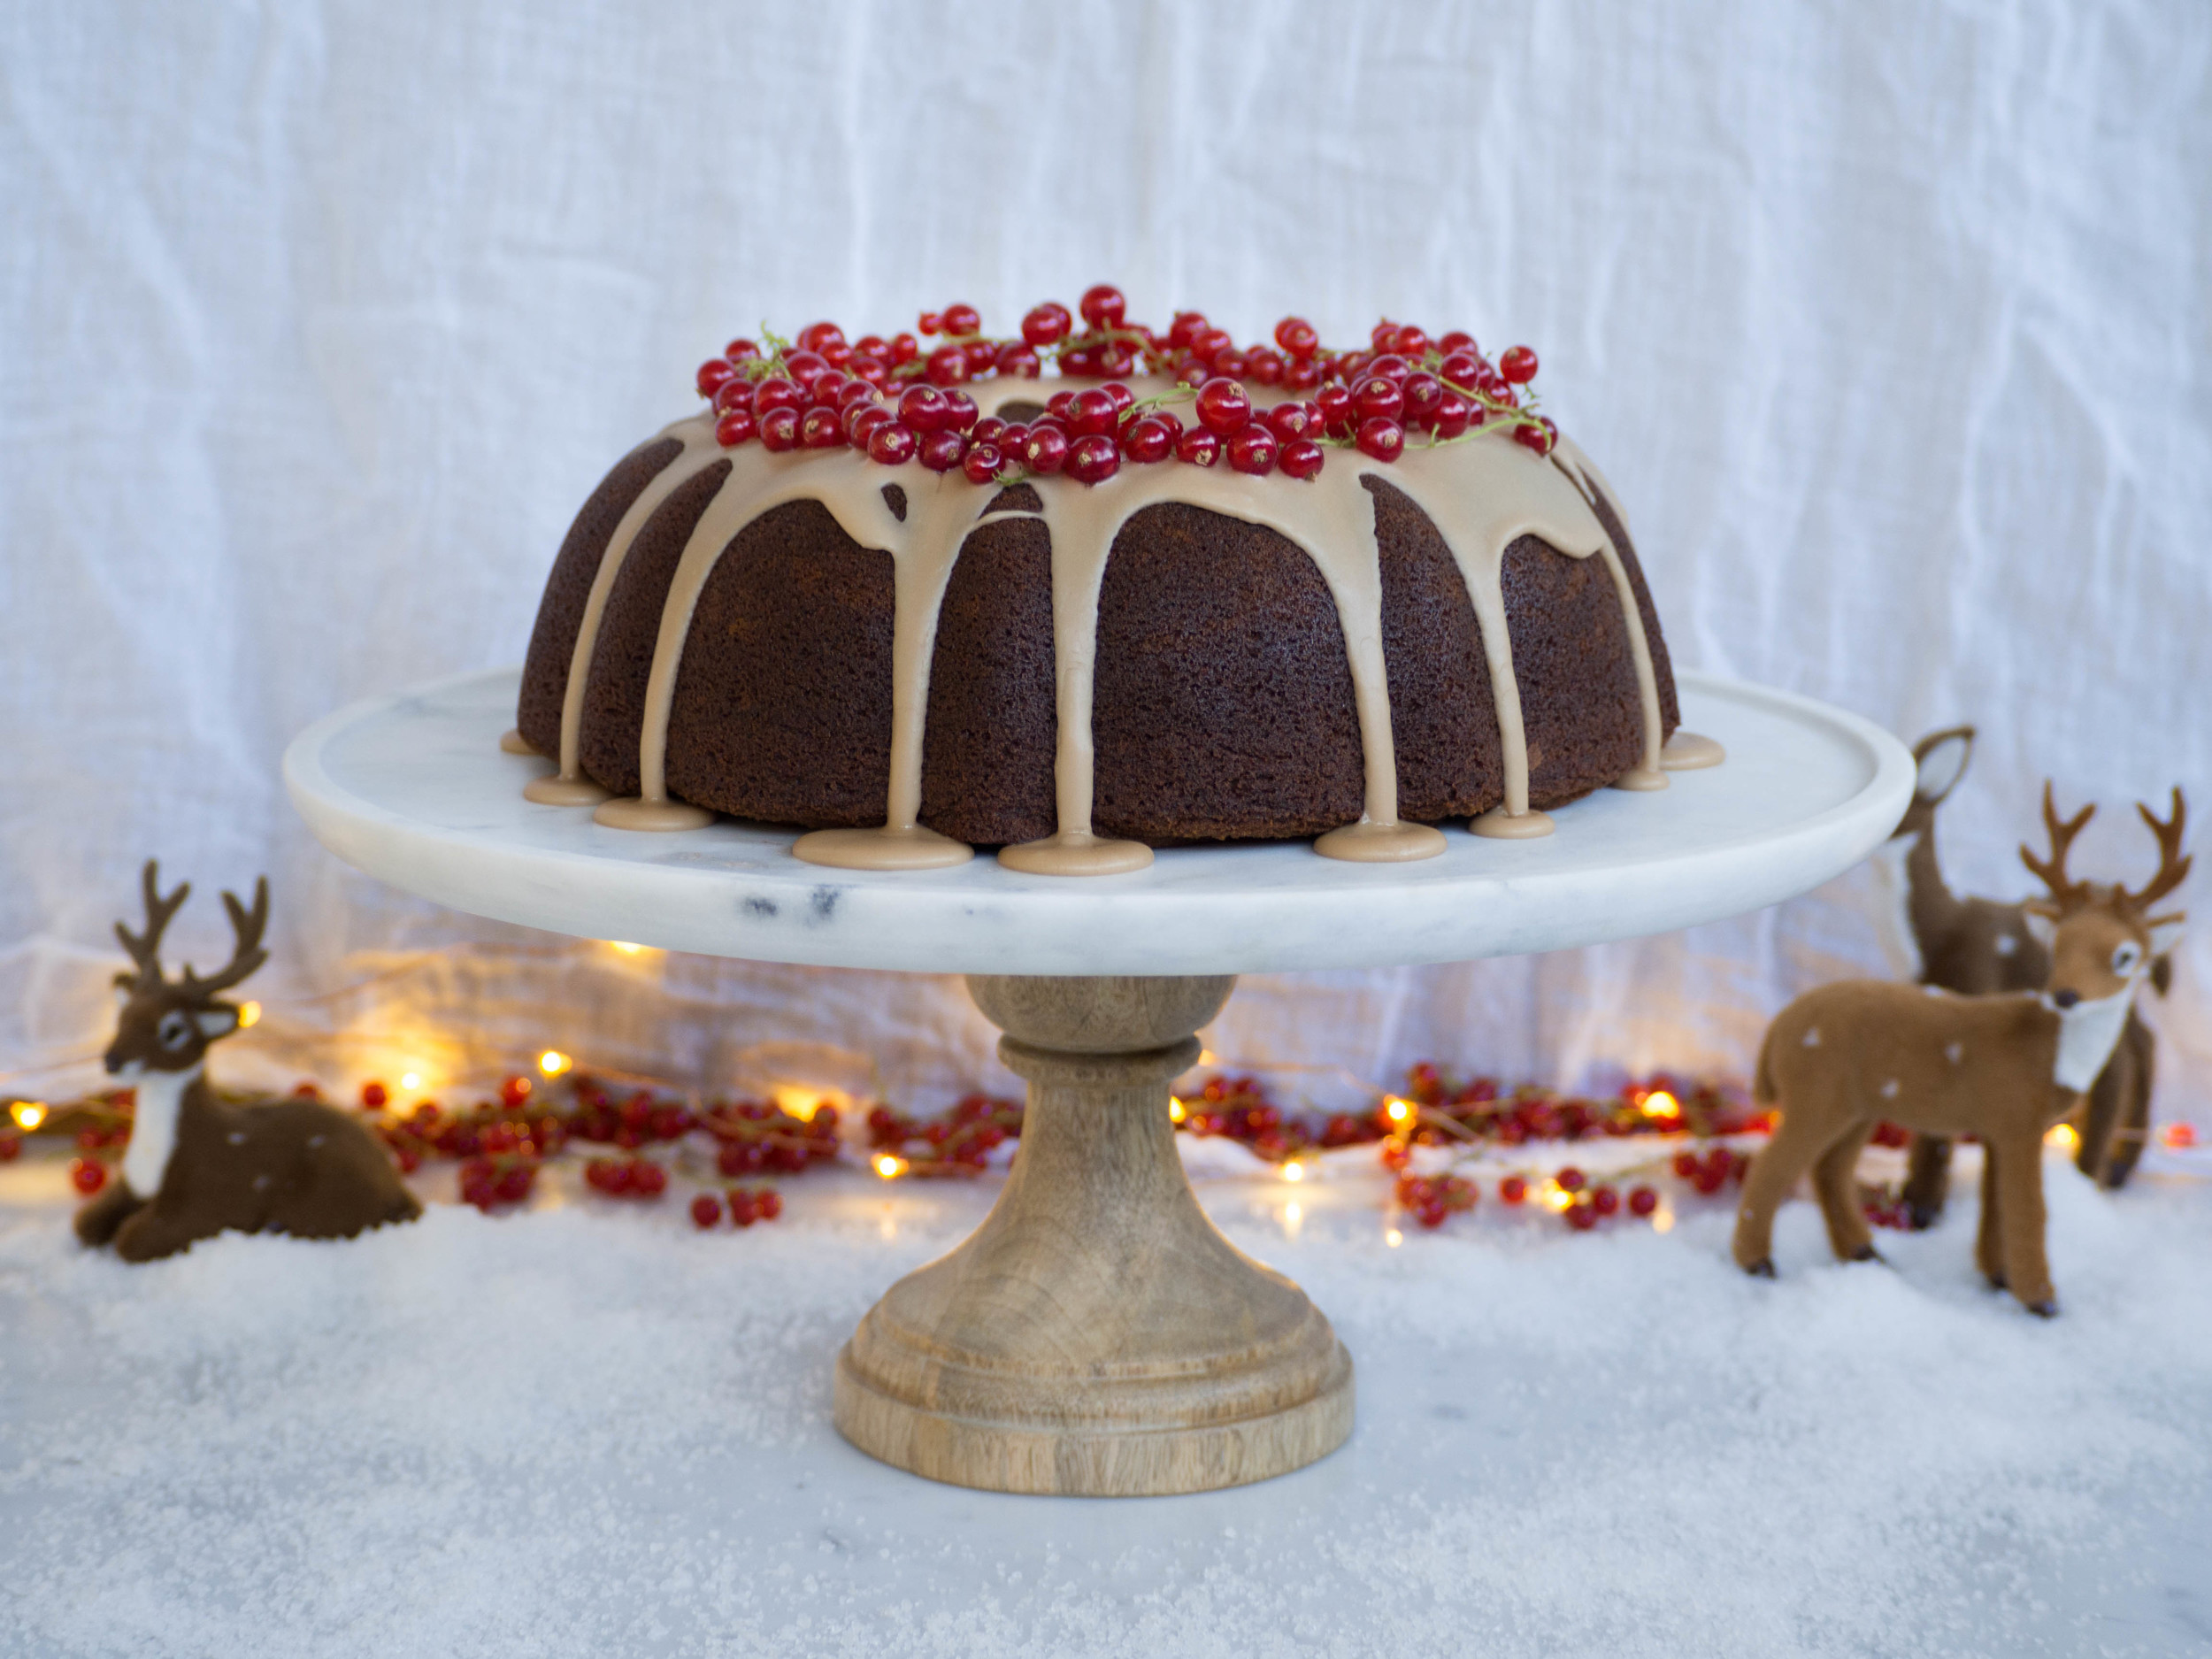
Festive Gingerbread Cake
Ingredients:
250g softened unsalted butter
200g brown sugar
2 eggs
310g molasses
230ml water
410g plain flour
1 1/2 tsp ground cinnamon
1 tsp baking powder
1 tsp bicarb soda
1 tsp ground ginger
1 tsp ground nutmeg
1/2 tsp ground all spice
canola oil spray, for greasing
Ingredients for Icing:
160g (approx.) icing sugar
1-2 tsp maple extract
red currants, to decorate
Method:
Grease a large bundt tin (around 2 litre capacity, approx. 24-26cm diameter) with the canola oil spray and pre-heat the oven to 180 degrees Celsius.
In a large bowl, cream butter and brown sugar until light and fluffy. Beat in the eggs. Then beat in the water and molasses.
Sift flour, baking powder, bicarb and the spices and add to the mixture. Beat on a low speed until the flour begins to combine, then beat on a medium speed for 2 minutes or until mixed well.
Pour the batter into the prepared tin and bake for 20-30 minutes at 180 degrees Celsius, then turn the oven down to 160 degrees Celsius for a further 20-25 minutes (this should prevent the cake forming a ‘peak’ on what will be the base of the cake), or until a skewer inserted in the centre of the cakes comes out clean. Cool for 10 minutes in the tin, before turning onto a cooling rack.
For the icing, sift the icing sugar into a bowl, then add the maple essence one teaspoon at a time, stirring well. The icing should have a nice smooth consistency. If the mixture needs more liquid add a little water and mix well. Drizzle the icing over the cooled cake, allowing it to fall over the sides. Decorate with red currants.


Reference: http://www.tasteofhome.com/recipes/gingerbread-cupcakes