Kulinary Adventures of Kath

Food Photography, Recipes & Baking
  • home
  • About
  • Work with Kath
  • Shop
  • Blog
    • The Blog
    • Recipe Archive
  • Newsletter
  • Contact
  • home
  • About
  • Work with Kath
  • Shop
    • The Blog
    • Recipe Archive
  • Newsletter
  • Contact
Raspberry Pistachio Rose Cake (23 of 25).jpg

The Blog

Recipes and Food Photography by Kath Vincent.

  • The Blog
  • Recipe Archive
  • All
  • Biscuits/Cookies
  • Breads Etc.
  • Breakfast
  • Cakes & Slices
  • Confectionary
  • Drinks
  • Events
  • Food Photography Tips
  • From The Mailing List
  • Heirloom Recipes
  • Holidays
  • Ice Cream
  • Jams Preserves & Spreads
  • Muffins
  • Off the Shelf
  • Other Desserts
  • Savoury Dishes/Meals
  • Scones
  • Tarts & Pastry
  • Travel
Easy Christmas Fruit Loaf Cake

Easy Christmas Fruit Loaf Cake

Kath November 5, 2019

I am going to preface this recipe with, this is not a traditional Christmas fruit cake. 

That is the exact reason however, that I love this cake. 

I have always severely disliked heavy alcohol laden Christmas cakes, and this is my much lighter take on the traditional. This cake uses delicious dried fruit, but the cake is more cake-y than fruit heavy. 

This cake is not alcohol free (but could easily be made so), but by using a large quantity of good quality vanilla extract (which contains alcohol) to soak the dried fruit you get an intense vanilla, only slightly alcoholic taste to the cake. All in all a much lighter flavour and texture than a traditional Christmas fruit cake. 

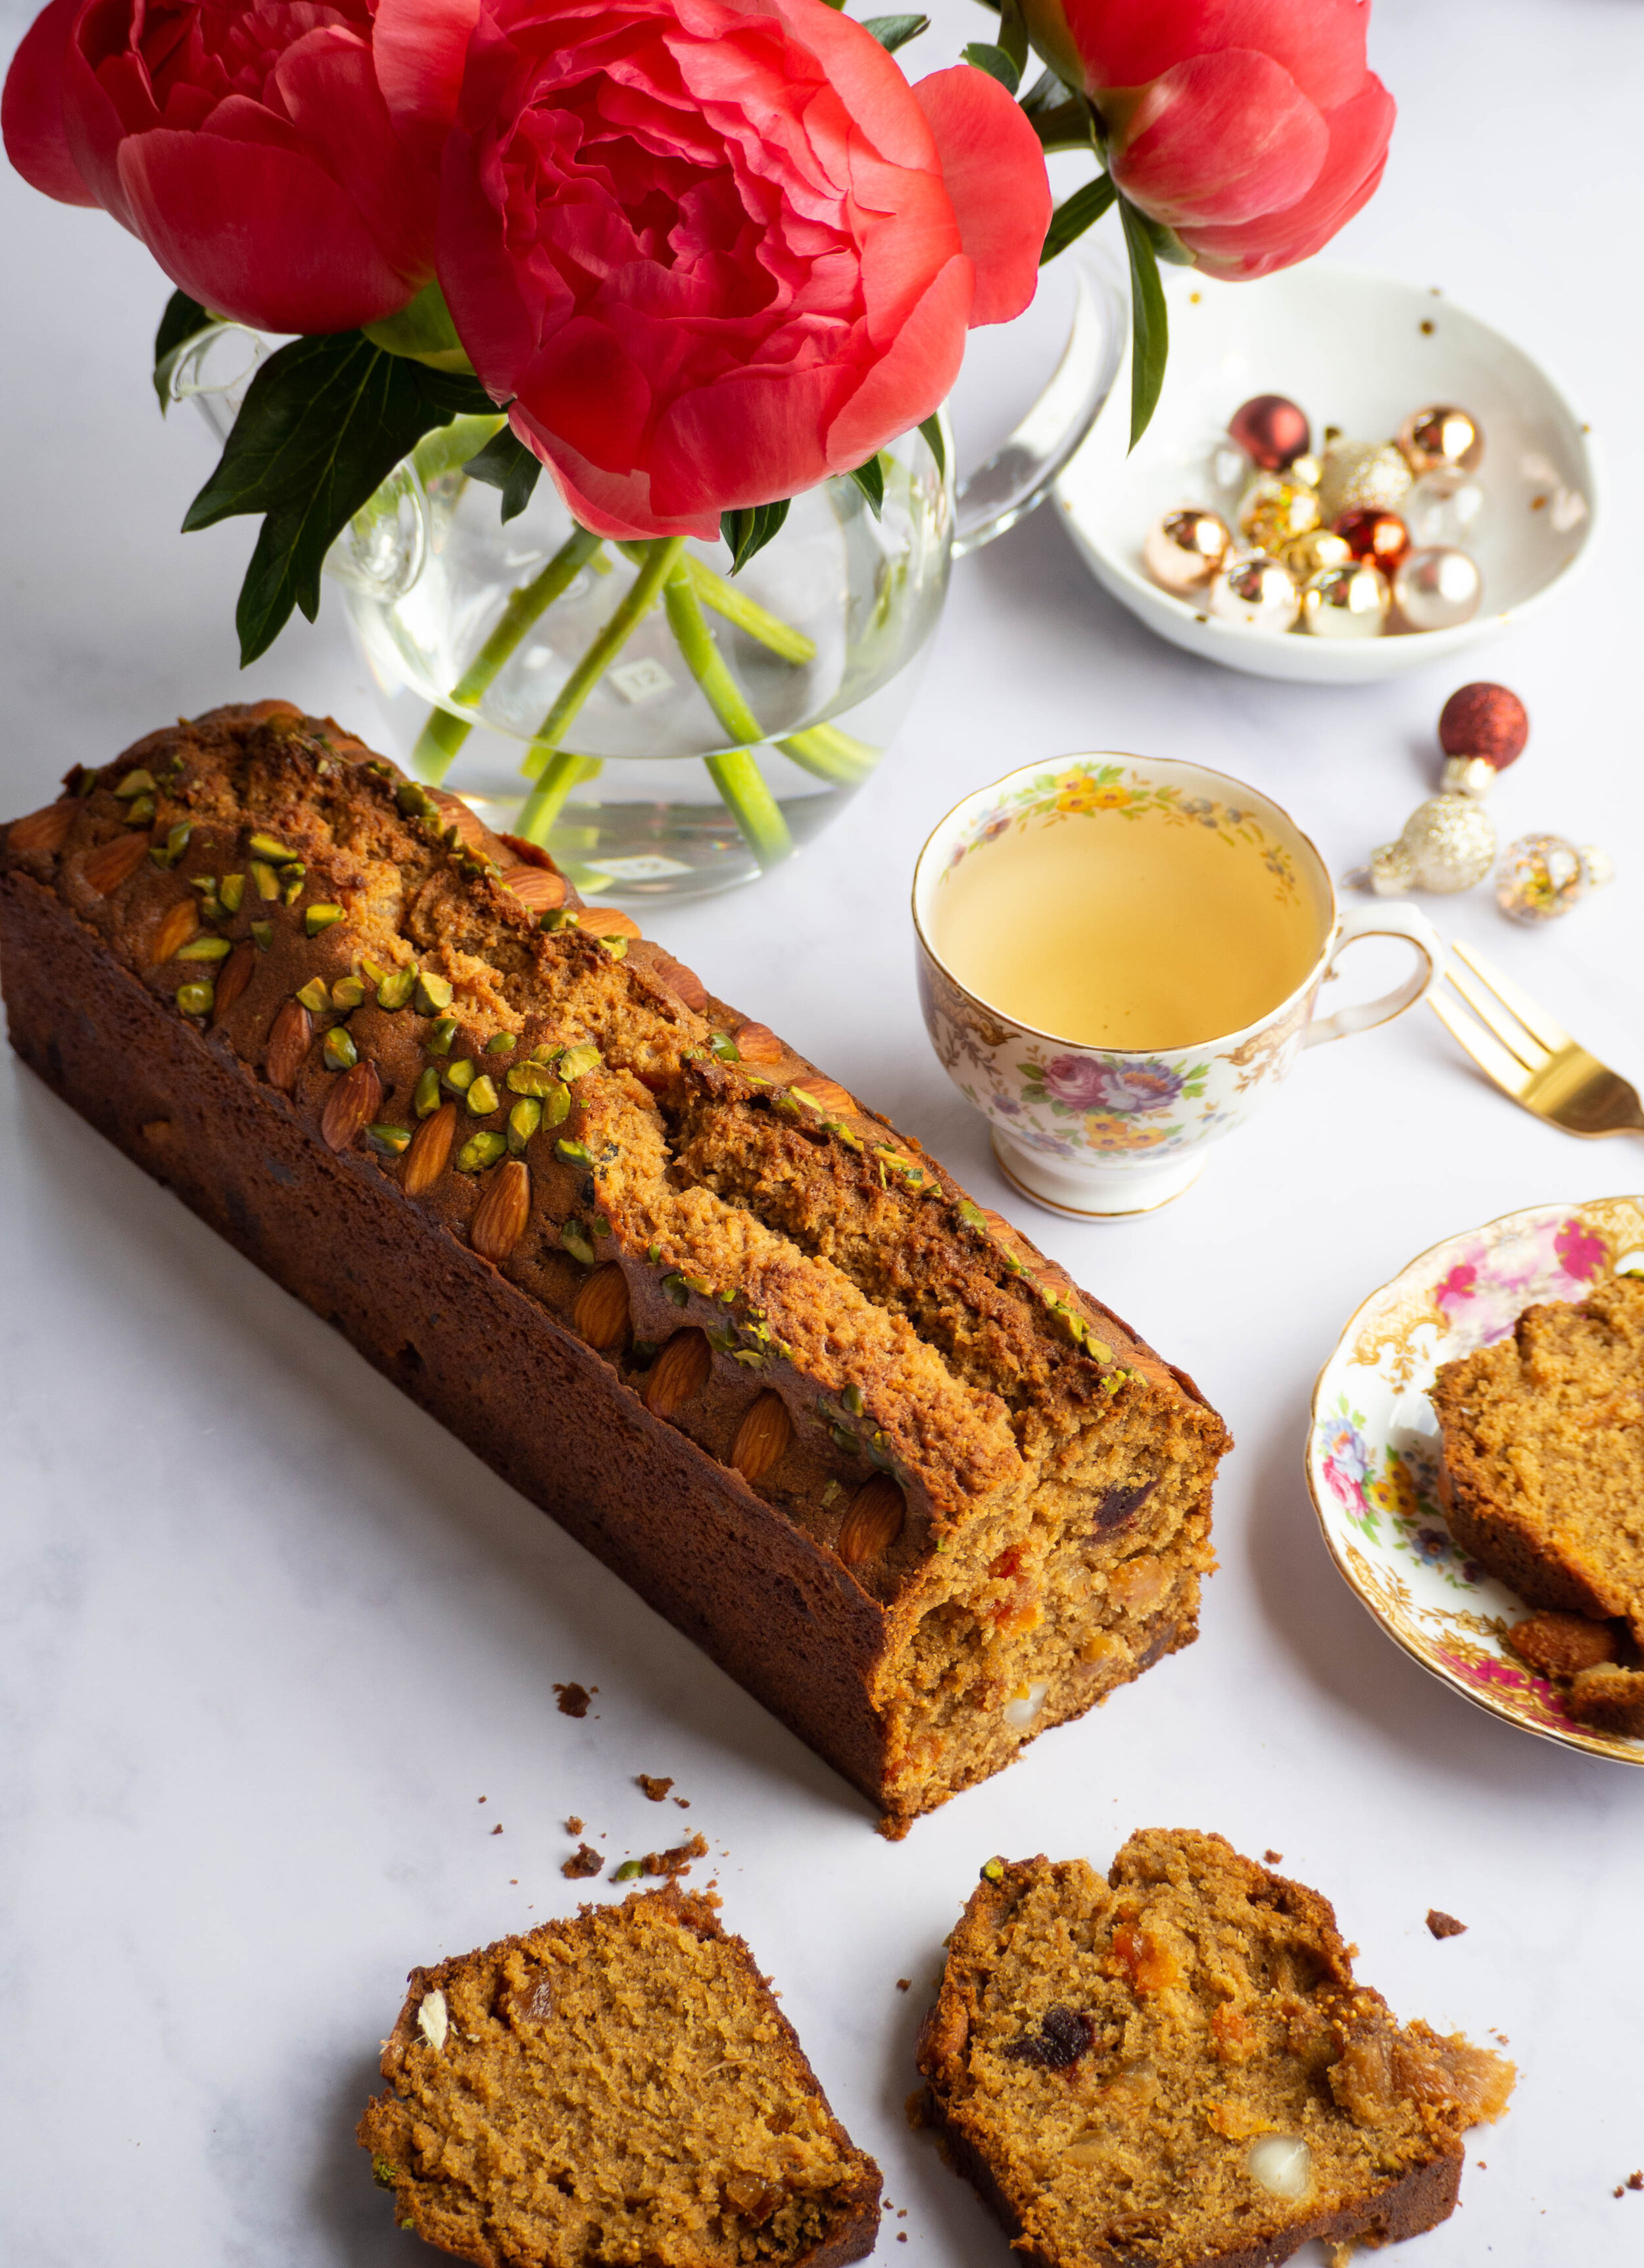
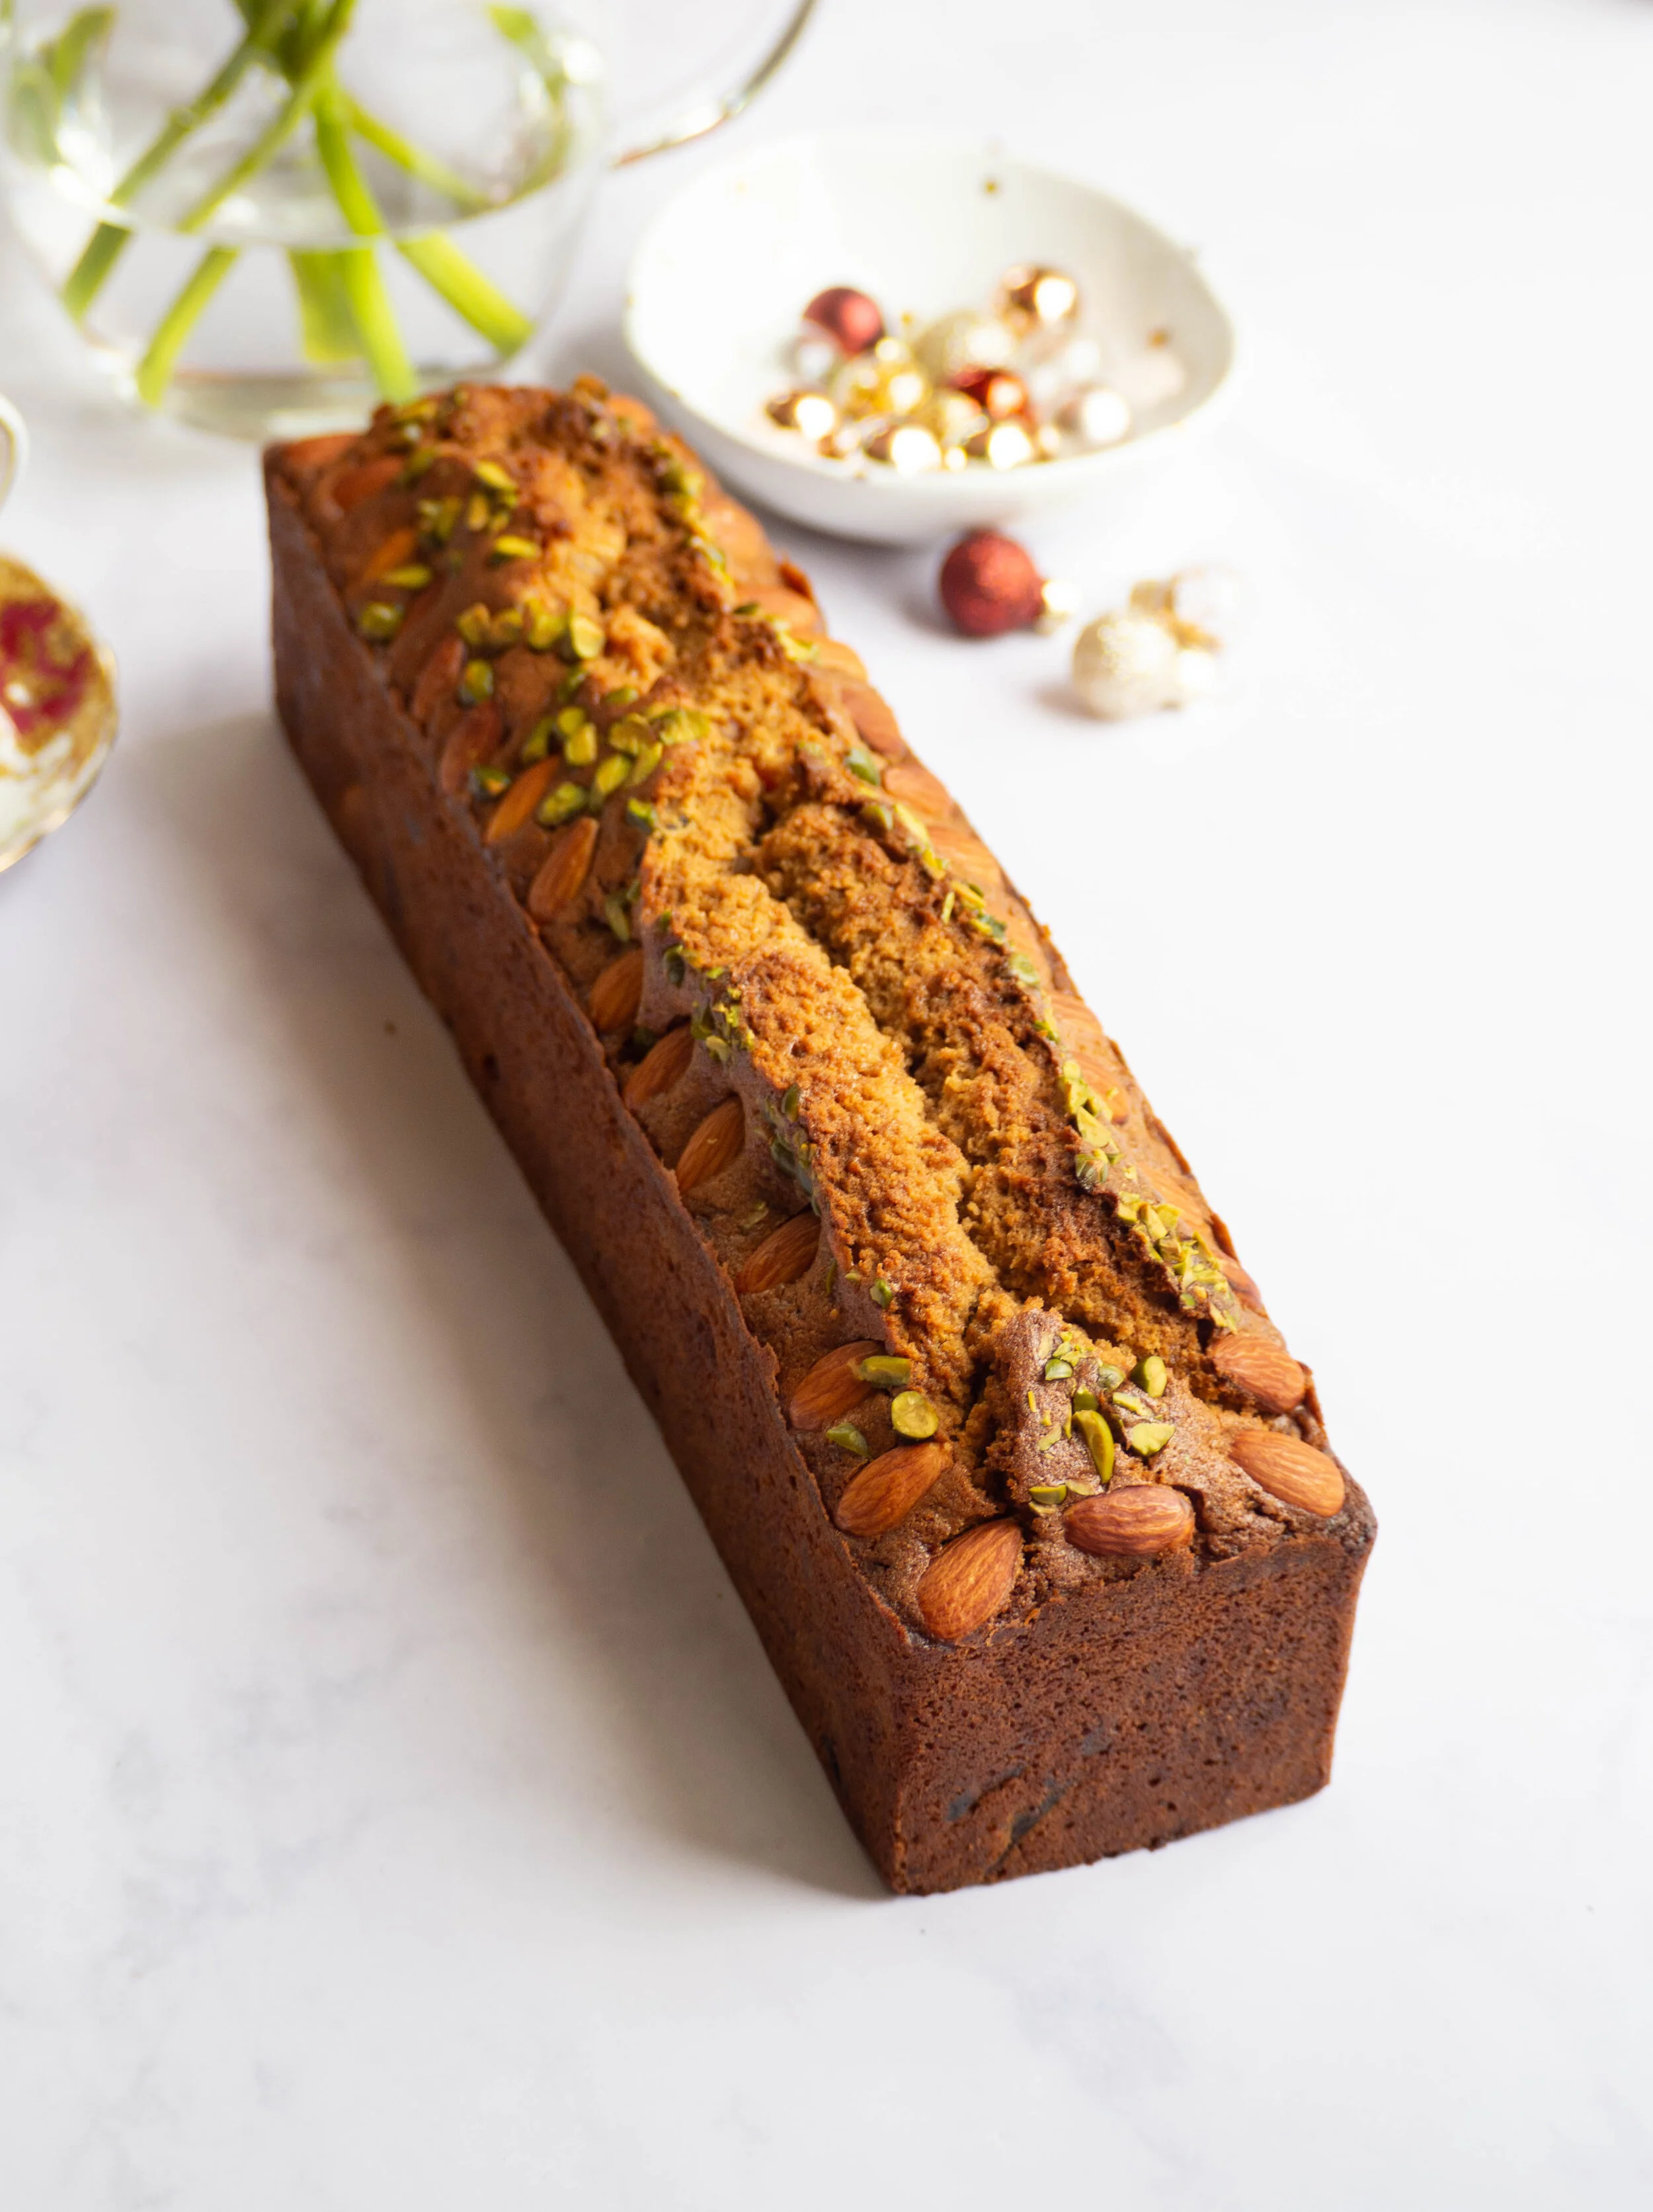
I have cooked it in a particularly skinny loaf tin as this creates the perfect serve when cutting slices of the cake (unfortunately the shape of the cake makes it much harder to photograph!). You could use something similar in size, just keep in mind a different shaped tin may change the cooking time for this cake.

I have used making this Christmas cake as a great opportunity to bake with some really great ingredients from some Australian businesses I really love. 

Riverland Melange and Sticky Quince Syrup from Singing Magpie Produce

Riverland Melange and Sticky Quince Syrup from Singing Magpie Produce

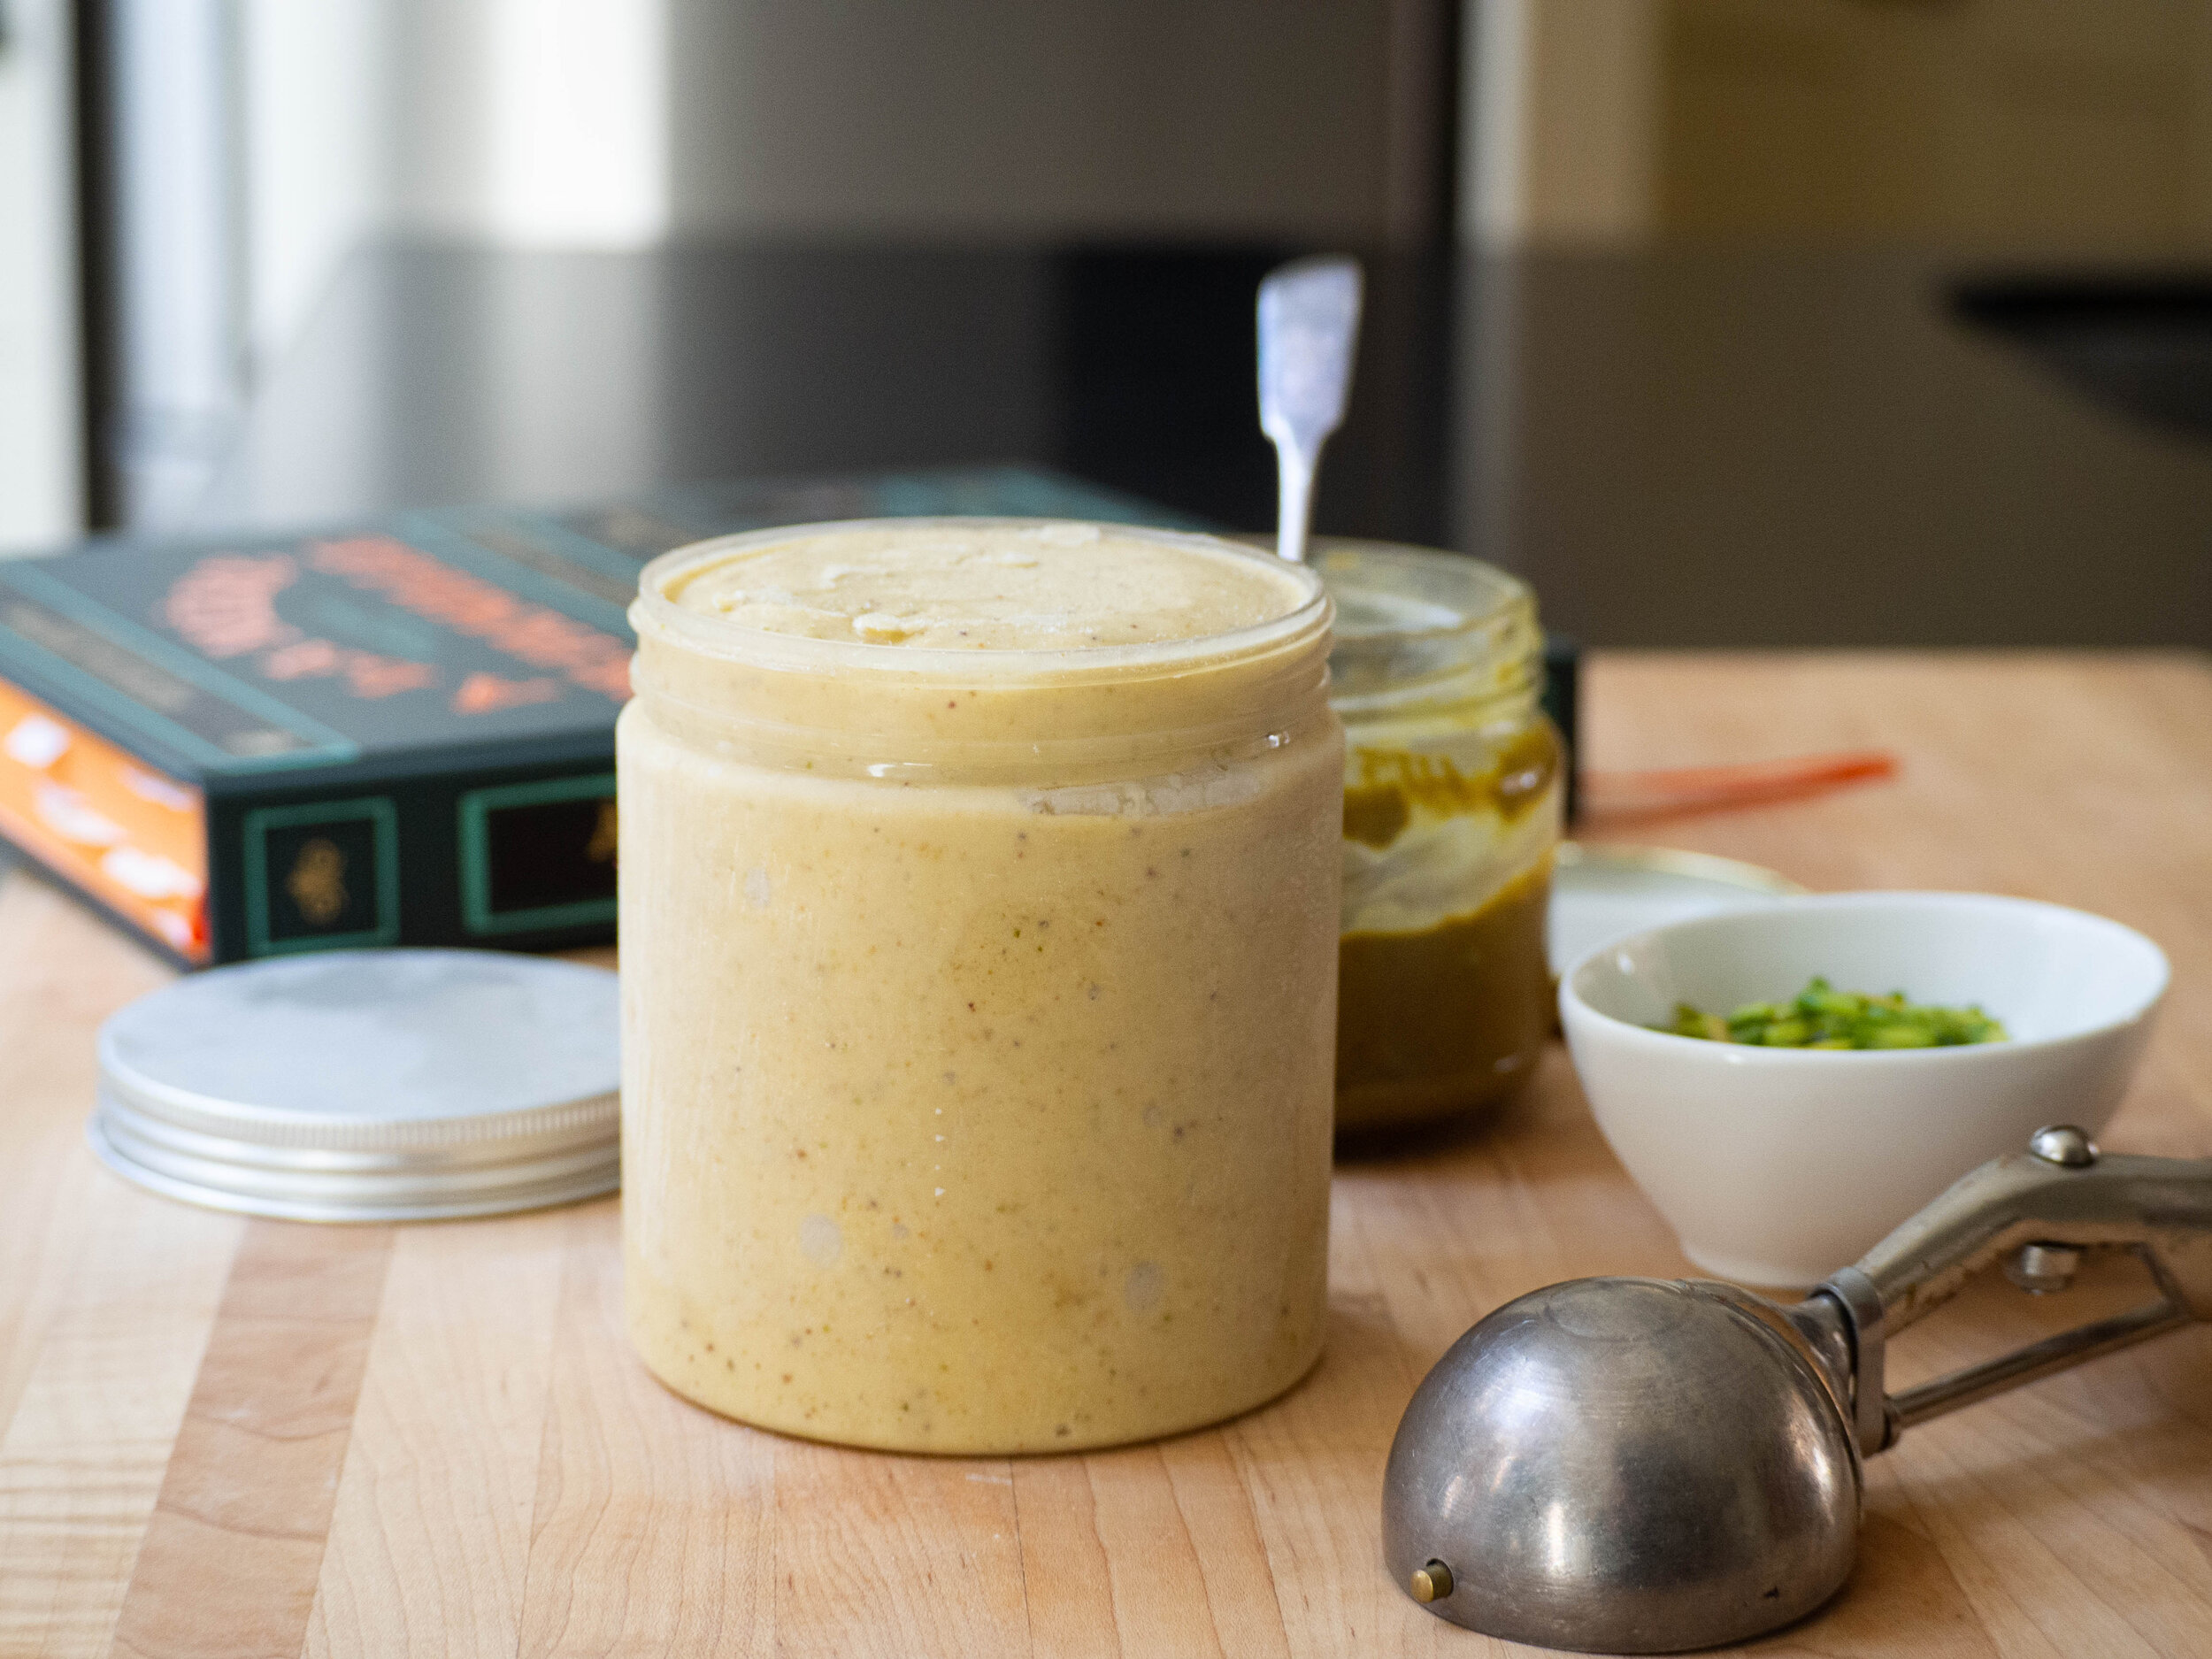
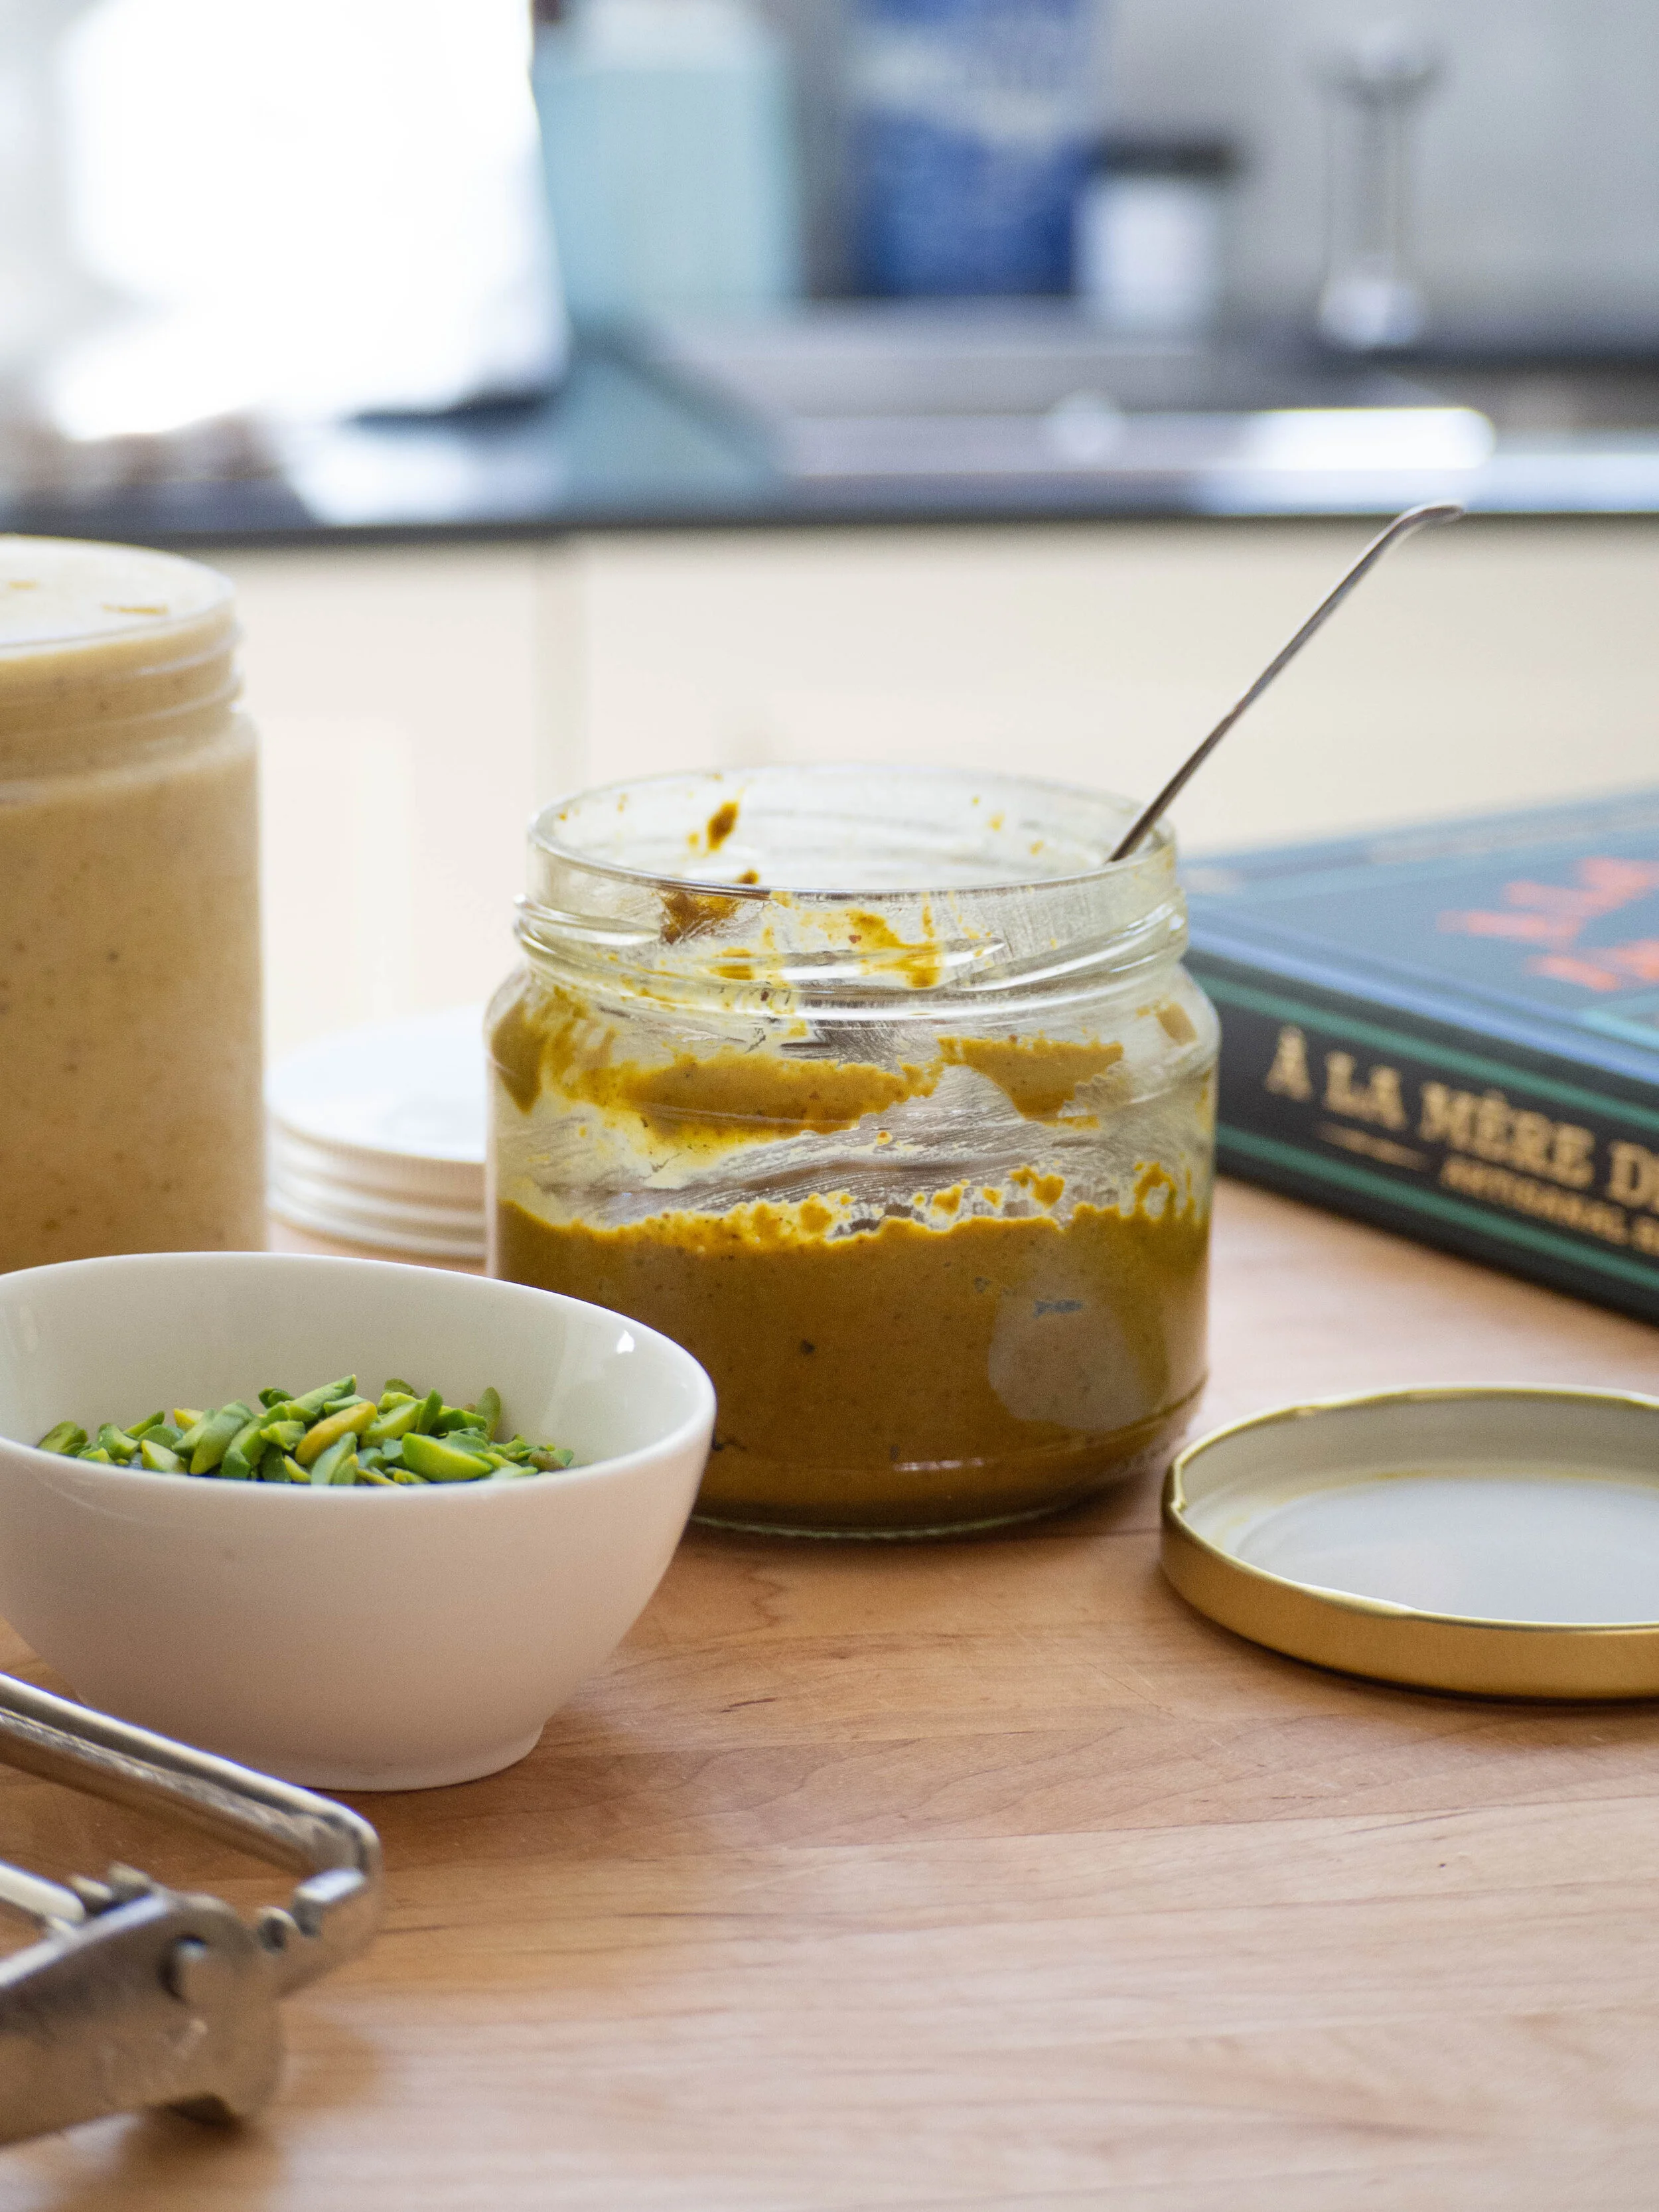
The mixed dried fruit is from Singing Magpie Produce and is called their Riverland Melange. It is a combination of sun dried quince, pears, apricots, peaches, black figs and white figs. While I highly recommend using a dried fruit mix like this, you can of course use any kind of mixed dried fruit for this cake. I also used Singing Magpie Produce’s soon to be released sticky quince syrup. As a lover of quince I bought this as soon as I could, when Sue at Singing Magpie Produce put together a limited run of a ‘Christmas Bakers Box’ containing this syrup, dried citrus and the Riverland Melange. It is delicious in both sweet and savoury recipes, and can be substituted with honey or date syrup. 

View fullsize Grounded Pleasures Vanilla
View fullsize St Nicolas Spekulaas Spice

I am a big fan of the Ballarat business, Grounded Pleasures and use their panela sugar at every opportunity. So this cake was no exception. Light brown or muscovado sugar could be substituted for the panela however. I also used some of their vanilla extract to soak my dried fruit in. This vanilla has a strong flavour, with the PNG sourced vanilla beans being paired with PNG white rum to create the extract. Any good quality vanilla extract can be used. Alcohol free vanilla extracts could also be used, to make this cake alcohol free.

Finally I used the Gewurzhaus St Nicolas Spekulaas spice for this cake, to give it a lovely festive edge. However you could also substitute with 1/2 tsp cinnamon and 1/2 tsp mixed spice.

Easy Christmas Fruit Cake

Easy Christmas Fruit Cake

Easy Christmas Fruit Loaf Cake

Ingredients: 

260g mixed dried fruit (I used Singing Magpie Produce Riverland Melange) 

50ml good quality vanilla extract (I used Grounded Pleasures Vanilla Extract)

75ml boiling water

300g plain flour

1.5 tsp baking powder

1 tsp Spekulaas Spice (I used Gewurzhaus St Nicolas Spekulaas ground spice); alternatively use 1/2 tsp cinnamon and 1/2 tsp mixed spice

250g unsalted butter, softened

240g panela sugar (I used Grounded Pleasures Panela), or brown sugar

3 eggs

1 tbsp sticky quince syrup (I used Singing Magpie Produce) or honey

50g mixed nuts such as almonds, pistachios or macadamias

35g (approx.) natural almonds, for decoration

10g blanched pistachios, roughly chopped, for decoration 

Method: 

Chop the dried fruit, and place into a bowl. Cover with the vanilla extract and boiling water and leave to soak for about half an hour. 

Preheat oven to 160 degrees Celsius, and line a 31 x 7.5 x 8cm loaf tin with baking paper. 

Combine the flour, baking powder and spice in a medium sized bowl and briefly whisk to combine and remove any lumps. 

In the bowl of a stand mixer, beat the butter and sugar together until well combined and fluffy. 

Add the eggs one at a time, ensuring they are well combined after each addition.

Add the sticky quince syrup and the flour mix and mix until combined. 

Remove the bowl from the stand mixer, add the soaked fruit along with any liquid left in the bowl and mix into the batter using a large wooden spoon or a spatula. Then add the nuts. 

Transfer the mixture to the prepared loaf tin and arrange the almonds around the outside. Sprinkle over the chopped pistachios, and bake for about 1 hour 15min. Check the cake at around 45min-1hour, and cover with foil if necessary. The cake will be ready when the top is golden and a skewer comes out clean. 

Allow the cake to cool in the tin for 20-30mins, then remove onto a wire rack.

Easy Christmas Fruit Loaf Cake

Easy Christmas Fruit Loaf Cake

Easy Christmas Cake

Reference: ‘Piri Piri Starfish - Portugal Found’ by Tessa Kiros (Murdoch Books, 2008), pp.191-2.

Easy Christmas Fruit Loaf Cake

Easy Christmas Fruit Loaf Cake

Easy Christmas Fruit Cake
In Cakes & Slices, Holidays Tags Christmas Fruit Cake, Christmas, Singing Magpie Produce, Grounded Pleasures, Gewurzhaus, Easy Baking, Holiday Baking, cake
2 Comments
Raspberry White Chocolate Biscuits (or Cookies!)

Raspberry White Chocolate Biscuits (or Cookies!)

Raspberry White Chocolate Biscuits (Cookies)

Kath November 3, 2019

I have been making these biscuits (or cookies), for about three years now. I had all good intentions of posting the recipe on the blog a long time ago, I even took some photos of them back in January 2017, but for some reason the recipe never made it here. Until now!

The original recipe comes from Claire Ptak’s book ‘ The Violet Bakery Cookbook’, which I have written more about here. I have adapted the recipe to suit my tastes, and inability to eat ‘normal’ chocolate as all good chocolate chip cookie recipes contain. I love the combination of raspberry and white chocolate, and I have found that using freeze dried raspberries work really well (I buy mine from Fresh As in New Zealand). I have also adapted this recipe to make Sesame and Pistachio Biscuits, you can find the recipe here. 

To add to the raspberry flavour, I also sometimes use a drop of Aftelier Perfumes Raspberry Chef’s Essence. I bought this online along with a couple of others in 2016, after hearing an interview with the owner of Aftelier on the podcast Radio Cherry Bombe. Unfortunately the product listing on Aftelier’s website now days for sale in the US only, which is a shame. If you don’t have anything like this, don’t worry just leave it out completely. I don’t use it every time I make these and the biscuits are delicious each time. And please don’t be tempted to use artificial raspberry extract or similar, you’re better off just using the freeze dried raspberries and leaving it at that. 

Raspberry White Chocolate Cookies

Raspberry White Chocolate Cookies

Ingredients: 

250g unsalted butter, softened or margarine (I use Proactiv Buttery)

200g brown sugar

100g white sugar

1/2 tsp vanilla extract

1 drop natural raspberry extract (optional)

3 egg yolks

325g plain flour

3/4 tsp baking soda

25g whole freeze dried raspberries, plus extra for decoration

180g white chocolate, chopped

Method: 

Beat the butter or margarine and sugars in the bowl of a stand mixer with the paddle attachment until combined. Add the vanilla extract and raspberry extract if using, then add the egg yolks mixing until combined. 

In a separate bowl, whisk together the flour and the baking soda, then add to the butter mixture and mix on a low speed until almost combined. Then add the whole freeze dried raspberries and chopped white chocolate and mix until combined. The freeze dried raspberries will crush up as they are being mixed so there is no need to crush them up before. 

Remove the bowl from the stand mixer, cover and refrigerate for at least 30-40 minutes (the dough can also be shaped into two logs, covered with plastic wrap or baking paper and frozen to bake at a later date at this point too). 

Pre-heat oven to 160 degrees Celsius and line 3-4 trays with baking paper. Once the dough has been in the fridge for 30-40 minutes, scoop out heaped tablespoons of the mixture and place on the prepared baking trays leaving room for the biscuits to spread as they cook. Sprinkle the tops of each biscuit a little crushed freeze dried raspberry (save some for the end as well, as the raspberries will loose their colour when baked). 

Bake for about 18 minutes, rotating the trays halfway so the biscuits cook evenly. The biscuits will be golden once done.

Allow to cool on their trays. Whilst the biscuits are still warm, sprinkle over some more crushed freeze dried raspberries. 

Store in an airtight container, will keep for about 1 week.

Makes about 40 biscuits.

Raspberry White Chocolate Cookies

Reference: ‘The Violet Bakery Cookbook’ by Claire Ptak (Ten Speed Press, 2015), pp.140-1.

Raspberry White Chocolate Cookies
In Biscuits/Cookies Tags Cookies, Biscuits, Freeze Dried Raspberries, White Chocolate, The Violet Bakery Cookbook, Biscuits/Cookies
Comment
Monday Morning Cooking Club - The Food, The Stories, The Sisterhood

Monday Morning Cooking Club - The Food, The Stories, The Sisterhood

Off The Shelf - ‘Monday Morning Cooking Club - The Food, The Stories, The Sisterhood’

Kath October 23, 2019

Bought at: a bookshop in Woolhara, Sydney. I don’t remember the name of it, but I remember vividly that I had drove over to the Eastern Suburbs to meet a friend, at the old Jones the Grocer (I think it was about 2012). There was a bookshop nearby and I had it in my mind that I wanted to buy this book. I remember hearing about it on the old day time show called The Circle. And whether or not they were actually talking about this book, or I got my wires crossed and found this one anyway, it doesn’t matter now. The fact is that this book has been such a well used addition to my cookbook collection that, I am so glad I did find it. 


Recipes Made: Custard Chiffon Cake p.35, Nice’s Date Slice p.55, Egg and Onion p.78, Talia’s Raspberry Tart p.93, Tomato Soup with Basil and Rocket Oil p.129, Hamantashen p.221, Couscous Roast Chicken p.233 and Challah from Heaven p.263. 

Monday Morning Cooking Club First Book
Monday Morning Cooking Club - The Food, The Stories, The Sisterhood

If you make only one thing from this book, make sure it’s the Custard Chiffon Cake. This cake is the lightest and fluffiest cake you will ever make or eat. I absolutely adore this cake, and it is well worth the effort of finding an angel food cake tin (that isn’t non stick). I first tried this cake at a baking demonstration/workshop with the Monday Morning Cooking Club at BakeClub in 2014 (for more see this blog post). The workshop coincided with the release of the Monday Morning Cooking Club’s second book, The Feast Goes On (which I also highly recommend), however a few things from the first book were made that day too. We saw how the cake is made, and then got to try some and take a little home. For me, the Chiffon cake stood out from all the rest and has been my go to chiffon cake recipe ever since. 

View fullsize Inverted Chiffon Whilst Cooling (2014)
View fullsize Finished Custard Chiffon

Nice’s Date Slice is also a recipe is has often been on high rotation in our house. A few years ago, when I was still at uni and worked in a cafe, I made it often as it is super quick and simple and was great to take with me as a little snack. It is also a massive crowd pleaser, I don’t recall anyone ever not liking this slice! 

Nice’s Date Slice

Nice’s Date Slice

I was introduced to Egg and Onion at last years Cornersmith workshop with the Monday Morning Cooking Club ladies. Isn’t it funny, that you can have a recipe sitting right under your nose for years, but not take notice until someone else makes it for you? Well, that’s what happened for me with this recipe. I really needed to taste it to know how good it was, especially as this dip/great accompaniment to bread, was quite a foreign concept to me having only been introduced to Jewish cooking in the last few years. After this workshop I made it so many times, it is super simple, yet so satisfying to eat. It is particularly good with challah and bagels, and I have a smaller quantity of the recipe on this blog post, if you like me, never have that many people to serve (the original recipe serves 12!). 

Egg and Onion with Challah

Egg and Onion with Challah

I think Talia’s Raspberry Tart was the first recipe I made from this book. I made it so many times in the first couple of years I had the book there is a labelled post it note for the recipe so it was very easy to find! It was also the first proper tart I ever made, and I always loved the story behind the recipe too. I think I was taken in by Talia’s desire to recreate the dishes she ate at restaurants at home, something that I often do too. The photo in the book of this tart is so inviting as well, with its perfect pastry and gorgeous raspberries. I have also made this tart with a combination of berries along with raspberries and it is just lovely. 

View fullsize Talia's Raspberry Tart
View fullsize Talia's Raspberry Tart Marked in the Book

Tomato Soup with Basil and Rocket Oil was made a couple of times by my Mum, who was looking for an alternative to our usual Tomato and Bacon Soup. This soup is made from fresh tomatoes rather than canned, and uses stale sourdough to thicken it. I absolutely loved it when Mum made it, and I think I will need to make it again very soon!

Earlier this year around the Jewish festival of Purim, I was doing research around Hamantashen recipes, and of course the Monday Morning Cooking Club was one of the first books I looked at. The image on the inside of the back cover of this book, is a striking picture of folded Hamantashen ready to go in the oven. This image always reminded me that this book had a recipe for Hamantashen, so I tried the dough recipe. I liked it except the recipe (in the edition I own at least), doesn’t say to the brush the cut dough with water or egg wash before folding the dough into the triangular Hamantashen. I found this meant the dough didn’t remain pinched together and didn’t keep that signature triangular shape during baking. I tried another recipe in the end (see blog post here), but I think if I used this recipe again in the future I would just brush the cut dough with an egg wash before shaping. 

Hamantashen using dough recipe from Monday Morning Cooking Club

Hamantashen using dough recipe from Monday Morning Cooking Club

The Couscous Roast Chicken is a dish we have made countless times over the years. As a family we have 3 or 4 roast chicken recipes we frequent often and this one has been a high rotation (another is the Pistachio Roast Chicken from MMCC’s third book, but that’s a story for another Off the Shelf post!). We always use pearl or Israeli couscous for this dish, and always dates rather than dried apricots. The combination of the coucous, dates, herbs, spices and nuts make a delicious chicken stuffing and side all in one. 

Simialar to the Egg and Onion I first tried the Challah from Heaven at the Cornersmith Workshop last year. I have certainly eaten challah before, but never a homemade one, and boy does it make a difference! The bread was soft and pillow like, and as I found when I made it at home, using the instructions given by the Monday Morning Cooking Club about how to do the six strand braid, isn’t too hard. I made many challah loaves in the months after that workshop, only stopping for a while as I was almost eating it for breakfast, lunch and dinner! 

Challah from Heaven

Challah from Heaven

Favourite Things About The Book: Everything! I love the recipes, some of which have become very firm family favourites (the Custard Chiffon Cake, Date Slice and Couscous Roast Chicken most notably). I also absolutely love reading the stories behind the recipes and the people who contributed to them. This was the first cookbook that really got me thinking about food history and heirloom recipes, and how important it is to write them down and continue making them. This was also the first cookbook that really introduced me to the varied world of Jewish cooking, and I have to say I haven’t looked back since! I have found it immensely interesting to learn about another culture through food, and I think it has enriched my life and my families dinner table so much for the better. 

I also love the story behind how the Monday Morning Cooking Club came about, and how at it’s core it was about recording recipes and celebrating food. If you already have a copy of this book, or can get a hold of one, read the introduction, it explains the whole concept so well. Then grab a big cup of tea, as you will probably find yourself sat reading all the stories behind each recipe and contributors to the book for a good long while. 

Bookmarked Recipes (to make later!): Buba’s Eggplant p.71, Ginger Snaps p.72, Ginger Cake p.75, Bienenstich p.94, Israeli Couscous Soup, Almond Kifli p.150 and Chicken Persian Pilau p.203.

*NB: I own the original 2011 edition of this book which was published by Hardie Grant. Page numbers for recipes may differ in newer editions of this title.

Monday Morning Cooking Club Books
In Off the Shelf Tags Monday Morning Cooking Club, Jewish Baking, Jewish Cooking, Cookbooks, Cookbook Review, Off the Shelf
4 Comments
Pistachio and Lemon Layer Cake inspired by Beatrix, North Melbourne

Pistachio and Lemon Layer Cake inspired by Beatrix, North Melbourne

Beatrix Inspired Pistachio + Lemon Layer Cake

Kath October 12, 2019

Attempting to make this cake has been on my mind since I visited Beatrix, a bakery in North Melbourne in late August. When I put the call out on social media for any tips on where to eat in Melbourne, this bakery was mentioned again and again. And for good reason! 

The cakes not only look amazing, but they taste great too. The shop itself is small and cute, with a wall of old egg beaters hanging behind the retro style wooden cake cabinet. Small white paper doilies are used to label each cake on the outside of the counter, and there seemed to be a steady steam of people coming visit even on a weekday. 

As soon as I saw the Pistachio and Lemon cake in the counter I knew that was the cake for me. I ordered it with a pot of peppermint tea, and my friend Sally ordered Apple Pie Cake with a coffee. Both cakes were delicious, and we sat and chatted for a while in the lovely calm cake-filled space. 

View fullsize IMG_8729.jpeg
View fullsize IMG_8728.jpeg
View fullsize IMG_8727.jpeg
View fullsize IMG_8737.jpeg

As I walked to my next stop of the day, I had already began thinking about recreating the Pistachio and Lemon Cake once I got home. Once I was home, I started researching through lots of my cookbooks and finally found recipes I could begin to recreate the Beatrix cake with. 

Even though I posted a recipe for Yuzu Curd not that long ago, and I could have easily made that recipe again but with lemon, I have had my eye on an easy lemon curd recipe I saw on Instagram from Jordan of Thistle + Whey. Jordan posted this recipe back in July as part of her Slow Saturday series. It immediately got my attention, and I screen shotted the recipe and the tips she posted on Stories too. 

Since this cake has a few steps to make it, I decided an easy option for the lemon curd would be most welcome! And not only is this recipe for lemon curd super easy, it produces the thickest tangiest lemon curd I have ever made! I am always hoping the lemon curds I make will be thicker than they end up, and the only time I achieved this before was when I used a recipe that contained gelatine. 

The taste and consistency of this lemon curd was just perfect for this layer cake, as it held its shape and didn’t drip everywhere, and the super tangy lemon flavour goes really well with the buttery sweet icing. So it’s win win all around, and Jordan’s Super Easy Lemon Curd is now my go to recipe! Thanks Jordan!

And a note on the meringue buttercream - if you like me, aren’t a big fan of the stock standard buttercream icing, this one is not like that! When I ate the Pistachio and Lemon Cake at Beatrix, I knew they had used a type of meringue buttercream as, not only did I actually enjoy eating it, but it had that slightly more white colour that comes from the meringue element. This recipe replicates theirs pretty well, and it is lighter and less buttery and dense than its regular buttercream counterpart, and well worth the effort in making it.

Beatrix Inspired Pistachio and Lemon Cake
Jordan’s Super Easy Lemon Curd

Jordan’s Super Easy Lemon Curd

Jordan’s Super Easy Lemon Curd 

Ingredients: 

2-3 lemons (medium to large sized, I used 4 very small lemons) 

160g caster sugar 

110g unsalted butter

5 egg yolks (save the whites for the meringue buttercream icing below)

Method: 

Slice the lemons into quarters, and place in the bowl of a food processor. Process the lemons until they have become pulpy and almost smooth. 

Cut the butter into cubes, add to the food processor along with the caster sugar and egg yolks. Process until everything is well combined and as smooth as possible. 

Transfer this lemon mixture into a medium saucepan, and stir over a low heat. The curd will look curdled at first but it will thin out as the butter melts, then thicken up again as the eggs cook. Once the curd has thickened and coats the back of your spoon or spatula it is done (this should take around 5 minutes). 

Pour through a sieve and discard any bits the sieve catches. Transfer to a large glass jar and allow too cool to room temperature before storing in the fridge. 

Makes about 400g, and will keep in the fridge for about 5 days. 

Pistachio and Lemon Cake

Pistachio and Lemon Cake

Beatrix Inspired Pistachio and Lemon Cake

Ingredients for the Cake: 

200g unsalted butter, softened

200g caster sugar

30g pistachio paste (see here for homemade version)

4 eggs

100g raw shelled pistachios

200g self raising flour

Ingredients for the Meringue Buttercream Icing + Assembly: 

270g caster sugar

67ml water

135g egg whites (3-4 egg whites approx. (but do measure specifically), use leftovers from making the lemon curd)

330g unsalted butter, softened 

1/2 tsp vanilla extract

130g (approx.) Jordan’s Super Easy Lemon Curd

50g blanched pistachios 

Method: 

Preheat oven to 160 degrees Celsius and grease and line two 20cm round baking tins. 

Place the pistachios on a small tray and lightly toast in the oven for 5 minutes. Remove, and allow to cool a little, then blitz into fine crumbs (similar to the consistency of almond meal) using a food processor. 

In the bowl of a stand mixer, place the butter, sugar and pistachio paste. Beat on medium speed until well combined and fluffy. 

Gently whisk the eggs in a jug, and add to the butter mixture with the mixer running on a low/medium speed. Add the ground pistachios and continue to beat on medium speed until combined. 

Measure out the self raising flour into a separate bowl and briefly whisk to remove any lumps. Add the flour to the batter, and mix on the lowest speed. Finnish mixing by hand to avoid over working the batter. 

Evenly transfer the cake batter between the two prepared tins, and bake for 30 minutes or until cooked through and golden in colour. 

Leave the cakes too cool in their tins for a few minutes, then remove from the tins and allow to cool completely on a wire rack. 

To make the icing, place the water and sugar in a small saucepan over high heat and allow to come to a rapid boil. Using a candy thermometer keep an eye on the temperature of the sugar syrup - it will be ready once it reaches 121 degrees Celsius. 

Place the egg whites in the bowl of a stand mixer, and gently whisk until foamy (start this once the sugar syrup is at around 100 degrees Celsius). 

Once the sugar syrup has reached 121 degrees Celsius, remove from the heat, and with the mixer running on low pour it over the whisked egg whites (avoiding the whisk itself as much as possible). 

Increase the speed of the mixer to medium, and continue to whisk until the meringue has cooled right down - this will take at least 5-10 minutes. 

Cut the butter into cubes, and add a cube or two at a time with the mixer still running. Allow each cube to incorporate into the mixture before adding more. Continue to beat until the meringue buttercream is completely smooth. Briefly beat in the vanilla extract. 

Place one of the cooled cakes on to a plate or cake stand (or a cake turntable if you have one) top side up. Spread a thin layer of the buttercream over the cake, then using a piping bag pipe a rim of icing around the edge - this will contain the lemon curd and create a more even surface for the second cake layer to sit on. Pipe a second rim inside the first if you think the cake needs more height around the edges to make it even.  

Spoon the lemon curd into the centre of the cake, pushing to the edge of the buttercream rim you have piped. Pipe over some more of the buttercream over the top of the lemon curd and gently smooth it out with a spatula. 

Trim the top of the second cake if necessary (so it will sit as flat as possible), and place top side down, over the curd and buttercream layer. 

Cover the top of the cake with more meringue buttercream, then spread down the sides and around the entirety of the cake. Try to make the buttercream as smooth and even as possible, using a spatula or palette knife. It doesn’t need to be perfect, as you will now cover the icing with some pistachios. 

Briefly blitz the blanched pistachios in a food processor so you get large crumbs (alternately you could chop them up with a knife). Cover the entire cake in the pistachio crumbs, sprinkling them over the top and pressing them into the sides of the cake. 

Place the cake into the fridge for about 30-60 minutes, to allow the icing the firm up - this will allow you to get some nice clean slices when you cut the cake. Any excess meringue buttercream icing can be stored for one week in an airtight container in the fridge. 

Store cake in the fridge, will keep for about 5 days. 

Serves 8-10.

Pistachio and Lemon Layer Cake

References: Thistle + Whey Lemon Curd (posted 21/07/2019); ‘Love Layer Cakes’ by Peggy Porschen (Quadrille Publishing, 2015), pp.10 & 26-28.

Pistachio and Lemon Cake Inspired by Beatrix Melbourne
Beatrix Pistachio and Lemon Cake
In Cakes & Slices, Jams Preserves & Spreads Tags Beatrix, Pistachio Paste, Pistachio Cake, Lemon Curd, Melbourne, cake
6 Comments
Homemade Pistachio Ice Cream

Homemade Pistachio Ice Cream

Kath September 16, 2019

I have quite the obsession with pistachio ice cream and gelato. It is a flavour I would have turned by nose up at as a child, but now the prospect of having a decent pistachio ice cream fills me with joy. 

My obsession started earlier this year, with a cafe in my local Westfield serving a pistachio thickshake made with pistachio gelato. It was utter heaven, and I ordered it a few times over those hot Summer months (to the point the waiters at the cafe began to recognise me and my standard order). Then a few months ago, the cafe changed their menu and the pistachio thickshake was long gone. 

I tried a couple of bought tubs of pistachio gelato, and while they were ok, they weren’t exactly what I was looking for. 

I began to research recipes in order to make some at home myself. It became a lot easier when I found a recipe for homemade pistachio paste, as most recipes for pistachio ice cream or gelato use it, however I have never been able to find it here in Sydney. 

View fullsize The Pistachio Thickshake that started it all
View fullsize Pistachio Praline Gelato from Gelato Messina
View fullsize My initial attempt at Pistachio Ice Cream
View fullsize Pistachio Gelato from Piccolina Gelateria

I first tried adding some homemade pistachio paste to my much used easy egg free ice cream recipe. While the flavour was good, the texture was far too firm and it froze like a solid log of ice cream. 

The next recipe I tried as another egg free one from the blog Top With Cinnamon by Izy Hossack. I really liked this recipe, as the flavour was really good and the texture much less icy and solid like my initial attempt. The recipe also made quite a lot of ice cream which I definitely liked. My only issue was it took a really long time to churn in the ice cream maker. The ice cream base was quite thin, and there being so much of it, it did feel like it wasn’t ever going to work! 

I had another recipe up my sleeve to try, which I found in the same book I found the pistachio paste recipe, À La Mère de Famille - Artisanal Recipes by Julien Merceron (too read my Off The Shelf post on this book click here). This book has been a wealth of information on making confectionary and the like, and it seems to have those hard to find recipes I have been looking for. I’m not sure if things have been lost in translation in this cookbook, but the instructions for each recipe are quite scant and I often find myself having to improvise or just guess what sized tin I need for something. 

Nevertheless the recipes from À La Mère de Famille have been super useful, and instrumental in me finding a great make at home pistachio ice cream! I have ever so slightly adapted their recipe for Pistachio Ice Cream Popsicles below, and used my version of their Pistachio Paste to flavour the ice cream. While I am very happy with the end result, I somehow doubt my obsession with making pistachio ice cream is over. I am now on the hunt for a good pistachio gelato recipe (notably after having a really good one at Piccolina Gelateria in Melbourne a couple of weeks ago!). 

Homemade Pistachio Ice Cream
Homemade Pistachio Paste

Homemade Pistachio Paste

How to Make Pistachio Paste

Ingredients: 

250g raw or blanched pistachios 

100g white sugar 

30ml water

60ml (4tbsp) pistachio oil 

Method: 

Pre heat oven to 160 degrees Celsius, and place the pistachios on a baking tray. Roast in the oven for 10 minutes. Once done set aside to cool a little. 

Place the sugar and water into a small/medium saucepan and heat until it reaches 120 degrees on a sugar thermometer. Whilst the sugar syrup is heating, place the roasted pistachios on the bowl of a food processor and blitz until they form a fine crumb. 

Once the sugar syrup has reached 120 degrees Celsius, gradually pour into the food processor whilst it is running. Gradually add the pistachio oil, and continue to process until a smooth paste forms. This should take between 5 and 10 minutes. Scrape down the sides of the food processor bowl at regular intervals if necessary. The finished product will be a smooth paste, similar to a nut butter. When the paste initially combines it will form a smooth ball, continue processing until a more paste like consistency is reached. 

Once a smooth paste has formed, decant into plastic containers or glass jars and store in the fridge until needed. It should last about 1 month refrigerated. If the oils in the paste separate a little during storage, mix the paste briefly before using.

Makes about 390g.

Homemade Pistachio Paste

Homemade Pistachio Paste

Homemade Pistachio Ice Cream

Pistachio Ice Cream

Ingredients: 

600ml milk 

30g cornflour 

50ml pouring cream

140g caster sugar

20g mild flavoured honey

3 egg yolks

100g pistachio paste (see above)

Method: 

Heat the milk in a medium saucepan over low/medium heat until it reaches 40 degrees celsius on a candy thermometer. 

Whisk in the cornflour, cream, sugar, honey, egg yolks and pistachio paste. Continue to whisk until all the ingredients are well combined, then use a wooden spoon or a spatula to stir for the remainder of the time. Continue to gently stir the mixture until it reaches 83 degrees celsius in a candy thermometer. The mixture will thicken up, most noticeably as it gets closer to the 80 degree mark. 

The mixture now needs to be strained (to remove any lumps etc) and then blended in a blender or food processor. If your sieve can comfortably fit over your food processor, strain the mixture straight into the food processor. If not strain into a medium/large bowl and then transfer to your food processor or blender. 

Whizz the ice cream base in the food processor/blender for one minute, then transfer to a container (at least 1L capacity). Place in the fridge to cool. 

Once the ice cream base has had some time to chill in the fridge, it can be transferred to the bowl of an ice cream maker to churn (according to your machine’s instructions). I found it took only a few minutes, and the ice cream will be ready once it has firmed up a bit and is clinging to the paddle of the ice cream maker. 

Transfer the ice cream into a container to freeze (you can use the same one as before), and allow to freeze for a few hours before serving. If the ice cream has been frozen for some hours, allow the ice cream to sit out of the freezer for a few minutes before serving. 

Makes a little under 1L of ice cream. 

Homemade Pistachio Ice Cream

References: ‘À La Mère de Famille’ by Julien Merceron (Hardie Grant Books, 2013), p.160 & p.250.

Homemade Pistachio Ice Cream
In Ice Cream, Other Desserts Tags Pistachio, Pistachio Paste, Pistachio Ice Cream, A La Mere de Famille, Ice Cream, Dessert
Comment
Melbourne Tram Card by Natalie Grantham

A Long Weekend in Melbourne + Where to Eat!

Kath September 12, 2019

A couple of weeks ago I spend a few days in Melbourne. I had never been there before, and I was so looking forward to not only going there and having some time away, but also going to some of the cafes and restaurants I have heard about for so long!

Thanks to Instagram and some lovely suggestions from readers of this blog, I had a nice list of places to try while I was there. I have compiled all the places I visited in this (rather lengthy!) blog post, and in a brief guide which can be downloaded here.

Now onto the food!

. . .

Our first proper meal in Melbourne was at Gazi on Exhibition St. Despite all the controversy around this restaurant lately, I had heard really good things about the food here. We were not disappointed and both nights we ate dinner here the restaurant was packed. So much so that on the second night we went there we were seated in an overflow area which we later realised was The Press Club. We actually enjoyed being sat here as it was quieter and calmer than the main restaurant.

View fullsize Ceiling of the Main Gazi Restaurant
View fullsize Gazi Overflow/The Press Club
View fullsize Taramosalata with Pita
View fullsize Prawn Kataifi

At our first dinner here we ordered the Taramosalata with pita, prawn kataifi, the wood fire spit chicken with black garlic and labneh and chips with oregano, garlic oil and feta. We loved the Taramosalata so much that the second time we went we order it again (but with extra pita that time!). The prawn kataifi were two large prawns wrapped in kataifi pastry with almond, honey and Aleppo mayo. The combination was really tasty, with the sweetness of the honey balancing the subtle spiciness of the Aleppo mayo. We also ordered this again on our second visit!

The chicken with black garlic and labneh was nice, but honestly could have fed four people. There was so much meat on the plate it was almost overwhelming, but I’m glad we tried it as it’s not often we’d eat something cooked on a wood fire spit! The chips were delicious as I predicted. With both Nigella Lawson and Yotam Ottolenghi having recipes in their books attempting to recreate these chips I knew they would be good! We also ordered these again the second time we went!

View fullsize Taramosalata with Pita, Chips + Prawn Kataifi
View fullsize Saganaki
View fullsize Loukoumades

A couple of nights later when we returned to Gazi, we also tried the Saganaki which is fried Kefalofraviera cheese. It was really good, and something I had never tried before. We also ordered a dessert this time too, trying the Loukoumades, which are Greek halloumi donuts paired with lemon curd and spiced cream. They were delicious, even if I did eat too many of them!

For breakfast on our first full day in Melbourne we ate at Pope Joan on Collins St. This cafe was really close to where we were staying, and as we had an early start that day we decided to try somewhere close. I had the Boiled egg, bacon bits and soldiers and Mum had scrambled eggs on toast. My breakfast wasn’t too big, which was good as I was heading over to the bakery Beatrix not long after. It was a little hard to eat as it was all served in an egg holder, and it didn't feel like it was anything terribly special. While the location was convinient, I don’t think I would rush back for breakfast here. I would love to try lunch or dinner however, and if you are planning on visiting Pope Joan keep in mind it’s only open Monday to Friday.

View fullsize Breakfast at Pope Joan
View fullsize Lune Croissanterie

After breakfast we quickly walked about five minutes to the CBD Lune Croissanterie, and waited in line to buy a couple of croissants. The line wasn’t long and moved quickly, and I ordered a traditional croissant and an almond croissant. Both were stunning and, the best we’ve ever had.

I then took a taxi to North Melbourne to meet my Insta friend Sally at Beatrix. I have been wanting to go to Beatrix for ages, and so many people suggested it as a must see when in Melbourne too, so I was really happy Sally was able to meet me there. The bakery is small, though on a weekday it didn’t feel busy and overcrowded. It really felt like Melbourne’s answer to the Sydney institution Flour and Stone. While the cakes they make are quite different to the offerings at Flour and Stone, the attention to detail, cosiness and small scale of the bakery made me feel like it was the best place to be. I had a slice of a pistachio and lemon cake, which I am hoping to try and recreate soon as it was so good. Sally had an apple pie cake, which looked amazing and she said it tasted really good! I also got a gingerbread to take away as well, which I very much enjoyed having later that evening.

View fullsize Beatrix, North Melbourne
View fullsize Pistachio & Lemon Cake

After meeting with Sally I walked to Queen Victoria Markets, where I had been dying to go to the bookshop Books for Cooks for years. I discovered them via Instragram ages ago, and it has been top of my Melbourne to do list ever since. I spend a good 45 minutes looking around the shop, there is so much in there, a great mixture of new and second hand titles. I walked away with a copy of ‘Simple’ by Diana Henry, which has been on my wishlist for a while, Piri Piri Starfish by Tess Kiros (which I have to admit I’d never seen or heard of before!) and the 4th issue of Peddler magazine.

I then took a look around the markets and sighed at the amazing produce on offer, that I couldn't really buy as I had no access to a kitchen in Melbourne and I doubt any of it would survive the flight home! I was particularly envious of the stand selling all types of fresh eggs, even duck eggs which I am always looking out for. I then walked back to our hotel, made myself a cup of tea and enjoyed my almond croissant from Lune.

View fullsize Books for Cooks, Queen Victoria Markets
View fullsize My purchases from Books for Cooks
View fullsize Selection of Eggs for Sale at Queen Victoria Markets
View fullsize Fresh Produce at Queen Victoria Markets
View fullsize Almond Croissant from Lune

When Mum and I met up in the afternoon we went to a little French tea shop we had stumbled across on Collins St the day before. La Belle Miette, specialises in the French tea Mariage Frères, having the largest range of it in Australia. Mum and I loving that brand and having great memories of going there in Paris years ago, we knew this place was for us! La Belle Miette also sell gorgeous macarons and chocolates. We enjoyed a couple of macarons each, and Mum had the Mariage Frères Earl Grey Impérial while I tried a green tea called Vert Provence (which I liked so much I bought a tin of it). The shop assistant was super helpful and lovely at this shop, and Mum and I both enjoyed the tea and macarons after a long day of walking (for me) and working (for Mum). I also really loved that Taylor Swift’s new album Lover was playing while we were in the shop too. It’s funny sometimes when music is on that I really like, it makes me think I’m just meant to be there. The whole combination of the music, decor, beautiful tea and delicious macarons was just perfection. The whole atmosphere of the shop really made us feel like we were back in Europe, and again we loved it so much we visited again the next day.

View fullsize La Belle Miette, Collins St
View fullsize Tea and Macarons at La Belle Miette

We then walked around the city a little deciding where to have dinner. Quite a few places had been recommended, but the pasta bar Lello really stood out to me (thanks Sally!). We luckily got a table, and ordered the barbequed calamari with caper anchovy dressing to start. I love capers and anchovies so I really loved this dish. For mains we ordered pasta. Even though I was pretty set on ordering pasta before we arrived, even the waiter we had recommended it over the pizzas. I ordered the Ravioli Alla Norma which was absolutely delicious, and Mum ordered the Culurgiones which is a potato and mint filled Sardinian ravioli. I really enjoyed our dinner at Lello, and definitely want to go back again when I’m next in Melbourne.

View fullsize Laneways of Melbourne
View fullsize Lello Pasta Bar
View fullsize Barbequed Calamari
View fullsize Pasta Alla Norma
View fullsize Culurgiones

The next morning we walked a couple of minutes to Cumulus Inc on Flinders Lane. While the lunch and dinner menu didn’t really grab me, when I heard they did breakfast I looked it up again and decided we had to go there. They had homemade crumpets and shakshuka on the menu, and in my mind any place that does either of those is a cafe worth visiting! As it was a Saturday morning it was quite busy, but the cafe is quite organised and well staffed so we got a seat at the bar fairly quickly. We both ordered the house made crumpets with whipped ricotta and rooftop honey, and we both thoroughly enjoyed it. We also ordered two made to order Madeleines with lemon curd as well, just because they sounded so special. And they were! Apart from homemade, I’ve never had such a good madeleine, it really made the difference that it was freshly baked. They even topped ones I’ve had in Paris. We came back to Cumulus Inc on the day we left Melbourne for an early breakfast before heading to the airport. I ordered the shakshuka that time, which I liked (but maybe not as much as the shakshuka from Shuk in Sydney), but honestly nothing beats those crumpets!

View fullsize Cumulus Inc
View fullsize House made crumpets
View fullsize Freshly made Madeleines with lemon curd
View fullsize Shakshuka

After breakfast we walked around the CBD, stopping in at the lovely bookshop Hill of Content, wandering around Bourke St Mall and the surrounding arcades and laneways, walked around Flinders St Station and along the Yarra, then stopped for lunch at Hopetoun Tea Rooms. The highlights for me were stopping in at the chocolate shop Chocamama, the spice shop Gewürzhaus and magazine shop Mag Nation.

View fullsize Hill of Content Bookshop
View fullsize Bourke St Mall
View fullsize Royal Arcade
View fullsize Flinders St Station
View fullsize Yarra River
View fullsize Crossing the Yarra towards Flinders St Station

On our final full day in Melbourne we caught at taxi down to the South Melbourne Markets. The markets were bustling as it was a weekend, and Father’s Day. I had hoped to get something from Agathe Patisserie but the line was so long! I had heard about how good these markets were from Emmylou who I follow on Instagram, however the cafes I had heard about were really packed. There are other shops and cafes in the streets around the Markets, so we headed to one of those. We ate at Panette which was a lovely cafe, a great place for brunch as they had so many great options on their menu. I had the Pancakes with Caramelised Banana and they were so good.

View fullsize IMG_8851.jpeg
View fullsize South Melbourne Markets
View fullsize Panette Eatery, Cecil St South Melbourne
View fullsize Pancakes with Caramelised Banana

After breakfast we headed back to to CBD and took a look around the old Treasury on Spring St, and walked around the gardens there too.

For lunch I had booked Mr Wolf in St Kilda. I had been wanting to go there for ages, and it really didn’t disappoint. We shared some calamari to start, then a Diavolo pizza (tomato, mozzarella, anchovies, olives, capers, chilli, oregano, basil) and a rocket salad. By this point of the weekend food coma was seriously starting to set in so a whole pizza each was out of the question! However since the pizza bases were really nice and thin, if you were hungry you could definitely have one to yourself. I would definitely come back to Mr Wolf as the pizza menu had some really great options on it, and it was quite a calm place to be.

View fullsize Mr Wolf, St Kilda
View fullsize Diavolo Pizza

After lunch we walked down to the main shops in St Kilda as I wanted to check out Piccolina Gelateria. I had seen this on Nigella Lawson’s Instagram feed earlier in the year, and thought if Nigella liked it enough to post about it, then we had to go there! St Kilda was super busy as there was a car show on, so Piccolina was quite packed. I got a scoop of White Chocolate Gelato and a scoop of Pistachio. Both were delicious and I honestly really wanted to go back for more, but my stomach just couldn’t handle more food by that point!

View fullsize Piccolina Gelateria, St Kilda
View fullsize Pistachio Gelato
View fullsize Pistachio Gelato (White Choc Gelato is Underneath!)
View fullsize That Melbourne weather
View fullsize Luna Park, St Kilda

Thanks again to everyone who gave me suggestions for where to eat and go in Melbourne! I definitely have a list of places to visit next time as well!

For a short and sweet guide to my favourite places to eat in Melbourne, download my Melbourne Eats Guide here. Print it out or save it on your phone for your next trip!

Don’t forget to let me know in the comments where your favourite places to eat in Melbourne are!

In Travel Tags Melbourne, Melbourne Eats, Gazi, Pope Joan, Lune Croissanterie, Beatrix, Queen Victoria Markets, Books for Cooks, La Belle Miette, Mariage Frères Tea, Lello Pasta Bar, Cumulus Inc, Hill of Content Bookshop, South Melbourne Markets, Panette Eatery, Mr Wolf, Piccolina Gelateria
Comment
  • The Blog
  • Older
  • Newer

recipes

  • Biscuits/Cookies 39
  • Breads Etc. 9
  • Breakfast 7
  • Cakes & Slices 67
  • Confectionary 5
  • Drinks 6
  • Events 14
  • Food Photography Tips 3
  • From The Mailing List 24
  • Heirloom Recipes 12
  • Holidays 44
  • Ice Cream 9
  • Jams Preserves & Spreads 9
  • Muffins 4
  • Off the Shelf 47
  • Other Desserts 25
  • Savoury Dishes/Meals 15
  • Scones 4
  • Tarts & Pastry 9
  • Travel 13

Sign up to Friday Food Chat with Kath, a weekly newsletter for more food, baking, cookbook chat and more!

Sign Up Here!
instagram-unauth pinterest facebook url

Website Accessibility: To enable text to speech function on the blog, click the sound button to the right of each blog post.

All images & content are the property of Kathryn Vincent, unless stated otherwise. Please do not use without permission.

Kulinary Adventures of Kath

Food Photography, Recipes & Baking

instagram-unauth pinterest facebook url