If you follow along regularly with the recipes I post on this blog, you will know pistachio is one of my most favourite flavours. I seem to be endlessly drawn to it, which means it makes its way into many things I bake.
And this babka is no exception. I have been wanting to make a babka for quite a while, and seeing as they aren’t sold widely in Sydney, making one myself was almost my only option if I wanted to eat one.
I decided to use a challah dough to make the babka, hence this recipes name ‘challah babka’. In my mind challah is the best kind of bread, so a babka could only be improved by using it. I always use the challah recipe from the Monday Morning Cooking Club’s first book, and it works really well every time.

Initially, I made my own pistachio and white chocolate butter (based on the recipe in my Cosy Winter Bakes eBook) for the babka filling. The taste and colour were amazing, but being a homemade nut butter the consistency was a little thick which made the filling hard to spread over the dough. This also made the distribution of the filling quite uneven throughout the cooked babka (as you can see in the images below).
I had made the filling this way to deliberately avoid using a jar of Italian crema di pistacchio, mostly due to the cost of it (between $14.95-$24.95 AUD/200g jar). However I also didn’t want to create a recipe that was difficult for others to replicate, and seeing as I have only recently found crema di pistacchio in a couple of stores here in Sydney, I am assuming it isn’t widely available, or available at all, in most places. And if you did find some, I would understand based on the price of it, that you might not want to use a whole jar of it in one recipe!


Cream di Pistacchio I used for my babka filling
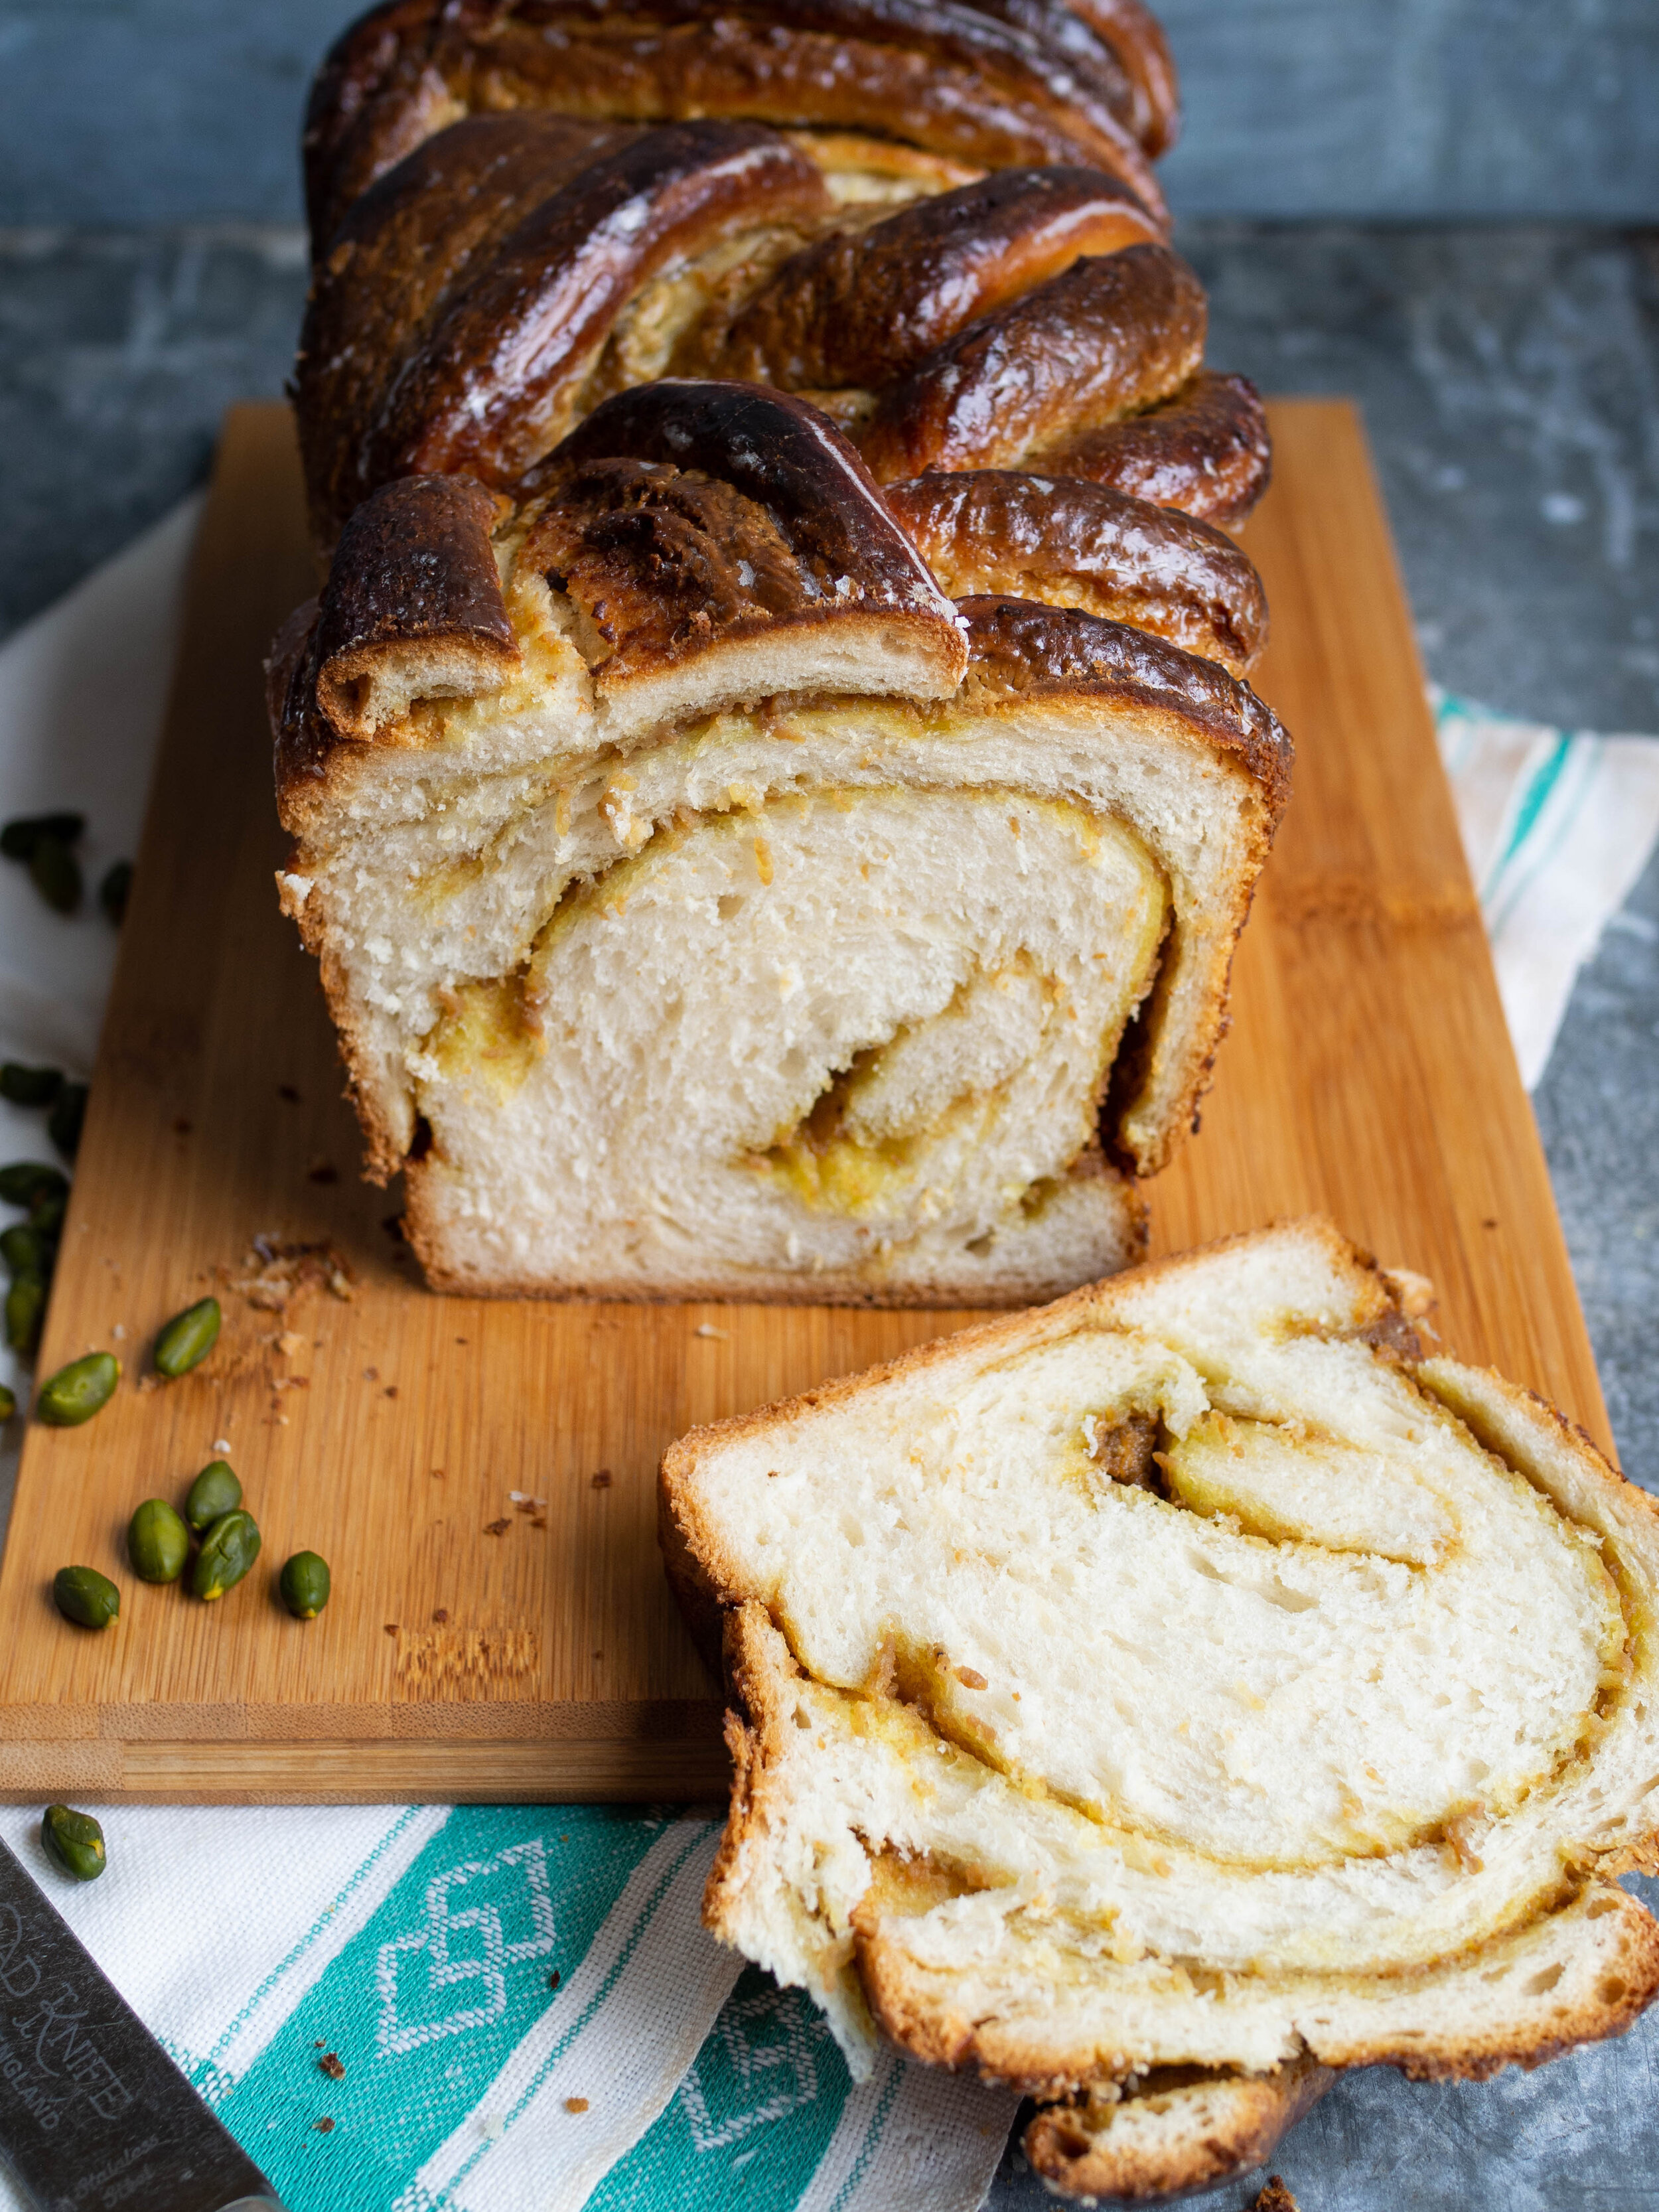
Despite all that, a jar of crema di pistacchio turned out to be the perfect babka filling. Babka is often filled with Nutella, so something of that kind of consistency would be a perfect substitute. Crema di pistacchio has a wonderful creamy spreadable consistency similar to Nutella (it is essentially the pistachio version of Nutella after all), which makes it easy to spread over the dough and distributes more evenly amongst the babka as a result.
If you can find and are happy to use crema di pistacchio for your challah babka, you will end up with a fantastic result. If you prefer to make your own pistachio butter, the taste of your challah babka will still be amazing, you just might not get the wonderful dainty swirls of filling throughout your babka. Honestly either way the taste is amazing, and well worth making babka from scratch!
Click the button below for the Pistachio & White Chocolate Butter recipe I used for my first babka attempt. The recipe makes enough for one babka filling.
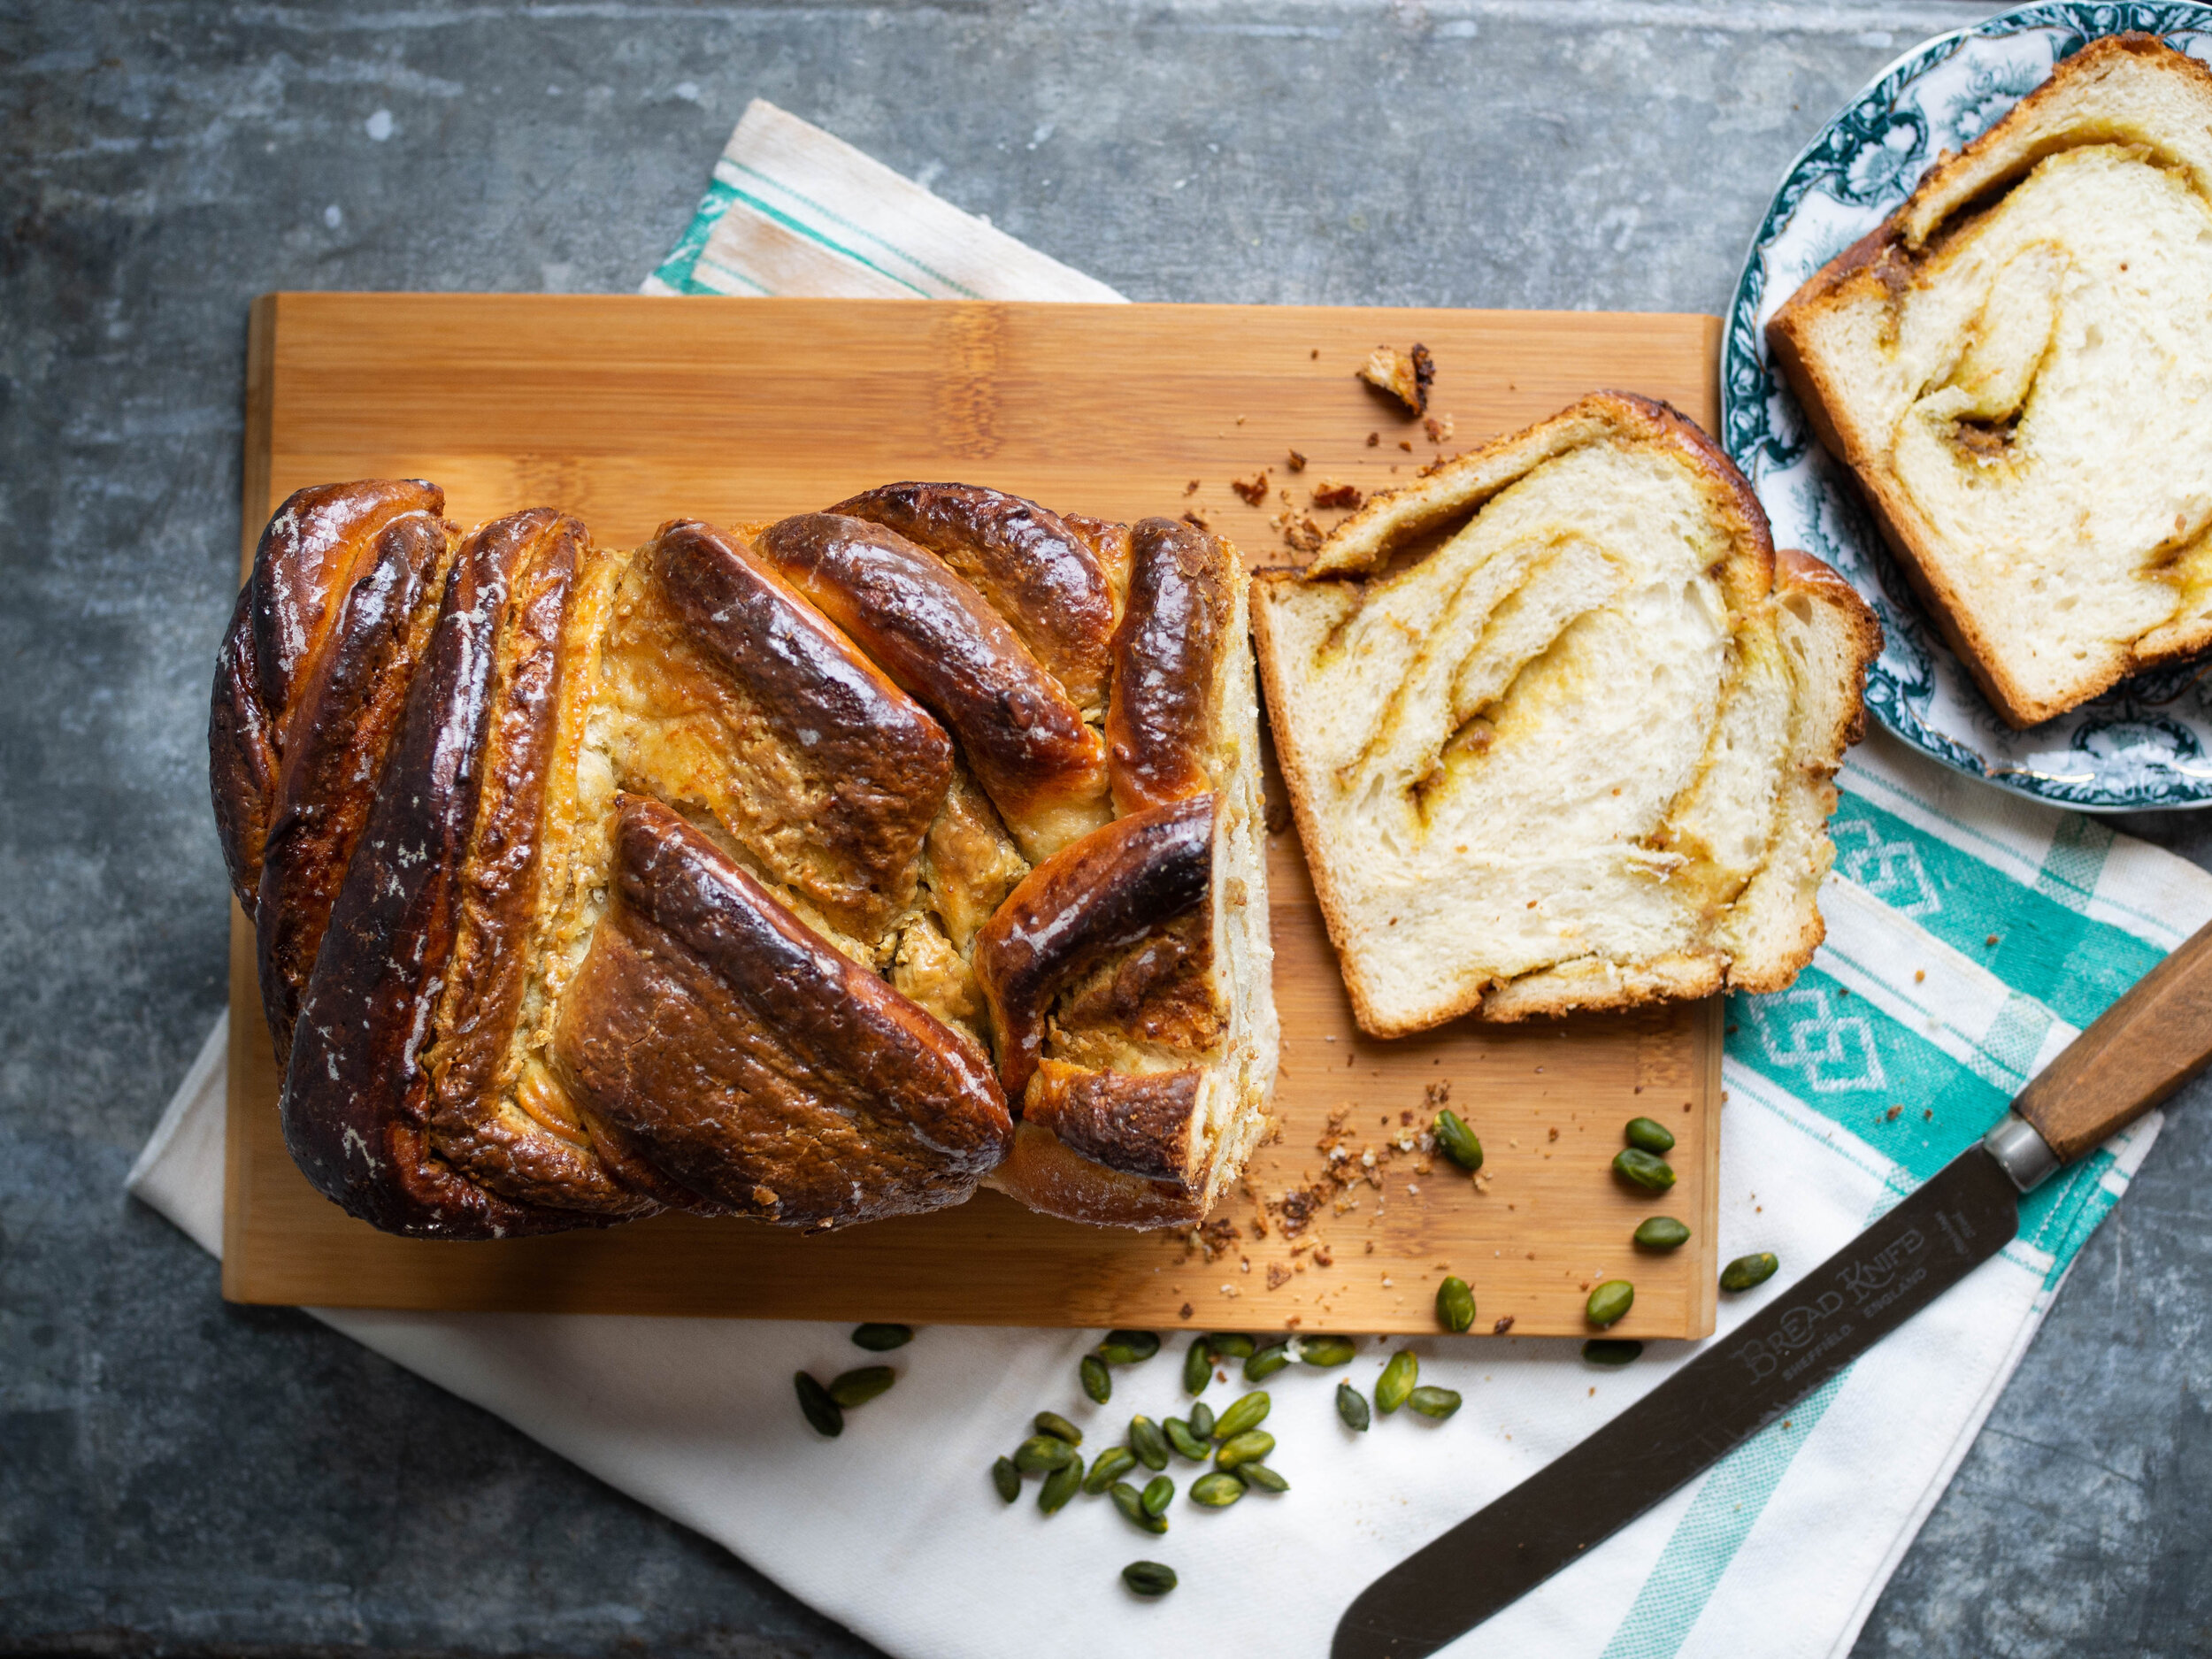
Pistachio Challah Babka made with Crema di Pistacchio
Pistachio Challah Babka
Ingredients:
500g plain flour, plus extra
250ml warm water
9g dried yeast
85g caster sugar
3/4 tsp salt
1 egg, beaten
63ml canola or vegetable oil
200g crema di pistacchio
cooking spray
Ingredients for the Glaze:
50g white sugar
60ml water
Method:
Place the flour into a large bowl (one that fits your stand mixer if you have one). Make a well in the centre of the flour, then pour in the warm water. Add the yeast and 60g of the caster sugar and stir (don’t mix in the flour at this stage). Leave for 10-15 minutes, or until the yeast has become foamy.
Then add the salt and remaining sugar, stir again (don’t mix in the flour at this stage), and wait 5-10 minutes for the yeast to become foamy again.
Once the yeast is foamy, add the egg and the oil to the yeast mixture and combine. Then start to gradually incorporate the flour into the wet mixture. Once everything is combined, attach your bowl to your stand mixer fitted with the dough hook, and knead on a medium speed for about five minutes. The dough will be smooth and a little sticky once done. If the dough is too sticky, add a little more flour (1-2 tbsp).
While the dough is kneading, lightly oil a large bowl.
Once the dough is ready, place into the oiled bowl and cover. Leave in a warm spot for 1-1.5 hours, or until the dough has risen and doubled in size.
Spray a 22 x 10 x 8.5cm (approx.) loaf tin with the cooking spray.
Once the dough has risen, flour your work surface and tip the dough out. Lightly flour the top of the dough to prevent it sticking to your rolling pin. Using a rolling pin, roll out the dough into a rectangle (approx. 20 x 5cm).
Dust any excess flour from the top of the dough, then spread the crema di pistacchio over the surface of the dough.
Roll the dough tightly from one of the long edges to form a long log. Trim the ends off to neaten it up, and cut the log evenly down the middle.
Turn the cut side of each piece of dough so it is facing up, then twist the two strands of dough together. Tuck the ends under, and gently squash the dough from either end to make it a bit more tight if it has become quite long.
Place the dough into the prepared tin, cover and leave in a warm spot for about 30 minutes, or until the dough has risen.
While the dough is rising, preheat oven to 180 degrees Celsius.
Once the dough has risen, place in the oven for 40 minutes. Check after 20 minutes, and loosely place some foil over the top to prevent the babka from over browning.
While the babka is baking, make the glaze. Place the water and sugar in a small saucepan over medium heat and stir until the sugar has dissolved. Allow it to come to the boil, and then simmer for 3-5 minutes. Remove from the heat and allow to cool.
The babka will be ready when it is golden on top, and sounds hollow when gently tapped. Remove babka from the oven, and place on a wire rack. Using a pastry brush, paint the top of the babka in about three layers of the syrup (this will help preserve the babka and stop it drying out), then leave to cool for 15-20 minutes.
Once the babka has had a little time to cool, remove from the tin, and either cut into slices and serve immediately or allow to cool completely then slice.
Babka like many homemade breads, is best eaten on the day it is made. If you won’t be eating all on day it is made, once the babka has cooled, cut into slices and freeze each individually.

References: ‘Monday Morning Cooking Club - The Food, The Stories, The Sisterhood’ by Merelyn Frank Chalmers, Natanya Eskin, Lauren Fink, Lisa Goldberg, Paula Horwitz and Jacqui Israel (HarperCollins, 2013), p.263; ‘The Jewish Cookbook’ by Leah Koenig (Phaidon Press Limited, 2019), p.324; ‘Breaking Breads’ by Uri Scheft (Artisan, 2016), pp.74-79.