Kulinary Adventures of Kath

Food Photography, Recipes & Baking
  • home
  • About
  • Work with Kath
  • Shop
  • Blog
    • The Blog
    • Recipe Archive
  • Newsletter
  • Contact
  • home
  • About
  • Work with Kath
  • Shop
    • The Blog
    • Recipe Archive
  • Newsletter
  • Contact
Raspberry Pistachio Rose Cake (23 of 25).jpg

The Blog

Recipes and Food Photography by Kath Vincent.

  • The Blog
  • Recipe Archive
  • All
  • Biscuits/Cookies
  • Breads Etc.
  • Breakfast
  • Cakes & Slices
  • Confectionary
  • Drinks
  • Events
  • Food Photography Tips
  • From The Mailing List
  • Heirloom Recipes
  • Holidays
  • Ice Cream
  • Jams Preserves & Spreads
  • Muffins
  • Off the Shelf
  • Other Desserts
  • Savoury Dishes/Meals
  • Scones
  • Tarts & Pastry
  • Travel

Ginger Oat and Raisin Slice

Kath September 28, 2023

This recipe is loosely based on the Ma Lyn’s Fruit Slice in Amy Minichello’s cookbook Recipes in the Mail (p.71), which in turn comes from Christine O’Neill (and Ma Lyn of course!). 

When I was making the slice for the afternoon tea Amy and I hosted in August, the recipe really reminded me of how ANZAC Biscuits are made. The recipe refers to the slice base as a cake, but it really reminded me more of a biscuit. 

I enjoyed the slice so much, that the following weekend I made it again, and used Singing Magpie Produce’s Quince Syrup in place of the golden syrup, which added a lovely flavour and gave the slice a slighter deeper golden colour. When I was making the slice, the thought suddenly occurred to me, what would this slice be like if I added oats and ginger?

Something about the recipe’s similarities to ANZAC Biscuits, and me having not long used crystallised ginger in another recipe (I made these biscuits here but with crystallised ginger not stem), had my brain thinking up adaptations to Ma Lyn’s Fruit Slice and creating something new. 

I admit I sometimes do find it hard not to think about changes I can make to a recipe, or how a recipe could influence the creation of a new one. It’s not that the original recipe actually needs any changes, it is really really good as it is. However, recipe development and adapting recipes to work out how they could accommodate different flavours and ingredients just comes naturally to me. Recipe ideas come always come from somewhere, and sometimes one perfect recipe can bring many others to life. 

I took some of this slice to my work and one colleague said it reminded them of something their mum used to make, which was lovely to hear that a newly created recipe had some nostalgic value to someone else. Which ties back nicely to Amy’s cookbook and the nostalgia that I believe is what keeps all of us making and enjoying family recipes like those shared with Amy, that have in turn been shared in her book Recipes in the Mail. 

Oat Raisin and Ginger Slice

Ingredients: 

50g rolled oats (not instant oats)

80g golden raisins, chopped 

45g desiccated coconut

155g self raising flour

105g caster sugar

80g crystallised ginger, chopped

1 tsp ground ginger

125g unsalted butter

2 tbsp golden syrup

1 tsp vanilla extract

Method: 

Preheat oven to 160 degrees Celsius, and line a 30 x 20cm slice tin with baking paper, ensuring some hangs over the sides so you can easily get the slice out of the tin later.

In a large bowl, mix the oats, golden raisins, coconut, self-raising flour, sugar, crystallised ginger and ground ginger with a wooden spoon. 

In a small saucepan melt the butter and the golden syrup over low/medium heat until the butter has just melted. 

Add the butter mixture, and the vanilla extract to the dry ingredients and mix together until combined with the wooden spoon you used earlier. 

Tip the mixture into the prepared tin, and press it out so it reaches the edges of the tin and has a relatively smooth top. You can use your wooden spoon for this or a spatula.

Bake for 25-30 minutes, or until the slice is nicely golden brown. 

Allow the slice to cool in the tin for about 15-20 minutes, then using the overhanging baking paper, gently transfer the slice to a cooling rack to cool completely. 

Once the slice has cooled completely, you can cut it into however many portions you would like, or you could just cut of bits as you want to eat it.

Makes about 12-15 portions, store in a airtight container. Will keep for 4-6 days. 

In Cakes & Slices Tags Slices, Ginger, Mixer Free Recipes, Easy Baking, Recipes in the Mail, Amy Minichiello
2 Comments

Recipes in the Mail Sydney Afternoon Tea - August 2023

Kath September 14, 2023

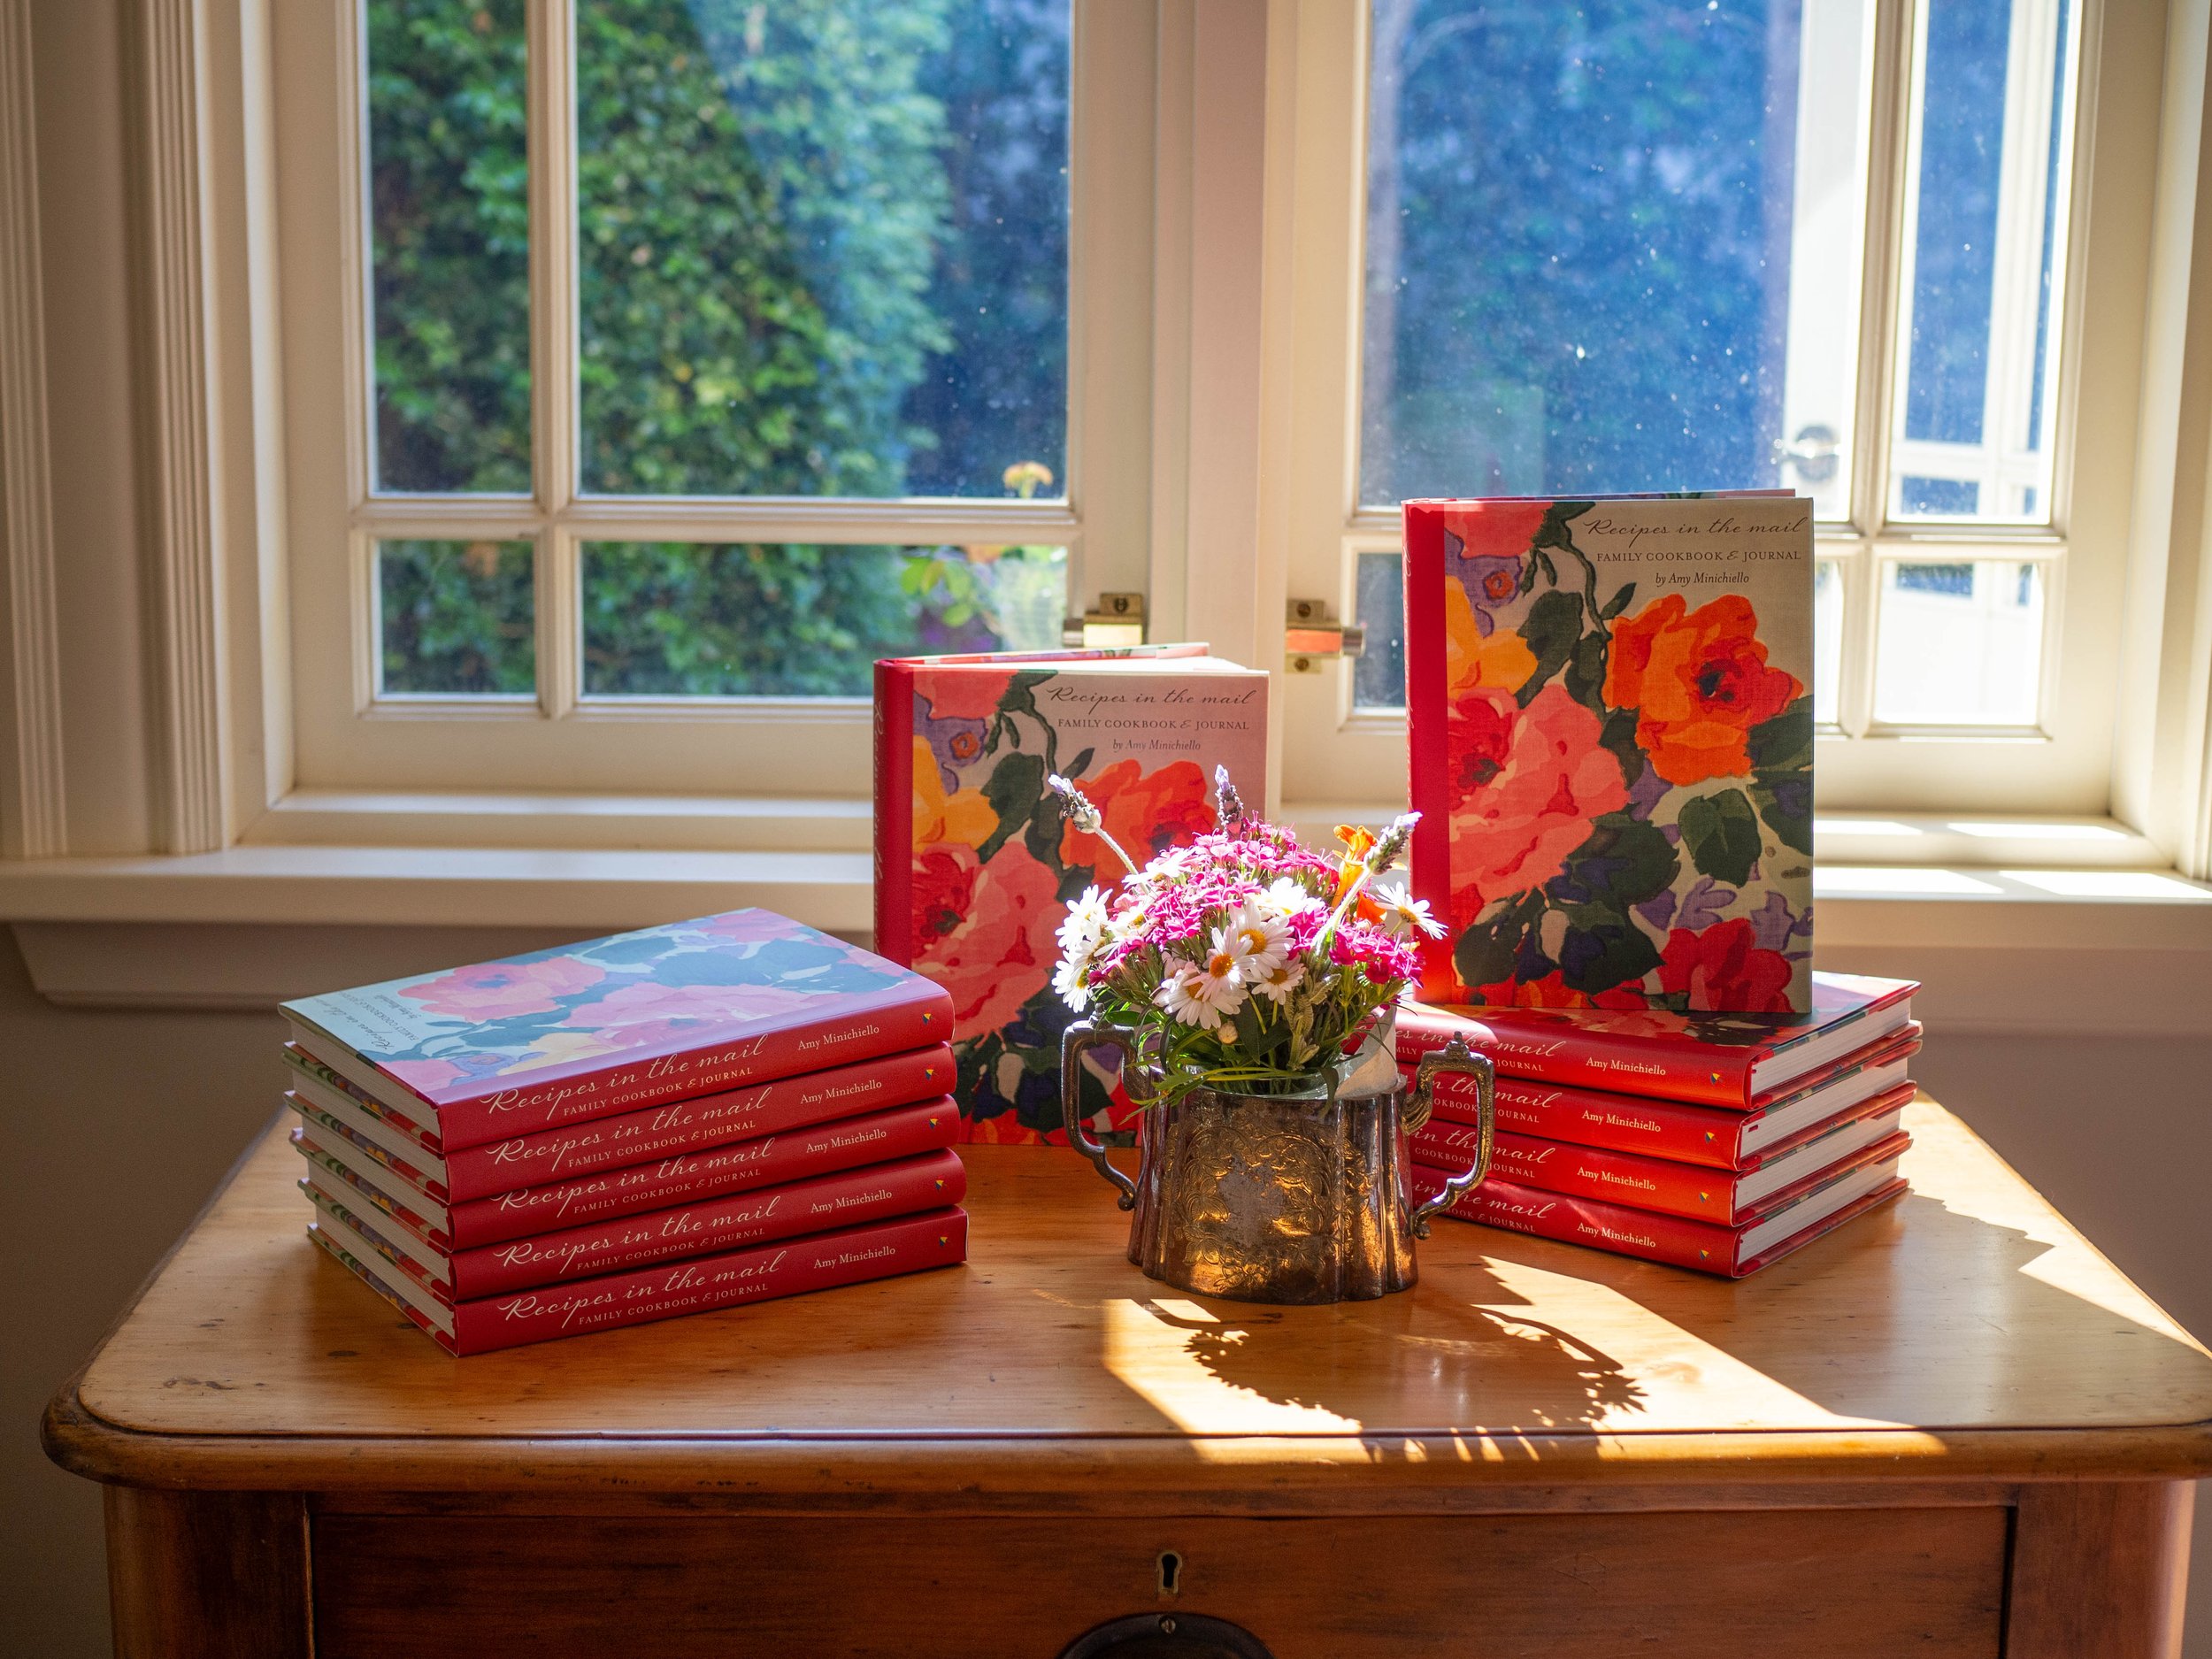
Last month I had the great fortune to host the lovely Amy Minichiello to celebrate her cookbook Recipes in the Mail with an afternoon tea filled with baked goods from the book and a room full of wonderful like minded people.

When Amy’s book was released, and I saw she was doing a launch event down on the Mornington Peninsula in Victoria I dearly wished I could attend. I knew I couldn’t have been the only Sydney-sider thinking the same thing, and asked Amy if she had any plans for book events in Sydney. Amy mentioned something was in the works for an event outside of Sydney much later in the year, and I insisted she must do something else before then, and to let me know if she wanted help organising.

Not long after, Amy messaged both myself and Dimi (@celebratebydimi who also owns the linen brand Inspired Table), asking if we had any ideas for venues etc for a Sydney based event to celebrate the launch of her book.

I suggested we could use my family’s home, as we had enough space for a few people and Amy could have access to a kitchen to bake all the treats from her book. I was so happy she agreed, and the three of us went on organising all the elements of the afternoon such as date, time, what costs we needed to cover and most importantly, which recipes we would make from Recipes in the Mail to share with those who chose to join us.

The day before the afternoon tea Amy and her Mum Lisa (after many delayed and cancelled flights from Melbourne!), arrived and we got to baking!

We had decided on making My Grandma’s Pavlova (p.46), Ma Lyn’s Fruit Slice (p.71), Nana Bebe’s Simplicity Chocolate Cake (p.82), Aunty Linda’s Milk Tart (p.97), Nonna’s Jam Rolls (p.101), Aunty Tricia’s Ginger Fluff (p.104), Granny’s Scones (p.111) and Nanna Joy’s Sausage Rolls (p.151).

Amy and I got to making everything, and Dimi made Nanna Joy’s Sausage Rolls and dropped them off - they were the most perfect looking sausage rolls I have ever seen! Dimi also left some of her lovely linens with us from her brand Inspired Table so they could be sold on the day. The apron Amy wears in the images in her book is one from Dimi’s collection, and it was so nice to see them in person as they are just gorgeous.

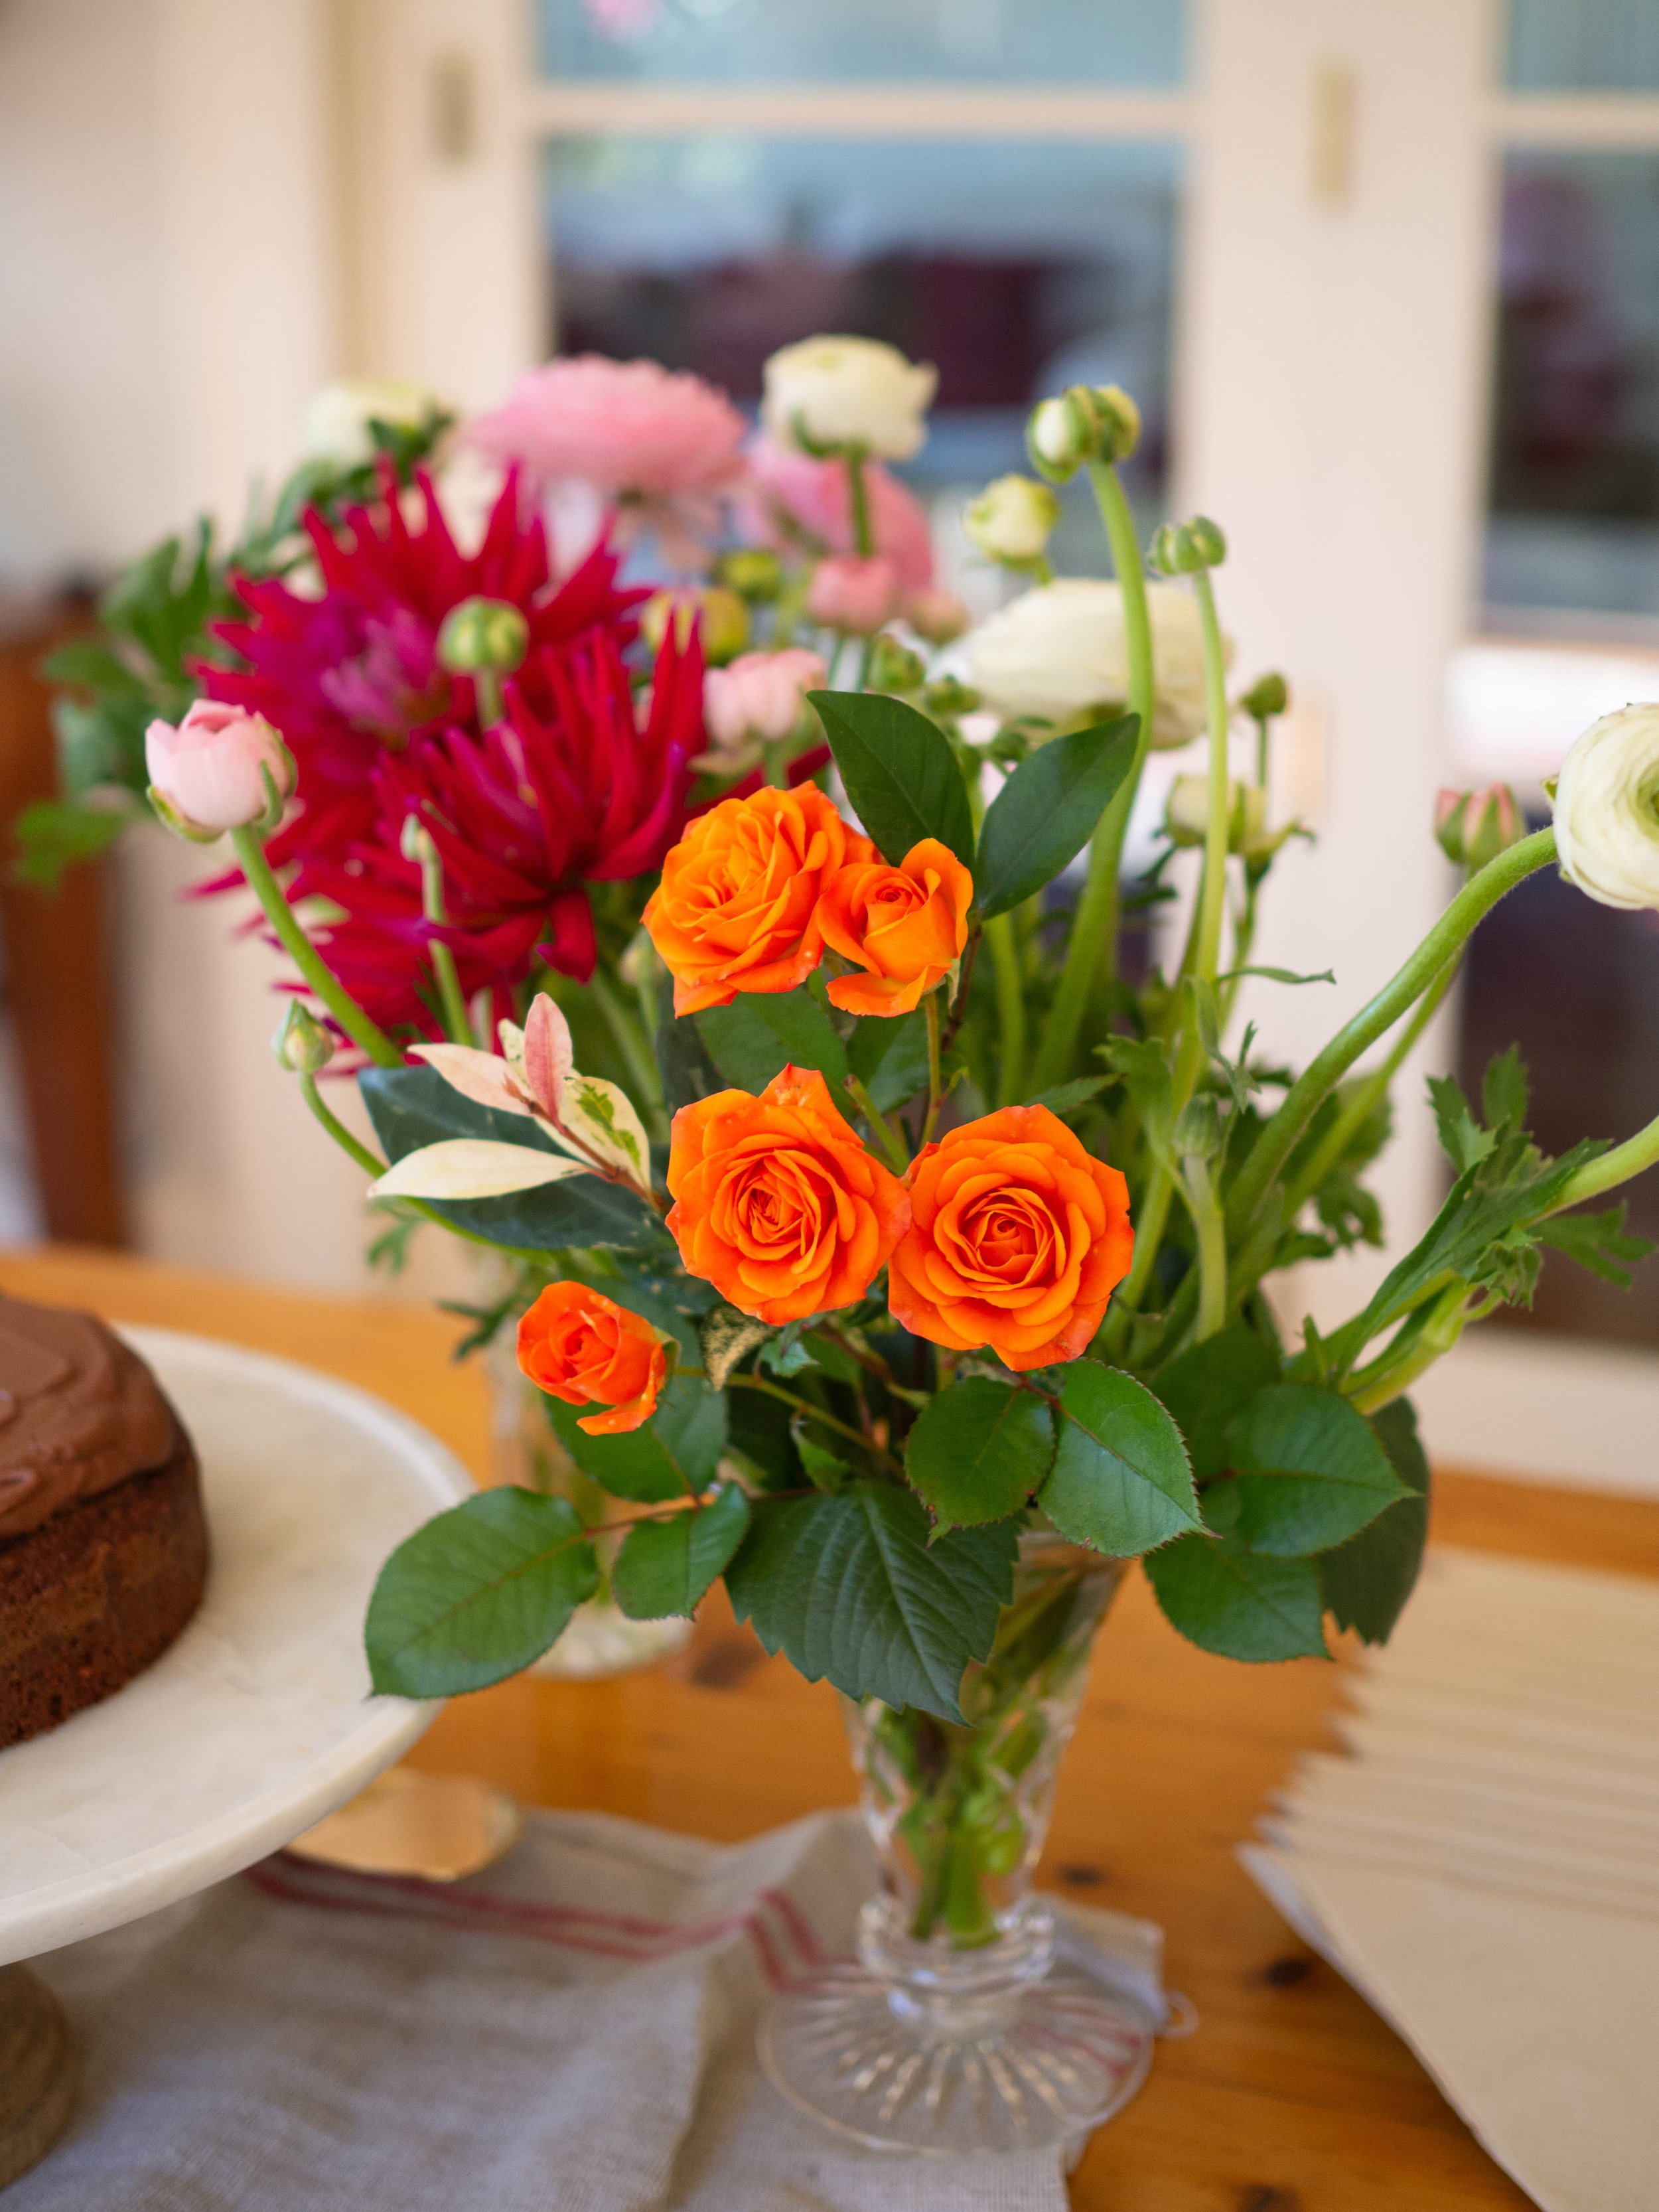
It was really lovely to share our kitchen with Amy and Lisa, Lisa also did an amazing job at arranging flowers to decorate the table for the afternoon tea. As Amy said her in recent blog post about the afternoon tea, it was wonderful to share a kitchen with someone as mostly we bake alone. Amy and I had known each other for a few years via Instagram, but had never met in person before the Saturday! It was a real treat to bake together and catch up in person.

Flowers by Lisa!

Ma Lyn’s Fruit Slice and Nonna’s Jam Rolls

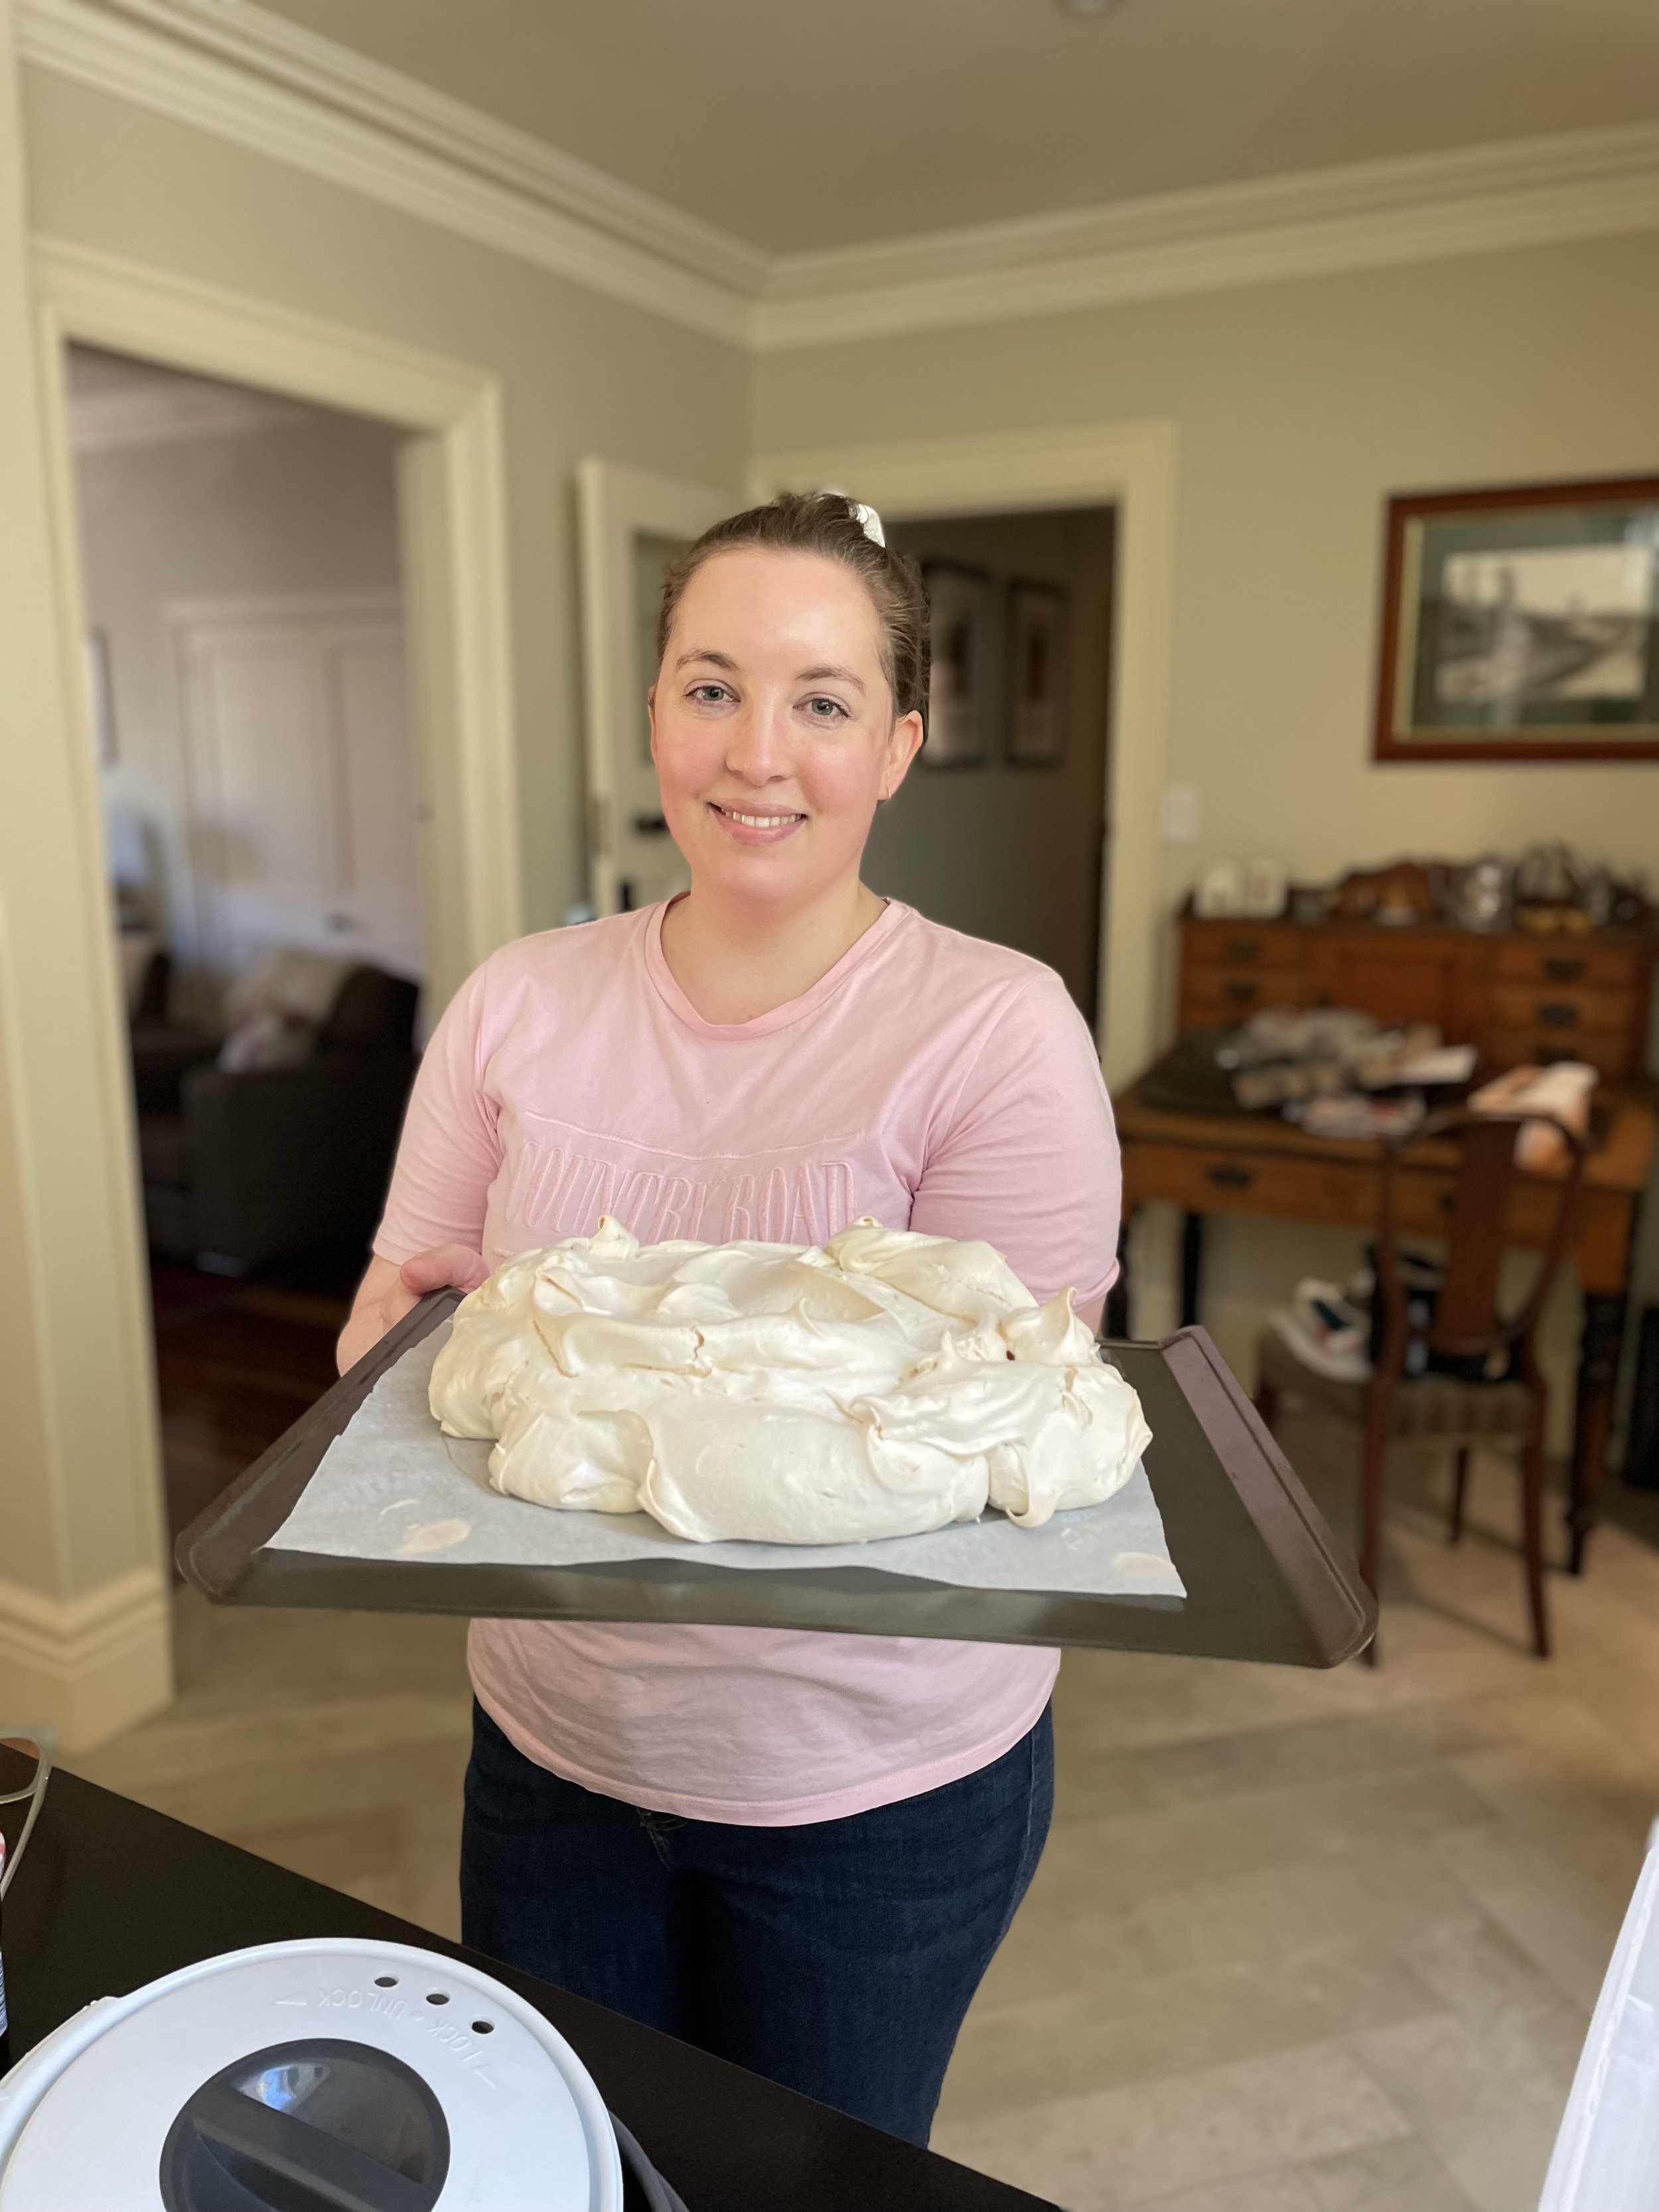
The next day the last minute things were done, mostly without much help from me as I was in the midst of a migraine attack and could barely communicate or function. Amy and Lisa got a real insight into what my life is like most of the time! Everyone including my Mum got everything ready, and all I had to do was top the Pavlova I’d made the evening before, with cream and strawberries (which had been prepared by Amy and Lisa - if only I always had this many people to pick up the pieces when a migraine attack strikes).

Kath with her Pavlova ready for cream and strawberries

Our guests patiently waited at the gate while the last things were done, and once they were opened everyone walked down the garden path to the room we had filled with cake, tea, cookbooks and flowers.

It was really nice to see people I’d only known via Instagram, or catch up with those I hadn’t seen for a long time, as well as meet a whole lot of new like minded people - everyone was there to support Amy and her cookbook, and have a joyful afternoon with lots of cake.

Amy and I also had a little interview so we could all learn more about how Recipes in the Mail began and how to book came to be. When I asked Amy about how the initial idea for Recipes in the Mail came about, which started with putting a call out on Instagram for people to send their family recipes to Amy via the post (and there was no intention for it all to become a book at that time!), Amy said it came from a desire to connect with people, and to preserve family recipes that might have otherwise been lost.

Amy and our table of baked goods from Recipes in the Mail

In terms of deciding which recipes made it into the book once that portion of the Recipes in the Mail journey came to life, a lot of it came down to whether a recipe had any copyright issues (i.e. had already been published in a book or online), and whether the recipe turned out well when being tested. We also might have established that there are more recipes to share, so maybe we’ll see a second Recipes in the Mail cookbook in the future (no pressure Amy!).

We discussed which recipe from the book that wasn’t already a family recipe within Amy’s family, had become a new family favourite. Amy and her family love Catherine’s Grandma’s Pikelets on page 22, shared by Catherine Redman. Amy’s kids love them and sometimes have them in their lunchboxes. Amy’s eldest is also starting to have a go at making them too (heavily supervised of course!).

We then spoke about actually getting the book published. A large part of the cookbook publishing process for any prospective cookbook writer is either finding a publisher or committing to self publishing. Amy knew self publishing wasn’t an option at that time for her, so she set out finding a publisher who would see the value of this book and to help bring it to life. Amy said it was difficult to stay motivated during this time as there were many times she felt the book wouldn’t be taken on by a publisher. She said the support from people via Instagram who believed in Recipes in the Mail and wanted to see it as a book really helped keep her motivated. The support and advice from mentors like Belinda Jeffrey and Julie Gibbs also proved pivotal in getting Recipes in the Mail published.

Amy and Kath with the finished Pavlova

That community of people online, who wanted to see Recipes in the Mail as a cookbook they could hold in their hands and cook from in their kitchens was essential to Amy bringing this cookbook to life. As one attendee said, this community of people is because of Amy - we were there that Sunday as we felt a connection to Amy, and to her cookbook. Amy has an amazing ability to connect with people and to make people feel welcome and seen. That sense of community radiates from the Recipes in the Mail cookbook, through the stories shared and the recognition of names above the recipes, maybe people we ourselves know via social media.

The best piece of advice Amy felt she received during the process of getting her cookbook to publication, was not to give up. Amy acknowledged it is always easier said than done, and imposter syndrome will likely try and get in the way, but it is important to keep going and not be hesitant to ask questions. Amy found many people she made connections with over social media were happy to answer questions she had and give her a little of their time. Amy also said that creating a community via social media was key to bringing these kinds of projects to life. Amy also talked about the fast paced nature of publishing once the book had been accepted, and how if she were to work on another book that knowledge would help her plan for a tight and busy deadline period.

I then asked Amy about what her hopes were for her future work in food, and Amy instantly said she wanted to do ‘more of this’ - in person events, connecting with people in real life and hosting people in her home. Since the day of the afternoon tea fell on Amy’s birthday we were all able share that with her in person, as I surprised Amy with a giant birthday biscuit topped with lit candles (very much helped by my Mum).

I made a giant biscuit as I thought there was probably enough cake to go around that afternoon, and it was something people could take a little home if they wanted. It was so nice to celebrate not only Amy’s cookbook but her birthday as well, on a cake filled day with so many lovely people.

The aftermath!

Once all our guests left for the day, we began the clean up and stored away the little food that was left over. Amy and I stood and ate pieces of my Grandma’s Pavlova, and expressed how wonderful the event had been. We lamented having to say goodbye so soon, and expressed hopes that we could do this kind of thing again sometime soon.

If you don’t already follow Amy on Instagram I highly recommend you do. Amy’s cookbook Recipes in the Mail is available at all good bookshops or via her online store. I also highly recommend you take a look at Dimi’s linen range via her brand Inspired Table.

Dimi very generously gifted me one of her aprons that weekend, and it is most definitely the nicest apron I’ve ever had! When I said it was probably too nice to use, Dimi assured me it can withstand a lot and washes up really well. I have gotten into a bad habit of not wearing aprons when I am baking, so I’m hoping I can change my ways with this lovely new apron!

Dimi’s Inspired Table Apron and Linens

In Events Tags Recipes in the Mail, Amy Minichiello, Inspired Table, Afternoon Tea
Comment

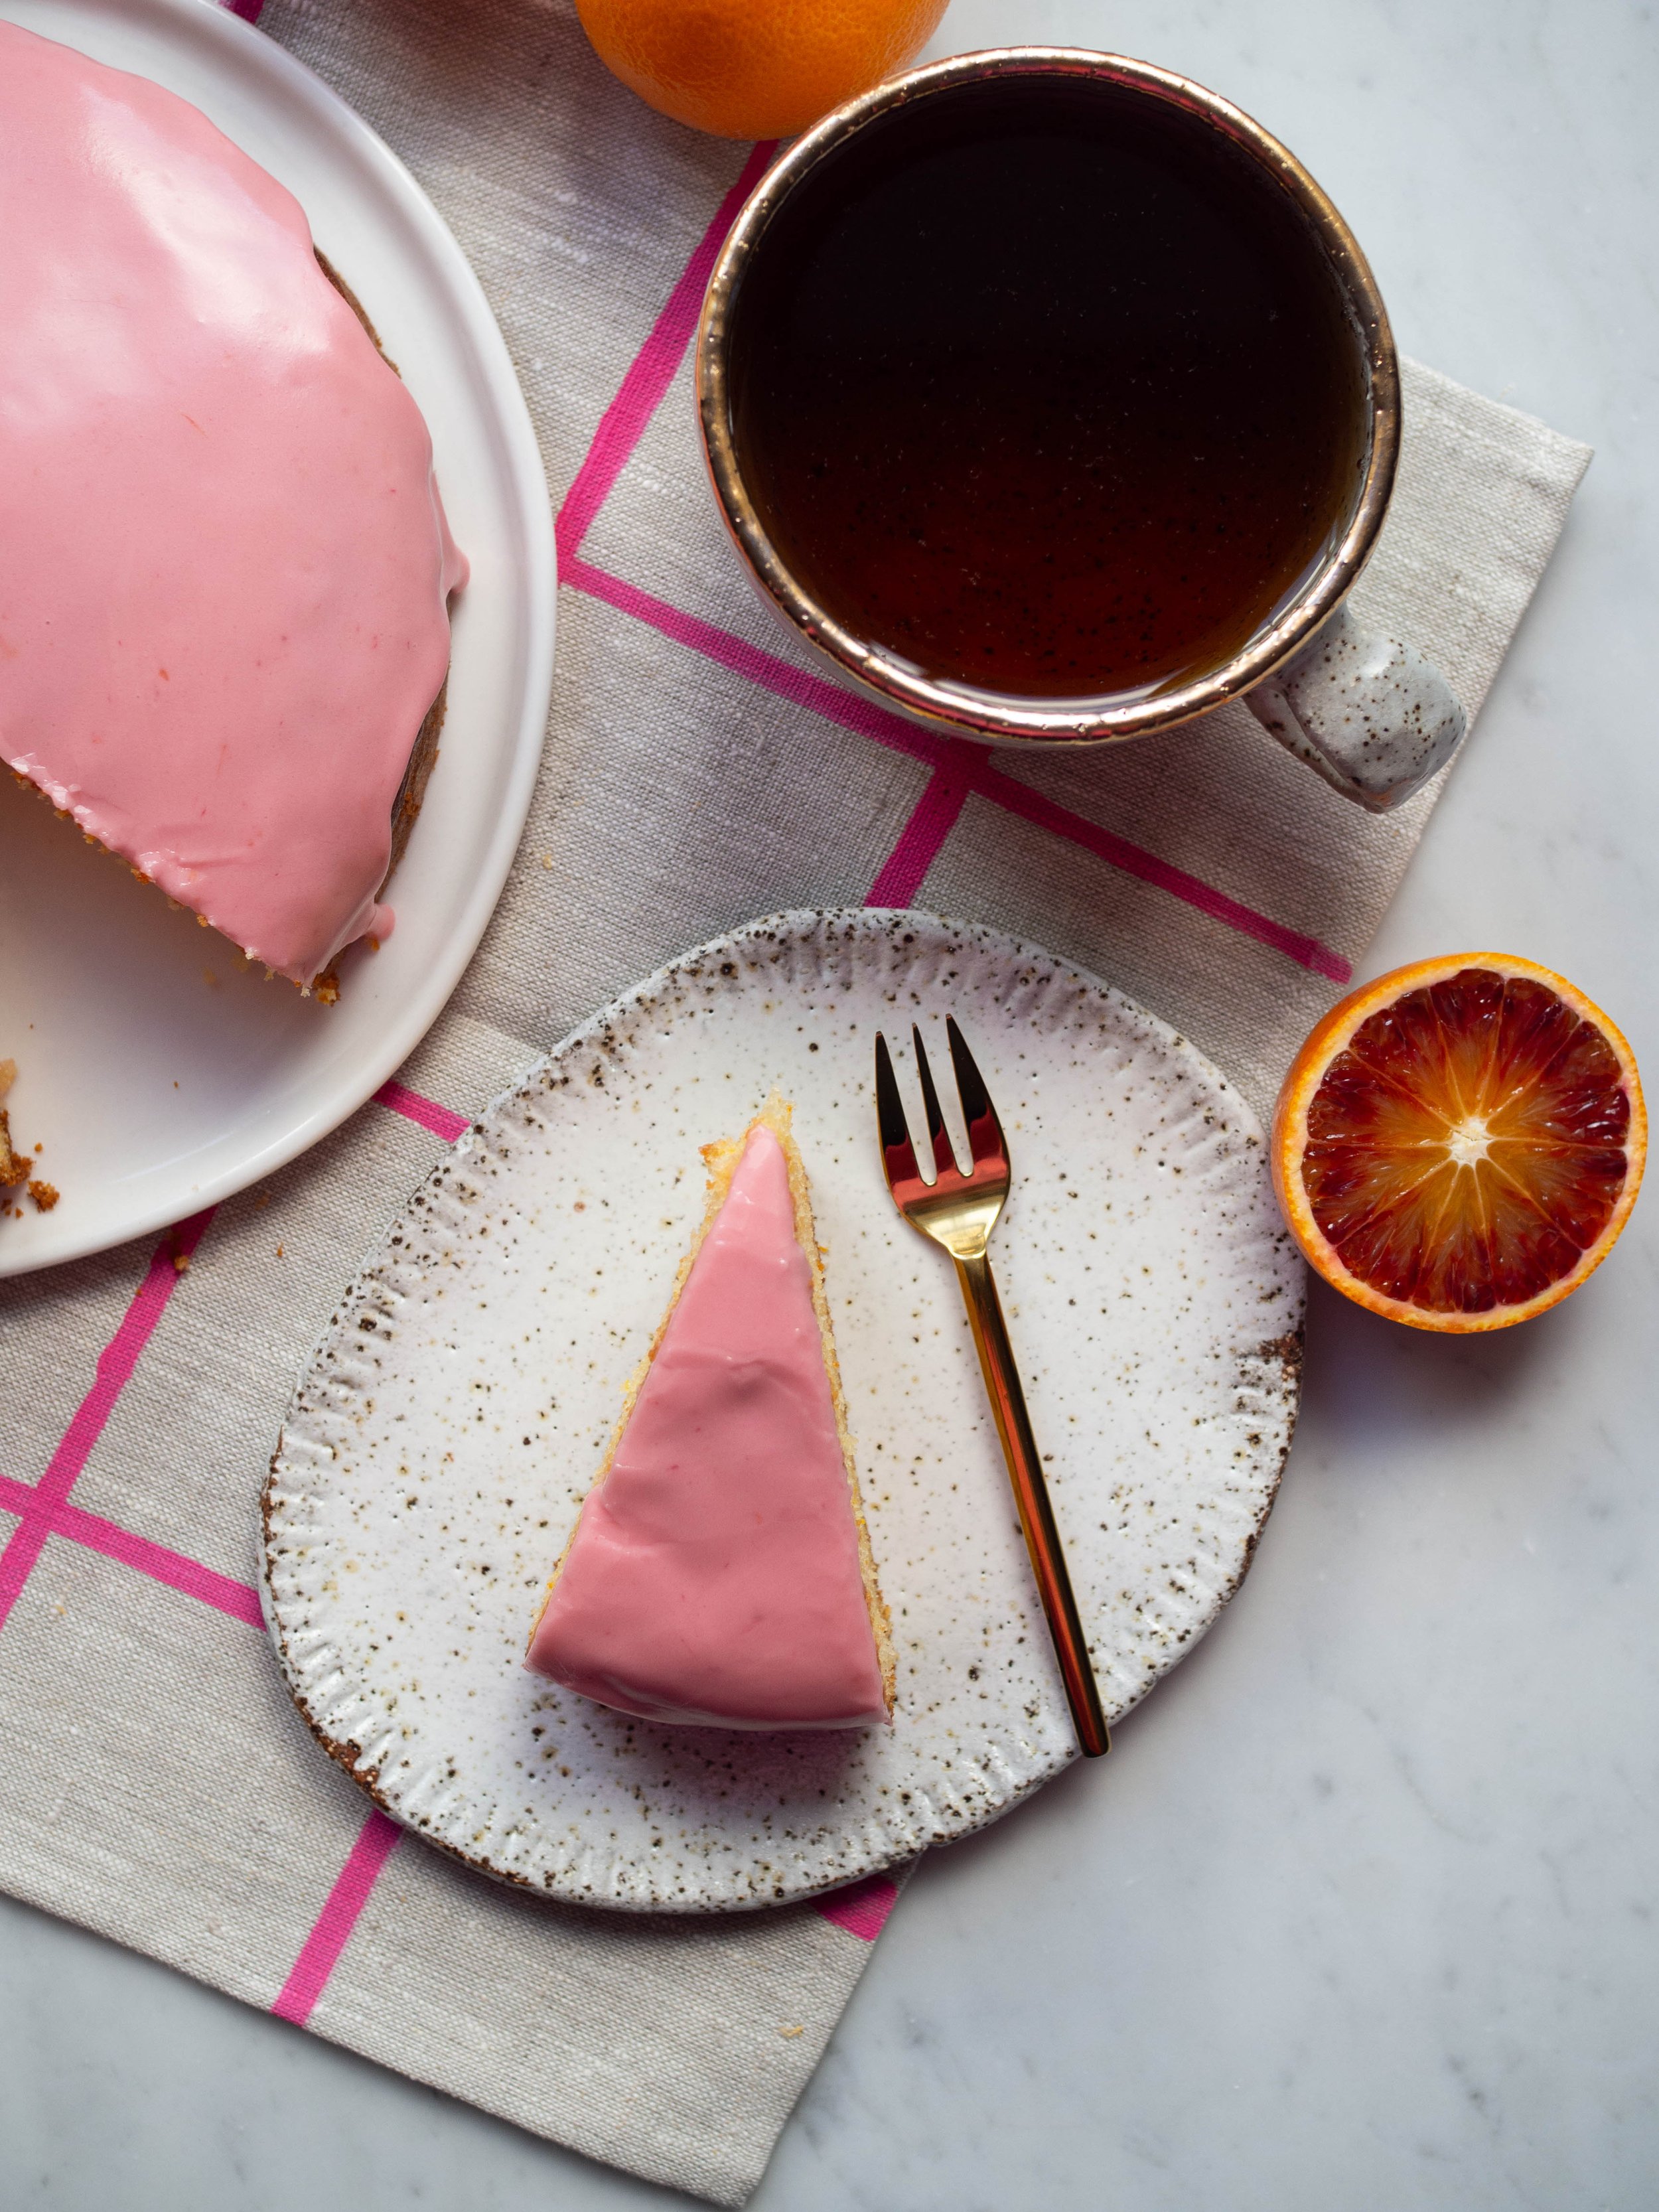
Blood Orange Yoghurt Cake

Kath September 7, 2023

I rarely make cakes that I cannot eat. Where’s the fun in baking something that I cannot enjoy? 

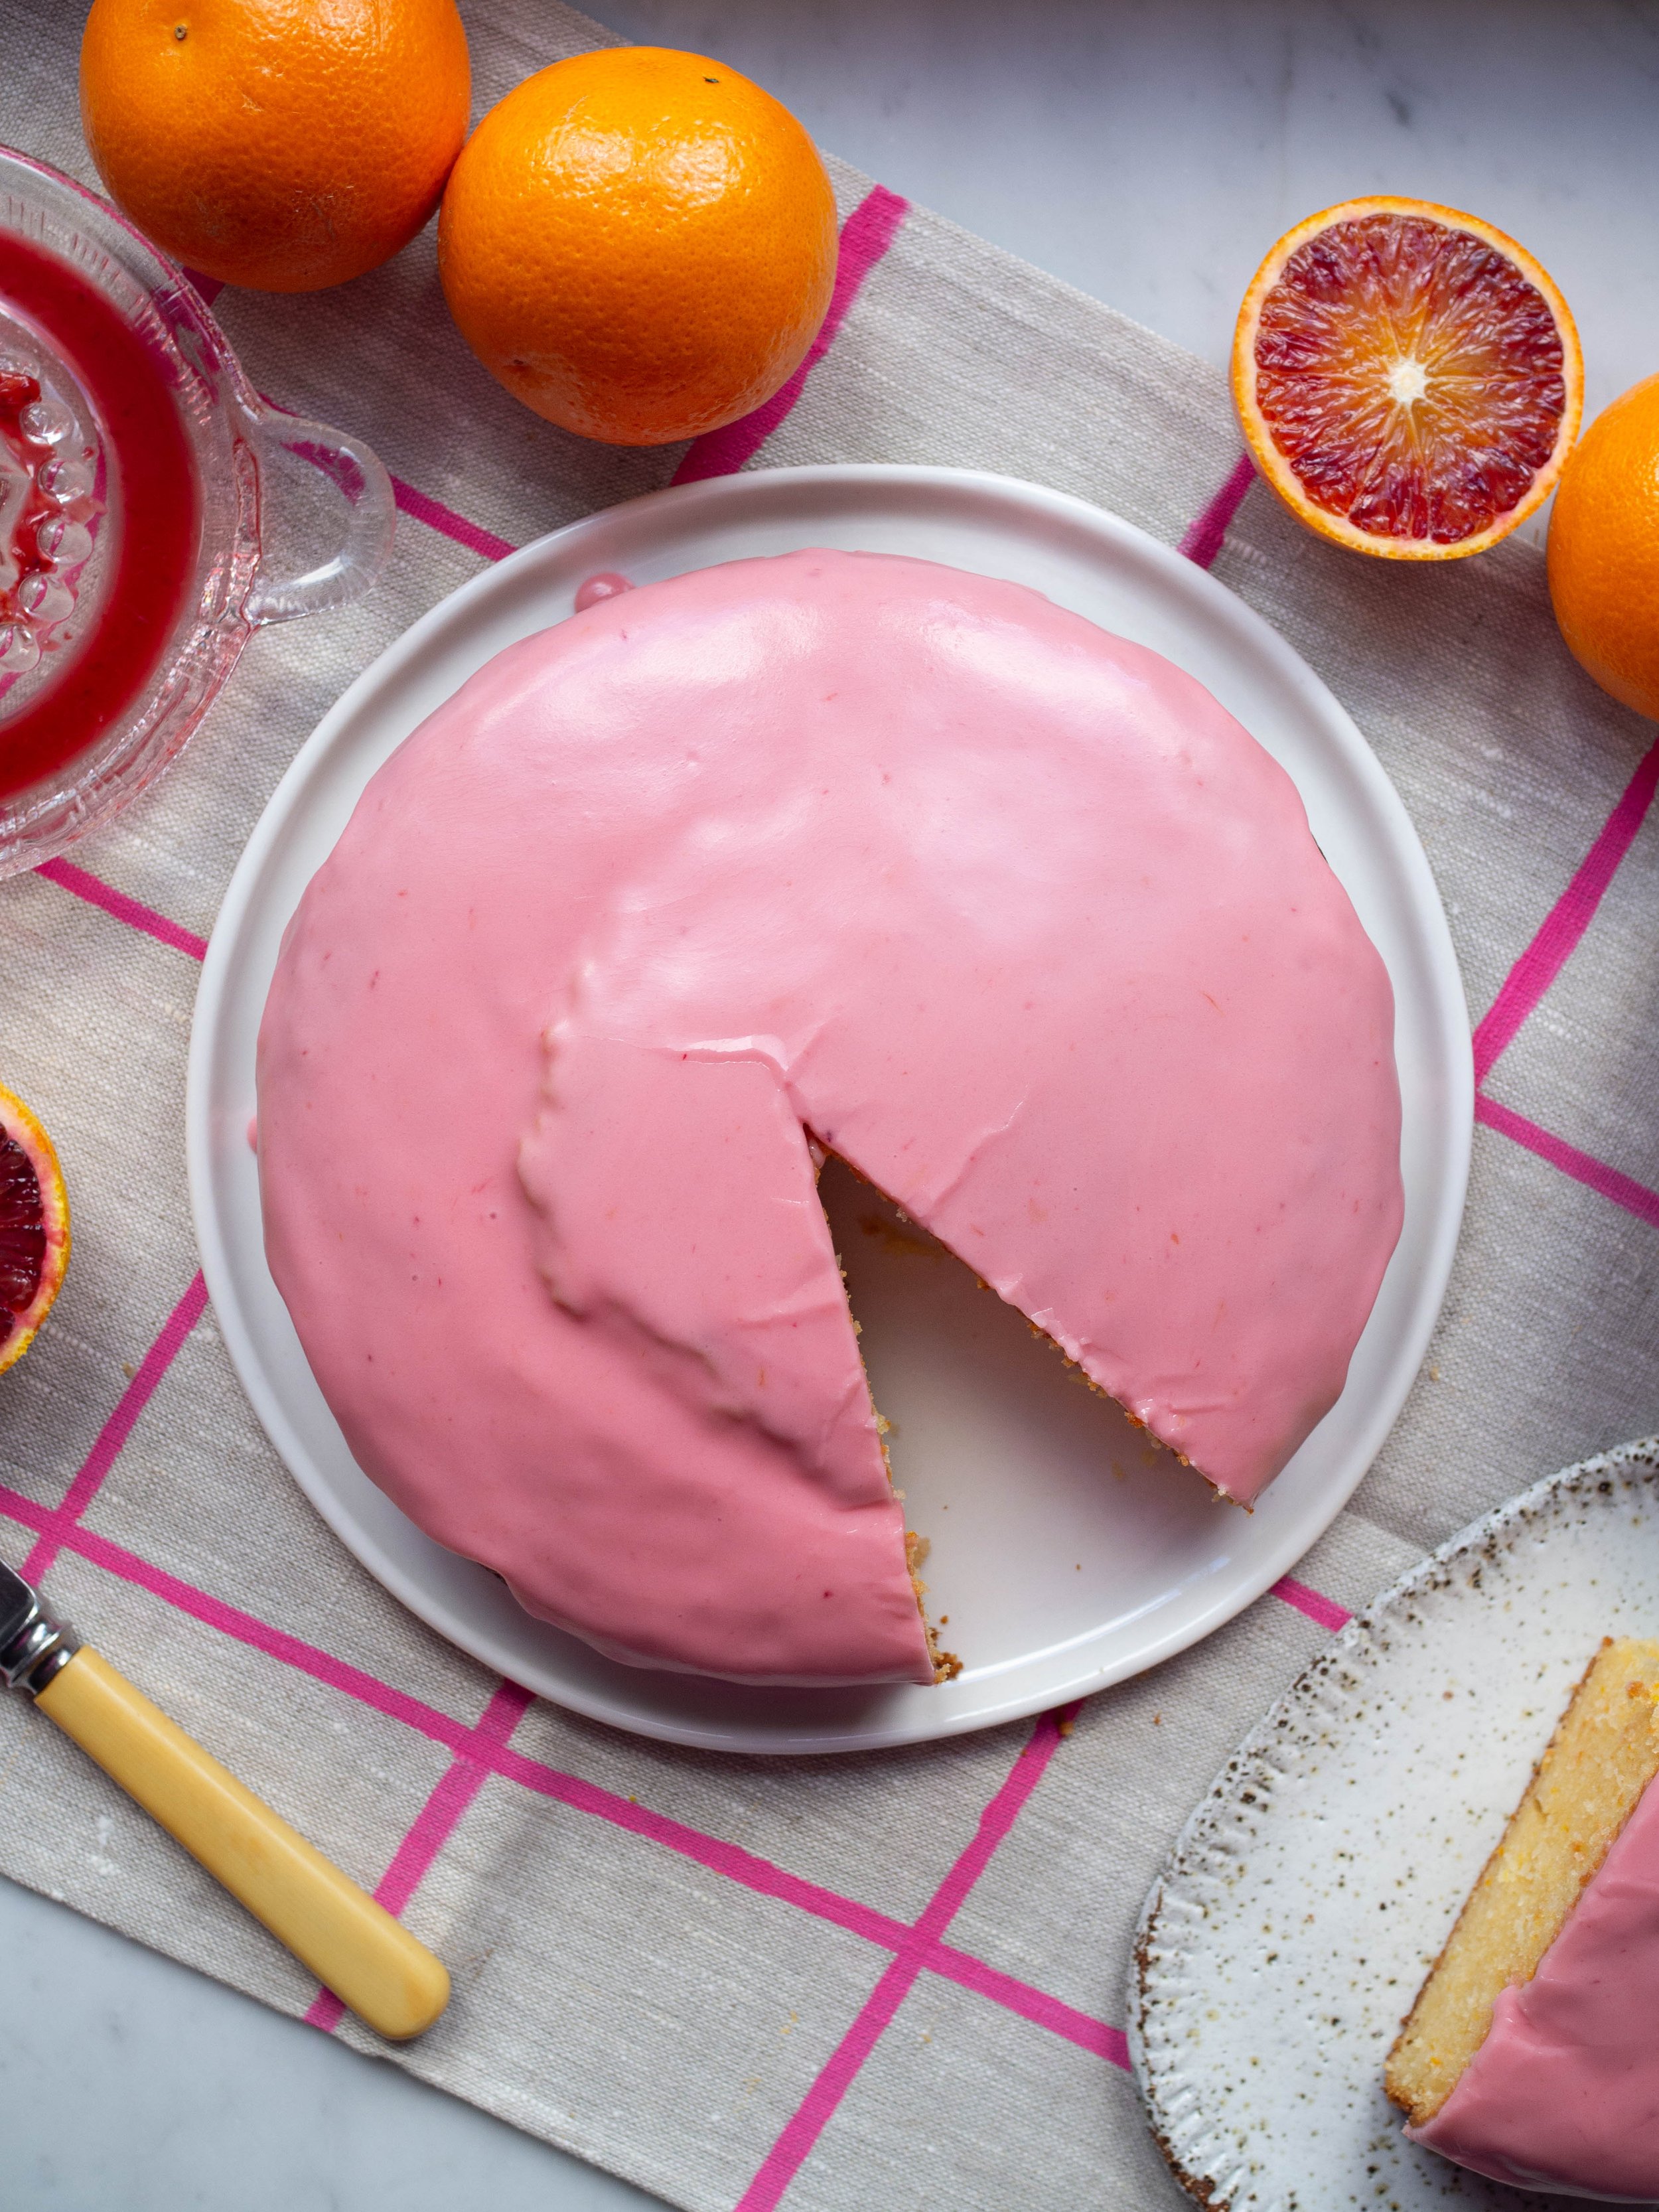
But sometimes ingredients need to be used up, and cakes need to be made. In this case we had blood oranges and yoghurt that needed using so this Blood Orange Yoghurt Cake was the perfect solution. 

I really like blood oranges, however they do not like me. Anything vaguely orange citrus wise triggers migraine attacks for me (as does many other things), so I have had to give them up. I still so enjoy the surprise of what the blood orange will look like inside when first cut, and the fact that the juice will make the best naturally pink icing. 

So if unlike me, you can enjoy blood oranges please make this very easy cake and enjoy it in my stead!

Blood Orange Yoghurt Cake

Ingredients: 

175g Greek Style Yoghurt

150g caster sugar

2 eggs

125ml canola/sunflower/vegetable oil

finely grated zest of one blood orange

175g self-raising flour

cooking spray

Ingredients for the Icing:

125g icing mixture*

1-2 tbsp fresh blood orange juice

Method:

Preheat oven to 160 degrees Celsius (fan), and grease and line a 20cm round springform cake tin. 

In a large bowl whisk together the yoghurt, sugar, eggs, oil and blood orange zest until combined. 

Add the self-raising flour and whisk until combined, and there are no lumps. 

Pour into the prepared cake tin, and bake for about 45 minutes. The cake will be golden in colour when its ready, and a skewer will come out clean. If the cake looks like its peaking too much (this will depend on your oven), you can turn the temperature down by 5-10 degrees Celsius. 

Allow the cake to cool in its tin for a few minutes, before removing from the in and leaving to cool completely on a wire rack.

Once the cake has cooled, make the icing by combining the icing mixture and 1 tbsp of the blood orange juice in a medium bowl. Add a little more juice, a teaspoon at a time until you have a smooth thick icing. Don’t make the icing too thin or it will run off the cake, if it looks too thin you can add more icing mixture a little at a time to rectify. 

Spread the icing over the cake, allowing it to fall over the sides a bit. 

Serves 8-10, will keep for a few days in an airtight container. 

*you can use pure icing sugar instead it will just need to be sifted first.

In Cakes & Slices Tags Blood Orange, cake, Mixer Free Recipes, Easy Baking
Comment

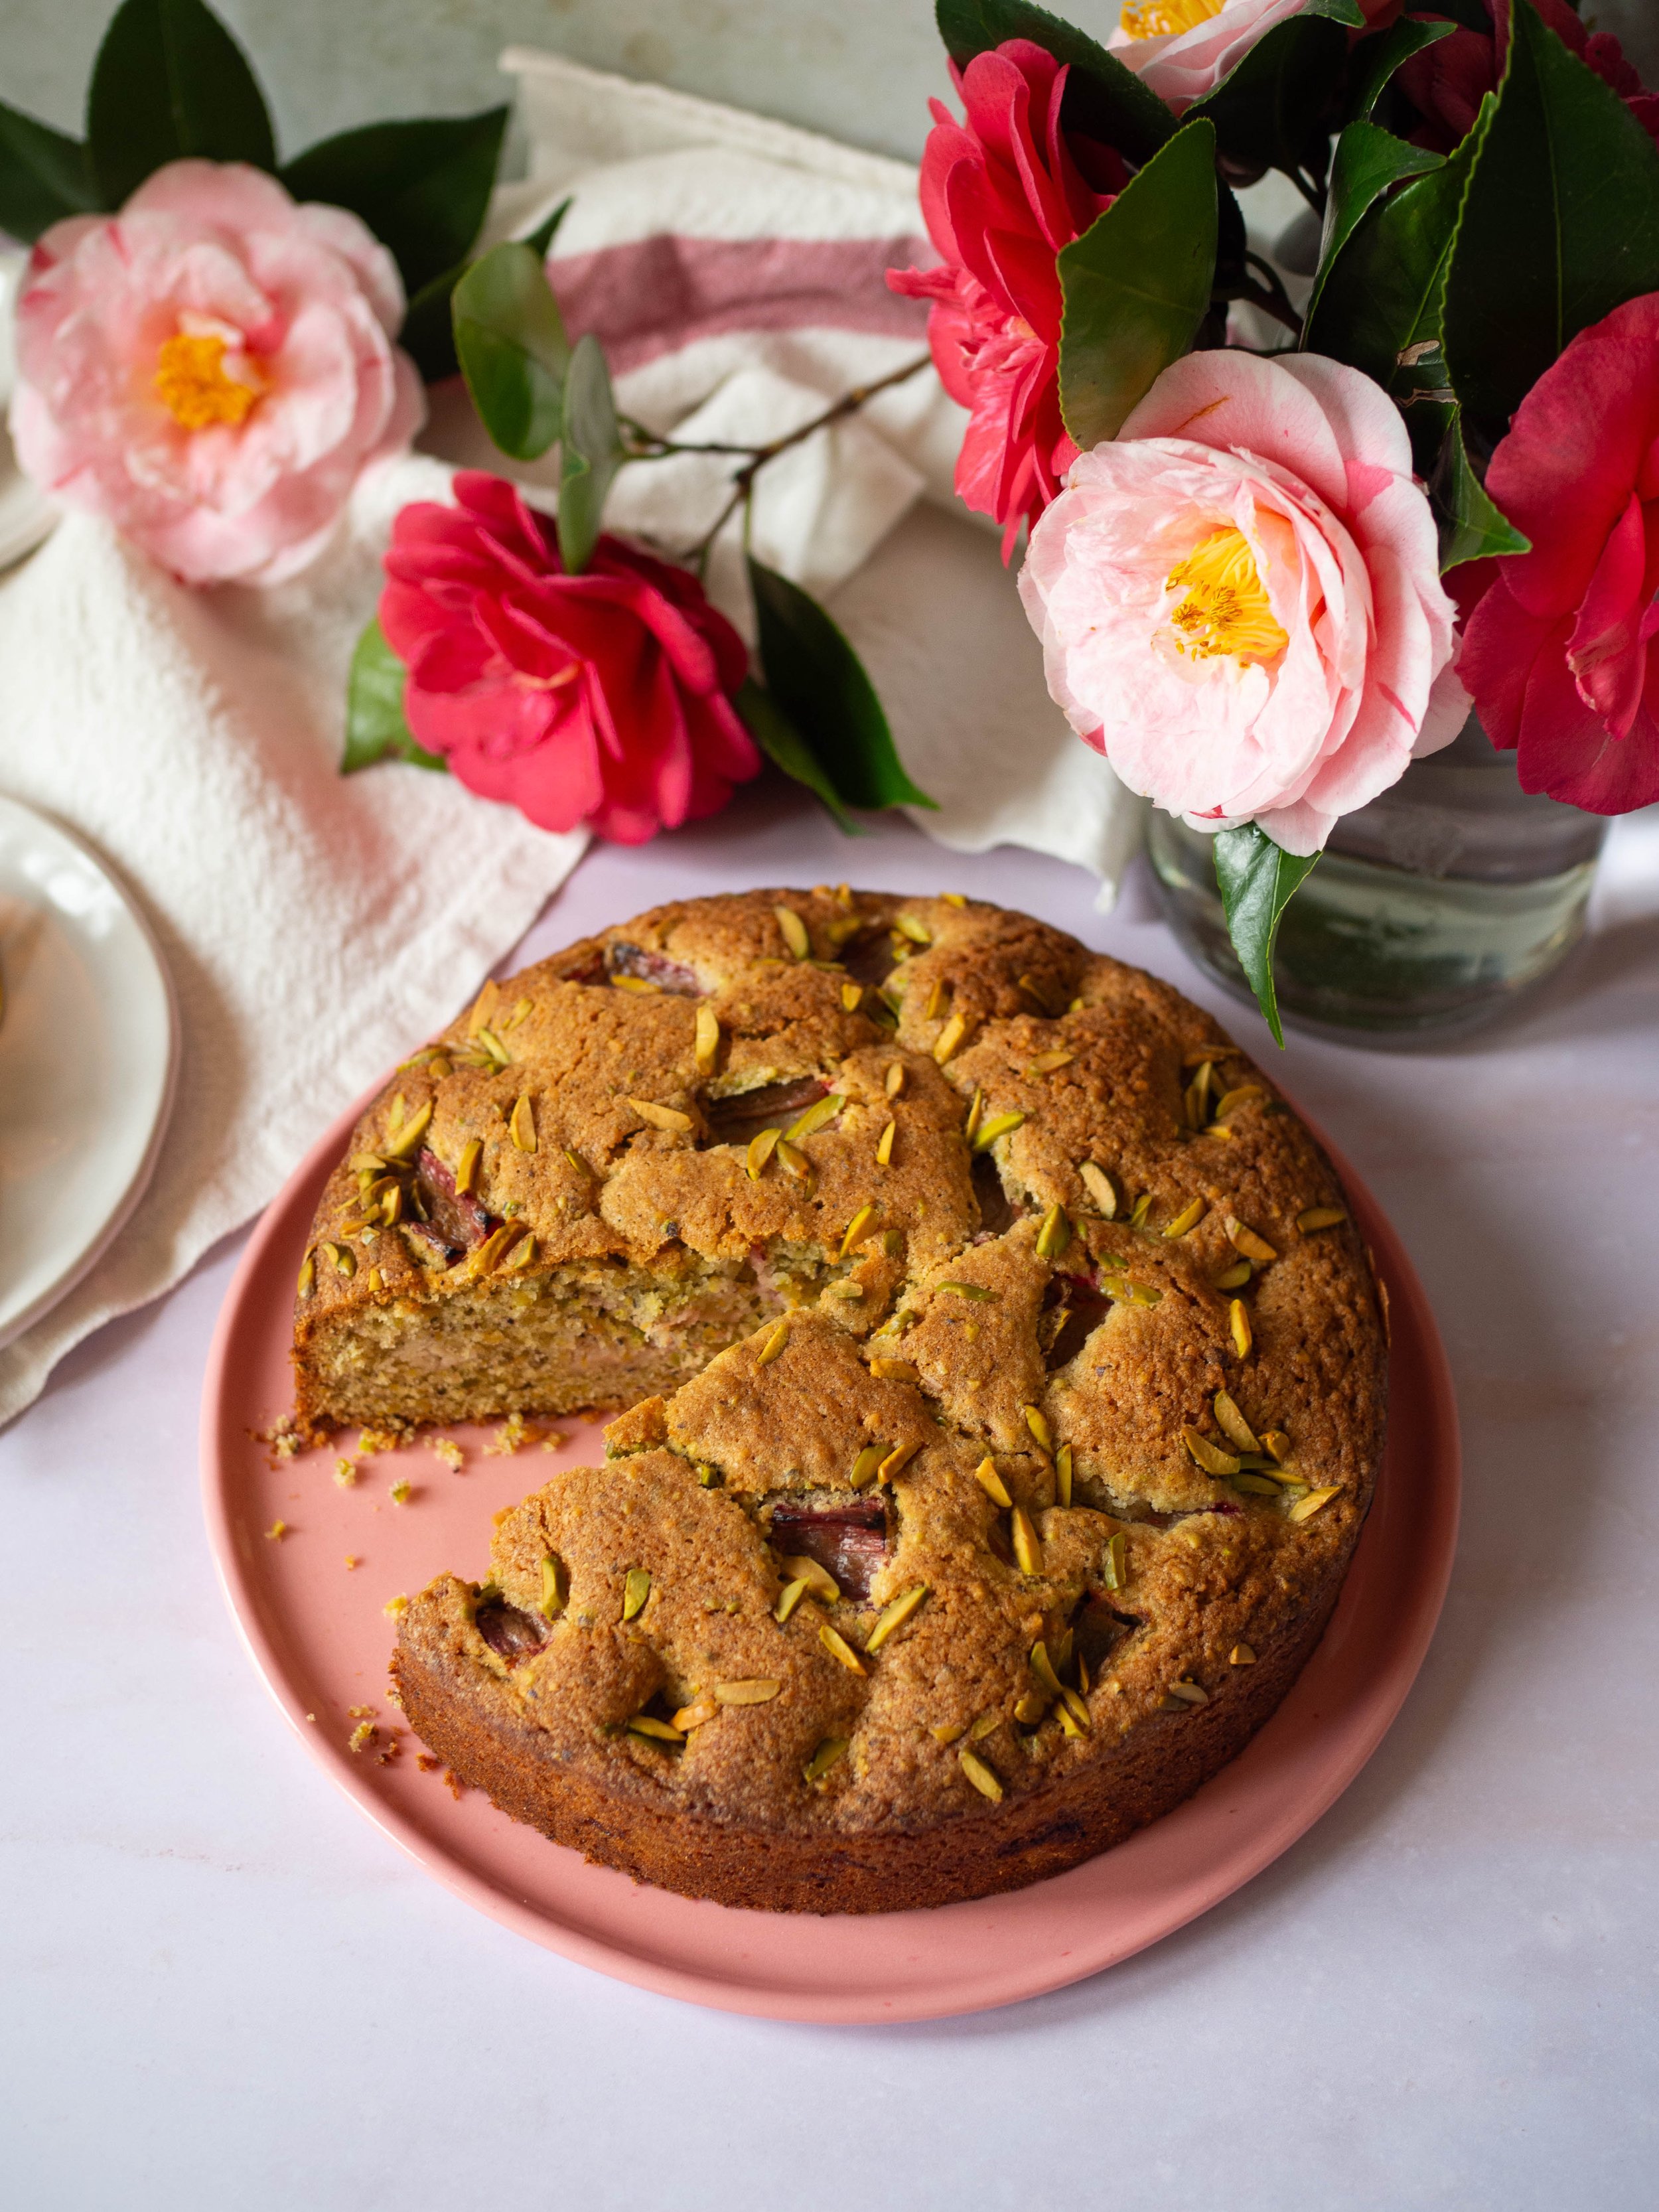
Pistachio and Rhubarb Cake

Kath August 17, 2023

To me, this is a very satisfying cake to make. The most complex part is blitzing the pistachios to form a crumb. You can use a stand mixer for this recipe, however if your butter is very much at room temperature (or you are using an alternative like margarine, which is the perfect consistency straight from the fridge), you could just use a wooden spoon to mix it all together in a large mixing bowl. 

The flavours are also exactly what I want to eat. Obviously I always want to eat cake that contains pistachio, and rhubarb adds a lovely sweet yet tart element to the whole thing that feels just right. 

The inspiration for this cake came from the many times I have been looking at Tilly Pamment’s new book ‘The Plain Cake Appreciation Society’ of late, and my eye constantly being drawn to the recipes that used pistachio and those that used rhubarb. Tilly’s book uses a lot of flavours that I love to bake with and eat, and it gave me an idea to create a simple cake with some things I already had ingredient wise. 

I basically always have pistachios of some kind on hand, and we have had some rhubarb in the freezer for a few months now that is crying out to be used. The pistachios add a really nice green colour to the cake, and also a great texture too. And as much as I love a cake with icing, I also really like that this cake doesn’t need one. The slightly chewy texture the pistachios give the outer of the cake is perfect the way it is. It also means a slice of cake can be enjoyed a little sooner, which is a win in my books. 

Pistachio and Rhubarb Cake

Ingredients: 

175g unsalted butter, softened

175g caster sugar

1 tsp vanilla extract

2 eggs

125g raw pistachios

175g self raising flour

150g rhubarb, cut into 2cm pieces

1 tbsp slivered or roughly chopped pistachios 

Method: 

Pre-heat oven to 160 degrees Celsius and grease and line a 20cm round springform or loose bottomed cake tin.

Using a food processor, grind the pistachios into a fine crumb/meal (the same consistency as almond meal). Don’t over process or you may end up with pistachio nut butter, rather than pistachio meal. 

In the bowl of a stand mixer add the butter, sugar and vanilla. Beat using the paddle attachment until light and fluffy. Add the eggs separately, beating well after each. 

In a separate bowl whisk together the flour and blitzed pistachios, then add to the batter and gently mix until just combined.

Transfer the cake batter into the tin and smooth the top. Push the rhubarb into the top of the cake a little, evenly covering the cake in the rhubarb pieces. Scatter the slivered pistachios over the top of the cake.

Bake for about an hour, or until the cake is springy to the touch and a skewer comes out clean when inserted into the cake. 

Leave the cake to cool before removing from the tin. 

Serves 8, stores well in an airtight container for 3-4 days.

In Cakes & Slices Tags Pistachio, Rhubarb, Tilly Pamment, The Plain Cake Appreciation Society, Cake, Mixer Free Recipes, Easy Baking
Comment

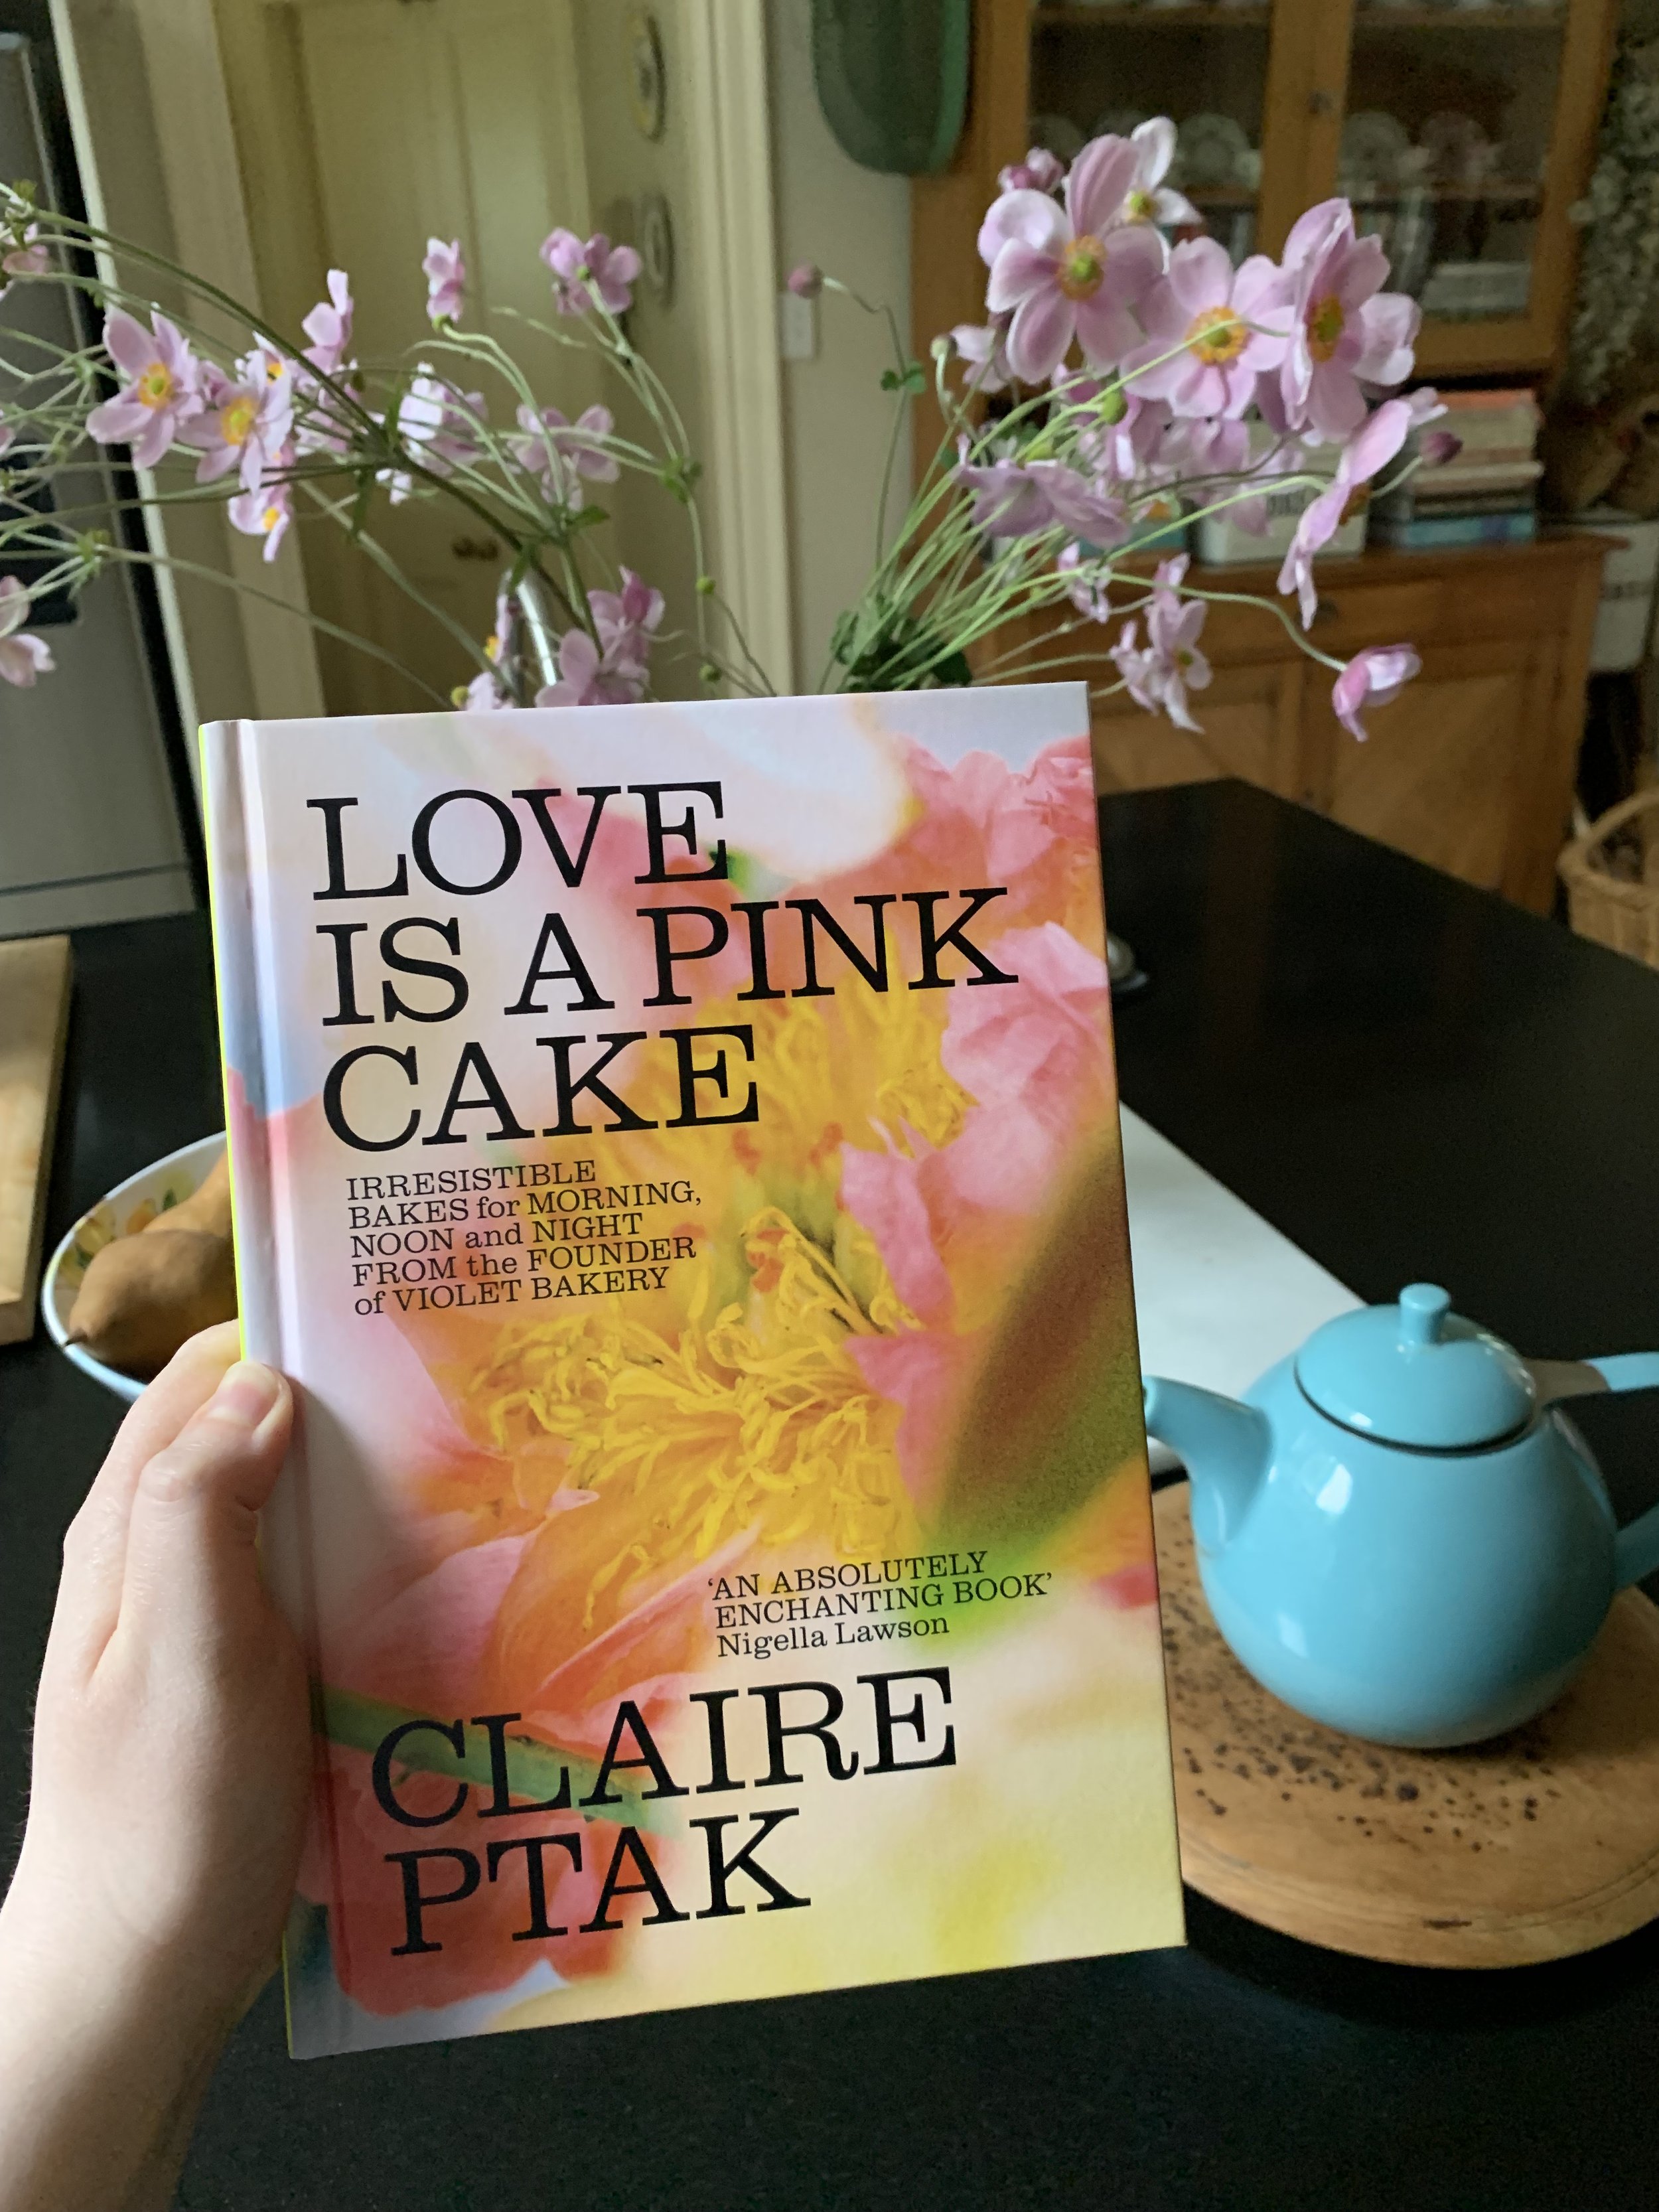
Off The Shelf - 'Love is A Pink Cake' by Claire Ptak

Kath July 13, 2023

Bought at: Pre-ordered via Amazon

Recipes Made: Blondie Peanut Butter Cookies p.29, Sticky Toffee Date Pudding p.77 and Pear Eve’s Pudding p.81

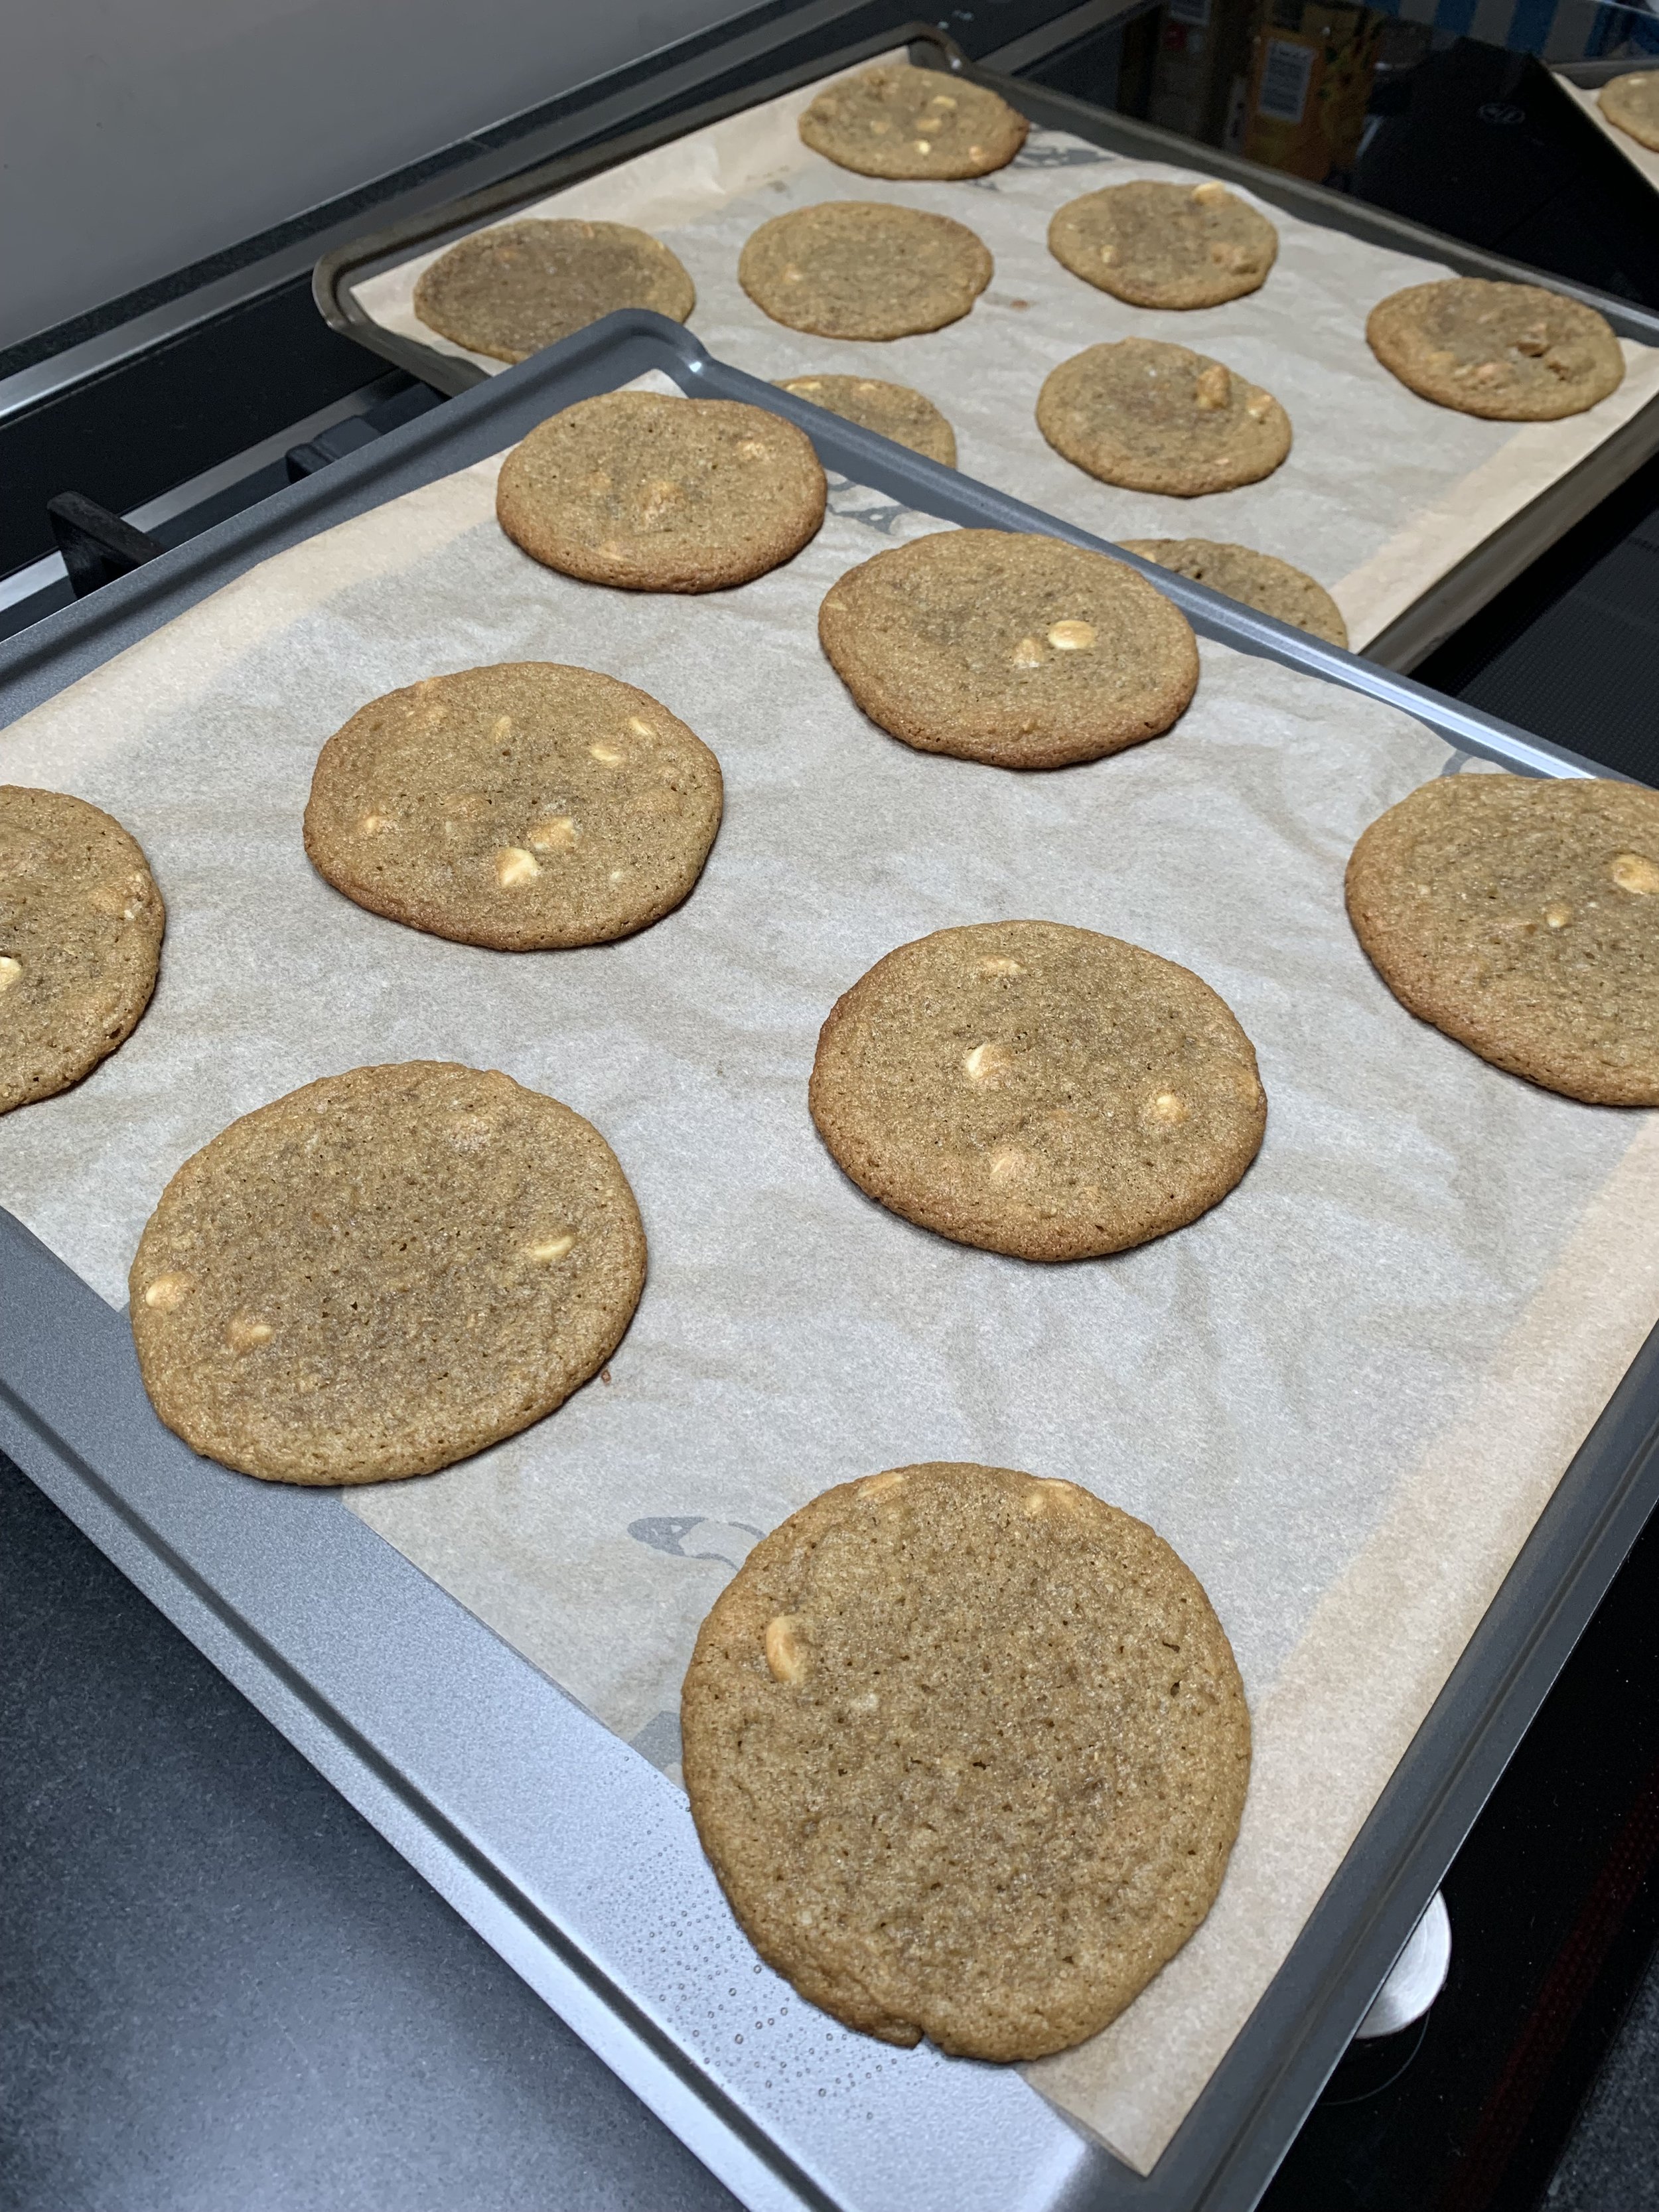
Blondie Peanut Butter Cookies (made with crema di pistachio)

Since I cannot eat any peanut products, I made the Blondie Peanut Butter Cookies with crema di pistachio instead. This substitution didn’t really work unfortunately. As you can see in the photo, the cookies turned out flat as pancakes and some of them struggled to cook through properly. Maybe I could try this again with pistachio butter instead, but possibly it’s better to move on to a recipe that doesn’t contain peanuts and need a substitution at all! I’m sure they are good made as they are intended to be!

Sticky Toffee Date Pudding

The first time I made the Sticky Toffee Date Pudding I also made the sauce for the pudding as well as I had all the ingredients needed for it. The sauce is quite different to any I have made before as an accompaniment to a sticky date pudding, and it was probably a little rich for my tastes (2 cups of double cream in a recipe will do that!). The sauce was nice, but I found the pudding almost didn’t need it. The pudding was light, and did not dry out even when I kept it in the fridge. Once reheated it was soft and pillowy and was very delicious on it’s own (which is how I ate it the second time I made this), or with some ice cream. I will definitely be making this again as it was very easy to make and can be made in advance.

Edit 24/07/2023 - I have since found that the Sticky Toffee Date Pudding was nice without the sauce and didn’t dry out in the fridge because I somehow did not read the recipe properly either time I made it! The recipe says to drain the dates once they have been soaked in water, I did not do this so the texture of my pudding was very different - though very nice and much more to my tastes than the original recipe made as intended as it turns out. I would personally continue to make it with the water in. The recipe with the water from the dates drained, definitely needs some kind of sauce (whether or not it is the one from this recipe or another you have made before and liked). Made as per the recipe in this book, the pudding is too dry and dense to eat on its own - though nice with a sauce! So really you can choose your own adventure on this one!

Sticky Toffee Date Pudding

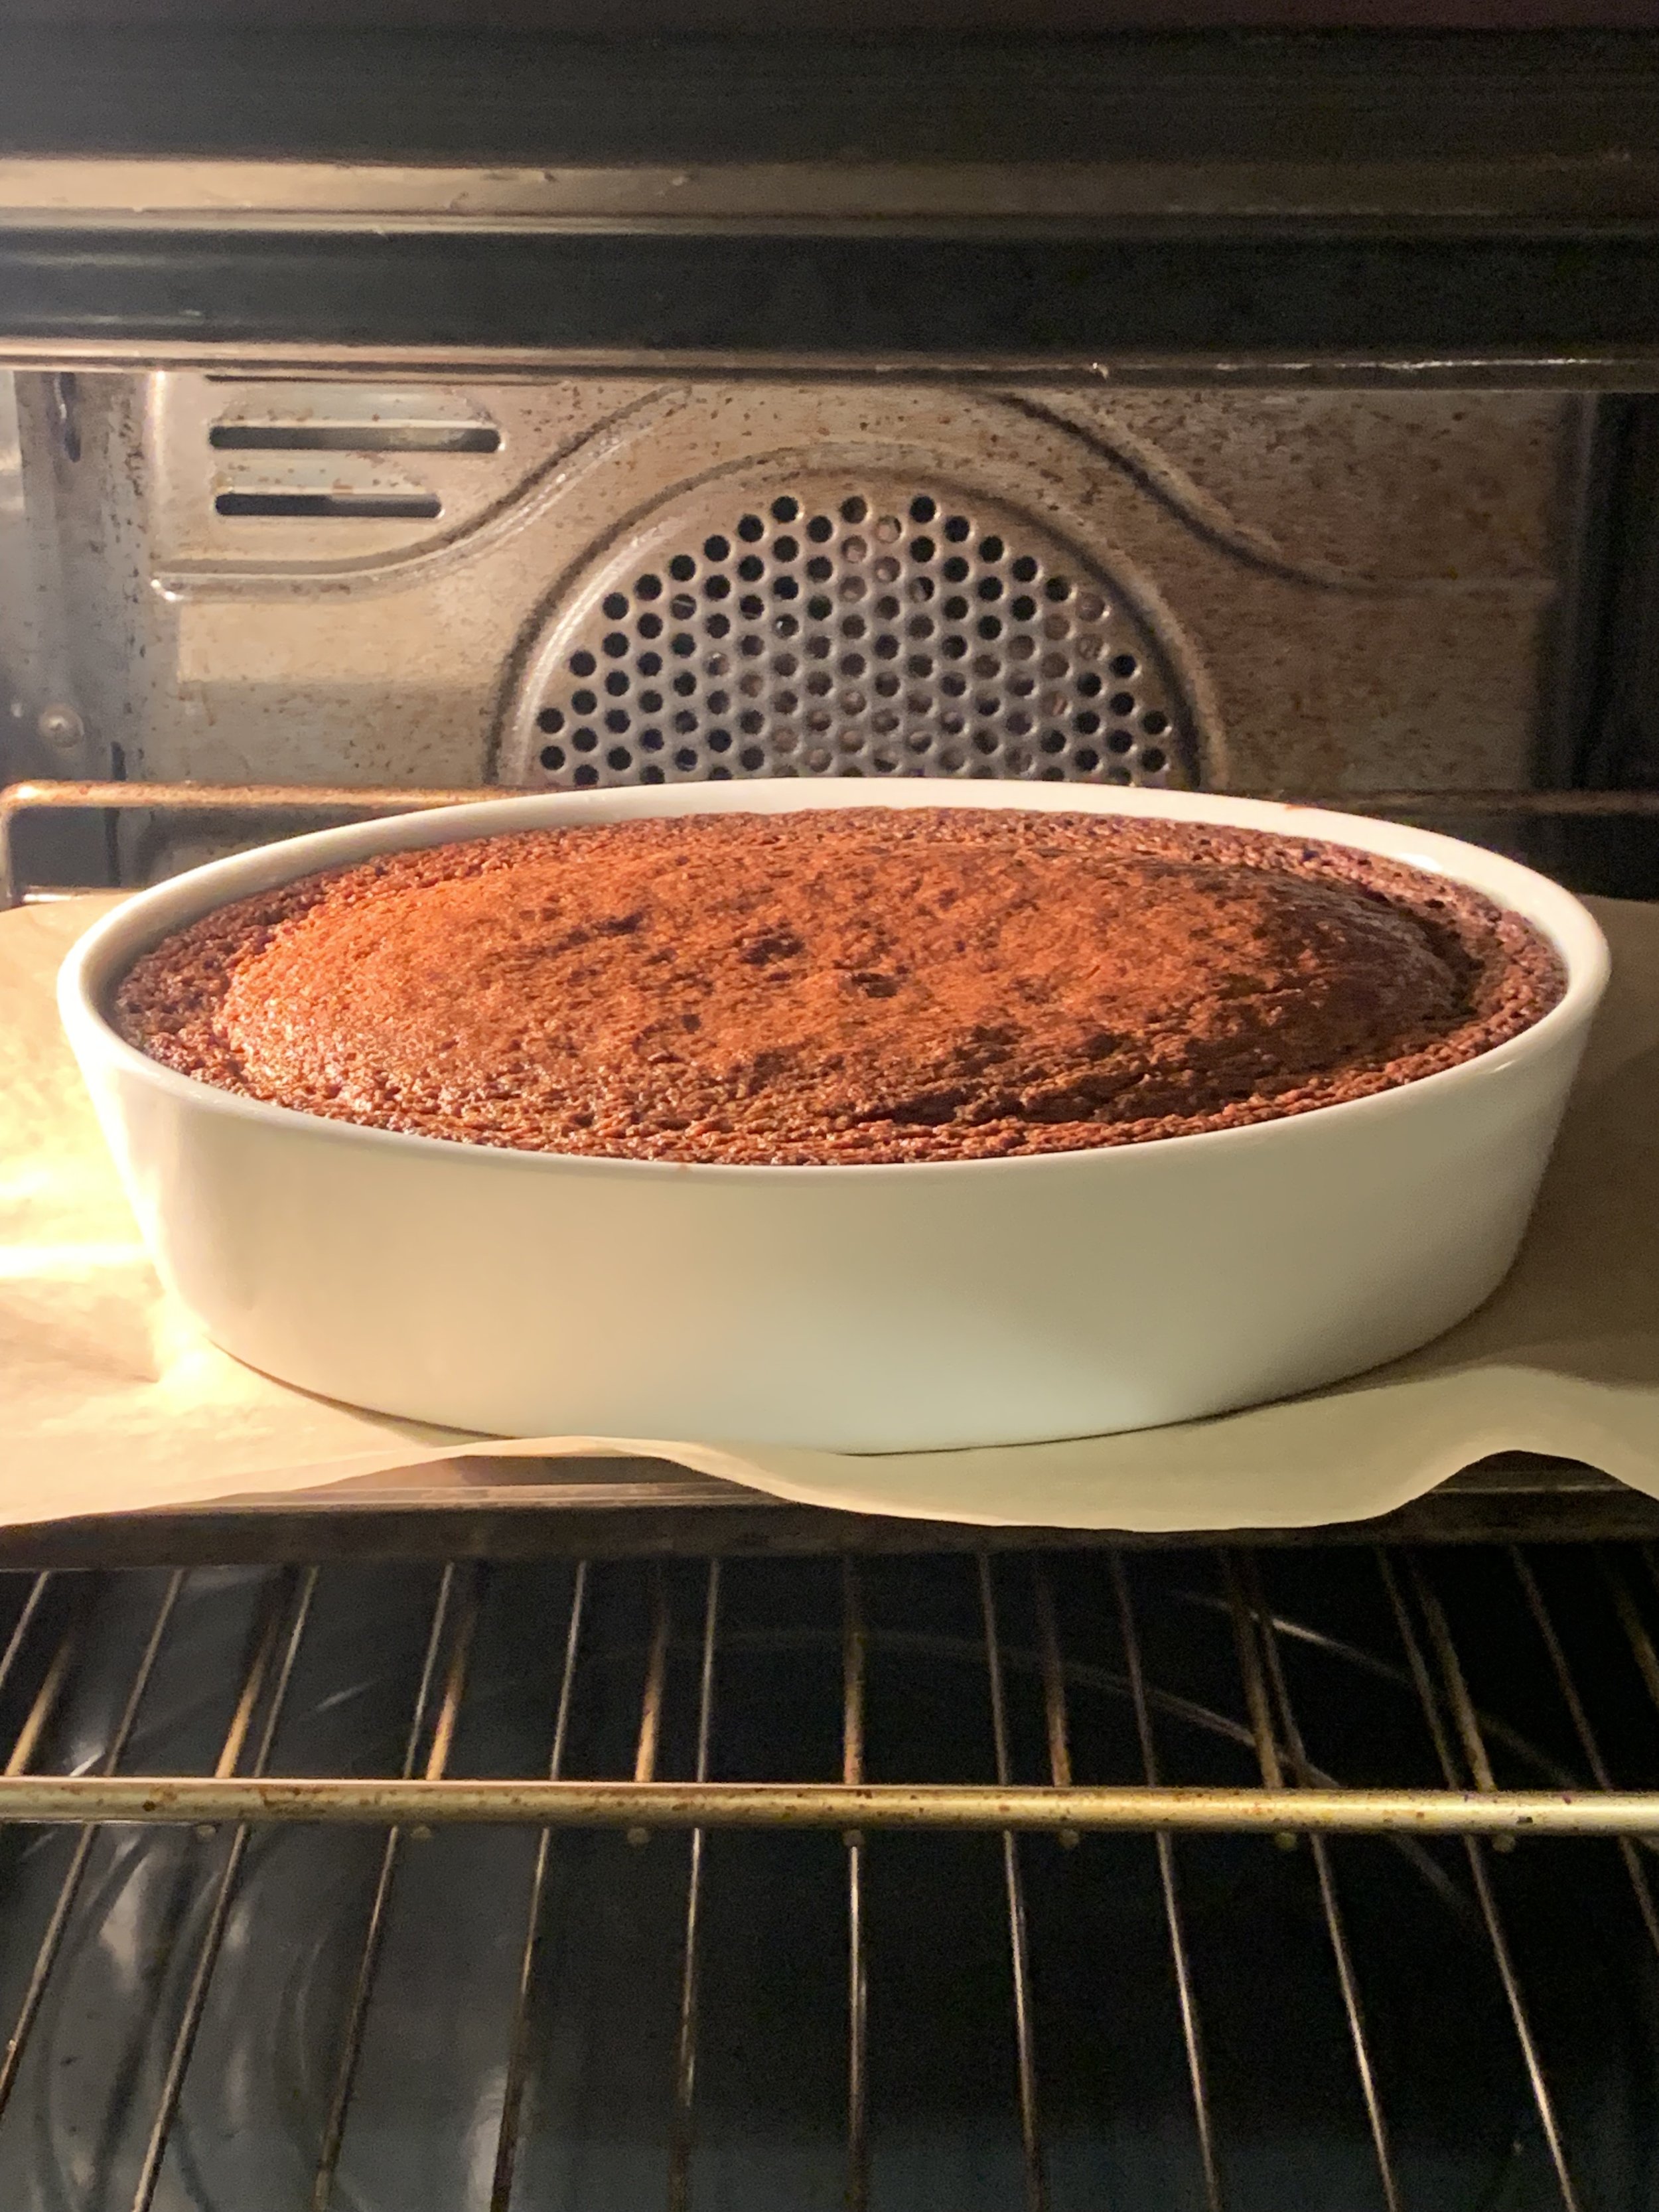
My Mum made the Pear Eve’s Pudding not long after I got this book, and I was a little skeptical as apart from sticky date pudding I’m not a massive fan of pudding. This pudding was great though, and the leftovers reheated really well. It was quite a cake-like pudding, and the top crisped up nicely similar to how some cakes can be when they first come out of the oven. There aren’t too many ingredients in this recipe, but it was still delicious and had a nice flavour. Another recipe to be made again!

Favourite Things About the Book: I really love the look and feel of this book. The photography, style of recipes and flavour used really feel like what I’ve come to love from Claire’s books. I love her book ‘The Violet Bakery’, and this book feels like a extension of that but with it’s own distinct differences too. The book is divided into two main sections, California and England, the two places Claire is connected to and influenced by the most. Within those sections recipes are then divided by Mornings, Afternoons, After a Meal, Party Party and Savouries and Holiday Treats (with a pastry section at the end of the book too). 
Claire has a really unique way of baking, that to me doesn’t feel distinctly American or English (though I would definitely associate her recipes with more English style baking if I had to choose). It has a focus on ingredients that I don’t associate with American style baking, yet a individual way of putting flavour together that I wouldn’t associate with traditional English baking either. It’s interesting and diverse, and doesn’t feel like so many other baking cookbooks that can start to feel all a bit the same. Even if you own previous cookbooks from Claire, I think there is still something new to be discovered here. 

Bookmarked Recipes (to make later!): Big Sur Cookies p.27, Pistachio Green Plum Cake with Candied Violets p.47, Lemon Meringue Pie Bars p.55, Poached Pear Pavlova p.76, Nectarine and Cherry Cobbler p.147 and English Angel Cake p.168.

In Off the Shelf Tags Love is A Pink Cake, Claire Ptak, Violet Bakery London, Cookbooks, Off the Shelf, Cookbook Review
Comment

Off The Shelf - 'Sweet Enough' by Alison Roman

Kath June 29, 2023

Bought at: My copy was gifted to me by HardieGrant*. 

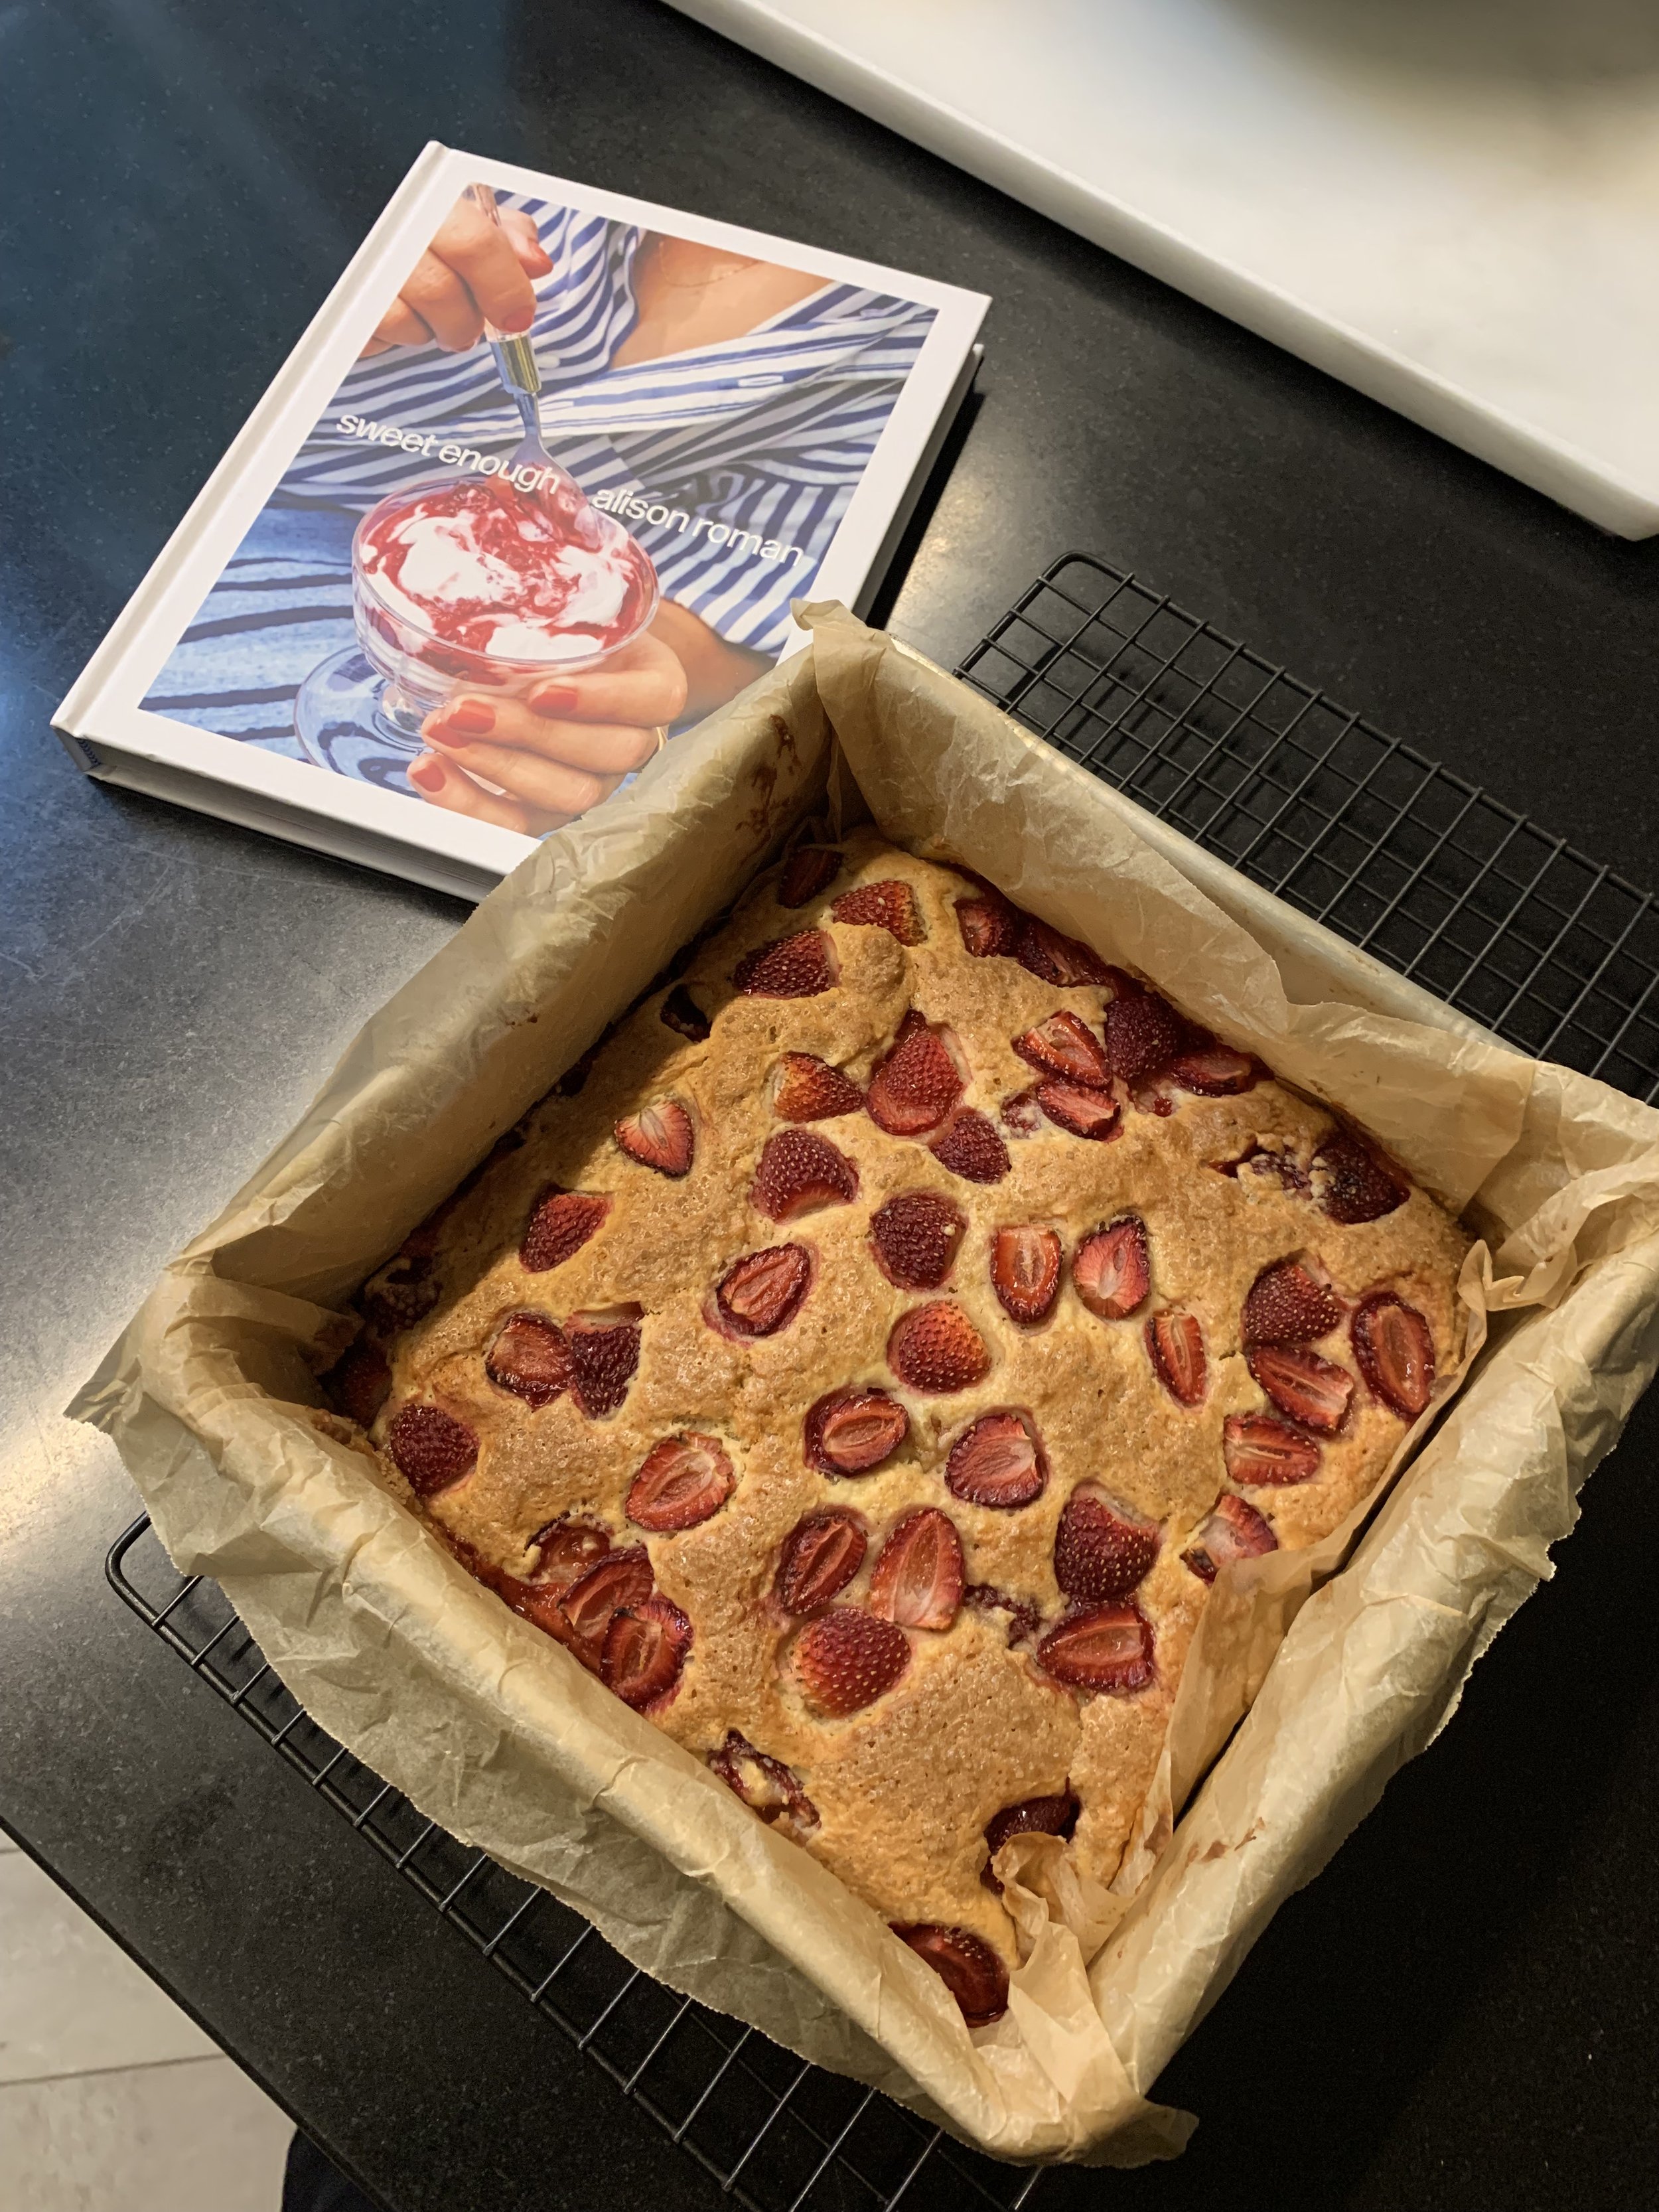
Recipes Made: Old-Fashioned Strawberry Cake p.91, Plummy Pudding p.146, Salted Pistachio Shortbread p.173 and Cheesy Salty Savoury Scones p.258.

Old Fashioned Strawberry Cake

I made the Old-Fashioned Strawberry Cake and substituted the buttermilk for plain yoghurt mixed with some milk (I did not have any buttermilk, but needed to use the yoghurt up). I don’t know if it was my substitution, but the cake was dense. I usually find swapping yoghurt and buttermilk easy in baking, and won’t notice any difference. I know lots of people have made this cake, but it definitely wasn’t a favourite for me. I later made this cake with strawberries, and enjoyed it infinitely more.

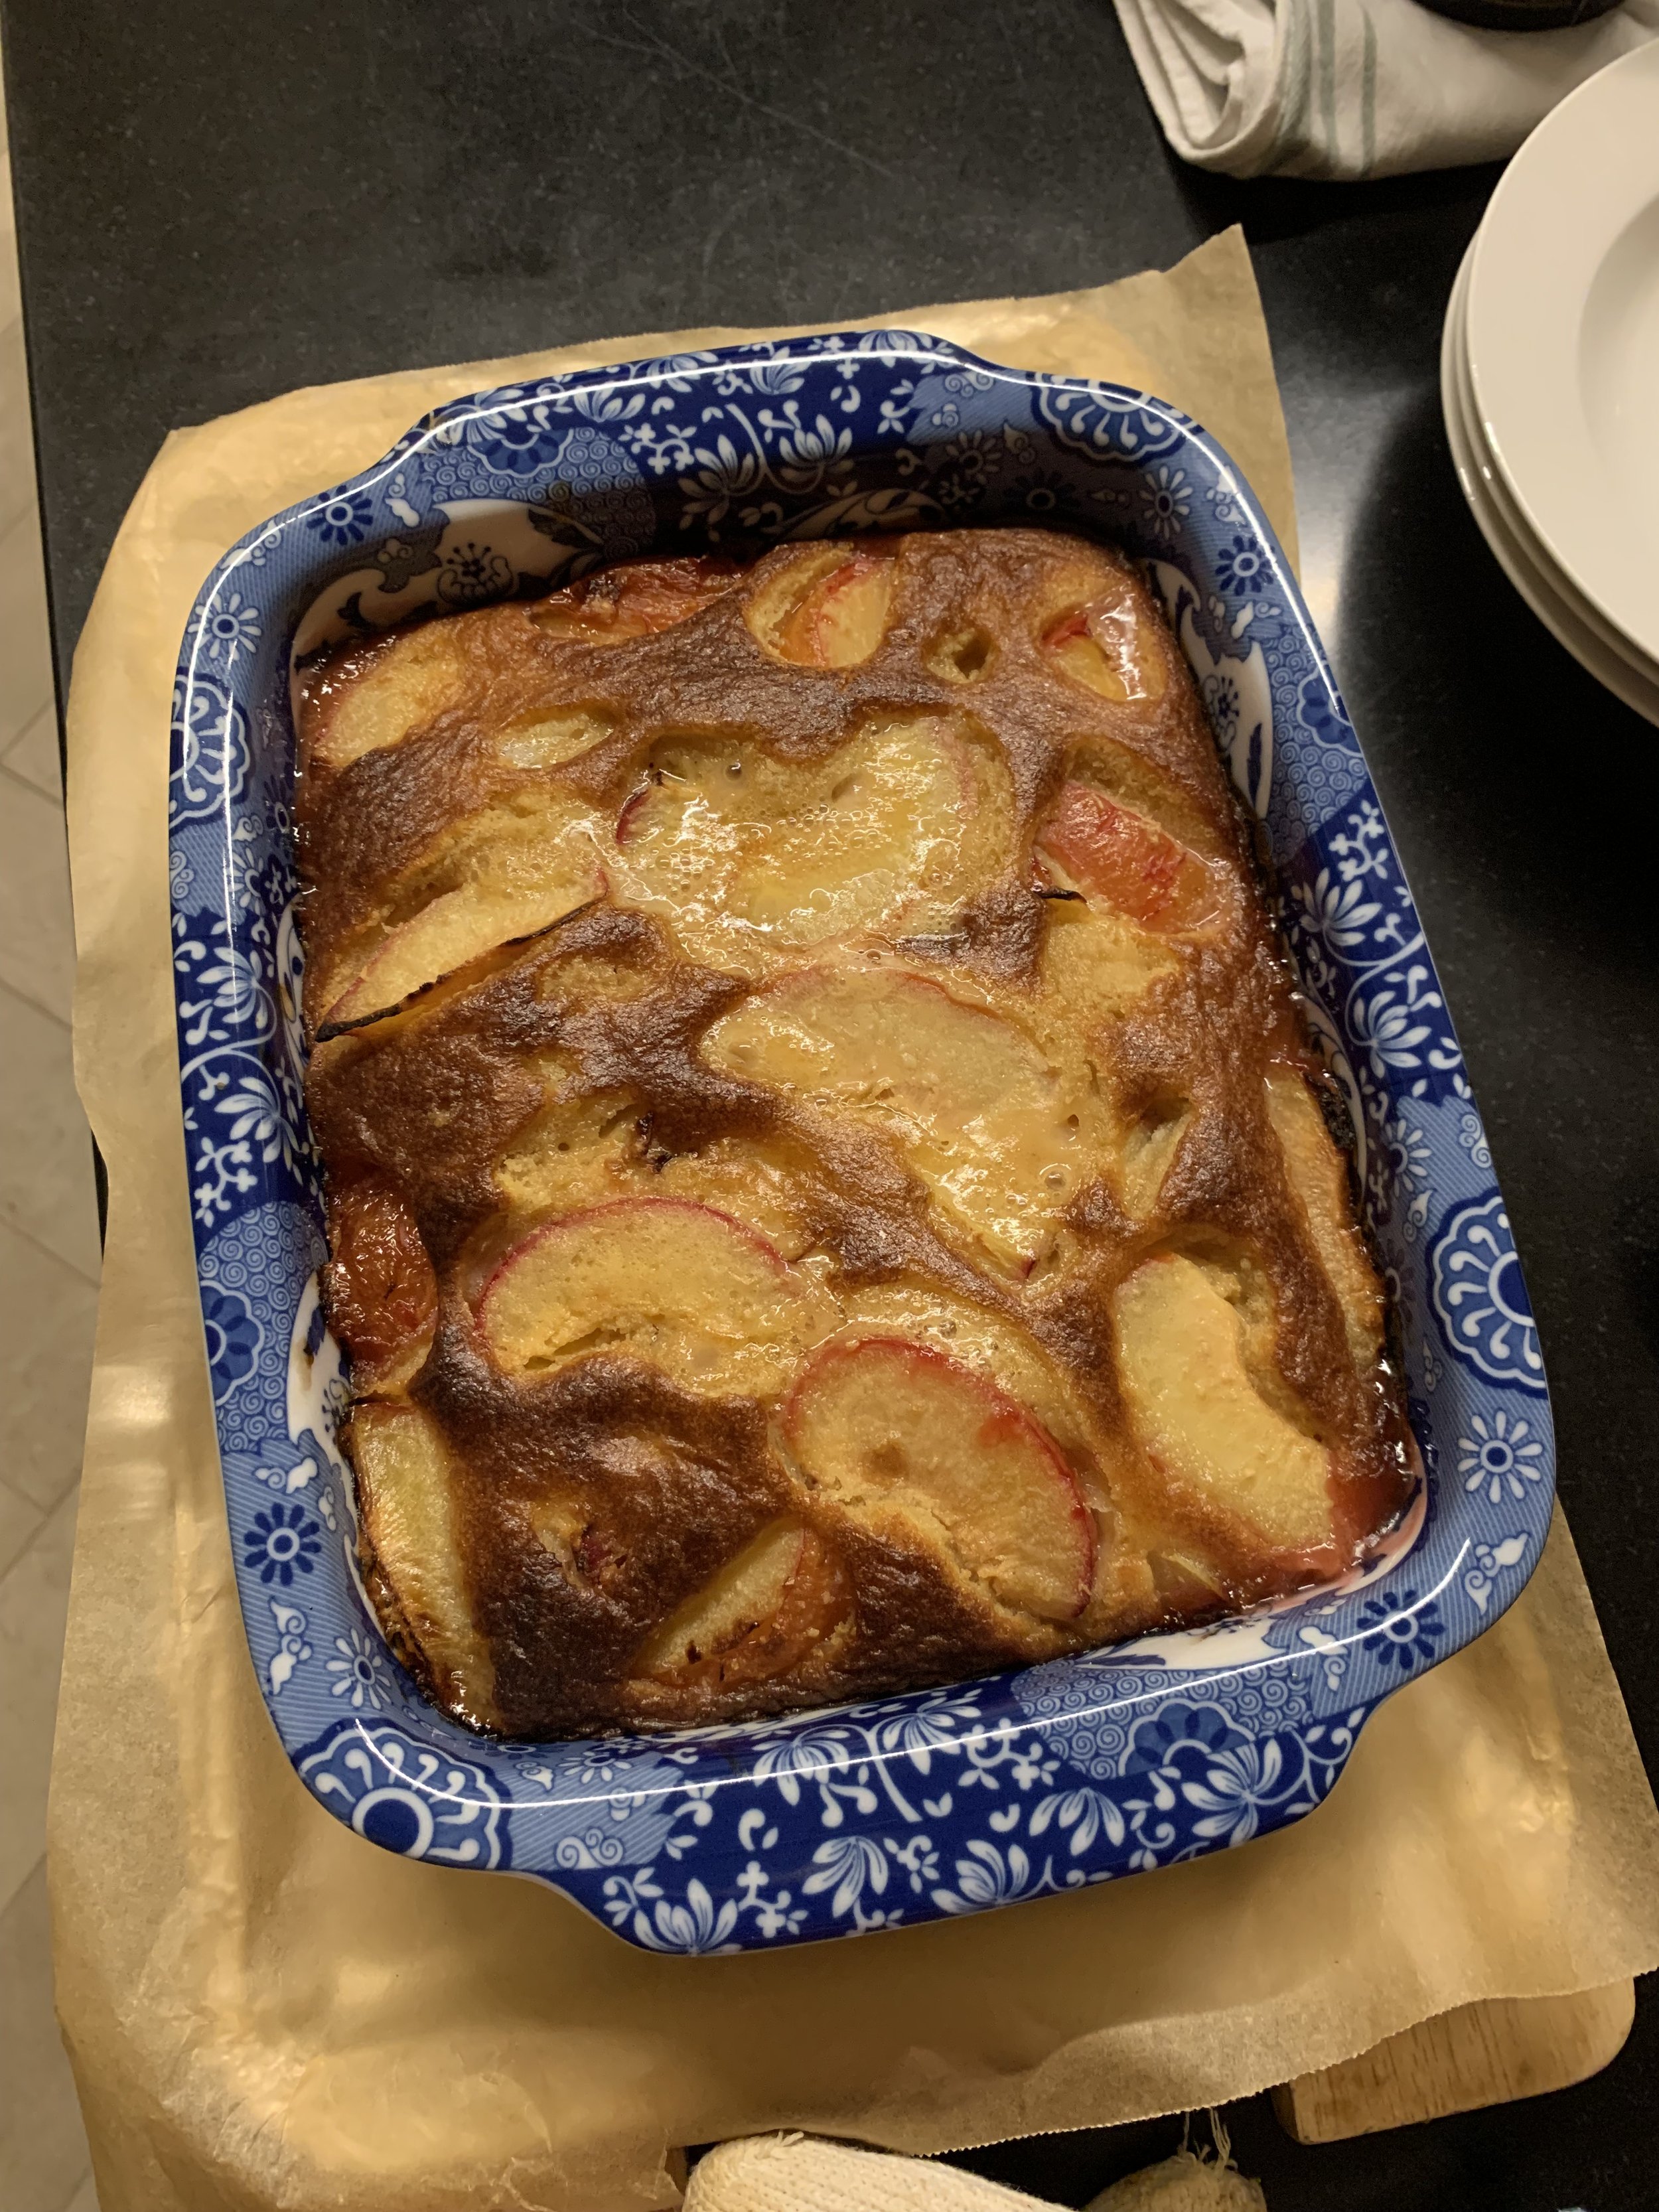
Plummy Pudding

I don’t make puddings often, but since plum season was coming to an end, I decided to try the Plummy Pudding. In the recipe notes Alison says it’s “near impossible to mess up this pudding”, but maybe I did? I found it rubbery and very eggy, maybe I cooked it too long? A lot of the oven temperatures in this book tend towards the high side, and since our oven runs hot I usually feel the stipulated temperatures will be too much. In this case, maybe turning the oven temperature down meant cooking it longer which possibly wasn’t right. Either way, this one wasn’t for me. Whether the recipe just wasn’t my thing, or just puddings generally aren’t my thing, maybe we’ll never know. 

Salted Pistachio Shortbread

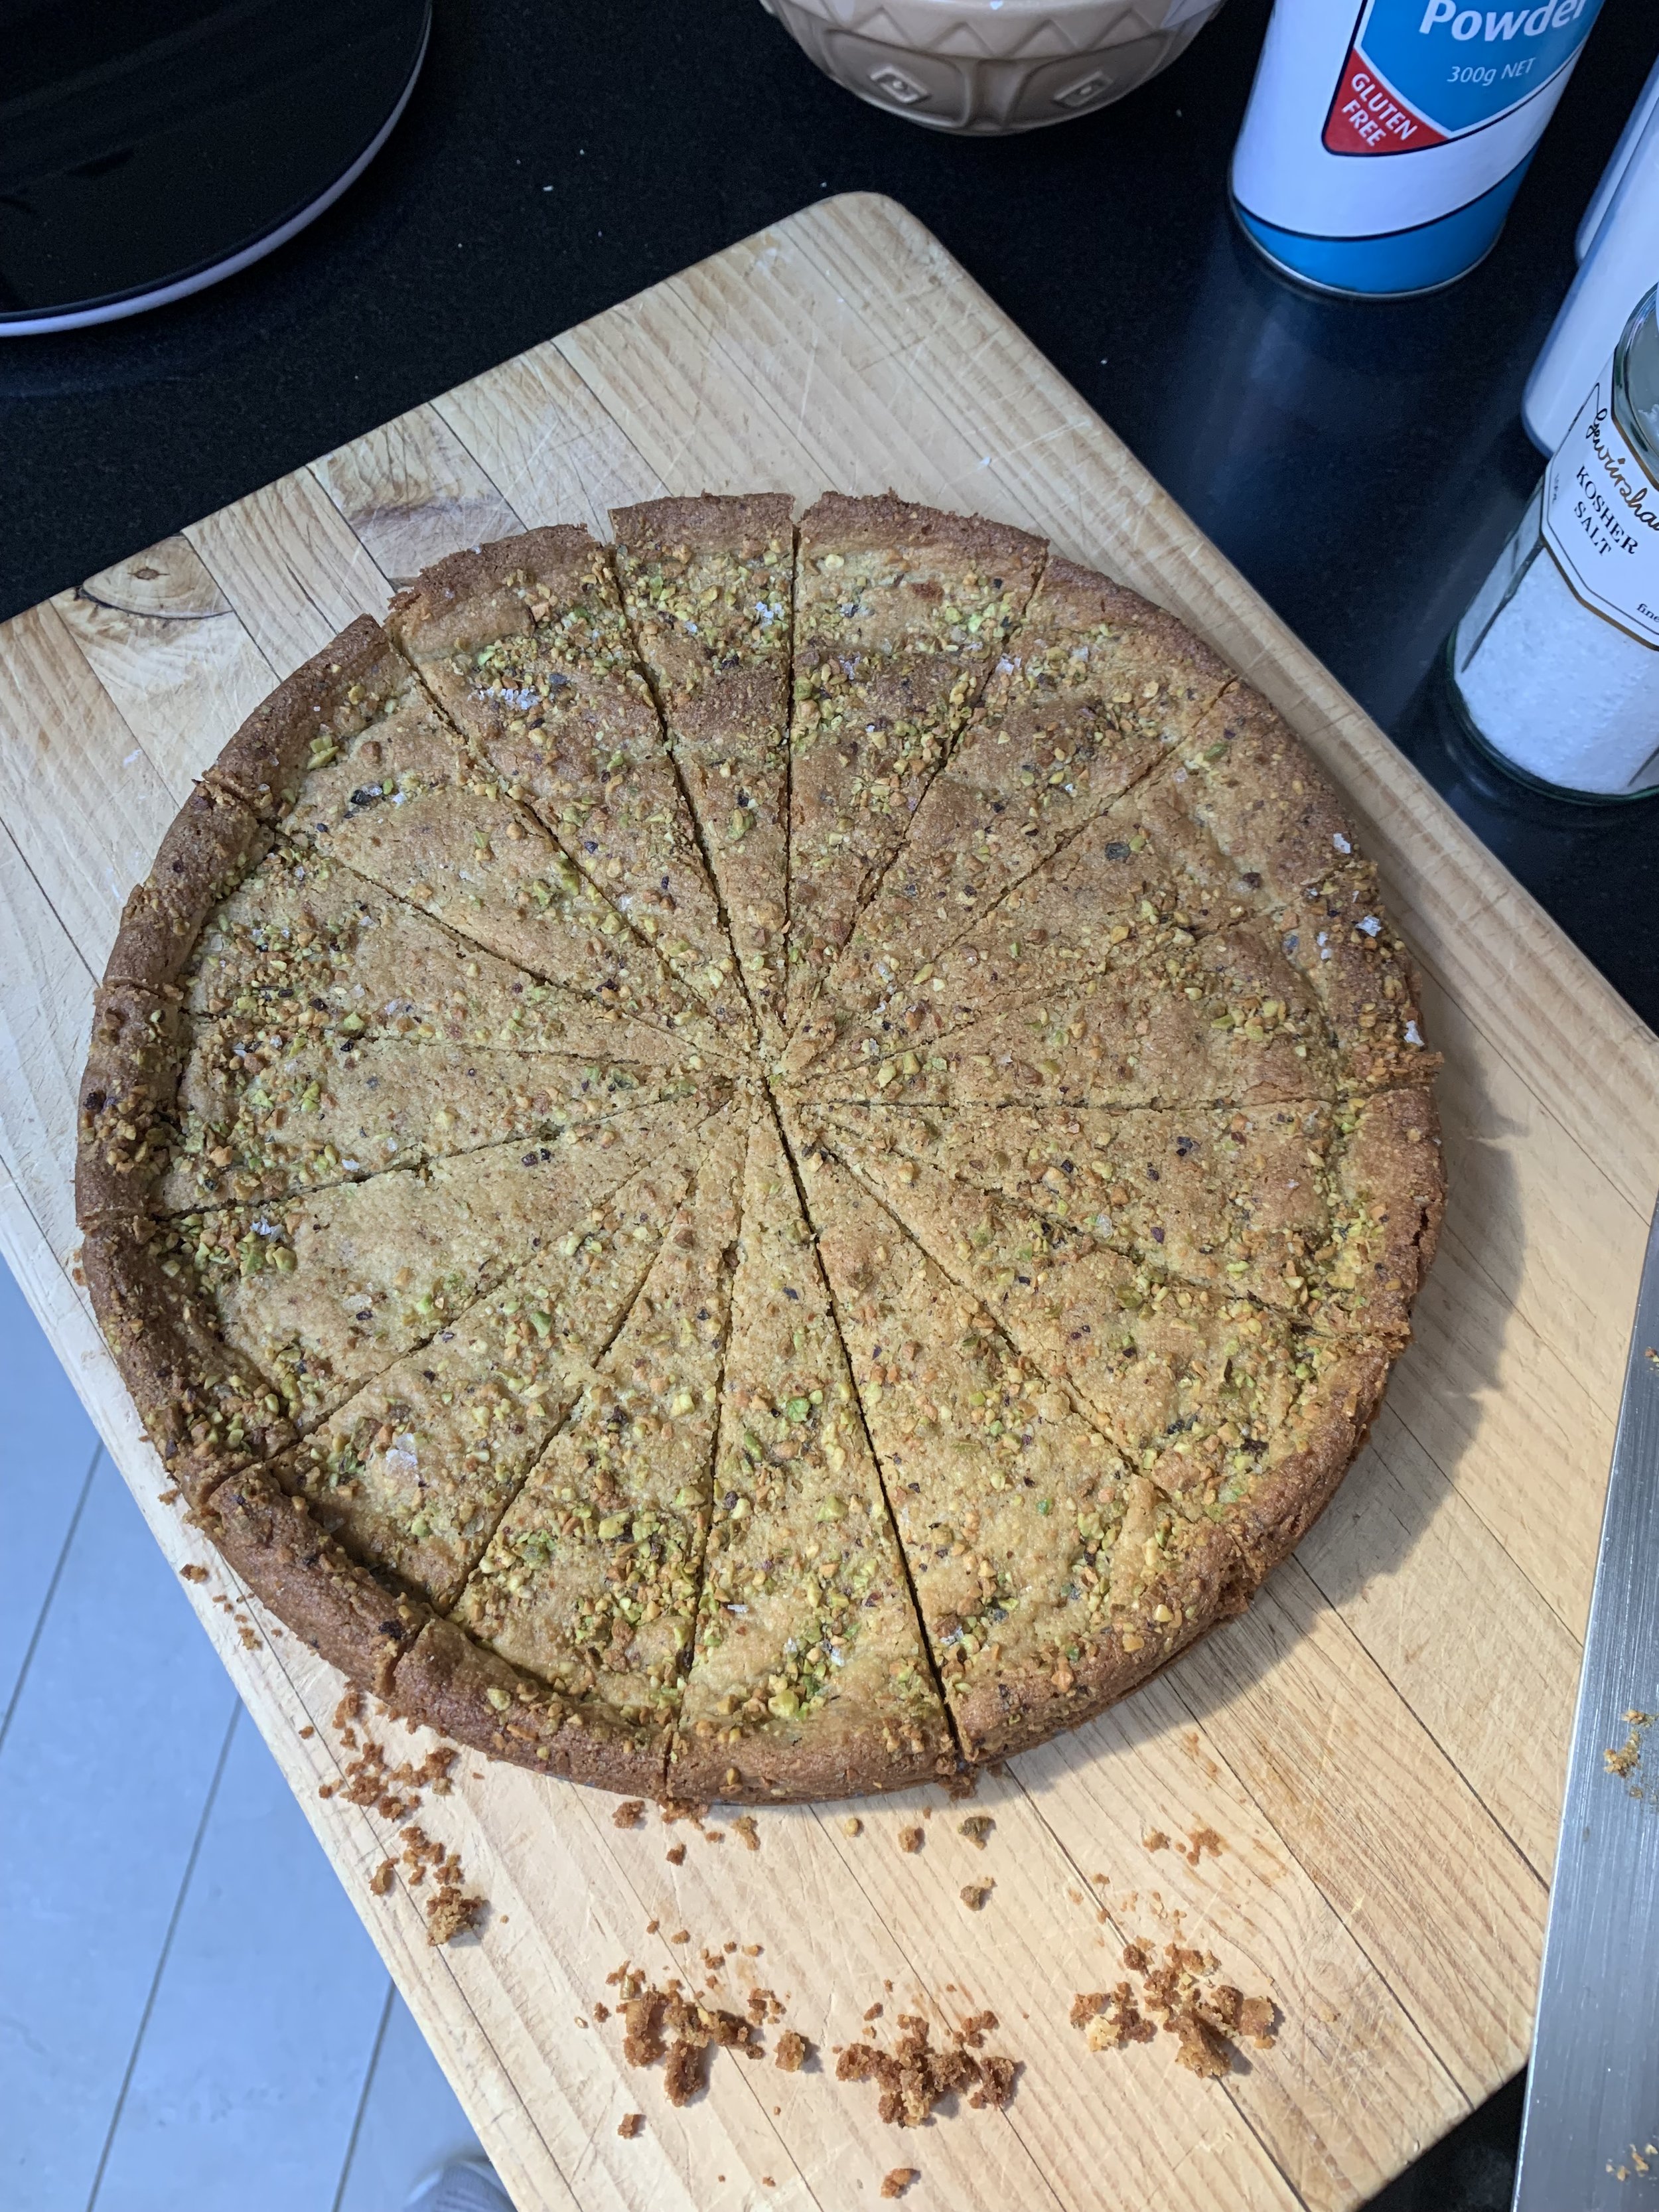
The first recipe I made out of ‘Sweet Enough’ was the Salted Pistachio Shortbread. Mostly because I am a pistachio obsessive, and I also had all the ingredients needed when the book arrived. Out of all the recipes I’ve tried in this book, I did like this one. I could have done without the sprinkling of salt over the top of the shortbread as it just took it too a slightly too salty place for me, but otherwise it was nice. The shortbread dough itself was quite different to others I am used to, it was very wet and definitely could only be pressed into a tin as this recipe does. It could not be rolled out and cut into shapes like the shortbread I normally make. This made it a crumbly shortbread to eat, but very satisfying all the same. 

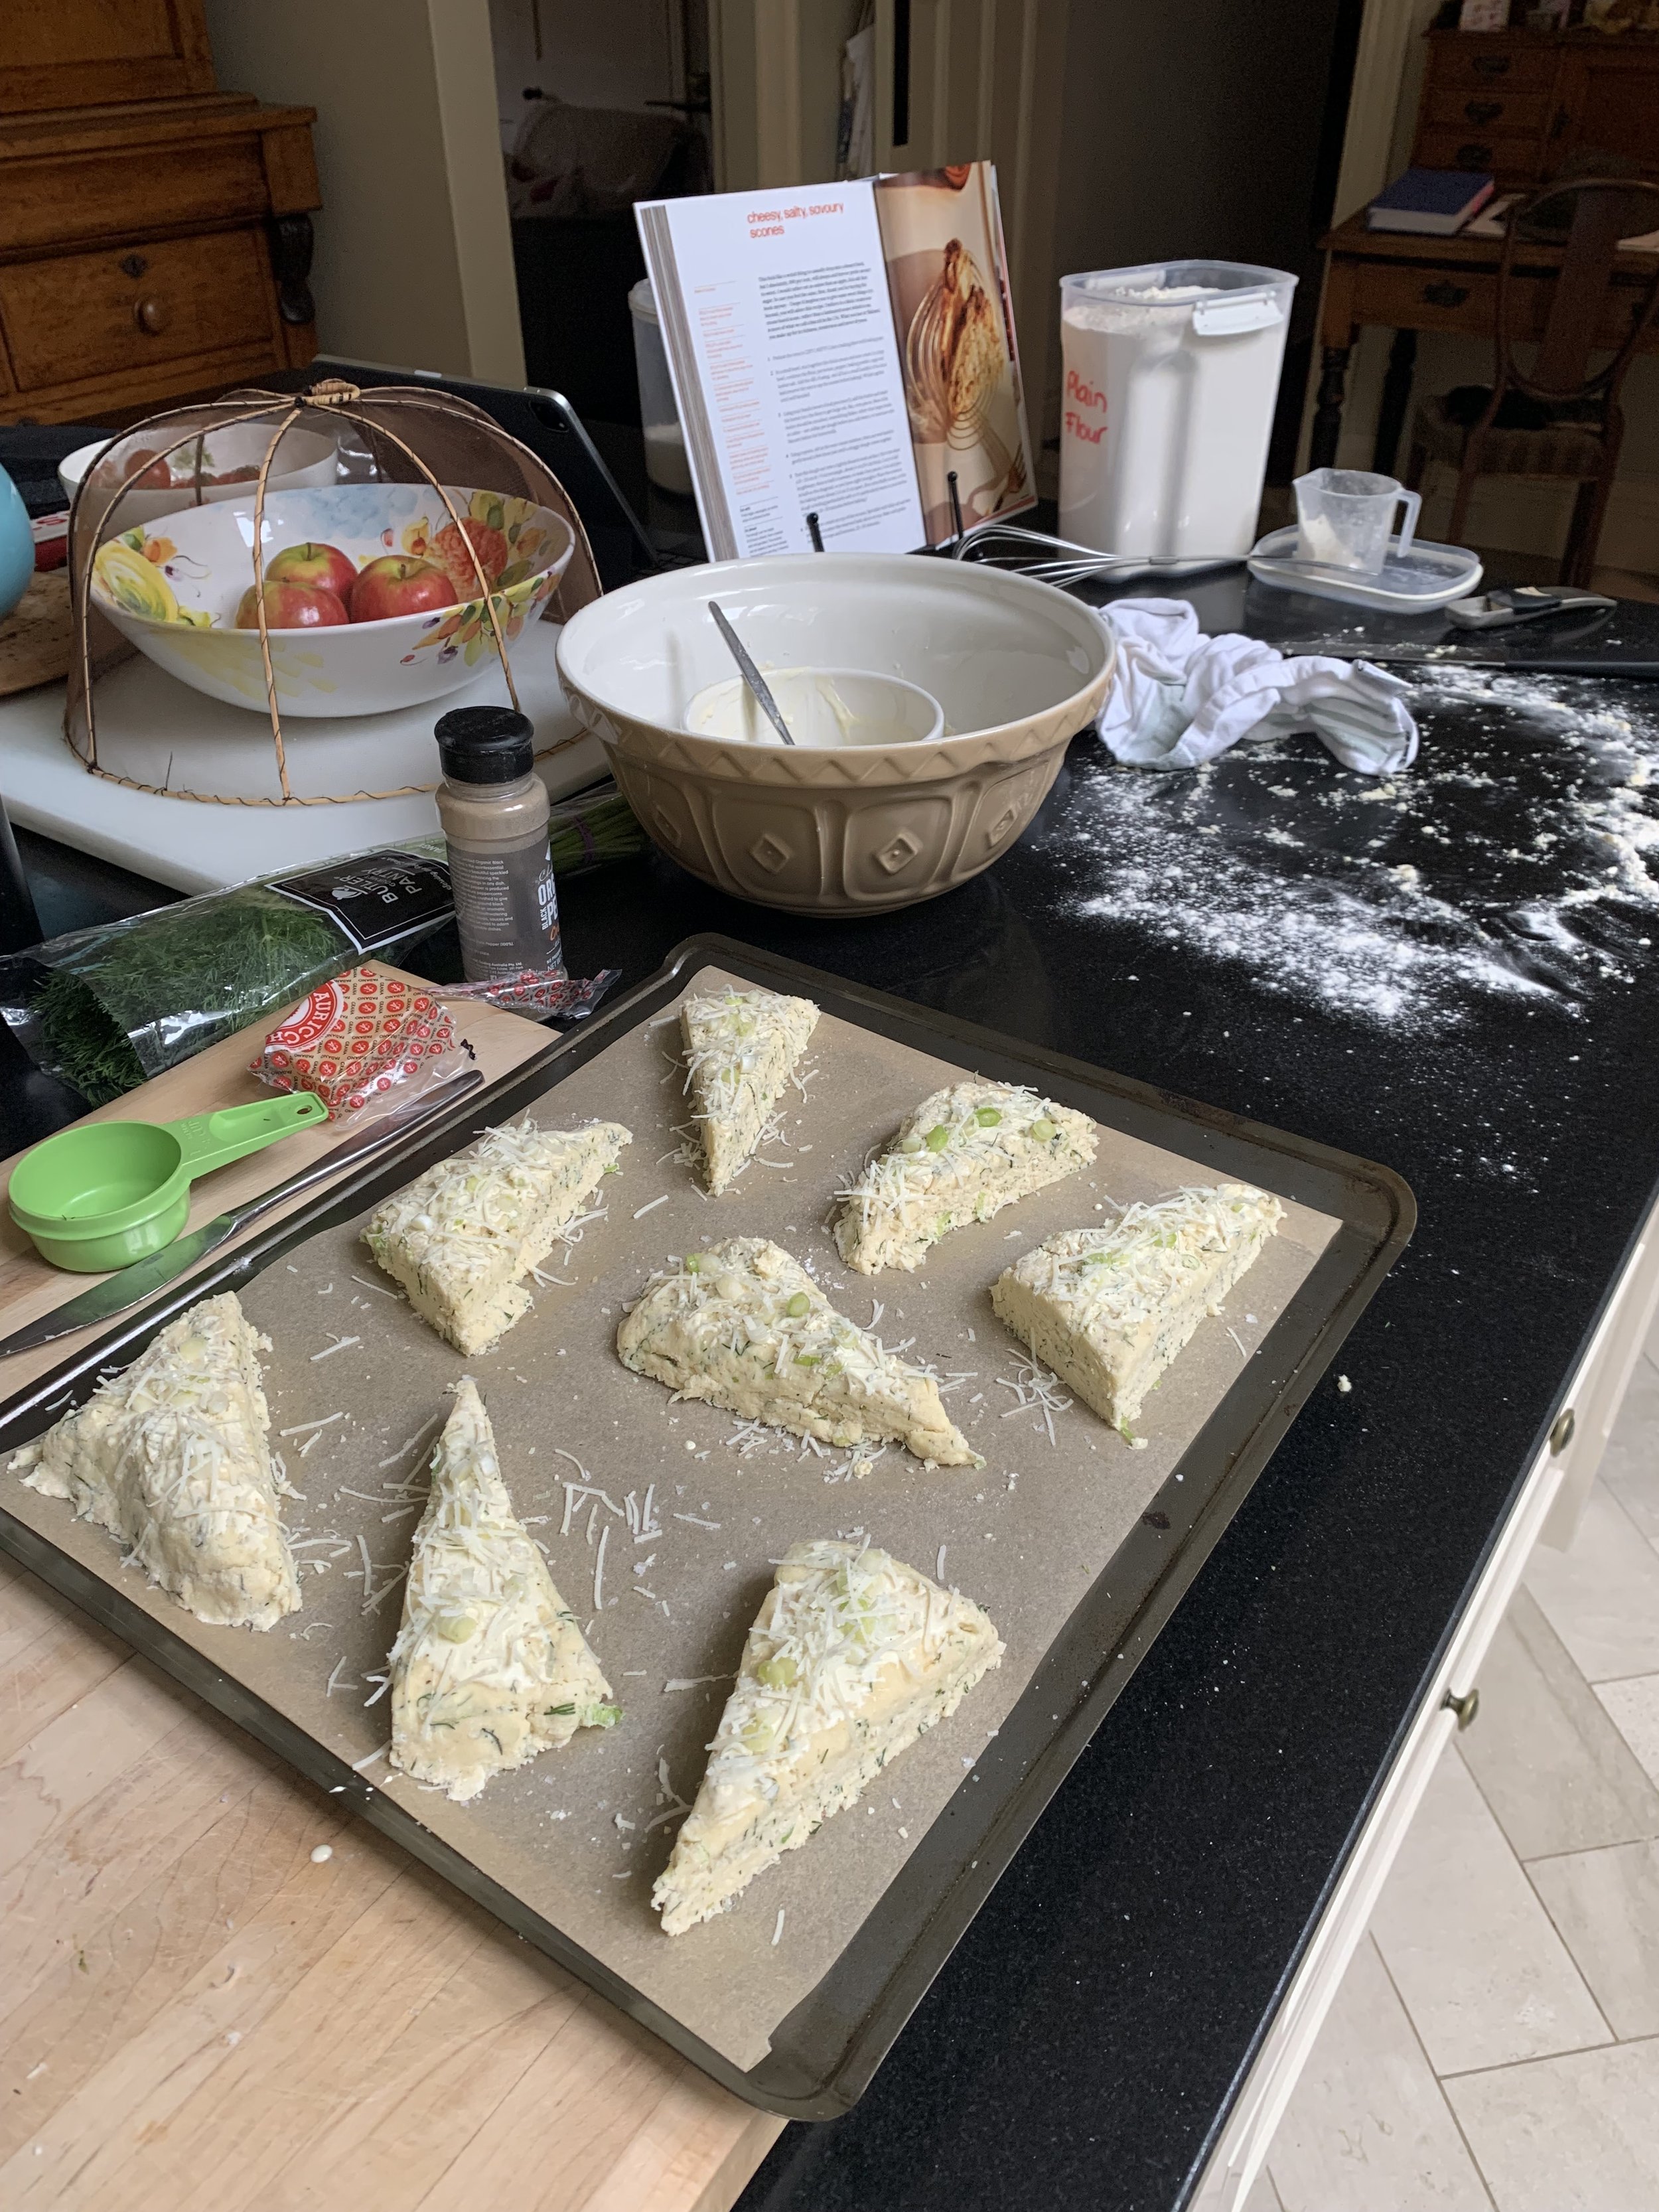
Cheesy Salty Savoury Scones (before baking)

After trying some of the above sweet recipes and not being blown away, I decided the magic of this book for me may lie in the handful of savoury recipes dotted throughout ‘Sweet Enough’. After watching Alison’s Home Movies episode on scones, I decided to make the Cheesy Salty Savoury Scones. I must caveat this with I think American scones and British scones are almost two different things. In the episode everything Alison said she disliked about scones, were basically all the things that make a traditional British scone, a scone. These scones are very heavy on fat (double cream, sour cream, butter and a lot of cheese). I’m not at all saying this is a bad thing in and of itself as fat is essential to baking and cooking generally. In this case however, it did make the scones very rich. To the point they really didn’t need any butter or other spread on them. It just would have been too much. 

The fat heavy mix also meant these scones don’t rise as much as you would expect a traditional scone to, and they were definitely less flakey as well. I liked the very cheesy flavour of these, but that’s all I could taste. I used spring onions in the mix and they were lost, along with the dill, to the cheese. Considering the richness of the whole thing, I also thought the scones could have been a but smaller in size (maybe also as I’m accustomed to British style scones). These were nice, but I felt I could use some of the aspects of this recipe to make my own more traditional version that suited my tastes more (which I have done in a way here). 

Cheesy Salty Savoury Scones

Favourite Things About the Book: Ok, by this point it may not have escaped your notice that I don’t love this book. I know, I’m a bit sad about it too, but also not 100% surprised. I’ve always loved Alison’s recipes, but more specifically her savoury recipes. There are many from ‘Nothing Fancy’ in particular that we make regularly in our family, and I frequent those shared in her newsletter (a newsletter) and her YouTube channel Home Movies often. So this isn’t a ‘Alison Roman’s recipes just isn’t for me’ thing - most certainly not! This is more of a ‘I don’t love Alison’s baking recipes as much as her other recipes’ thing. It’s not that they aren’t good. They just aren’t for me. I am a self confessed sweet tooth, so something that is ‘sweet enough’ may not actually be sweet enough for me. I also don’t love adding salt to my baked goods (shock horror!) so some of these recipes were too salty for me. 

However, as always, I love Alison’s writing. I really enjoy her trademark humorous tone, and very realistic approach to things. I really enjoyed reading what Alison had to say about baking in this book, even if the recipes themselves don’t take my fancy as much. The introduction was great and definitely worth a read (anyone else often skip those first few pages?!).The pages on what Alison loves and hates about baking (pp.52-3) was my favourite part of the whole book, as it’s so relatable. Alison isn’t trying to make out like baking is always easy and that it’s for everyone (though I think Sweet Enough will appeal to those less inclined to check out more traditional baking/dessert books), and is honest about the process. I think many will relate to that.

Bookmarked Recipes (to make later!): Raspberry Ricotta Cake p.118, Tomato Tart pp.76-7 and Caramelised Onion and Anchovy Tart p.71. 

* This gift came with no obligation to talk about the book, and my opinions are my own. And honestly, I love Alison Roman so I would have bought this book myself anyway!

In Off the Shelf Tags Sweet Enough, Alison Roman, Cookbooks, Cookbook Review, Off the Shelf
2 Comments
  • The Blog
  • Older
  • Newer

recipes

  • Biscuits/Cookies 39
  • Breads Etc. 9
  • Breakfast 7
  • Cakes & Slices 68
  • Confectionary 5
  • Drinks 6
  • Events 14
  • Food Photography Tips 3
  • From The Mailing List 24
  • Heirloom Recipes 12
  • Holidays 44
  • Ice Cream 9
  • Jams Preserves & Spreads 9
  • Muffins 4
  • Off the Shelf 50
  • Other Desserts 25
  • Savoury Dishes/Meals 15
  • Scones 4
  • Tarts & Pastry 9
  • Travel 13

Sign up to Friday Food Chat with Kath, a weekly newsletter for more food, baking, cookbook chat and more!

Sign Up Here!
instagram-unauth pinterest facebook url

Website Accessibility: To enable text to speech function on the blog, click the sound button to the right of each blog post.

All images & content are the property of Kathryn Vincent, unless stated otherwise. Please do not use without permission.

Kulinary Adventures of Kath

Food Photography, Recipes & Baking

instagram-unauth pinterest facebook url